

Page 1

Autodesk Navisworks 2013
Installation Guide
April 2012
Page 2

©
2012 Autodesk, Inc. All Rights Reserved. Except as otherwise permitted by Autodesk, Inc., this publication, or parts thereof, may not
be reproduced in any form, by any method, for any purpose.
Certain materials included in this publication are reprinted with the permission of the copyright holder.
Trademarks
The following are registered trademarks or trademarks of Autodesk, Inc., and/or its subsidiaries and/or affiliates in the USA and other countries:
123D, 3ds Max, Algor, Alias, Alias (swirl design/logo), AliasStudio, ATC, AUGI, AutoCAD, AutoCAD Learning Assistance, AutoCAD LT, AutoCAD
Simulator, AutoCAD SQL Extension, AutoCAD SQL Interface, Autodesk, Autodesk Homestyler, Autodesk Intent, Autodesk Inventor, Autodesk
MapGuide, Autodesk Streamline, AutoLISP, AutoSketch, AutoSnap, AutoTrack, Backburner, Backdraft, Beast, Beast (design/logo) Built with
ObjectARX (design/logo), Burn, Buzzsaw, CAiCE, CFdesign, Civil 3D, Cleaner, Cleaner Central, ClearScale, Colour Warper, Combustion,
Communication Specification, Constructware, Content Explorer, Creative Bridge, Dancing Baby (image), DesignCenter, Design Doctor, Designer's
Toolkit, DesignKids, DesignProf, DesignServer, DesignStudio, Design Web Format, Discreet, DWF, DWG, DWG (design/logo), DWG Extreme,
DWG TrueConvert, DWG TrueView, DWFX, DXF, Ecotect, Evolver, Exposure, Extending the Design Team, Face Robot, FBX, Fempro, Fire, Flame,
Flare, Flint, FMDesktop, Freewheel, GDX Driver, Green Building Studio, Heads-up Design, Heidi, Homestyler, HumanIK, IDEA Server, i-drop,
Illuminate Labs AB (design/logo), ImageModeler, iMOUT, Incinerator, Inferno, Instructables, Instructables (stylized robot design/logo),Inventor,
Inventor LT, Kynapse, Kynogon, LandXplorer, LiquidLight, LiquidLight (design/logo), Lustre, MatchMover, Maya, Mechanical Desktop, Moldflow,
Moldflow Plastics Advisers, Moldflow Plastics Insight, Moldflow Plastics Xpert, Moondust, MotionBuilder, Movimento, MPA, MPA (design/logo),
MPI, MPI (design/logo), MPX, MPX (design/logo), Mudbox, Multi-Master Editing, Navisworks, ObjectARX, ObjectDBX, Opticore, Pipeplus, Pixlr,
Pixlr-o-matic, PolarSnap, PortfolioWall, Powered with Autodesk Technology, Productstream, ProMaterials, RasterDWG, RealDWG, Real-time
Roto, Recognize, Render Queue, Retimer, Reveal, Revit, RiverCAD, Robot, Scaleform, Scaleform GFx, Showcase, Show Me, ShowMotion,
SketchBook, Smoke, Softimage, Softimage|XSI (design/logo), Sparks, SteeringWheels, Stitcher, Stone, StormNET, Tinkerbox, ToolClip, Topobase,
Toxik, TrustedDWG, U-Vis, ViewCube, Visual, Visual LISP, Voice Reality, Volo, Vtour, WaterNetworks, Wire, Wiretap, WiretapCentral, XSI.
Lightworks, the Lightworks logo, LWA and LWA-Enabled are registered trademarks of Lightwork Design Ltd. The LWA-Enabled logo, Interactive
Image Regeneration, IIR, A-Cubed, Feature-Following Anti-Aliasing and FFAA are all trademarks of Lightwork Design Ltd. All other trademarks,
images and logos remain the property of their respective owners. Copyright of Lightwork Design Ltd. 1990-2007, 2008-2012.
This software is based in part on the work of the Independent JPEG Group.
Disclaimer
THIS PUBLICATION AND THE INFORMATION CONTAINED HEREIN IS MADE AVAILABLE BY AUTODESK, INC. "AS IS." AUTODESK, INC. DISCLAIMS
ALL WARRANTIES, EITHER EXPRESS OR IMPLIED, INCLUDING BUT NOT LIMITED TO ANY IMPLIED WARRANTIES OF MERCHANTABILITY OR
FITNESS FOR A PARTICULAR PURPOSE REGARDING THESE MATERIALS.
Page 3

Contents
Chapter 1 Installation Process . . . . . . . . . . . . . . . . . . . . . . . . . 1
Chapter 2 Stand-Alone Installation . . . . . . . . . . . . . . . . . . . . . . 3
Prepare for Stand-Alone Installation . . . . . . . . . . . . . . . . . . . . 3
System Requirements for Stand-Alone Installation . . . . . . . . . 4
Install Microsoft .Net Framework 4.0 . . . . . . . . . . . . . . . . 5
Understand Administrative Permission Requirements . . . . . . . 6
Specify License . . . . . . . . . . . . . . . . . . . . . . . . . . . . 6
Change Product Language . . . . . . . . . . . . . . . . . . . . . . 7
Locate Your Autodesk Navisworks Serial Number and Product
Key . . . . . . . . . . . . . . . . . . . . . . . . . . . . . . . . . 8
Avoid Data Loss During Installation . . . . . . . . . . . . . . . . . 9
Install and Run Autodesk Navisworks 2013 . . . . . . . . . . . . . . . . 9
Configure and Install . . . . . . . . . . . . . . . . . . . . . . . . . 9
Launch Autodesk Navisworks . . . . . . . . . . . . . . . . . . . . 13
How to Launch Autodesk Navisworks in Another
Language . . . . . . . . . . . . . . . . . . . . . . . . . . . . . 14
Add or Remove Features . . . . . . . . . . . . . . . . . . . . . . . 15
Repair Autodesk Navisworks 2013 . . . . . . . . . . . . . . . . . 16
Uninstall Autodesk Navisworks 2013 . . . . . . . . . . . . . . . . 17
Activate Products . . . . . . . . . . . . . . . . . . . . . . . . . . . . . 18
Move to Autodesk Navisworks from a Previous Release . . . . . . . . . 18
iii
Page 4

Chapter 3 Network Administration and Deployment . . . . . . . . . . . . 19
Plan a Deployment . . . . . . . . . . . . . . . . . . . . . . . . . . . . 19
Check Deployment Readiness . . . . . . . . . . . . . . . . . . . 20
System Requirements for a Deployment . . . . . . . . . . . . . . 21
Determine the Installation Type . . . . . . . . . . . . . . . . . . 25
Determine the License Server Model . . . . . . . . . . . . . . . . 26
Include Service Packs . . . . . . . . . . . . . . . . . . . . . . . . 26
Create a Network Share . . . . . . . . . . . . . . . . . . . . . . . 28
Set Up Network Tools and Your License Server . . . . . . . . . . . . . . 29
Install the Network License Manager . . . . . . . . . . . . . . . . 29
To Activate a Network License Through Autodesk.com . . . . . . 30
Configure Your License Server . . . . . . . . . . . . . . . . . . . 30
Your Deployment Choices . . . . . . . . . . . . . . . . . . . . . . . . 32
Silent Mode . . . . . . . . . . . . . . . . . . . . . . . . . . . . . 32
Specify Log File Locations . . . . . . . . . . . . . . . . . . . . . . 32
Change Deployment Language . . . . . . . . . . . . . . . . . . . 34
Configure Individual Products for Deployment . . . . . . . . . . 35
Select the Project and Site Folders . . . . . . . . . . . . . . . . . 36
Select Additional Configuration Options . . . . . . . . . . . . . . 37
Create a Deployment . . . . . . . . . . . . . . . . . . . . . . . . . . . 38
Modify a Deployment . . . . . . . . . . . . . . . . . . . . . . . . . . . 42
Direct Users to the Administrative Image . . . . . . . . . . . . . . . . . 43
Overview of Distribution Methods . . . . . . . . . . . . . . . . . . . . 44
Chapter 4 Installation Questions . . . . . . . . . . . . . . . . . . . . . . . 45
General Installation Questions . . . . . . . . . . . . . . . . . . . . . . 45
What if I have lost my serial number or product key? . . . . . . . 45
Why do I need to activate a product after installation? . . . . . . 45
Can I install Autodesk products from a website? . . . . . . . . . . 46
How do I register and activate Autodesk Navisworks? . . . . . . . 46
How do I switch my license from stand-alone to network or
network to stand-alone? . . . . . . . . . . . . . . . . . . . . . . 47
Where can I find product license information after
installation? . . . . . . . . . . . . . . . . . . . . . . . . . . . . 47
How can I check my graphics card driver to see if it needs to be
updated? . . . . . . . . . . . . . . . . . . . . . . . . . . . . . . 48
When performing a Typical installation, what gets
installed? . . . . . . . . . . . . . . . . . . . . . . . . . . . . . 49
How do I share the Autodesk Navisworks settings on a site and
project basis? . . . . . . . . . . . . . . . . . . . . . . . . . . . 49
How do I change which exporter plugins are installed? . . . . . . 51
Deployment and Networking Questions . . . . . . . . . . . . . . . . . 51
Where should deployments be located? . . . . . . . . . . . . . . 51
When should I select all products for the administrative image,
and can I add products later? . . . . . . . . . . . . . . . . . . . 52
iv | Contents
Page 5

Where can I check if service packs are available for my
software? . . . . . . . . . . . . . . . . . . . . . . . . . . . . . . 52
How do I choose between 32-bit and 64-bit deployments? . . . . 53
Where do I find my server name? . . . . . . . . . . . . . . . . . 53
What is an administrative image (MSI) file? . . . . . . . . . . . . 53
How do I extract an MSP file? . . . . . . . . . . . . . . . . . . . . 53
How should I configure a network license server for a
firewall . . . . . . . . . . . . . . . . . . . . . . . . . . . . . . . 54
Licensing Questions . . . . . . . . . . . . . . . . . . . . . . . . . . . . 54
What is the difference between a stand-alone license and a
network license? . . . . . . . . . . . . . . . . . . . . . . . . . . 54
What is the benefit of using a network licensed version of the
software? . . . . . . . . . . . . . . . . . . . . . . . . . . . . . . 54
What is SAMreport-Lite? . . . . . . . . . . . . . . . . . . . . . . 55
Uninstall and Maintenance Questions . . . . . . . . . . . . . . . . . . 55
How can I see what is included in a default installation? . . . . . 55
Is it possible to change the installation folder when adding or
removing features? . . . . . . . . . . . . . . . . . . . . . . . . 55
How do I install tools and utilities after installing my
product? . . . . . . . . . . . . . . . . . . . . . . . . . . . . . . 56
When should I reinstall the product instead of repairing
it? . . . . . . . . . . . . . . . . . . . . . . . . . . . . . . . . . 56
Do I need the original media to reinstall my product? . . . . . . . 56
When I uninstall my software, what files are left on my
system? . . . . . . . . . . . . . . . . . . . . . . . . . . . . . . 56
Chapter 5 Glossary . . . . . . . . . . . . . . . . . . . . . . . . . . . . . . 57
Index . . . . . . . . . . . . . . . . . . . . . . . . . . . . . . . . 59
Contents | v
Page 6

vi
Page 7
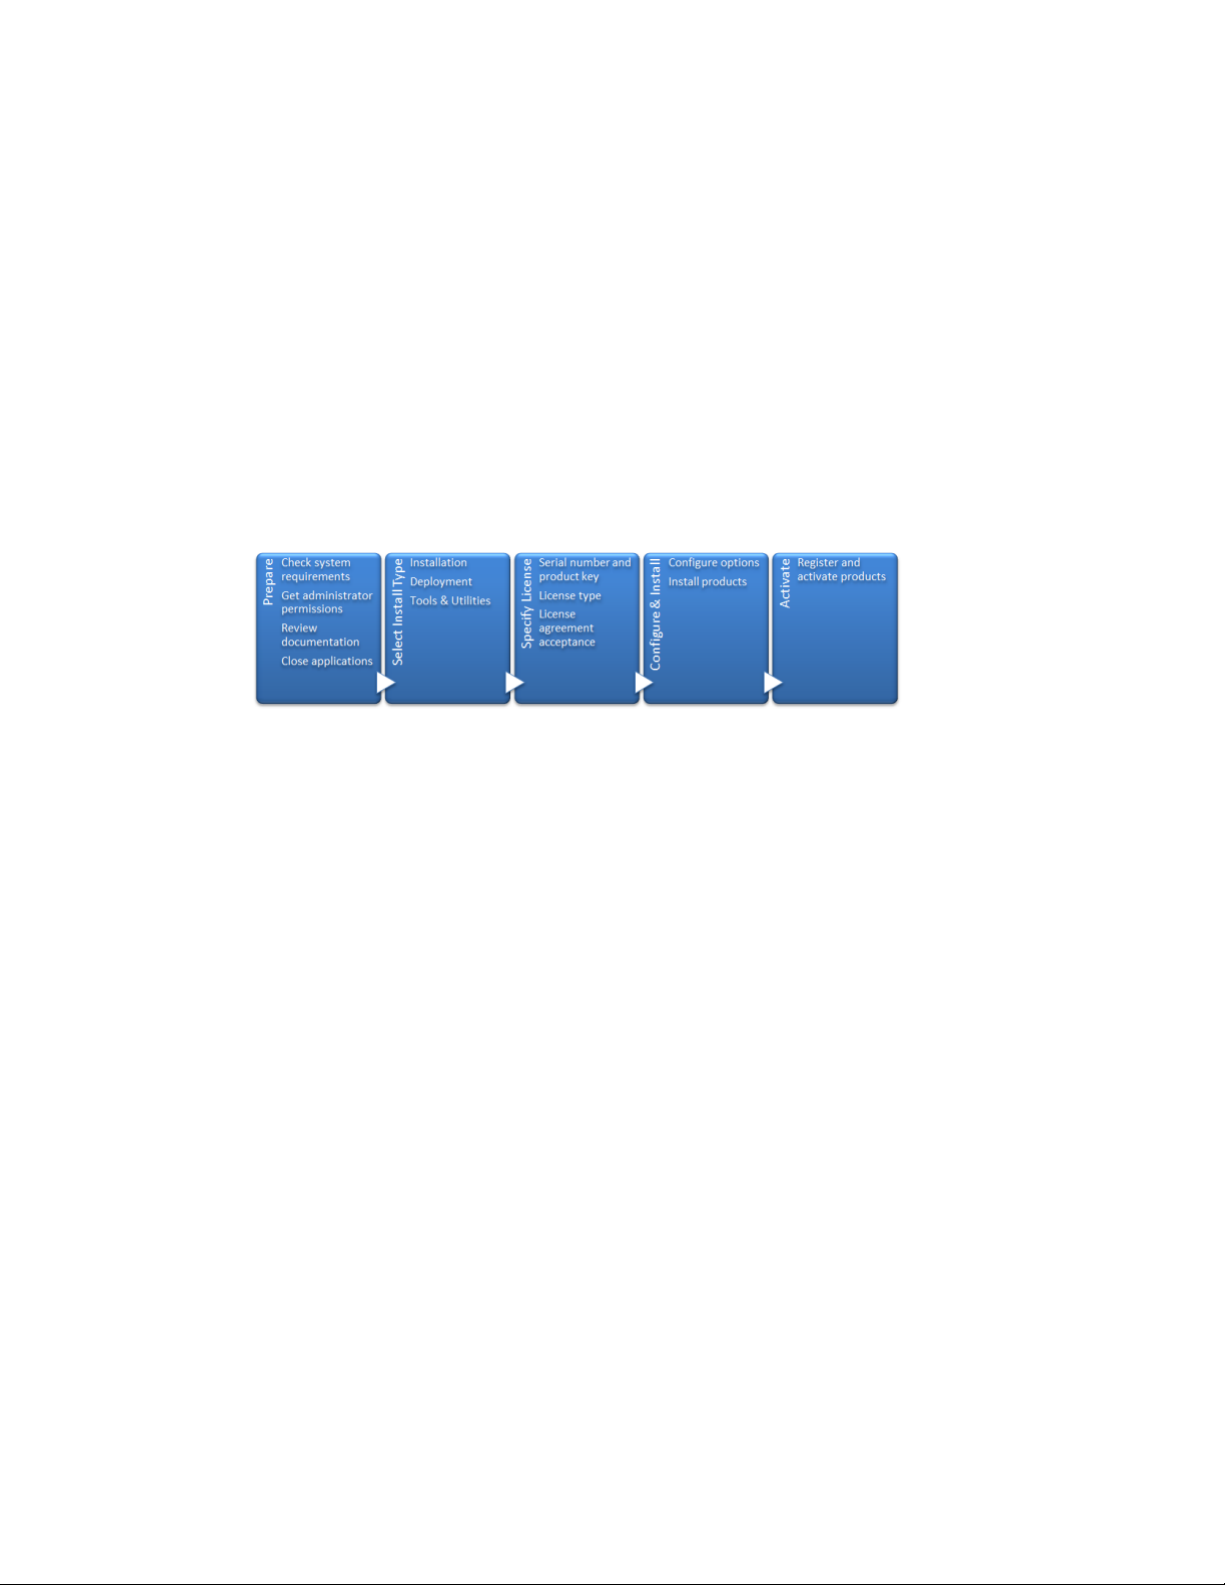
Installation Process
1
The following diagram shows the major parts of the installation process for Autodesk
Navisworks 2013 products:
When you run the Installation wizard, there are several installation paths you can
take:
■ Install is recommended for individual users or small groups. The key point is that you
will repeat the installation process on each computer. This is the only valid installation
type for a stand-alone license, but it can also be used with a multi-seat stand-alone or
network license. See Stand-Alone Installation (page 3) section for the installation
instructions.
■ Create Deployment is recommended for network administrators, using either a multi-seat
stand-alone or network license. In the deployment process, the installation is configured
once, stored on the network, and then distributed efficiently to users' computers. See
Network Administration and Deployment (page 19) section for the installation instructions.
■ Install Tools & Utilities is used to install tools and utilities related to your suite or
product. If you have a network license for your Autodesk product, you will need to use
this option to install the Network License Manager before any users can run the product.
See Set Up Network Tools and Your License Server (page 29) for the installation instructions.
1
Page 8

2
Page 9

Stand-Alone Installation
2
Stand-alone installation is recommended for individual users or small groups. The
key point is that you will repeat the installation process on each computer. For a
stand-alone license this is the only valid installation type, but it can also be used
with a multi-seat stand-alone or network license. For information about installing
network-licensed or multi-seat stand-alone versions of the program, see Network
Administration and Deployment (page 19).
Prepare for Stand-Alone Installation
To prepare for a stand-alone installation, you should review the system
requirements, understand administrative permission requirements, locate your
Autodesk Navisworks 2013 serial number and product key, and close all running
applications. If you are installing Autodesk Navisworks Freedom, you do not
need to have a serial number and product key.
It is recommended that you take the time to familiarize yourself with the
complete installation process before you install Autodesk Navisworks.
Documentation is accessible from links on the lower left corner of the installer.
NOTE It is also recommended that you install Microsoft .Net Framework 4.0 before
installing the product. See Install Microsoft .Net Framework 4.0 (page 5).
3
Page 10

System Requirements for Stand-Alone Installation
The first task you need to complete is to make sure that your computer meets
the minimum system requirements. If your system does not meet these
requirements, problems can occur, both within Autodesk Navisworks and at
the operating system level.
Whether your Windows operating system is the 32-bit or the 64-bit version,
the version is automatically detected during installation.
See the following table for hardware and software requirements.
Hardware and software requirements for client machine
RequirementHardware/Software
Operating System
Web browser
Processor
Microsoft® Windows 7 (32-bit or 64-bit) Home Ba-
sic, Home Premium, Professional, Enterprise, or Ultimate (recommended)
Microsoft® Windows Vista® SP2 (32-bit or 64-bit)
Home Premium, Business, Enterprise, or Ultimate
Microsoft® Windows XP SP3 (32-bit) Home, or
Professional
Microsoft® Windows XP SP2 (64-bit) Professional
Microsoft® Internet Explorer® 7.0 or later
AMD Athlon™, 3.0 GHz or faster (minimum); Intel
Pentium® 4, 3.0 GHz or faster (recommended) -
with SSE2 technology
512 MB (minimum); 2 GB or more (recommended)Memory (RAM)
1280 x 800 with true color (minimum)VGA Display
®
4 | Chapter 2 Stand-Alone Installation
Page 11

Hardware and software requirements for client machine
1920 x 1080 32-bit color video display adapter with
true color (recommended)
Graphics Card
Pointing device
Direct3D 9® and OpenGL® capable graphics card
with Shader Model 2 (minimum)
18.5 GB free disk space for installationHard disk
Microsoft® Mouse-compliant pointing device
Any speed (for installation only)DVD-ROM
Printer or plotterOptional hardware
Modem or access to an Internet connection
Network interface card
Install Microsoft .Net Framework 4.0
Autodesk Navisworks 2013 requires Microsoft .Net 4.0 to be installed prior to
product installation.
Most Windows updates should include Microsoft .NET Framework 4, however,
for old versions of Windows, you can download and install Microsoft .NET
Framework 4 redistributables from: http://www.microsoft.com/downloads/en/de-
tails.aspx?FamilyID=0a391abd-25c1-4fc0-919f-b21f31ab88b7 or install Microsoft
.Net Framework 4 from the following directory in the installation media:
\3rdParty\NET\4\wcu\dotNetFramework\.
The Installation wizard will install Microsoft .Net Framework 4 if it detects
that required updates have not been installed.
Prepare for Stand-Alone Installation | 5
Page 12

NOTE If the Installation wizard prompts you to install the Microsoft .NET 4.0
Framework, the .NET 4.0 Framework installer may prompt you to first install the
Windows Imaging Component (WIC). This can occur if you do not have the latest
Microsoft Windows updates or service packs. You are most likely to need WIC if
you are running Windows XP SP2 without certain Windows Updates installed. If
required, the Microsoft WIC installers are available at the following locations:
■ 32-bit installer: http://www.microsoft.com/downloads/en/details.aspx?Family-
ID=8e011506-6307-445b-b950-215def45ddd8&displaylang=en
■ 64-bit installer: http://www.microsoft.com/downloads/en/details.aspx?Family-
ID=f64654ac-6e26-41d9-a90a-0e7783b864ee
Understand Administrative Permission Requirements
To install Autodesk Navisworks, you must have administrator permissions.
You do not need to have domain administrative permissions. See your system
administrator for information about administrative permissions.
To run Autodesk Navisworks, you do not need administrator permissions. You
can run the program as a limited user.
Specify License
You can install Autodesk Navisworks Manage and Autodesk Navisworks
Simulate for a trial period of 30 days to evaluate the products.
The following notes provide a general overview. For more detailed information,
see the Licensing Guide.
If you purchase a license, it is configured as either stand-alone or network,
and for a specific number of users. These license types are briefly described as
follows:
■ A stand-alone license is intended for use by one person. The licensed
products can be installed on two computers, as long as both instances are
not running concurrently.
■ A multi-seat stand-alone license is intended to support a specified
maximum number of users, but it can be installed on a larger number of
computers for convenient access.
6 | Chapter 2 Stand-Alone Installation
Page 13
■ A network license supports a specified number of users who are
connected to a network. The Network License Manager is installed on one
or more servers on the network to manage the distribution of licenses to
users.
If you are using a network license, choose the server configuration for the
Network License Manager that was specified at the time of license purchase:
■ Single License Server. One server manages all licenses on the network.
■ Distributed License Server. Licenses are distributed across a pool of
multiple servers in the network. You enter the name of each server in the
pool.
■ Redundant License Server. Three servers are available to authenticate
each license. You enter the names of the three servers.
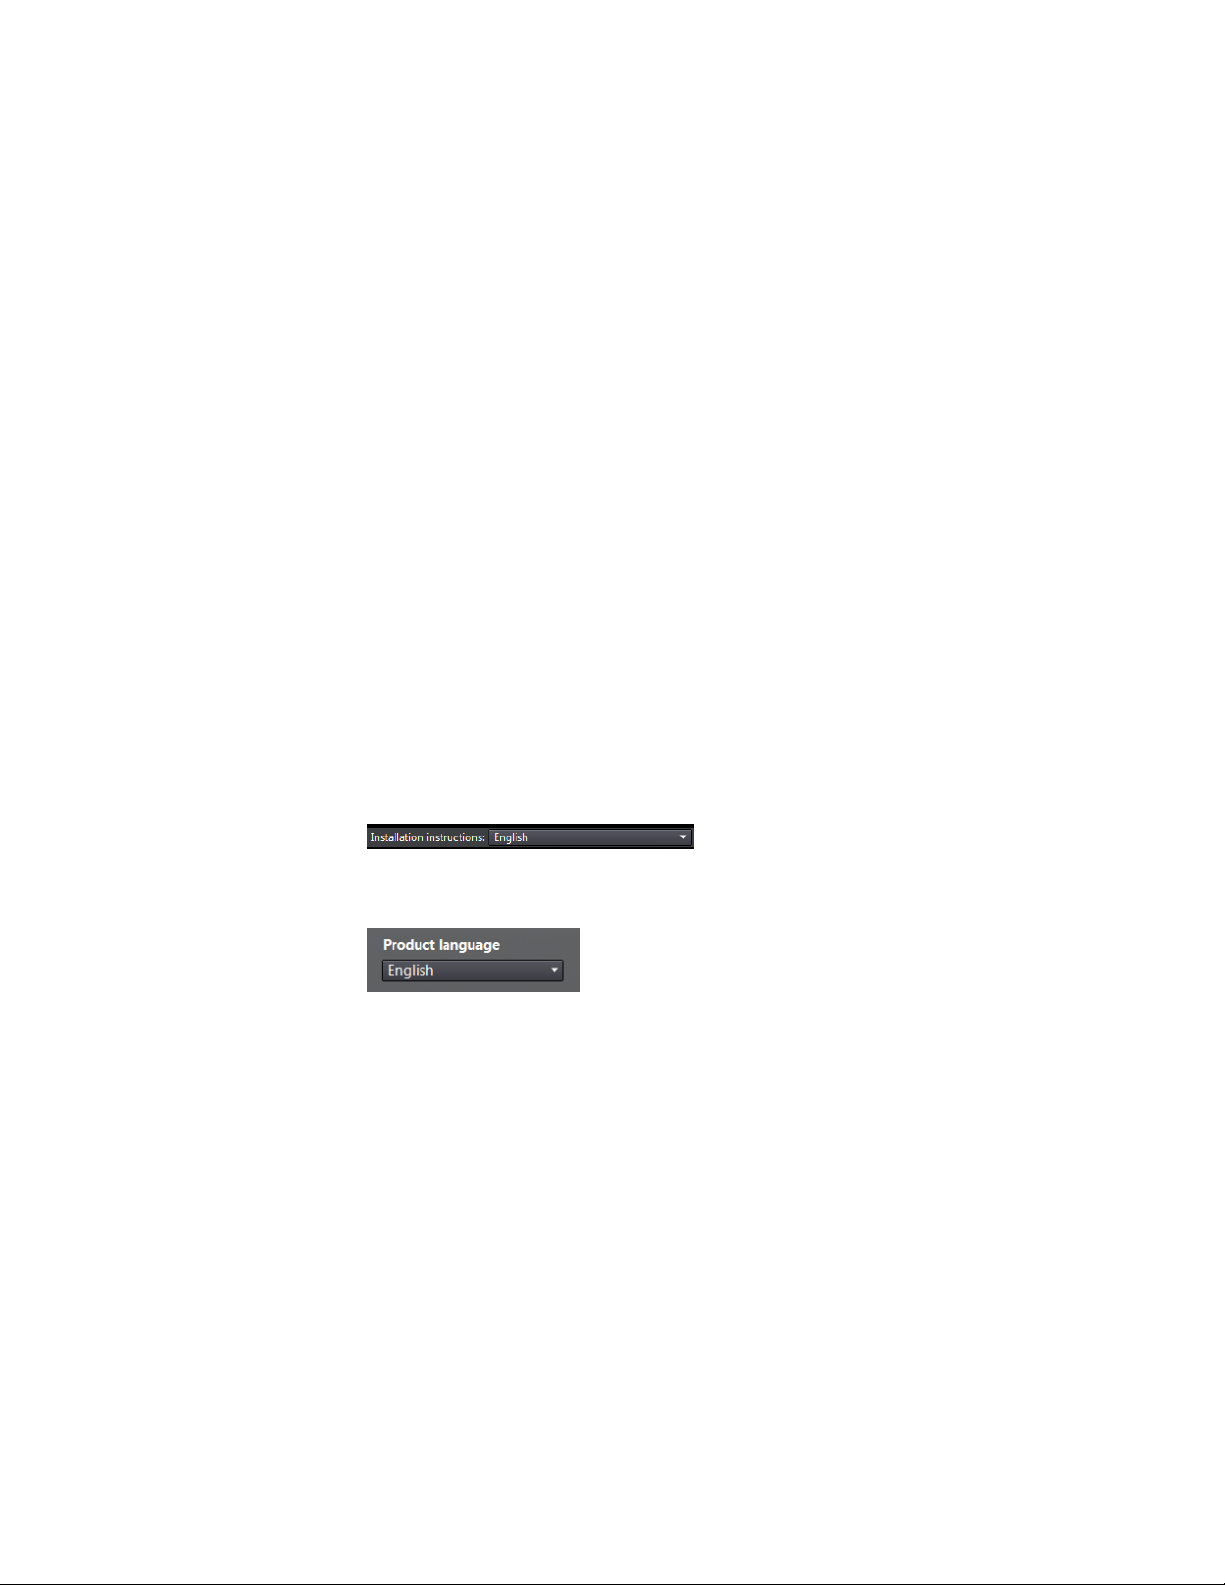
Change Product Language
When you start the installation process, the installer automatically determines
your operating system language. If a supported language is detected, your
install pages are displayed in that language.
You can change language for installation instructions on the first page of the
Installation wizard before you start the installation process:
You can also change the product language at the time of installation, using
this drop-down menu on the installer (Product Information page):
After you leave the Product Information page of the installer, the menu
for selecting a language or adding a language pack is disabled. If you later
decide to change the language or add a language pack, you cannot go back to
the Product Information page and use the menu. Instead, you must cancel
the installation, start the installer again, and then make the correct language
selection on the Product Information page.
Prepare for Stand-Alone Installation | 7
Page 14

Using Language Packs
Language packs support use of different languages in each Autodesk Navisworks
product, including exporters. Pack names start with NAVFREE_, NAVSIM_,
NAVMAN_, and exporters_ respectively.
NOTE You must install at least one language pack for each product.
It is possible to install additional language packs to Autodesk Navisworks
products later. You can manually install the required language packs by
double-clicking on the language pack MSI file.
Language packs are located on the installation DVD and unpacked downloaded
media under the x86 folder for 32-bit products and under the x64 folder for
64-bit products.
■ Language packs for specific products are included in the NAVFREE,
NAVSIM, NAVMAN, and NWEXPORT subfolders of x86 and x64 folders.
■ Language packs for specific languages are included in the en-US (English),
de-DE (German), es-ES (Spanish), fr-FR (French), it-IT (Italian), ja-JP
(Japanese), ko-KR (Korean), pt-BR (Brazilian Portuguese), ru-RU (Russian)
and zh-CN (Chinese PRC) subfolders of the product folders.
So, for example, to install the 32-bit French language pack for Autodesk
Navisworks Simulate, double-click x86/NAVSIM/fr-FR/NAVSIM_LP.msi. To
install the 32-bit French language pack for Autodesk Navisworks Manage,
double-click x86/NAVMAN/fr-FR/NAVMAN_LP.msi, and so on.
Locate Your Autodesk Navisworks Serial Number and Product Key
When you install Autodesk Navisworks Manage or Autodesk Navisworks
Simulate, you are prompted for your serial number and product key on the
Product Information page.
The serial number must contain a three-digit prefix followed by an eight-digit
number. The product key consists of five digits.
The serial number and product key are located on the outside of the product
packaging, or in the email you received if you downloaded your product. Make
sure to have these available before you install the program so that you don't
have to stop in the middle of the installation. Also be sure to have these
available before you activate the program.
8 | Chapter 2 Stand-Alone Installation
Page 15

The information you enter is permanently retained with the product. Because
you can’t change this information later without uninstalling, take care when
entering the information. To review this product information later, in the
InfoCenter box, click the down arrow next to the Help button ➤ About
Autodesk Navisworks 2013.
NOTE If you have lost your serial number or product key, contact your local
Autodesk office for assistance.
Avoid Data Loss During Installation
The Autodesk Navisworks installation process may stop if some applications
(such as Microsoft® Outlook® or virus-checking programs) are running.
Close all running applications to avoid possible data loss.
Install and Run Autodesk Navisworks 2013
You must have administrative permissions to install Autodesk Navisworks.
This section provides instructions for installing and activating Autodesk
Navisworks for an individual user on a stand-alone computer.
For information about installing network-licensed or multi-seat stand-alone
versions of the program, see Network Administration and Deployment (page
19).
When you run Autodesk Navisworks Manage or Autodesk Navisworks Simulate
for the first time, you will be asked to activate the product. For more
information, see How do I register and activate Autodesk Navisworks? (page
46)
Configure and Install
During the installation process, you choose either a typical installation (install
the product with default settings), or a customized installation.
Installation Path
This path specifies where the product folder will be installed. If you change
the location, use only valid ASCII characters in the install path.
Install and Run Autodesk Navisworks 2013 | 9
Page 16
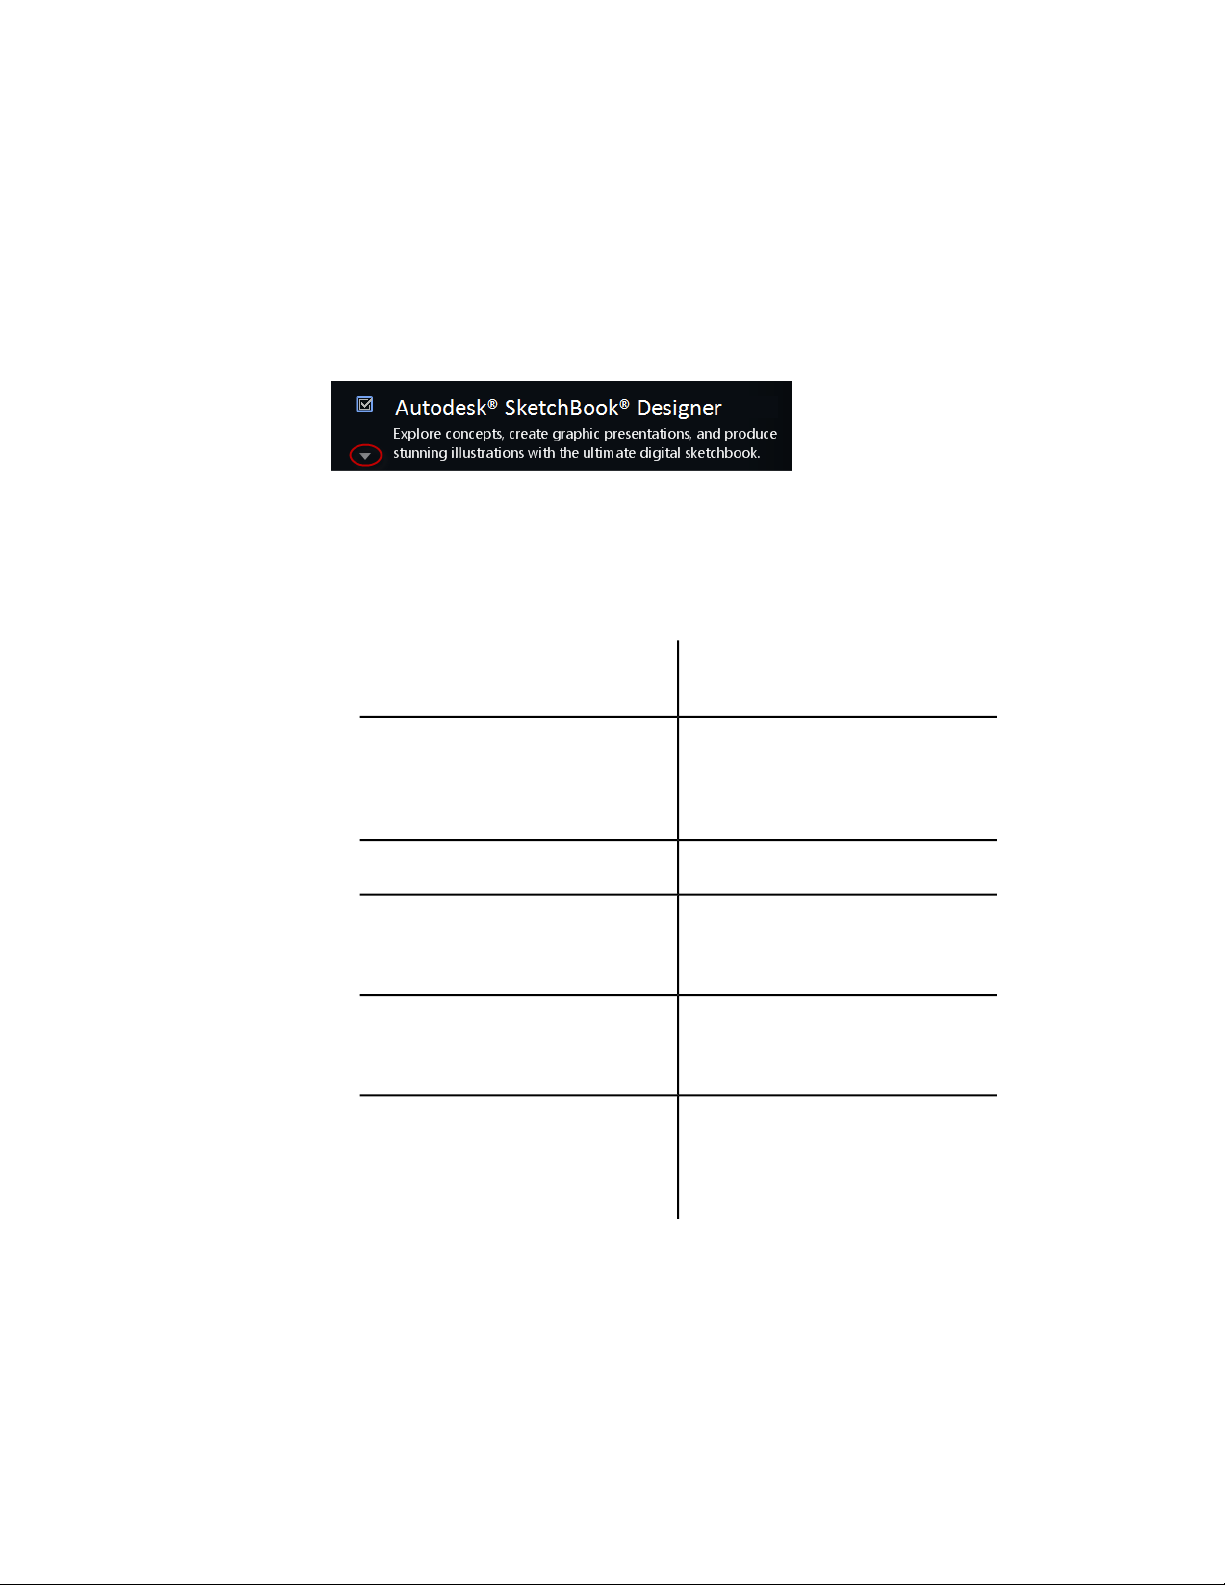
Configuration
On the Install ➤ Configure Installation page, for any product you have
selected to install, you will see a triangular control for access to a configuration
panel.
Click anywhere in the product box to open the configuration panel:
■ Installation Type. If you choose a Typical installation (default settings)
the product installs the most common application features. A Custom
installation installs only the application features that you select from the
Select Features To Install list. The available features will depend upon
the product you are installing:
Redistributable ActiveX Control
API
Batch Utility
Sample RPCs
Inventor Switchback Plugin
Contains Autodesk Navisworks Redistributable ActiveX control.
Contains the Component Object Model
interface for customizing and extending
the functionality for Autodesk Navisworks
Manage and Autodesk Navisworks Simulate.
Contains various feature sample files.Example NWD files
Contains an add-in to run and schedule
commands. This is not available for
Autodesk Navisworks Freedom.
Contains several Rich Photorealistic Content
files. This is not available for Autodesk
Navisworks Freedom .
Contains the Inventor Switchback add-in
required to use the Switchback functionality
with Inventor models. This is not available
for Autodesk Navisworks Freedom.
10 | Chapter 2 Stand-Alone Installation
Page 17

NOTE For Autodesk Navisworks exporter plugins, you can change which
plugins are installed.
Indicates the third-party software already installed on your computer.
Indicates plugins for the third-party software, that are either not
installed or have not been detected by the Installation wizard.
Select the check boxes next to all required plugins. If the third-party
software has not been detected by the wizard, you can manually enable
the plugins for it. Selecting the check box automatically opens the dialog
box, which enables you to browse for the correct software installation
directory.
■ Create the Desktop Shortcut. Select the check box to create the desktop
shortcut for Autodesk Navisworks.
■ Project and Site Folders. Use the Browse buttons to select the
directories that will contain Autodesk Navisworks settings that can be
shared across an entire project site, or across a specific project group (see
Select the Project and Site Folders (page 36)).
■ Service Packs. If a service pack is available for your installation, you can
include it in the installation.
After you have configured the settings as required, click the product name to
close the configuration panel.
This is the fastest means of installing Autodesk Navisworks on your system.
Only default values are used which means it is a typical installation being
installed to C:\Program Files\Autodesk\ [product name] 2013.
To install Autodesk Navisworks using default values on a stand-alone computer
1 Close all running applications on your computer and start the
Installation wizard.
2 On the Installation wizard, if required, select an alternate language
for the Installation wizard from the Installation Instructions
drop-down, and then click Install.
3 Review the Autodesk software license agreement for your country or
region. You must accept this agreement to proceed with the installation.
Choose your country or region, click I Accept, and then click Next.
NOTE If you do not agree to the terms of the license and want to terminate
the installation, click Cancel.
Install and Run Autodesk Navisworks 2013 | 11
Page 18

4 On the Product Information page, use the Product Language
drop-down if required (see Change Product Language (page 7)).
IMPORTANT After you leave the Product Information page of the installer,
the menu for selecting a language or adding a language pack is disabled. If
you later decide to change the language or add a language pack, you cannot
go back to the Product Information page and use the menu. Instead,
you must cancel the installation, start the installer again, and then make the
correct language selection on the Product Information page.
5 Select Stand-Alone license type, enter your serial number and product
key, then click Next.
NOTE This step does not apply to Autodesk Navisworks Freedom installation.
6 On the Configure Installation page, select the products to install.
7 If required, use the Installation PathBrowse button to select the
drive and location where product will be installed.
8 Click Install. The wizard installs the products you selected using a
Typical installation, which installs the most common application
features. To see which features are included in a Typical installation,
refer to When performing a Typical installation, what gets installed?
(page 49).
NOTE By default, the Installation wizard automatically enables the exporter
plugins for all third-party products already installed on your computer.
9 Click Finish.
With this installation method, you can fine-tune exactly what gets installed.
You can alter the license type, the installation type, the install path, and
specify the location of the Project and Site folders.
To install Autodesk Navisworks using configured values on a stand-alone
computer
1 Close all running applications on your computer and start the
Installation wizard.
2 On the Installation wizard, if required, select an alternate language
for the Installation wizard from the Installation Instructions
drop-down, and then click Install.
3 Review the Autodesk software license agreement for your country or
region. You must accept this agreement to proceed with the installation.
Choose your country or region, click I Accept, and then click Next.
12 | Chapter 2 Stand-Alone Installation
Page 19

NOTE If you do not agree to the terms of the license and want to terminate
the installation, click Cancel.
4 On the Product Information page, add language pack(s) from the
Product Language drop-down, if required (see Change Product Lan-
guage (page 7)).
IMPORTANT After you leave the Product Information page of the installer,
the menu for selecting a language or adding a language pack is disabled. If
you later decide to change the language or add a language pack, you cannot
go back to the Product Information page and use the menu. Instead,
you must cancel the installation, start the installer again, and then make the
correct language selection on the Product Information page.
5 Select the License Type (Stand-Alone or Network) and enter your
serial number and product key, then click Next.
NOTE This step does not apply to Autodesk Navisworks Freedom installation.
6 On the Configure Installation page, select the products to install.
7 Click the product name to open the configuration panel where you can
review and change settings. See Configure and Install (page 9). After
you have configured the settings as required, click the product name to
close the configuration panel.
8 If required, use the Installation PathBrowse button to select the
drive and location where product will be installed.
9 Click Install. The wizard installs the products you selected using your
Custom installation settings.
10 Click Finish.
Launch Autodesk Navisworks
You can start Autodesk Navisworks in the following ways:
■ Desktop shortcut icon. When you install Autodesk Navisworks, a
shortcut icon is placed on your desktop. Double-click the Autodesk
Navisworks icon to start the program.
■ Start button. Click Start ➤ All Programs ➤ Autodesk ➤ [product
name] 2013.
■ Location where Autodesk Navisworks is installed. If you have
administrative permissions, you can run Autodesk Navisworks in the
location where you installed it. If you are a limited-rights user, you must
Install and Run Autodesk Navisworks 2013 | 13
Page 20

run Autodesk Navisworks from the Start button or from the desktop
shortcut icon. If you want to create a custom shortcut, make sure that the
Start In directory for the shortcut points to a directory where you have
write permissions.
NOTE If you installed Autodesk Navisworks with one or more language packs,
then when it is started, by default, it uses the language that best matches the
settings on your computer. You can also launch Autodesk Navisworks in another
of the supported languages.
How to Launch Autodesk Navisworks in Another Language
To run Autodesk Navisworks in another of the installed languages, you need
to add one of the language selector arguments to the desktop shortcut. To be
able to do this, you need to have installed at least one language pack during
the Autodesk Navisworks installation process.
To run Autodesk Navisworks in another language
1 Right-click the Autodesk Navisworks desktop shortcut, and click
Properties on the shortcut menu to open the Autodesk
NavisworksProperties dialog box.
2 On the Shortcut tab, enter a space in the Target field after
..\roamer.exe, and then enter one of the following arguments:
■ -lang en-US for English localization
■ -lang de-DE for German localization
■ -lang es-ES for Spanish localization
■ -lang fr-FR for French localization
■ -lang it-IT for Italian localization
■ -lang ja-JP for Japanese localization
■ -lang ko-KR for Korean localization
■ -lang pt-BR for Brazilian Portuguese localization
■ -lang ru-RU for Russian localization
■ -lang zh-CN for Chinese (PRC) localization
The syntax for the shortcut is "drive:pathname\roamer.exe" - lang [language
pack]. So for example, the following entry starts the program from a
14 | Chapter 2 Stand-Alone Installation
Page 21

folder named Autodesk Navisworks in Italian language: "C:\Autodesk
Navisworks\roamer.exe" -lang it-IT
NOTE To run the product in a different language you must have already
installed the corresponding language pack.
3 Click OK to save the changes.
Add or Remove Features
You can add or remove Autodesk Navisworks 2013 features at any time. For
example, you may have chosen a Custom installation option when you first
installed Autodesk Navisworks, but now you want to add features that you
did not install originally. Or you may no longer need to use all of the features
that were installed originally.
You can add or remove features by using the Control Panel. This functionality
is not available for Autodesk Navisworks Freedom.
To add or remove features
1 Do one of the following:
■ (Windows XP) Click Start ➤ Settings ➤ Control Panel ➤ Add
or Remove Programs.
■ (Windows Vista and Windows 7) Click Start ➤ Control
Panel ➤ Programs ➤ Programs and Features.
2 From the list of programs, click Autodesk Navisworks 2013, and then
click Change/Remove (Windows XP) or Uninstall/Change (Windows
Vista and Windows 7).
The Autodesk Navisworks 2013Installation wizard re-opens in
Maintenance Mode.
3 Click Add or Remove Features. On the Add/Remove Features
page, select a feature to install or uninstall. The icons to the left of the
selections give you an indication of the action that will be taken.
Indicates a feature that was marked for installation will be in a
typical installation.
Indicates a feature that is not currently scheduled for installation.
Install and Run Autodesk Navisworks 2013 | 15
Page 22

Indicates a feature that was not originally marked for installation,
but was added to the installed feature list.
Indicates an installed feature that is chosen for removal.
NOTE If you need to revert to the Autodesk Navisworks 2013 features that
you selected in your original installation, click Cancel.
Click Update.
4 On the Update Complete page, you are informed when the updates
have been performed. Click Finish.
Repair Autodesk Navisworks 2013
If you accidentally delete or alter files that are required by Autodesk Navisworks
2013, Autodesk Navisworks might not perform correctly, and you might receive
error messages when you try to execute a command or find a file. You can
attempt to fix this problem by repairing Autodesk Navisworks 2013.
Repairing uses the features that were part of the installation type you chose
when you initially installed the program.
To repair Autodesk Navisworks 2013
1 Do one of the following:
■ (Windows XP) Click Start ➤ Settings ➤ Control Panel ➤ Add
or Remove Programs.
■ (Windows Vista and Windows 7) Click Start ➤ Control
Panel ➤ Programs ➤ Programs and Features.
2 From the list of programs, click Autodesk Navisworks 2013, and then
click Change/Remove (Windows XP) or Uninstall/Change (Windows
Vista and Windows 7).
The Autodesk Navisworks 2013Installation wizard re-opens in
Maintenance Mode.
3 Click Repair or Reinstall.
4 On the Repair or Reinstall page, click RepairAutodesk Navisworks
2013. This option replaces all registry entries that Autodesk Navisworks
initially installed and restores Autodesk Navisworks 2013 to its default
state. Click Repair.
16 | Chapter 2 Stand-Alone Installation
Page 23

NOTE ReinstallAutodesk Navisworks 2013 repairs the registry and reinstalls
all files from the original installation. Use this option if the RepairAutodesk
Navisworks 2013 option does not solve the problem.
5 On the Repair Complete page, click Finish.
Uninstall Autodesk Navisworks 2013
When you uninstall Autodesk Navisworks 2013, all components are removed.
This means that even if you've previously added or removed components, or
if you've reinstalled or repaired Autodesk Navisworks 2013, the uninstall
removes all Autodesk Navisworks installation files from your system.
IMPORTANT Do not use registry cleaning programs or attempt to modify the
registry entries yourself to uninstall Autodesk Navisworks 2013. Failure to follow
the official uninstall procedure will result in the inability to re-install the software
.
To uninstall Autodesk Navisworks 2013
1 Do one of the following:
■ (Windows XP) Click Start ➤ Settings ➤ Control Panel ➤ Add
or Remove Programs.
■ (Windows Vista and Windows 7) Click Start ➤ Control
Panel ➤ Programs ➤ Programs and Features.
2 From the list of programs, click Autodesk Navisworks 2013, and then
click Change/Remove (Windows XP) or Uninstall/Change (Windows
Vista and Windows 7).
The Autodesk Navisworks 2013Installation wizard re-opens in
Maintenance Mode.
3 Click Uninstall.
4 When informed that the product has been successfully uninstalled, click
Finish.
NOTE Even though Autodesk Navisworks 2013 is removed from your system,
the software license remains. If you reinstall Autodesk Navisworks 2013 at
some future time, you will not have to register and re-activate the program.
This does not apply to Autodesk Navisworks Freedom product.
Install and Run Autodesk Navisworks 2013 | 17
Page 24

Activate Products
When you run Autodesk Navisworks 2013 for the first time, you will be asked
to activate the product. This does not apply to Autodesk Navisworks Freedom.
If your computer is connected to the Internet, your computer can communicate
directly with Autodesk to complete the activation process.
If your computer is disconnected from the Internet, you can activate later
when you are connected. Some products also permit you to activate offline
by sending the serial number, request code, and registration data to Autodesk
over the Web or by email. For more information on activation, go to Autodesk
Licensing and select the FAQ link.
Move to Autodesk Navisworks from a Previous Release
If you have a previous version of Autodesk Navisworks installed on your
system, you can install Autodesk Navisworks 2013 and keep other versions of
the program on the same system. This is called a side-by-side installation. This
feature is not applicable to Autodesk Navisworks Freedom.
If you’ve purchased an upgrade version of Autodesk Navisworks 2013, you are
required to uninstall the previous version within 120 days of installing
Autodesk Navisworks 2013. See your license agreement for more information.
18 | Chapter 2 Stand-Alone Installation
Page 25

Network Administration and Deployment
3
This section provides step-by-step instructions for installing network-licensed or multi-seat
stand-alone versions of the Autodesk Navisworks Manage and Autodesk Navisworks
Simulate2013.
Plan a Deployment
A deployment provides an efficient way to install one or more Autodesk products
with a standard configuration on multiple computers.
The files required for the installation process are stored on the network, in an
administrative image, in a folder to which all users have shared access. To install
the products, users navigate to the deployment folder and double-click an
installer shortcut (.LNK file).
Some essential facts about deployments:
■ Deployments can be created for network licenses or multi-seat stand-alone
licenses.
■ Multiple deployments with different configurations can exist in the same
folder, sharing the same administrative image, which is a set of installation
files.
■ Each deployment installs products in a single language.
■ An existing deployment can form the basis for creating another deployment
with a different configuration.
■ Deployments can be configured to generate a log file for each installation.
Network administrators can use these log files for troubleshooting.
■ Each deployment creates a subfolder, <deployment name>\SMS_SCCM scripts,
which contains two documents to help you with the distribution of
deployments using Microsoft Systems Management Server (SMS) and System
19
Page 26

Center Configuration Manager (SCCM): SMS_SCCM_ReadMe.txt and
<deployment name>_SCCM.txt.
Check Deployment Readiness
This checklist identifies preliminary tasks to complete, information to gather,
and decisions to make before creating a network deployment.
TIP To review deployment settings, including details of product configuration,
you can create a test deployment. After the learning process, you can delete the
test deployment.
Deployment Checklist
Review the system requirements by clicking the System
Requirements link in the installer. Confirm that your
network, servers, and client computers meet these system
requirements.
Understand the general process for installing the type of
license you have purchased. For a network license deployment, know the license server name(s), and the type of
license server model that was specified at the time of license purchase. For more information, see Determine
the License Server Model (page 26).
Install and activate any supporting tools and utilities. For
example, if you are using a network license, install the
Network License Manager from the installer.
Locate your product serial number and product key. The
serial number and product key are located on the outside
of the product packaging, or in an email message you
received if you downloaded your product or upgrade
from Autodesk.
Identify a network location for deployments, and create
a shared folder to contain deployments.
20 | Chapter 3 Network Administration and Deployment
Page 27

Deployment Checklist
Close all other programs and disable anti-virus software.
Decide what languages you will include in your administrative image, and what languages you will use for your
deployment package.
NOTE Languages can be included when you initially
create a deployment, or when you create a new deployment configuration, but not when you modify a deployment.
Determine whether to create log files on individual
computers, in the deployment folder, or both.
Determine whether to run installations in silent mode.
NOTE When products are installed in silent mode, the
user's system can automatically reboot without warning
when the installation is complete.
Identify other applicable configuration settings such as
locations of support files, and whether to automatically
install service packs.
Identify other applicable configuration settings such as
global options, workspaces, datatools, avatars, Clash
Detective rules and custom tests, Presenter archives,
object animation scripts, and so on.
System Requirements for a Deployment
This section contains the system requirements for the location of the
administrative image that you create, the network license server, and the client
workstation.
Plan a Deployment | 21
Page 28

Before you begin installing the program on a network, make sure that your
servers and client workstations meet the minimum recommended hardware
and software requirements for a deployment.
Whether the Windows operating system is the 32-bit or the 64-bit version is
automatically detected when installing Autodesk Navisworks. You can choose
which versions of Autodesk Navisworks will be installed.
See the following tables for administrative image, license server, and client
workstation system requirements.
Hardware and software requirements for the location of the administrative
image
RequirementHardware/Software
10 GBHard disk
Hardware and software requirements for client machine
RequirementHardware/Software
Operating System
Web browser
Processor
Microsoft® Windows 7 (32-bit or 64-bit) Home Basic,
Home Premium, Professional, Enterprise, or Ultimate (recommended)
Microsoft® Windows Vista® SP2 (32-bit or 64-bit) Home
Premium, Business, Enterprise, or Ultimate
Microsoft® Windows XP SP3 (32-bit) Home, or Profession-
al
Microsoft® Windows XP SP2 (64-bit) Professional
Microsoft® Internet Explorer® 7.0 or later
AMD Athlon™, 3.0 GHz or faster (minimum); Intel
Pentium® 4, 3.0 GHz or faster (recommended) - with
SSE2 technology
22 | Chapter 3 Network Administration and Deployment
®
Page 29

Hardware and software requirements for client machine
512 MB (minimum); 2 GB or more (recommended)Memory (RAM)
1280 x 800 VGA with true color (minimum)VGA Display
1920 x 1080 32-bit color video display adapter with true
color (recommended)
Graphics Card
Pointing device
Direct3D 9® and OpenGL® capable graphics card with
Shader Model 2 (minimum)
18.5 GB free disk space for installationHard disk
Microsoft® Mouse-compliant pointing device
Any speed (for installation only)DVD-ROM
Printer or plotterOptional hardware
Modem or access to an Internet connection
Network interface card
Hardware and software requirements for the network license server (Windows)
RequirementHardware/Software
Operating System
Microsoft® Windows 7 (32-bit or 64-bit)
■ Windows 7 Enterprise
■ Windows 7 Ultimate
■ Windows 7 Professional
■ Windows 7 Home Premium
Microsoft® Windows Vista® SP2 or later (32-bit or 64-bit)
■ Windows Vista Enterprise
Plan a Deployment | 23
Page 30

Hardware and software requirements for the network license server (Windows)
RequirementHardware/Software
■ Windows Vista Ultimate
■ Windows Vista Business
■ Windows Vista Home Premium and Basic (32-bit)
■ Windows Vista Home Premium (64-bit)
Microsoft® Windows XP SP2 or later (32-bit or 64-bit)
■ Windows XP Professional
■ Windows XP Home
Windows Server SP1 or later (32-bit or 64-bit)
■ Windows 2008 Server R2
■ Windows 2008 Server
■ Windows 2003 Server R2
■ Windows 2003 Server
Computer/processor
Intel® Pentium® III or higher
450 Mhz (minimum)
Compatible with existing Ethernet network infrastructureNetwork interface card
NOTE The Network License Manager supports Ethernet network configurations only.
TCP/IPCommunication protocol
NOTE The Network License Manager uses TCP packet types.
11.10.0.0FLEXnet
24 | Chapter 3 Network Administration and Deployment
Page 31

Determine the Installation Type
When you set up your deployment, you specify the installation type by target
platform and license type.
Target Platform
Specify either a 32-bit or 64-bit platform, depending on the operating system
of the computers that will use the deployment. For some Autodesk products,
you can install a 32-bit version on a 64-bit operating system.
License Type
Specify one of the following license types, based on the type of license you
purchased:
■ Network License. With this license type, you install the product to
computers on a network, along with the files and registry entries that allow
the product to communicate with the Network License Manager (NLM)
on one or more servers. You also define the NLM configuration. When an
Autodesk product starts up on a client computer, it requests a license from
NLM, then returns it when the product is stopped. Computers running
the product based on a network installation do not require individual
activation. For more information, see Determine the License Server Model
(page 26).
A major advantage of a network license is that you can install the product
on more systems than the number of licenses you have purchased (for
example, purchase 25 licenses, but install on 40 computers). At any one
time, the product runs on the maximum number of computers for which
you have licenses, so you get true floating licenses.
■ Stand-Alone License. This license type is for multi-seat stand-alone
installations where a single serial number and product key are used to
install products on multiple computers. With this license type you do not
use NLM to manage product licensing. Instead, installation, registration,
and activation occur on each computer. After the first activation using the
multi-seat stand-alone serial number and product key, activation occurs
automatically for all computers using this deployment, as long as they are
connected to the Internet.
Plan a Deployment | 25
Page 32

Determine the License Server Model
If you chose the Network License option, you need to know which license
server model will be used to distribute the product licenses.
This was specified as one of the following when the license was purchased:
■ Single license server model. The Network License Manager (NLM)
is installed on a single server, so license management and activity is
restricted to this server. A single license file records the total number of
licenses available on the server.
■ Distributed license server model. Licenses are distributed across more
than one server. A unique license file is required for each server. To create
a distributed license server, you must run NLM on each server that is part
of the distributed server pool.
■ Redundant license server model. Three servers are available to
authenticate each license. One server acts as the master, while the other
two provide backup if the master server fails. With this configuration,
licenses continue to be monitored and issued as long as at least two servers
are functional. The license file on all three servers is the same. You must
run NLM on each server.
Each of these license server models is described in detail in the Autodesk
Licensing Guide. It is recommended that you also read that guide before you
deploy the product. You can find the Autodesk Licensing Guide by clicking the
Installation Help link in the installer.
TIP If you are deploying a stand-alone or multi-seat stand-alone installation type,
you do not use a license server model.
Include Service Packs
Autodesk Navisworks 2013 provides the option to include service packs in a
deployment.
You can use a service pack stored on a local hard drive or network location.
You can add multiple service packs to your deployment.
NOTE The service pack will be applied only after the installation of the main
product is completed. If the deployment process for the main product is canceled
or fails, the service pack installation will automatically be canceled.
26 | Chapter 3 Network Administration and Deployment
Page 33

Two options are available for including service packs in deployments:
■ Append the Service Pack onto the Deployment. When you append
a service pack, the service pack is applied to the current deployment only.
Multiple service packs may be appended to a deployment. The service pack
file is included in the deployment and the service pack is applied after the
product is deployed.
■ Merge the Service Pack into the Administrative Image MSI File.
With this option, the service pack is merged into the administrative image.
Once merged, a service pack cannot be removed from the administrative
image.
To extract a Microsoft Installer Patch (MSP) file from a service pack
1 Download the service pack from the Support site.■
■ Review the service pack Readme file for information about patch
usage.
■ Open a Windows command prompt and enter the patch file name
followed by the /a switch. Here is the general command format:
<local_drive:>\<patch_name>.exe /a
Here is an example: ProductSP1.exe /a, where ProductSP1.exe is the
name of the downloaded patch.
NOTE To include a service pack with a deployment, an MSP file must be extracted
from the downloaded service pack executable.
Plan a Deployment | 27
Page 34

To include a service pack with the deployment
1 On the Configure Deployment page, click the product name to
■
open the configuration panel.
■ In the Service Packs area, click the Add button.
■ In the Open dialog box, locate the service pack you want to include
with the deployment.
■ Select the MSP file and click Open.
■ Specify whether you want to append the service pack to the
deployment or merge the service pack into the administrative image.
■ Click the product name to close the configuration panel.
Create a Network Share
A network share is an installation folder that you make available to users'
computers on a network. You create deployments in the network share, and
point users to this location to install the program. Any subfolders inside a
network shared folder are automatically shared. You point users to this location
to install the program.
You can create a deployment folder on a network share as part of the process
of creating the deployment. If you plan to create several deployments of the
same product or suite, configured for different user groups, then these
deployments can share the same administrative image, and the shortcuts can
reside in the same folder. However, if you plan to create deployments of
different products or suites, it is recommended that you create separate product
folders on the network share before starting to create deployments.
For example, you can name the network share folder Deployments on the
desktop of the system where you want deployments stored. You can then add
subfolders inside the shared Deployments folder that clearly convey the name
of product you plan to deploy. This is also beneficial if you plan to deploy
multiple products.
You must have Full Control permissions set for your shared folder when
you are creating your deployment images. Read permissions are necessary to
28 | Chapter 3 Network Administration and Deployment
Page 35

access the network share and administrative permissions on the workstation
where the program is deployed. If you select the option to create a network
log file, then during installation, the user's computer writes an entry to the
log file in the network share. Therefore, this option requires that users have
read-write access to the network share.
To create your network share
1 For Windows 7, Vista and XP, on the desktop of your network server,
create a folder named Deployments.
2 Right-click the Deployments folder and click Properties.
3 In the Properties dialog, select the Sharing tab ®Advanced Sharing.
4 In the Advanced Sharing dialog, check the box Share this folder.
5 Click Permissions, then in the Share Permissions dialog, add or
remove users.
6 In Permissions for , select Full Control for your users.
These steps are important when creating your deployment images.
7 Click OK or Close to close the Properties dialog box.
8 For each product you plan to install, create a subfolder in the Deployments
folder. Name each folder with the pertinent product name.
NOTE Your file sharing procedure may vary according to your operating
system. Contact your System Administrator for details.
Set Up Network Tools and Your License Server
If you are planning to have users run the program using network licenses, you
need to use the Network License Manager.
The Network License Manager helps you configure and manage license
servers.
Install the Network License Manager
The Network License Manager is used to configure and manage the license
servers.
Set Up Network Tools and Your License Server | 29
Page 36

To install your Network License Manager
1 In the Autodesk Navisworks 2013Installation wizard, click Install
Tools and Utilities.
2 On the Configure Installation page, select Network License
Manager and click Install.
NOTE You can accept the default installation path (C:\Program Files\Autodesk)
or Browse to specify a different path. If you enter a path that does not exist,
a new folder is created using the name and location you provide.
WARNING Do not install the Network License Manager on a remote
drive. When you install the Network License Manager files, you must
provide a path to a local drive. You must specify the drive letter; the universal
naming convention (UNC) is not supported.
3 Review the Autodesk software license agreement for your country or
region. You must accept this agreement to proceed with the installation.
Choose your country or region, click I Accept, and then click Next.
4 When the Installation Complete page displays, click Finish.
To Activate a Network License Through Autodesk.com
If your product does not include the Network License Activation Utility, you
can activate your license by going to https://registeronce.autodesk.com, and
following the on-screen instructions.
Configure Your License Server
You configure a license server so that you can manage the Autodesk Navisworks
product licenses.
You can configure the license server with the lmtools.exe utility.
You should be logged in with Administrator rights when working with the
LMTOOLS utility.
30 | Chapter 3 Network Administration and Deployment
Page 37

To configure your license server
1 Do one of the following:
■ (Windows XP) Click Start ➤ All
Programs ➤ Autodesk ➤ Network License
Manager ➤ LMTOOLS.
■ (Windows Vista and Windows 7) Double-click the LMTOOLS icon
on the desktop.
2 In the Lmtools program, on the Service/License File tab, select the
Configure Using Services option.
3 Click the Config Services tab.
4 In the Service Name list, select the service name you want to use to
manage licenses.
By default, the service name is FLEXnet Service 1. If FLEXnet® is managing
other software on your computer in addition to Autodesk, you can change
the service name to avoid confusion, for example, you can rename
FLEXnet Service 1 to Autodesk Server1.
NOTE If you have more than one software vendor using FLEXnet for license
management, the Service Name list contains more than one option. Make
sure that only one Autodesk service is listed.
5 In the Path to Lmgrd.exe File field, enter the path to the Network
License Manager daemon (lmgrd.exe), or click Browse to locate the file.
By default, this daemon is installed in the C:\Program Files\Autodesk
Network License Manager folder.
6 In the Path to the License File box, enter the path to your license
file, or click Browse to locate the file.
7 In the Path to the Debug Log File box, enter a path to create a debug
log, or click Browse to locate an existing log file.
It is recommended that you save to the \Program Files\Autodesk Network
License Manager folder. The log file must have a .log file extension. For
new log files, you must enter the .log extension manually.
8 To run lmgrd.exe as a service, select Use Services.
9 To automatically start lmgrd.exe when the system starts, select Start
Server at Power Up.
10 Click Save Service to save the new configuration under the service
name you selected in step 4. Click Yes when prompted if you would like
to save the settings to the service.
Set Up Network Tools and Your License Server | 31
Page 38

11 Click the Start/Stop/Reread tab and do one of the following:
■ If a service has not yet been defined for Autodesk, click Start Server
to start the license server.
■ If a service for Autodesk is already defined and running, click ReRead
License File to refresh the Network License Manager with any
changes made to the license file or Options file.
The license server starts running and is ready to respond to client
requests.
12 Close lmtools.exe.
Your Deployment Choices
When you create a deployment, you will make several choices during the
process to create various client deployment images and deployment types.
The following sections outline your choices in more detail.
Silent Mode
When silent mode is active and a user initiates the deployment, the installation
proceeds without any explicit user input.
No dialog boxes are presented that require interaction from the user. This
includes all error and warning dialog boxes. Check the log file for errors that
may occur in the event of installation problems.
Enable silent mode by selecting the Run Installations in Silent Mode
check box in the Configure Deployment page.
To prevent a silent install from failing on client computers:
■ Install Microsoft .Net Framework 4.0 (page 5) on the client computers
■ Reboot client computers before installing Autodesk Navisworks 2013
Specify Log File Locations
On the Create Deployment ➤ Configure page of the deployment process,
you can choose whether or not to create a log file by selecting the appropriate
check box in the Installation Settings area. The program has two types of
32 | Chapter 3 Network Administration and Deployment
Page 39

log files with which you can monitor information about deployments and
installations.
■ Network log. The network log file keeps a record of all workstations that
run the deployment. The log lists the user name, workstation name, and
the status of the installation. Refer to this file for status information and
details about problems that users encountered during installation (for
example, low disc space or inadequate permissions).
The network log is named with the same name you chose for your
deployment. You can specify where the log file is created by entering either
a valid UNC (universal naming convention) path or hard-coded path on
your network, for example \\MyComputer\Autodesk\<Autodesk product>.
Users should use their actual computer name in place of MyComputer.
NOTE The folder where the network log resides must be a shared folder where
users who install the program have Change permissions. Otherwise, successes
or failures for user installations cannot be written to the log file.
■ Client log. The client log contains detailed installation information for
each workstation. This information may be useful in diagnosing installation
problems. The client log is located in the "Temp" directory of each client
workstation.
To specify a log file location
1 While creating a deployment, on the Configure Deployment page,
select the Create a Network Log File check box. Enter the name of
the folder where you want the network log to be located.
2 If you want to create a client log, select the Create a Log File in Each
Workstation's Temp Folder option.
3 Click Next.
Your Deployment Choices | 33
Page 40

Change Deployment Language
You can select a different language for deployment instructions, and a language
for product installations in the same deployment process.
NOTE Language packs can only be included in an administrative image during
the creation of the deployment and not during modification.
When you start the deployment process, the installer automatically determines
your operating system language. If a supported language is detected, your
deployment pages are displayed in that language. You can change language
for installation instructions on the first page of the Installation wizard before
you start the installation process:
If you need to provide Autodesk Navisworks to users in one or more languages
different than your own, you can use the language packs from the installer
(Product Information page); this will allow you to deploy the product in
the languages you need to support:
After you leave the Product Information page of the installer, the menu
for selecting a language or adding a language pack is disabled. If you later
decide to change the language or add a language pack, you cannot go back to
the Product Information page and use the menu. Instead, you must cancel
the installation, start the installer again, and then make the correct language
selection on the Product Information page.
Using Language Packs
Language packs support use of different languages in each Autodesk Navisworks
product, including exporters. Pack names start with NAVFREE_, NAVSIM_,
NAVMAN_, and exporters_ respectively.
IMPORTANT You can only select one language pack for each product for
deployment.
It is possible to manually install additional language packs to Autodesk
Navisworks products later by double-clicking on the language pack MSI file.
Alternatively, you can set up and run scripts to install additional language
packs.
34 | Chapter 3 Network Administration and Deployment
Page 41

Language packs are located on the installation DVD and unpacked downloaded
media under the x86 folder for 32-bit products and under the x64 folder for
64-bit products.
■ Language packs for specific products are included in the NAVFREE, ,
NAVSIM, NAVMAN, and NWEXPORT subfolders of x86 and x64 folders.
■ Language packs for specific languages are included in the en-US (English),
de-DE (German), es-ES (Spanish), fr-FR (French), it-IT (Italian), ja-JP
(Japanese), ko-KR (Korean), pt-BR (Brazilian Portuguese), ru-RU (Russian)
and zh-CN (Chinese PRC) subfolders of the product folders.
Configure Individual Products for Deployment
When you create a deployment, you can accept the default settings for any
product you choose to install, or you can configure these settings to create a
custom deployment.
IMPORTANT The configuration settings you choose apply to every instance of
the product installed from the deployment. After the deployment is created, these
settings can be changed only by modifying the deployment. For more information,
see Modify a Deployment (page 42).
On the Create Deployment ➤ Configure Deployment page of the
installer, for any product you have selected to install, you will see a triangular
control for access to a configuration pane.
Click anywhere in the product box to open the configuration panel:
■ Installation Type. If you choose a Typical installation (default settings)
the product installs the most common application features. A Custom
installation installs only the application features that you select from the
Select Features To Install list. The available features will depend upon
the product you are installing:
Redistributable ActiveX Control
Contains Autodesk Navisworks Redistributable ActiveX control.
Your Deployment Choices | 35
Page 42

API
Contains the Component Object Model
interface for customizing and extending
the functionality for Autodesk Navisworks
Manage and Autodesk Navisworks Simulate.
Contains various feature sample files.Example NWD files
Batch Utility
Sample RPCs
Inventor Switchback Plugin
Contains an add-in to run and schedule
commands. This is not available for
Autodesk Navisworks Freedom.
Contains several Rich Photorealistic Content
files. This is not available for Autodesk
Navisworks Freedom .
Contains the Inventor Switchback add-in
required to use the Switchback functionality
with Inventor models. This is not available
for Autodesk Navisworks Freedom.
NOTE For Autodesk Navisworks exporter plugins, currently you cannot change
which plugins are installed. By default, the exporter plugins for all third-party
products installed on a client computer will be automatically enabled.
After you have configured the settings as required, click the product name to
close the configuration panel.
Select the Project and Site Folders
When you set up your deployment, you can share various Autodesk Navisworks
settings across entire project site, or across a specific project group depending
on the required level of granularity.
See also:
How do I share the Autodesk Navisworks settings on a site and project
basis? (page 49)
36 | Chapter 3 Network Administration and Deployment
Page 43

To select the Project and Site folders
1 On the Configure Installation page, click the product name to open
the configuration panel where you can review and change settings.
2 In the Project Folder box, click the Browse button to select the
directory that contains the Autodesk Navisworks settings specific to a
project group.
3 In the Site Folder box, click the Browse button to select the directory
that contains the Autodesk Navisworks settings standard across the entire
project site.
Select Additional Configuration Options
The following options are available in the configuration panel in the Create
Deployment ➤ Configure Deployment page of the Installation wizard.
You can customize user preferences, include additional files and service packs,
and specify Communication Center options and access to online resources
for each of the products you choose to install. Some options may not be
available for all products.
Additional Files
You can include additional files, such as stylesheets, images, and sample files
with your deployment. It is recommended that you use the Project and Site
Folders area to share the Autodesk Navisworks settings across project sites and
project groups.
User Preferences
■ Display Welcome Screen at Startup
■ Require Internet Explorer for Installation (does not apply to
Autodesk Navisworks)
■ Set DWFx as the Default Publishing Format (does not apply to
Autodesk Navisworks)
■ Set the Default Profile Name (does not apply to Autodesk Navisworks)
■ Create a Desktop Shortcut for Autodesk Navisworks 2013
Your Deployment Choices | 37
Page 44

Service Packs
You can include service packs in your deployment. See Include Service Packs
(page 26) for more information.
Communication Center Options
■ Enable Live Updates
■ Enable Information Channels
■ Enable CAD Manager Channel (does not apply to Autodesk Navisworks)
■ Enable RSS Feeds
■ Allow User to Add RSS Feed
Access to Online Resources
■ Specify the Ability to Access Online Tools (does not apply to
Autodesk Navisworks)
■ Specify the Customer Error (CER) Settings
■ Specify the InfoCenter Search Settings (does not apply to Autodesk
Navisworks)
Create a Deployment
A deployment contains a Microsoft Transform (MST) file that modifies the
default behavior of the installation program.
As you begin a deployment, you need to select the location of your
administrative image, a deployment name, and if your target systems are 32or 64-bit operating systems.
To create an original deployment using default values
1 Close all running applications on your computer and start the
Installation wizard.
2 On the Installation wizard, if required, select an alternate language
for the Installation wizard from the Installation Instructions
drop-down, and then click Create Deployment.
38 | Chapter 3 Network Administration and Deployment
Page 45

3 On the Configure Deployment page, Administrative Image
section, specify the following data:
a In the Deployment Configuration Name field, enter a
descriptive name for the deployment that identifies the user group,
platform, or other attribute to differentiate this deployment from
others. The name you enter here is the name of the shortcut users
will access to install the product.
b In the Administrative Image Path field, enter the path to your
existing shared network location, or use the Browse button to
navigate to that location. This area is where you create and store
your administrative image. Users install the program from this
location.
TIP If you do not know how to create a network share, see Create a
Network Share (page 28).
c Under Target Platform select either 32-bit or 64-bit for your
target operating system. This selection does not identify the system
your deployment was created on; it identifies your target system.
d Choose whether to Include Only the Products Required by
this Configuration.
■ If selected, the deployment cannot be modified in future to
include additional products.
■ If unselected, the administrative image will include all possible
products, so the current deployment can be modified in any
way.
TIP It is recommended that you include all available products if you plan
to create multiple deployments from this administrative image with different
product mixes, and prefer not to use the installation media again. If there
are products you will never use, or if you do not expect to create additional
deployments, you should select a subset of products.
4 In the Installation Settings section, select one or more of these
options:
■ Silent Mode. The installation runs in background, without
prompting the user for any input.
NOTE Silent mode can automatically restart the user's computer without
warning after installation. See also Silent Mode (page 32).
Create a Deployment | 39
Page 46

■ Workstation Log. Log file on each workstation can enable users
to review and troubleshoot their own installations.
■ Network Log. Log file in a central location supports the network
administrator in reviewing data for all installations.
NOTE The network log file must be in a shared folder where users of the
deployment have read-write access. Otherwise, log data for user
installations cannot be written to the log file. For more information
regarding log files, refer to Specify Log File Locations (page 32).
5 Click Next.
6 On the Product Information page, use the Product Language
drop-down if required (see Change Deployment Language (page 34)).
7 Select a License Type (page 25) and enter your Serial Number and
Product Key. If the data is valid, green check marks appear. Click Next.
8 Review the Autodesk software license agreement for your country or
region. You must accept this agreement to proceed with the installation.
Choose your country or region, click I Accept, and then click Next.
NOTE If you do not agree to the terms of the license and want to terminate
the installation, click Cancel.
9 On the Configure Deployment page, select the products to include
in the deployment, and click Create.
After the deployment is created, the Deployment Configuration
Complete page opens, presenting useful paths to the new deployment
and a link for registering products online.
10 After you have finished using this screen, click Finish.
To create an original deployment with custom settings
1 Close all running applications on your computer and start the
Installation wizard.
2 On the Installation wizard, if required, select an alternate language
for the Installation wizard from the Installation Instructions
drop-down, and then click Create Deployment.
3 On the Configure Deployment page, Administrative Image
section, specify the following data:
a In the Deployment Configuration Name field, enter a
descriptive name for the deployment that identifies the user group,
platform, or other attribute to differentiate this deployment from
40 | Chapter 3 Network Administration and Deployment
Page 47

others. The name you enter here is the name of the shortcut users
will access to install the product.
b In the Administrative Image Path field, enter the path to your
existing shared network location, or use the Browse button to
navigate to that location. This area is where you create and store
your administrative image. Users install the program from this
location.
NOTE If you do not know how to create a network share, see Create
a Network Share (page 28).
c Under Target Platform: select either 32-bit or 64-bit for your
target operating system. This selection does not identify the system
your deployment was created on; it identifies your target system.
d Choose whether to Include Only the Products Required by
this Configuration.
■ If selected, the deployment cannot be modified in future to
include additional products.
■ If unselected, the administrative image will include all possible
products, so the current deployment can be modified in any
way.
TIP It is recommended that you include all available products if you plan
to create multiple deployments from this administrative image with different
product mixes, and prefer not to use the installation media again. If there
are products you will never use, or if you do not expect to create additional
deployments, you should select a subset of products.
4 In the Installation Settings section, select one or more of these
options:
■ Silent Mode. The installation runs in background, without
prompting the user for any input.
NOTE Silent mode can automatically restart the user's computer without
warning after installation. See also Silent Mode (page 32).
■ Workstation Log. Log file on each workstation can enable users
to review and troubleshoot their own installations.
■ Network Log. log file in a central location supports the network
administrator in reviewing data for all installations.
Create a Deployment | 41
Page 48

NOTE The network log file must be in a shared folder where users of the
deployment have read-write access. Otherwise, log data for user
installations cannot be written to the log file. For more information
regarding log files, refer to Specify Log File Locations (page 32).
5 Click Next.
6 On the Product Information page, use the Product Language
drop-down if required (see Change Deployment Language (page 34)).
7 Select a License Type (page 25) and enter your Serial Number and
Product Key. If the data is valid, green check marks appear. Click Next.
8 Review the Autodesk software license agreement for your country or
region. You must accept this agreement to proceed with the installation.
Choose your country or region, click I Accept, and then click Next.
NOTE If you do not agree to the terms of the license and want to terminate
the installation, click Cancel.
9 On the Configure Deployment page, select the products to deploy.
10 If you need to configure settings for a product, click the product name
to open the configuration panel, where you can review and change
settings. See Configure Individual Products for Deployment (page 35).
NOTE The configuration settings you choose apply to every instance of the
product installed from the deployment. After the deployment is created,
these settings can be changed only by modifying the deployment.
Click the product name to close the configuration panel.
11 Click Create.
After the deployment is created, the Deployment Configuration
Complete page opens, presenting useful paths to the new deployment
and a link for registering products online.
12 After you have finished using this screen, click Finish.
Modify a Deployment
After a deployment is created, it may be necessary to modify the deployment
for some client workstations.
Inside each deployment folder is a Tools folder that contains a shortcut (.LNK
file) named Create & Modify a Deployment. You can use this shortcut to
■ Create a new deployment configuration
42 | Chapter 3 Network Administration and Deployment
Page 49

■ Create a new deployment configuration that uses an existing deployment
as a template
■ Modify the configuration of an existing deployment
The installer pages guide you through the process, similar to when creating
an original deployment. If your original administrative image was set to include
only products required by the deployment configuration, then your options
for creating or modifying the deployment are limited. In particular, you cannot
add products to the deployment that are not in the original administrative
image. Conversely, if your original administrative image was not set to include
only the required products, then it includes all product files. As a result, you
can add products when you modify this deployment or when you create new
deployment configurations.
To modify a deployment
1 Open the shared network folder that contains the deployment.
2 In the Tools folder, double-click the Create and Modify a
Deployment shortcut.
The installer opens at the Modify Deployment page.
3 Click through the deployment configuration pages, and select the
required options.
4 Click Create Deployment.
Direct Users to the Administrative Image
After you have created the deployment, users can install the program using
the shortcut (.LNK file) located in the deployment folder with the
administrative image.
The shortcut name matches the deployment name that you specified when
creating the deployment. Notify users of the shortcut name and location.
Instruct them to double-click the shortcut to start the installation. If the
deployment uses silent mode, advise users to keep other applications closed
during the installation, because their computers might restart automatically
after products are installed.
To point users to the administrative image
■ The simplest method of notifying users how to install the deployment is
to email them with instructions about using the shortcut. At a minimum,
Direct Users to the Administrative Image | 43
Page 50

the instructions need to include the location of the deployment and
instructions about double-clicking the shortcut to the deployment.
Overview of Distribution Methods
You can use the following alternative methods of distributing Autodesk
Navisworks .
You can choose from several methods of distributing an Autodesk program.
Network sharing is the default method.
■ Network Share. Users launch the program with the shortcut icon that
you created with the Deployment wizard. The program is installed on users'
local computers, and a product icon appears on their desktop. See Direct
Users to the Administrative Image (page 43) for more information.
■ Scripting. A script executes a command or a set of commands. Scripts
are similar to batch files but are more flexible. Installation scripts are most
useful for stand-alone installation of programs on computers that are
connected to a network. Scripts are also useful for installing service packs,
extensions, and object enablers on a network.
■ Imaging Software. You can use imaging software, such as Norton Ghost,
to create a master image to distribute Autodesk products. Once created,
the master image is then replicated to other computers throughout your
facility.
Care needs to be taken since the use of imaging software can result in
conflicts with the product licensing, incomplete installations, and problems
with activation.
44 | Chapter 3 Network Administration and Deployment
Page 51

Installation Questions
4
This section provides answers to some frequently asked questions about installation and
deployment.
For additional advice and assistance, go to Autodesk Support, and search the
Knowledgebase for your product.
General Installation Questions
This section provides answers to some frequently asked questions about
installation.
What if I have lost my serial number or product key?
Check your product packaging or purchase records, if available, or contact
Autodesk Customer Service for assistance.
Why do I need to activate a product after installation?
Activation verifies for Autodesk and for you as a license holder that your
Autodesk product is installed on an eligible computer. The activation process
improves license security and management. For example, it ensures that a
multi-seat license is not in use by more than the authorized number of users.
45
Page 52

Can I install Autodesk products from a website?
Several Autodesk websites are being set up to support product downloads,
including Subscription, Education, eStore, My Account, and the Trial site. On
each site where downloads have been implemented, you have a choice of
several download methods to suit different requirements. If you want to install
products directly on your computer, you can use a Web Installer. If you want
to download the files to install products later, or to create a deployment, you
can use Download Manager, or Browser Download. More details are provided
on the download websites.
How do I register and activate Autodesk Navisworks?
The first time you start Autodesk Navisworks 2013, the Product Activation
wizard is displayed. You can either activate Autodesk Navisworks at that time
or run Autodesk Navisworks and activate it later.
Until you register and enter a valid activation code for Autodesk Navisworks
2013, you are operating the program in trial mode and the Product
Activation wizard is displayed for 30 days from the first time that you run
the program. If after 30 days of running Autodesk Navisworks 2013 in trial
mode you have not registered and provided a valid activation code, your only
option is to register and activate Autodesk Navisworks 2013. You will not be
able to run in trial mode after the 30 days expires. Once you register and
activate Autodesk Navisworks 2013, the Product Activation wizard is no
longer displayed.
TIP The fastest and most reliable way to register and activate your product is by
using the Internet. Simply enter your registration information and send it to
Autodesk over the Internet. Once you submit your information, registration and
activation occur almost instantly.
If you installed Autodesk Navisworks as part of a suite, a single trial period,
usually 30 days, applies to all Autodesk products in the suite. When the first
product is started, the trial period countdown begins for all products. If you
do not activate one of the products before the trial period ends, access to all
of the products is denied. After the trial period ends, you can restore access
to the products by entering an activation code.
46 | Chapter 4 Installation Questions
Page 53

To register and activate Autodesk Navisworks 2013
1 Click Start ➤ All Programs ➤ Autodesk ➤ Autodesk Navisworks
2013 ➤ Autodesk Navisworks 2013.
2 In the Autodesk Navisworks 2013Product Activation wizard, select
Activate the Product, and then click Next.
This starts the Register Today process.
3 Click Register and Activate (Get an Activation Code).
4 Click Next and follow the on-screen instructions.
If you do not have Internet access, or if you want to use another method
of registration, you can register and activate Autodesk Navisworks 2013
in one of the following ways:
■ Email. Create an email message with your registration information
and send it to Autodesk.
■ Fax or Post/Mail. Enter your registration information, and fax or
mail the information to Autodesk.
How do I switch my license from stand-alone to network or network to stand-alone?
If you simply entered the wrong license type by mistake, and are still running
the installer, use the Back button to return to the Product Information
page, and change the License Type.
If you want to change the license type for an installed product, contact your
Autodesk reseller or license supplier to obtain the new license and serial
number. Then uninstall your product and run a new install to change the
license type and enter the new serial number.
Where can I find product license information after installation?
Select Help menu ➤ About, or About [Product Name]. If your product uses
InfoCenter, that is where you can find the Help menu.
General Installation Questions | 47
Page 54

How can I check my graphics card driver to see if it needs to be updated?
It is recommended that you ensure your computer has the most current
graphics card driver for the best possible display performance.
To identify your graphics card driver
1 Start Autodesk Navisworks 2013.
2 In the InfoCenter box, click the down arrow next to the Help button
➤ System Info.
The Autodesk Navisworks 2013 information dialog box opens.
3 Review the information about your system including the graphics card
driver and driver version, and click OK to close the dialog.
To check the Web for an updated graphics card driver
■ Use Windows Update. If a more recent graphics card driver is available,
select it to have Windows Update download and install it.
■ Search the graphics card manufacturer’s website for the type of installed
graphics card. If a more recent graphics card driver is available, install it
following the instructions provided by the manufacturer.
To install an updated graphics card driver
1 Check the Web for to see if an updated driver is available.
■ Use Windows Update.
■ Search the graphics card manufacturer’s website for the type of
installed graphics card.
2 If a more recent graphics card driver is available, follow the instructions
from the website to download and install it.
48 | Chapter 4 Installation Questions
Page 55

When performing a Typical installation, what gets installed?
A Typical installation of Autodesk Navisworks 2013 includes the following
features:
Redistributable ActiveX Control
API
Batch Utility
Sample RPCs
Inventor Switchback Plugin
Contains Autodesk Navisworks Redistributable ActiveX control.
Contains the Component Object Model interface for customizing and extending the
functionality for Autodesk Navisworks
Manage and Autodesk Navisworks Simulate.
Contains various feature sample files.Example NWD files
Contains an add-in to run and schedule
commands. This is not available for
Autodesk Navisworks Freedom.
Contains several Rich Photorealistic Content
files. This is not available for Autodesk Navisworks Freedom .
Contains the Inventor Switchback add-in
required to use the Switchback functionality
with Inventor models. This is not available
for Autodesk Navisworks Freedom.
How do I share the Autodesk Navisworks settings on a site and project basis?
Sharing Autodesk Navisworks settings requires you to export the desired
settings as an XML file to the appropriate Site or Project directory’s
global_options folder. The name of the XML file is not significant. However it
must be stored in the global_options folder.
General Installation Questions | 49
Page 56

TIP When you configure global options, you can lock some of the options to
prevent users from editing them later on local machines. To create a locked global
options file, run the stand-alone Options Editor from the command line by
typing “drive:pathname\OptionsEditor.exe” -l. The Options Editor opens
with the locking facility.
To share settings on a site and project basis
1 Create appropriate Site and Project directories and subfolders in a central
location to be accessed by other Navisworks users.
2 In Autodesk Navisworks, click the application button ➤ Options
Editor.
3 Click Export.
4 In the Select Options to Export dialog box, check all options you
want to export and click OK.
5 In the Save As dialog box, name the XML file as desired and save it to
the global_options folder in the appropriate Site or Project directory.
See also:
Select the Project and Site Folders (page 36)
50 | Chapter 4 Installation Questions
Page 57

How do I change which exporter plugins are installed?
For Autodesk Navisworks exporter plugins, you can change which plugins are
installed by clicking on an exporter plugin to open the configuration panel
on the Configure Installation page of the Installation wizard.
Indicates the third-party software already installed on your computer.
Indicates plugins for the third-party software, that are either not installed
or have not been detected by the Installation wizard.
Select the check boxes next to all required plugins. If the third-party software
has not been detected by the wizard, you can manually enable the plugins
for it. Selecting the check box automatically opens the dialog box, which
enables you to browse for the correct software installation directory.
Deployment and Networking Questions
This section provides answers to some frequently asked questions about
deployments and networking.
Where should deployments be located?
Shared folders are required for both network license and multi-seat stand-alone
methods of installation.
It is recommended that you create a network share folder named Deployments
on the desktop of the system where you want deployments stored. You can
then add subfolders inside the shared Deployments folder that clearly convey
the names of products you plan to deploy. For example:
If you plan to create several deployments of the same product or suite,
configured for different user groups, then these deployments can share the
Deployment and Networking Questions | 51
Page 58

same administrative images, and the shortcuts can reside in the same folder.
Any subfolders inside a shared folder are automatically shared.
For more information on network shares, see Create a Network Share (page
28).
When should I select all products for the administrative image, and can I add products later?
If you include all products in your deployment, the administrative image will
be larger, but you will be able to modify the deployment or create new ones
without restrictions. If you select the checkbox Include only Products
Required by this Deployment Configuration, the resulting deployment
includes a subset of the available products. Any modifications to this
deployment, or additional deployments based on the first one, will be limited
to the same set of products or fewer.
It is recommended that you include all available products if you plan to create
multiple deployments from this administrative image with different product
mixes, and prefer not to use the installation media again. If there are products
you will never use, or if you do not expect to create additional deployments,
you should select a subset of products.
You can create another deployment later, and include additional products,
but to do this you need to create a new administrative image from the
installation media.
Where can I check if service packs are available for my software?
To find out if a patch or Service Pack is available for your product, visit the
Product Support page.
52 | Chapter 4 Installation Questions
Page 59

How do I choose between 32-bit and 64-bit deployments?
You have a choice of selecting 32-bit or 64-bit deployment. This choice controls
which operating system the deployment is targeted at, NOT what sort of
products to include in the deployment.
■ Selecting 32-bit deployment gives you a choice of 32-bit products, and will
only install on 32-bit operating systems.
■ Selecting 64-bit deployment gives you a choice of 32-bit and 64-bit
products, and will only install on 64-bit operating systems.
So, for example, if you want to install available 32-bit products on a 64-bit
operating system, you need to choose 64-bit deployment.
NOTE You can make either type of deployment from either type of operating
system.
Where do I find my server name?
When installing a network licensed product, you must specify the name of
the server that will run the Network License Manager.
If you don’t know the server name, you can quickly find it by opening a
Windows command prompt on the system that will be the Network License
Manager. At the prompt, enter ipconfig /all and note the Host Name
entry.
What is an administrative image (MSI) file?
An administrative image is a collection of shared file resources created during
the deployment process and is used by deployments to install the program to
networked workstations. An MSI file is a Microsoft Installer file.
How do I extract an MSP file?
A Microsoft Patch (MSP) file is usually contained in a Service Pack executable
that you download from the Support website for your product. To extract the
Deployment and Networking Questions | 53
Page 60

MSP file from the executable, run the patch program from the Windows
command prompt using the /a switch. The syntax is as follows:
<local_drive:>\<patch_name>.exe /a. See also Include Service Packs (page 26).
How should I configure a network license server for a firewall
If you have a firewall between the license server(s) and the client computers,
you need to open some TCP/IP ports on the server for license-related
communication. Open port 2080 for adskflex, and open ports 27000 through
27009 for lmgrd.
Licensing Questions
What is the difference between a stand-alone license and a network license?
A stand-alone license supports one or more Autodesk products for an individual
user. Similarly, a multi-seat stand-alone license supports a specific number of
users. While the software can be installed on additional computers in your
facility, the licensed number of users cannot be exceeded.
A network license supports a specific maximum number of users who are
connected to a network. A software utility known as the Network License
Manager (NLM) issues licenses to users, up to the number of licenses purchased.
At this point, no more computers can run the Autodesk product until a license
is returned to the NLM.
What is the benefit of using a network licensed version of the software?
Network licensing provides ease of license management for large
drafting/design facilities, classrooms, and other environments that need to
support many users. The Network License Manager provides centralized control
of licenses, including their registration, activation, and distribution to users.
One main advantage of a network license is that you can install products on
54 | Chapter 4 Installation Questions
Page 61

more computers than the number of licenses you have purchased. For example,
you can purchase 25 licenses but install them on 40 computers for ease of
access. At any one time, products can run on the maximum number of
computers for which you have licenses. This means you get a true floating
license. A network licensing system can also be configured to allow users to
borrow a license for a limited time to use on a computer disconnected from
the network.
What is SAMreport-Lite?
SAMreport-Lite is a report generator that helps you monitor the usage of
network licenses for products that use FLEXnet™. SAMreport-Lite is not
distributed with Autodesk products, but it is available from Autodesk.
SAMreport-Lite can help you better manage your software licenses. For more
information, click SAMreport-Lite.
Uninstall and Maintenance Questions
How can I see what is included in a default installation?
To see what is installed during a default installation, go through the installation
process to the Product Configuration page. The products selected here are
installed in a default installation. If you click a selected product box to open
the configuration panel, you can see the default settings for subcomponents
and features.
Is it possible to change the installation folder when adding or removing features?
After your product is installed, you cannot change the installation path.
Changing the path while adding features results in program corruption, so it
is not an option.
Uninstall and Maintenance Questions | 55
Page 62

How do I install tools and utilities after installing my product?
Run the installer again from the original media, and click Install Tools &
Utilities on the first screen. The installer guides you through the process of
selection, configuration and installation of tools and utilities.
When should I reinstall the product instead of repairing it?
Reinstall your product if you accidentally delete or alter files that are required
by the program. Missing or altered files adversely affect the performance of
your product and cause error messages when you try to execute a command
or find a file.
If an attempt to repair an installation fails, reinstalling is the next best option.
Do I need the original media to reinstall my product?
Yes. When reinstalling a product, you are prompted to load the original media.
If the product was installed from a network deployment, you need access to
the original deployment, unaltered by later changes such as the addition of
a service pack.
When I uninstall my software, what files are left on my system?
If you uninstall the product, some files remain on your computer such as files
you created or edited (for example, drawings or custom menus).
Your license file also stays on your computer when you uninstall your product.
If you reinstall on the same computer, the license information remains valid;
you do not have to reactivate the product.
56 | Chapter 4 Installation Questions
Page 63

Glossary
5
activate Part of the Autodesk software registration process, it allows you to run a product in
compliance with the product's end-user license agreement.
administrative image A collection of shared file resources created by the deployment process
and used to install the program to network computers.
deployment The process of installing Autodesk products to one or more computers on a
network.
hot fix Autodesk terminology for a minor application patch that contains a few code fixes.
installation image A deployment that consists of one or more MSI files and their associated
data files, any associated transforms, additional user-specified custom files, profile, and registry
settings.
language family A set of languages (core product, plus language packs) that are distributed
together, typically based on a geographic grouping. Languages are not distributed in this way
for all Autodesk products.
language pack A set of installed files, used by some Autodesk products, that enable the user
to work in the application in the language specified by the language pack.
License Transfer Utility A tool used to transfer a stand-alone license for an Autodesk product
from one computer to another, using Autodesk servers. Both the source and target computers
require Internet access.
multi-seat stand-alone installation A type of installation in which multiple stand-alone
seats of the product are installed using a single serial number.
network license installation A type of installation in which the product is installed on
multiple computers, but the distribution of licenses is handled by the Network License
Manager.
patch A software update to an application.
service pack Autodesk terminology for a major application patch that typically includes
many code fixes.
57
Page 64

silent mode An installation that proceeds without any explicit user input. No dialog boxes
are presented that require interaction from the user.
58 | Chapter 5 Glossary
Page 65

Index
A
activation 45
administrative image 52
C
configuration
defaults 55
L
license server models 6
license types 6, 54
M
multiple-user installation 19
D
default installation 55
deployments
modifying 52
distributed license server 6
Download Manager 46
G
glossary 57
I
InfoCenter 47
installation 9
default settings 55
deployment 19
deployment issues 51
general questions 45
languages 7
multiple users 19
side-by-side 18
stand-alone 3
tools and utilities 56
troubleshooting 45
installation path, changing 55
N
network deployment 19
network license 54
usage reports 55
Network License Activation 29
Network License Manager 29
network share 28
R
redundant license server 6
reinstall product 56
S
SAMreport-Lite 55
serial number 45
side-by-side installation 18
single license server 6
stand-alone installation 3
stand-alone license 54
system requirements
network deployment 22
stand-alone installation 4
T
tools and utilities, installing 56
59 | Index
Page 66

U
W
uninstall product 56
upgrade 18
web-based installation 46
60 | Index
 Loading...