

Autodesk Design Suite 3D - Planix Home Design Suite 3D, AutoCAD Design Suite 2013 Installation Manual
Page 1

AutoCAD Design Suite 2013 Installation Guide
Page 2

©
2012 Autodesk, Inc. All Rights Reserved. Except as otherwise permitted by Autodesk, Inc., this publication, or parts thereof, may not
be reproduced in any form, by any method, for any purpose.
Certain materials included in this publication are reprinted with the permission of the copyright holder.
Trademarks
The following are registered trademarks or trademarks of Autodesk, Inc., and/or its subsidiaries and/or affiliates in the USA and other countries:
123D, 3ds Max, Algor, Alias, Alias (swirl design/logo), AliasStudio, ATC, AUGI, AutoCAD, AutoCAD Learning Assistance, AutoCAD LT, AutoCAD
Simulator, AutoCAD SQL Extension, AutoCAD SQL Interface, Autodesk, Autodesk Homestyler, Autodesk Intent, Autodesk Inventor, Autodesk
MapGuide, Autodesk Streamline, AutoLISP, AutoSketch, AutoSnap, AutoTrack, Backburner, Backdraft, Beast, Beast (design/logo) Built with
ObjectARX (design/logo), Burn, Buzzsaw, CAiCE, CFdesign, Civil 3D, Cleaner, Cleaner Central, ClearScale, Colour Warper, Combustion,
Communication Specification, Constructware, Content Explorer, Creative Bridge, Dancing Baby (image), DesignCenter, Design Doctor, Designer's
Toolkit, DesignKids, DesignProf, DesignServer, DesignStudio, Design Web Format, Discreet, DWF, DWG, DWG (design/logo), DWG Extreme,
DWG TrueConvert, DWG TrueView, DWFX, DXF, Ecotect, Evolver, Exposure, Extending the Design Team, Face Robot, FBX, Fempro, Fire, Flame,
Flare, Flint, FMDesktop, Freewheel, GDX Driver, Green Building Studio, Heads-up Design, Heidi, Homestyler, HumanIK, IDEA Server, i-drop,
Illuminate Labs AB (design/logo), ImageModeler, iMOUT, Incinerator, Inferno, Instructables, Instructables (stylized robot design/logo),Inventor,
Inventor LT, Kynapse, Kynogon, LandXplorer, LiquidLight, LiquidLight (design/logo), Lustre, MatchMover, Maya, Mechanical Desktop, Moldflow,
Moldflow Plastics Advisers, Moldflow Plastics Insight, Moldflow Plastics Xpert, Moondust, MotionBuilder, Movimento, MPA, MPA (design/logo),
MPI, MPI (design/logo), MPX, MPX (design/logo), Mudbox, Multi-Master Editing, Navisworks, ObjectARX, ObjectDBX, Opticore, Pipeplus, Pixlr,
Pixlr-o-matic, PolarSnap, PortfolioWall, Powered with Autodesk Technology, Productstream, ProMaterials, RasterDWG, RealDWG, Real-time
Roto, Recognize, Render Queue, Retimer, Reveal, Revit, RiverCAD, Robot, Scaleform, Scaleform GFx, Showcase, Show Me, ShowMotion,
SketchBook, Smoke, Softimage, Softimage|XSI (design/logo), Sparks, SteeringWheels, Stitcher, Stone, StormNET, Tinkerbox, ToolClip, Topobase,
Toxik, TrustedDWG, U-Vis, ViewCube, Visual, Visual LISP, Voice Reality, Volo, Vtour, WaterNetworks, Wire, Wiretap, WiretapCentral, XSI.
All other brand names, product names or trademarks belong to their respective holders.
Disclaimer
THIS PUBLICATION AND THE INFORMATION CONTAINED HEREIN IS MADE AVAILABLE BY AUTODESK, INC. "AS IS." AUTODESK, INC. DISCLAIMS
ALL WARRANTIES, EITHER EXPRESS OR IMPLIED, INCLUDING BUT NOT LIMITED TO ANY IMPLIED WARRANTIES OF MERCHANTABILITY OR
FITNESS FOR A PARTICULAR PURPOSE REGARDING THESE MATERIALS.
Page 3

Contents
Chapter 1 Installation Overview and FAQ . . . . . . . . . . . . . . . . . . . 1
Installation Overview . . . . . . . . . . . . . . . . . . . . . . . . . . . 1
Prepare for Installation . . . . . . . . . . . . . . . . . . . . . . . . 1
Select Install Type . . . . . . . . . . . . . . . . . . . . . . . . . . . 2
Change Product Language . . . . . . . . . . . . . . . . . . . . . . 3
Specify License . . . . . . . . . . . . . . . . . . . . . . . . . . . . 4
Configure and Install . . . . . . . . . . . . . . . . . . . . . . . . . 5
Activate Products . . . . . . . . . . . . . . . . . . . . . . . . . . . 5
Create Deployment . . . . . . . . . . . . . . . . . . . . . . . . . . 6
Frequently Asked Questions . . . . . . . . . . . . . . . . . . . . . . . . 6
What if I have lost my serial number or product key? . . . . . . . . 7
Why do I need to activate a product after installation? . . . . . . . 7
Can I install Autodesk products from a website? . . . . . . . . . . 7
How does a trial license work in a product suite or bundle?
. . . . . . . . . . . . . . . . . . . . . . . . . . . . . . . . . . . 7
How do I switch my license from stand-alone to network or
network to stand-alone? . . . . . . . . . . . . . . . . . . . . . . 8
Where can I find product license information after
installation? . . . . . . . . . . . . . . . . . . . . . . . . . . . . . 8
After installation, how can I change product configuration,
repair, or uninstall the product? . . . . . . . . . . . . . . . . . . 8
Chapter 2 Product Configuration . . . . . . . . . . . . . . . . . . . . . . . 9
iii
Page 4

AutoCAD FAQ . . . . . . . . . . . . . . . . . . . . . . . . . . . . . . . 9
FAQ: What features can I customize? . . . . . . . . . . . . . . . . 9
FAQ: How can I migrate my custom settings and files from
previous releases? . . . . . . . . . . . . . . . . . . . . . . . . . 10
FAQ: What are support content folders? . . . . . . . . . . . . . . 11
FAQ: What is the purpose of changing the default search paths
and location of program files for a deployment? . . . . . . . . 11
FAQ: What are the services of the Communication Center? . .
12
FAQ: What are the tools and utilities available for installation?
. . . . . . . . . . . . . . . . . . . . . . . . . . . . . . . . . . . 12
3ds Max Design FAQ . . . . . . . . . . . . . . . . . . . . . . . . . . . 13
Installation Information Specific to Autodesk 3ds Max . . . . . . 13
Autodesk Alias Installation . . . . . . . . . . . . . . . . . . . . . . . . 20
Autodesk Mudbox 2013 Installation Information . . . . . . . . . . . . 20
Install a 32-bit Product on a 64-bit Operating System . . . . . . . 20
Switch from Online (Default) to Local Help . . . . . . . . . . . . 20
Additional Mudbox Resources . . . . . . . . . . . . . . . . . . . 21
Autodesk Mudbox Licensing . . . . . . . . . . . . . . . . . . . . . . . 22
Showcase Configuration . . . . . . . . . . . . . . . . . . . . . . . . . 22
Installation Information Specific to Autodesk Showcase . . . . . . 22
SketchBook Designer FAQ . . . . . . . . . . . . . . . . . . . . . . . . . 26
System requirements for Windows . . . . . . . . . . . . . . . . . 26
System requirements for Mac OS X . . . . . . . . . . . . . . . . . 29
Administrative Permission Requirements . . . . . . . . . . . . . . 30
Locating Your Serial Number and Product Key . . . . . . . . . . . 30
Locating Your Serial Number and Product Key . . . . . . . . . . . 31
Installing and Running the Product . . . . . . . . . . . . . . . . 32
Installing SketchBook Designer for Mac OS X . . . . . . . . . . . 33
Register and Activate SketchBook Designer . . . . . . . . . . . . . 36
Chapter 3 Network Administration Guide . . . . . . . . . . . . . . . . . . 39
Network Administration and Deployment . . . . . . . . . . . . . . . . 39
About Deployments . . . . . . . . . . . . . . . . . . . . . . . . . 39
Planning a Deployment . . . . . . . . . . . . . . . . . . . . . . . 40
Creating a Deployment . . . . . . . . . . . . . . . . . . . . . . . 46
Alternative Distribution Methods . . . . . . . . . . . . . . . . . . . . . 49
Overview of Distribution Methods . . . . . . . . . . . . . . . . . 49
Use Batch Files to Deploy the Program . . . . . . . . . . . . . . . 49
Use Group Policies to Run a Deployment . . . . . . . . . . . . . 53
Use Microsoft SCCM to Deploy Products . . . . . . . . . . . . . . 57
Distribute Products Using Imaging Software . . . . . . . . . . . . 61
Installation Questions . . . . . . . . . . . . . . . . . . . . . . . . . . . 63
Licensing Questions . . . . . . . . . . . . . . . . . . . . . . . . . 64
Deployment and Networking Questions . . . . . . . . . . . . . . 65
Uninstall and Maintenance Questions . . . . . . . . . . . . . . . 67
iv | Contents
Page 5

Glossary . . . . . . . . . . . . . . . . . . . . . . . . . . . . . . . . . . 69
Chapter 4 Licensing Guide . . . . . . . . . . . . . . . . . . . . . . . . . . 71
Introduction . . . . . . . . . . . . . . . . . . . . . . . . . . . . . . . . 71
License Types . . . . . . . . . . . . . . . . . . . . . . . . . . . . 71
Activation . . . . . . . . . . . . . . . . . . . . . . . . . . . . . . 72
Registration . . . . . . . . . . . . . . . . . . . . . . . . . . . . . 73
Stand-Alone Licensing . . . . . . . . . . . . . . . . . . . . . . . . . . . 73
Introduction to Stand-Alone Licenses . . . . . . . . . . . . . . . 73
Multi-Seat Stand-Alone License . . . . . . . . . . . . . . . . . . . 74
Manage Your Stand-Alone License . . . . . . . . . . . . . . . . . 74
Transfer Your Stand-Alone License . . . . . . . . . . . . . . . . . 76
Troubleshoot a Stand-Alone License Error . . . . . . . . . . . . . 79
Network Licensing . . . . . . . . . . . . . . . . . . . . . . . . . . . . . 81
Planning Your Network Licensing . . . . . . . . . . . . . . . . . 81
Understanding Your Network License . . . . . . . . . . . . . . . 87
Running the Network License Manager . . . . . . . . . . . . . . 98
Using Other Features of Network Licensing . . . . . . . . . . . . 106
Frequently Asked Questions about Network Licensing . . . . . . 122
Glossary . . . . . . . . . . . . . . . . . . . . . . . . . . . . . . . . . 123
Index . . . . . . . . . . . . . . . . . . . . . . . . . . . . . . . 127
Contents | v
Page 6

vi
Page 7
Installation Overview
and FAQ
Installation Overview
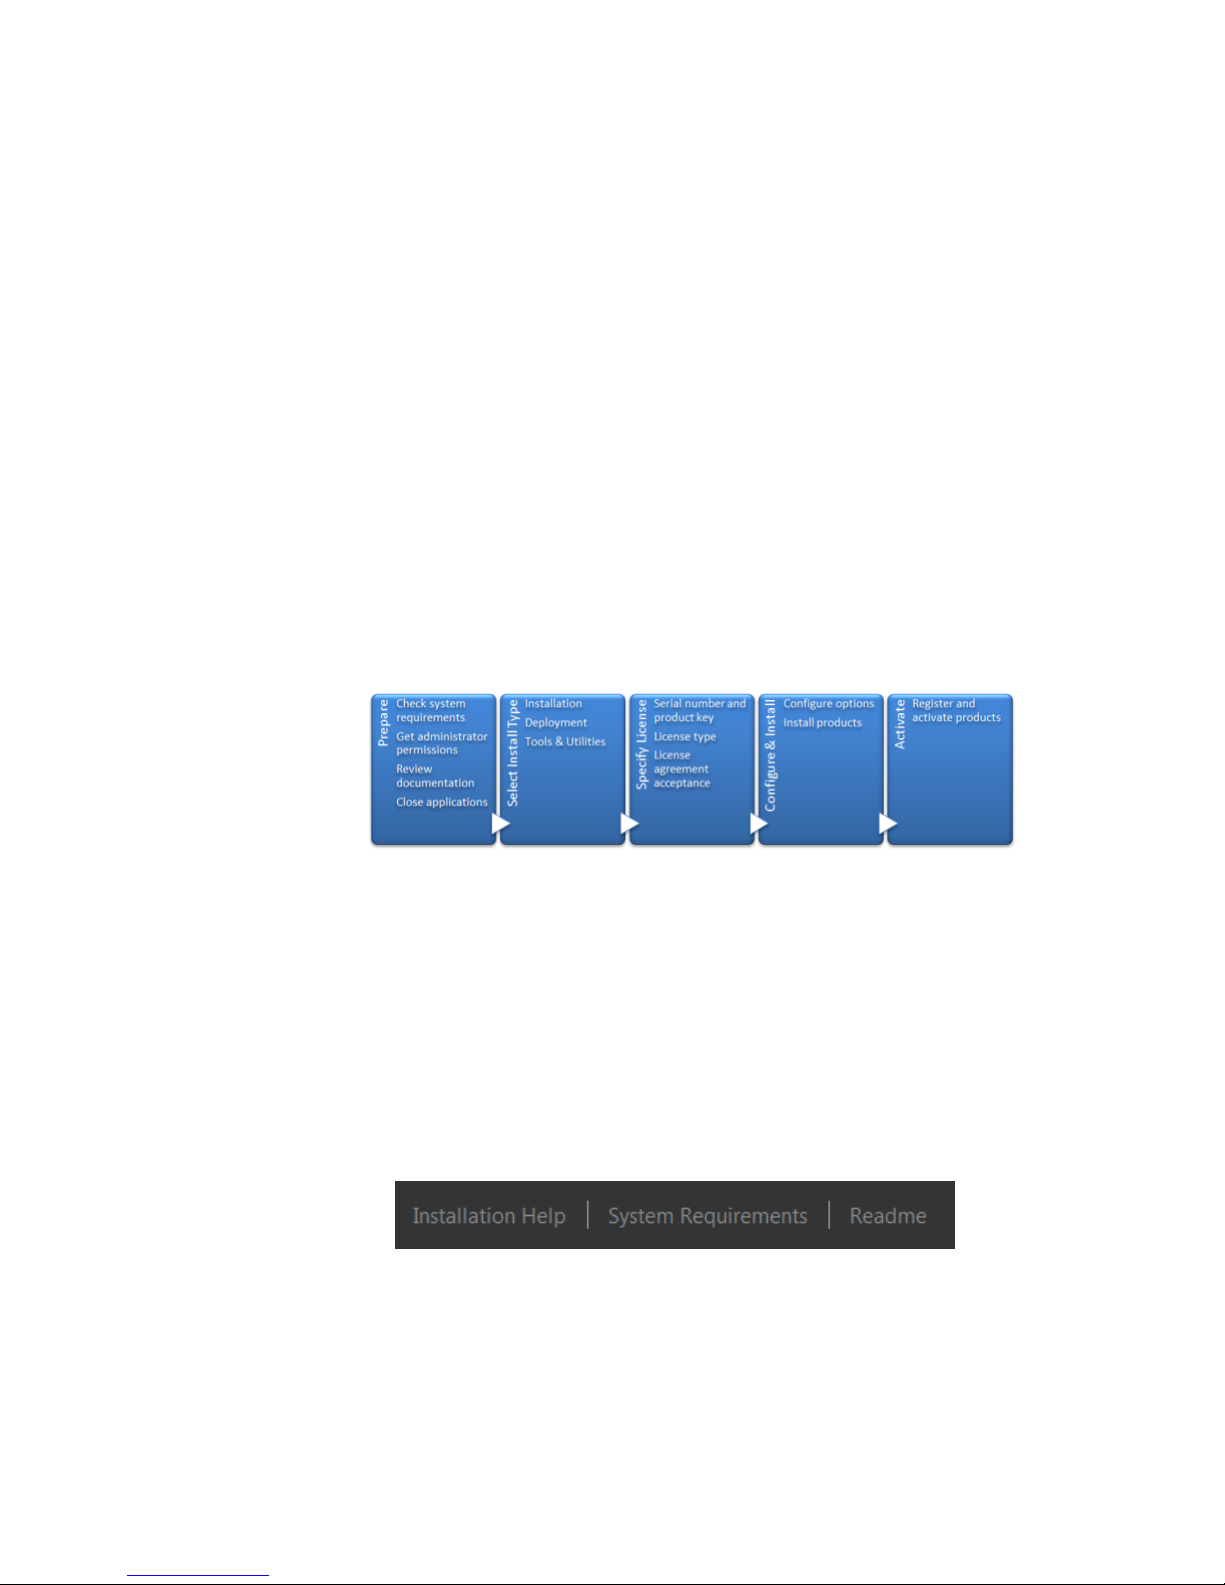
The following diagram shows the major parts of the installation process:
Further details are provided in the following sections.
1
Prepare for Installation
Before starting to install, check the following details:
■ Confirm that your computer meets the minimum system requirements. If
in doubt, click System Requirements at the bottom of the installer screen.
■ Review product documentation to clarify details such as the type of
installation to do (stand-alone or network) and which products to install.
Documentation is accessible from links on the lower left corner of the
installer:
1
Page 8
■ Ensure that your user name has Administrator permissions to install
applications on the computer or network.
■ Obtain serial numbers and product keys for all products you want to install.
These are on the product package or provided at the time you download
the software.
■ Close all running applications.
Select Install Type
Here is some basic information to help you choose the right path.
■ Install is recommended for individual users or small groups. The key
point is that you will repeat the installation process on each computer.
This is the only valid installation type for a stand-alone license, but it can
also be used with a multi-seat stand-alone or network license.
■ Create Deployment is recommended for network administrators, using
either a multi-seat stand-alone or network license. In the deployment
process, the installation is configured once, stored on the network, and
then distributed efficiently to users' computers.
For more information on deployments, see Create Deployment (page 6)
or the Network Administrator's Guide.
■ Install Tools & Utilities is used to install tools and utilities related to
your suite or product. If you have a network license for your Autodesk
product, you will need to use this option to install the Network License
Manager before any users can run the product. Consult the documentation
for your suite or product to identify the available tools and utilities of
interest.
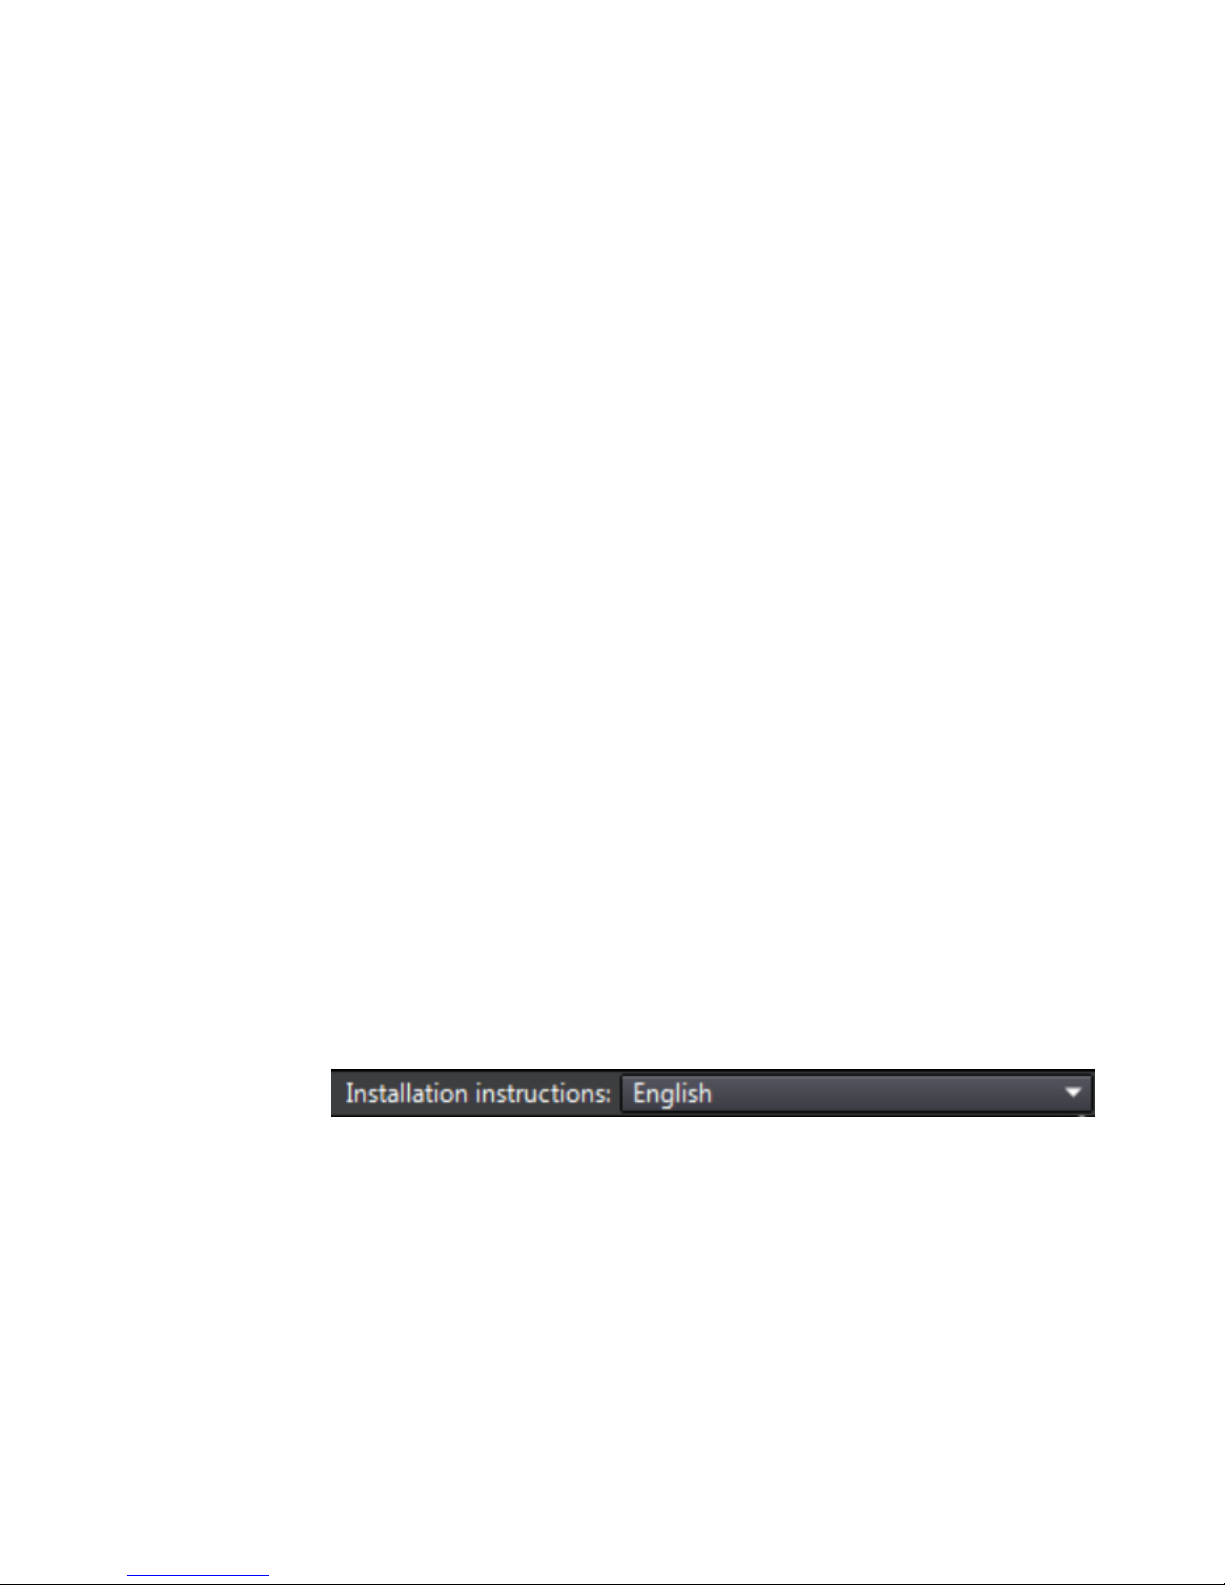
Select Installer Language
On the first screen of the installer, you can select the language for the installer
screens, using this control on the upper right:
For some Autodesk products, later in the install process you can select the
language for installed products. For more information, see Change Product
Language (page 3).
2 | Chapter 1 Installation Overview and FAQ
Page 9
Change Product Language
IMPORTANT This topic does not apply to Autodesk products that provide each
language version on separate media. For these products, you must specify the
product language when purchasing, and cannot change it.
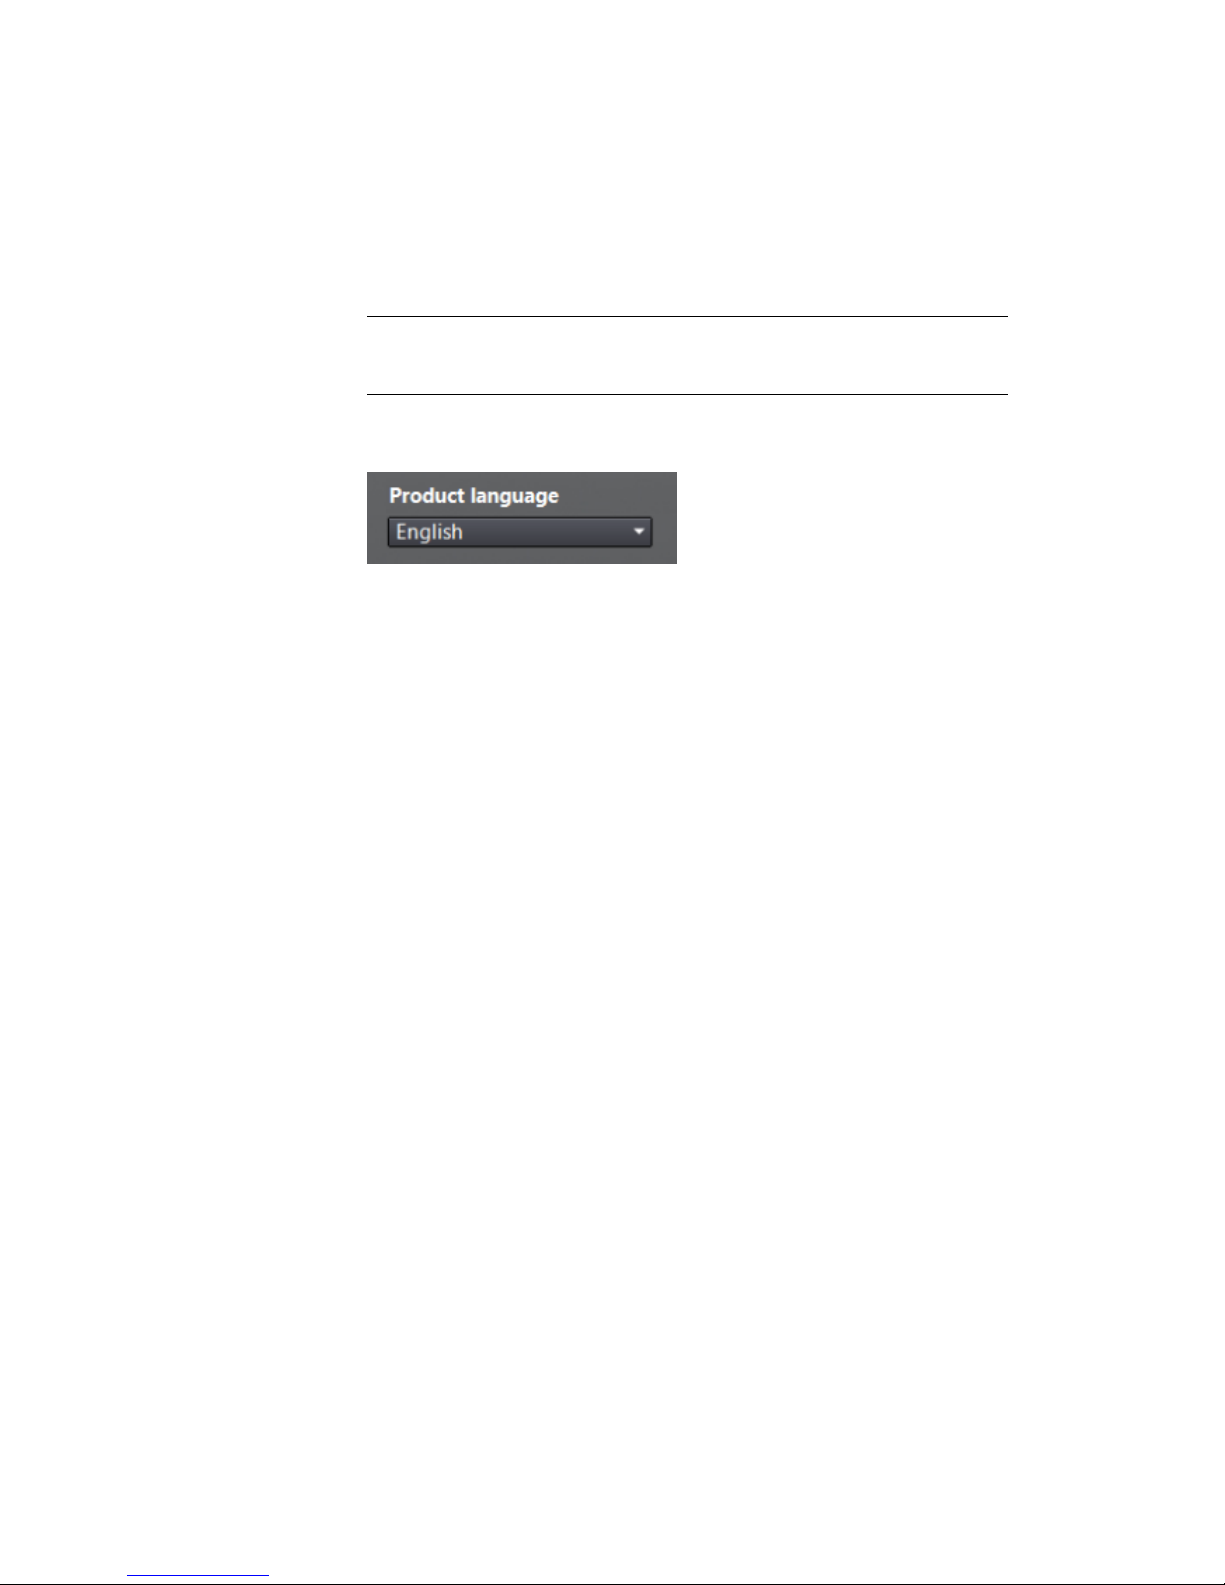
For some Autodesk products, you can select the product language at the time
of installation, using this drop-down menu on the installer:
Language Selection Menu
If the language you want is not on this menu, your available options vary by
Autodesk product. Many products, such as 3ds Max, Inventor, and all
AutoCAD-based products, use language packs to support additional languages.
These conditions apply to language selection:
■ Each suite installation uses a single language. If you need to install one or
more products in a different language, that requires a separate installation.
■ All deployments must be in a single language. One administrative image
can support deployments for different languages, but each deployment is
for one language.
■ If you are installing multiple products and select a language that is not
supported by some products, these products use a default language.
■ After you leave the Product Information page of the installer, the menu
for selecting a language or adding a language pack is disabled. If you later
decide to change the language or add a language pack, you cannot go back
to the Product Information page and use the menu. Instead, you must
cancel the installation, start the installer again, and then make the correct
language selection on the Product Information page.
About Language Packs
A language pack is a software module that can be added to an Autodesk product
to change the language used throughout the user interface and the
documentation. A single instance of the product software can support multiple
languages by adding language packs. Each language pack is matched to a
specific Autodesk product, and includes an installer. You must install the
Installation Overview | 3
Page 10

Autodesk product before installing a language pack. Each installed language
pack creates a separate icon on the Windows Start menu, such as "Inventor French (Francais)" that you can use to start the product in that language.
Depending on your product, language packs may be available on the
installation media or from a website.
A language pack installer provides an option to create a language pack
deployment for a particular product. The language pack deployment can be
installed on multiple computers, after the related product is installed, to add
another language version.
Specify License
The following notes provide a general overview. For more detailed information,
see the Licensing Guide for your product.
License Types
You can install most Autodesk products for a trial period of 30 days to evaluate
the product. If you purchase a license, it is configured as either stand-alone
or network, and for a specific number of users. These license types are briefly
described as follows:
■ A stand-alone license is intended for use by one person. The licensed
products can be installed on two computers, as long as both instances are
not running concurrently.
■ A multi-seat stand-alone license is intended to support a specified
maximum number of users, but it can be installed on a larger number of
computers for convenient access.
■ A network license supports a specified number of users who are
connected to a network. The Network License Manager is installed on one
or more servers on the network to manage the distribution of licenses to
users.
Network License Server Models
If you are using a network license, choose the server configuration for the
Network License Manager that was specified at the time of license purchase:
■ Single License Server
One server manages all licenses on the network.
■ Distributed License Server
4 | Chapter 1 Installation Overview and FAQ
Page 11
Licenses are distributed across a pool of multiple servers in the network.
You enter the name of each server in the pool.
■ Redundant License Server
Three servers are available to authenticate each license. You enter the
names of the three servers.
Configure and Install
Installation Path
This path specifies where the product folder will be installed. If you change
the location, use only valid ASCII characters in the install path.
Configuration
Most products have a number of configuration settings. On the Install >
Configure Installation page, for any product you have selected to install, you
see a triangular control for access to a configuration panel:
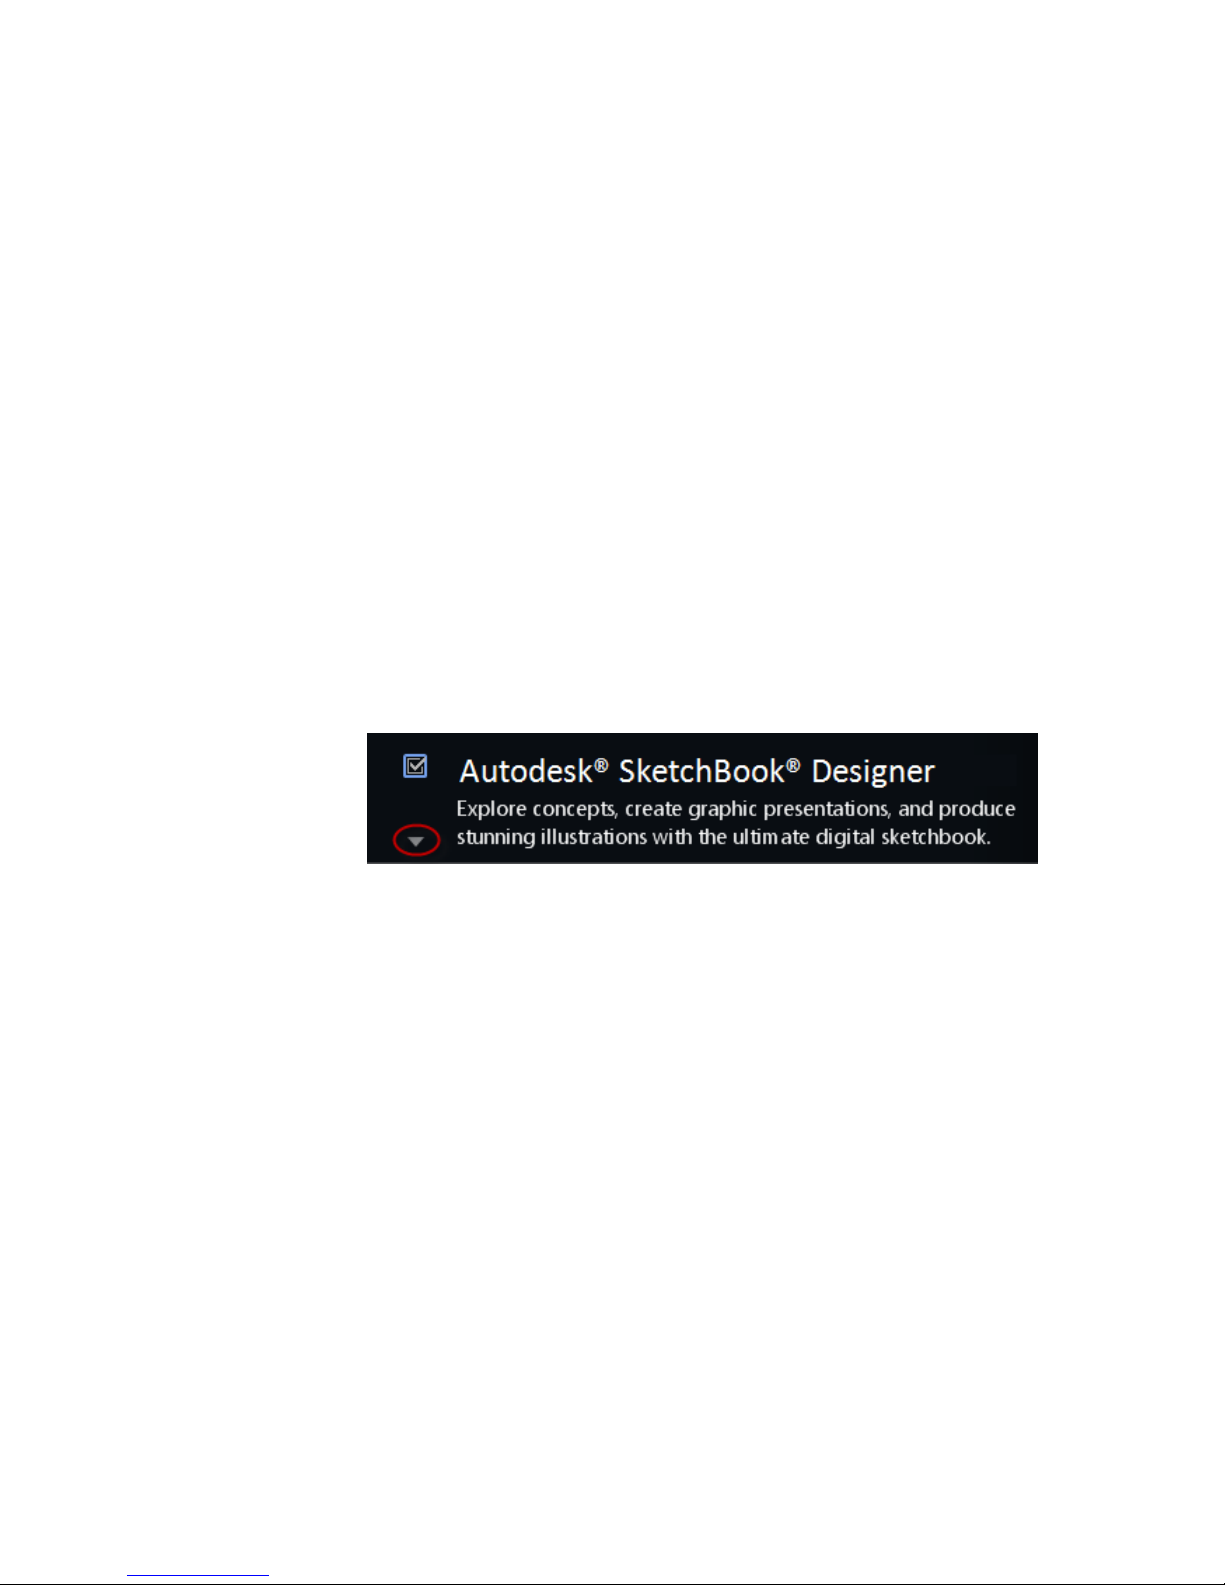
Click anywhere in the product box to open the configuration panel. For many
products, you can select an installation type, either Typical to accept the
default configuration settings, or Custom to review the settings and decide
whether to modify them. More information on the configuration settings for
your product may exist in an appendix to this guide. After you have configured
the settings as required, click the triangle to close the configuration panel.
Activate Products
When you run an Autodesk product for the first time, you will be asked to
activate the product. If it is connected to the Internet, your computer can
communicate directly with Autodesk to complete the activation process.
If your computer is disconnected from the Internet, you can activate later
when you are connected. Some products also permit you to activate offline
Installation Overview | 5
Page 12

by sending the serial number, request code, and registration data to Autodesk
over the Web or by email. For more information on activation, go to Autodesk
Licensing and select the FAQ link.
Create Deployment
Administrative Image
This is a customized set of installation files created by the deployment process.
It is used to install a consistent configuration of programs on each computer.
Other settings:
■ Administrative image path. Specify a shared network location where
you have Full Control permissions. Users will go to this path to install the
programs.
■ Target platform. Select either 32-bit or 64-bit to match the operating
system of the computers that will use the deployment.
■ Include only products required by this deployment
configuration. If selected, the deployment cannot be modified in the
future to include additional products. If unselected, the administrative
image will include all possible products, and the deployment can be
modified in the future in any way.
Installation Settings
■ Silent mode runs the installation in background, without user input.
IMPORTANT In silent mode, the user's computer can restart automatically and
without warning when the installation is complete.
■ A log file records installation data for each computer.
■ A network log file keeps a central record of installation data for all
computers that run the deployment. It has the same name as your
deployment, and must reside in a shared folder where users have Change
permissions, so that their computers can write to the log file.
Frequently Asked Questions
For advice and assistance with topics not covered here, go to Autodesk Support,
click your product name, and search in the Knowledgebase for your product.
6 | Chapter 1 Installation Overview and FAQ
Page 13

What if I have lost my serial number or product
key?
Check your product packaging or purchase records, if available, or contact
Autodesk Customer Service for assistance.
Why do I need to activate a product after installation?
Activation verifies for Autodesk and for you as a license holder that your
Autodesk product is installed on an eligible computer. The activation process
improves license security and management. For example, it ensures that a
multi-seat license is not in use by more than the authorized number of users.
Can I install Autodesk products from a website?
Several Autodesk websites are being set up to support product downloads,
including Subscription, Education, eStore, My Account, and the Trial site. On
each site where downloads have been implemented, you have a choice of
several download methods to suit different requirements. If you want to install
products directly on your computer, you can use a Web Installer. If you want
to download the files to install products later, or to create a deployment, you
can use Download Manager, or Browser Download. More details are provided
on the download websites.
How does a trial license work in a product suite
or bundle?
A single trial period, usually 30 days, applies to all Autodesk products in the
suite or bundle. When the first product is started, the trial period begins for
all products. If the user does not activate one of the products before the trial
period ends, access to all of the products is denied. After the trial period ends,
the user can restore access to the products by entering an activation code.
Frequently Asked Questions | 7
Page 14

How do I switch my license from stand-alone to
network or network to stand-alone?
If you simply entered the wrong license type by mistake, and are still running
the installer, use the Back button to return to the Product Information dialog,
and change the license type.
If you want to change the license type for an installed product, contact your
Autodesk reseller or license supplier to obtain the new license and serial
number. Then uninstall your product and run a new install to change the
license type and enter the new serial number.
Where can I find product license information
after installation?
Select Help menu ➤ About, or About [Product Name]. If your product uses
InfoCenter, that is where you can find the Help menu.
After installation, how can I change product
configuration, repair, or uninstall the product?
1 Go to the Windows control panel:
■ Windows XP: On the Start menu, click Settings ➤ Control
Panel ➤ Add or Remove Programs.
■ Windows 7: On the Start menu, click Settings ➤ Control
Panel ➤ Programs/Uninstall a Program.
2 In Windows control panel, click the product name, and then click
Change/Remove (Windows XP) or Uninstall/Change (Windows 7).
The Installer opens in maintenance mode, and directs you through the
process.
8 | Chapter 1 Installation Overview and FAQ
Page 15

Product Configuration
AutoCAD FAQ
FAQ: What features can I customize?
Most features are pre-selected for installation. However, you can de-select any
feature you choose not to install or select one of the few features that have not
been pre-selected. To do so, you must first reveal the feature tree, which is
hidden when you choose a Typical install in the configuration area. To reveal
the feature tree, choose the Custom install option.
Here are the features available:
■ Model Documentation: Interface for Autodesk Inventor Server, a
programming component that allows you to open and query the geometry
and feature information of an Autodesk Inventor part file or other imported
models and to create the corresponding data within AutoCAD or AutoCAD
Mechanical.
■ CAD Standards: Tools for managing design files for compliance with your
standards.
■ Database: Database access tools.
■ Dictionaries: Multi-language dictionaries.
■ Drawing Encryption: Security tool for protecting drawing files with a
password.
■ Express Tools: Productivity tools to extend AutoCAD functions for
dimensioning, drawing, object selection, and object modification. These
tools are not supported by Autodesk.
■ Fonts: AutoCAD fonts and TrueType
®
fonts.
2
9
Page 16

■ Autodesk Content Explorer: Interface for quick browsing of DWG files
on local and network drives and on Autodesk Seek. Note: In order to search
network folders, the Autodesk Content Service utility must also be installed
from the Tools & Utilities component of the Installer.
■ Autodesk Seek: Web service for finding, previewing, and downloading
branded and generic building information modeling (BIM) files, models,
drawings, and product specifications. Users can also upload their drawings
to Seek.
■ License Transfer Utility: Tool to allow users to transfer an Autodesk
product license between computers.
■ Migrate Custom Settings: Utility to migrate custom user settings and
files from a previous version of AutoCAD. When this utility is installed, it
will present a dialog box for migration on the first launch of AutoCAD.
You will also be able to run the utility later from Windows Start > All
Programs > Autodesk > AutoCAD > Migrate Custom Settings.
■ Reset Settings: Utility to reset AutoCAD to its original settings. This
function may be useful for users who have used the "Migrate Custom
Settings" utility and been dissatisfied with the results. If installed, the Reset
Settings program will be available from Windows Start > All Programs >
Autodesk > AutoCAD > Reset Settings.
■ Reset Settings: Utility to reset AutoCAD to its original settings.
■ Reference Manager: Utility that allows users to view and edit the paths
of externally referenced files associated with a drawing.
■ Samples: Product samples, DesignCenter samples, and Visual Lisp
samples.
■ Tutorials: Visual Lisp
®
Tutorials
®
FAQ: How can I migrate my custom settings and
files from previous releases?
The first time you launch your software after installation, the Migrate Custom
Settings dialog box will be displayed to give you the opportunity to migrate
custom settings and files from previous releases to your new release. (Migrate
Custom Settings is installed by default unless you de-select it from the feature
tree in the configuration area of the Installer.)
10 | Chapter 2 Product Configuration
Page 17

FAQ: What are support content folders?
Under Support Content, you can specify where your support content will be
installed.
You choose between four destination options for support content.
■ Local user profile folders: Default.
■ Program install folder: Content installed to your application
installation folder on individual user station.
■ Single shared folder: Allows for one unique local folder to be specified
for all content types.
■ Custom folders: Allows a unique path to be specified for each different
content type.
Here are the six categories of support content for AutoCAD:.
■ Support: Customization/menu files and palette, hatch, and line type
content.
■ Plotters: Plot styles and plot configuration files.
■ Data Links: Data link files.
■ Template: Drawing, sheet set, and publish to web templates.
■ Rendering: Hardware certification and web light files.
■ Help: User's Guide, Command Reference, Customization Guide,
Installation FAQ, and Licensing Guide.
FAQ: What is the purpose of changing the default search paths and location of program files
for a deployment?
There are several reasons you might want to modify default search paths or
the location of program files. For example, if you prefer to use a third-party
plug-in instead of a similar plug-in installed with your product, you can
reference that file and avoid having to add it at each workstation.
Another example might involve default file locations that have changed in
the new version of your software. You can modify the location of the files to
be the same as with an earlier version.
AutoCAD FAQ | 11
Page 18

FAQ: What are the services of the Communication Center?
During a custom deployment, you can choose whether or not to activate user
preferences for Communication Center services.
■ Enable live updates: Allows users to check for updates when an internet
connection is established. If a product patch is available, notification of
its availability is received on the program's status bar; the patch can be
either downloaded directly from an Autodesk server or modified before
being copied to workstations. The default setting is to enable live updates.
■ Enable CAD Manager Channel: Controls the display of CAD Manager
Channels, allowing users to toggle CAD Manager Channels, define the
CAD Manager feed location, and set the CAD Manager Channel display
name. The default setting is to disable the CAD Manager Channel.
FAQ: What are the tools and utilities available
for installation?
You can install the following products from the Tools & Utilities section of
the Installer.
■ Autodesk Network License Manager— Manages network licenses for
your software by "checking out" and "checking in" licenses.
■ Autodesk CAD Manager Tools — Utility to allow CAD administrators
to modify resource settings after a deployment is completed.
■ Autodesk Content Service— Utility (for installation on network server)
to build index and enable searching on shared network folders and in
Autodesk Seek. Works in conjunction with Autodesk Content Explorer
(preselected feature for installation), which must also be installed.
12 | Chapter 2 Product Configuration
Page 19

3ds Max Design FAQ
Installation Information Specific to Autodesk
3ds Max
Certain items are unique to the Autodesk® 3ds Max® / Autodesk® 3ds Max
Design install process (in contrast with other Autodesk products). In this
chapter, learn about the process for switching to the local version of the help
and the sub-components and tools and utilities that ship with 3ds Max (also
includes 3ds Max Design unless otherwise noted). Also, learn how to install
the 32-bit version of 3ds Max on a 64-bit machine.
Limited Language Support in Windows XP
The XP operating system runs 3ds Max / 3ds Max Design in English only. To
use 3ds Max / 3ds Max Design in another language, you must also use Windows
7.
Switch from Online (Default) to Local Help
By default, the Help in 3ds Max is internet-based. If you do not have a
dedicated internet connection, you can download a local version of your help.
To override the default behavior you then need to change the corresponding
preference.
1 Download and run the Help installer from www.autodesk.com/3dsmax-
helpdownload-enu.
2 Once installed, in 3ds Max / 3ds Max Design go to Customize ➤
Preferences ➤ Help tab and select Local Computer / Network.
®
NOTE If you are using the default path this is all you need to do. Change the path
if you have not used the default location. To revert to the default location (which
matches the Help installer's default), click Reset. You can switch back to the online
version of the Help at any time, which is the most up-to-date version of the Help
available.
3ds Max Design FAQ | 13
Page 20

Sub-Components Installed with 3ds Max
The sub-components installed with Autodesk 3ds Max 2013 include 3ds Max
Composite 2013, the various Autodesk Material Libraries, and Autodesk
Backburner 2013. The only optional sub-component is 3ds Max Composite.
3ds Max Composite 2013
When installing 3ds Max, 3ds Max Composite installs by default. 3ds Max
Composite 2013 includes:
■ Raster and Vector Paint
■ Image Processing
■ Color Correction
■ Keying and Rotoscoping
■ Stereoscopic Production Support
■ Motion Blur
■ Advanced 2D Tracking
■ Camera Mapping
■ Depth of Field
■ Node and Layer-based Compositing Options
■ Spline-Based Warping
■ Enhanced Render Passes
■ Data Managing and Collaborating
Autodesk Material Libraries
The Autodesk Material Libraries are shared libraries installed with Autodesk
products such as Inventor, AutoCAD, Revit and 3ds Max. These three items
are selected for install by default when you install 3ds Max. If one of the other
applications is already installed, the material libraries might be installed
already.
14 | Chapter 2 Product Configuration
Page 21

WARNING If you uninstall or remove a library, the library is no longer available
for any products. Uninstalling also means you will be unable to view or display
scenes that have Autodesk Materials currently in them.
The Autodesk Material Library consists of three sub-libraries:
■ Autodesk Material Library 2013: Contains the material appearances used
for Realistic Appearance in color styles. This component is installed by
default, and it is required for 3ds Max to have full visual style and color
style functionality. It is recommended you do not uninstall this component
unless you are also uninstalling all Autodesk products that require this
library.
■ Autodesk Material Library 2013 Base Image Library: Contains low-resolution
(approximately 512 x 512) images for use with Autodesk Materials. This is
also installed by default.
■ Autodesk Material Library 2013 Medium Image Library: Contains
medium-resolution (approximately 1024 x 1024) images for rendering
materials in medium detail. This library is used for close-ups and for
rendering objects at a larger scale. This library is an installation option
available on the Select Products to Install page in the installation wizard.
NOTE To reinstall the material libraries, run the corresponding MSI:
■ Autodesk Material Library 2013:
\Content\ADSKMaterials\2013\CM\MaterialLibrary2013.msi
■ Autodesk Material Library 2013 Base Image Library:
\Content\ADSKMaterials\2013\ILB\BaseImageLibrary.msi
■ Autodesk Material Library 2013 Medium Image Library:
\Content\ADSKMaterials\2013\ILM\MediumImageLibrary.msi
Autodesk Backburner 2013
Autodesk® Backburner™ is the 3ds Max network-rendering management
software, also used by products such as Autodesk® Flame® and Autodesk
Smoke®. Backburner is a required install and is installed by default when you
install Autodesk 3ds Max 2013 / Autodesk 3ds Max Design 2013. You must
uninstall older versions of Backburner before installing Backburner 2013.
Backburner 2013 is backward compatible, but settings do not migrate from
earlier versions. For information about using Backburner from inside 3ds Max,
refer to the "Network Rendering" section in the "Rendering" chapter of the 3ds
3ds Max Design FAQ | 15
®
Page 22

Max Help. For further information about installing and using Backburner see
the Help menu in the Backburner Manager.
Backburner for Managing and Monitoring Only
You can install Autodesk Backburner on a machine without 3ds Max or 3ds
Max Design. However, such an installation of Autodesk Backburner cannot
be used for rendering. You can use this machine only to manage or monitor
jobs. Although the Autodesk Backburner server can be installed on a single
machine, it will not do anything; it will work only if it detects a supported
program such as Autodesk 3ds Max, Autodesk 3ds Max Design, Autodesk
Flame, or Autodesk Smoke. This means that you must have Autodesk
Backburner installed with at least one additional Autodesk product for a
machine in your configuration to be capable of rendering.
Tools and Utilities
The following table summarizes the optional installs available from the 3ds
Max / 3ds Max Design Tools and Utilities section in the installer.
Website:Description:Tool or Utility:
Autodesk 3ds Max 2013
SDK
Network License Manager
Allegorithmic Substance
Bonus Pack (Designer and
Player) Content) for additional sub-
16 | Chapter 2 Product Configuration
Use the SDK to create new
Autodesk 3ds Max features
and tools by writing your
own plug-ins.
NOTE The SDK is not
shipped with Autodesk 3ds
Max Design.
You must install the Network License Manager if
you are using network licensing.
Substance Bonus Pack (Extra
www.autodesk.com/develop3dsmax
www.autodesk.com/me-licensing-2013-enu
www.allegorithmic.com/Install the Allegorithmic
Page 23

stances that work with the
Substance Designer trial,
that is also included.
Website:Description:Tool or Utility:
ArchVision™ Dashboard
ArchVision™ RPC™ Plug-In
Autodesk Civil View
EASYnat® 2.5 for 3ds Max
2013 (Demo)
quired using RPC™ Plug-ins
with the ArchVision Dashboard.
Add photorealistic objects
(such as cars, people, and
so on) with the RPC PlugIns.
Convert 3D civil-engineering data into 3D visualizations. Autodesk Civil View is
integrated into Autodesk
3ds Max Design and is accessed from the Civil View
menu.
NOTE Autodesk Civil View
is included only with
Autodesk 3ds Max Design.
included samples and
“grow” them in your model
to add life-like plants. This
includes 2D, 3D, and hybrid
models with branch and leaf
detail.
www.archvision.com/Manage the content ac-
See the Civil View menu in
3ds Max Design for Help
and Tutorial information.
NOTE The first time you access Civil View you will need
to initialize it and set some
basic settings. After that you
have access to the complete
Civil View menu where you
can find the Help and Tutorials.
www.bionatics.com/EASYnat/Drop virtual seeds from the
Craft Director Studio™ Plug-
in Bundle
www.craftanimations.comUse the Craft Director Stu-
dio Plug-in Bundle to perform advanced, in-the-box,
rigging and physics simula-
3ds Max Design FAQ | 17
Page 24

tions. These features help
you animate cameras and
vehicles more quickly and
realistically.
Website:Description:Tool or Utility:
Okino Plug-ins (Demo)
Okino PolyTrans™ and Nu-
Graf™ Demos
and NuGraf, from Okino
Computer Graphics, lets
you evaluate dozens of
CAD, DCC, and VisSim data
converters directly within
3ds Max or 3ds Max
Design.
www.okino.com/A demo version of PolyTrans
Installing a 32-bit Product on a 64-bit Operating System
Manually override the installer's default behavior, which automatically installs
the 64-bit product on a 64-bit computer. For a standalone installation, navigate
to the root directory of the install media and launch the 32-bit installer, which
has a file name of Setup_32.exe, or something similar. For a deployment, you
can select the 64-bit target platform, and specify the 32-bit version of a product.
Switching from Standalone to Network License Mode
After you install, switch the licensing mode from Standalone to Network.
1 Ensure that the Network License Manager is set up and configured with
a valid network license file for 3ds Max or 3ds Max Design.
2 Close 3ds Max or 3ds Max Design on the client machine.
3 On the Windows desktop, right-click the 3ds Max or 3ds Max Design
shortcut icon and choose Properties from the pop-up menu.
18 | Chapter 2 Product Configuration
Page 25

4 On the Shortcut tab of the Properties dialog, add -yc to the end of the
path in the Target field so the path now reads: "C:\Program
Files\Autodesk\3ds Max 2013\3dsmax.exe"-yc.
5 Click OK to save the changes and restart 3ds Max or 3ds Max Design by
double-clicking on the application shortcut.
6 On restart, the FLEXnet License Finder dialog appears. In the dialog,
either specify the location of the Network License Server System or the
location of the Network License File.
7 After specifying the License Server System or the Network License file,
the 3ds Max will start and continue to run in Network license mode.
NOTE If you wish to switch from a Network to a Standalone license, you need to
perform a full uninstall/reinstall with the Strandalone License mode selected during
reinstallation.
3ds Max Design FAQ | 19
Page 26

Autodesk Alias Installation
Autodesk Alias can be installed with other products in the suite. Autodesk
Alias Design requires the Autodesk Alias sub-component and Autodesk
DirectConnect.
Autodesk Alias Design has no other configuration options available during
installation. For general information on installing products in your suite, refer
to the Installer Overview/FAQ guide.
For the most updated information, refer to http://autodesk.com/wikihelp-alias-
install-2013-enu.
Autodesk Mudbox 2013 Installation Information
Certain items are unique to the Autodesk® Mudbox® install process (in contrast
with other Autodesk products). In this chapter, learn about the process for
downloading a copy of the Mudbox Help, and how to install the 32-bit version
of Mudbox on a 64-bit machine.
Install a 32-bit Product on a 64-bit Operating
System
You can manually override the installer's default behavior, which automatically
installs the 64-bit product on a 64-bit computer. For a stand-alone installation,
navigate to the root directory of the install media, and launch the 32-bit
installer, which has a file name of Setup_32.exe or similar. For a deployment,
you can select the 64-bit target platform, and specify the 32-bit version of a
product.
Switch from Online (Default) to Local Help
By default, Mudbox calls an Autodesk web server to display the Mudbox Help.
You must have Internet access to view the Help. This ensures you have the
most up-to-date version of the Help and allows Autodesk to make updates to
the Help between software releases.
If you do not have reliable Internet access, you can download the Mudbox
Help from the Autodesk Web site and install it locally as follows.
20 | Chapter 2 Product Configuration
Page 27

Prepare to install the Mudbox Help
Before you install the Mudbox Help, ensure that you do the following:
■ Install Mudbox
■ Download the Autodesk Mudbox English Documentation executable file
for your version and platform from www.autodesk.com/mudbox-helpdownload-
enu. This file installs Mudbox Help for 32-bit and 64-bit systems.
Install the Mudbox Help
(Windows)
1 Download and run the Help installer from www.autodesk.com/mudbox-
helpdownload-enu, following the instructions in the installer.
By default, the Mudbox Help is installed in the following directory:
Program Files\Autodesk\Help\mudbox<version>\.
2 Start Mudbox.
3 Select Windows > Preferences to open the Preferences window.
4 Expand the Help section and set Help Location to Installed Local
Help.
5 Click Ok to exit the Preferences window.
Once installed, the local Mudbox Help is available when you select Help
> Mudbox Help, press F1, or click the Help button in various Mudbox
windows.
Additional Mudbox Resources
You can find the following additional Mudbox resources online:
■ The Autodesk Mudbox 2013 Help at www.autodesk.com/mudbox-help-2013-
enu.
■ A listing of the most current qualified hardware and operating systems at
www.autodesk.com/mudbox-systemreq-2013-enu.
■ The full Mudbox Installation Help at www.autodesk.com/mudbox-install-
2013-enu.
■ Mudbox licensing information at www.autodesk.com/me-licensing-2013-
enu.
Autodesk Mudbox 2013 Installation Information | 21
Page 28

Autodesk Mudbox Licensing
Autodesk Mudbox shares licensing and activation procedures with other
products in the suite. For additional information on licensing Mudbox, for
example if you plan to install and license Mudbox for Mac OS X or Linux
platforms, see www.autodesk.com/me-licensing-2013-enu.
Showcase Configuration
Installation Information Specific to Autodesk
Showcase
This topic describes important information on installing and setting up
Autodesk Showcase, including how to:
■ Install Showcase Professional (page 22)
■ Switch from Online (Default) to Local Help (page 24)
■ Run Showcase in Kiosk Mode (page 25)
For last-minute news and information on Showcase installation and other
important issues, see the Showcase Readme at http://autodesk.com/showcase-
readme-2013-enu.
Install Showcase Professional
NOTE Showcase Professional is not included in any Autodesk suite offering.
The process to install and use a Showcase Professional license varies depending
on your circumstance, as described here. You may need to first install Showcase
using a standard (that is, not Professional) license. In some cases, you may
need to download and run the Showcase Professional Licensing Utility. The
Showcase Professional Licensing Utility can be downloaded from ht-
tp://www.autodesk.com/showcaseprolicensing. These procedures apply to both
suite and standalone versions of standard Showcase.
22 | Chapter 2 Product Configuration
Page 29

If you have a Showcase license that came with the Showcase DVD, and you
have a license server that hosts Professional licenses:
1 Run the Showcase installation DVD and enter the standard Showcase
product key when prompted.
2 Run the Showcase Professional Licensing Utility and enter the Showcase
Professional network product key when prompted.
If you do not have a license from a Showcase DVD, and your license server
hosts both Professional and standard Showcase licenses:
1 Run the Showcase installer and enter the network Showcase standard
product key when prompted.
2 Run the Showcase Professional Licensing Utility and enter the network
Showcase Professional product key when prompted.
If you do not have a license from a Showcase DVD, and if your license server
hosts Showcase Professional licenses but not standard Showcase licenses:
■ Run the Showcase installer and enter the network Showcase Professional
product key when prompted.
NOTE Check with your license server administrator to make sure the server does
not host standard Showcase licenses.
If you have both standard and Professional Showcase DVD licenses (no license
servers):
1 Run the Showcase installation DVD and enter the standard Showcase
product key when prompted.
2 Run the Showcase Professional Licensing Utility and enter the Showcase
Professional standalone product key when prompted.
If you have a Showcase Professional license from a DVD, and you have a
license server that hosts standard Showcase licenses:
1 Run the Showcase installation DVD and enter the network Showcase
standard product key when prompted.
2 Run the Showcase Professional Licensing Utility and enter the Showcase
Professional standalone product key when prompted.
Showcase Configuration | 23
Page 30

Switch from Online (Default) to Local Help
By default Autodesk Showcase Help is internet-based. If you do not have a
dedicated internet connection, you can install the help to your local hard
disk. Do this in one of two ways.
Install Showcase help at the end of application installation:
1 On the last screen of the Showcase installation wizard, a list of installed
components appears, and beside the Showcase component, a blue
information icon is displayed.
Hover the mouse pointer over the blue icon to see a link.
2 Click the link and follow the instructions to install the help.
Install Showcase help at any time:
1 Go to http://www.autodesk.com/showcase-helpdownload-enu.
24 | Chapter 2 Product Configuration
Page 31

2 Follow the instructions to install the help.
Once help is installed locally, Showcase will detect it and use it from that
point onward. If you want Showcase to resume pointing to the internet-based
help, you must uninstall the local copy of the help.
To uninstall the local copy of Showcase help:
■ In Windows Control Panel, open Uninstall / Add or Remove Programs.
■ Select "Autodesk Showcase 2013 Language Documentation" and click
Uninstall / Remove.
The next time you start Showcase, the internet-based help will be used.
NOTE Showcase Customization Help is only available in English at this time.
Start Showcase in Kiosk Mode
Follow these steps to start Showcase in "Kiosk" mode (formerly known as
"Presenter" mode). First, you need to create a shortcut that will start Showcase
in this mode, using the "-kiosk" parameter.
To create a shortcut that starts Showcase in Kiosk mode:
1 In Windows Explorer, right-click inside the folder where you want to
place the shortcut.
2 Select New > Shortcut.
3 In the location box, enter the following:
Showcase_application_path_in_quotes -kiosk
So for example, your shortcut could look like this:
"C:\Program Files\Autodesk\Showcase 2013\bin\Showcase.exe"
-kiosk
You could also add in the "-borderless" parameter, so that there are no main
window borders and no heads-up display messages, as well as the "-fullscreen"
parameter:
"C:\Program Files\Autodesk\Showcase 2013\bin\Showcase.exe"
-kiosk -borderless -fullscreen
Showcase Configuration | 25
Page 32

Finally, if you want to specify an initial scene to open in Kiosk mode, use the
file parameter:
-file file_path_and_name_in_quotes
So, your shortcut could look like this:
"C:\Program Files\Autodesk\Showcase 2013\bin\Showcase.exe"
-kiosk -borderless -fullscreen -file
"C:\Users\myaccount\Documents\mycomputer\MyScenes\My_Demo.a3s"
Once your shortcut is created, double-click it to run Showcase in Kiosk mode.
Remember that in Kiosk mode, Showcase only responds to Web server inputs.
You will not be able to interact with Showcase without Web server inputs,
and the only way to load a different scene during your Kiosk session is through
the Web server.
TIP To close the Kiosk mode of Showcase without using a Web server, right-click
it in the Windows task bar and select the Close command for your version of
Windows.
For a complete list of available parameters and their descriptions, run Showcase
from a Windows command prompt using the "-help" parameter; for example:
"C:\Program Files\Autodesk\Showcase 2013\bin\Showcase.exe"
-help
SketchBook Designer FAQ
System requirements for Windows
Autodesk certifies certain system configurations as meeting the requirements
to work with SketchBook Designer software. Check that your system meets
the following minimum requirements.
You can examine your system capabilities using system diagnostic tools. Select
Start > Programs > Accessories > System Tools > System Information.
Hardware requirements
■ An 800MHz CPU
■ 4 GB RAM or more
26 | Chapter 2 Product Configuration
Page 33

■ A DVD-ROM drive on this machine or a shared DVD drive accessed via a
networked mapped drive
■ An input device for drawing and sketching. Intuos 3 or higher tablet or
Wacom Cintiq® active tablet highly recommended, using a tablet driver
of 6.1.6-7 or higher.
Graphics requirements
DirectX 9.0 capable graphics card with 256 MB or greater dedicated video
memory with a minimum screen resolution of 1280 x 1024 with True Color
or 32-bit Color.
See Set up your graphics card (Windows) (page 28).
Operating system requirements
■ Microsoft
■ Microsoft
■ Microsoft
■ Microsoft
®
Windows 7 Enterprise 32-bit and 64-bit
®
Windows 7 Ultimate 32-bit and 64-bit
®
Windows 7 Professional 32-bit and 64-bit
®
Windows® XP Professional Service Pack 2 (SP2) or later, 32-bit
and 64-bit Edition*
*Certain elements of the application will have a different appearance when
compared with Windows Vista or Windows 7.
■ Intel
®
Pentium® 4 or AMD Athlon processor, 3.0 GHz or greater or Intel
Core2Duo or AMD Dual Core processor, 2.0 GHz or greater
■ Microsoft Windows
■ 4 GB or greater system memory
■ DirectX 9.0 capable graphics card with 512MB or greater dedicated video
®
XP, Windows® Vista, Windows® 7
memory
■ Minimum screen resolution of 1280 x 1024 with True Color or 32-bit Color
■ Microsoft .NET Framework Version 2.0 (included with install)
■ 5 GB of free disk space
■ For Bamboo users, a tablet driver of 5.2.4-5 is recommended
SketchBook Designer FAQ | 27
Page 34

NOTE The installer will automatically detect whether your system is 32 or 64-bit,
and will install the appropriate version of the software. The 32-bit software version
cannot be installed on a 64-bit OS. If you cannot install the 64-bit version of
SketchBook Designer on a machine running 64-bit Vista, Windows 7, or XP, try
the following:
Update your video card driver to the latest 64-bit version, via Intel or another
website, to meet the requirements, then install the 64-bit version of SketchBook
Designer.
Disk space requirements
■ 5 GB of hard drive space for installation
Other software
■ Adobe
®
Acrobat® Reader version 6 or higher, is required to view the PDF
documentation. You can download a free copy of Acrobat Reader from
http://www.adobe.com.
■ Microsoft Internet Explorer
®
6 or later Web browser is required to view
the online help.
■ Flash plug-in to view animated tutorial sequences in your browser. Free
plug-ins are available from http://www.flash.com.
■ If a Wacom table is being used, update to the latest Wacom driver software
(http://www.wacom.com).
Graphics card setup
The graphics display performance in SketchBook Designer depends on the
quality of your graphics card and on the option settings in the Display
Properties window of your graphics card.
If your graphics card is not certified (see Graphics Requirements above), perform
the following steps. These steps offer general guidelines only because each
manufacturer has a unique set of display options.
To set up your graphics card.
1 Right-click your desktop, select Properties, then select the Settings
tab in the Display Properties window.
2 From the Color quality menu, select 32-bits of color for best color
quality in displayed images.
28 | Chapter 2 Product Configuration
Page 35

3 Drag the Screen resolution slider to the best display resolution
supported by your hardware. The higher you set the display resolution,
the more graphics card main memory you need. This is called VRAM on
some computers.
System requirements for Mac OS X
Autodesk certifies certain system configurations as meeting the requirements
to work with SketchBook Designer software. Check that your system meets
the following minimum requirements.
To examine the system capabilities of your Apple Macintosh computer
Do one of the following:
■ From the Apple menu, select About This Mac and click the More Info
button.
■ Double-click the Apple System Profiler application (Applications >
Utilities).
Apple System Profiler provides information about your computer, operating
system, disks, and applications.
System requirements
■ Apple Mac OS X 10.6 or greater
■ 64-bit Intel Core2 Duo 2.33 GHz or greater CPU
■ 2 GB RAM or greater, with 4GB or more highly recommended
■ NVIDIA GeForce or ATI Radeon graphics card with 512 MB or more
dedicated memory
■ Minimum screen resolution of 1280 x 1024 with True Color or 32-bit Color
■ Intuos 3 or higher tablet or Wacom Cintiq (R) active tablet is HIGHLY
recommended, using a tablet driver of 6.1.6-7 or higher (http://www.wa-
com.com)
Hardware requirements
■ 2GB RAM (4 GB recommended)
■ DVD-ROM drive
■ a valid serial number and product key (typically on the product box)
SketchBook Designer FAQ | 29
Page 36

■ To license and activate SketchBook Designer, you need the following:
■ for node-locked licenses: an internet connection
■ for floating licenses: a local network connection to an active license
server
Other software
■ Apple QuickTime
QuickTime and Preview are provided with the Mac operating system. You
can also download Adobe® Acrobat® Reader version 6 or higher, from ht-
tp://www.adobe.com to view the PDF documentation.
■ Apple
■ Flash plug-in to view animated tutorial sequences in your browser. Free
®
Safari™ Web browser is required to view the online help.
plug-ins are available from http://www.flash.com.
®
and Preview (to view the PDF documentation).
Administrative Permission Requirements
To install SketchBook Designer, you must have administrator permissions.
You do not need to have domain administrative permissions. See your system
administrator for information about administrative permissions.
You do not need administrator permissions to run SketchBook Designer. You
can run the program as a limited user.
Locating Your Serial Number and Product Key
When you install SketchBook Designer, you are prompted for your serial
number and product key in the Product and User Information page, or the
option of installing the product in trial mode. You may enter your product
information at any time during your trial mode period if you opt to install
the product in that mode.
The serial number and product key are located on the outside of the product
packaging, or in the Autodesk Upgrade and Licensing Information email. Make
sure to have these available before you install the program so that you don't
have to stop in the middle of the installation.
The serial number must contain a three-digit prefix followed by an eight-digit
number. The product key consists of five characters.
30 | Chapter 2 Product Configuration
Page 37

NOTE When you enter the serial number and product key, if you make a mistake,
an X will appear next to the entry. If it's correct, a check appears.
The information you enter is permanently retained with the product. Because
you can't change this information later without uninstalling, take care when
entering the information. To review this product information later while the
product is running, on the InfoCenter toolbar, click the drop-down arrow
next to the Help button (the question mark). Then click About SketchBook
Designer.
NOTE If you have lost your serial number or product key, contact the Autodesk
Business Center (ABC) at 800-538-6401 for assistance.
Locating Your Serial Number and Product Key
When you install SketchBook Designer, you are prompted for your serial
number and product key in the Licensing page, or the option of installing the
product in trial mode. You may enter your product information at any time
during your trial mode period if you opt to install the product in that mode.
The serial number and product key are located on the outside of the product
packaging, or in the Autodesk Upgrade and Licensing Information email. Make
sure to have these available before you install the program so that you don't
have to stop in the middle of the installation.
The serial number must contain a three-digit prefix followed by an eight-digit
number. The product key consists of five characters.
SketchBook Designer FAQ | 31
Page 38

The information you enter is permanently retained with the product. Because
you can't change this information later without uninstalling, take care when
entering the information. To review this product information later, on the
InfoCenter toolbar, click the drop-down arrow next to the Help button (the
question mark). Then, click About.
NOTE
If you have lost your serial number or product key, contact the Autodesk
Business Center (ABC) at 800-538-6401 for assistance.
Installing and Running the Product
To use the product, you must install the product, register and activate it, and
then launch it. You must have administrative permissions to install SketchBook
Designer.
32 | Chapter 2 Product Configuration
Page 39

Installing SketchBook Designer for Mac OS X
The installation program on the SketchBook Designer DVD guides you through
installation. Install SketchBook Designer on each computer where you want
to run it.
To install SketchBook Designer for Mac OS X
1 Insert the SketchBook Designer DVD into the drive of your computer.
The contents of the DVD appear in a new Finder window. If the
SketchBook Designer 2013 Finder window does not open automatically,
double-click the SketchBook Designer 2013 disk icon on your
Desktop.
2 Double-click the SketchBook Designer 2013 package icon within
the SketchBook Designer 2013 folder to begin the installation process.
The SketchBook Designer Installation window appears. You can cancel
the installation at any time by closing the installer window.
NOTE At various points during the installation, the installer may ask you to
type in the name and password of an administrator account on the local
machine.
3 The Autodesk SketchBook Designer 2013 installer will launch. When
each screen is complete, clickContinue to advance to the next screen.
4 The Autodesk Software License Agreement appears.
You can print or save this License Agreement for future reference. This
agreement requires your acceptance for the SketchBook Designer software
installation to continue. If you do not agree to the terms and conditions
of the agreement, the installation process does not continue.
SketchBook Designer FAQ | 33
Page 40

5 ClickAgree and thenContinue to continue with the SketchBook
Designer software installation.
6 Select the Installation Destination volume.
NOTE Only volumes with enough available disk space will be available, and
removable or network drives will not be shown.
ClickContinue to proceed to the next screen.
7 You are prompted to enter your serial number and product key.
NOTE To locate this information, see Locating Your Serial Number and
Product Key (page 31)
34 | Chapter 2 Product Configuration
Page 41

Enter your license information for the SketchBook Designer software
and click Continue.
8 You will be prompted for your login name and password (for OS X) to
start the installation.
NOTE If you are not an administrator on the computer, you may not be
able to successfully install the product.
The SketchBook Designer software and accompanying utilities are
installed on your computer. The progress of the installation is indicated
by the progress bar at the bottom of the installer’s window.
9 When all elements have been installed, a green check mark will appear
on the summary screen.
When finished, click Done.
It is not usually necessary to restart your computer after installing SketchBook
Designer. If it is, the installation window will tell you so.
SketchBook Designer FAQ | 35
Page 42

Congratulations! You have now installed SketchBook Designer. Before you
can run it, you must activate your license. See Register and Activate SketchBook
Designer in this book.
Register and Activate SketchBook Designer
The first time you start SketchBook Designer, the Product License Activation
wizard is displayed. You can either activate SketchBook Designer at that time,
or Try SketchBook Designer and activate it later. Until you register and enter
a valid activation code for SketchBook Designer, you are operating the program
in trial mode and the Product License Activation wizard is displayed for 30
days from the first time that you run the program.
If after 30 days of running SketchBook Designer in trial mode you have not
registered and provided a valid activation code, your only option is to register
and activate SketchBook Designer. You will not be able to run in trial mode
after the 30 days expires. Once you register and activate SketchBook Designer,
the Product License Activation wizard is no longer displayed.
NOTE
The licensing and activation of both and the add-in SketchBook Designer for
AutoCAD are shared. Activating one will automatically activate the other.
Also, their trial periods are linked, so that a trial for one will start the trial for
the other, even if not yet installed.
The fastest and most reliable way to register and activate your product is by
using the Internet. Simply enter your registration information and send it to
Autodesk over the Internet. Once you submit your information, registration
and activation occur quickly.
To register and activate SketchBook Designer
1 Do one of the following:
■ (Windows XP) Click Start menu ➤ Programs ➤ Autodesk ➤
SketchBook Designer ➤ SketchBook Designer .
■ (Windows Vista and Windows 7) Click Start menu ➤ All Programs
➤ Autodesk ➤ SketchBook Designer ➤ SketchBook Designer .
■ If the SketchBook Designer for AutoCAD add-in is installed, you must
launch AutoCAD to access the add-in.
36 | Chapter 2 Product Configuration
Page 43

NOTE
Registering and activating either SketchBook Designer or SketchBook
Designer for AutoCAD will register and activate both products on
your system, even if they are installed at different times.
2 In the SketchBook Designer Product License Activation wizard, select
Activate, and then click Next.
This starts the activation process.
3 Click Register and Activate (Get an Activation Code).
4 Click Next and follow the on-screen instructions.
If you do not have Internet access, or if you want to use another method
of registration, you can register and activate SketchBook Designer in one
of the following ways:
Email Create an email message with your registration information and
send it to Autodesk.
Fax or Post/Mail Enter your registration information, and fax or mail
the information to Autodesk.
SketchBook Designer FAQ | 37
Page 44

38
Page 45

Network Administration
Guide
Network Administration and Deployment
About Deployments
A deployment provides an efficient way to install one or more Autodesk products
with a standard configuration on multiple computers. The files required for the
installation process are stored on the network, in an administrative image, in
a folder to which all users have shared access. To install the products, users
navigate to the deployment folder and double-click an installer shortcut (.LNK
file).
3
NOTE The installer referenced in this guide applies only to Windows operating
systems. However, some of the concepts and procedures may be useful to
administrators of Autodesk products on Linux or Mac OS X networks.
Some essential facts about deployments:
■ Deployments can be created for network licenses or multi-seat stand-alone
licenses.
■ Multiple deployments with different configurations can exist in the same
folder, sharing the same administrative image, which is a set of installation
files.
■ Each deployment installs products in a single language. If you need to install
products in different languages, each language requires a separate
deployment.
39
Page 46

■ An existing deployment can form the basis for creating another deployment
with a different configuration.
■ Deployments can be configured to generate a log file for each installation.
Network administrators can use these log files for troubleshooting.
■ Each deployment creates a subfolder, <deployment name>\SMS_SCCM scripts,
which contains two documents to help you with the distribution of
deployments using Microsoft Systems Management Server (SMS) and System
Center Configuration Manager (SCCM): SMS_SCCM_ReadMe.txt and
<deployment name>_SCCM.txt.
Deploying Language Packs
AutoCAD-based products, Inventor, and 3ds Max can use separate language
packs to add one or more additional language versions to an installed product.
Each language pack provides user interface strings, message text, and
documentation in a specific language, without duplicating the product
software. To distribute a specific language version to multiple instances of an
Autodesk product, you can use the installer included with each language pack
to create a language pack deployment. If you need to deploy language packs
for multiple languages or multiple products, you can create a batch file to
install a series of language packs on each computer.
Planning a Deployment
Check Deployment Readiness
This checklist identifies preliminary tasks to complete, information to gather,
and decisions to make before creating a network deployment.
TIP To review deployment settings, including details of product configuration,
you can create a test deployment. After the learning process, you can delete the
test deployment.
Deployment Checklist
Review the system requirements by clicking the System Requirements link in the
installer. Confirm that your network, servers, and client computers meet these
system requirements.
40 | Chapter 3 Network Administration Guide
Page 47

Deployment Checklist
Understand the general process for installing the type of license you have purchased. For a network license deployment, know the license server name(s), and
the type of license server model that was specified at the time of license purchase.
For more information, see Determine the License Server Model (page 43)
Install and activate any network administrator tools and utilities. For example, if
you are using a network license, install the Network License Manager from the
installer.
Locate your product serial number and product key. These are located on the
outside of the product packaging, or in an email message if you downloaded
your product or upgrade from Autodesk.
Identify a network location for deployments, and create a shared folder to contain
deployments.
If your product has language options, decide which language to use for each
deployment.
NOTE Languages can be included when you initially create a deployment, or
when you create a new deployment configuration, but not when you modify a
deployment.
Determine whether to create log files on individual computers, in the deployment
folder, or both.
Determine whether to run installations in silent mode.
NOTE When products are installed in silent mode, the user's system can automatically reboot without warning when the installation is complete.
Identify other applicable configuration settings such as defined search paths,
locations of support files, and whether to automatically install service packs.
Network Administration and Deployment | 41
Page 48

Determine the Installation Type
When you set up your deployment, you specify the installation type by target
platform and license type.
Target Platform
Specify either a 32-bit or 64-bit platform, depending on the operating system
of the computers that will use the deployment. For some Autodesk products,
you can install a 32-bit version on a 64-bit operating system. For more
information, consult product-specific documentation.
License Type
Specify one of the following license types in the installer, based on the type
of license you purchased:
Network License With this license type, you install the product to computers
on a network, along with the files and registry entries that allow the product
to communicate with the Network License Manager (NLM) on one or more
servers. You also define the NLM configuration. When an Autodesk product
starts up on a client computer, it requests a license from NLM, then returns
it when the product is stopped. Computers running the product based on a
network installation do not require individual activation. For more
information, see Determine the License Server Model (page 43).
A major advantage of a network license is that you can install the product on
more systems than the number of licenses you have purchased (for example,
purchase 25 licenses, but install on 40 computers). At any one time, the product
runs on the maximum number of computers for which you have licenses, so
you get true floating licenses.
Stand-Alone License This license type is for multi-seat stand-alone installations
where a single serial number and product key are used to install products on
multiple computers. With this license type you do not use NLM to manage
product licensing. Instead, installation, registration, and activation occur on
each computer. After the first activation using the multi-seat stand-alone serial
number and product key, activation occurs automatically for all computers
using this deployment, as long as they are connected to the Internet.
42 | Chapter 3 Network Administration Guide
Page 49

Determine the License Server Model
If you choose the Network License option, you need to know which license
server model will be used to distribute the product licenses. This was specified
as one of the following when the license was purchased:
■ Single license server model. The Network License Manager (NLM) is
installed on a single server, so license management and activity is restricted
to this server. A single license file records the total number of licenses
available on the server.
■ Distributed license server model. Licenses are distributed across more
than one server. A unique license file is required for each server. To create
a distributed license server, you must run NLM on each server that is part
of the distributed server pool.
■ Redundant license server model. Three servers are available to
authenticate each license. With this configuration, licenses continue to
be monitored and issued as long as at least two servers are functional. The
license file on all three servers is the same, and you must run NLM on each
server.
Each of these license server models is described in detail in the Licensing Guide.
It is recommended that you also read that guide before you deploy the product.
You can find the Licensing Guide by clicking the Installation Help link in the
installer.
Configure Individual Products
When you create a deployment, you can accept the default settings for any
product you choose to install, or you can configure these settings to create a
custom deployment. Configuration details for each product are usually covered
in a product-specific appendix to this guide. It is recommended that you review
these appendices, and determine the right settings for each product in your
deployment.
To configure product settings, on the Create Deployment page of the installer,
ensure that the product is selected for installation, and then click the product
in the scrolling list. The configuration panel opens.
Network Administration and Deployment | 43
Page 50

IMPORTANT The configuration settings you choose apply to every instance of
the product installed from the deployment. After the deployment is created, these
settings can be changed only by modifying the deployment. For more information,
see Modify a Deployment (page 48).
Most products allow you to choose an installation type, either Typical to select
the most common options, or Custom to review options in more detail.
Some other common product settings are as follows:
■ User preferences for product behavior
■ Installation of support files, such as material libraries
■ Access to online resources
Click Installation Help for further information specific to your product or
suite.
Include Service Packs
Most products provide the option to include service packs in a deployment.
You can download a service pack from autodesk.com, or use a service pack
stored on a local hard drive or network location. In either case, the service
pack will be applied only after the installation of the main product is
completed.
If you select the Install Service Pack from autodesk.com button, the service pack
will be automatically downloaded and you will not need to extract the MSP
file.
You can add multiple service packs to a deployment only if the service packs
are locally stored, not if you are downloading them from autodesk.com.
NOTE If the deployment process for the main product is canceled or fails, the
service pack installation will automatically be canceled.
Two options are available for including service packs in deployments:
■ Append the Service Pack onto the Deployment. When you append
a service pack, the service pack is applied to the current deployment only.
Multiple service packs may be appended to a deployment. The service pack
file is included in the deployment and the service pack is applied after the
product is deployed.
■ Merge the Service Pack into the Administrative Image MSI File.
With this option, the service pack is merged into the administrative image.
44 | Chapter 3 Network Administration Guide
Page 51

Once merged, a service pack cannot be removed from the administrative
image.
To extract a Microsoft Installer Patch (MSP) file from a service pack
1 Download the service pack from the Support site for your product.
2 Review the service pack Readme file for information about patch usage.
3 Open a Windows command prompt and enter the patch file name
followed by the /e switch and a target file name. Here is the general
command format:
<local_drive:>\<patch_name>.exe /e
<local_drive:>\<patch_name>.msp
Here is an example:
ProductSP1.exe /e ./ProductSP1.msp
where ProductSP1.exe is the name of the downloaded patch and
ProductSP1.msp is the name of the extracted file. Using ‘./’ in front of the
extraction file name places the extracted file in the same folder as the
original executable. The “e” command line switch extracts the MSP file
from the executable.
To include a service pack with the deployment
To include a service pack with a deployment, an MSP file must be extracted
from the downloaded service pack executable.
1 On the Include Service Packs page, click the Browse button.
2 In the Open dialog box, locate the service pack you want to include with
the deployment.
3 Select the MSP file and click Open.
4 Specify whether you want to append the service pack to the deployment
or merge the service pack into the administrative image.
5 Click Next.
Create a Network Share
After you have fully prepared for creating a deployment, you are ready to set
up and distribute Autodesk products from a shared network location. A network
share is an installation folder to which all users' computers have access. You
create deployments in the network share, and point users to this location to
Network Administration and Deployment | 45
Page 52

install the program. Any subfolders inside a network shared folder are
automatically shared.
If you select the option to create a network log file, then during installation,
the user's computer writes an entry to the log file in the network share.
Therefore, this option requires that users have read-write access to the network
share.
You can create a deployment folder on a network share as part of the process
of creating the deployment. If you plan to create several deployments of the
same product or suite, configured for different user groups, then these
deployments can share the same administrative image, and the shortcuts can
reside in the same folder. However, if you plan to create deployments of
different products or suites, it is recommended that you create separate product
folders on the network share before starting to create deployments.
For more information on how to create a network share, see the documentation
for your operating system.
Creating a Deployment
Create an Original Deployment
Use this procedure to create a new deployment from the installer. In the
process, you can create a default deployment by accepting the default
configuration of each installed product, or you can create a custom
deployment by customizing the configuration settings of one or more
products in the deployment.
To create an original deployment
1 Close all running applications on your computer.
2 Start the installer.
3 On the first page, if language choices are available, select a language for
the deployment instructions, and then click Create Deployment.
4 On the Configure <name> page, Administrative Image section, specify
the following data:
a Enter a descriptive name for the deployment that identifies the
user group, platform, or other attribute to differentiate this
deployment from others.
46 | Chapter 3 Network Administration Guide
Page 53

b Enter the path or browse to the shared network folder where you
want to create and store your administrative image. Users install
the program from this location.
NOTE For information on how to create a network share, see Create
a Network Share (page 45).
c Select either 32-bit or 64-bit for the target operating system.
d Choose whether to include only the products required by this
configuration.
■ If selected, the deployment cannot be modified in future to
include additional products.
■ If unselected, the administrative image will include all possible
products, so the current deployment can be modified in any
way.
5 In the Installation Settings section, select one or more of these
options:
■ Silent mode runs the installation in background, without prompting
the user for any input.
NOTE Silent mode can automatically restart the user's computer without
warning after installation.
■ Log file on each workstation can enable users to review and
troubleshoot their own installations.
■ Network log file in a central location supports the network
administrator in reviewing data for all installations.
NOTE The network log file must be in a shared folder where users of the
deployment have read-write access. Otherwise, log data for user
installations cannot be written to the log file.
6 Review and accept the Autodesk software license agreement.
7 On the Product Information page, select your license type, and enter
your serial number and product key. If this data is valid, green check
marks appear.
8 If you are sure that the product information is correct, click Next.
9 On the Create Deployment Configuration page, select the products to
include in the deployment.
Network Administration and Deployment | 47
Page 54

10 If you need to configure settings for a product, click the product name
to open the configuration panel where you can review and change
settings.
IMPORTANT The configuration settings you choose apply to every instance
of the product installed from the deployment. After the deployment is
created, these settings can be changed only by modifying the deployment.
Configuration settings vary widely by product. For more information,
click Installation Help to see the product documentation.
11 Click Create to create the deployment.
After the deployment is created, the Deployment Configuration Complete
page opens, presenting useful paths to the new deployment and a link
for registering products online.
12 After you have finished using this screen, click Finish.
Modify a Deployment
Inside each deployment folder is a Tools folder that contains a shortcut (.LNK
file) named Create & Modify a Deployment. You can use this shortcut to
■ Create a new deployment configuration
■ Create a new deployment configuration that uses an existing deployment
as a template
■ Modify the configuration of an existing deployment
The installer pages guide you through the process, similar to when creating
an original deployment. If your original administrative image was set to include
only products required by the deployment configuration, then your options
for creating or modifying the deployment are limited. In particular, you cannot
add products to the deployment that are not in the original administrative
image. Conversely, if your original administrative image was not set to include
only the required products, then it includes all product files. As a result, you
can add products when you modify this deployment or when you create new
deployment configurations.
To modify a deployment
1 Open the shared network folder that contains the deployment.
2 In the Tools folder, double-click the Create & Modify a Deployment
shortcut.
48 | Chapter 3 Network Administration Guide
Page 55

The installer opens at the Modify Deployment page.
3 Click through the deployment configuration pages, and select the
required options.
4 Click Create Deployment.
Direct Users to the Administrative Image
After you have created the deployment, users can install the program using
the shortcut (.LNK file) located in the deployment folder with the
administrative image. The shortcut name matches the deployment name that
you specified when creating the deployment. Notify users of the shortcut
name and location. Instruct them to double-click the shortcut to start the
installation. If the deployment uses silent mode, advise users to keep other
applications closed during the installation, because their computers might
restart automatically after products are installed.
Alternative Distribution Methods
Overview of Distribution Methods
In addition to standard deployments, you can use the following alternative
methods of distributing Autodesk programs on Windows platforms:
■ Scripting. See Use Batch Files to Deploy the Program (page 49).
■ Group Policy Objects (GPOs). See Use Group Policies to Run a Deploy-
ment (page 53).
■ Microsoft System Center Configuration Manager (SCCM). See Use
Microsoft SCCM to Deploy Products (page 57).
■ Imaging Software. See Distribute Products Using Imaging Software
(page 61).
Use Batch Files to Deploy the Program
A batch file executes a set of commands. Installation batch files are useful for
installation of stand-alone or network licensed programs on computers that
Alternative Distribution Methods | 49
Page 56

are connected to a network. These files are also useful for installing service
packs, extensions, and object enablers on a network.
The batch file consists of one or more commands, as well as command switches
that specify options, and flags that modify the options. An installation script
also contains path names.
An installation script points to the location of the product's setup.exe file. You
must point to the setup.exe file on your installation media or network location.
In order for your Autodesk product to run properly, you must have
Administrator permissions on the computer where the program is being
installed.
Sample Installation Batch Files
The sample batch files in this section install AutoCAD in typical configurations
for stand-alone or network licensed versions. To make it easy to copy this
sample batch file and substitute your own information, the same names are
used throughout for variables.
Notes
<mediaDriveLetter> is the drive letter where the media is mounted or the
setup.exe file is stored
Install options used here include /t (setup is executed by script) and /qb (display
a basic user interface). Others such as /w (log nonfatal warnings) are defined
for Microsoft Msiexec command line, and documented on the MS TechNet
website.
<SerialPrefix> is the first 3 digits of the serial number
<SerialPostFix> is the last 8 digits of the serial number
<ProdKey> is the Product Key
<lang> is the IETF language tag, for example en-US for English-United States
<eula_lang> is the ISO 3166-1 alpha-2 standard for the country for example
US = United States
Stand-Alone License
<mediaDriveLetter>\setup.exe /t /qb /language <lang> /c
ACAD: INSTALLDIR="%programFiles%\Autodesk\AutoCAD 2013"
ACADSERIALPREFIX=<SerialPrefix>ACADSERIALNUMBER=<SerialPostFix>
50 | Chapter 3 Network Administration Guide
Page 57

ADLM_PRODKEY=<ProdKey> ADLM_EULA_COUNTRY=<eula_lang>
InstallLevel=5
Example:
C:\setup.exe /t /qb /language en-us /c
ACAD: INSTALLDIR="%programFiles%\Autodesk\AutoCAD 2013"
ACADSERIALPREFIX=123 ACADSERIALNUMBER=12345678
ADLM_PRODKEY=001E1 ADLM_EULA_COUNTRY=US InstallLevel=5
Single Network License
<mediaDriveLetter>\setup.exe /t /qb /language <lang> /c
ACAD: INSTALLDIR="%programFiles%\Autodesk\AutoCAD 2013"
ACADSERIALPREFIX=<SerialPrefix>ACADSERIALNUMBER=<SerialPostFix>
ADLM_PRODKEY=<ProdKey> ADLM_EULA_COUNTRY=<eula_lang>
InstallLevel=5
ACADSTANDALONENETWORKTYPE="3" ACADLICENSESERVERTYPE="Single
Server License"
ACADLICENSETYPE="Network License"
ACADSERVERPATH="<FlexLicenseServer> 000000000000"
Notes
For network licenses, ACADSTANDALONENETWORKTYPE identifies the type
of license being installed. It has three possible values: 0 for both network and
stand-alone, 1 for stand-alone, and 3 for network.
<FlexLicenseServer> is the network license server.
Distributed Network License
<mediaDriveLetter>\setup.exe /t /qb /language <lang> /c
ACAD: INSTALLDIR="%programFiles%\Autodesk\AutoCAD 2013"
ACADSERIALPREFIX=<SerialPrefix>ACADSERIALNUMBER=<SerialPostFix>
ADLM_PRODKEY=<ProdKey> ADLM_EULA_COUNTRY=<eula_lang>
InstallLevel=5
ACADSTANDALONENETWORKTYPE="3"
ACAD_LICENSESERVER_DISTRIBUTED="1"
ACADLICENSESERVERTYPE="Distributed Server License"
ACADLICENSETYPE="Network License"
ACADSERVERPATH="@<server1>;@<server2>;@<server3>;"
Notes
Alternative Distribution Methods | 51
Page 58

<server1> thru <serverN> are valid network license servers.
Redundant Network License
<mediaDriveLetter>\setup.exe /t /qb /language <lang> /c
ACAD: INSTALLDIR="%programFiles%\Autodesk\AutoCAD 2013"
ACADSERIALPREFIX=<SerialPrefix>ACADSERIALNUMBER=<SerialPostFix>
ADLM_PRODKEY=<ProdKey> ADLM_EULA_COUNTRY=<eula_lang>
InstallLevel=5
ACADSTANDALONENETWORKTYPE="3"
ACADLICENSESERVERTYPE="Redundant Server License"
ACADLICENSETYPE="Network License"
ACADSERVERPATH="<server1> 000000000000 27005;<server2>
000000000000 27005;<server3> 000000000000 27005;"
Notes
<server1> thru <server3> are valid network license servers with redundant
licenses.
Run Batch Files
After creating a batch file, you move it to a server or use a mapped drive letter
or a UNC (universal naming convention) path. If you place it on a server for
users to run, create a shared folder on the server, and then add users to the
share with the rights they need. Users who just run the batch file can have
read-only access to the shared folder.
Next, in another server location, create a directory for each product you want
to install. Copy the installation files to this directory from the product media.
You may also want to create directories for service packs, extensions, and your
own customization tools.
Use one of the following methods to run an installation batch file:
■ Run the batch file manually at each individual computer. To run the
installation, paste the batch file into the Run dialog box or run it from the
Windows command prompt.
■ Send an email to each user who should run the batch file, with the UNC
path and any required instructions.
■ Email the batch file to each user with instructions for use.
■ Set up the batch file so that it runs on login.
52 | Chapter 3 Network Administration Guide
Page 59

Use Group Policies to Run a Deployment
With group policies, you can advertise and install a program by assigning a
deployment to computers. A deployment that is assigned to a computer can
be used by any user of that computer. Generally, you would assign the
deployment to a computer that is shared by several users.
NOTE Autodesk products are designed to be installed on a computer so that any
user who logs on to the computer can run the software. If you assign a deployment
to a specific user rather than a computer, you may encounter problems when a
second specified user tries to install or uninstall a copy of the program.
The following section outlines the advantages and disadvantages of using
group policies.
Advantages
■ Works well with deployment functionality.
■ Allows you to add custom files to a deployment.
■ Allows deployment to computers rather than to users.
Disadvantages
■ Prohibits the passing of command-line parameters to an MSI executable.
You must use scripts instead.
■ Prohibits customization of application settings, other than what is set
while creating a deployment.
Autodesk products typically have software prerequisites that must be installed
on a computer to support the Autodesk product. In particular, Microsoft .NET
Framework 4.0, Fusion, and the Fusion plug-in must be installed prior to using
group policies. Before deploying products, consult the System Requirements for
each product, and ensure that these are installed on the computer where the
program will being installed.
Distributing a program through group policies involves three main steps:
1 Create an application distribution share point. The application
distribution share point is created when you create a deployment. See
Create an Original Deployment (page 46) to create a deployment.
2 Assign the deployment to a computer. See Use Group Policies to
Assign a Deployment to Computers (page 54).
Alternative Distribution Methods | 53
Page 60

3 Verify the installation. Confirm that the program has been correctly
installed. See Verify a Group Policy Deployment (page 57).
Use Group Policies to Assign a Deployment to Computers
Perform the following procedures from a Windows XP computer or a Windows
2000 or 2003 server that has Group Policy Management Console installed,
and has access to the Active Directory server.
NOTE For more information, go to Microsoft TechNet and search for "Group Policy
Management Console".
To assign a deployment to a computer
1 Start the Group Policy Management Console (gpmc.msc).
2 Right-click the organizational unit where you want to create the group
policy object (GPO). Then select Create and Link a GPO Here and name
the Group Policy.
3 Edit the policy.
4 In the Group Policy Object Editor dialog box, under Software Settings,
right-click Software Installation, and click New ➤ Package.
5 In the Open dialog box, navigate to the administrative image created by
the deployment process. Navigate to AdminImage\<processor
type>\<product name folder>. The processor type is either x86 or x64,
depending on the processor type for which you created your deployment.
Examples
For x86 deployments:
\\server123\Deployment\AdminImage\x86\acad
For x64 deployments:
\\server123\Deployment\AdminImage\x64\acad
6 Select the Windows Installer Packages file called acad-<deployment
name>.msi. Click Open.
If the deployment was called “Design 2013 32 bit,” then the deployment’s
MSI file would be acad-Design 2013 32 bit.msi.
54 | Chapter 3 Network Administration Guide
Page 61

7 In the Deploy Software dialog box, select Advanced and click OK.
8 In the Properties dialog box, Modifications tab, click Add.
9 In the Open dialog box, select the Transform Package file called
acad-<deployment name>.mst). Click Open.
10 In the Properties dialog box, Modifications tab, click Add.
11 In the Open dialog box, navigate to <deployment location>\Tools and
select the Transform Package file called gpo.mst.
12 Click OK to complete the package.
Adding a Language Pack
If your product uses language packs, you may need to add a language pack to
your package.
To add a language pack
1 In the Group Policy Object Editor dialog box, under Software Settings,
right-click Software Installation for the same object, and then click New
➤ Package.
2 In the Open dialog box, navigate to the location of the administrative
image that you specified when creating the deployment. Navigate to
AdminImage\<processor type>\<locale>\acad\acadlp.msi. Click Open.
The <locale> used in the examples is en-us for US English.
Examples
For x86 deployments: \\server123\Deployment\AdminImage\x86\en-us\acad
For x64 deployments: \\server123\Deployment\AdminImage\x64\en-us\acad
3 In the Deploy Software dialog box select Advanced and click OK.
4 In the <product name> Properties dialog box, Modifications tab, click
Add.
5 In the Open dialog box, select the Transform Package file called
acad-<deployment name>.mst located at AdminImage\<processor type>\acad.
Click Open.
6 In the <product name> Properties dialog box, Modifications tab, click
Add.
Alternative Distribution Methods | 55
Page 62

7 In the Open dialog box, navigate to <deployment location>\Tools and
select the Transform Package file called gpo.mst.
8 Click OK to complete the package.
To add the product-specific package
1 In the Group Policy Object Editor dialog box, under Software Settings,
right-click Software Installation for the same object, and then click New
➤ Package.
2 In the Open dialog box, navigate to the location of the administrative
image that you specified when creating the deployment. Navigate to
AdminImage\<processor type>\<locale>\acadps.msi. Click Open.
The <locale> used in the examples is en-us for US English.
Examples
For x86 deployments: \\server123\Deployment\AdminImage\x86\en-us\acad
For x64 deployments: \\server123\Deployment\AdminImage\x64\en-us\acad
3 In the Deploy Software dialog box select Advanced and click OK.
4 In the <product name> Properties dialog box, Modifications tab, click
Add.
5 In the Open dialog box, select the Transform Package file called
acad-<deployment name>.mst located at AdminImage\<processor type>\acad.
Click Open.
6 In the <product name> Properties dialog box, Modifications tab, click
Add.
7 In the Open dialog box, navigate to <deployment location>\Tools and
select the Transform Package file called gpo.mst.
8 Click OK to complete the package.
The GPO is now assigned to all computers that are members of the
organizational unit for which the GPO was created. The next time a computer
in the organizational unit is restarted, the program will be installed and will
be available for all users of the computer. See Verify a Group Policy Deployment
(page 57) to confirm that the group policy has been created correctly.
56 | Chapter 3 Network Administration Guide
Page 63

Verify a Group Policy Deployment
To verify that this deployment has been correctly assigned to a computer,
restart a computer that is in the organizational unit for which the group policy
was created. The program installation begins before the login prompt is
displayed. The operating system displays group policy messages, including a
message indicating the installation of any managed software.
After logging in, double-click the program icon on the desktop to complete
the installation and start the program.
NOTE If problems arise, an entry is logged in the system's Event Viewer, under
Applications.
Use Microsoft SCCM to Deploy Products
Microsoft System Center Configuration Manager (SCCM) allows you to manage
software distribution to selected target systems through a remote process. For
more information about this topic, go to Microsoft TechNet and search for
"System Center Configuration Manager".
Each deployment includes a folder <deployment name>\SMS_SCCM scripts,
which contains two documents to help you with SCCM deployments:
SMS_SCCM_ReadMe.docx and <deployment name>_SCCM.txt.
NOTE Microsoft .NET Framework 4.0 must be installed on each target computer
before using SCCM to distribute Autodesk products.
To deploy Autodesk products with SCCM
1 Identify or create a collection of target computers to receive the software
package.
2 Create a source directory using the Create Deployment procedure in the
installer. See Set Up a Source Directory for SCCM (page 58).
3 Create an SCCM package to deploy to your target systems, and notify
users that the software package is available. See Create the SCCM Software
Installation Package (page 58).
Alternative Distribution Methods | 57
Page 64

NOTE Distribution of DirectX 9.0C to Windows XP by SCCM is not supported.
For an Autodesk product to run properly, you must manually install DirectX 9.0C
from the product media (<media>\3rdParty\DirectX\DXSETUP.exe). This version
of DirectX 9.0C is customized for use with Autodesk products.
Set Up a Source Directory for SCCM
When you use SCCM to deploy Autodesk products, you set up the source
directory using the Create Deployment process in the installer.
The Create Deployment process creates an administrative image that is used
by SCCM to distribute the Autodesk products to the target systems. The
location of the administrative image is the package source directory.
To learn more about deployments and setting up the source directory for
Autodesk software, see About Deployments (page 39).
NOTE Before trying to configure SCCM to deploy the product, it is recommended
that you test your deployment to ensure that it can install the product successfully.
To test your deployment
1 Log on to a Windows computer as a user who has administrative
privileges.
2 Navigate to the source directory where your administrative image was
created.
3 Double-click the deployment shortcut created by the deployment process.
The program is either installed, or error information is written to the
log file at %temp%.
Create the SCCM Software Installation Package
After creating the source directory using the deployment process, create the
SCCM software installation package. An SCCM package contains the files and
instructions that SCCM uses to distribute the software and advertise the
package to users. The deployment process creates the files and instructions,
but SCCM must be configured to use these files.
58 | Chapter 3 Network Administration Guide
Page 65

To create a software installation package using SCCM
1 Click Start menu ➤ All Programs ➤ Microsoft System Center ➤
Configuration Manager 2007 ➤ ConfigMgr Console.
2 In the Configuration Manager Console window, expand Software
Distribution.
3 Right-click Packages ➤ Distribute ➤ Software.
4 In the Distribute Software wizard, click Next.
5 In the Package dialog box, select Create a New Package and Program
without a Definition File. Click Next.
6 In the Package Identification dialog box, enter the information for Name,
Version, Publisher, Language and any comments. Click Next.
7 In the Source Files dialog box, make selections for where SCCM retrieves
the files and how it manages them. Select “Always Obtain Files from a
Source Directory”. Click Next.
8 In the Source Directory dialog box, specify the location of the source
directory. Click Next.
9 In the Distribution Points dialog box, select the distribution point(s).
This is the location from which the software package will be deployed
to the target computers. Click Next.
10 In the Program Identification dialog box, enter the name of your
program. This is the name that displays in Add or Remove Programs in
the Control Panel. In the Command Line field, enter
.\AdminImage\setup.exe /W /Q /I .\AdminImage\<deployment
name>.ini /language en-us. For example, if your deployment is
named "Adsk-2012", you would enter .\AdminImage\setup.exe /W
/Q /I .\AdminImage\Adsk-2012.ini /language en-us. Click Next.
NOTE This example assumes the language pack you wish to install is US
English. About the flags, /W indicates SMS and SCCM, /Q indicates a silent
install, and /I indicates a deployment installation.
11 In the Program Properties dialog box, Program Can Run drop-down list,
select how you want your program to install. Your choices are
■ Only When a User is Logged On
■ Whether or Not a User is Logged On
■ Only When No User is Logged On
Alternative Distribution Methods | 59
Page 66

12 In the After Running drop-down list, select an action to take after the
program has been installed. Your choices are
■ No Action Required
■ Program Restarts Computer
■ ConfigMgr Restarts Computer
■ ConfigMgr Logs User Off
NOTE Some products require a system restart after installation.
Click Next.
13 In the Advertise Program dialog box, select Yes to advertise the program
to users. Click Next.
14 In the Select a Program to Advertise dialog box, select the package you
want to advertise. Click Next.
15 In the Select Program ➤ Advertisement Target dialog box, select the
collection of people to whom you want to advertise, or create a new
collection.
16 In the Select Program ➤ Advertisement Name dialog box, enter or
change the name of your advertisement. Add any comments to further
describe the advertisement. Click Next.
17 In the Select Program ➤ Advertisement Subcollection dialog box, select
one of the following options:
■ Advertise this Program to an Existing Collection
■ Create a New Collection and Advertise this Program to It
18 Click Next.
19 In the Select Program ➤ Advertisement Schedule dialog box, if desired,
set options to advertise your program at a specific date and time, or set
an expiration date. Click Next.
20 In the Select Program ➤ Assign Program dialog box, select one of the
following options:
■ If the installation process is mandatory, select Yes, Assign the Program.
■ If the installation process is optional, select No, Do Not Assign the
Program.
Click Next.
21 In the Summary dialog box, verify your advertisement information. Use
the back buttons to make any changes. To finish, click Next.
60 | Chapter 3 Network Administration Guide
Page 67

Distribute Products Using Imaging Software
You can use imaging software, such as Norton Ghost, to create a master image
to distribute Autodesk products. Once created, the master image can be
replicated to other computers throughout your facility.
IMPORTANT Autodesk does not recommend or support the distribution of products
using imaging software. However, if you plan to use this method of distribution,
please review the following instructions carefully.
The use of imaging software can result in conflicts with product licensing,
incomplete installations, and problems with activation.
NOTE If you experience licensing instability in a SATA RAID environment, using
imaging software to distribute Autodesk products can cause product activation
problems, such as an “Activation code limit exceeded” situation.
Distribute Multi-Seat Stand-Alone Products
You can use a master image to distribute a multi-seat stand-alone product to
multiple computers.
NOTE When using Norton Ghost, you must use the -ib switch to include the boot
sector in your master image. Consult your imaging software for more details on
including the boot sector as part of the master image.
Master images should not be created if you have previously run Autodesk
products on the master computer. Cleaning the system may be necessary. For
more information, see Clean a Master System and Restore the Operating System
(page 63).
To distribute a multi-seat stand-alone product to multiple computers using
a master image
1 Create a network deployment for a multi-seat stand-alone product. For
more information, see Create an Original Deployment (page 46).
2 Install the Autodesk product from the deployment onto the master
computer.
3 On the master computer, create a master image, including the boot
sector. Test the product on a machine other than the master computer
before distributing the product. Launch the product on the other
Alternative Distribution Methods | 61
Page 68

machine, and then register and activate it. Users have a trial period to
register and activate the product on their machines.
4 Apply the master image to the target computers.
Distribute Network Licensed Products
You can use a master image to distribute network licensed products.
To distribute a network licensed product to multiple computers using a master
image
1 Create a network deployment for a network licensed product. For more
information, see Create an Original Deployment (page 46).
2 Install the product from the deployment onto the master computer.
NOTE A license server must be running, and each computer must be
connected to the network in order for the product to obtain a license.
3 After the product has been installed, use imaging software to create a
master image of the system's hard drive.
4 Apply the master image to the target computers.
Restore the Master Image
The following procedure assumes that you have saved a copy of each
computer’s AdLM folder (and Product Licenses folder, if present) to either
another computer or a disc before you reformat the computer.
To restore a product using a master image
1 Exit the application. Do not run the application again until after you
have completed this procedure.
2 In Windows Explorer, copy the AdLM folder from the appropriate path
shown below to a location other than the disc that will be restored.
C:\Documents and Settings\All Users\Application Data\FLEXnet
3 Reformat the computer and restore the master image.
NOTE Do not perform a low-level format of the hard drive.
62 | Chapter 3 Network Administration Guide
Page 69

4 Copy the AdLM folder that you created in step 2 to its original location
on the reformatted computer.
NOTE When you restore the disc image, any files that were altered are put back
in their original state and ready to use again. The license files are preserved, and
no reactivation of products is necessary.
Clean a Master System and Restore the Operating
System
If you have already run your Autodesk product on the master computer, the
master computer should be properly cleaned before creating a master image.
To clean a master computer and restore the operating system
1 Clean the hard drive, including the boot sector.
For example, if you use Norton’s GDISK utility, use the following
command:
gdisk 1 /diskwipe
Where 1 is the hard disk that is being wiped.
NOTE If you use a utility other than Norton Ghost, make sure that it cleans
the boot sector; otherwise, you will not be able to activate Autodesk products.
2 Create a new partition and use the restore disc or product media to install
the operating system.
Installation Questions
This section provides answers to some frequently asked questions about
installation and deployment. For additional advice and assistance, go to
Autodesk Support, click your product name, and search in the Knowledgebase
for your product.
Installation Questions | 63
Page 70

Licensing Questions
What is the difference between a stand-alone license
and a network license?
A stand-alone license supports one or more Autodesk products for an individual
user. Similarly, a multi-seat stand-alone license supports a specific number of
users. While the software can be installed on additional computers in your
facility, the licensed number of users cannot be exceeded.
A network license supports a specific maximum number of users who are
connected to a network. A software utility known as the Network License
Manager (NLM) issues licenses to users, up to the number of licenses purchased.
At this point, no more computers can run the Autodesk product until a license
is returned to the NLM.
What is the benefit of using a network licensed version
of the software?
Network licensing provides ease of license management for large
drafting/design facilities, classrooms, and other environments that need to
support many users. The Network License Manager provides centralized control
of licenses, including their registration, activation, and distribution to users.
One main advantage of a network license is that you can install products on
more computers than the number of licenses you have purchased. For example,
you can purchase 25 licenses but install them on 40 computers for ease of
access. At any one time, products can run on the maximum number of
computers for which you have licenses. This means you get a true floating
license. A network licensing system can also be configured to allow users to
borrow a license for a limited time to use on a computer disconnected from
the network.
What is SAMreport-Lite?
SAMreport-Lite is a report generator that helps you monitor the usage of
network licenses for products that use FLEXnet™. SAMreport-Lite is not
distributed with Autodesk products, but it is available from Autodesk.
64 | Chapter 3 Network Administration Guide
Page 71

SAMreport-Lite can help you better manage your software licenses. For more
information, click SAMreport-Lite.
Deployment and Networking Questions
Where should deployments be located?
It is recommended that you create a network share folder named Deployments
on the desktop of the system where you want to store deployments. You can
then add subfolders named to reflect the products deployed. If you plan to
create several deployments of the same product or suite, configured for
different user groups, then these deployments can share the same
administrative images, and the shortcuts can reside in the same folder. Any
subfolders inside a shared folder are automatically shared.
For more information on network shares, see Create a Network Share (page
45).
When should I select all products for the administrative
image, and can I add products later?
If you include all products in your deployment, the administrative image will
be larger, but you will be able to modify the deployment or create new ones
without restrictions. If you select the checkbox "Include only products required
by this deployment configuration", the resulting deployment includes a subset
of the available products. Any modifications to this deployment, or additional
deployments based on the first one, will be limited to the same set of products
or fewer.
It is recommended that you include all available products if you plan to create
multiple deployments from this administrative image with different product
mixes, and prefer not to use the installation media again. If there are products
you will never use, or if you do not expect to create additional deployments,
you should select a subset of products.
You can create another deployment later, and include additional products,
but to do this you need to create a new administrative image from the
installation media.
Installation Questions | 65
Page 72

What are the profiles associated with user computer
settings?
Profiles are created on the Profiles tab of the Options dialog box. Profiles can
contain configuration settings for just about anything that is not a drawing
based system variable. For example, a profile can contain things like support
paths, grip settings, and plot settings.
When you specify a profile on the Specify User Preferences page during the
deployment process, it ensures a standard configuration for all computers that
use that deployment to install the product.
What happens if I choose to append or merge service
packs?
When you append a service pack, it is applied to the current deployment only.
The service pack file is included in the deployment, and the service pack is
applied after the product is deployed.
When you merge a service pack, the service pack is merged into the
administrative image. Once merged, a service pack cannot be removed from
the administrative image.
You can choose to append or merge service packs from the product
configuration panel when creating a deployment.
Where can I check if service packs are available for my
software?
To find out if a patch or Service Pack is available, visit the Support page for
your product at http://autodesk.com/servicesandsupport.
How do I extract an MSP file?
This topic applies only to Windows platforms. A Microsoft Patch (MSP) file is
usually contained in a Service Pack executable that you download from the
Support website for your product. To extract the MSP file from the executable,
66 | Chapter 3 Network Administration Guide
Page 73

run the patch program from the Windows command prompt using the /e
switch. The syntax is as follows:
<local_drive:>\<patch_name>.exe /e <local_drive:>\<patch_name>.msp
Pay particular attention to the location where the files are extracted. For details
about using the patch file, review the Readme file for the patch.
How should I configure a network license server for a
firewall?
If you have a firewall between the license server(s) and the client computers,
you need to open some TCP/IP ports on the server for license-related
communication. Open port 2080 for adskflex, and open ports 27000 through
27009 for lmgrd.
Uninstall and Maintenance Questions
How can I see what is included in a default installation?
To see what is installed during a default installation, go through the installation
process to the Product Configuration page. The products selected here are
installed in a default installation. If you click a selected product box to open
the configuration panel, you can see the default settings for subcomponents
and features.
Is it possible to change the installation folder when
adding or removing features?
After your product is installed, you cannot change the installation path.
Changing the path while adding features results in program corruption, so it
is not an option.
Installation Questions | 67
Page 74

How do I install tools and utilities after installing my
product?
Run the installer again from the original media, and click Install Tools &
Utilities on the first screen. The installer guides you through the process of
selection, configuration and installation of tools and utilities.
When should I reinstall the product instead of repairing
it?
Reinstall your product if you accidentally delete or alter files that are required
by the program. Missing or altered files adversely affect the performance of
your product and cause error messages when you try to execute a command
or find a file.
If an attempt to repair an installation fails, reinstalling is the next best option.
Do I need the original media to reinstall my product?
Yes. When reinstalling a product, you are prompted to load the original media.
If the product was installed from a network deployment, you need access to
the original deployment, unaltered by later changes such as the addition of
a service pack.
When I uninstall my software, what files are left on
my system?
If you uninstall the product, some files remain on your computer such as files
you created or edited (for example, drawings or custom menus).
Your license file also stays on your computer when you uninstall your product.
If you reinstall on the same computer, the license information remains valid;
you do not have to reactivate the product.
68 | Chapter 3 Network Administration Guide
Page 75

Glossary
activate Part of the Autodesk software registration process, it allows you to
run a product in compliance with the product's end-user license agreement.
administrative image A collection of shared file resources created by the
deployment process and used to install the program to network computers.
deployment The process of installing Autodesk products to one or more
computers on a network.
hot fix Autodesk terminology for a minor application patch that contains a
few code fixes.
installation image A deployment that consists of one or more MSI files and
their associated data files, any associated transforms, additional user-specified
custom files, profile, and registry settings.
language family A set of languages (core product, plus language packs) that
are distributed together, typically based on a geographic grouping. Languages
are not distributed in this way for all Autodesk products.
language pack A set of installed files, used by some Autodesk products, that
enable the user to work in the application in the language specified by the
language pack.
License Transfer Utility A tool used to transfer a stand-alone license for an
Autodesk product from one computer to another, using Autodesk servers.
Both the source and target computers require Internet access.
multi-seat stand-alone installation A type of installation in which multiple
stand-alone seats of the product are installed using a single serial number.
network license installation A type of installation in which the product is
installed on multiple computers, but the distribution of licenses is handled
by the Network License Manager.
patch A software update to an application.
service pack Autodesk terminology for a major application patch that typically
includes many code fixes.
silent mode An installation that proceeds without any explicit user input.
No dialog boxes are presented that require interaction from the user.
Glossary | 69
Page 76

70
Page 77

Licensing Guide
Introduction
License Types
Autodesk provides two main types of licenses:
■ A stand-alone license supports one or more Autodesk products for an
individual user. This license type also has a multi-seat version that supports
a specific number of users. The software can be installed on additional
computers in your facility, but the number of concurrent users is limited.
■ A network license supports a specific maximum number of users who are
connected to a network. A software utility known as the Network License
Manager (NLM) issues a license to each user who starts an Autodesk product,
up to the number of licenses purchased. When a user closes all Autodesk
products, typically the license is returned to the NLM, and is available to
other users. However, NLM can be configured to allow a user to borrow a
license and disconnect from the network until a specified return date. A
borrowed license is only returned to NLM on the return date, or sooner if
the user chooses to return it early.
4
Autodesk supports dynamic product usage and license behaviors. You can
purchase a specific type of behavior with a specific license and change that
license at a later date without having to uninstall and reinstall the Autodesk
product.
71
Page 78

License usage types
NOTE All license types are available as stand-alone and network except for the
Student Portfolio license, which is available as stand-alone only.
Commercial A license for a product that was purchased commercially.
Not for Resale A license for a product that is not sold commercially.
Educational (EDU)/Institution A license designed specifically for educational
institutions.
Student Portfolio A license for students who are using an Autodesk product
as part of their curriculum.
License behaviors
Trial A license that allows individuals to run a product or suite in trial mode
for a specified time period, usually 30 days. The trial period starts the first
time you launch the product, or one of the products in the suite. You can
activate and register the license at any time, before or after the trial period
expires.
Permanent Allows permanent use of an Autodesk product.
Term Extendable Allows access to an Autodesk product for a limited time.
The term can be extended at any time.
Term Non-Extendable Allows access to an Autodesk product for a limited
time. The term cannot be extended.
License models
Standard Applies to an activated stand-alone license.
Capacity Applies to a usage-based license. In this model, the user pays a fee
that varies according to the amount of time that the product is actually used.
Activation
Activation is the process of verifying the serial number and product key of an
Autodesk product, and licensing it to run on a specific computer. If a license
administrator registers products with Autodesk before they are used, then
activation occurs automatically as users start the products.
72 | Chapter 4 Licensing Guide
Page 79

Activation cannot occur if the serial number and product key combination is
invalid, or if the user is disconnected from the Internet. In such cases, the user
must contact Autodesk to resolve the situation. Some products provide
instructions for offline registration. This can involve generating a request
code, sending it to Autodesk, and then receiving an activation code to enter
on a product screen to complete the activation process.
If you upgrade your product from an earlier version, you may need to provide
your old serial number. For more information on activation, go to Autodesk
Licensing and select the FAQ link.
NOTE If you are installing and using an Autodesk product on both operating
systems of a dual-boot operating system, you must obtain a separate activation
code for each operating system.
Registration
Depending on your product, registration is optional or required. If required,
you are prompted to create an Autodesk User ID associated with an individual
or company account. If registration is optional, you can choose to postpone
it, and you will be reminded periodically to register. The Autodesk website
where you register products is https://registeronce.autodesk.com.
Stand-Alone Licensing
Introduction to Stand-Alone Licenses
A stand-alone license authorizes a single user to use the specified Autodesk
product. The product can be installed on more than one computer, but
multiple instances of the same product cannot be running concurrently on
different computers.
Stand-alone licensing allows you to use your Autodesk product in trial mode
for a specified period, usually 30 days, from the first time you start the product.
For a product suite, the trial period countdown begins when the first product
is started, and it applies to all Autodesk products in the suite. You can activate
your license at any time before or after the trial period expires.
The licensing process creates a license file and a minor change to the
computer's file system. These changes remain on your computer when you
Stand-Alone Licensing | 73
Page 80

uninstall your product. If you reinstall your Autodesk product on the same
computer, the license remains valid. You do not have to reactivate the product.
Multi-Seat Stand-Alone License
A multi-seat stand-alone license allows you to use a single serial number and
product key to run one or more Autodesk products on a specified number of
computers. As with a single stand-alone license, products activate automatically
when started for the first time if an Internet connection is available, and if
the serial number and product key combination is registered correctly with
Autodesk.
A multi-seat stand-alone license can be deployed efficiently to multiple
computers on a network from an image created by the Create Deployment
option in the installer.
For more information about multi-seat stand-alone installation and
deployments, see the Network Administrator's Guide for your product, or go to
www.autodesk.com/licensing.
Manage Your Stand-Alone License
View Product License Information
You can view detailed information about your Autodesk product license, such
as the serial number, license usage type and behavior.
To view product license information
1 Start your Autodesk product.
2 Click Help ➤ About, or About [Product Name].
3 In the About window, click Product Information or Product License
Information.
74 | Chapter 4 Licensing Guide
Page 81

Save License Information as a Text File
You can view detailed information about your Autodesk product and your
product license (such as the serial number, license usage type and behavior),
and then save this information as a text file for future reference.
To save license information as a text file
1 Start your Autodesk product.
2 Click Help ➤ About or About [Product Name].
3 In the About window, click Product Information or Product License
Information.
4 In the Product License Information dialog box, click Save As.
5 In the Save As dialog box, name the file, choose a location where you
want to save the file, and then click Save.
6 In the Product License Information dialog box, click Close.
Update Your Serial Number
You typically update your serial number for a stand-alone license when you
purchase a new license in order to change the license type or behavior. For
example, you would do this if you want to convert an educational license to
a commercial license, or if you want to extend the term of a term extendable
license. When you update a license, you do not need to uninstall and reinstall
the product. The new license includes a new serial number that you enter in
the Product License Information dialog box.
Your serial number is located on the outside of the product packaging or in
the Autodesk Upgrade and Licensing Information email you received when you
downloaded your product.
When you register and activate your product, your serial number is submitted
to Autodesk over the Internet, if a connection is available.
If you have a suite of products that use a single serial number, only the first
product you register and activate displays the updated serial number. For other
products to display the serial number, you must update them from the Help
menu.
Stand-Alone Licensing | 75
Page 82

To update your serial number
1 Start your Autodesk product.
2 Click Help ➤ About, or About [Product Name].
3 In the About window, click Product Information or Product License
Information.
4 In the Product License Information dialog box, click Update.
5 In the Update the Serial Number dialog box, enter your product serial
number.
NOTE If you have lost your serial number, go to www.autodesk.com/contactus
for assistance.
6 Click Activate. The updated serial number is displayed.
NOTE In some cases, you must restart the product to display the updated
serial number.
7 In the Product License Information dialog box, click Close.
Transfer Your Stand-Alone License
About the License Transfer Utility
The License Transfer Utility is used only with stand-alone licenses. It transfers
a product license online from one computer to another, and ensures that the
product works only on the computer that contains the license. A single license
applies to all products in a product suite. When you transfer the license, any
installed products of the suite are disabled on the exporting computer, and
enabled on the importing computer.
For some Windows-based products, you can install the License Transfer Utility
from the Tools & Utilities tab of the installer. For others, you select the License
Transfer Utility on the product configuration panel of the installer.
IMPORTANT To transfer a license, the Autodesk product must be installed on
both computers. In addition, you need an Internet connection, and an Autodesk
user ID and password, available from the Autodesk Register Once website(https://re-
gisteronce.autodesk.com).
76 | Chapter 4 Licensing Guide
Page 83

IMPORTANT If you are using Autodesk products on Mac OS X or Linux platforms,
see your product appendix for more information on how to install and start the
License Transfer Utility. After the utility is started, the procedures for exporting
and importing licenses are the same on all platforms.
The License Transfer Utility is a custom stand-alone installation option. During
installation, a shortcut is created. A shortcut is installed once per product, per
computer.
You can transfer a license to another computer temporarily or permanently.
For example, a temporary transfer enables you to use the Autodesk product
on a mobile computer while your main computer is being repaired or replaced.
License transfers rely on the product serial number. Before an Autodesk license
can be exported, it must be activated with the serial number and product key.
During license import, a previously activated and exported license is imported
to a product or suite installed with the same serial number. The activation is
transferred to the importing computer, completing the license transfer.
The maximum number of concurrent license exports is equal to the number
of seats you own. For example, if your license covers five seats you can have
up to five license exports in progress at any time.
When you upgrade your Autodesk product, you can no longer perform online
license transfers of the previous license.
Although the License Transfer Utility allows you to transfer your product
license between computers, your license agreement may not allow the
installation of an Autodesk product on more than one computer. Read your
license agreement to find out whether your product license permits the use
of the License Transfer Utility.
Export a License
A license is exported when the License Transfer Utility moves a product license
from a computer to the online Autodesk server.
The license can be exported as public or private:
■ Public means that anyone using the same serial number and their own
user ID and password can import that license.
■ Private means that you are reserving that license for yourself and the
license can only be imported with the same serial number, user ID, and
password that were used when it was exported.
Stand-Alone Licensing | 77
Page 84

If it has not been imported, a private license becomes public after 14 days.
To export a license
1 On the computer where you want to export the license, start the License
Transfer Utility.
■ On a Windows computer, click Start menu and navigate to Autodesk
➤ [Product Name] ➤ License Transfer Utility.
■ For a Mac OS X or Linux computer, see the appendix for your product
for information on how to start the License Transfer Utility.
The Export the License dialog box displays the Autodesk product name
and serial number.
2 Click Sign In.
3 On the Log In page, enter your Autodesk user ID and password and click
Log In.
4 On the License Export page, confirm the export information.
5 If you want to make the license available as a public import, click Make
the license available as a public import.
6 Click Export.
7 On the License Export Confirmation page, click Finish.
Import a License
A license is imported when the License Transfer Utility moves a previously
exported product license from the online Autodesk server to a computer. The
import action completes the license transfer process, and transfers the product
activation to the importing computer. The presence of an active license allows
your Autodesk product to run on that computer.
To import a license
1 On the computer where you want to import the license, start the License
Transfer Utility.
■ On a Windows computer, click Start menu and navigate to Autodesk
➤ [Product Name] ➤ License Transfer Utility.
■ For a Mac OS X or Linux computer, see the appendix for your product
for information on how to start the License Transfer Utility.
78 | Chapter 4 Licensing Guide
Page 85

The Import the License dialog box displays the Autodesk product name
and serial number.
NOTE If you are importing a license to replace a trial license, you will see
the Update the Serial Number and Product Key dialog box. In this case, enter
the required data, and then click Update.
2 In the Import the License dialog box, click Sign In.
3 On the Log In page, enter your Autodesk user ID and password and click
Log In.
4 On the License Import Confirmation page, click Finish.
The license is now imported to the computer and you can run your
Autodesk product on this computer. If you want to transfer the license
to another computer, repeat the export and import procedures.
Troubleshoot a Stand-Alone License Error
Preserving a License When Hardware Changes
If you replace or reconfigure hardware on the computer where your Autodesk
product license resides, the stand-alone license might fail, with the result that
you will not be able to use your product.
To prevent damage to your product license, use the License Transfer Utility
to export your license file before changing the hardware. After the hardware
change, you can import the license file back. For information about using the
License Transfer Utility, see About the License Transfer Utility (page 76).
NOTE If you get a license error when you change your hardware, you may have
to reactivate your license. See Activation (page 72).
Reinstalling an Operating System
If you reinstall your operating system on the computer where your Autodesk
license resides, the license might fail. You will not be able to use your product.
To resolve a license error in this case, you must reactivate your product. See
Activation (page 72).
Stand-Alone Licensing | 79
Page 86

NOTE The following procedure is for the Windows operating system. If you are
running Autodesk products on Mac OS X or Linux platforms, see your product
appendix for more information.
To prevent a license error when you reinstall an operating system
NOTE If using Norton Ghost™ or another image utility, do not include the Master
Boot Record.
1 Locate one of the following folders and make a backup copy:
■ (Windows XP) C:\Documents And Settings\All Users\Application
Data\FLEXnet
■ (Windows 7 or Vista) C:\ProgramData\FLEXnet
2 Reinstall the operating system and reinstall the Autodesk product.
3 Paste the license folder to the same location from which you originally
copied the folder in step 1.
You can now run your Autodesk product.
Changing the System Date and Time
Your product license allows for time changes to the system clock within two
days of the current time. If you set your system clock back more than two
days, the next time you start your product, you will receive a message that
gives you the option of correcting the system clock. If you do not correct the
system clock, you receive a license error.
To prevent a license error due to a change in system date and time, ensure
that your computer's system date and time are accurate when you install and
activate your Autodesk product.
Distributing a Software Image to Multiple Computers
You can use the installer's Create Deployment option to create a product
installation image on your server, and make it available on your computer
network. During creation of this image, you are prompted for registration
information, which is stored with the image and deployed to all product
installations. For more information, see the Network Administration Guide.
80 | Chapter 4 Licensing Guide
Page 87

Additionally, you can manually distribute the software using the installation
media that comes with your Autodesk product. However, if your computers
do not have an Internet connection, make sure that the registration data for
each computer matches exactly. Inconsistent registration data can cause
activation failures.
NOTE The distribution of applications using “ghosting” is not recommended. It
can result in incomplete installations and activation problems.
Preserving a License on a Re-imaged Computer
On a network license server, licenses are maintained on the server. No
additional steps are needed to preserve network licenses.
For a stand-alone license, you need to export the license before re-imaging
the computer. You can use the License Transfer Utility to export the license
to the Autodesk server. After the re-imaging, import the license to the correct
computer.
Network Licensing
Planning Your Network Licensing
Understanding License Server Models
This section explains the three possible server models that support the Network
License Manager. A server network can include Windows, Mac OS X, and
Linux servers in any combination. Advantages and disadvantages of each
model are presented to help you decide which one best suits your needs. When
you purchase a network license, you specify which server model you will use.
Single License Server Model
In the single license server model, the Network License Manager is installed
on a single server, so license management and activity is restricted to this
Network Licensing | 81
Page 88

server. A single license file represents the total number of licenses available
on the server.
Advantages of the Single License Server Model
■ Because all license management takes place on a single server, you have
just one point of administration and one point of failure.
■ Of the three license server models, this configuration requires the least
amount of maintenance.
Disadvantage of the Single License Server Model
■ If the single license server fails, the Autodesk product cannot run until the
server is back online.
Distributed License Server Model
In the distributed license server model, licenses are distributed across more
than one server. A unique license file is required for each server. To create a
distributed license server, you must run the Network License Manager on each
server that is part of the distributed server pool.
Advantages of the Distributed License Server Model
■ Servers can be distributed across a wide area network (WAN); they do not
need to exist on the same subnet.
■ If one server in the distributed server pool fails, the licenses on the
remaining servers are still available.
■ If you need to replace a server in the distributed server pool, you do not
need to rebuild the entire pool.
■ Server replacement is easier than in a redundant server pool, where you
must reactivate the entire pool.
Disadvantages of the Distributed License Server Model
■ If a server in the distributed server pool fails, the licenses on that server
are unavailable.
■ This model can require more time for setup and maintenance than other
models.
82 | Chapter 4 Licensing Guide
Page 89

Redundant License Server Model
In the redundant license server model, three servers are configured to
authenticate license files. Licenses can be monitored and issued as long as at
least two license servers are still functional. The Network License Manager is
installed on each server, and the license file on each server is the same.
In the redundant license server model, all servers must reside on the same
subnet and have consistent network communications. (Slow, erratic, or dial-up
connections are not supported.)
Advantage of the Redundant License Server Model
■ If one of the three servers fails, all licenses that are managed in the server
pool are still available.
Disadvantages of the Redundant License Server Model
■ If more than one server fails, no licenses are available.
■ All three servers must reside on the same subnet and have reliable network
communications. The redundant server pool does not provide network
fault tolerance.
■ If one of the three servers is replaced, the complete redundant server pool
must be rebuilt.
■ If your Autodesk product supports license borrowing, and licenses are
borrowed from a redundant license server pool, you must restart the license
server after you stop the Network License Manager.
Windows System Requirements for the Network License Manager
NOTE The Network License Manager supports Ethernet network configurations
only.
Hardware and software requirements for the network license server
RequirementHardware/Software
Operating System
Windows® 7® 32- or 64-bit
■ Windows 7 Home Premium
Network Licensing | 83
Page 90

Hardware and software requirements for the network license server
RequirementHardware/Software
■ Windows 7 Professional
■ Windows 7 Ultimate
■ Windows 7 Enterprise
Windows Vista 32-bit SP2 or later
Windows Vista 64-bit SP2 or later
■ Windows Vista Home Premium and Basic (32-bit)
■ Windows Vista Home Premium (64-bit)
■ Windows Vista Ultimate
■ Windows Vista Business
■ Windows Vista Enterprise
Windows XP 32- or 64-bit SP2 or later
■ Windows XP Home
■ Windows XP Professional
Windows Server 32- or 64-bit SP1 or later
■ Windows 2008 Server R2
■ Windows 2008 Server
■ Windows 2003 Server R2
■ Windows 2003 Server
Computer/processor
Intel® Pentium® III or higher
450 MHz (minimum)
Compatible with existing Ethernet network infrastructureNetwork interface card
NOTE The Network License Manager supports multiple network interface
cards, but at least one must be an Ethernet card.
84 | Chapter 4 Licensing Guide
Page 91

Hardware and software requirements for the network license server
RequirementHardware/Software
TCP/IPCommunication protocol
NOTE The Network License Manager uses TCP packet types.
11.10.0.0FLEXnet
Virtual Machine Support
Virtual OSVirtualizerHardware
Intel PC 64
Windows 2008 or Windows 2003
R2 servers running on VMware
ESX3.5 (Update 3) or 4.0 (License
Manager Only)
Windows Vista 32- or 64-bit, Windows
®
XP 32-bit, Windows 7 32-bit (Home
Premium, Professional, Ultimate, and
Enterprise), Windows 7 64-bit, Windows Server 32- or 64-bit.
Linux System Requirements for the Network License
Manager
NOTE The Network License Manager supports Ethernet network configurations
only.
Linux hardware and software requirements for the network license server
RequirementHardware/Software
Operating system
Linux® 32- or 64-bit
Red Hat® Enterprise Linux 5.0 WS (U4)
Intel Pentium 3 or higherComputer/processor
450 MHz (minimum)
Compatible with existing Ethernet network infrastructureNetwork interface card
Network Licensing | 85
Page 92

Linux hardware and software requirements for the network license server
RequirementHardware/Software
NOTE The Network License Manager supports multiple network interface
cards, but at least one must be an Ethernet card.
TCP/IPCommunication protocol
NOTE The Network License Manager uses TCP packet types
11.10.0.0FLEXnet
Mac OS X System Requirements for the Network License Manager
NOTE The Network License Manager supports Ethernet network configurations
only.
Mac OS X hardware and software requirements for the network license server
RequirementHardware/Software
Operating system
Mac OS® X version 10.6 and higher
Intel MacComputer/processor
Compatible with existing Ethernet network infrastructureNetwork interface card
NOTE The Network License Manager supports multiple network interface
cards, but at least one must be an Ethernet card.
TCP/IPCommunication protocol
NOTE The Network License Manager uses TCP packet types
11.10.0.0FLEXnet
86 | Chapter 4 Licensing Guide
Page 93

Understanding Your Network License
How Your License Works
When you start an Autodesk product, it requests a license from the license
server through the TCP/IP network . If the number of available licenses has
not been exceeded, the Network License Manager assigns a license to the
computer, and the number of available licenses on the license server is reduced
by one.
Likewise, when you exit a product, the license returns to the Network License
Manager. If you run multiple sessions of an Autodesk product on an individual
computer, only one license is used. When the last session is closed, the license
is released.
The following three processes manage the distribution and availability of
licenses:
■ License manager daemon (lmgrd or lmgrd.exe) handles the original
contact with the application, and then passes the connection to the vendor
daemon. By using this approach, a single lmgrd daemon can be used by
multiple software vendors to provide license authentication. The lmgrd
daemon starts and restarts the vendor daemons as needed.
■ Autodesk vendor daemon (adskflex or adskflex.exe) tracks the Autodesk
licenses that are checked out and the computers that are using them. Each
software vendor has a unique vendor daemon to manage vendor-specific
licensing.
NOTE If the adskflex vendor daemon terminates for any reason, all users lose
their licenses until lmgrd restarts the vendor daemon or until the problem
causing the termination is resolved.
■ License file is a text file that has vendor-specific license information.
Interpreting Your License File
The network license file you receive from Autodesk contains licensing
information required for a network installation. You obtain license file data
when you register your Autodesk product.
Network Licensing | 87
Page 94

The license file contains information about network server nodes and vendor
daemons. It also contains an encrypted digital signature that is created when
Autodesk generates the file.
The license file configures network license servers to manage licenses. When
creating a deployment, the network license server name(s) are specified so
that each product instance knows which server(s) to contact to obtain a license.
The network license server(s) must be accessible to every user who runs one
or more products that require a network license.
The following table defines each license file parameter. For more information,
see the License Administration Guide, installed with the Network License
Manager.
Definitions of license file parameters
ExampleDefinitionParameterLine
Host NameSERVER
Host ID
[None]USE_SERVER
Vendor DaemonVENDOR
Port Number
COMPONENTS
Network License Manager resides
the Network License Manager resides
vendor daemon
assigned for use only by Autodesk
products running the Autodesk
vendor daemon
List of feature codes supported in the
package
LABSERVERHost name of the server where the
03D054C0149BEthernet address of the server where
adskflex.exeName of the server-side Autodesk
port=2080Network port number reserved and
SERIES_1Name of feature code groupNamePACKAGE
1.000Internal version number referenceVersion
COMPONENTS=
"526000REVIT_9_OF\
51200ACD_2007_OF\
513001INVBUN_11_OF"
88 | Chapter 4 Licensing Guide
Page 95

Definitions of license file parameters
ExampleDefinitionParameterLine
OPTIONS=SUITEOPTIONS
SUPERSEDE
SIGN
Expiration Date
Number of Licenses
VENDOR_STRING
BORROW
SUPERSEDEReplacement for any existing Increment line of the same feature code
from any license files on the same license server that have a date earlier
than the defined Issue Date
SIGN=0 SIGN2=0Encrypted signature used to authenticate the attributes of the license file
51200ACD_2007_0FProduct supported by the license fileFeature CodeINCREMENT
permanentAmount of time the licenses are
available
25Number of licenses supported by the
license file
COMMERCIALLicense usage type and license behavior of the product that is supported
by the license file
BORROW=4320Definition of the license borrowing
period for the licenses defined under
the same increment line.
In this example, the maximum period
that licenses can be borrowed is 4320
hours (180 days), unless otherwise
noted.
License borrowing is disabled when
this parameter is absent in the license
file.
Network Licensing | 89
Page 96

Definitions of license file parameters
ExampleDefinitionParameterLine
DUP_GROUP
when the same user and same host
share the same license
ISSUED
ated by Autodesk
Serial Number
product
SIGN
ticate the attributes of the license file
DUP_GROUP=UHDefinition of multiple license requests
15-jul-2010Date that the license file was gener-
123-12345678Serial number of the Autodesk
SIGN=6E88EFA8D44CEncrypted signature used to authen-
License File Examples
The Autodesk network license file contents reflect the license server
configuration and the licensed products, as shown in the examples provided.
Example of a License File Not Specific to a Product
Here is an example of the contents of a license file and the parameters
associated with each line:
SERVER
ServerName HostID USE_SERVER VENDOR
adskflex port=portnumber INCREMENT
feature_code Adskflex Version ExpDate NumberofLicenses \
VENDOR_STRING=UsageType:Behavior
BORROW=4320 SUPERSEDE \
DUP_GROUP=DupGrp ISSUED=IssueDate SN=SerialNumber SIGN=
\
90 | Chapter 4 Licensing Guide
Page 97

Example of a License File for a Single or Distributed
Server
Here is an example of a completed license file for a single or distributed license
server model:
SERVER
XXHP0528 0019bbd68993USE_SERVER VENDOR
adskflex port=2080 INCREMENT
57600ACD_2009_0F adskflex 1.000 permanent 5 \
VENDOR_STRING=commercial:permanent BORROW=4320 SUPERSEDE
\
DUP_GROUP=UH ISSUED=09-Jan-2008 SN=123-12345678 SIGN="1393
\
E368 816E D417 C1CD 7DBD 7B90 1354 D6F0 48FE EBB8 9C84 C3AF
\
7D79 BEE1 0181 0655 76FF 996C B707 14B5 D4DE A3FE 0B2D 2D36
\
057C A579 7866 26BF 44E2" SIGN2="1280 943B 53A7 9B93 E00B
D967 \
D821 BD37 BE6D B78A F074 B223 88AA 242C DD0A 1292 D56F 4108
\
62CD FA35 E365 0736 A011 7833 8B35 7BFF DAD8 34A8 452F
2EB4"
Example of a License File for a Redundant Server
Here is an example of a completed license file for a redundant license server
model:
SERVER CCN12378042 001cc4874b03 27005
SERVER XXHP0528 0019bbd68993 27005
SERVER CCN12378043 001cc4874b10 27005
USE_SERVERVENDOR adskflex port=2080INCREMENT
57600ACD_2009_0F adskflex 1.000 permanent 5 \
VENDOR_STRING=commercial:permanent BORROW=4320 SUPERSEDE
\
DUP_GROUP=UH ISSUED=10-Jan-2008 SN=123-12345678 SIGN="11C4
\
CA79 07FC 7AD0 409A 6E04 6E98 D76C 197C 0416 076C B211 1CDD
\
Network Licensing | 91
Page 98

D0AB 698B 16BF 7A0E D4F8 1CFE 2985 644F 64CD CECE 0DDB 5951
\
3262 7C31 13A8 F08F 55B2" SIGN2="19A6 FDA3 2ED5 5301 8675
7B81 \
1B0E 451B 19F1 1A99 C8E9 CBA6 8CB3 6AC3 8B38 1519 13F2 2373
\
82AE 55E5 1A25 4952 4458 F3A2 6F28 D25D 1DC0 E066 209B
0953"
NOTE The redundant server model requires the addition of a port number (the
default is 27005) for each server.
Example of a License File for Combined Autodesk
Product Versions
You can combine a license file for different releases of the same Autodesk
product or for different Autodesk products, and run all products from one
license server.
Here is an example of the contents of a combined license file for AutoCAD 2008
and AutoCAD 2009:
SERVER
XXHP0528 0019bbd68993USE_SERVER VENDOR
adskflex port=2080 INCREMENT
57600ACD_2009_0F adskflex 1.000 permanent 5 \
VENDOR_STRING=commercial:permanent
BORROW=4320 SUPERSEDE \
DUP_GROUP=UH ISSUED=09-Jan-2008 SN=123-12345678 SIGN="1393
\
E368 816E D417 C1CD 7DBD 7B90 1354 D6F0 48FE EBB8 9C84 C3AF
\
7D79 BEE1 0181 0655 76FF 996C B707 14B5 D4DE A3FE 0B2D 2D36
\
057C A579 7866 26BF 44E2" SIGN2="1280 943B 53A7 9B93 E00B
D967 \
D821 BD37 BE6D B78A F074 B223 88AA 242C DD0A 1292 D56F 4108
\
62CD FA35 E365 0736 A011 7833 8B35 7BFF DAD8 34A8 452F
2EB4"
INCREMENT 54600ACD_2008_0F adskflex 1.000 permanent 3 \
VENDOR_STRING=commercial:permanent
92 | Chapter 4 Licensing Guide
Page 99

BORROW=4320 SUPERSEDE \
DUP_GROUP=UH ISSUED=09-Jan-2008 SN=123-12345678 SIGN="1E6E
\
4B61 5712 4766 92A0 6782 9EF4 3F47 56A1 1F38 6DE8 C0C7 90AC
\
7289 152E 0EA2 CC0D 3F10 577A 0489 CEB6 10D5 FBCC B552 0C9D
\
5966 91A6 59F0 2788 FACE" SIGN2="1DDF 3B9D 3392 71D5 AB08
7E05 \
8497 111E 092F 0E54 8DC2 2BED 17C2 2CC1 981B 0EC2 BC15 8F00
\
C79A ABFD 2136 BABA 2EDF E941 EA53 32C6 597F F805 5A8A
599A"
Package License File Types and Examples
Autodesk offers a package license file option, which allows the use of a suite
of products that are packaged and sold together. The package license file
contains a set number of licenses for four different versions of your software.
Running an instance of any one of the versions uses one license in the package.
Packaged license files support prior versioning for subscription users. Package
license files operate under the following guidelines:
■ Package license files come with the current version of the software and
three previous versions of the same product.
■ License files can be combined with license files for different products. For
more information about combining license files, see Example of a Package
License File for Combined Autodesk Product Versions (page 96).
■ Package license files cannot be combined with non-package license files
for product versions contained in the package. For example, you cannot
combine an Autodesk 2009 package license file with a regular license file
for an Autodesk Product 2008, 2007, or 2006.
■ Both the PACKAGE and INCREMENT sections of the license are required
for licensing to work properly. When you combine license files, be sure to
include both of these sections.
■ License borrowing, option files, and licensing cascading work the same
for package licenses as they do for regular license files.
■ A new license file supersedes an older one.
Network Licensing | 93
Page 100

Example of a Package License File for a Single or Distributed Server
Here is an example of a completed package license file for a single or distributed
license server model:
SERVER
Server1 1a34567c90d2USE_SERVER VENDOR
adskflex port=2080 PACKAGE
SERIES_1 adskflex 1.000 COMPONENTS="54700REVIT_2009_0F \
54600ACD_2009_0F 51300INVBUN_11_0F" OPTIONS=SUITE SUPERSEDE
\
ISSUED=09-Jan-2008 SIGN="1707 9EAC CBCB 2405 692E 4A89 \
AA26 30CC 2AC2 D6B3 A61B AB5E 492E 3EBD 0B48 4E75 193A
DA82" \
FC45 C009 E360 944A 14BA E99C 9B24 5A1B 4A44 083A BE5F 3827
\
SIGN2="004A FC90 AB47 3F6B 59BC 0E6D 6681 6971 A76A BA52
98E2 \
5671 26B3 0E78 791B 109F 0591 7DC3 F09F 4D8D 4FB7 E341 4A03
\
CD68 1D77 27F8 8555 9CF7 DEDD 9380"
INCREMENT SERIES_1 adskflex 1.000 permanent 100 \
VENDOR_STRING=commercial:permanent BORROW=4320 DUP_GROUP=UH
\
SUITE_DUP_GROUP=UHV SN=123-12345678 SIGN="1707 9EAC CBCB
\
692E 4A89 FC45 C009 E360 944A 14BA E99C 9B24 5A1B 4A44 BE5F
\
3827 AA26 30CC 2AC2 D6B3 A61B AB5E 492E 3EBD 0B48 DA82" \
SIGN2="004A FC90 AB47 3F6B 59BC 0E6D 6681 6971 A76A BA52
\
5671 26B3 0E78 791B 109F 0591 7DC3 F09F 4D8D 4FB7 E341 4A03
\
CD68 1D77 27F8 8555 9CF7 DEDD 9380"
94 | Chapter 4 Licensing Guide
 Loading...