

Page 1

WinCue Pro News
Version 1.3
User Guide
Autocue Ltd 2002 – All Rights Reserved
Page 2

Page 3

About this guide
The WinCue Pro News prompting solution has been designed for general production
and prompting; its features include Runorder management, simultaneous prompt
and edit, and script timings calculation. WinCue can also be used to connect to
networked newsroom systems, by doing this WinCue is able to open scripts from the
newsroom system and then prompt them. This user guide has been produced to
explain to you how to set-up and use WinCue Pro News, you should also have
received a user guide explaining how to connect WinCue Pro News with your
newsroom system.
Audience
This guide is for all users of the WinCue Pro News prompting software. From complete
WinCue Pro News novices to experts, this guide should be useful to all, providing a
quick reference for experts and step-by-step help for novices. The only pre-requisite
to using this guide is that you should be familiar with the Microsoft Windows
environment, in particular that of Microsoft Word.
Page 4

Contents
About this guide....................................................................................................3
Audience ...............................................................................................................3
1 WinCue Pro News Installation 9
1.1 Hardware Requirements........................................................................10
1.1.1 Before Installing your chosen Operating System.........................11
1.1.2 WinCue Pro News Installation Help ............................................... 11
1.2 The WinCue Pro News Package ........................................................... 11
1.3 IMT Scroll Card ........................................................................................ 12
1.4 Installing the Hardware - Desktop PCs................................................. 12
1.4.1 Installing the I.M.T. Card Inside a PC............................................. 12
1.4.2 Connecting a Scroll Control .......................................................... 12
1.4.3 Connecting a Composite Video Feed......................................... 13
1.4.4 Connecting a Genlock Feed ........................................................ 13
1.5 Installing the Hardware - Laptops.........................................................13
1.5.1 Connecting the I.M.T. Box to a Laptop ........................................ 13
1.5.2 Connecting a Scroll Control .......................................................... 14
1.5.3 Connecting a Composite Video Feed......................................... 14
1.5.4 Connecting a Genlock Feed ........................................................ 14
1.5.5 Connecting a Power Supply..........................................................14
1.6 Restarting Your PC..................................................................................14
1.7 Installing the Software............................................................................ 15
1.8 Starting WinCue Pro News for the First Time ........................................ 16
2 Getting Started with WinCue Pro News 18
2.1 WinCue Pro News Basics........................................................................19
2.1.1 Prompters .........................................................................................19
2.1.2 Script Editor ...................................................................................... 19
2.1.3 The Scroll Controller.........................................................................19
2.2 Starting WinCue Pro News .....................................................................19
2.3 Creating a new Script ............................................................................20
2.3.1 Using toolbars for command shortcuts.........................................22
2.3.2 Adding Markers to a Script ............................................................ 22
2.4 Saving Your Work....................................................................................23
2.4.1 Saving a Script for the First Time .................................................... 23
2.4.2 Saving Changes to the Script ........................................................ 24
2.5 Prompting a Script .................................................................................. 24
2.5.1 Beginning a Prompting Session...................................................... 24
2.5.2 Ending the Prompt Session ............................................................. 25
3 Script Files 26
WinCue Pro News User Guide WinCue Pro News Installation • 4
Page 5

3.1 Script Files ................................................................................................ 27
3.1.1 The Script Editor Window ................................................................ 27
3.1.2 The Script Window........................................................................... 27
3.1.3 The Word Count Boxes ................................................................... 28
3.1.4 The Script Duration Boxes ............................................................... 28
3.1.5 Importing Scripts .............................................................................. 28
3.1.6 IMT Scroll Control ............................................................................. 29
4 Rundown Files 30
4.1 WinCue Rundown Window ................................................................... 31
4.1.1 WinCue Rundown Information Window ....................................... 31
4.1.2 The Script Editor Window ................................................................ 32
4.1.3 Creating a New Story .....................................................................33
4.1.4 Saving Scripts and Rundowns ........................................................34
4.1.5 Moving Stories Within the Running Order ..................................... 35
4.1.6 Renumbering Stories in the Rundown........................................... 35
4.2 Editing Within the Rundown ..................................................................35
4.2.1 New story.......................................................................................... 36
4.2.2 Edit Story ...........................................................................................36
4.2.3 View Story.........................................................................................36
4.2.4 Delete Story...................................................................................... 37
4.2.5 Deleting Multiple Stories ................................................................. 37
4.2.6 Edit Field ...........................................................................................37
4.2.7 Toggle Hold State............................................................................ 38
4.2.8 Prompt From Here ........................................................................... 38
4.3 Working with Multiple Rundowns .......................................................... 38
4.3.1 Tiling windows ..................................................................................38
4.3.2 Cascading Windows.......................................................................39
4.3.3 Arranging Icons ...............................................................................39
4.3.4 Moving Stories Between Rundowns ..............................................39
4.4 Prompting Mode .................................................................................... 39
4.4.1 Entering Prompt Mode ...................................................................40
4.4.2 Controlling Prompted Text .............................................................40
4.4.3 Quitting Prompt Mode.................................................................... 41
5 Printing 42
5.1 Is your Printer setup?...............................................................................43
5.1.1 Network ............................................................................................43
5.2 Print Menu................................................................................................ 44
6 WinCue Pro News Menus 47
6.1 File Menu .................................................................................................48
6.2 Edit............................................................................................................49
6.3 Rundown ................................................................................................. 52
6.4 Format......................................................................................................52
6.5 Insert ......................................................................................................... 54
6.6 Prompt ..................................................................................................... 55
6.7 Automation ............................................................................................. 57
6.8 Master/Slave ........................................................................................... 57
6.9 Tools.......................................................................................................... 57
6.10 Windows .................................................................................................. 59
6.11 Help ..........................................................................................................59
7 WinCue Pro News Configuration 61
WinCue Pro News User Guide WinCue Pro News Installation • 5
Page 6

7.1 Options .................................................................................................... 62
7.2 Access control ........................................................................................ 62
7.3 Data Converters .....................................................................................63
7.3.1 Options For Microsoft Word Files ................................................. 64
7.3.2 Options For RTF Files.........................................................................64
7.3.3 Options For Text Files .......................................................................66
7.4 File Based Queues .................................................................................. 67
7.4.1 Types .................................................................................................67
7.4.2 Presenter Options ............................................................................ 67
7.4.3 Presenters ......................................................................................... 68
7.4.4 Presenter Settings ............................................................................68
7.4.5 Simple Script File Defaults ............................................................... 71
7.5 Master/Slave Interface ..........................................................................71
7.6 Multilingual Support................................................................................ 71
7.7 Prompt Engine ........................................................................................ 74
7.7.1 Auto Captioning.............................................................................. 74
7.7.2 Hardware Settings ........................................................................... 74
7.7.3 Scroll Controls .................................................................................. 79
7.8 User Preferences ..................................................................................... 79
8 Scroll Controls 83
8.1 Scroll Control Types ................................................................................ 84
8.2 Selecting a Scroll Control ...................................................................... 84
8.3 Hybrid Serial/IMT Multibutton ................................................................85
8.4 Connecting a Foot Control ...................................................................89
8.5 I.M.T Card Scroll Port ..............................................................................90
8.6 On-screen Scroll Control........................................................................ 92
8.7 Scroll From Master Machine ..................................................................93
8.8 Serial Multibutton Controller ..................................................................93
8.9 Two Button Serial Controller................................................................... 93
9 Layout Editor 94
9.1 WinCue Pro News Layouts..................................................................... 95
9.1.1 Warning ............................................................................................ 95
9.2 Running the WinCue Pro News Layout Editor .....................................95
9.2.1 Layout Types ....................................................................................96
9.2.2 Display Layout .................................................................................97
9.2.3 Copying a Layout ...........................................................................97
9.2.4 Creating a new Layout .................................................................. 98
9.2.5 Clone Form.......................................................................................99
9.2.6 Editing a Form ................................................................................ 100
9.2.6.1 Adding a Field ......................................................................... 102
9.2.7 Editing Fields................................................................................... 104
9.2.8 Aligning fields and copying their properties ..............................105
9.3 Changing the Layout........................................................................... 107
9.4 Creating a print layout ........................................................................ 107
9.5 Quick Print Layout.................................................................................109
10 PC90 Stands 113
10.1 Using PC90 Stands ................................................................................ 114
10.2 Configuring WinCue............................................................................. 114
10.3 Controlling the stand from WinCue ................................................... 114
10.4 Formatting the scripts for use .............................................................. 115
WinCue Pro News User Guide WinCue Pro News Installation • 6
Page 7

11 PowerPoint Automation 117
11.1 PowerPoint Automation.......................................................................118
11.1.1 Licensing....................................................................................... 118
11.1.2 What you need ........................................................................... 118
11.1.3 What is PowerPoint Agent?........................................................ 119
11.1.4 Installing PowerPoint Agent ....................................................... 119
11.2 Configuring WinCue Pro News............................................................ 120
11.3 Inserting PowerPoint Controls..............................................................124
11.4 WinCue to PowerPoint connection.................................................... 126
11.4.1 Configuring PowerPoint Agent.................................................. 126
11.4.2 Connecting PowerPoint Agent ................................................. 127
11.4.3 Connecting WinCue to the PowerPoint Agent....................... 128
11.5 Triggering PowerPoint Slides ................................................................ 128
12 Master/Slave 130
12.1 The Concept ......................................................................................... 131
12.2 Before you start..................................................................................... 131
12.3 Configuring WinCue for Master/Slave ............................................... 131
12.3.1 Serial Port Connection................................................................ 133
12.3.2 Modem Connection................................................................... 133
12.3.3 Other Master/Slave Configuration Options ............................. 134
12.4 To set-up Master/Slave ........................................................................ 134
12.5 Using Master/Slave ...............................................................................135
13 IMT and SCSI cards 137
13.1 Problem Solving ....................................................................................138
13.1.1 Laptop systems (Slim SCSI 1460a).............................................. 138
13.1.2 Laptop systems (USB Devices) ................................................... 138
13.1.3 Desktop systems (2940xx) ........................................................... 139
13.1.4 Desktop systems (2906)............................................................... 139
13.1.5 WinCue Pro News I/O Error......................................................... 139
13.1.6 Windows 2000 .............................................................................. 140
13.1.7 Other SCSI Conditions.................................................................141
13.1.7.1 SCSI Cards for Desktop PCs .................................................... 142
13.1.7.2 SCSI Cards for Laptops ........................................................... 142
13.1.7.3 USB SCSI Adaptors ................................................................ 142
14 IMT Card Information 144
14.1 Card Layout ..........................................................................................145
14.1.1 Termination - J6............................................................................ 148
14.1.2 Power to Bus for SCSI Termination - J6 ...................................... 148
14.1.3 SCSI ID - SW2 ................................................................................ 148
14.1.4 SCSI/Parallel Select - SW2........................................................... 149
14.1.5 Video (PAL or NTSC) - J11........................................................... 150
14.1.5.1 SECAM ................................................................................. 150
14.1.6 Internal and External Power Supply - J12 .................................150
14.1.7 Composite Video Features Connector - J10 ........................... 151
14.1.8 Other Jumpers ............................................................................. 151
15 Wiring Diagrams 152
15.1 Standalone Prompter Wiring Diagram............................................... 153
15.2 Laptop and I.M.T. Box Wiring Diagram (UK) ...................................... 154
15.3 Laptop and I.M.T. Box Wiring Diagram (US) ......................................155
15.4 Edit Station Wiring ................................................................................. 156
WinCue Pro News User Guide WinCue Pro News Installation • 7
Page 8

15.5 Standalone Edit Station Wiring............................................................157
16 Hand Control Pin outs 158
16.1 WinCue Pro News Multibutton Hand Control....................................159
16.1.1 WinCue Pro News IMT card 9 way d connections .................. 159
16.1.2 9 way d Serial port connections................................................ 159
16.1.3 P4 Multibutton Remote Connector 15 Pin D Male .................. 160
16.2 2 button IMT Hand Control .................................................................. 160
16.2.1 IMT Hand control ......................................................................... 160
17 Shortcuts 162
17.1 Deleting and Copying ......................................................................... 163
17.2 Prompting Shortcuts ............................................................................. 163
17.3 Text Formatting .....................................................................................164
17.4 Menu Commands ................................................................................165
17.5 Function Key Commands ....................................................................165
18 Technical Support 167
18.1 Technical Support ................................................................................ 168
WinCue Pro News User Guide WinCue Pro News Installation • 8
Page 9

1 WinCue Pro News
Installation
WinCue Pro News User Guide WinCue Pro News Installation • 9
Page 10

1.1 Hardware Requirements
WinCue Pro News will run on the Windows 95, 98, Windows NT4 and Windows 2000
operating systems; the minimum hardware requirements and recommended
specifications are as follows:
Windows 95/98
• 133MHz Pentium processor (200MHz Pentium or better is recommended)
• 16MB RAM (32MB RAM is recommended)
• 50MB free disk space
• Adaptec SCSI card 2906 for desktop, Adaptec 1460 SlimSCSI PCMCIA
card for laptop
• PCI or AGP graphics card (AGP preferred)
• 1024x768 16 bit High Colour is recommended
Windows NT 4.0
• 166MHz Pentium processor (200MHz Pentium or better is recommended)
• 32MB RAM (128MB RAM is recommended)
• 50MB free disk space
• Adaptec SCSI card 2906 for desktop, Adaptec 1460 Slim SCSI PCMCIA
card for laptop
• PCI or AGP graphics card (AGP preferred)
• 1024x768 16 bit High Colour is recommended
Windows 2000
• 166MHz Pentium processor (200MHz Pentium or better is recommended)
• 64MB RAM (128MB RAM is recommended)
• 50MB free disk space
• Adaptec SCSI card 2906 for desktop, Adaptec 1460 Slim SCSI PCMCIA
card for laptop
• PCI or AGP graphics card (AGP preferred)
• 1024x768 16 bit High Colour is recommended
Note: IMT Card must have Version 2 ROMs fitted and must use builds 589 or above.
WinCue Pro News User Guide WinCue Pro News Installation • 10
Page 11

1.1.1 Before Installing your chosen Operating System
Before you install your chosen operating system you should configure your SCSI card
in accordance with the documentation supplied with it. Do NOT at this stage install
any hardware supplied with WinCue Pro News.
1.1.2 WinCue Pro News Installation Help
There are issues to look out for when installing WinCue Pro News:
WinCue Pro News works on Window's 95, 98, Window's NT 4.0, Window's 2000 and
Window's XP. Windows ME is NOT supported. It is not recommended to have a SCSI
hard disk or any other SCSI device on the same SCSI bus as the IMT Card.
If you have this setup then see the SCSI documentation below.
We recommend using an Adaptec 29xx SCSI adapter in a desktop PC. If you are
using another Adaptec card e.g. 2906xxx Ensure that the SCSI cards ROM BIOS is not
Version 1.3x, if so apply downgrade, which can be obtained from Autocue.
Note: Not all Adaptec SCSI cards can be downgraded.
Use an Adaptec 1460 Slim SCSI adapter in a laptop PC.
For both desktops and laptops do not use a motherboard that uses an Intel TX
chipset. Only use genuine Intel processors. We recommend you don’t use an Intel
Celeron processor.
Ensure that the installed SCSI drivers match those in the following SCSI
documentation.
1.2 The WinCue Pro News Package
The WinCue Pro News package consists of:
• Software (1 CD plus 1 License diskette)
• I.M.T. Scroll Card
• Scroll Control
WinCue Pro News User Guide WinCue Pro News Installation • 11
Page 12

• Manuals (WinCue Pro News User Guide and a guide to connecting
WinCue to your Newsroom system)
• Laptop users will receive an I.M.T. box, not the I.M.T. scroll card.
1.3 IMT Scroll Card
The I.M.T. scroll card allows WinCue Pro News to prompt text in any language. Data
from the scroll card is sent to the prompter screen via the on-board composite video
channel. The I.M.T. card also features an on-board genlock port. In addition, an I.M.T.
scroll control can be attached to the I.M.T. card leaving all the ports on your PC free
for other peripherals.
1.4 Installing the Hardware - Desktop PCs
Before installing the WinCue Pro News software you have to install the IMT scroll card.
Your PC must be turned off before the I.M.T. scroll card can be installed.
The I.M.T. card will have been configured prior to despatch for the settings required
in your country. Therefore changes to jumpers or dipswitch settings should not be
necessary.
1.4.1 Installing the I.M.T. Card Inside a PC
Remove the cover from the PC’s case.
1. The I.M.T. card should be connected to the end of the SCSI cable.
2. Find a free PCI slot inside the PC.
3. Remove the appropriate blanking plate.
4. Carefully insert the I.M.T. card.
5. Connect the SCSI cable to the I.M.T. card.
6. Replace the PC’s cover.
1.4.2 Connecting a Scroll Control
The standard scroll control used with WinCue Pro News is the I.M.T. scroll control. The
I.M.T. scroll control port is the 9 pin analogue port on the back of the I.M.T. card.
WinCue Pro News expects the scroll control to be connected to this port.
WinCue Pro News User Guide WinCue Pro News Installation • 12
Page 13

See Chapter 7 to learn more about the different scroll controls supported by WinCue
Pro News.
1.4.3 Connecting a Composite Video Feed
This port supplies the composite video feed to the prompter screen(s). The I.M.T card
comes in 3 versions:
Issue 1 card; the composite video output port is the BNC port closest to the
scroll control port on the I.M.T card.
Issue 2 card, the composite video output port is the BNC port furthest the
scroll control port on the I.M.T card.
Issue 3 PCI card, the composite video output port is the BNC port closest to
the scroll control port on the I.M.T card.
1.4.4 Connecting a Genlock Feed
This port accepts a genlock input feed.
Issue 1 card the genlock port is the BNC port furthest from the scroll control
port on the I.M.T card.
Issue 2 cards the genlock port is the BNC port closest to the scroll control port
on the I.M.T card.
Issue 3 PCI card the genlock port is the BNC port furthest from the scroll
control port on the I.M.T card.
1.5 Installing the Hardware - Laptops
The I.M.T. Scroll box must be attached to your Laptop externally, before you connect
it to your laptop make sure your laptop is turned off. The I.M.T. scroll card inside the
I.M.T. box has been configured prior to dispatch for the settings required in your
country. Therefore it should not be necessary to open the I.M.T. box or change
jumpers or dipswitch settings.
See section 11.2 for further information about setting up the WinCue Pro News
hardware on a Laptop.
1.5.1 Connecting the I.M.T. Box to a Laptop
1. Insert the PCMCIA SCSI card into your laptop
2. Connect one end of the SCSI cable supplied with the SCSI card to the
PCMCIA card and the other to the SCSI port on the I.M.T. box
3. Connect a power cord to the appropriate input of the I.M.T. box (you
have a choice of IEC mains or 12V DC)
WinCue Pro News User Guide WinCue Pro News Installation • 13
Page 14

1.5.2 Connecting a Scroll Control
Laptops normally use the I.M.T. scroll control. The I.M.T. scroll control port is the 9 pin
analogue port on top of the I.M.T. box. WinCue Pro News expects a scroll control to
be connected to this port.
The I.M.T. scroll control will not work if it is attached to any other port on your PC.
1.5.3 Connecting a Composite Video Feed
There are 2 versions of the I.M.T. box, one has four BNC composite outputs and the
other has one. These ports supply the composite video feed to the prompter
screen(s). You can connect your video cable to the BNC output.
See section 10.1 for further information about the IMT card layout.
1.5.4 Connecting a Genlock Feed
The genlock port is the BNC port next to the I.M.T. scroll control port on the I.M.T. box.
This port accepts a genlock feed.
1.5.5 Connecting a Power Supply
The I.M.T. box can be powered from one of three different sources; the mains power
supply, 12V DC and an optional PAG battery (UK version only).
A reset button is provided on the I.M.T. box to reset the I.M.T. scroll card.
1.6 Restarting Your PC
Once all the WinCue Pro News hardware has been installed restart your PC.
WinCue Pro News User Guide WinCue Pro News Installation • 14
Page 15

Laptop users must switch on the I.M.T. box before switching on the laptop. This is to
ensure the PCMCIA SCSI card successfully detects the I.M.T. scroll card.
1.7 Installing the Software
It is assumed you have already successfully installed your chosen operating system
on a PC and this meets the minimum hardware requirements.
If WinCue Pro News is being installed on Windows NT 4.0 or Windows 2000 you will
need to be logged in as Administrator.
The software is supplied on CD with a license diskette.
To begin installing WinCue Pro News:
Close all programs running on your computer
Insert the License Disk in the floppy drive of your computer
Insert the CD into your CD drive of your computer (Note: The CD will not auto run)
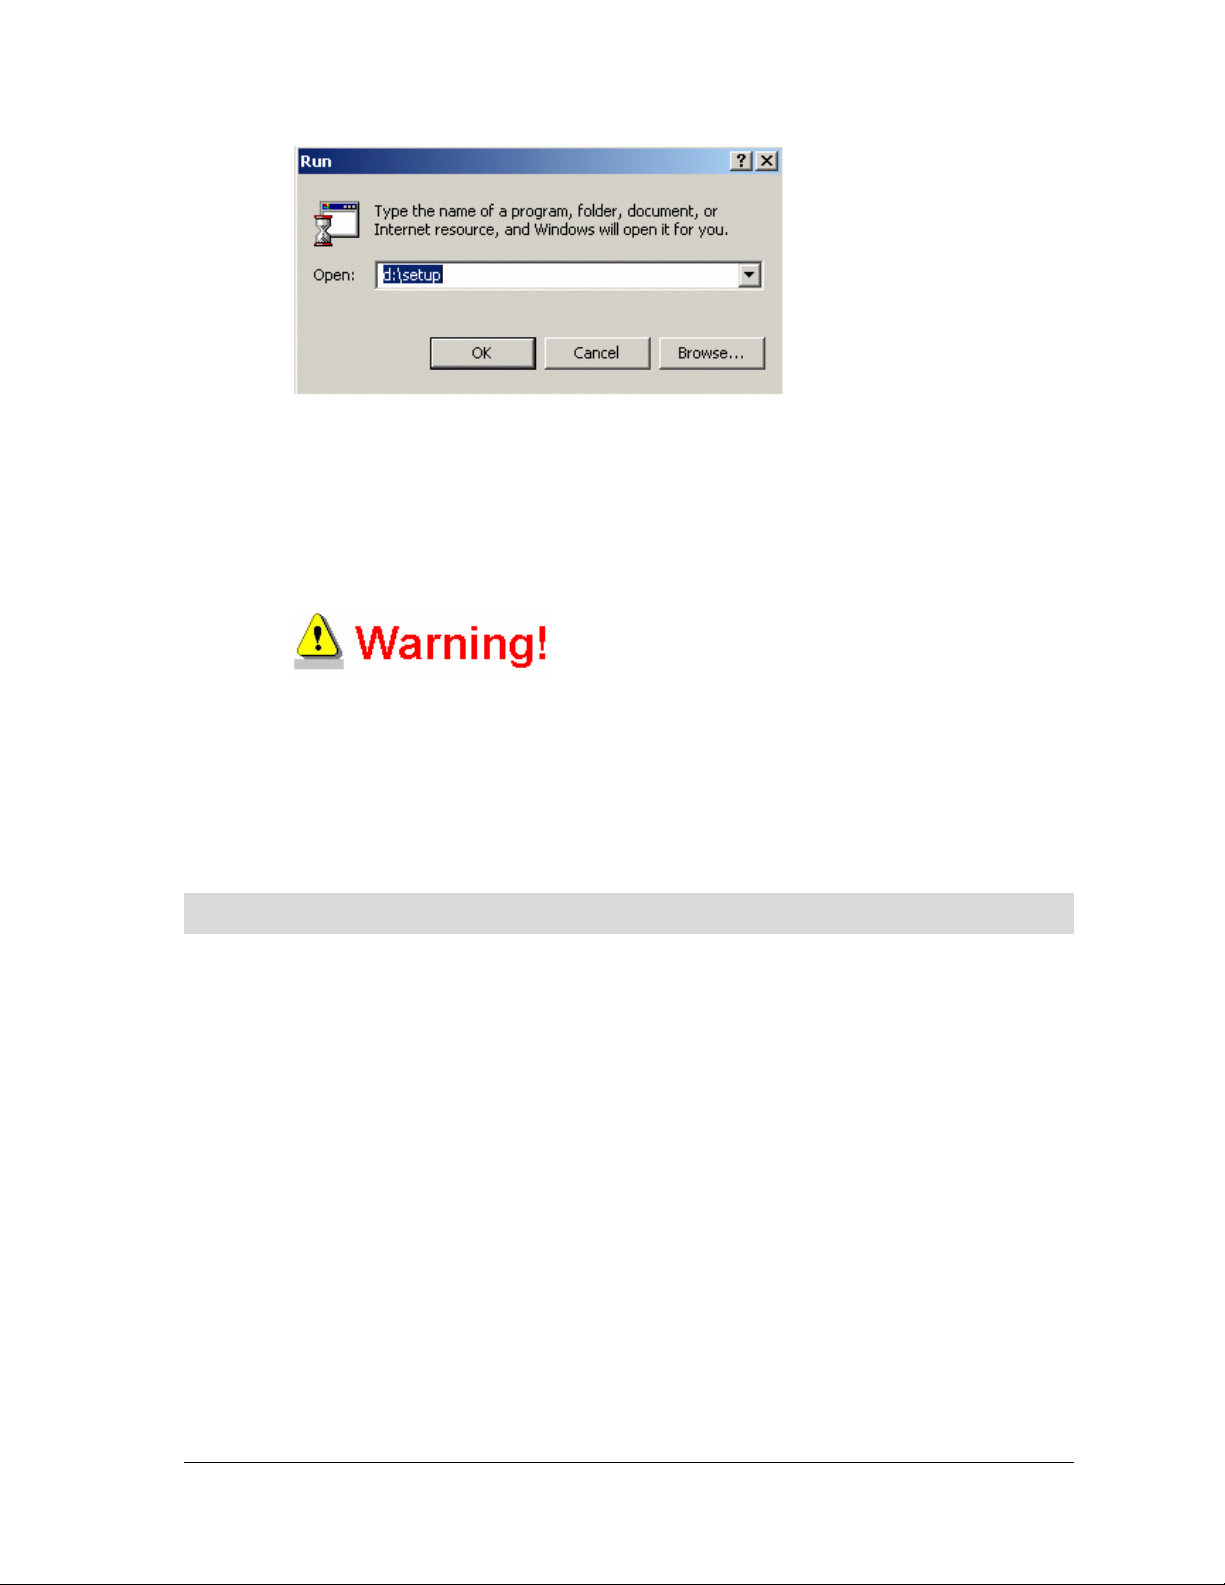
Choose R
un… from the Start menu
The Run dialog box appears. Type in the drive letter of your CD drive followed by the
setup command. E.g. D:\setup in the Open: text box then click on OK.
WinCue Pro News User Guide WinCue Pro News Installation • 15
Page 16
The installation program will load. Follow the on screen instructions carefully.
Once all the software has been copied onto your PC you will need to shut it down
and switch it off to install the I.M.T. scroll card.
The licence included with each copy of WinCue Pro News is designed to work with
the supplied I.M.T. scroll card. It will not work with any other I.M.T. card.
1.8 Starting WinCue for the First Time
When WinCue Pro News starts for the first time the following message appears, “Your
scroll control configuration is not set. WinCue Pro News will now allow you to select
which scroll control your have installed”. Click OK and the Configure Scroll Controls
dialog box appears:
WinCue Pro News User Guide WinCue Pro News Installation • 16
Page 17
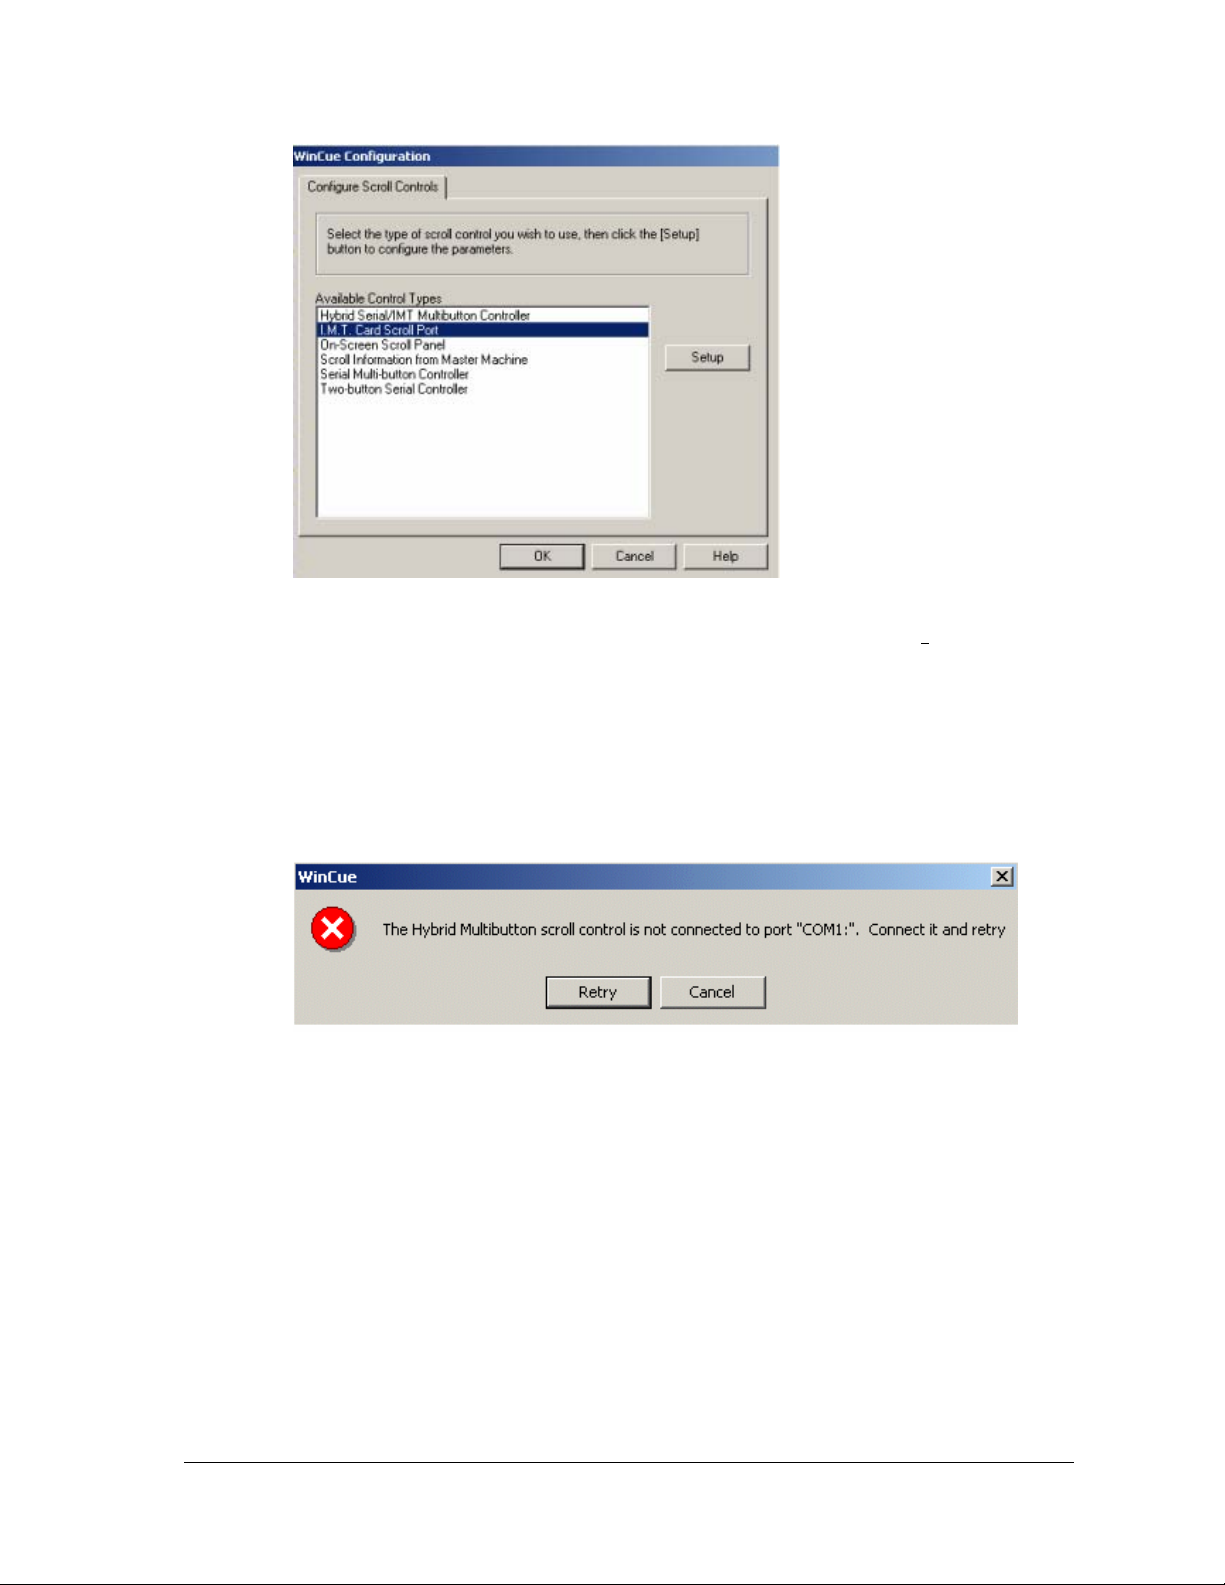
Select the appropriate scroll control from the list of Available Control T
OK.
See Chapter 7 for more information on the different scroll controls.
If the following error message appears:
Make sure that you have your hand control connected to the correct COM port, this
is set in the “Configure Hybrid Serial / IMT Multibutton Controller” set-up menu. If this
has been set correctly then re-select the COM port that you are using. The WinCue
Pro News installation is now complete and
you are ready to begin working with
ypes and click
WinCue Pro News.
WinCue Pro News User Guide WinCue Pro News Installation • 17
Page 18

2 Getting Started with WinCue
Pro News
WinCue Pro News User Guide Getting Started with WinCue Pro News • 18
Page 19

2.1 WinCue Pro News Basics
This section aims to provide those who are unfamiliar with prompting systems with the
basic terms involved.
2.1.1 Prompters
The prompter is normally mounted on the front of the camera and displays the
scrolling text created by the script editor for the presenter to read. The text from the
monitor is reflected onto a special sheet of glass enabling the presenter to see and
read the text.
2.1.2 Script Editor
The script editor is used to write and modify the stories the presenter is going to read.
Each story is represented as a one-line entry in the rundown.
2.1.3 The Scroll Controller
The scroll controller is used to control the prompted text. The prompter operator
controls the speed and direction the text scrolls to suit the presenter.
2.2 Starting WinCue Pro News
Normally, you start WinCue Pro News from within Windows by double clicking on the
WinCue Pro News icon on your desktop:
OR
Click on the Windows Start button, then click on Programs and then select WinCue
Pro News
WinCue Pro News User Guide Getting Started with WinCue Pro News • 19
Page 20
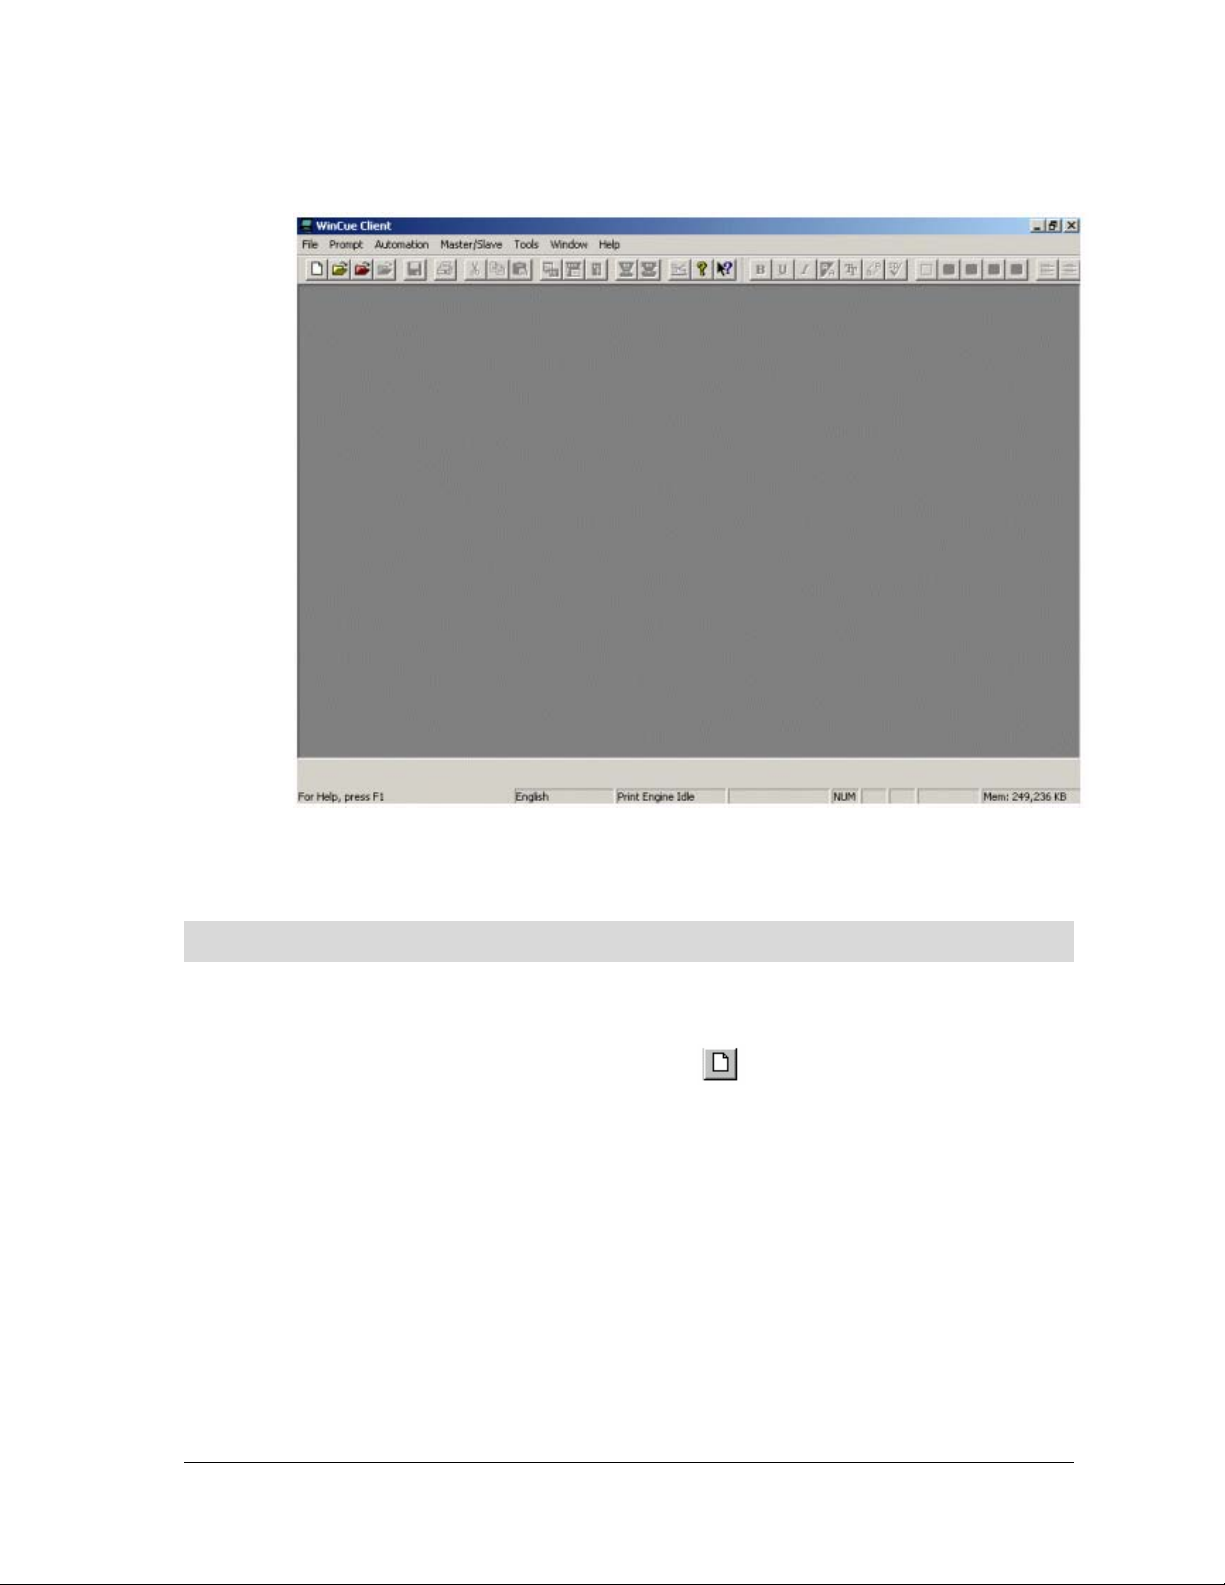
The WinCue Pro News main window will then open.
2.3 Creating a new Script
To create a new script, open the File menu and select New…
OR click the New File button on the Toolbar:
A window called Untitled Simple Script File will appear inside the WinCue Pro News
Client window:
WinCue Pro News User Guide Getting Started with WinCue Pro News • 20
Page 21
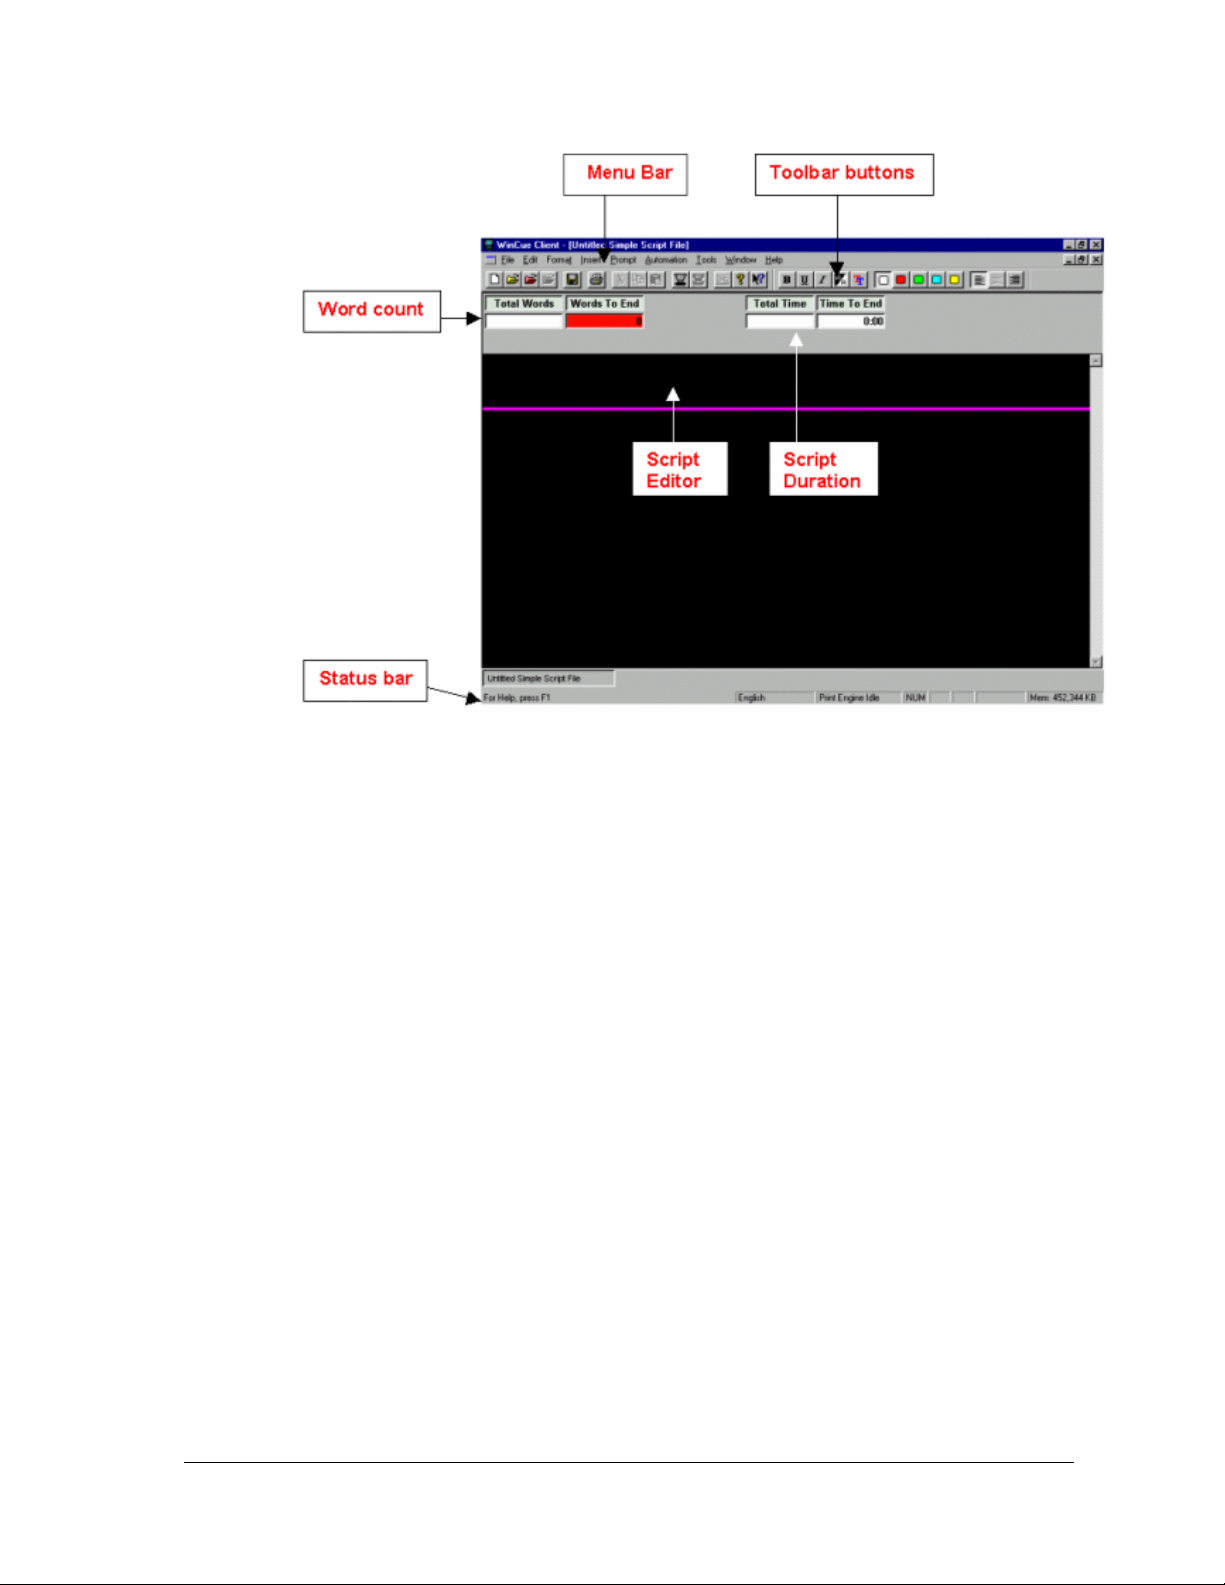
Menu Bar – Shows all the menus that are available in the current editor window.
Toolbar Buttons – This shows the most used buttons. This toolbar can be configured if
you require.
Word Count – These boxes will turn yellow when prompt is enabled.
Total Words - As you type the script into WinCue Pro News, the total words box will
track the number of words that are in the script. The current word count is constantly
updated and displayed.
Words to End – This box will track the number of words remaining in the script, from a
specific point within the script.
Script Duration - These boxes will turn yellow when prompt is enabled.
Total Time – This shows the total length of the script.
Time to End – This displays the time to the end of the script from wherever the cursor is
positioned.
WinCue Pro News User Guide Getting Started with WinCue Pro News • 21
Page 22
Script Editor – This is where you enter your text.
Status Bar – Displays the script file name, printing information and the current
language that you are using.
You can now begin typing your script. When the text reaches the right hand margin,
WinCue Pro News automatically “wraps” the following text to the next line, as in
standard word processors. You can move the cursor to any position in the script and
start typing from there. To start a new line press Return.
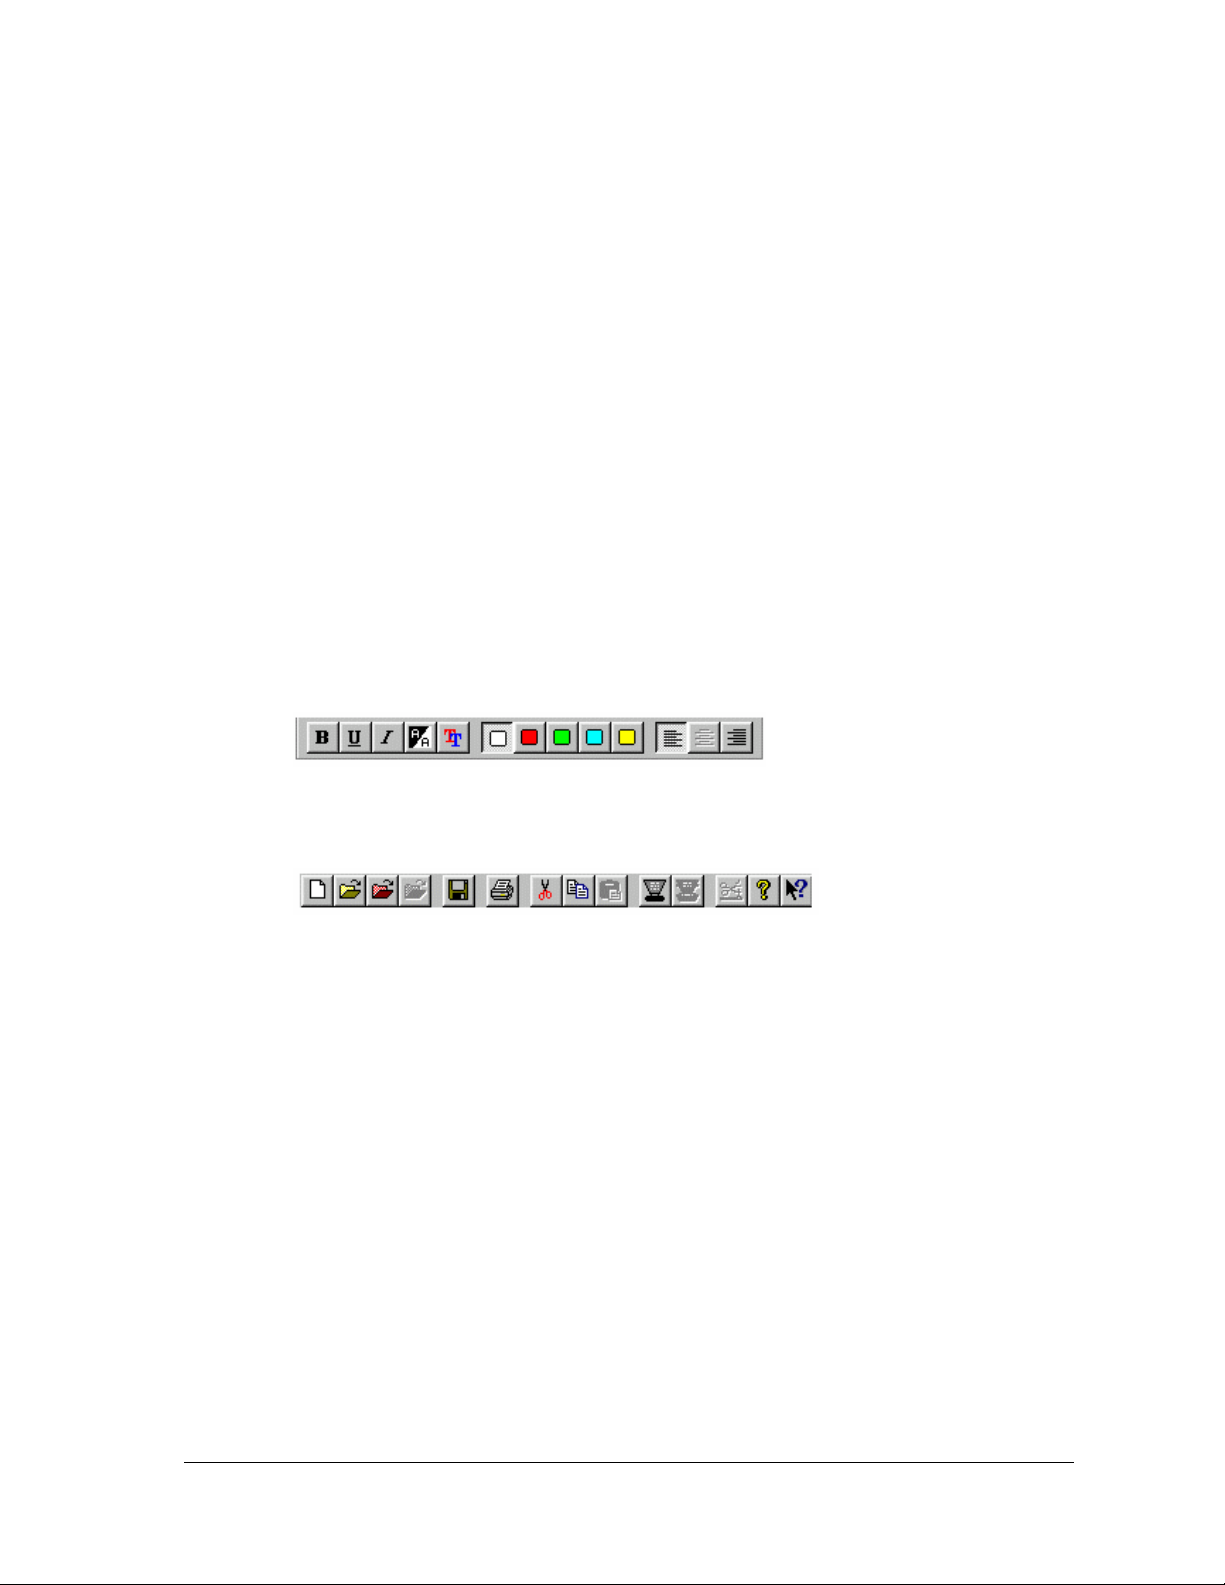
2.3.1 Using toolbars for command shortcuts
Using the mouse to click buttons on the toolbars provides quick access to commonly
used commands and tools.
Formatting toolbar
Standard toolbar
To display or hide a toolbar, open the Tools menu and select Toolbars. From the sub-
menu select the toolbar/s you want to display or hide. The selected toolbars will have
a check mark (9) displayed next to them.
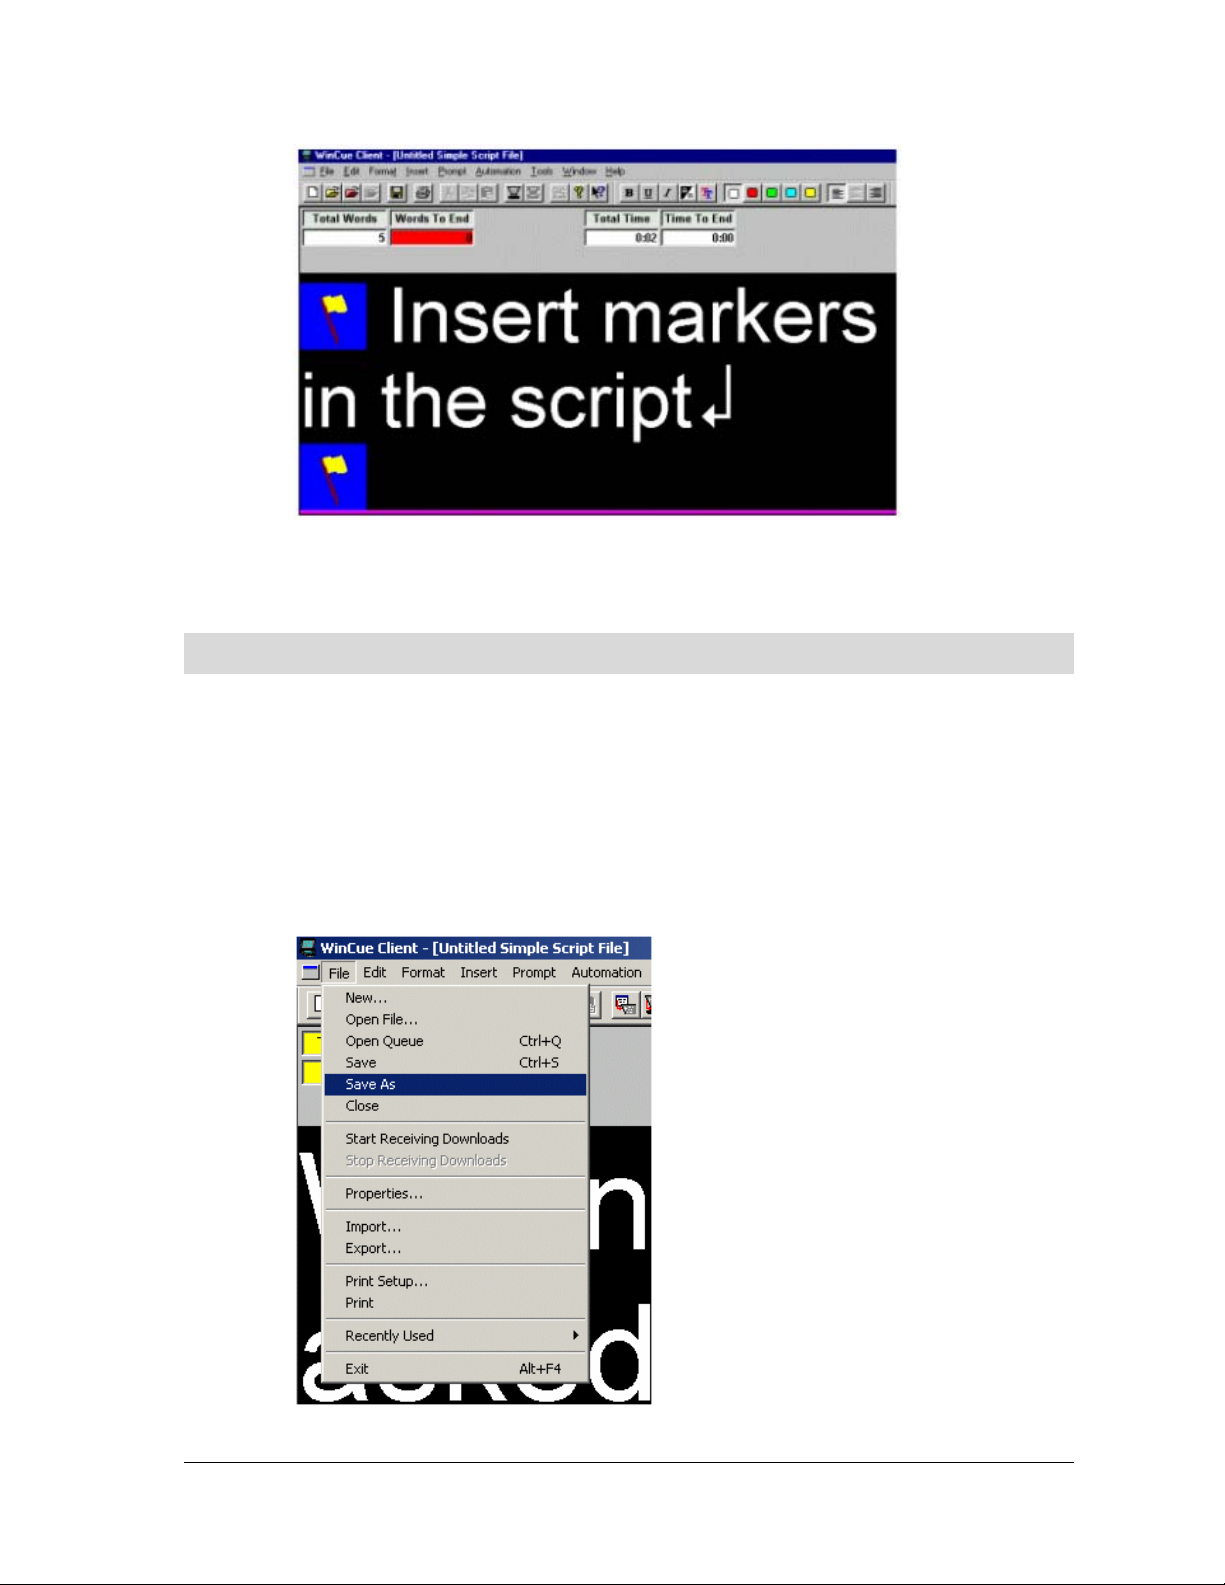
2.3.2 Adding Markers to a Script
When prompting, it is sometimes useful to be able to jump to specific parts of a script
without having to scroll to that point. Markers are placed at points where the
operator may need to jump too.
To insert a marker, move the cursor to the required position in the text, open the Insert
menu and select Marker, or you can use the shortcut keys CTRL + M.
A marker flag is then displayed in the text:
WinCue Pro News User Guide Getting Started with WinCue Pro News • 22
Page 23
2.4 Saving Your Work
It is good practice to save your work regularly, whilst writing your script, just in case
there is a problem with the PC.
2.4.1 Saving a Script for the First Time
To save a script for the first time choose File then Save As from the menu:
WinCue Pro News User Guide Getting Started with WinCue Pro News • 23
Page 24

OR click the Save button on the toolbar:
The Save As dialog box will then appear, select the directory where you would like to
save your scripts in, then enter a File name and click Save.
2.4.2 Saving Changes to the Script
To save further changes to the script open the File menu and select Save… The
changes will be saved to the existing Simple Script File. If you want to save the script
as a new Simple Script File follow the procedure for saving a script for the first time as
above.
2.5 Prompting a Script
Once you have finished typing your script, now its time to prompt it.
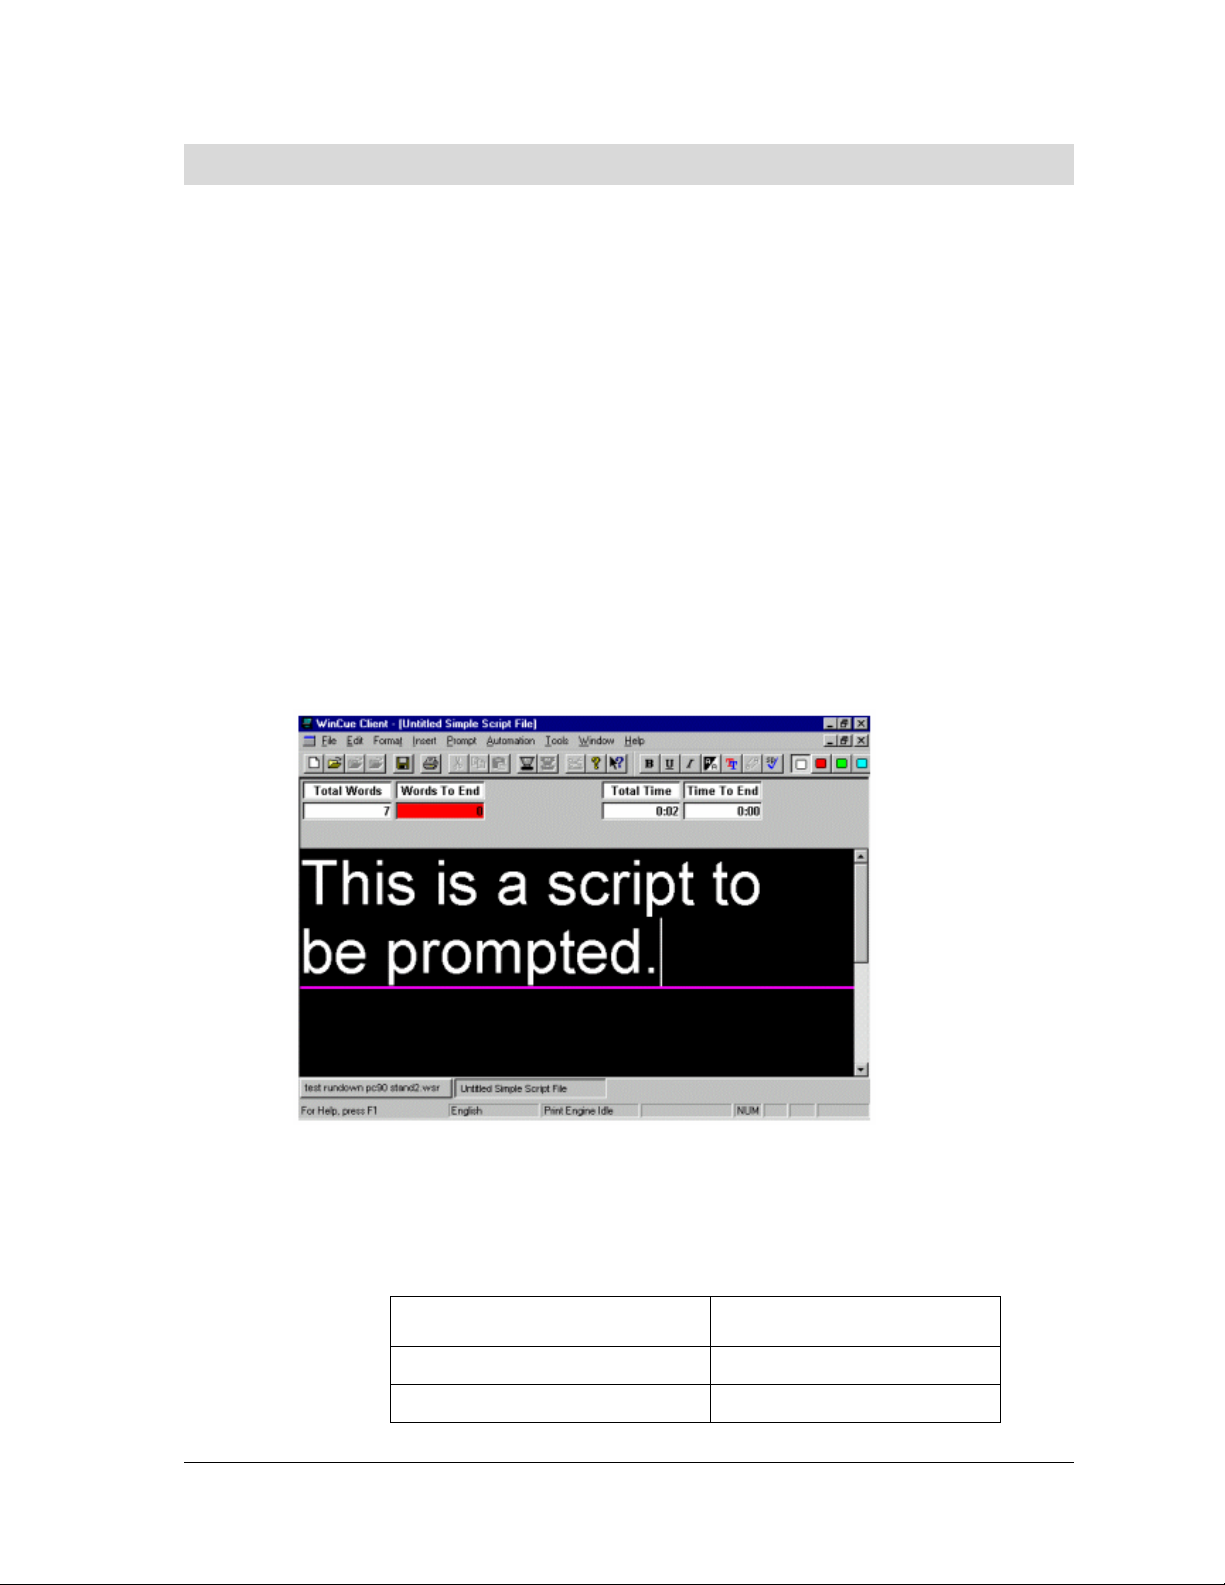
2.5.1 Beginning a Prompting Session
When you are ready to prompt your script choose Prompt then Begin Prompting from
the menu
OR click the Begin Prompting button on the toolbar:
The first few lines of your script will appear on the prompter’s screen. Use the Scroll
control attached to your computer to prompt the text. When prompting the Word
Count box and Time box will turn yellow:
WinCue Pro News User Guide Getting Started with WinCue Pro News • 24
Page 25

2.5.2 Ending the Prompt Session
When you have finished prompting your script choose prompt then Stop Prompting
from the menu.
OR click the Stop Prompting button on the toolbar:
This will clear the prompter’s screen.
WinCue Pro News User Guide Getting Started with WinCue Pro News • 25
Page 26

3 Script Files
WinCue Pro News User Guide Script Files • 26
Page 27
3.1 Script Files
In this Chapter you will learn more about how the simple file script editor works. The
Script Editor is used to create the prompting text and is similar to many Windows
based editors.
3.1.1 The Script Editor Window
The Script Editor is used to create the scripts; the basic functions of the Script Editor
were described in the previous chapter, this chapter explains how to use the Script
Editor in more detail.
3.1.2 The Script Window
The script is created in this window and this represents what will be seen when
WinCue Pro News is in the prompt mode.
WinCue Pro News supports both mouse and keyboard controls. A summary of the
shortcut keyboard controls is shown below. These keystrokes will help you to move
around the editor quickly.
Key To move
HOME To the beginning of a line
END To the end of a line
WinCue Pro News User Guide Script Files • 27
Page 28

Page Up Up one screen
Page down Down one screen
Ctrl + HOME To the beginning of the script
Ctrl + END To the end of the script
3.1.3 The Word Count Boxes
As you type a script WinCue Pro News will keep track of the number of words in the
script. The current word count appears in the Total Words box and is constantly
updated.
WinCue Pro News also displays the number of words to the end of the script from the
position of the cursor within the script. The number of words to the end of the script is
displayed in the Words To End box.
3.1.4 The Script Duration Boxes
The time taken for a person to read a script from the prompter screen will depend on
the number of words in the script and how fast that person reads. WinCue Pro News
uses the current word count and the presenters read rate to calculate the duration
of the script. The script duration, in seconds, is displayed in the Total Time box and this
is also constantly updated.
The default read rate of 180 words per minute is used if the read rate is unknown. The
default read rate can be changed for each presenter. These settings will be covered
later on in this handbook
WinCue Pro News also displays the time to the end of the script from the position of
the cursor within the script. This is calculated in the same way as the Total Time. The
time to the end of the script is displayed in the Time To End box.
3.1.5 Importing Scripts
As well as typing in scripts you can import files into WinCue Pro News. Place the cursor
where you want the imported text to be placed in the script then click on import,
which is located in the file menu. If you prefer to keep you imported scripts
separately you can have as many WinCue Pro News *.wss files open as you require.
WinCue Pro News User Guide Script Files • 28
Page 29

Note: Remember you can also drag and drop files into the script window.
WinCue Pro News File Types – *.WSS – WinCue Pro News Simple Script File
3.1.6 IMT Scroll Control
The two button I.M.T control allows you to scroll the text up and down the screen and
jump between markers.
To scroll your text, turn the knob at the end clockwise to speed up and anti-clockwise
to slow down.
To change the direction of the prompted text, press the BLACK BUTTON.
To jump to the next marker press the RED BUTTON.
WinCue Pro News User Guide Script Files • 29
Page 30

4 Rundown Files
WinCue Pro News User Guide Rundown Files • 30
Page 31

4.1 WinCue Rundown Window
A WinCue Rundown basically a collection of simple script files. Using a rundown is a
better way to look after multiple scripts. By the end of this chapter you will be able to
prompt using multiple rundowns. Editing scripts is done in just the same way as in the
simple script files editor.
This chapter assumes that you have the basic knowledge the script editor.
The WinCue Pro News Rundown window consists of two parts, the WinCue Rundown
and the Script Editor. The rundown displays a list of the stories, which will be displayed
for the presenter. The stories are then prompted in the order they appear in the
rundown list. The Script editor is used to create the text attached to each of the
stories.
When a new runorder is first opened this is what you will see:
4.1.1 WinCue Rundown Information Window
ID - This provides a unique number for all stories in the rundown and is not connected
with the running order.
WinCue Pro News User Guide Rundown Files • 31
Page 32

Story Title - Simply a title to identify the individual stories.
Words - Provide a word count of the number of words in the script displayed in the
Script Editor.
Link - This is the time for this script based on the set read rate. (Default read rate 180
words per minute).
Modified - This is used in the WinCue Pro News system and it indicates the time when
the story was last changed.
Status - This is used in the WinCue Pro News system and it indicates weather a story is
missing or when a story has received a story updated over a network.
4.1.2 The Script Editor Window
The script is created in this window and this represents what will be seen when
WinCue is in the prompt mode. The text by default is white on a black background:
The Script editor is used to create the scripts. The basic functions of the Script Editor
were described previously.
The Script Editor window displays the Story title at the top and below three text boxes.
Firstly the ID number of the story is displayed in the first box labelled ID. Secondly the
word count box which displays the number of words in the script, labelled Words.
Finally the duration of the script based on the number of words and the set read rate
is displayed in the box labelled Time.
WinCue Pro News User Guide Rundown Files • 32
Page 33

The size of the Script Editor window can be adjusted. As you move the pointer onto
the left hand side of the frame the pointer changes shape. When the pointer
changes shape click the mouse button and drag to the desired width.
4.1.3 Creating a New Story
The first step in creating a new rundown is creating a new story. To create a new
stories select Story, then New from the menu or press the insert key. A sub menu
appears and from this you can select Single-column Script or Single-column Break.
Choose Single-column Script and the New Item Title dialog box appears. Enter the
story name in the text box and click OK. The story name should be one or two word
description of the story.
A Single-column Break can be used to split the rundown into sections. The total times
for each section can be displayed in the running order by the break item.
WinCue Pro News User Guide Rundown Files • 33
Page 34

The title of the story will appear in WinCue Pro News Rundown window under the
Story Title heading.
A black bar on the rundown order indicates the story you have selected.
To attach text to the story using the Script Editor, double click on the line of the story
in the WinCue Pro News Rundown window. A black bar on the rundown order
indicates the story you are currently prompting. The Story Title will be shown at the
top of the Script Editor box. The cursor is automatically placed in the Script Editor
window and you can type in the accompanying script to the story. The text written in
the Script Editor will appear on the prompter’s output.
To quit the Script Editor press the Esc (Escape) key on the keyboard.
Creating a new story adds a line to the rundown. The text for this item can be
attached to this story using the script editor Choose Story, then New from the menu.
A sub menu appears and from this you can select Single-column Script or Single-
column Break. Choose Single-column Script and the New Item Title dialog box
appears. Enter the story name in the text box and click OK.
4.1.4 Saving Scripts and Rundowns
It is good practice to save the rundown and scripts regularly to ensure no information
is lost accidentally. To save rundown and accompanying scripts, choose File, Save As
from the menu. A Save As dialog box will be displayed. Enter the name of the
Rundown in File name text box and click on Save.
Use the Save button on the toolbar to save your work:
To save changes made to a script choose File Save from the menu. The script
changes will be added to the existing file.
WinCue Pro News User Guide Rundown Files • 34
Page 35

4.1.5 Moving Stories Within the Running Order
The stories within a rundown can be reordered very easily using the drag and drop
facility in WinCue Pro News. Drag-and–drop is the easiest way to move a story within
a Rundown. Select the story you want to move by pointing to it and hold down the
left-hand mouse button. When the drag and drop pointer appears, drag the dotted
insertion point to the new location. Release the mouse button to drop the story in its
new place in the runorder.
4.1.6 Renumbering Stories in the Rundown
The stories within a rundown can be renumbered at any stage when lines are added
or deleted. Choose Rundown, then Renumber from the menu.
4.2 Editing Within the Rundown
It is possible to edit the rundown and the attached stories in the rundown window.
This will be quicker and often more convenient than the pull down menus. To do this
click once with the right mouse button on the story you wish to edit. A menu appears
next to the cursor. This section describes the commands available from this menu.
WinCue Pro News User Guide Rundown Files • 35
Page 36

4.2.1 New story
To add a new story to the rundown, click once with the right mouse button on the
position in the rundown where you want it to appear. A sub menu appears next to
the cursor. Select New from this menu, you can then select Single-column Script or
Single-column Break. Choose Single-column Script and the New Item Title dialog box
appears. Enter the story name in the text box and click OK.
4.2.2 Edit Story
To do this click once with the right mouse button on the line you to view. A menu
appears next to the cursor. Select Edit Story from this menu. The item can then be
edited.
The item can also be edited by selecting it from the rundown list and then using the
menu commands. Choose Story, then Edit from the menu.
Finally, you can edit the attached script by double left clicking on the story and the
Script Editor window appears.
4.2.3 View Story
To do this click once with the right mouse button on the line you to view. A menu
appears next to the cursor. Select View Story from this menu. Viewing the text allows
you to read the text attached to a story but does not allow you to make changes to
it.
The item can also be viewed by selecting it from the rundown list and using the menu
commands. Choose Story, and then View from the menu.
Finally, you can view the attached script by double left clicking on the story and the
Script Editor window appears.
WinCue Pro News User Guide Rundown Files • 36
Page 37

4.2.4 Delete Story
It may be necessary to delete stories from the rundown. To do this click once with the
right mouse button on the line you wish to delete. A menu appears next to the cursor.
Select Delete from this menu. A dialog box will appear Sure you want to delete this
item? Click Yes to delete. The item will be deleted from the rundown and the text
from the Script Editor.
The item can also be deleted by selecting it from the rundown list and using the
menu commands. Choose Story, then Delete from the menu. A Dialog box Sure you
want to delete this item? will appear. Click on Yes to delete.
4.2.5 Deleting Multiple Stories
It may be necessary to delete multiple stories from the rundown. This removes the
highlighted lines and the attached text contained in the Script Editor.
Hold the Ctrl key on the keyboard and click once on each of the stories you wish to
delete from the Rundown. Choose Story, then Delete from the menu. A Dialog box
Sure you want to delete this item? will appear. Click on Yes to delete.
Alternatively, hold the Ctrl key on the keyboard and click once on each of the stories
you wish to delete from the Rundown. Click once on the right mouse button on any
highlighted story. A menu appears next to the pointer. Choose Delete from the
menu. A Dialog box Sure you want to delete this item? will appear. Click on Yes to
delete.
4.2.6 Edit Field
The unique title field in the rundown simply identifies each individual story. The title
field should contain a one or two word description of the story. To do this click once
with the right mouse button on the story you wish to edit. Choose Edit Field from the
menu. The title field will now appear white indicating you can now edit. Make your
changes and when you are happy click on the left-hand mouse button or press
enter.
WinCue Pro News User Guide Rundown Files • 37
Page 38

If you have a three-button mouse it’s even simpler. Just click on the story you wish to
edit with the middle mouse button.
To edit the field directly with a two button mouse press Ctrl and press the right hand
button on the mouse to edit the field directly.
4.2.7 Toggle Hold State
Toggle Hold State allows you place an item in the rundown, which will not be
prompted and will not be included in any timing calculations. This allows stories to be
on standby. To do this click once with the right mouse button on the line you wish to
hold. A menu appears next to the cursor. Select Toggle Hold State from this menu.
The item selected turns blue.
4.2.8 Prompt From Here
The Prompt From Here command allows you to begin prompting from anywhere
within the rundown. To do this click once with the right mouse button on the line you
wish to begin prompting at. A menu appears next to the cursor and select Prompt
From Here. The rundown then goes into prompting mode and the item selected, as
the first turns yellow.
4.3 Working with Multiple Rundowns
WinCue Pro News will allow the user to have a large number of rundowns and Script
Editor windows open at the same time. However, to limit the confusion it is best to
have only one open at a time.
WinCue Pro News provides a number of standard tools to help organise multiple
rundown windows. The rundown windows currently opened are displayed on the
window bar.
4.3.1 Tiling windows
The windows can be tiled this enables the operator to see part of all the rundowns on
one screen. The way in which the windows are tiled depends on how many are
open.
WinCue Pro News User Guide Rundown Files • 38
Page 39

If you wish to see only the Rundown windows, then close all the Script Editors
windows. Choose Window, then Tile Horizontally or Tile Vertically from the menu. The
tilling can be horizontal or vertical depending on what you prefer. To make a window
active choose the corresponding Rundown name from the window and click on it.
4.3.2 Cascading Windows
Cascading windows arranges all the open windows one behind each other with their
titles visible. The top window is the only one that can be seen complete.
Once again if only the Rundowns are to be cascaded, close all the script editors.
Choose Window, and then Cascade from the menu. All the open windows are
stacked so their titles are visible.
To bring a chosen rundown to the front, choose click on the rundown name in the
stack or click on title on the status bar.
4.3.3 Arranging Icons
All the open windows can be minimised to icons. These icons can become
disorganised; Arrange places them in an orderly fashion.
Choose Window, then Arrange from the menu. All the icons will be arranged in an
orderly fashion at the bottom of the WinCue Pro News window in the Status bar.
4.3.4 Moving Stories Between Rundowns
Stories can be moved between Rundowns very easily using the drag and drop
facility in WinCue Pro News Drag-and–drop is the easiest way to move a story
between Rundowns. Select the story you want to move by pointing to it and hold
down the left-hand mouse button. When the drag and drop pointer appears, drag
the dotted insertion point to the new location. Release the mouse button to drop the
story in its new place in the Rundown.
4.4 Prompting Mode
When WinCue Pro News enters the prompting mode the stories in the chosen
rundown can be scrolled. The prompter operator controls the speed at which the
WinCue Pro News User Guide Rundown Files • 39
Page 40

text is scrolled to suit the presenters read rate. The stories within a rundown can be
skipped or returned as necessary.
4.4.1 Entering Prompt Mode
To start the prompter choose Prompt, then Begin Prompting from the menu. The first
item on the rundown list appears yellow indicating that this is the current item
prompting. The prompter operator can now control the text on the prompter using
the scroll controller.
ww bar on the rundown indicates the story you have selected.
o
l
l
e
A yy
o
l
l
e
y
w
o
l
l
e
Or click on the prompt icon on the menu bar:
4.4.2 Controlling Prompted Text
The prompter operator uses the scroll controller to vary the text scroll speed, the
direction, to skip backwards and forwards between stories in the rundown. There are
a number of other options available, within the Prompt menu, when prompting.
Choose Prompt, then any of the following from the menu:
E
dit at Prompt Position Allows editing at current position
Script Lock Mode Stops prompting and set prompter at
the beginning of current item
Jump prompt to editor Skips to start of current item and
continues prompting
Refresh Prompt Output Skips back a couple of lines and
continues prompting
A check mark (9) indicates the command is on.
WinCue Pro News User Guide Rundown Files • 40
Page 41

4.4.3 Quitting Prompt Mode
To quit the prompter, choose Prompt, then Stop Prompting from the menu.
Or click on the stop-prompting icon on the menu bar:
WinCue Pro News User Guide Rundown Files • 41
Page 42

5 Printing
WinCue Pro News User Guide Printing • 42
Page 43

5.1 Is your Printer setup?
Firstly make sure that you have a printer installed on your system, if not you will see
this warning message if you try to access the printer setup menu:
Once your printer is installed correctly you can then setup your printer.
The printer setup menu is there to inform you of your printer’s configuration, the
options in there are all self-explanatory.
5.1.1 Network
If your prompter PC has a network connection then you can also print a script over
your network.
Note: If you're not sure about setting up a network printer consult your network
administrator.
WinCue Pro News User Guide Printing • 43
Page 44

5.2 Print Menu
There are 3 ways to print from within WinCue Pro News.
You can click on the print icon on the task bar:
You can go to the file menu and select print or with the view on the runorder window
you can select Runorder Print Scripts.
Whatever method you choose you will be presented with this Print window:
WinCue Pro News User Guide Printing • 44
Page 45

Printer – This shows you the printer(s) that are installed on your system. The properties
tab will allow you to change the settings for your printer.
Print Range – This will allow you to specify which pages of a script to print.
Copies – This sets how many copies are printed.
Print Layout – The print layout specifies how your scripts will be printed.
There are three Print Layout options that you can choose from:
Simple Script File Layout will print out you script in draft mode e.g.
WinCue Pro News User Guide Printing • 45
Page 46

And all of the formatting information will be lost.
The print size has been scaled to be 1/3 the original font size that you are using in the
editor. This means that the size of the text in the editor is directly related to the size of
the font in your printouts
The Scaling size and the formatting for your printouts can be changed,
See Chapter 8 Layout Editor for more information about customising WinCue Pro
News.
WinCue Pro News User Guide Printing • 46
Page 47

6 WinCue Pro News Menus
WinCue Pro News User Guide WinCue Pro News Menus • 47
Page 48

6.1 File Menu
New – This opens the new file dialogue box.
Open File – This opens the open file dialogue box, if you click on a non-WinCue Pro
News file such as a word or text file then WinCue Pro News will import the selected
file. You may open more than one file at any time and just switch between them by
minimizing the file that you don’t want, but only one file can be active “being
prompted” at any time. All WinCue Pro News files will have one of the following file
extensions, *.wss or *.wsr. These files cannot be imported into one another.
Save – Click on this to save your work.
Save As – If you want to re-name your file or save the file in a different location.
Close – Close the currently open script file window. Remember you can have more
that one file open at any time.
Properties – This is used to change how the currently opened file is displayed, and to
add presenters.
Import – If you are importing a non-WinCue Pro News file this option will open a file
import dialogue box. If you click on the down arrow on the file type window you will
see a list of supported files.
Export – If you want to open the WinCue Pro News script using Microsoft word then
you will have to export your file using this function. This is a list of formats that WinCue
Pro News will convert its file to.
WinCue Pro News User Guide WinCue Pro News Menus • 48
Page 49

Print Setup – This will open the printer setup screen.
Print – this opens the print options box
6.2 Edit
Cut – This becomes active when you highlight a section of text, you can then remove
the selected text by selecting Cut from the menu or by using the keyboard shortcut
Shift+Del or by clicking on the cut icon.
Copy – This becomes active when you highlight a section of text, this is useful when
you want to copy large portions of text within your story.
WinCue Pro News User Guide WinCue Pro News Menus • 49
Page 50

Paste – This becomes active after you have cut a section of text from your script, you
can then paste it else where in the story.
Paste Special – When this is selected you will this menu.
If you need to paste a section of text in within your current script in a different format
then you can use one of the available formats to do this. Depending on which
format you select you will be presented with a Paste Settings window – see 6.3 Data
Converters for more information.
Select All – This will select all the text in your current script.
Find – Use this to find words within the script.
Type in the word that you want to search for then click Ok to begin the search. This
will then find the first instance of the specified word in the script.
By clicking on the Special Characters tab you can search for these additional
characters.
WinCue Pro News User Guide WinCue Pro News Menus • 50
Page 51

Find Next - If you want to continue searching for a word you can use this function.
Each time the word that you have specified is found it will be highlighted.
Replace – Use this to automatically search and replace words within the script.
Spell Check – Once spell checking is selected you will see this window.
Note: Spell checking will start from wherever the cursor is in the script.
Ignore – Will ignore the current word in the “consider changing” box.
WinCue Pro News User Guide WinCue Pro News Menus • 51
Page 52

Ignore All – will ignore all instances of the same word within the current script.
Change – Will change the current “consider word” to one that is in the dictionary.
Change All – Will change every instance of the current word to the one that has
been suggested.
Add To Dictionary – Use this to add more words into the WinCue Pro News Dictionary.
Add To Auto-correct – If you want to automatically change particular words click on
this to add them to the Auto-correct dictionary.
Suggest More – Click on this to see if there are more suggestions for a particular word.
6.3 Rundown
To see this menu the Runorder list has to be the active window.
Renumber – Select this option to number the scripts in your Rundown sequentially.
Trashcan - This function is not available in WinCue Pro News.
Print Scripts – Use this option to print the scripts in your Rundown.
Renumber Shots – This function is not available in WinCue Pro News.
6.4 Format
To see this menu the WinCue Pro News Editor has to be the active window.
WinCue Pro News User Guide WinCue Pro News Menus • 52
Page 53

The first section shows standard word processing formatting functions; these options
are also on the toolbar.
Not Captioned – When this is selected any text that you don’t want to go to the
Caption Generator is highlighted as shown.
Not Prompted – For text that you don’t want to be prompted you can use the Not
Prompted option. The text will then be highlighted as shown in the editor but will not
appear on the prompter screen.
WinCue Pro News User Guide WinCue Pro News Menus • 53
Page 54

All Text
Use this option to format all the text with a script
Leave – This will leave the text as it is.
On – This will turn on the formatting function that you have selected and format the
script.
Off – This will remove the formatting from the script.
6.5 Insert
Presenter - This will insert presenters into the script. As standard there is only the
Default presenter available
See 6.42 Setting up presenters.
WinCue Pro News User Guide WinCue Pro News Menus • 54
Page 55

When you select your presenter and click ok you will see the presenter icon in the
script.
Marker – Click on this to add story markers.
When prompting, it is sometimes useful to be able to jump to specific parts of a Script
without having to scroll to that point. This problem is overcome by adding Markers;
these are placed at points where the operator may need to jump to.
Place the cursor where you want the marker to be inserted, click on the Insert menu
and select Marker or press <CTRL + M>.
6.6 Prompt
Begin Prompting – Click on this to enable the prompt output.
Stop Prompting – This will deactivate the prompt output.
WinCue Pro News User Guide WinCue Pro News Menus • 55
Page 56

Tracking - When this is ticked the text in the editor will follow the prompt output.
Edit At Prompt Position – This is useful when tracking has been disabled. When it is
selected the editor screen will jump to wherever the cursor is on the prompt output.
Script Lock Mode – When this is selected the prompt output is locked to the editor
position.
Note: that this will disable the scroll control.
Jump Prompt To Editor – This will force the prompt output to go to the same position in
the script as the editor.
Refresh Prompt Output – This will refresh the prompt output screen.
Genlock – This is used to lock the video output signal to an external synchronisation
signal.
Invert Colours – This will invert the colours of the prompt output screen.
Note: This is not the same as Inverse on the menu bar.
Activate AutoCaption – Only used if you have captioning enabled in your license.
Deactivate Autocaption – Switches off the above.
WinCue Pro News User Guide WinCue Pro News Menus • 56
Page 57

6.7 Automation
These functions are only available if you have purchased an Automation Controller,
or.
See the PC90 Stand and PowerPoint sections for more information about setting up
these functions.
6.8 Master/Slave
These functions are only available if you have purchased the master/slave system.
See the Master/Slave section for more information about setting up this function.
6.9 Tools
Toolbar – If you want to remove any of the toolbars from the WinCue Pro News
desktop you can do this from here
WinCue Pro News User Guide WinCue Pro News Menus • 57
Page 58

Standard Toolbar
Formatting Toolbar
Status Bar
Window Bar – Shows which files are loaded in WinCue Pro News
Log Output – Displays information about the WinCue Pro News system.
Customise - This feature is not available in this version of the WinCue Pro News
software.
Server Administrator – This feature is not available in this version of WinCue Pro News
software.
WinCue Pro News User Guide WinCue Pro News Menus • 58
Page 59

Server Monitor – This feature is not available in this version of WinCue Pro News
software.
Layout Editor – See Chapter 8 The Layout Editor.
Options – See Chapter 6 for configuration information.
6.10 Windows
Cascade – This re-sizes the windows so that they overlap one another.
Tile Horizontally – If you have more than one runorder open you can have both
displayed horizontally at the same time.
Tile Vertically – If you have more than one runorder open you can have both
displayed vertically at the same time.
Close – This will close the current WinCue Pro News file.
Next Item – This will move down an item in the runorder.
Previous Item – This will move you up an item in the runorder.
Untitled Simple Script File – This shows the file that is currently active. If there are two
or more files loaded the active file will have a tick by its name.
6.11 Help
Index – Opens the WinCue Pro News Help file.
WinCue Pro News User Guide WinCue Pro News Menus • 59
Page 60

Help – Opens the WinCue Pro News Help file.
Tip Of The Day – There are no tips available for WinCue Pro News.
About – This will give you information about the WinCue Pro News system that you
have purchased.
WinCue Pro News User Guide WinCue Pro News Menus • 60
Page 61

7 WinCue Pro News
Configuration
WinCue Pro News User Guide WinCue Pro News Configuration • 61
Page 62

7.1 Options
The Tools Options Menu is used to configure how your WinCue Pro News prompter will
work.
Click on the Tools on the tool bar then select Options from the pull down menu.
7.2 Access control
If you do not want other users to be able to change the WinCue Pro News set-up
then you can give each user, specific user rights.
Security – This is where you add specific user names to the WinCue Pro News system.
These names must match the Windows log on names.
WinCue Pro News User Guide WinCue Pro News Configuration • 62
Page 63

This is the list of privileges that a user can set:
7.3 Data Converters
This section explains the settings that can be used to handle the conversion of non-
WinCue Pro News files that are imported into WinCue Pro News.
WinCue Pro News User Guide WinCue Pro News Configuration • 63
Page 64

7.3.1 Options For Microsoft Word Files
Common - If you do not want to see the import dialogue box then tick this setting.
Select Default Font - This setting is used when you import a file that contains fonts that
are not available on your computer. By selecting a font from the list and clicking on
the tick box, WinCue Pro News will automatically replace the non-valid font with the
one you selected.
Import Overrides – If you have to change the character set or locales that are used
when importing word files then you can change this here.
Code Page – used to change the default code page for imported files.
7.3.2 Options For RTF Files
Translate Carriage Returns to Spaces - If this setting is selected carriage returns will be
converted into spaces. Without this setting being selected WinCue Pro News will
convert the single returns into double returns, so it’s a good idea to select this setting.
Combine Multiple Spaces into Singles - If this setting is selected large spaces within
the imported text will be reduced to a single space.
Strip leading Spaces from Lines - If this setting is selected spaces at the start of lines
will be removed.
Dot Space Converts to Carriage Return - If this setting is selected then any spaces
after a dot will be converted into a new line.
WinCue Pro News User Guide WinCue Pro News Configuration • 64
Page 65

Check For Special Character - E.g. /M =Marker When this option is ticked when any
occurrences of this character is detected within the imported text file a marker will
be placed in the script.
Automatically use these settings - If this setting is selected then whenever you import
one of these file types it will use the settings that have been selected without giving
you the opportunity to change them.
Select Default Font - This setting is used when you import a file that contains fonts that
are not available on your computer. By selecting a font from the list and clicking on
the tick box, WinCue Pro News will automatically replace the non-valid font with the
one you selected.
Import Overrides – If you have to change the character set or locales that are used
when importing word files then you can change this here.
Code Page – used to change the default code page for imported files.
WinCue Pro News User Guide WinCue Pro News Configuration • 65
Page 66

7.3.3 Options For Text Files
Translate Carriage Returns to Spaces – If this setting is selected carriage returns will be
converted into spaces. Without this setting being selected WinCue Pro News will
convert the single returns into double returns, so it’s a good idea to select this setting.
Combine Multiple Spaces into Singles – If this setting is selected large spaces within
the imported text will be reduced to a single space.
Strip leading Spaces from Lines – If this setting is selected spaces at the start of lines
will be removed.
Dot Space Converts to Carriage Return – If this setting is selected then any spaces
after a dot will be converted into a new line.
Convert String to Marker: By entering a word or character in the box below this
setting, any occurrences of this word or character within the imported text will be
converted into a Marker.
Automatically use these settings - Click the A
checkbox if you want to prevent this dialog box appearing again.
utomatically use these settings
WinCue Pro News User Guide WinCue Pro News Configuration • 66
Page 67

7.4 File Based Queues
In this section you can configure the appearance for all WinCue Pro News script files.
7.4.1 Types
Simple Script File Defaults - This is used to set up the appearance of your WinCue Pro
News script files.
7.4.2 Presenter Options
There are 2 ways of adding presenters to a script.
1 - On opening a script file you can add presenters by selecting Properties from the
file menu. Any presenters created or settings changed using this method are only
available to that specific script file.
2 – By adding Presenters using the Tools /Options /File Based Queues method any
presenters or settings changed here will apply to all WinCue Pro News files.
Although there are different ways to add presenters to a script the setup for this is the
same.
WinCue Pro News User Guide WinCue Pro News Configuration • 67
Page 68

7.4.3 Presenters
Presenter’s settings allow you to customise settings for individual presenters. The font,
colour, style and read rate can be allocated for individual presenters. These settings
will be automatically applied to the script when the presenter is selected.
There is always a DEFAULT presenter in WinCue Pro News this is used to set the default
script file settings.
7.4.4 Presenter Settings
Open the File menu and select Properties….
OR
Click on the Tools /Options menu and select the File Based Queues tab. Then select
Simple Rundown File Defaults
This dialog box will be displayed:
General Tab
If you find that your script font is to small then you can set the default font type here
The Font style and Size that you set here will be used as the default for all of your
scripts.
Presenter Settings Tab
These are the different options that you can change or fix for your presenters.
WinCue Pro News User Guide WinCue Pro News Configuration • 68
Page 69

Presenters Tab
To add a new presenter, click A
dd. The Presenter Properties dialog box opens. Enter
the presenter’s name in the Presenter Name text box and click OK. The new
presenter will then be shown in the list of Currently Defined Presenters.
WinCue Pro News User Guide WinCue Pro News Configuration • 69
Page 70

Note: All of the available options are greyed out. This is because no options had
been ticked in the Presenter Settings window. Only after an option has been selected
will it be available in the Attributes window.
Once you have assigned the Presenters attributes and clicked OK, the new Presenter
will appear in your list of Presenters and will be available for use in your scripts.
Note: Remember presenters that have been created using the File Properties method
will not appear under the Tools /Options /File Based Queues menu.
Modify – Used if you need to change your settings.
Delete – Will remove a presenter that is no longer required.
Set Default – The default presenter will be highlighted in bold and will be used for all
scripts.
Banners
This menu is used if you want to change the colour or font style used for the prompter
banner.
Padding – Increasing this value will make your Banner Thicker.
WinCue Pro News User Guide WinCue Pro News Configuration • 70
Page 71

Trailing Gap – Increasing this value will put a larger gap between the banner and the
first line text.
Fields to Display – Changes the order of the Item Title and the Item Number.
7.4.5 Simple Script File Defaults
For simple script file defaults there are no banner settings but all of the other menus
work in the same way as above.
7.5 Master/Slave Interface
This interface is covered in the Master/Slave section of this guide.
7.6 Multilingual Support
WinCue Pro News can be used in many different languages but you must install the
correct language fonts for the language that you would like to use. This is setup from
within Windows.
Windows 95/98/NT4
Open the Windows Control Panel and select keyboard:
WinCue Pro News User Guide WinCue Pro News Configuration • 71
Page 72

This will then open the keyboard properties box.
In Windows NT4 you click on the Input Locals tab:
In Windows 95/95 you click on the Languages tab:
Click on Add to install additional keyboard layouts, this will open a pull down list off
supported languages. Select the ones that you want to install then click on apply;
you will need your Windows CD to complete the process.
WinCue Pro News User Guide WinCue Pro News Configuration • 72
Page 73

Another option is to use a third party multilingual pack such as Global Writer 98; once
this has been installed you will then be able to use the fonts in from this package from
within WinCue Pro News.
Windows 2000
Follow the installation instruction as above but if you still cannot see the language
that you want open the Windows Control Panel and select Regional Options.
This window will know open up:
You can now select more countries from this menu. After you have selected the ones
that you need click on apply, you will need the Windows 2000 CD to complete this
WinCue Pro News User Guide WinCue Pro News Configuration • 73
Page 74

process. Now when you go back to the Input Locals tab you will notice that there are
a few more languages that can be selected.
7.7 Prompt Engine
From here you are able to configure the settings for when using WinCue Pro News LT
to prompt.
7.7.1 Auto Captioning
This is used if you are sending the text from WinCue Pro News to a captioning
machine.
Those of you running WinCue Pro News with a caption generator may want to select
particular parts of the script that won’t be sent to the caption generator. Select the
text by highlighting, and then choose Format, then Not Captioned from the menu.
The marked text will not be sent to the caption generator.
7.7.2 Hardware Settings
This is where you setup how your WinCue Pro News prompter card works:
Layout
WinCue Pro News User Guide WinCue Pro News Configuration • 74
Page 75

Left Margin Width – Sets the size of the left margin. If you find that you cannot see the
cursor you can increase this value to reduce the scanning range.
Left Margin Width - Sets the size of the right margin.
No Cue Marker – This will remove the cursor from the prompt output display.
On Left – This will display the cursor on the left side of the prompt output display.
On Right - This will display the cursor on the right side of the prompt output display.
Offset from screen top – Increase this value to move the cursor position further up the
screen.
Width – Increase this value to make the cursor larger.
Display STOPPED Status – If this is enabled when the stop button on the Multibutton
hand control is pressed a “STOPPED” logo will appear on the prompt output monitor.
Display BLANK Status - If this is enabled when the blank screen button on the
Multibutton hand control is pressed a “BLANKED” logo will appear on the prompt
output monitor.
WinCue Pro News User Guide WinCue Pro News Configuration • 75
Page 76

Hardware
Generate Colour Burst – The colour burst signal is part of the overall video output
signal, one of its functions is to control the colour of the output signal. DO NOT TURN
THIS OFF.
Genlock Port Enabled – Genlock is used to lock the WinCue Pro News signal to an
external sync signal, this is mostly used in newsroom set-ups.
Brightness – This control will adjust the overall level of the video output signal,
therefore it can be used to set the overall brightness of the prompt monitors that are
connected to the I.M.T card. The range is set from the values that have been set
under Colour Temperature Metrics.
You may need an Oscilloscope to set the following levels.
Minimum Colour Value – This sets the video signal range, by default the video signal
sits slightly below the sync level, if this causes a problem with your monitors then
increase this value (16 set the video level to the video standard).
Maximum Colour Value – This sets the maximum output video level.
WinCue Pro News User Guide WinCue Pro News Configuration • 76
Page 77

Text Format
Extra Line Spacing – This will increase the spacing between each line of text on the
prompt output; the spacing in the editor will not be changed.
End Of Story Gap – This increases the gap at the end of each story.
Font Scale Factor – By increasing this value you can change the overall size of the
text on the screen, the default size is always 7.
Prompt Output Colours
This screen sets the main colour of the output by double clicking on a colour you can
adjusts its properties. Cue markers are not displayed on the output so changing the
values will have no effect.
Background - sets the colour of the prompt output.
Black - sets the colour of the text.
WinCue Pro News User Guide WinCue Pro News Configuration • 77
Page 78

Prompt Overlay Colours
Draw fixed Leading And Trailing Edges On Glyphs - A glyph is a presentable form of
one or more characters or a part of a character in some cases. By enabling this you
can make the prompted text look smoother.
Demo options
Loop Forever – When the end of the script is reached the prompt will start over again.
WinCue Pro News User Guide WinCue Pro News Configuration • 78
Page 79

7.7.3 Scroll Controls
See Chapter 7 Scroll Controls
7.8 User Preferences
User Interface
Leave The Screen Empty – WinCue Pro News will start-up without opening a file.
Create A New File – This option is not available.
Invert Prompt Colours – On start-up the prompt output colours will be inverse e.g.
black characters on a white background.
Windows
Restore Main Window Position – If the main window has been resized then WinCue
Pro News will remember its settings.
Maximize View Window – This will force the queue file to fit the main WinCue Pro
News window.
MDI Frame Window – This function is only available with Runorders, it will remove the
preview window and only display the runorder. If you double click on an item in the
runorder then the editor screen will open.
WinCue Pro News User Guide WinCue Pro News Configuration • 79
Page 80

Splitter View - This will split the screen so that the runorder is on the left 70% of the
screen and the editor in on the remaining 30% of the screen. The view area for this
can be resized.
On Screen Trashcan – This is only available if you are using a news interface. This will
show all deleted stories form the runorder.
Preview Next Prompt Item – When this is enabled the editor window will be resized
and another window will appear below it, this will display the next item in the
rundown.
Rundown ID – This sets how items are listed in the rundown.
Require Conformation For Single / Multi Story Delete – You will have to confirm that
you wish to delete an item.
Select Twice Field Editing –This will allow you to edit an item name by double clicking
on the item title.
WinCue Pro News User Guide WinCue Pro News Configuration • 80
Page 81

Prompt Tracking
Auto Follow On Prompt Item – This will force the editor to follow each item in the
runorder
Auto Jump To Editor On Speed Zero – When the scroll control has been moved to the
stop position the editor will jump to wherever the prompt is.
Keep On Prompt Item Visible In List – The item that is being prompted is always
highlighted yellow in the runorder
Auto Follow Prompt Line By Line – The editor will automatically follow the prompted
text a line at a time.
Editor
Prevent Replacement Of Selections When Entering Characters – This will prevent you
from accidentally deleting a section of highlighted text
Enable Delete Mode Ctrl-D – This is used to quickly enable or disable the WinCue Pro
News editor.
WinCue Pro News User Guide WinCue Pro News Configuration • 81
Page 82

Spell Check Settings
This is the currently supported list of languages that WinCue Pro News can perform a
spell check on. If you require any of these languages they can be purchased from
Autocue Ltd.
WinCue Pro News User Guide WinCue Pro News Configuration • 82
Page 83

8 Scroll Controls
WinCue Pro News User Guide Scroll Controls • 83
Page 84

8.1 Scroll Control Types
WinCue Pro News is supplied with an I.M.T. scroll control as standard, which plugs into
the I.M.T. card.
These are the scroll controls supported by WinCue Pro News:
• Hybrid Serial IMT Multi-button Controller IMT Scroll Control
• On-screen Scroll Control
• Scroll Information from Master Machine
• Serial Multi-button Controller
• Two-button Serial Controller
• Foot Control – Not listed in the menu
8.2 Selecting a Scroll Control
Choose Tools then Options… from the menu. Double click on Prompt Engine, and
then click on Scroll Controls.
The Configure Scroll Controls dialog box appears:
WinCue Pro News User Guide Scroll Controls • 84
Page 85

Select the type of control you wish to use and click OK.
8.3 Hybrid Serial/IMT Multibutton
This controller has two 9 way D connections, one is connected into the I.M.T port and
the other is connected to a free COM port. The 15 way D connector on the back of
the Multibutton controller is for a remote foot control unit.
If you need to change any settings for the selected hand control click on the setup
button
General tab Settings
Serial Port – This is the port that your Multibutton hand control is connected to.
Centre Stop Mode – This is set if you require your scroll control to change the
direction off the prompted text as well as controlling the speed of the text.
Stop Point – If you have centre stop mode enabled then this setting will increase the
dead zone.
Stop Zone – The Stop Z
text does not scroll. If the S
rates between 55 and 65 will mean the prompted text is not scrolled.
WinCue Pro News User Guide Scroll Controls • 85
one is a range between 0 and 40 over which the prompted
top Point is set to 60 and the Stop Zone is set to 5, scroll
Page 86

In this menu you can configure the function for the 12 buttons on the hand control.
Remember all, except the fwd/rev button functions, are controlled by WinCue via
your COM port, the fwd/rev function and the scroll control is directly connected to
the I.M.T card.
WinCue Pro News User Guide Scroll Controls • 86
Page 87

If you click on any of these buttons you will see this menu:
You can then choose a function from the list. Once a button function has been set
that function is no longer available in the menu.
Note: You cannot re-program the function for the FWD/REV button as this directly
connects to the I.M.T card.
WinCue Pro News User Guide Scroll Controls • 87
Page 88

End Stop Scroll Table – This table is used to configure the scroll performance.
Centre Stop Scroll Table – This table is used to configure the scroll performance in
centre stop mode.
WinCue Pro News User Guide Scroll Controls • 88
Page 89

8.4 Connecting a Foot Control
At the rear of the multi-button scroll control is a 15 pin D connector for attaching a
foot scroll control and a button to select between foot and hand control operation.
When this button is pressed in the foot scroll control can be used to prompt the text.
Otherwise the multi-button scroll control can be used.
The foot control can also be connected direct to the IMT 9 pin connector for stand-
alone use.
The foot scroll control is used for controlling the speed and direction of the prompted
text only. All other functions such as next marker and reset rundown are available by
using the buttons of the multi-button scroll controller.
The red button is used for changing the direction of the prompted text. The foot
pedal controls the speed.
WinCue Pro News User Guide Scroll Controls • 89
Page 90

8.5 I.M.T Card Scroll Port
The I.M.T. 2-button scroll controller is supplied with WinCue Pro News and is
connected to the I.M.T. card. This scroll controller does not require any kind of
configuration apart from having to select it.
Click on I.M.T. Card Scroll Port and click OK.
To scroll the text, turn the knob at the end of the scroll control clockwise to speed up
and anti clockwise to slow down.
To change the direction of the prompted text press the black button.
To jump to the next marker press the red button.
Centre Stop Mode – This is set if you require your scroll control to change the direction
off the prompted text as well as controlling the speed of the text.
How it works:
The IMT Scroll Control can be set up for Centre Stop mode. In the Configure Scroll
Controls dialog box, click on IMT Card Scroll Port.
To enable C
(9).
Next the stop point and stop zone should be set.
The I.M.T scroll control sends data in the range 0 to 120 to tell WinCue Pro News how
fast to prompt the text; 0 is stop and 120 is the fastest scroll rate. This scroll rate is
determined by the position of the scroll control knob. If the Stop Point is set to 60,
entre Stop Mode, the Centre Stop Mode check box should be checked
WinCue Pro News User Guide Scroll Controls • 90
Page 91

scroll rates of less than 60 will prompt the text backwards, scroll rates greater that
over 60 will prompt the text forward, and a scroll rate of exactly 60 will stop the text
from scrolling.
The Stop Z
scroll. If the S
and 65 will mean the prompted text is not scrolled.
Configuring the Red and Black Buttons
Action For Red Button - This allows you to change the function for the Red button; if
you click on the down arrow you will see some additional functions.
Action For Black Button - This allows you to change the function for the Black button;
if you click on the down arrow you will see some additional functions; but you can
only set this when you are in centre stop mode it cannot be configured in standard
mode.
The End Stop and Centre Stop tables are used to set the scroll performance. These
settings should not be adjusted.
one is a range between 0 and 40 over which the prompted text does not
top Point is set to 60 and the Stop Zone is set to 5, scroll rates between 55
Each of the two buttons can be configured, if necessary to perform different
functions from standard. Click on the arrow next to the text box next to Action for r
button. A sub menu will be displayed containing all the different options for this
button. The table explains what each function option does. Click on option required
then on OK to set these options.
ed
Function Description
Caption On/Off
Clear Caption Decoder Clear the caption output
Cue Story Moves prompter back to the last lines of the previous story
Marker In Current Direction Moves the prompter to the next marker in the direction in which
Next Marker Moves the prompter to the next marker in the story
Next Story
WinCue Pro News User Guide Scroll Controls • 91
Switches caption data sent by WinCue Pro News on and off
which means that the correct next item is prompted even if the
running order is changed
the text is being prompted
Moves the prompter to the next story in the rundown
Page 92

Previous Marker
Previous Story
Request Control
Reset Rundown
Reset Story
Story In Current Direction
Moves the prompter to the previous marker in the story
Moves the prompter to the previous story in the rundown
Makes multi-button hand control active when more that one
hand control is in use
Resets the prompter the top of the rundown
Moves the prompter to the beginning of the story currently
being prompted
Moves the prompter to the next story in the direction in which
the text is being prompted
8.6 On-screen Scroll Control
If required the On-Screen Scroll Panel enables you to prompt the text using the
mouse. In the unlikely event of your normal scroll control failing this is also a
convenient backup.
The Scroll Control Panel features a speed control slide bar, which is used for varying
the speed of the prompted text. Click on the left-hand button of the mouse and slide
to operate. The slide bar has a centre stop position. When it is above the centre
position text will be scrolled up the screen. When it is below the centre position the
text scrolls down the screen.
The Top of Queue button on the screen Scroll Control Panel changes the current
prompt position to be the start of the script or rundown.
The Top of S
position to the start of the current script being prompted.
The H
tory button on the screen Scroll Control Panel changes the prompt
alt button on the screen Scroll Control Panel stops the prompted text:
WinCue Pro News User Guide Scroll Controls • 92
Page 93

8.7 Scroll From Master Machine
This setting is used when you are using the Master Slave system.
See the Master/Slave section.
8.8 Serial Multibutton Controller
This hand control should not be used with WinCue Pro News.
8.9 Two Button Serial Controller
This hand control should not be used with WinCue Pro News.
The simple serial scroll control is connected to a free serial communication port. In
Standard Configuration the simple serial scroll control allows you to scroll the
prompted text up and down the screen and jump between markers.
WinCue Pro News User Guide Scroll Controls • 93
Page 94

9 Layout Editor
WinCue Pro News User Guide Layout Editor • 94
Page 95

9.1 WinCue Pro News Layouts
In this chapter we learn how to use the Layout Editor to create and customise Display
and Print Layouts to suit your needs. As part of the WinCue Pro News installation there
are some default layouts installed which are suitable for the basic requirements but
which can be modified or added to. By the end of this Chapter you will be able to
create and edit layouts using WinCue Pro News.
9.1.1 Warning
The WinCue Pro News layout is used to create and customise layouts for displaying
information on the screen and layouts for printing to suit your needs, therefore if they
are corrupted or deleted you will not be able to create new or access your scripts. If
this happens then you will see this error message when you try to open a file.
Before you attempt to edit your layouts it would be a good idea to backup your
layout files.
To do this go into the WinCue Pro News folder e.g. C:\WinCue Pro News\ and make
a backup of the Configuration folder. The actual layout files are stored in a sub
directory within this one, the “O” folder contains the display layout information and
the “1” folder contains the print layout information.
9.2 Running the WinCue Pro News Layout
Editor
To access the Layout Editor open the Tools menu and select Layout Editor.
WinCue Pro News User Guide Layout Editor • 95
Page 96

The Layout Editor window will then open and the installed layouts will be displayed:
9.2.1 Layout Types
There are two basic layouts in WinCue Pro News:
Display Layouts – This is used to configure how the WinCue Pro News script files will
appear on your VGA monitor screen.
Print Layouts – This will configure your script printout.
WinCue Pro News User Guide Layout Editor • 96
Page 97

9.2.2 Display Layout
There are 3 types of display layouts and when this tab is expanded you will see them:
As you can see there is a layouts for each script type. Each layout type is created in
the same way with only slight differences between them therefore, for a better
understanding on how they work; the next section will show you how to create a new
layout.
9.2.3 Copying a Layout
To make a copy of an existing layout select the one that you want to copy by right
clicking on the form and select Clone.
Then give the layout a new name and then select OK.
WinCue Pro News User Guide Layout Editor • 97
Page 98

Your new layout will then appear in the Display Layouts list.
9.2.4 Creating a new Layout
To create a new layout right-click on the type of layout (Display or Print) you wish to
create and select New Layout.
Enter the name of the new layout and click OK:
When you add a new layout the required categories are added: Display List Items
and Editor Headers. You then need to add a form to the category by right clicking
on the category and selecting Add New Form.
WinCue Pro News User Guide Layout Editor • 98
Page 99

Select each item in turn from the list of available form types for this category and
click OK making sure that you add all of these items. Note: the available form types
depends on what category it is. This list is for the “Display List” Items category.
For the Editor Headers category you will get a different list:
As Multiple column Scripts are not supported in 1.30 you must select the Single
Column Scripts item.
You can now edit each form to suit your needs.
9.2.5 Clone Form
If you are going to edit an existing form we recommend that you clone the form
before making changes to it so that you have a backup of it. To do this Right-click on
the form and select Clone Form:
WinCue Pro News User Guide Layout Editor • 99
Page 100

9.2.6 Editing a Form
To edit a forms just double click on the one that you want to edit. A newly created
form will appear empty:
An existing form will appear like this:
WinCue Pro News User Guide Layout Editor • 100
 Loading...