

Page 1
11. For larger cameras the mounting plate may need
extending. Loosen the four thumb screws on the
camera plate and remove the rear two, the plate will
now slide out. Replace the two rear screws and
tighten them to secure the plate.
12. For smaller cameras the camera plate will need
to be raised. Remove the four thumb screws and then
lift off the plate.
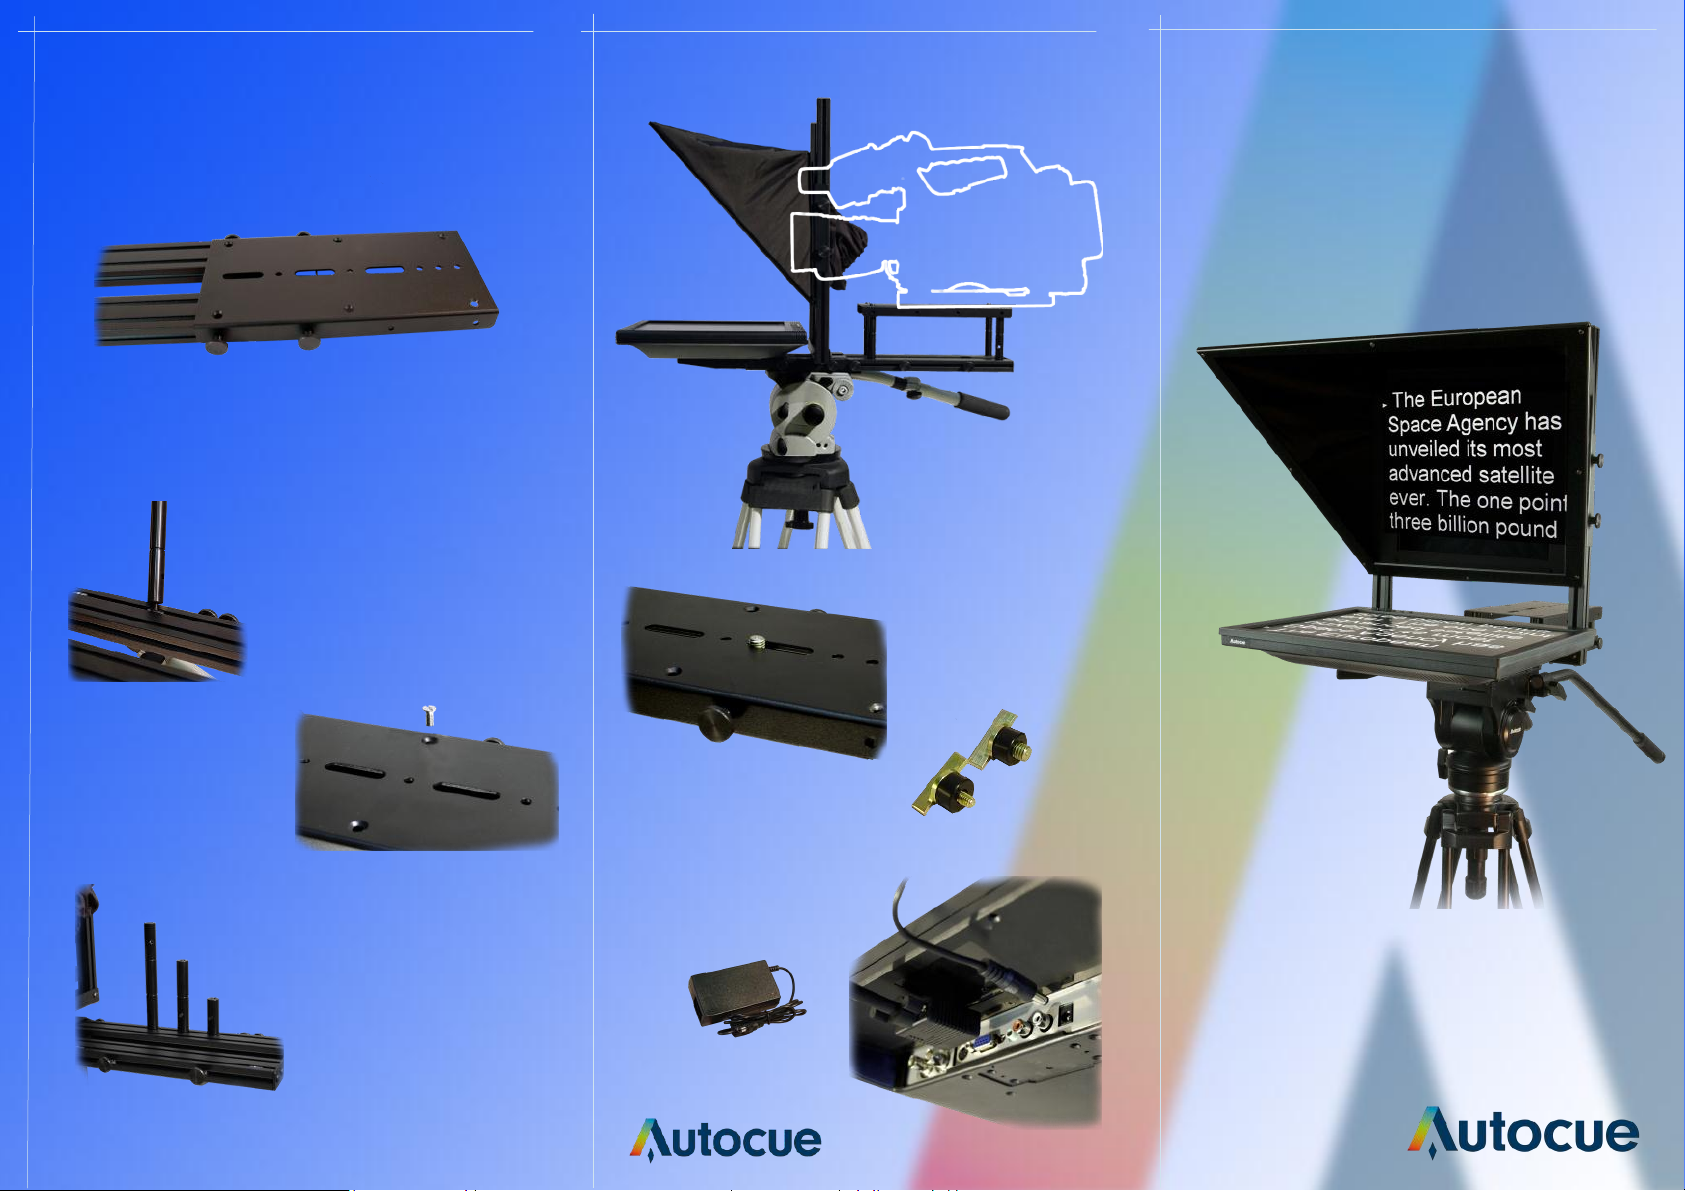
Camera Fixing
SSP17
Guide
14 Re-fix the camera
plate using the four
screws provided.
Pillar combinations
13. Install four camera plate pillars
of the appropriate height.
15. To achieve the maximum
height, combine the long and
short pillars.
16. Fix the camera in
place using the camera
screws provided.
3/8” BSW
1/4” BSW
17. Connect the power
supply and the VGA or
video cable.
Power Supply
autocue.com
Page 2
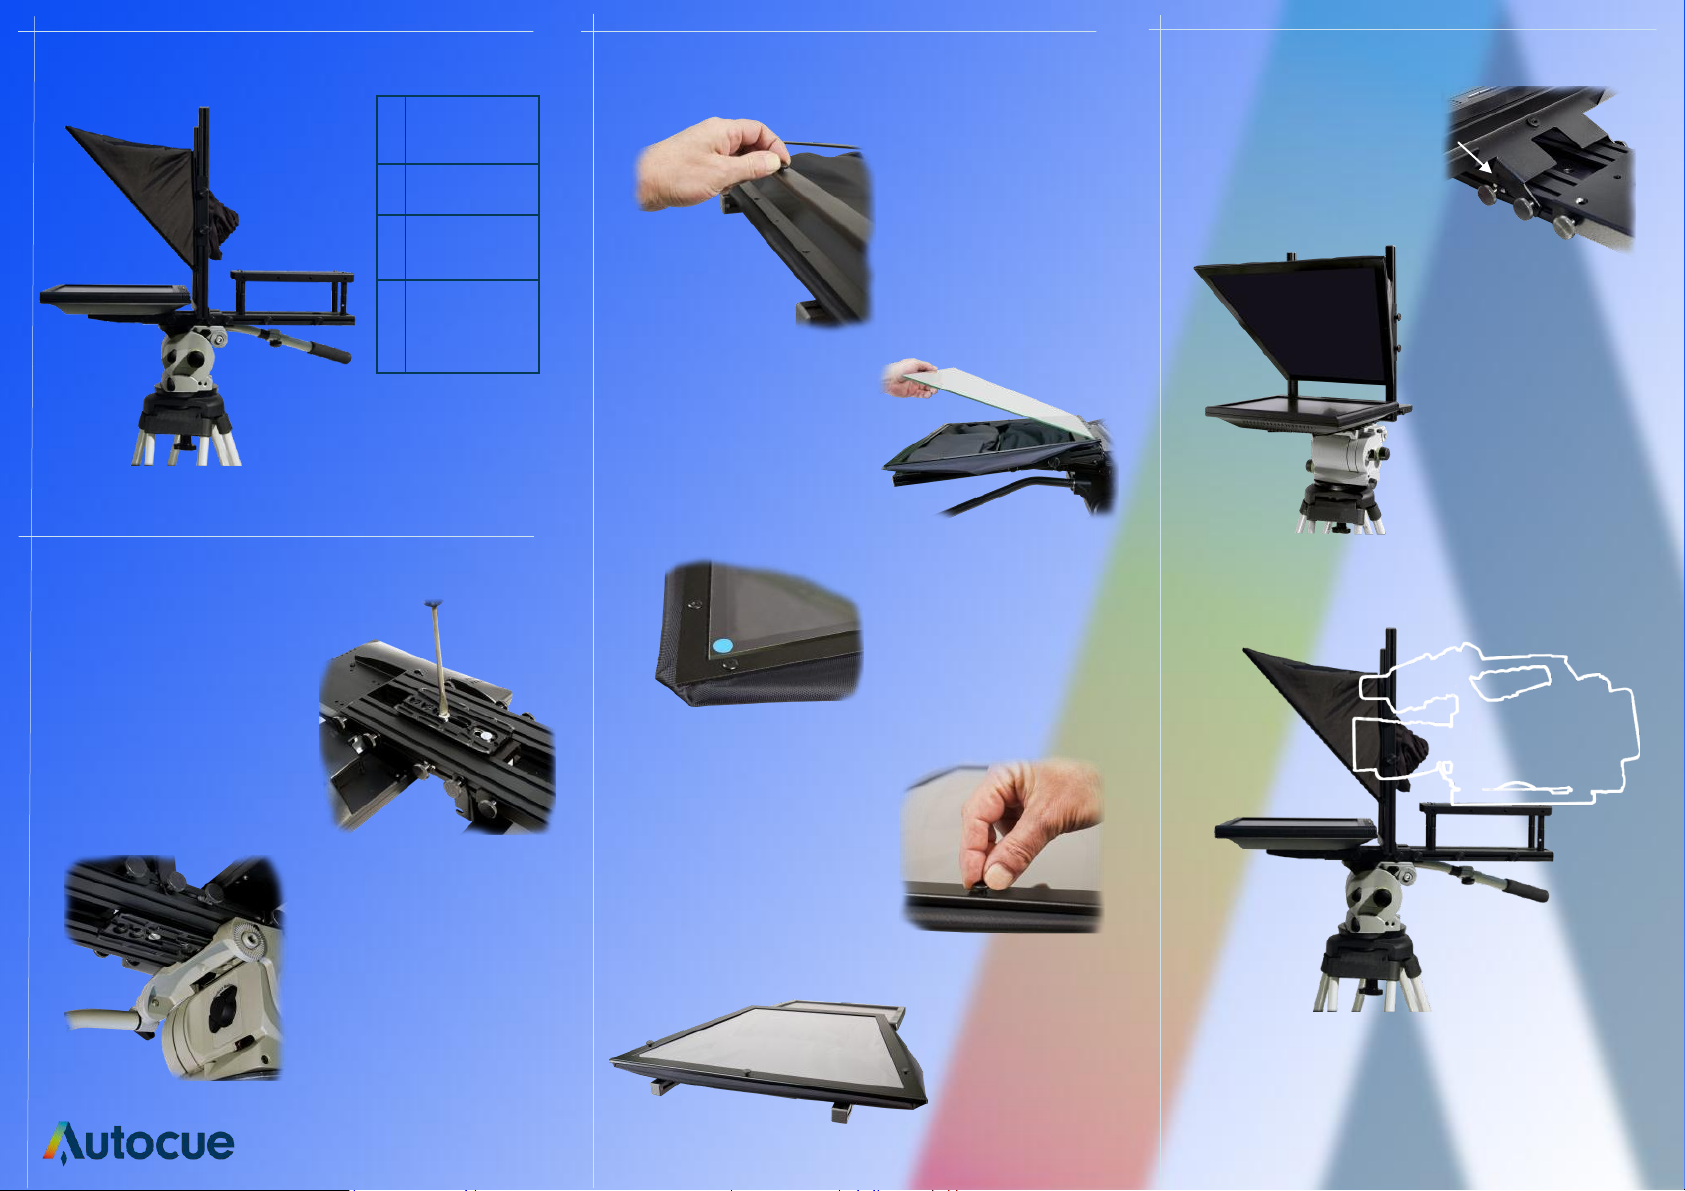
Components
A
D
B
C
A
B
C
D
Adjustment
Hood and
Glass
Monitor
Mounting
Plate
Hood
Glass Installation
3. Remove the three
thumb screws that secure
the hood frame and
open the hood.
4. Place the glass in the
hood and ensure that
the glass is located in
the recess.
8. Raise the hood and lock it
in the upright position by
tightening the four thumb
screws.
9. The Hood is
now locked in
the upright
position.
Assembly
1. Fix the hot shoe from your
tripod to the underside of the
mounting plate. Slide the hot
shoe to the approximate
position and tighten the
screws.
2. Mount the unit on the
tripod.
6. Close the hood and
replace the three thumb
screws and secure.
Please ensure that the
glass is in the recess or the
glass may be damaged.
5. The glass is installed with
the blue dot facing up. A
double image will be seen
in the reflection if the glass
is not installed correctly.
7. The glass is now
Installed.
Mounting the Camera
10. It is important that the camera lens is in the centre
of the aperture at the rear of the hood.
This is achieved by raising and lowering the camera
mounting plate and hood.
 Loading...