

Page 1
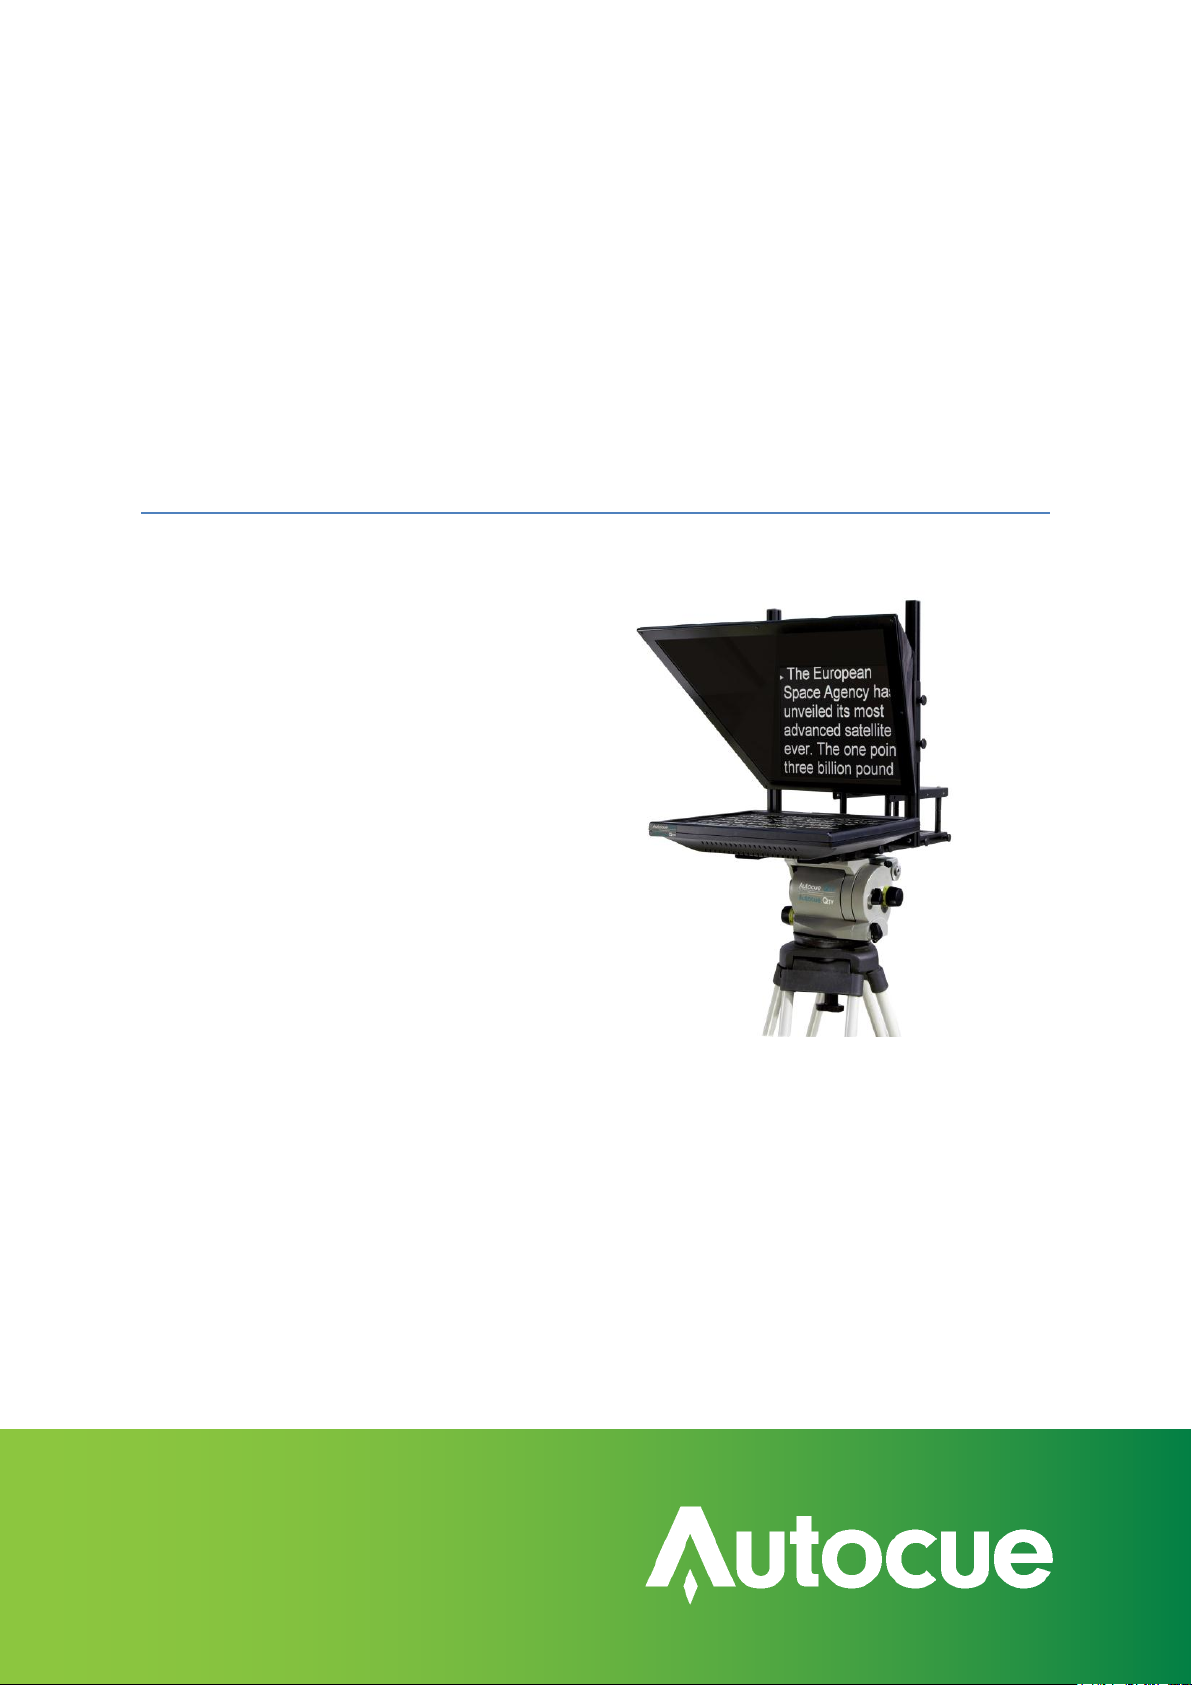
SSP17 or SSP10
& QStart
17” or 10” Starter Series Prompter
Installation and Operation Guide
Page 2

Installation and Operation Guide
Contents
Latest additions ................................................................................................................................................................... 3
Getting started ..................................................................................................................................................................... 4
Prepare and connect the prompting hardware ....................................................................................................... 4
Install the QStart software ............................................................................................................................................. 8
Using your Starter Series Prompter ............................................................................................................................. 9
Make the most of your prompter .................................................................................................................................. 13
Import, edit and prompt scripts ................................................................................................................................ 13
Format your scripts ....................................................................................................................................................... 15
Dividing long scripts or using multiple presenters ................................................................................................ 16
Different ways to control scrolling ............................................................................................................................ 19
Improve the performance of your prompter .......................................................................................................... 21
Using a single monitor ................................................................................................................................................ 21
Alternative operating systems you may use ........................................................................................................... 23
Use your prompter in different situations .................................................................................................................... 24
Upgrading Starter Series Prompter components ...................................................................................................... 33
If you need to contact Autocue or QTV ....................................................................................................................... 34
SSP-QStartUserManual.docx 2011-06-15 2 © 2003-2011 Autocue Group Ltd.
Page 3

Build number
Release date
Changes
2006
4 March 2011
New button mapping for
the ShuttleXpress
Installation and Operation Guide
Latest additions
This document was written for build 2006 of the QStart software, released on 4 March 2011.
Any changes since that point have been referenced below. These changes have not been reflected in the
rest of the document.
Revision history
SSP-QStartUserManual.docx 2011-06-15 3 © 2003-2011 Autocue Group Ltd.
Page 4
a
h c e
d b
f
g
i
Getting started
- Prepare and connect the prompting hardware
Getting started
This section is designed to get your Starter Series Prompter setup as quickly as possible so that you can start
writing and prompting your scripts.
Prepare and connect the prompting hardware
It is strongly recommended that you view the demonstration video showing the preparation of an Autocue
starter series prompter. Click “Play Demonstration Video” on the main menu of the installation CD.
You can also view the video on the Autocue web site: http://www.Autocue.com/autocueppvid
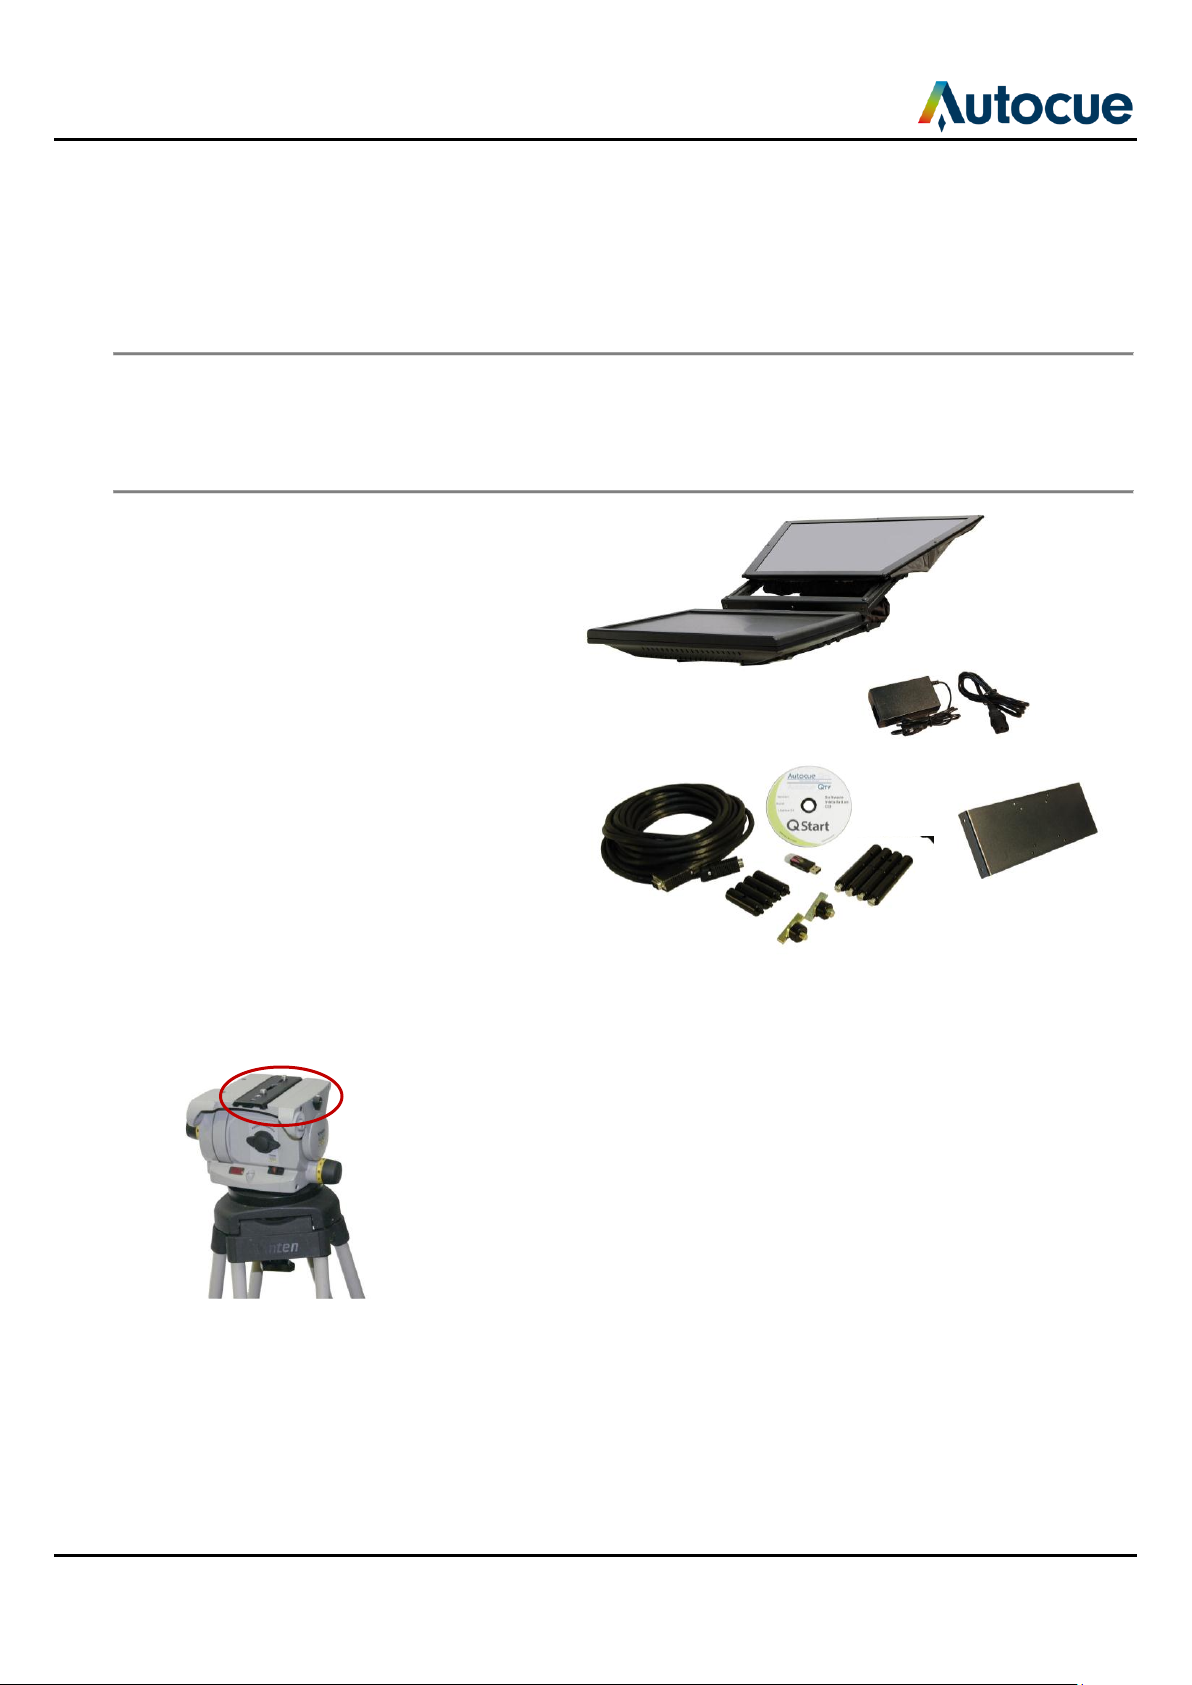
1. Remove the unit from the shipping box.
Check that the following items have been received:
a. Starter Series Prompter (SSP)
b. 2 x camera securing screws
c. 4 x long camera plate support pillars (with countersunk screws
attached)
d. 4 x short camera plate support pillars
e. Wide monitor mounting plate
f. Software CD
g. USB hardware licence dongle
h. 10 m VGA cable
i. Power cord and DC adaptor
Attach to tripod
2. Remove the camera mounting plate from your tripod. (Refer to the manufacturer’s
manual if you have difficulty doing this.)
SSP-QStartUserManual.docx 2011-06-15 4 © 2003-2011 Autocue Group Ltd.
Page 5

Getting started
- Prepare and connect the prompting hardware
3. Carefully turn your SSP unit over and place on a smooth padded surface to protect
the mirror and monitor screen.
4. Use the screws of the camera mounting plate to attach it to the underside of your
SSP unit.
5. Secure the whole assembly onto your chosen tripod.
Note: It is likely that the position of the unit will have to be adjusted after you have
mounted your camera so that it is balanced on the tripod. A balanced camera and
prompter assembly will make it easier to perform smooth pan and tilt shots.
SSP-QStartUserManual.docx 2011-06-15 5 © 2003-2011 Autocue Group Ltd.
Page 6

Getting started
- Prepare and connect the prompting hardware
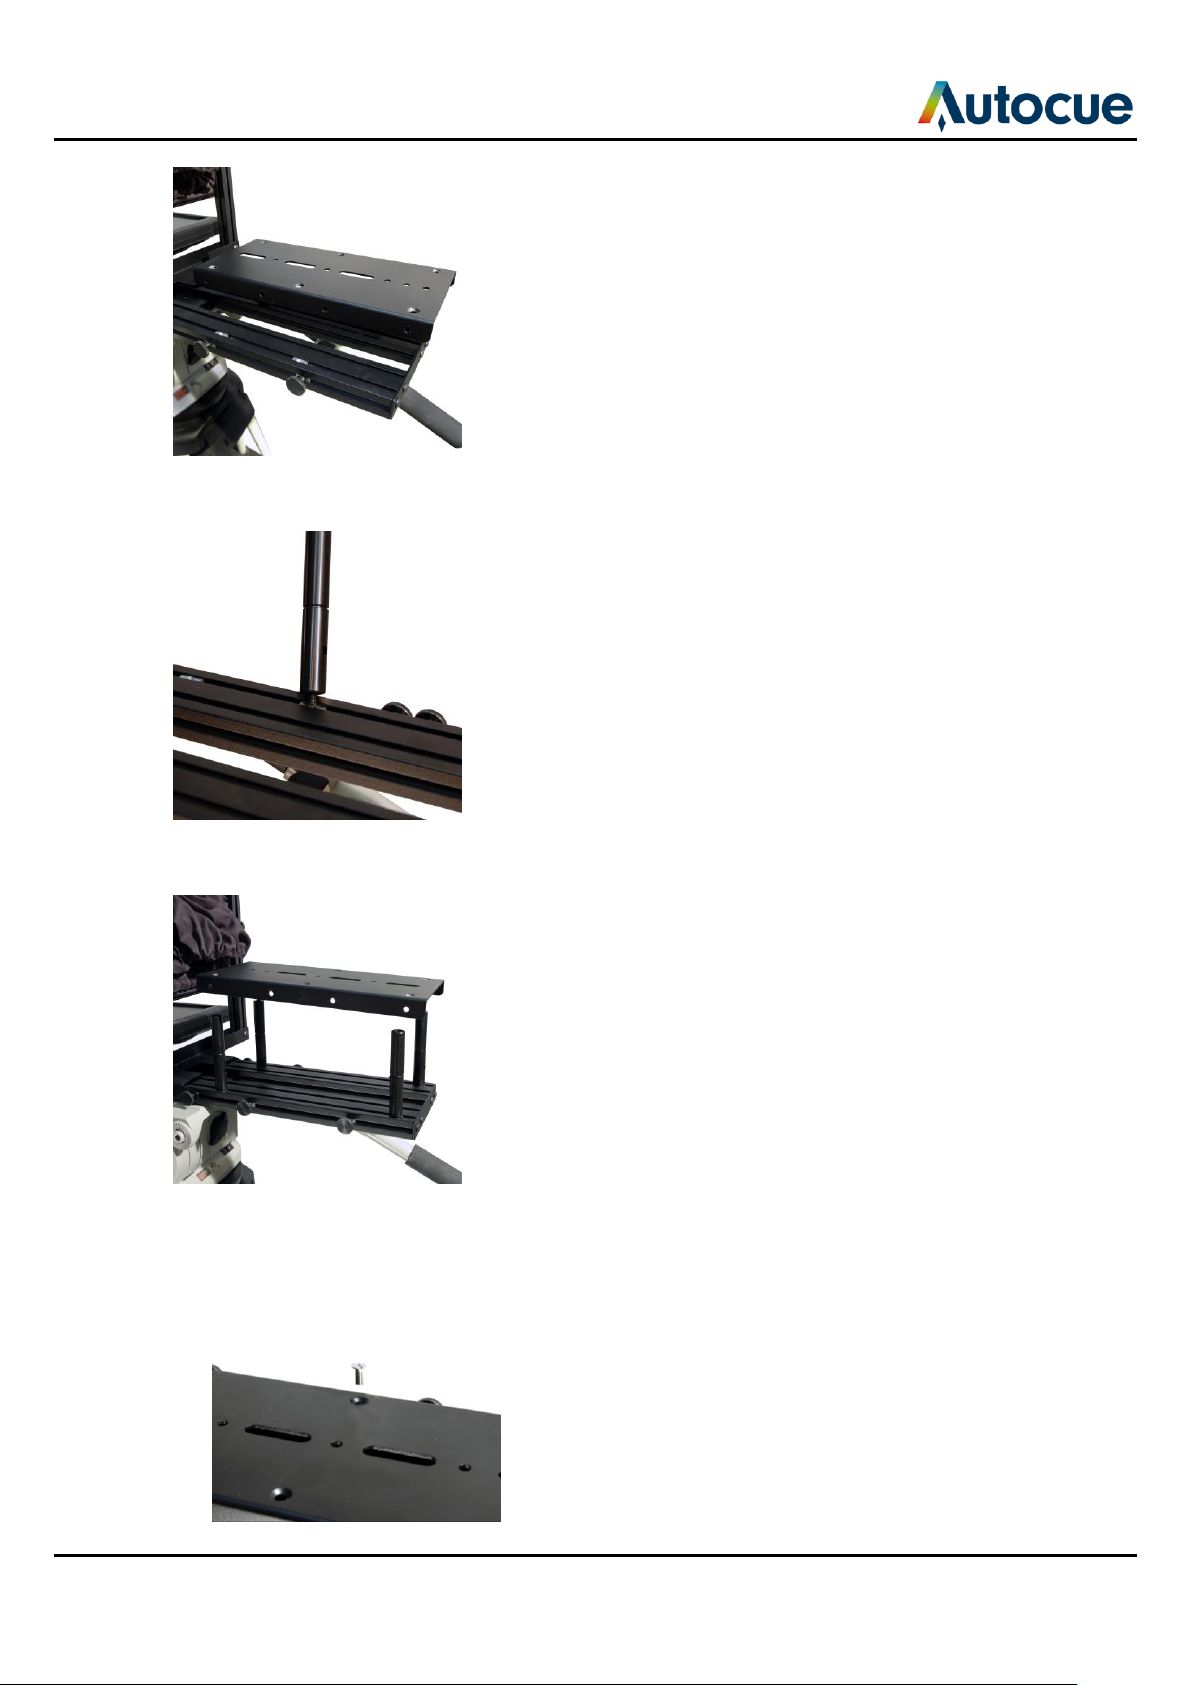
Position hood
6. Loosen the four thumbscrews of the hood assembly.
7. Raise the hood to the vertical position.
8. Secure in place by tightening the four thumbscrews.
Prepare camera mount
9. Remove the camera mounting plate.
Adjust camera mount height
Depending on the size of your camera you may need to use the supplied pillars to raise the camera
mounting plate. The smallest cameras will most likely need the longest pillars. Larger cameras require either
no pillars or the shortest ones.
Combine raising the camera with adjusting the position of the hood so that the camera lens is centred in the
mirrored glass.
SSP-QStartUserManual.docx 2011-06-15 6 © 2003-2011 Autocue Group Ltd.
Page 7
Getting started
- Prepare and connect the prompting hardware
10. Screw in the appropriate length pillars that raise the plate to the required height for
your camera.
11. Adjust the position of the pillars to align with the screw holes of the camera
mounting plate.
12. Re-attach camera mounting plate
if the camera is to be at the lowest level use the four thumbscrews
if the camera is to be in one of the raised positions, use the countersunk screws
to attach the plate to the tops of the mounting plate pillars
SSP-QStartUserManual.docx 2011-06-15 7 © 2003-2011 Autocue Group Ltd.
Page 8

Getting started
- Install the QStart software
Attach camera to mounting plate
13. Use either the supplied ⅜" or ¼" mounting screw to attach your camera to the
mounting plate. You can place the screw through any of the slots in the camera
mounting plate depending on the camera you are using. Ideally the camera lens
should be close to the mirrored glass.
Connect power and video cables
14. Plug in the power for the on-camera unit monitor and connect the supplied VGA
cable between the monitor and your computer.
Note: If necessary, you can adjust the position of the whole unit forwards or backwards so
that it is balanced on your tripod.
Install the QStart software
1. Insert the software CD into your computer
Note: Do not insert the hardware licence dongle until after the software has been installed.
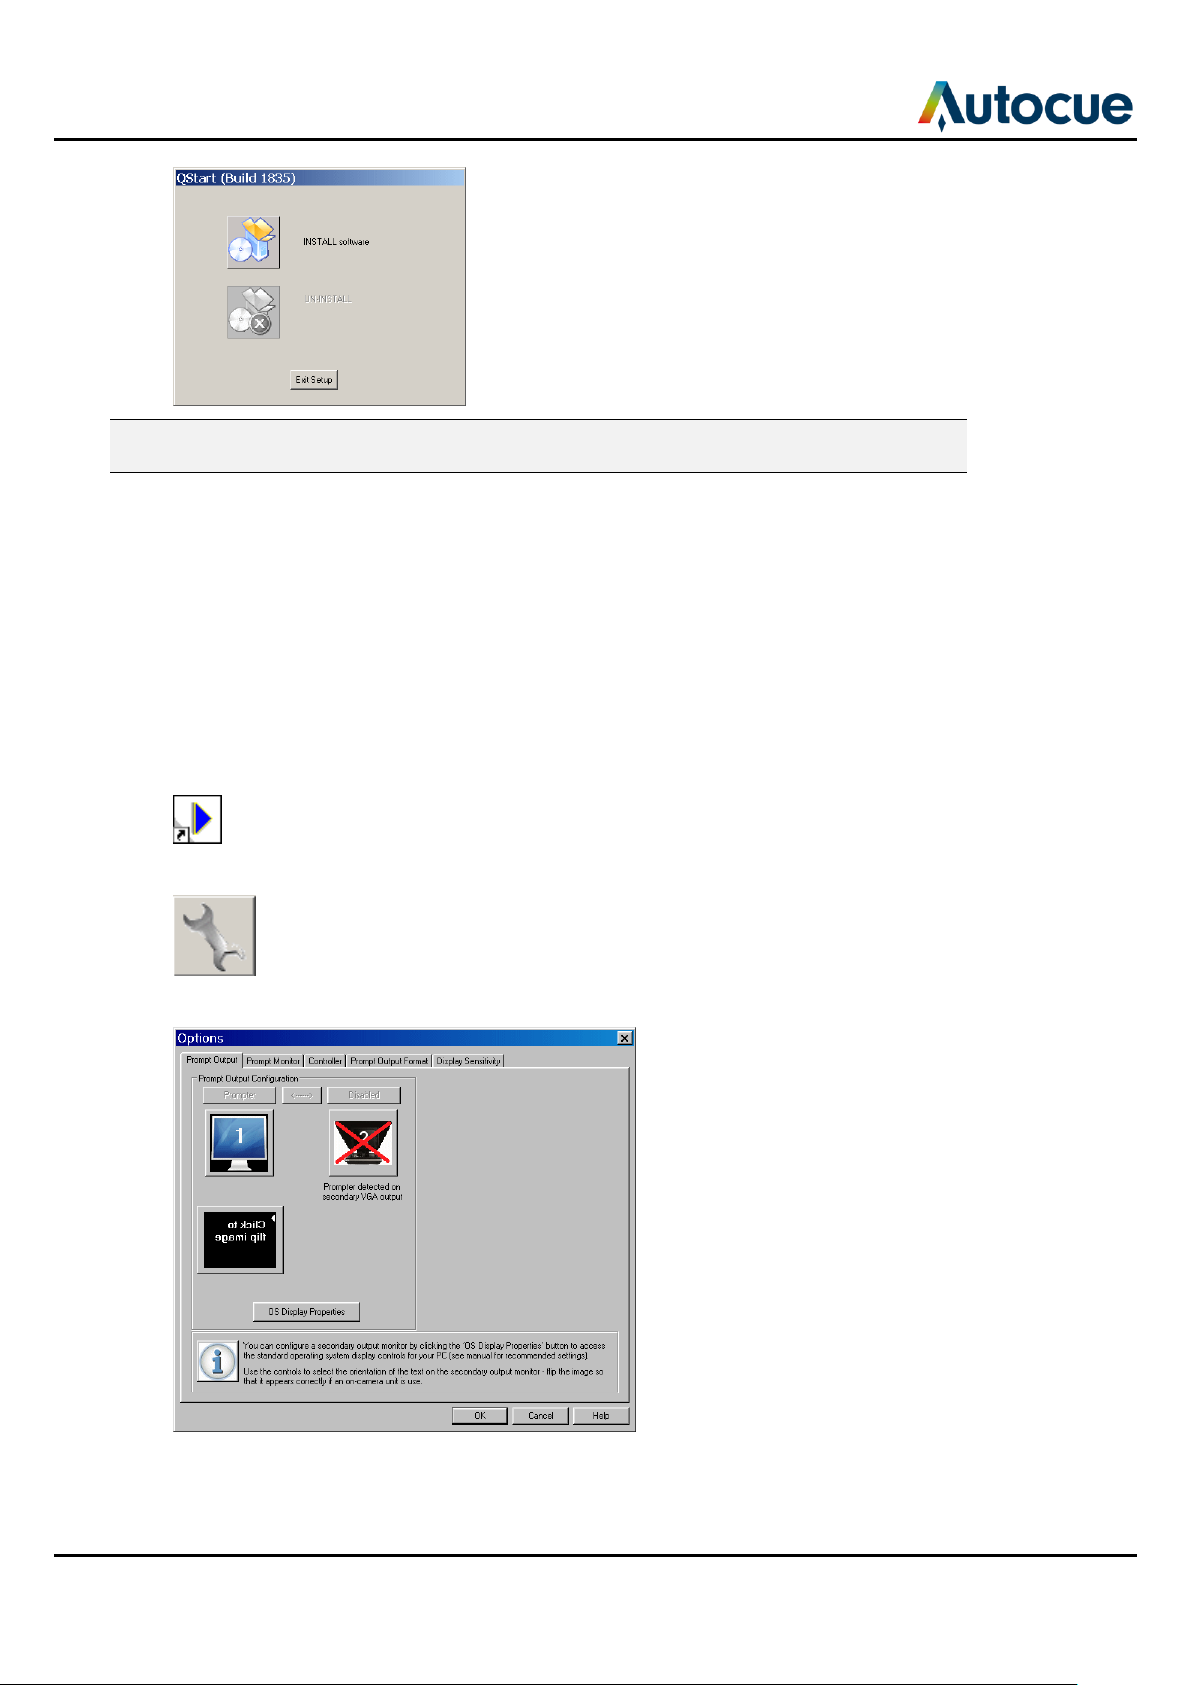
2. Click Install Software on the QStart installation window.
3. The installation wizard will display a screen showing the options available. If this is
the first time you have installed QStart, click the Install software button.
SSP-QStartUserManual.docx 2011-06-15 8 © 2003-2011 Autocue Group Ltd.
Page 9
Getting started
- Using your Starter Series Prompter
Note: If you are re-installing or upgrading your software, refer to “Upgrading Starter Series
Prompter components” for further information.
4. Read and accept the licence agreement and click Install.
5. On the next dialog box click OK to use the default installation folder.
6. When installation has finished, click OK on the dialog box.
Using your Starter Series Prompter
The remainder of this section assumes that you are using a computer to create/edit/scroll scripts that will
appear on the monitor of the Starter Series Prompter you have just assembled.
1. Insert the hardware licence dongle into a spare USB port on your computer.
2. Double-click the QStart icon on your computer desktop.
3. Click on the System Options button to access the configuration interface.
4. The Prompt Output tab is displayed.
SSP-QStartUserManual.docx 2011-06-15 9 © 2003-2011 Autocue Group Ltd.
Page 10
Getting started
- Using your Starter Series Prompter
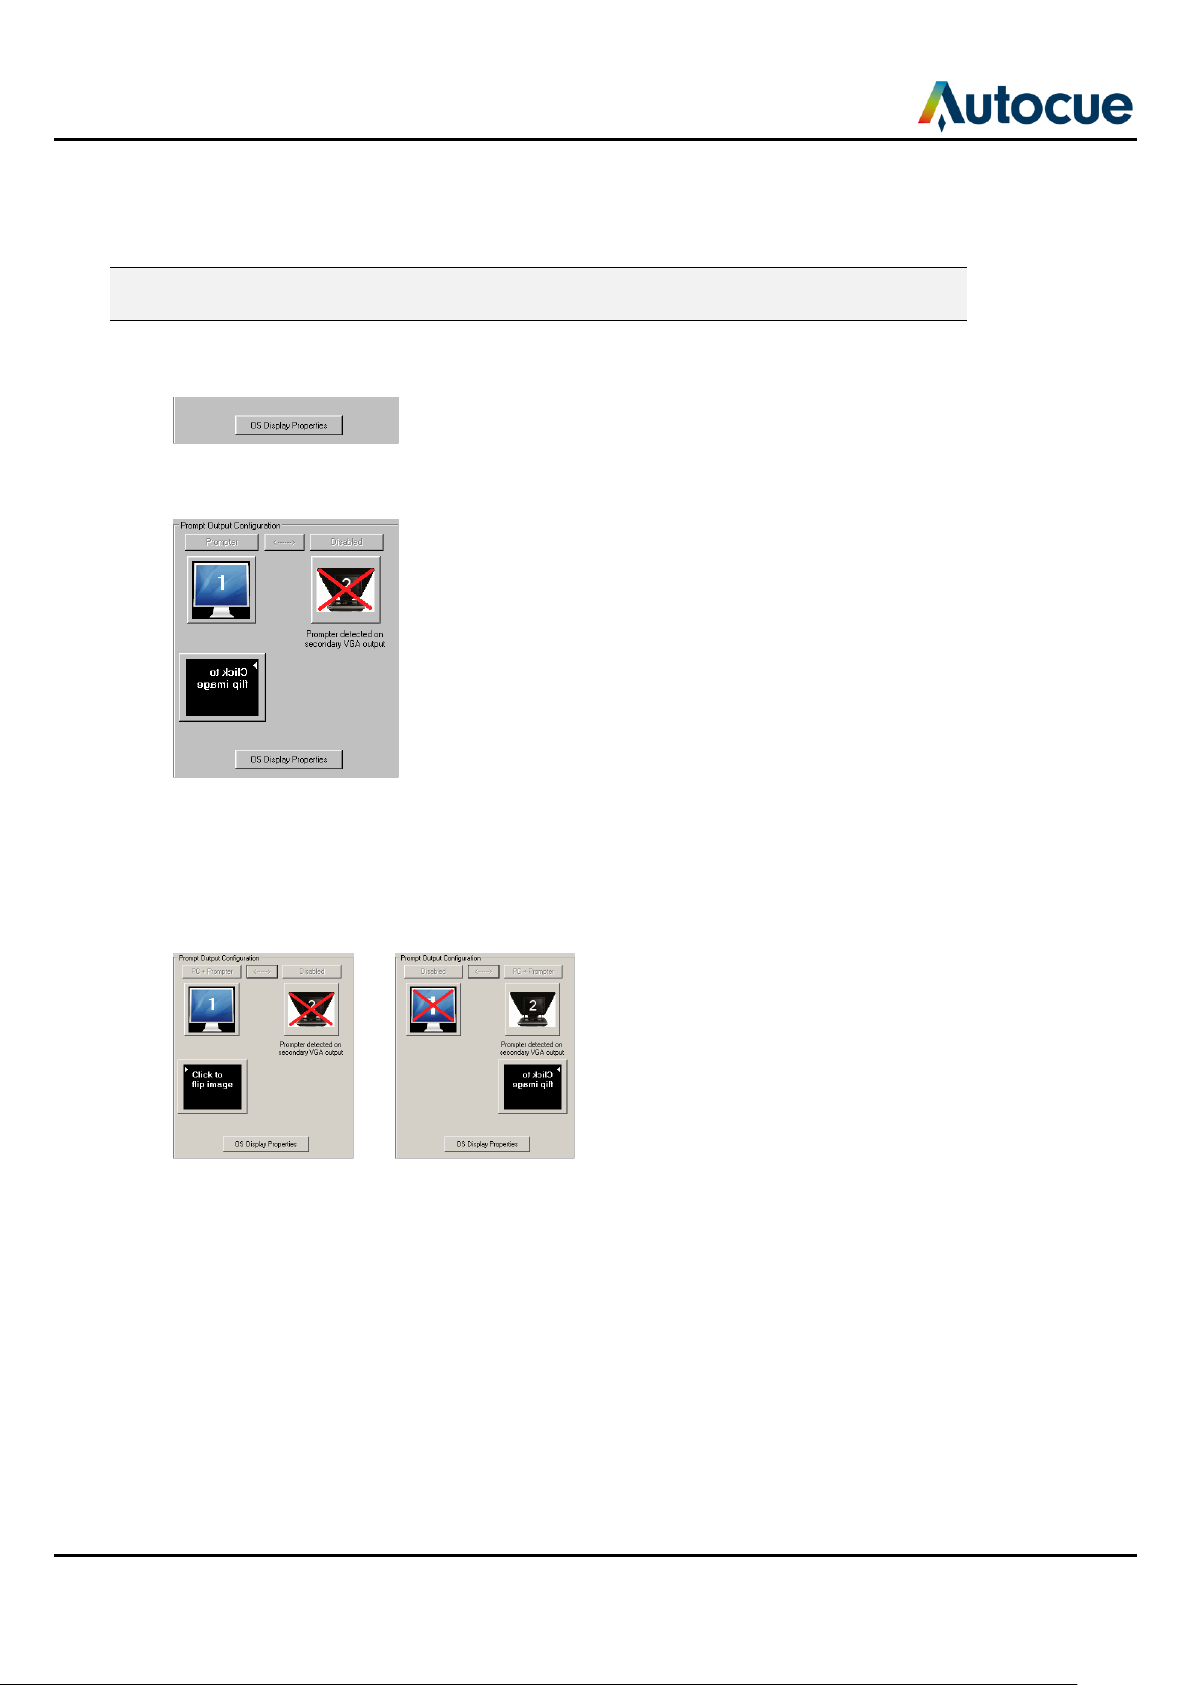
Prompt output
You can configure a secondary output monitor by changing the Windows display properties. The most
important property to change is the option to extend your computer desktop across both screens.
Refer to the user manuals for your computer or graphics card for guidance on
changing the display settings.
QStart provides a button to access the standard operating system display controls for your computer if
required.
If the computer desktop has been extended over the two screens, the QStart software automatically detects
whether you have an additional monitor connected to your computer.
D e f a u l t d u a l m o n i t o r
Dual screens
Click the teleprompter icon and the image representing the script being prompted automatically moves
under the second output and inverts. When you prompt your script the output will appear on the
teleprompter.
B e f o r e s el e c t in g A f te r c l i c k i n g
s e c on d a ry d i s p l a y s e c on d a ry d i s p l a y
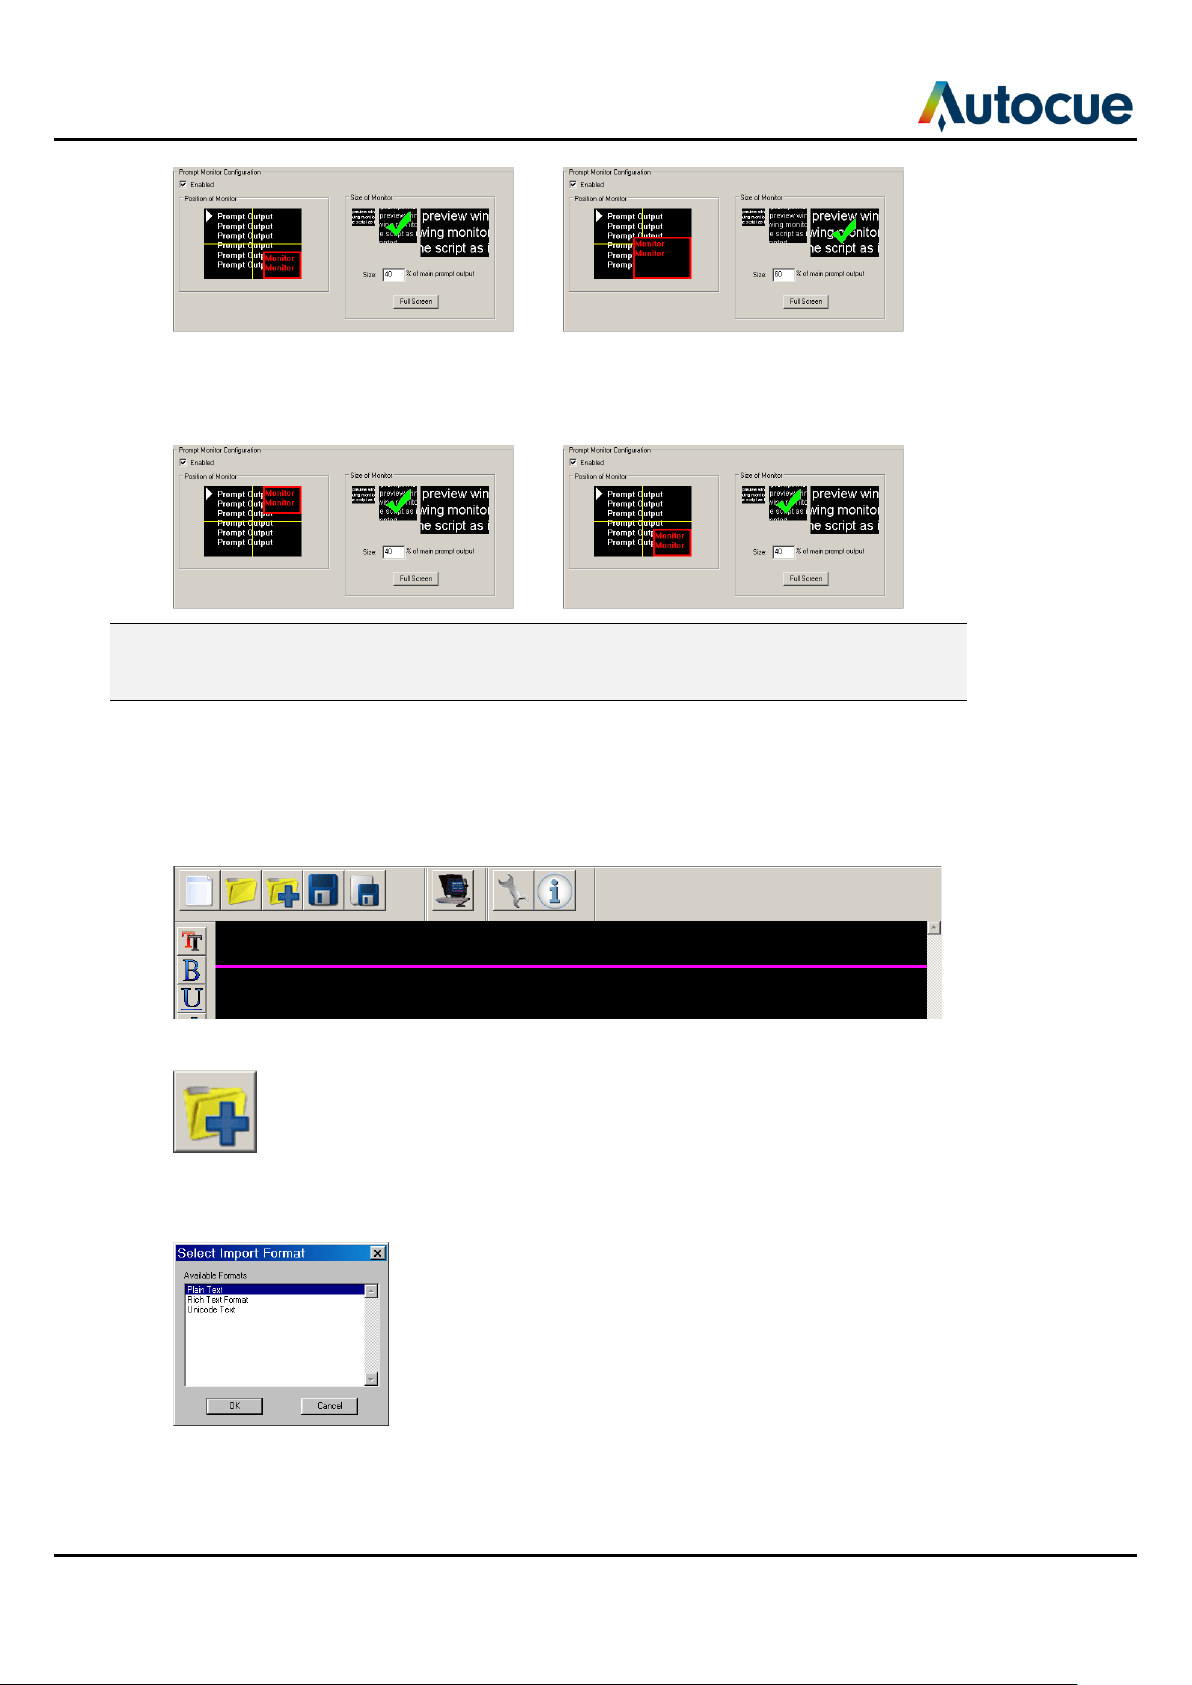
Enable a prompt monitor
If your script is being displayed on the teleprompter you can follow its progress using the in-built Prompt
Monitor window. When it is first enabled the Prompt Monitor is set to Full Screen mode.
Change the size
Click on the required thumbnail in the Size of Monitor panel. The value in the Size field automatically changes
and the red rectangle changes accordingly.
SSP-QStartUserManual.docx 2011-06-15 10 © 2003-2011 Autocue Group Ltd.
Page 11
Getting started
- Using your Starter Series Prompter
Change the position
Click in a different quadrant of the screen in the Position of Monitor panel. The red rectangle will move to this
location.
Note: You should not need to change any parameters on the other tabs of the QStart
Options interface. If required, there is detailed information in the “Make the most of
your prompter” section later in this manual.
Create and prompt scripts
Prepare your text
It is presumed that most scripts will be imported from some other text editor.
QStart can import Word (.doc), Rich Text (.rtf), Text (.txt) files.
1. Click the Import File button.
2. Navigate to select the required file.
3. If requested, select the appropriate file format.
4. The text is inserted at the position of the cursor.
Save your script
SSP-QStartUserManual.docx 2011-06-15 11 © 2003-2011 Autocue Group Ltd.
Page 12

Getting started
- Using your Starter Series Prompter
When you have finished typing your script you should save the file so that you do
not lose your work. It is good practice to regularly save your work.
2. Click the Save button.
3. If your script has not previously been saved you will have to give it a name and
save it to a folder on your computer.
Prompt your script
When you have finished preparing your script you can display it on your Starter
Series Prompter so that a presenter may read it.
4. Click the Begin Prompting button.
5. Your script will appear on the teleprompter.
Scroll the script
The default scroll control is a standard computer mouse. If you have ordered a
dedicated scroll control device, refer to the “Different ways to control scrolling”
section later in this manual for guidance on configuring the device.
6. Use your computer mouse to control the movement of the prompt output.
7. Press the ESC key on the computer keyboard to stop prompting and return to the
Script Editor window.
SSP-QStartUserManual.docx 2011-06-15 12 © 2003-2011 Autocue Group Ltd.
Page 13

Make the most of your prompter
- Import, edit and prompt scripts
Make the most of your prompter
QStart allows you to quickly and simply create, edit, format and prompt the scripts you write.
The QStart user interface is illustrated below.
Import, edit and prompt scripts
N e w Fi l e Op e n F i l e I m p o r t F i l e S a v e F i le Ex p o r t F i l e B eg i n P r o m p t i n g
Prepare your text
Create a new script
QStart opens with a blank script already open in the Editor window. You can start typing directly into this
area. Alternatively, click the New File button to open a blank file.
Open an existing script
If you already have a saved script file, you can click on the Open File button and navigate to the appropriate
location and open it into QStart. Existing files will have been created in a previous version of QStart. File
names will be in the format: *.wss
Write text directly
1. Start typing your script directly into the Editor window.
Import text
QStart can import Word files (.doc), Rich Text (.rtf), Text (.txt)
1. Click the Import File button.
SSP-QStartUserManual.docx 2011-06-15 13 © 2003-2011 Autocue Group Ltd.
Page 14

Make the most of your prompter
- Import, edit and prompt scripts
2. Navigate to select the required file
3. If requested, select the appropriate file format
4. The text is inserted at the position of the cursor.
Don’t lose your work
Save file
Click the Save button to save any changes you have made to the current script. If the file has not been saved
before, the standard Windows save file dialog will be displayed.
Export file
If you wish to change the name of the script you are editing, click the Export File button. This opens the
standard Windows save dialog where you can specify the name and storage location of the script.
Change words and phrases
Search and Replace
1. Click the Replace button
2. Enter the word you are searching for in the “Find what” text field
3. Add any special characters by clicking either the Internal Chars or Special Chars
buttons and selecting the required character to be searched.
4. Click the Find Next, Replace or Replace All button.
Undo changes
Click the Undo button to remove all unsaved changes made to your script
Prompt your script
Click the Begin Prompting button to send your completed script to be displayed on the monitor of the SSP.
SSP-QStartUserManual.docx 2011-06-15 14 © 2003-2011 Autocue Group Ltd.
Page 15

Make the most of your prompter
- Format your scripts
Use your selected scroll control device to prompt your script.
To stop prompting, press the ESC key on your computer keyboard.
Format your scripts
If no text is selected, changes made using the Format All interface will apply to the entire script. Most of the
buttons of the Format All interface have three states.
Leave: retain formatting already applied to the selected text.
On: apply the formatting to the selected text.
Off: clear the formatting from the selected text.
The individual format buttons at the left of the QStart script editor pane apply the same changes as those of
the Format All interface but only apply the changes to any selected text or new text entered at the cursor
location.
There are five colours available for the text in the script editor pane. Click the required colour button to
change any selected text to that colour
Change the appearance of the prompt output
You can add extra space between the lines of the prompt output and also change the colour of the text on
the output monitor.
Note: Any changes made using these controls do not show up in the Editor window.
Click the System Options button and select the Prompt Output Format tab.
SSP-QStartUserManual.docx 2011-06-15 15 © 2003-2011 Autocue Group Ltd.
Page 16

Make the most of your prompter
- Dividing long scripts or using multiple presenters
Extra line spacing
The default value for text line spacing is 0. Use the up/down arrows or type the required spacing in directly.
The space between each line of text of the prompt output will be increased. The distance added by each
increment is proportional to the size of the text in your script. For example, if your text is set to 100 and you
set the extra spacing value to 0.4, the gap between the lines of the output will be increased by 40. A value of
1 is equivalent to double line spacing.
Text and background colour
Use the slider controls to change the colour of the text and the background of the prompt output. (These do
not change the appearance of your script in the editing window.)
Dividing long scripts or using multiple presenters
Sometimes you may want several people to read different sections of a script. To make it easier to navigate
to the place in a script where a new presenter starts to speak, you can insert markers. Alternatively, you may
have a single long script which you want to divide into sections.
Add markers
1. Position the cursor where you want to add a marker
2. Click the Marker button
3. The Markers list window is displayed
SSP-QStartUserManual.docx 2011-06-15 16 © 2003-2011 Autocue Group Ltd.
Page 17

Make the most of your prompter
- Dividing long scripts or using multiple presenters
4. Click the Add button
5. Enter a description or name for the marker in the Comment field
6. Enter a sequence of keystrokes that you can use to jump to this marker position
while the script is being prompted
Note: If an inappropriate key sequence is selected, the dialog box will show this.
7. When you have entered a comment and valid shortcut click OK and the marker will
be added to the list.
The number in the first column of the list refers to the relative position of a marker in
the script. If you have two markers already and add another marker at a position
between them, the new marker will be numbered 2 and the previous marker 2 will
be renumbered as 3.
Note: If you use the same shortcut for two markers, the shortcut will only find the marker
with the lowest number.
SSP-QStartUserManual.docx 2011-06-15 17 © 2003-2011 Autocue Group Ltd.
Page 18

Make the most of your prompter
- Dividing long scripts or using multiple presenters
Delete markers
You can remove markers by highlighting a marker symbol in the script and deleting it. This will automatically
remove the entry from the Markers list.
You can also remove them using the controls of the Markers dialog.
1. Click the Marker button
2. The Markers list window is displayed.
3. Select an entry
4. Click the Delete button
The entry is removed from the list and deleted from the script.
Edit markers
You can alter the comment and shortcut of a Marker using the controls of the Markers dialog.
1. Click the Marker button
2. The Markers list window is displayed.
3. Select an entry
4. Click the Modify button
Make the required changes to the various fields and click OK.
Moving between markers
The shortcut keystrokes allow you to jump to the related position in the script in both
edit mode and prompt mode.
SSP-QStartUserManual.docx 2011-06-15 18 © 2003-2011 Autocue Group Ltd.
Page 19

Each number gives a faster scroll rate. 1 is the slowest
and 9 the fastest
0 stops scrolling
Backspace toggles between Forward and Reverse
Make the most of your prompter
- Different ways to control scrolling
Different ways to control scrolling
When prompting a script, movement of the text on the screen is controlled by a scroll control device. The
default device is a standard computer mouse. QStart supports a range of other dedicated scroll control
devices that you can connect to your computer.
Select an alternative scroll controller
1. Click on the System Options button to access the configuration interface.
2. Click on the Controller tab.
3. Click on the appropriate picture for the type of controller you will be using to control
the movement of the prompt output.
4. Click OK to return to the Script Editor window.
Default button actions
Note: The actions of the various keys on the scroll control devices cannot be changed or
adjusted using the QStart software.
Keyboard number keys
SSP-QStartUserManual.docx 2011-06-15 19 © 2003-2011 Autocue Group Ltd.
Page 20

The Up arrow key increases the speed each time it is
pressed and the down arrow key decrease the scroll rate.
Press the left arrow key to change direction and the right
arrow key to stop scrolling.
Use the Home key to jump to the top of your script and
the End key to jump to the bottom of the script.
Move the mouse forward to increase the scroll speed.
Move the mouse backwards to decrease the speed.
The left button changes direction and the right button
stops the scrolling.
The default actions of the ShuttleXpress buttons are, from
left to right:
Previous Item
Next Item
Forward/Reverse
Reset Item
Reset Runorder
The pedal of the controller varies the speed at which the
text moves up or down the screen.
The button on the top of the controller changes the
direction of scrolling.
Make the most of your prompter
- Different ways to control scrolling
Keyboard arrow keys
Mouse
ShuttleXpress
Foot controller
SSP-QStartUserManual.docx 2011-06-15 20 © 2003-2011 Autocue Group Ltd.
Page 21

Make the most of your prompter
- Improve the performance of your prompter
Improve the performance of your prompter
1. Click on the System Options button to access the configuration interface.
2. Click on the Display Sensitivity tab.
Display Sensitivity compensates for the performance capabilities of different computers when controlling both
the main prompt output and the prompt monitor window. This is usually shown by movement of the text in the
prompt output halting as the CPU is made to work harder. Move the slider control and test the scroll
movement until you see the best performance for your specific monitor.
3. Click OK to return to the Script Editor window.
Using a single monitor
It is possible to write, edit and prompt your scripts on the same screen when you only have your computer or
laptop available. You might use your system in this manner if you have to give a webcast of a speech or are
taking part in a video conference or meeting.
1. Click on the System Options button to access the configuration interface.
2. If you are using a single monitor the Prompt Output tab of the Options interface will
look similar to the image below.
SSP-QStartUserManual.docx 2011-06-15 21 © 2003-2011 Autocue Group Ltd.
Page 22

Make the most of your prompter
- Using a single monitor
Prompt output
If required you can configure your computer by clicking the “OS Display Properties” button to access the
standard operating system display controls.
Use the controls of the Prompt Output Configuration panel to select the orientation of the prompted text on
your computer screen.
If you are using your computer as the teleprompter or are using it with a conference stand, you can flip the
text so that the words are orientated correctly when they are mirrored. Click on the “Click to flip image”
button.
SSP-QStartUserManual.docx 2011-06-15 22 © 2003-2011 Autocue Group Ltd.
Page 23

Make the most of your prompter
- Alternative operating systems you may use
Alternative operating systems you may use
Your QStart software will run on computers using the following operating systems:
Windows XP Pro SP3
Windows Vista
Special requirement. You must first download and install winhlp32.dll from the
Microsoft web site http://go.microsoft.com/fwlink/?LinkID=82148
(For legal reasons Autocue cannot distribute this with its software.)
Windows 7
Special requirement: We strongly recommend disabling any of the Aero themes
for the desktop
Mac OS
Special requirement. The software must be run using Windows XP under
Bootcamp.
Autocue has Starter Series prompting software that runs under native Mac OS.
Contact the sales team for details of, or to purchase, this product.
Note: The appropriate device drivers for the hardware security dongle are automatically
selected during installation.
SSP-QStartUserManual.docx 2011-06-15 23 © 2003-2011 Autocue Group Ltd.
Page 24

Use your prompter in different situations
Use your prompter in different situations
You may not always need to use your prompter with a camera. The Starter Series hardware is designed to
give you five alternative mounting arrangements depending on how you wish to use your system.
Note: When altering the position of the different components of your Starter Series
Prompter, always handle with care to avoid damaging them, especially the mirrored
glass.
Use the following procedures where required when rearranging the components of your prompter into
the different configurations.
1. Remove the hood and mirrored glass
1. Locate the four thumb screws that attach the hood to the vertical frame
2. Remove the thumb screws
3. Carefully take the hood off the frame and store on a smooth, flat surface
2. Remove the monitor
1. Locate the four thumb screws that attach the monitor to the base of the prompter
2. Remove the thumb screws
3. Carefully take the monitor off and place on a smooth, flat surface
3. Remove the vertical frame
1. Locate the four thumb screws that attach the vertical frame to the base of the
prompter
SSP-QStartUserManual.docx 2011-06-15 24 © 2003-2011 Autocue Group Ltd.
Page 25

Use your prompter in different situations
2. Remove the thumb screws
3. Carefully take the frame off
4. Change the monitor mounting plate
1. Remove the monitor
2. Lay the monitor face down on a smooth, flat surface
3. Remove the four screws securing the standard mounting plate to the back of the
monitor
4. Remove the standard mounting plate
5. Align the supplied wide mounting plate over the correct holes on the rear of the
monitor
6. Securely attach the wide mounting plate
Use the four procedures outlined above
1. Remove the hood and mirrored glass
2. Remove the monitor
3. Remove the vertical frame
4. Change the monitor mounting plate
SSP-QStartUserManual.docx 2011-06-15 25 © 2003-2011 Autocue Group Ltd.
Page 26

Use your prompter in different situations
when rearranging the components of your prompter into the different configurations described in the
following sections.
SSP-QStartUserManual.docx 2011-06-15 26 © 2003-2011 Autocue Group Ltd.
Page 27

Use your prompter in different situations
Straight read (Monitor above the camera with no mirror)
The most common situation for using a straight read monitor is in conjunction with a light-ring for chromakey
filming.
1. Mount the prompter unit to the tripod head.
2. Remove the hood and mirrored glass.
3. Remove the monitor.
4. Change the monitor mounting plate
5. Align the holes in the edge of the mounting plate with the slide nuts in the edge of
the vertical frame
6. Loosely screw in four thumb screws
7. Adjust the position of the monitor by sliding it up and down the vertical frame
8. Fasten the monitor in position by tightening the thumb screws fully
SSP-QStartUserManual.docx 2011-06-15 27 © 2003-2011 Autocue Group Ltd.
Page 28

Use your prompter in different situations
Straight read (Monitor below the camera with no mirror)
The most common situation for using a straight read monitor is in conjunction with a light-ring for chromakey
filming.
Note: This is not a recommended configuration for the SSP17 monitor.
1. Mount the prompter unit to the tripod head.
2. Remove the hood and mirrored glass.
3. Remove the monitor.
4. Move a slide nut to the end of the frame and align these with the middle screw
holes on the monitor assembly
5. Secure the monitor in a vertical position across the end of the prompter
Free standing
You might use a free standing monitor where your presenters address a medium sized meeting where the
monitor can be positioned behind and above the heads of the audience.
1. Remove the hood and mirrored glass.
2. Remove the monitor.
3. Remove the vertical frame.
SSP-QStartUserManual.docx 2011-06-15 28 © 2003-2011 Autocue Group Ltd.
Page 29

Use your prompter in different situations
4. Change the monitor mounting plate
5. Screw your tripod head mounting plate into the threaded hole at the bottom of the
vertical frame
6. Mount the vertical frame onto your chosen tripod and fasten securely
7. Align the holes in the edge of the mounting plate with the slide nuts in the edge of
the vertical frame
8. Loosely screw in four thumb screws
9. Adjust the position of the monitor by sliding it up and down the vertical frame
10. Fasten the monitor in position by tightening the thumb screws fully
SSP-QStartUserManual.docx 2011-06-15 29 © 2003-2011 Autocue Group Ltd.
Page 30

Use your prompter in different situations
Floor standing
The floor standing arrangement is designed for events where a speaker is addressing small groups in an
office or larger audiences from a stage. The monitor can be positioned unobtrusively low down so that the
presenter can simply lance down at the screen to see the script.
1. Remove the hood and mirrored glass.
2. Remove the monitor.
3. Re-attach the monitor assembly to the underside of the prompter base.
4. Adjust the position of the vertical frame so that the monitor is at the required angle.
5. Secure the vertical frame in position.
SSP-QStartUserManual.docx 2011-06-15 30 © 2003-2011 Autocue Group Ltd.
Page 31

Use your prompter in different situations
Conference stand
An optional add-on manual conference stand is also available. The conference stand is designed for
corporate conferences or other events where a speaker is addressing an audience. The stand height and
angle of the prompting glass are adjustable to match the eye-line of the presenter.
1. Remove the hood and mirrored glass.
2. Remove the monitor.
3. Remove the vertical frame.
4. Change the monitor mounting plate.
5. Align the holes in the edge of the mounting plate with the slide nuts in the edge of
the vertical frame.
6. Loosely screw in four thumb screws.
7. Adjust the position of the monitor by sliding it back and forth along the now
horizontal frame.
8. Fasten the monitor in position by tightening the thumb screws fully.
9. Attach the conference stand and glass holder to the vertical frame and monitor
assembly.
SSP-QStartUserManual.docx 2011-06-15 31 © 2003-2011 Autocue Group Ltd.
Page 32

Use your prompter in different situations
10. Insert glass into the glass holder at the top of the conference stand and adjust the
height. (Ensure the blue dot on the glass faces the presenter.)
SSP-QStartUserManual.docx 2011-06-15 32 © 2003-2011 Autocue Group Ltd.
Page 33

Upgrading Starter Series Prompter components
Upgrading Starter Series Prompter components
Upgrade software
Contact the Autocue technical support team to request the link to download the latest version of the software
and the password to extract the files.
1. Use the supplied password to extract the files from the downloaded .ZIP file to your
computer
2. Double-click on the SetupQS.exe icon
3. Select Upgrade Software from the installation dialog
4. If asked if you wish to replace certain files, click the “Yes to All” button
5. When asked, ensure the licence dongle is not plugged in and click OK
6. When installation has finished, click OK on the dialog box
Upgrade hardware
If you wish to upgrade the size of your on-camera unit, contact the Autocue sales team to discuss your
requirements. All components are standard so you may only need to replace the monitor.
SSP-QStartUserManual.docx 2011-06-15 33 © 2003-2011 Autocue Group Ltd.
Page 34

If you need to contact Autocue or QTV
Support
Our hardware and software support is provided by in-house teams of experienced and dedicated staff.
We provide free telephone support for prompting customers during UK office hours (9am till 6pm GMT) and
US office hours (9am till 5pm EST). When contacting the technical support teams, please provide as much
detail as possible.
Check the FAQ section of the web site to see if the answer you need has already been provided:
http://www.autocue-qtv.com/faqs
Information we need
Whenever you make a support enquiry, the minimum information we will need is the name, version and build
number of the software you are using.
Click the About button to display the licence and serial number details for the software you have installed.
If you cannot find the answer on the web site, contact the Technical Support team.
International SoftwareSupport@autocue.com +44 20 8665 2992
HardwareSupport@autocue.com +44 20 8665 2992
Americas SoftwareSupport@autocue.com +1 704 377 1496
HardwareSupport@autocue.com +1 212 929 7755
Sales
If you require additional or replacement equipment, contact the Autocue sales team.
International sales@autocue.co.uk +44 20 8665 2992
Americas sales@qtv.com +1 212 929 7755
Copyright information
©2003-2011 Autocue Group Ltd. All rights reserved. All information about Autocue software, hardware and
accessories—including company and brand logos—contained in this guide is protected under international
copyright conventions.
No part of this publication may be reproduced, stored in a retrieval system, or transmitted in any recording
or otherwise, without prior permission of Autocue Group Ltd. All third-party software or hardware, including
logos, referenced within this guide is copyright of the respective owners.
Disclaimer
Autocue Group Ltd reserves the right to revise this publication and to make changes in its content without
obligation of Autocue Group Ltd to notify any person or persons of such revision.
SSP-QStartUserManual.docx 2011-06-15 34 © 2003-2011 Autocue Group Ltd.
 Loading...