

Page 1
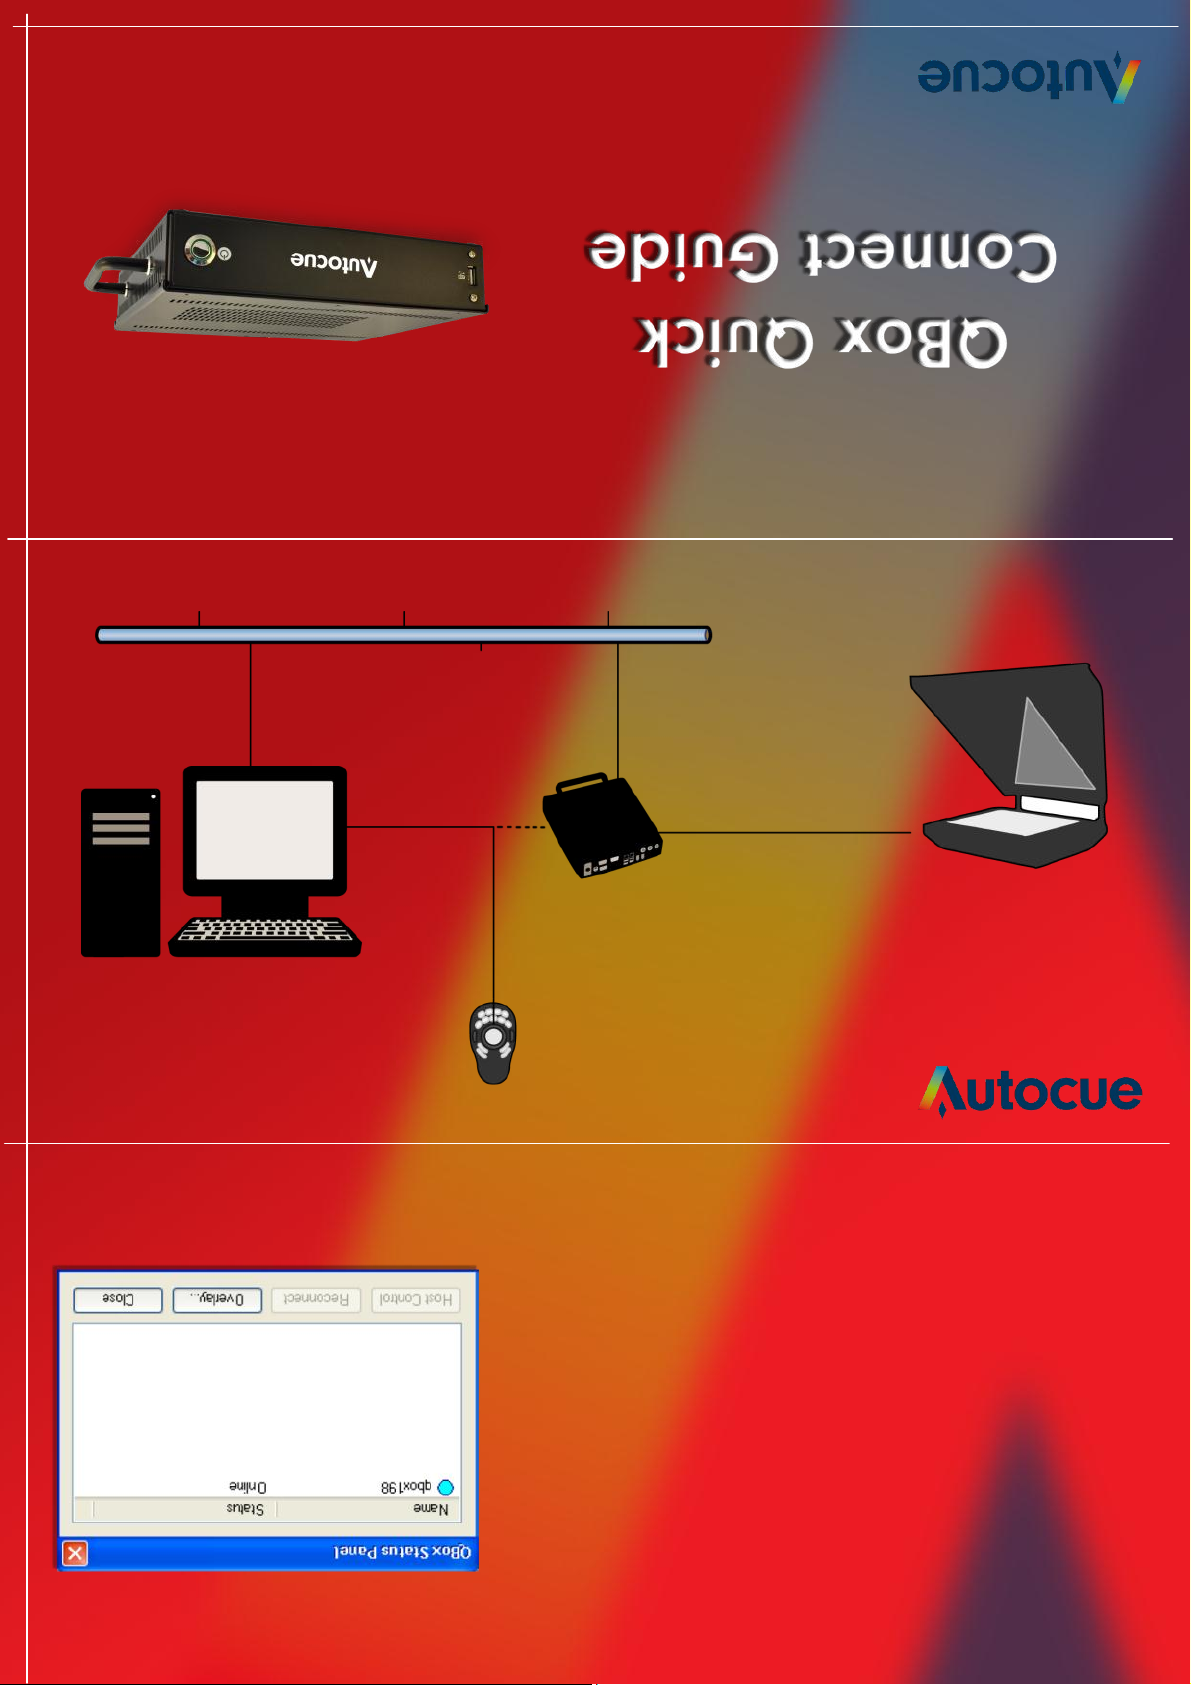
Ethernet
Composite Video (BNC)
PC with QMaster Soware
Connection Diagram
Scroll Control
QBox
On Camera Monitor
-camera
monitor with the scroll control.
the toolbar. You will be able to advance the text on the on
Load a script or enter a new script and press the begin prompt icon in
Test prompting:
QMaster is not detecting the QBox on the network.
the QBox, the QBox has been detected by QMaster. If the dot is red,
Leave all other default settings alone. If you see a blue indicator next to
Then enter the IP address for the QBox.
box and select Add. Enter a name ("QBox") and description for the QBox.
- Run QMaster. Go to Prompt->QBox Status panel. Right click in the white
Configure QMaster:
Page 2
Configuration
1. Install QMaster software on your PC:
Install QMaster software. This is on the CD-ROM.
Once installed, plug in the USB dongle into a free USB port on the PC.
2. Make necessary QBox connections:
Network:
Option A: Connect the QBox to your network using a network patch cable. Your PC will also connect to the network.
Option B: Connect the QBox directly to your PC via a network cross-over cable.
Video: Connect the QBox to the on camera monitor via the composite video (BNC) output.
Scroll controller: The scroll control is connected to the QBox. There is an option to connect scroll controls to the PC via USB or
serial (COM) ports. For more information, read the QMaster and QBox user guides.
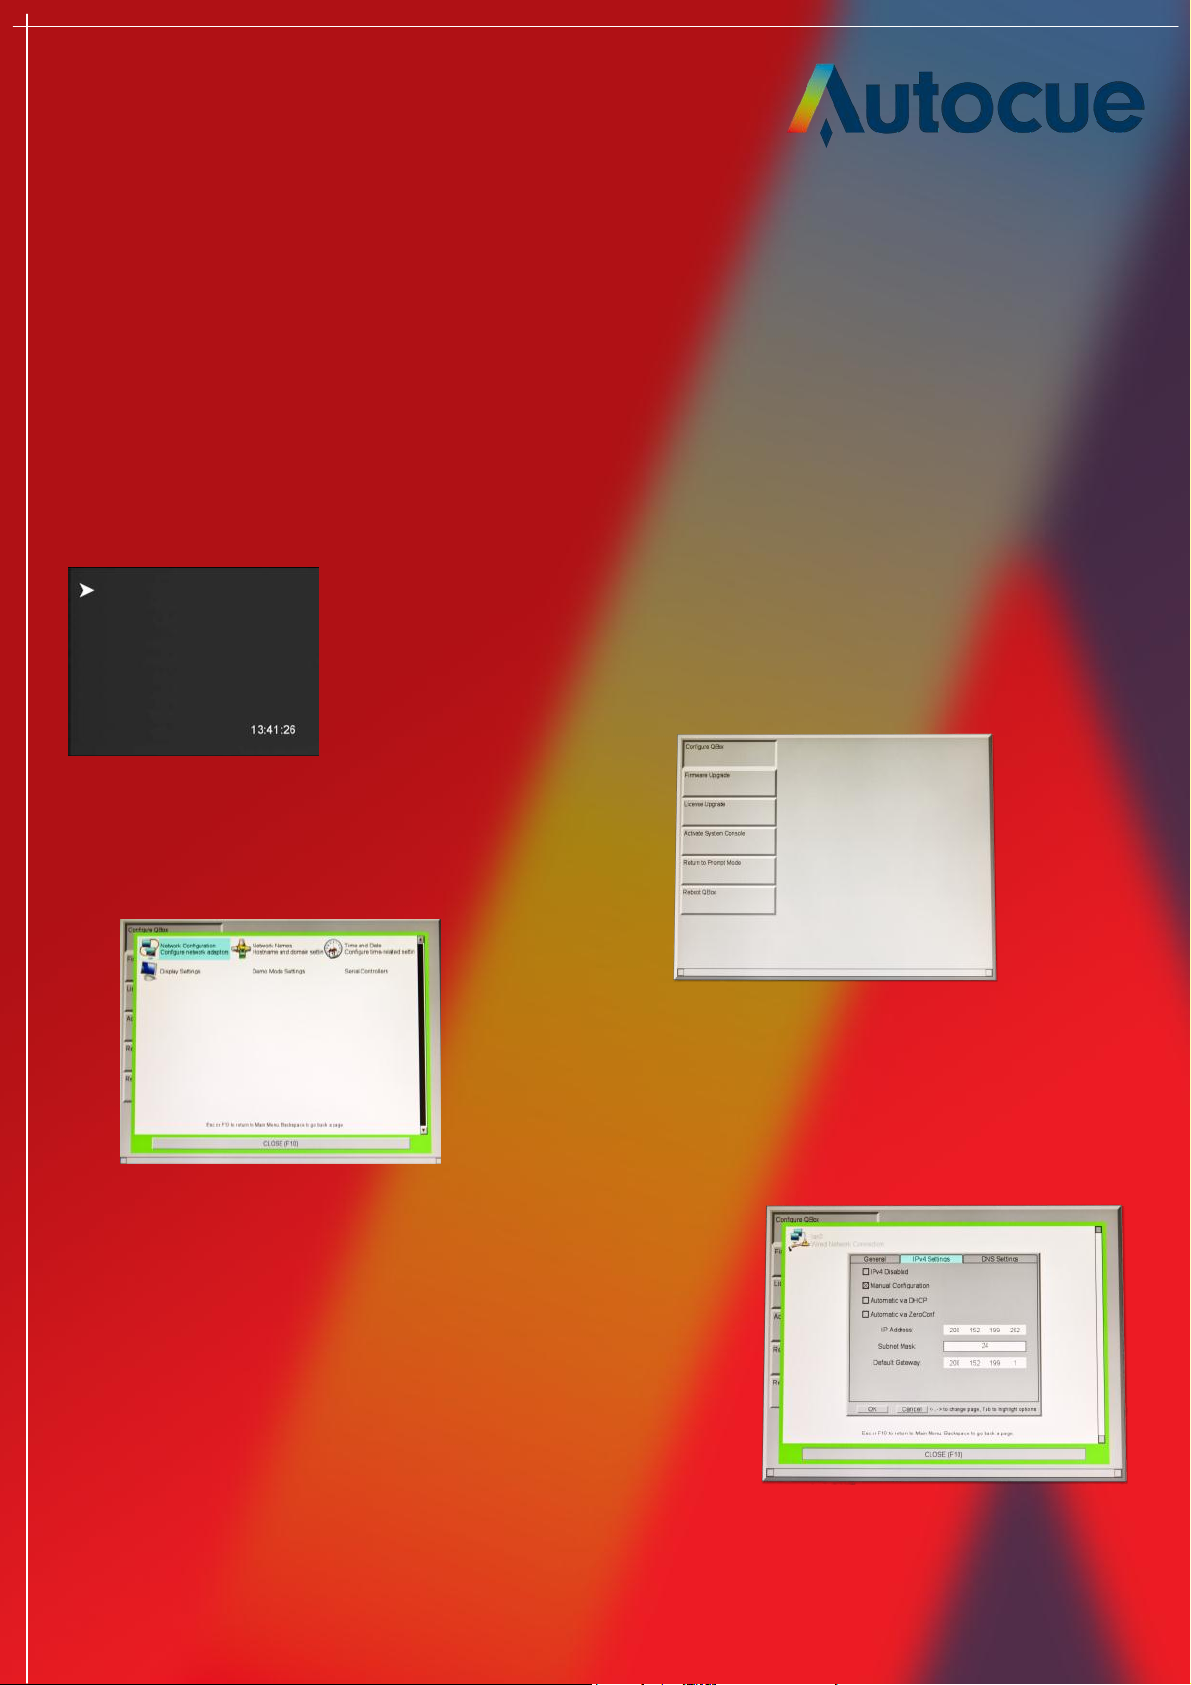
3. Configure the QBox:
Temporarily connect a keyboard (USB or PS/2) to the QBox. If PS/2 you will need to reboot the QBox.
Connect the power adapter to the QBox. Power up the QBox.
When the QBox has booted, you will see a small white triangle in the top left corner of the monitor.
4. Press F8 to bring up the QBox menu. Choose
‘Configure QBox’ by using the arrow keys and
pressing [ENTER]. Follow the QBox User Guide for
help with configuring the QBox. All guides are on the
CD-ROM.
If connecting the QBox to a network, we recommend using DHCP or Manual
configuration (Static IP address). If connecting the QBox directly to the PC, the
recommended settings to use are Zero Conf, or Manual configuration. With Zero
Conf, the QBox will self-assign an IP address in the range 169.254.X.X. Confirm
that the computer's IP address falls within the same range as the QBox.
When in the network configuration screens, use tab to jump to the next option.
To go to the next tab window, press TAB until you have the tab highlighted, then
press the left or right arrow keys to go to the next tab screen.
If you choose Manual configuration, use the period (".") to jump to the next box
for entering the IP address. Remove the existing IP using backspace.
Once network configuration is complete, exit the configuration menu and return
to prompt mode. Press F5 to get the QBox info screen. You will see the QBox's IP
address listed. If no IP address is listed, the QBox is not detecting a connection
to the network or to the PC.
Confirm the LED indicators are illuminated on the Ethernet port of the QBox.
Confirm you can ping the QBox from the PC
by using the QBox IP address. The PC must
be able to ping successfully in order for the
software to work with the QBox.
autocue.com
 Loading...