

Page 1

Specifications
autocue.com
Combining Lights
It is possible to combine multiple lights together if required.
Slide the light into one of
the three mounting
points on the top or the
sides of the light. Then
secure in place by
tightening the locking
disc. (A)
A
On Camera
LED 120pcs white LEDs with
high brightness
Brightness 1300lx /50cm/20”
(325lx /1m) /39”
ISO100 50cm f 8 / 1/8 S
Beam angle 60 degree
Colour
Temperature
Connuous
working hours
Baery lifeme Charge for approx. 500
Output power 7.5W
Chargeable
voltage
5600 ± 600K
Approx. 3 hours
times
AC 100-240V
LED Light
Guide
Built-in Lithium
baery
Baery charge
display
Dimension 94 x 81 x 31mm
Weight 189g / 6.6oz
Hot shoe mount Up / Left / Right 3pcs
Accessory Camera bracket
Rechargeable, 3400m
AH, 3.7V
4 levels
Page 2
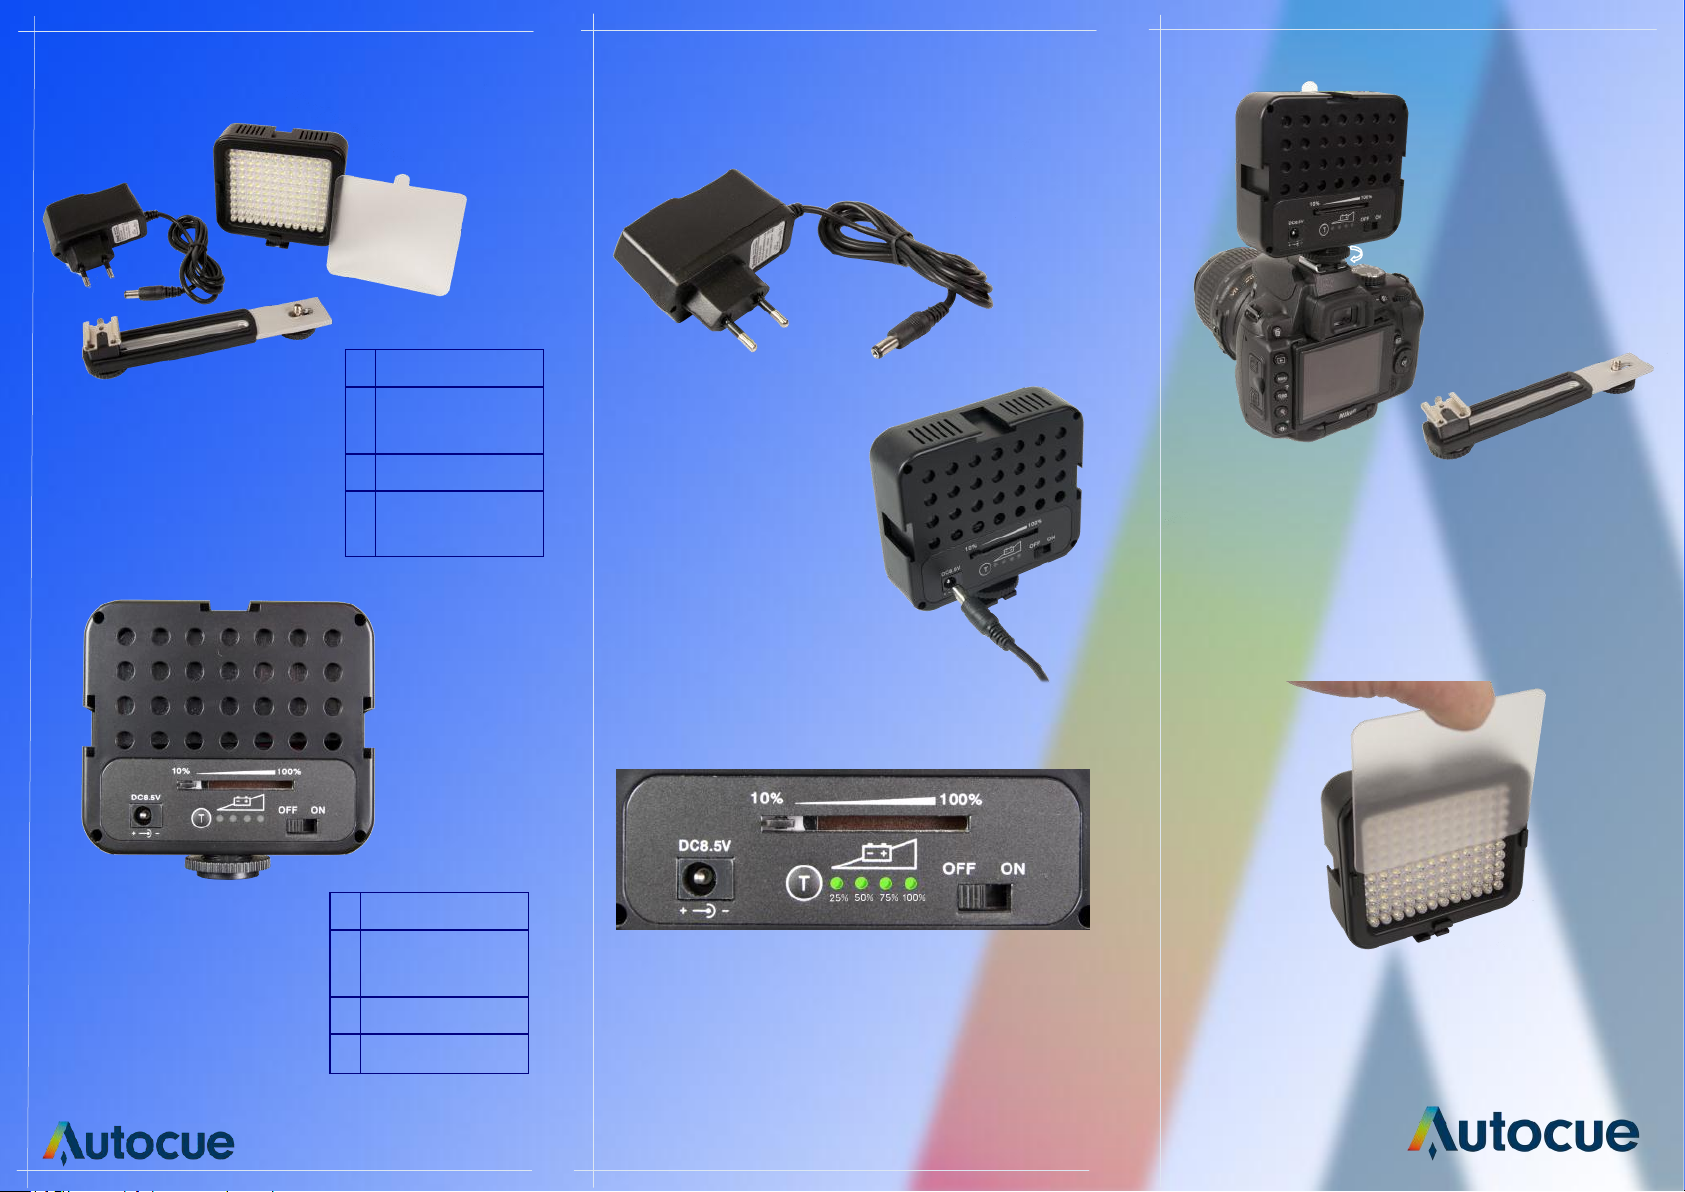
Components
A
B
C
D
Charging
1. Charge the light for
at least 12 hours
before use.
2. Connect the charger to
the light using the DC
Input socket. (A)
A Charge Socket
B Battery level
indicator
C On/Off Switch
D Dimmer Control
A
B
C
D
You can monitor the battery level by pressing the Test
button marked T.
The brightness can be controlled with the brightness
slider.
Switch the unit on and off using the On/Off switch.
The light can be mounted directly to your camera or
the Camera Light Mount. Secure in place by using the
locking disc. (A)
A
Install the Diffusion Filter if required. Slide the filter
into the guides to secure it in place.
A
Controls
A Charger
B 120 LED Lamp
Light
C Diffusion Filter
D Camera Light
Mount
 Loading...