

Page 1
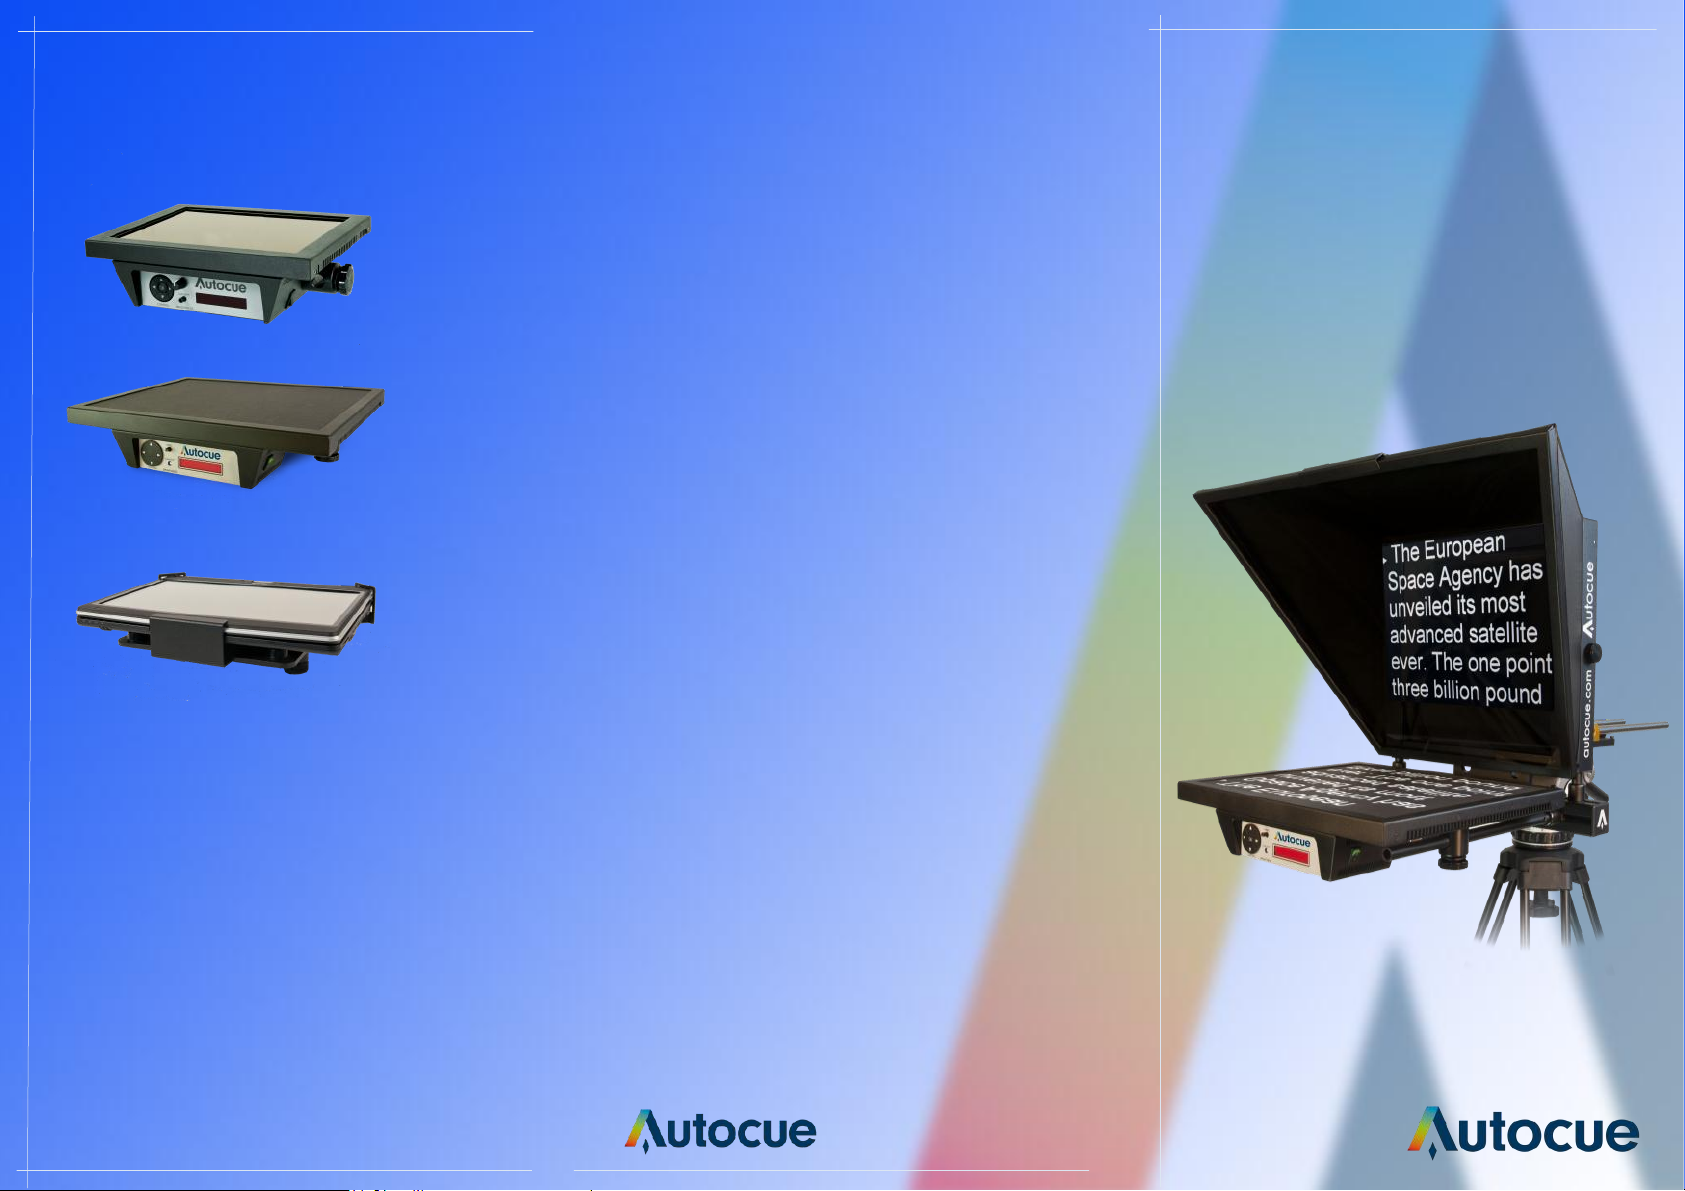
Display Compatibility
Master Series
Hoods
MSP 12”
Medium & Large
Wide Angle
MSP 17” & 20”
Tablet PC
Display
For more compatible
monitors see our website.
Guide
autocue.com
Page 2
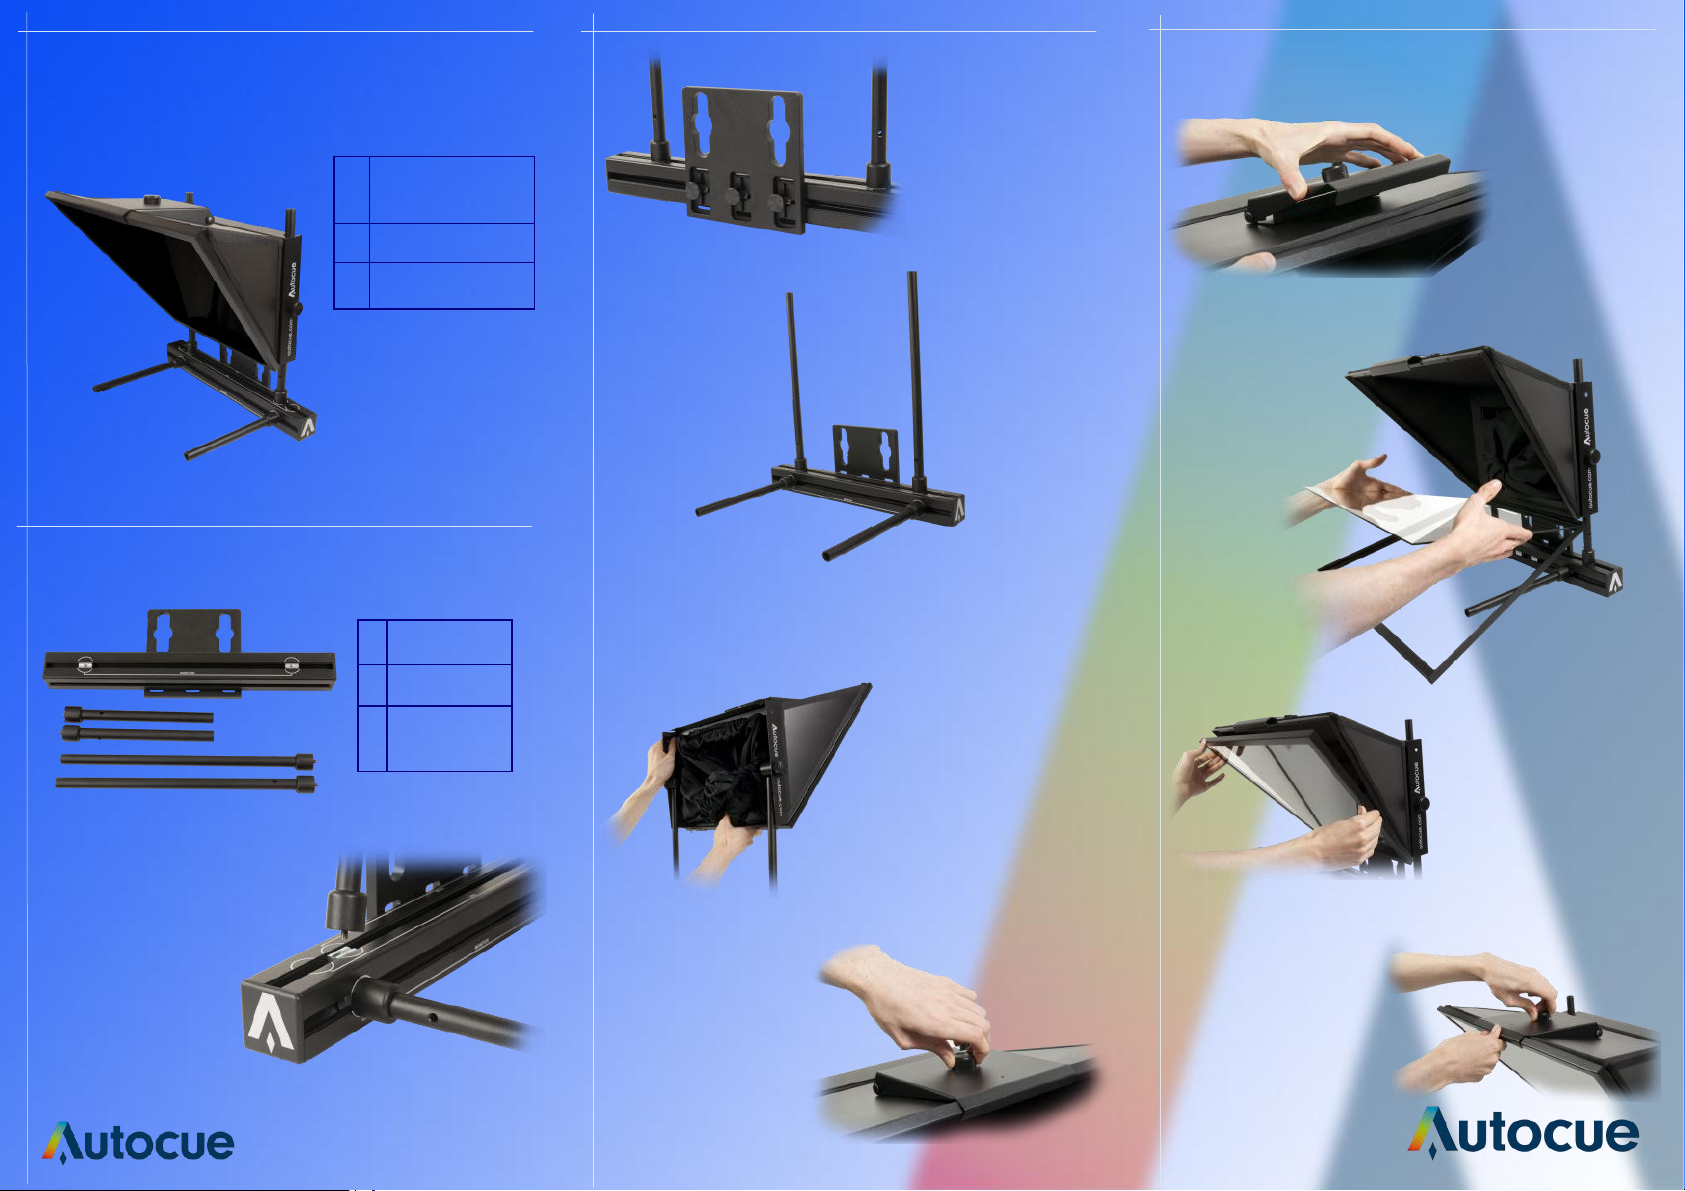
Components
A
B
C
Glass Frame
A
B
C
Bracket Set Assembly
A
A
Retainer
Hood
Bracket Set
Drop Plate
Hood Assembly
2. Ensure the
drop plate is in the
appropriate
position on the
bracket.
3. Pull the catch
forwards and lift it
up to release the
glass frame. Lower
the glass frame.
4. Insert the
glass in the
frame.
Ensuring the
blue dot is
facing down.
C
B
1. Screw the monitor
and hood poles into
the slide nuts on the
bracket set.
The bracket has
markings to indicate
the correct pole
positions.
Hood Poles
B
Monitor
C
Poles
2. Release the
glass frame
retainer using the
knob on top.
A
1. Mount the hood
onto the hood poles,
secure in place at the
desired height by
tightening the clamps.
(A)
5. Holding the
frame to avoid
fingerprints on
the glass, push
the frame up
into the closed
position.
6. Position the
catch over the
frame and fasten
by pushing the
assembly back
into position and
secure using the
knob.
 Loading...