

Page 1

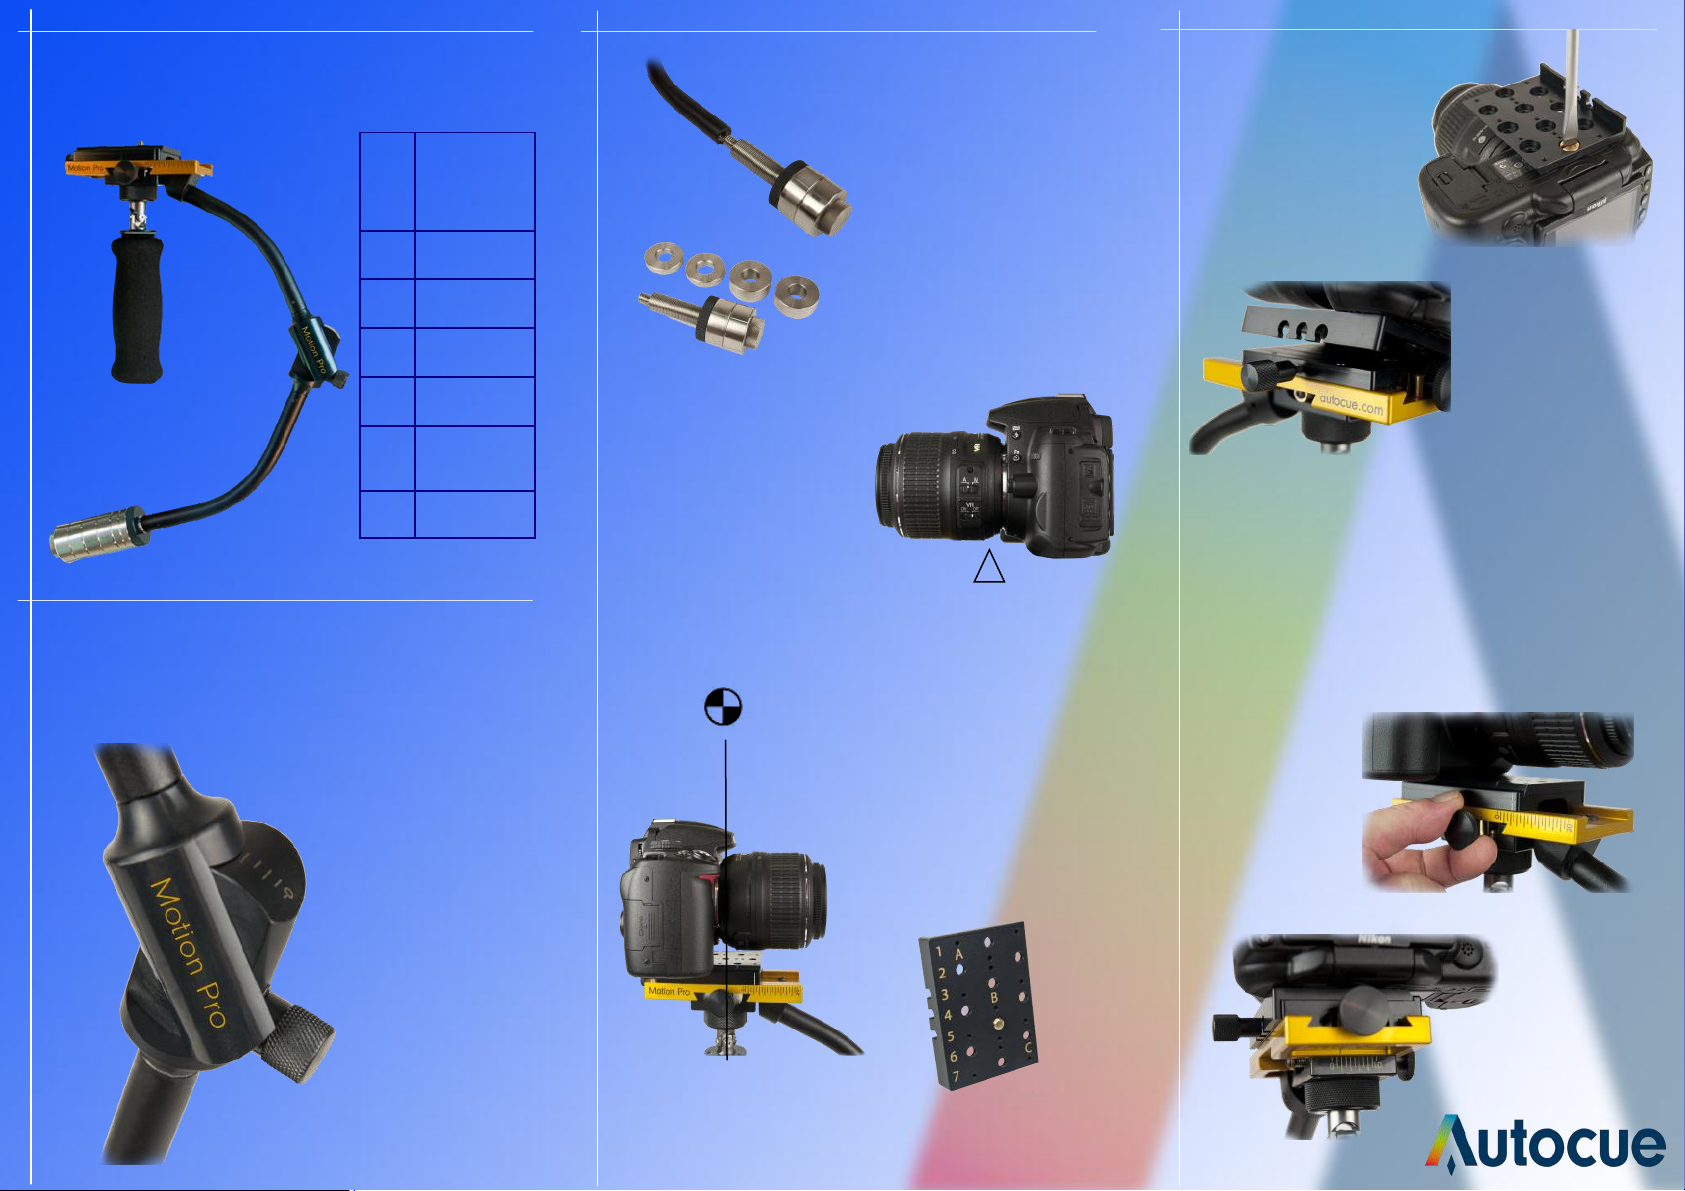
Camera Weight Settings
Camera Weight Bottom Weight Joint Setting
Motion Pro
Guide
8. When the Motion Pro is in perfect balance the camera
should be level fore-and-aft and left-to-right as above.
Operation
The Motion Pro is operated
using two hands. Support
the Motion Pro using the
grip with one hand and
guide the camera with the
other hand using only two
fingers on the guide ring to
perform pan and tilt.
343g / 0.75lbs 1 Large 5
680g / 1.5lbs 2 Large 4
907g / 2lbs 2 Large 1 Small 4
1133g / 2.5lbs 3 Large 3
1360g / 3lbs 3 Large 1 Small 3
1557g / 3.5lbs 3 Large 2 Small 3
1814g /4lbs 4 Large 2
2041g / 4.5lbs 4 Large 1 Small 2
2267g / 5lbs 4 Large 2 Small 2
Tripod Dock
A tripod docking
mount is available
for the Motion Pro.
This makes
balancing the unit
easier. Please see
our website for
details.
autocue.com
Page 2
Components
A
B
C
D
F
G
Assembly
1. Use the camera weight
guide to set the limb joint to
the suggested mark on the
scale. This is only a guide it
may need to be adjusted
later.
E
A
Camera
mounng
plate
B Guide Ring
C Gimbal
D Hand Grip
E Limb Joint
F Weight
G Weights
2. Install the correct amount
of weights on the lower limb
using the weight guide.
Remove the weight holder by
unscrewing it from the
Motion Pro and subtract the
weight rings as required.
Lock them in place by
replacing the locking disc.
3. Establish the approximate
centre of gravity of the
camera. You can do this by
balancing the camera on
the tip of your finger.
The c.g. of this camera is as
marked.
4. Mount the camera on the camera
mounting plate using the hole that
positions your cameras c.g. directly
above the centre of the gimbal.
c.g.
5. To mount the camera use
the camera fixing screw. To
change to the location of
the screw, unscrew it from
the plate to remove and
reposition.
6. Replace the camera
and plate onto the
Motion Pro and secure
A
7. It is essential that the Motion Pro is in perfect
balance. This is achieved by adjusting the balance
controls. Control (A) shifts the camera left-to-right.
Control (B) shifts the camera fore-and-aft. Adjust both
these controls to level the camera. If more adjustment
is needed fore-and-aft an alternative slot in the camera
mounting plate can be used.
in place using the fixing
screw. (A)
A
c.g.
B
Camera mounting plate
 Loading...