

Page 1
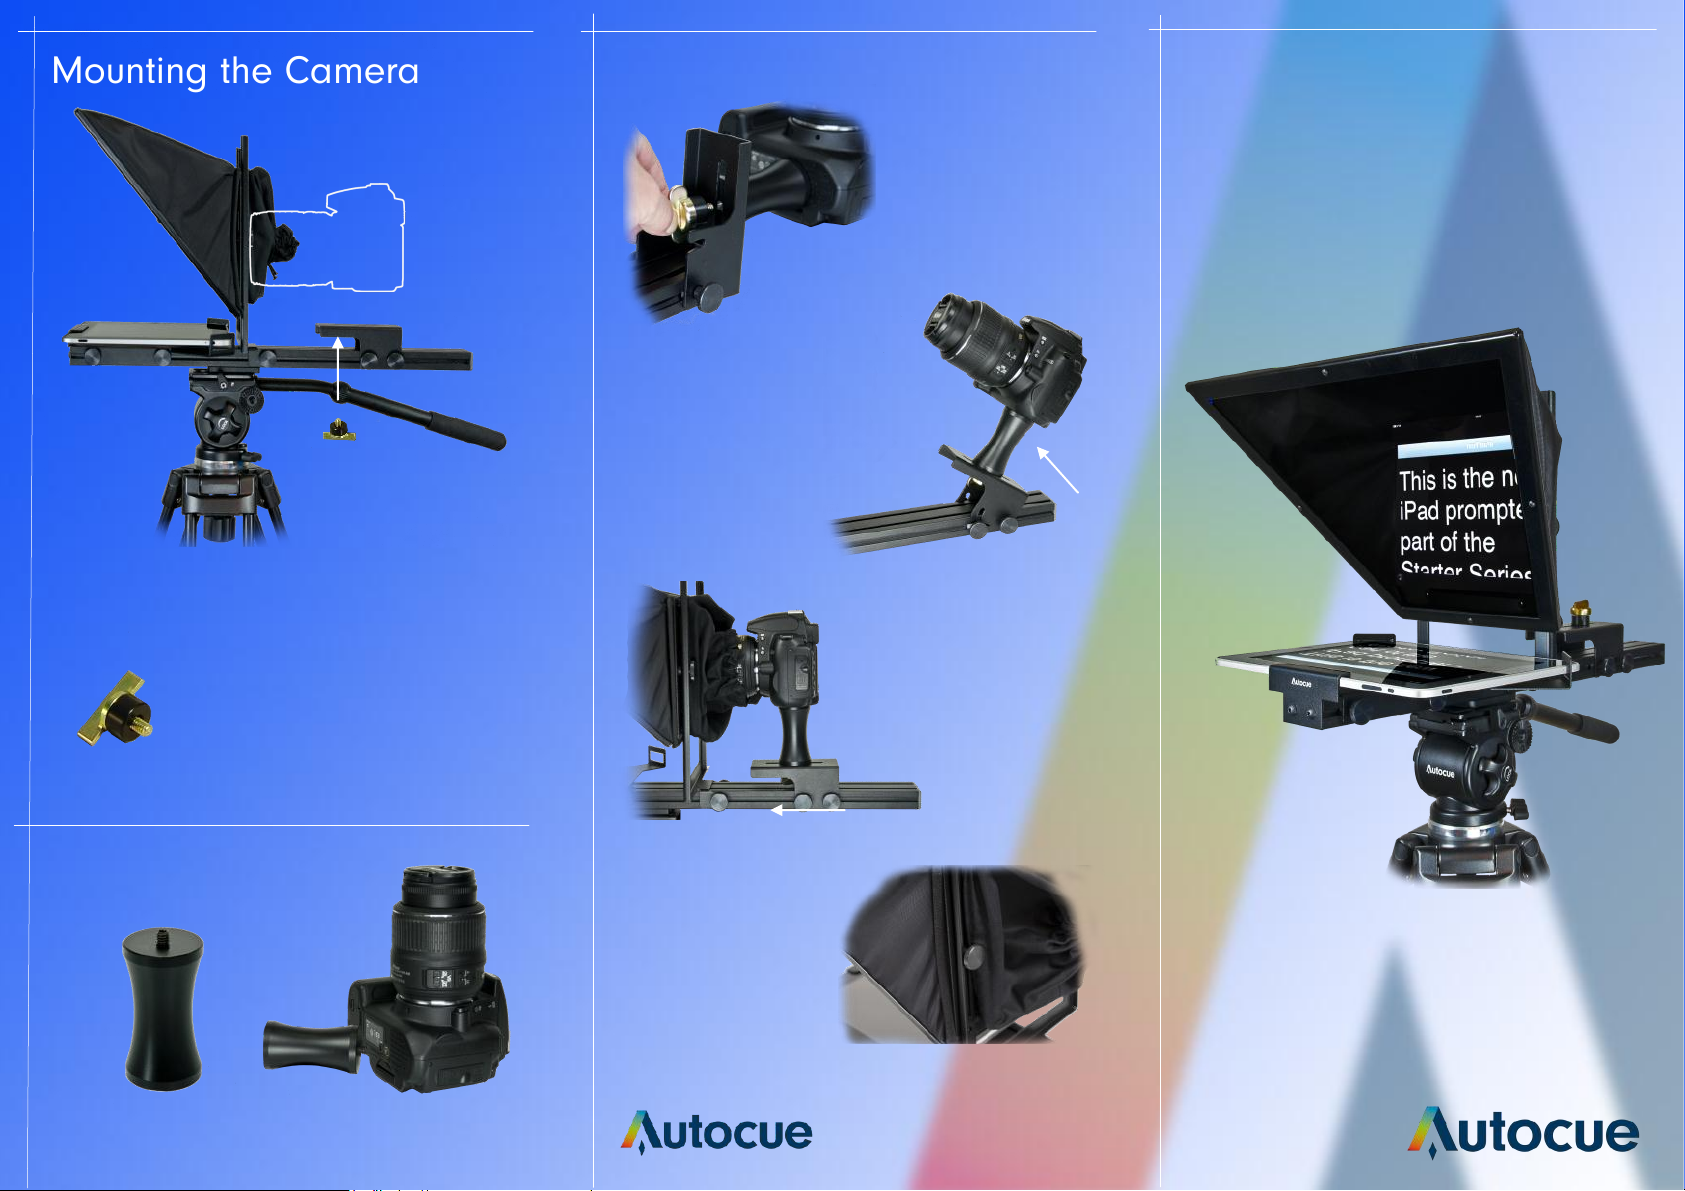
Mounting the Camera
3. Raise the camera to
the vertical position.
Secure by tightening
the four thumb screws.
2. Install camera riser to
the camera mounting
plate using the camera
screw provided
iPad Lite
Guide
It is important that the camera lens is in the centre of
the aperture at the rear of the hood. This is achieved by
raising and lowering the hood and fitting a camera
riser.
Camera Screw
1/4” BSW
Fix the camera in place
using the camera screw
provided.
Camera Riser
1. Fit camera riser to
the camera.
5. Centre the lens in the
aperture at the rear of
the hood, by raising or
lowering the hood.
Secure it in place by
tightening the two thumb
screws. (B)
4. Slide the camera
forward so that the lens
is in the aperture at the
rear of the hood.
(B)
autocue.com
Page 2
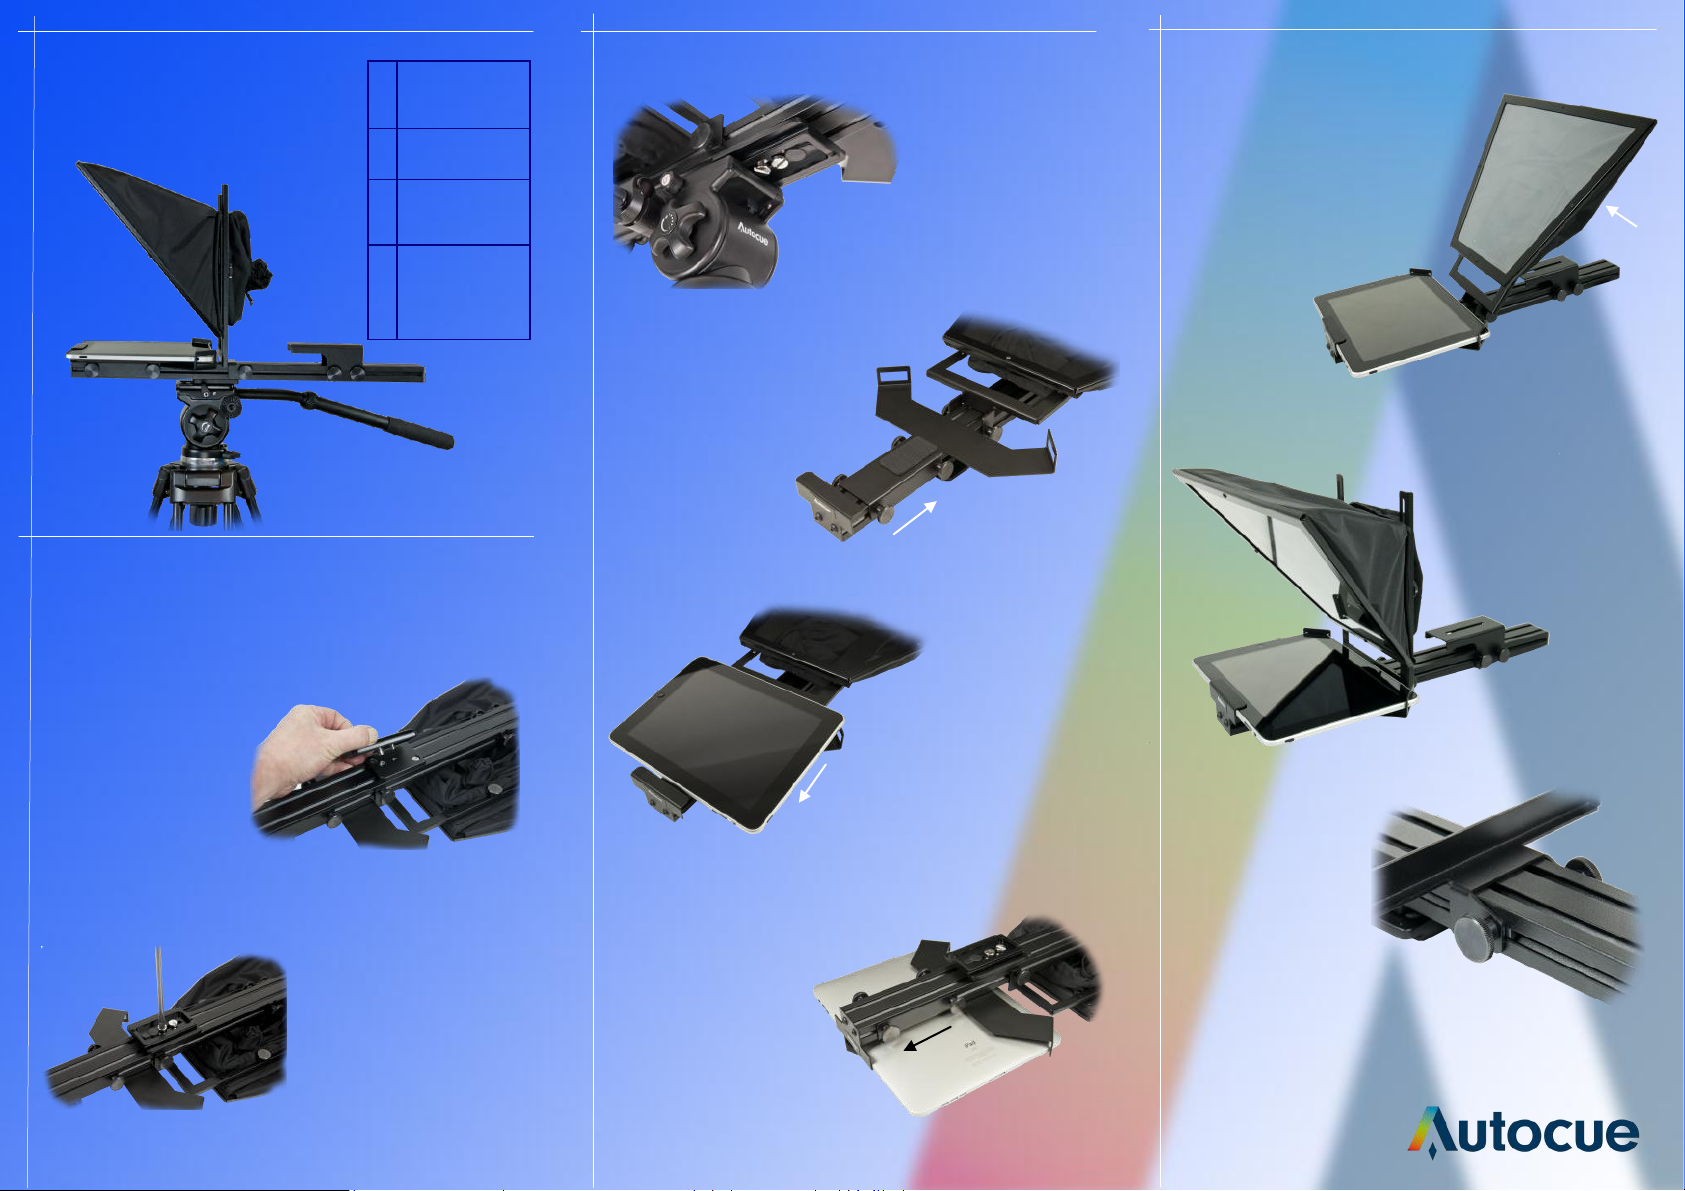
Components
A
A
B
C
Hood and
Glass
iPad
Mounting
Plate
2. Mount the unit
on the tripod.
6. Raise the hood up into
the vertical position.
B
Assembly
1. Fix the hot shoe
from your tripod to the
underside of the
mounting plate. Slide
the hot shoe to the
approximate position
and tighten the
screws.
D
C
D
Adjustment
Hood
Screws
3. To mount the iPad
loosen the thumb
screws (B) and slide
the carrier to the
open position.
(C)
(B)
4. Place the iPad so that
the front edge is under
the retainer (C)
If you have an iPad 2
please use the adaptor
kit provided.
Vercal posion
Use two fixing if possible.
5. To secure the iPad
in place slide the
retainer forward so
that the corners of
the iPad are located
in the mount. (D)
(D)
(B)
7. Lock the hood into
position by tightening
the two thumb
screws. (B)
 Loading...