

Page 1
Head Balancing
Counter-balance Weight
Gold Plate
Guide
2kg/4.4lbs
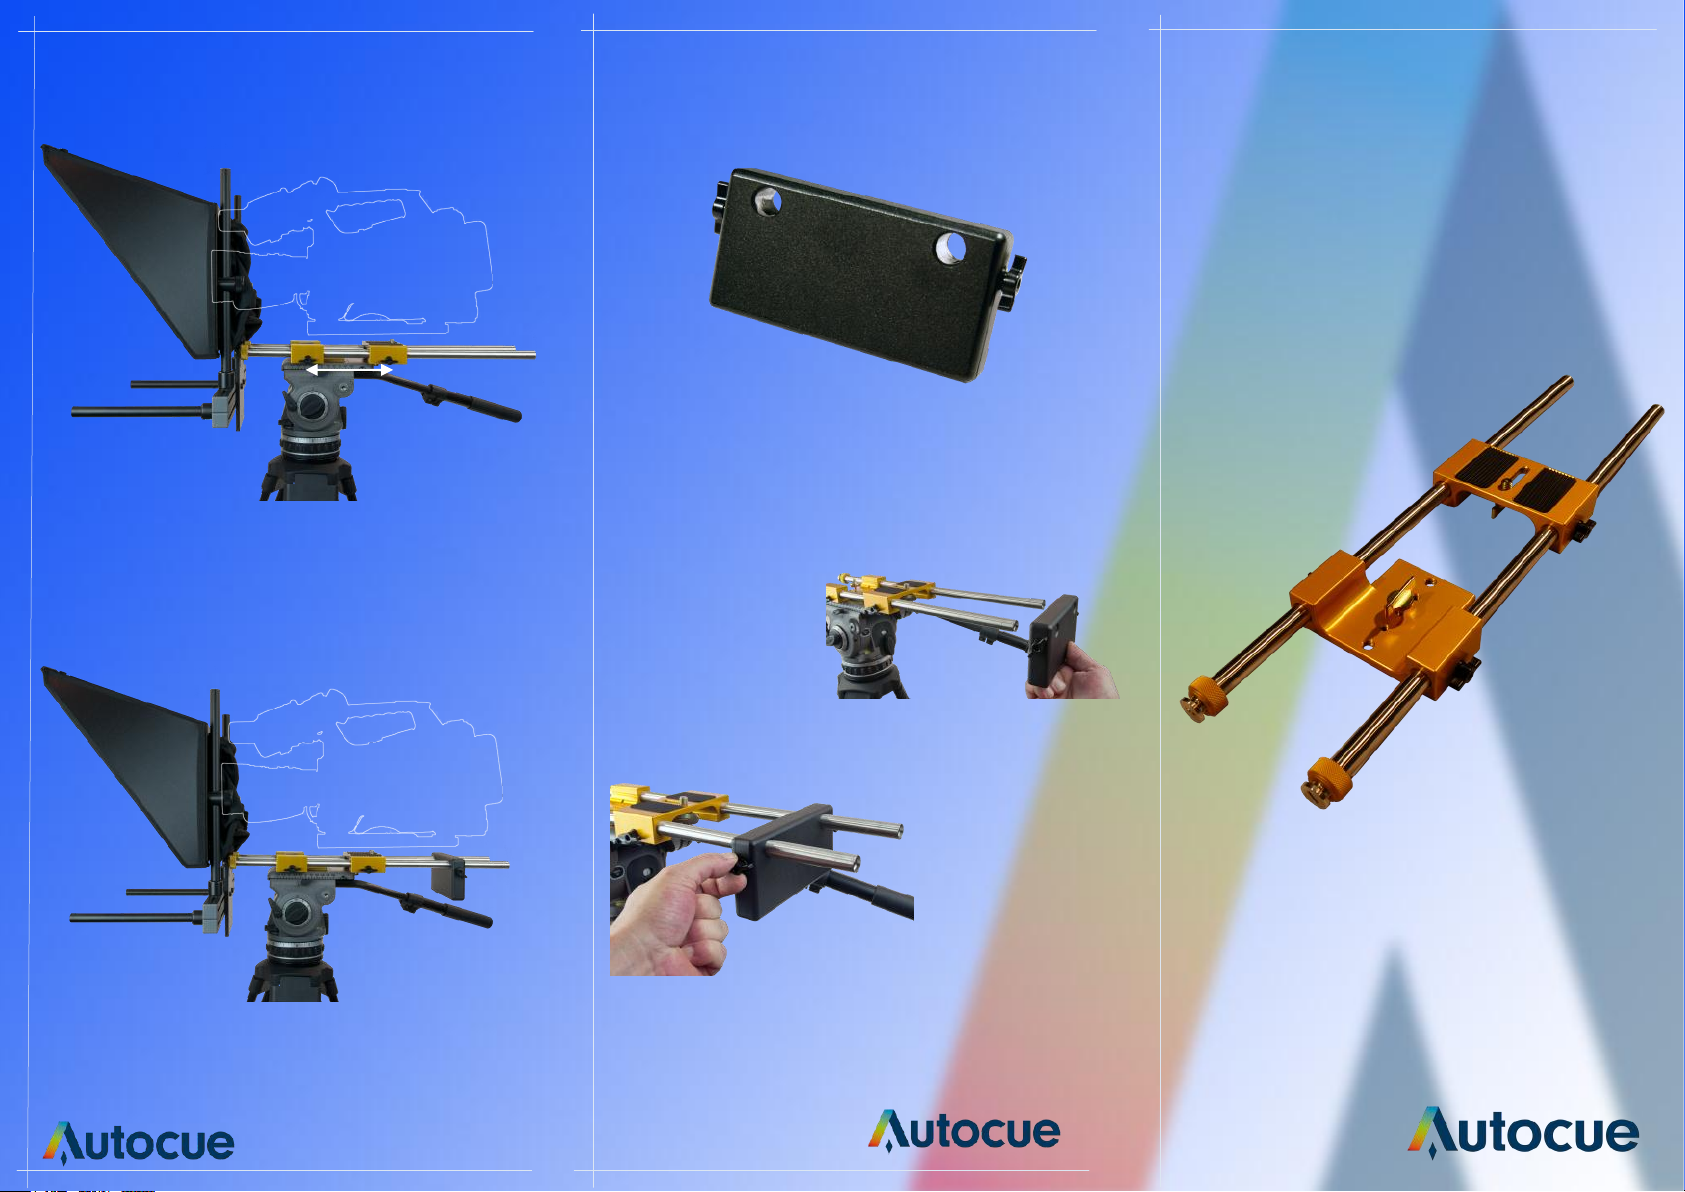
1. To balance the head with the camera mounted,
loosen the rod adjustment clamps, the rods will now
slide freely back and forth. When you have achieved a
good balance retighten the knobs, this will secure the
plate in this position.
2. If extra counter-balance weight is needed it can be
added by installing a counter-weight on the rear of the
Gold Plate. (A)
A
1. Install the
counter-balance
weight by sliding it
over the two rods at
the rear of the Gold
Plate. Slide the weight
back and forth to
achieve a balance.
2. To lock the
weight in position
tighten the two
clamp screws on
either side.
Additional weights
can be added if
required.
Page 2
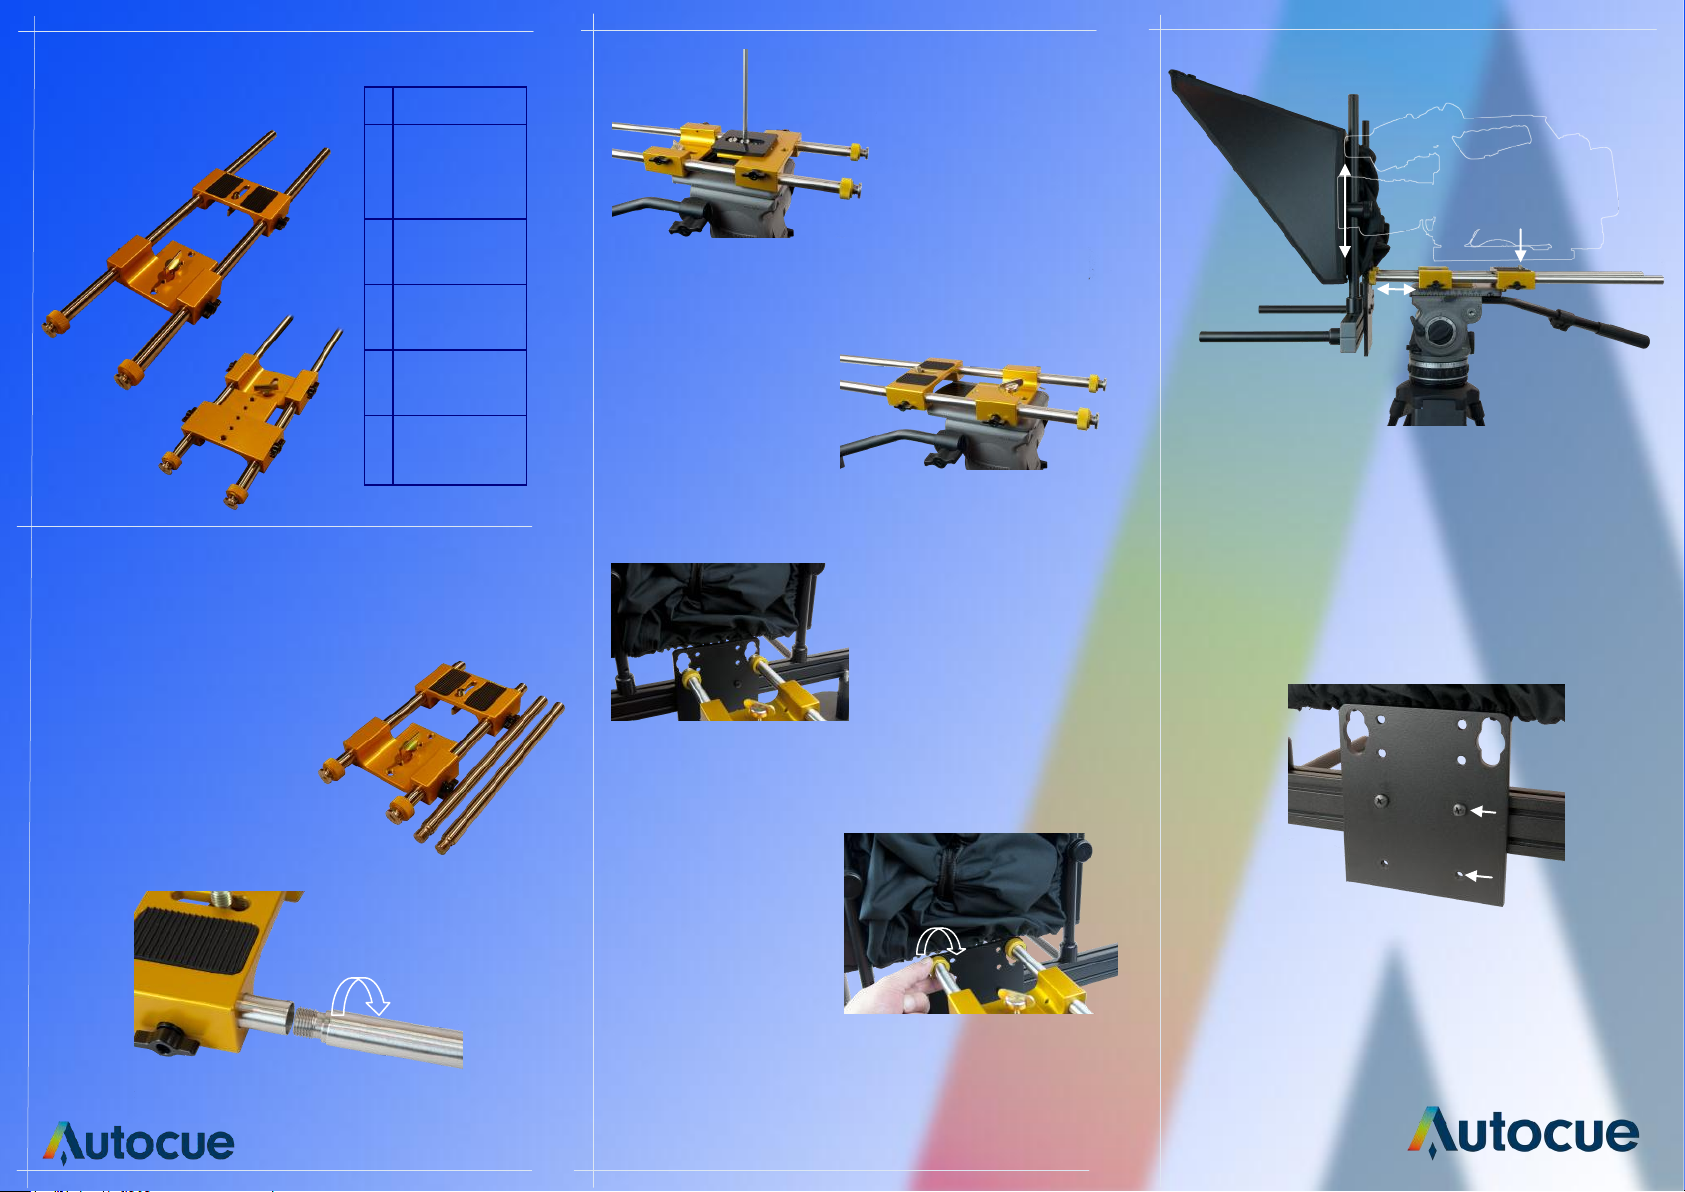
Components
Assembly
A
B
F
C
E
D
1. Assemble the Gold Plate
by screwing the extension
rods into the rear of the Gold
Plate. (A)
A
6. Mount the camera using the camera screw ensuring
that the lens is in the centre of the aperture on the back
of the hood. To adjust the height of the hood loosen the
tube clamps, adjust to the desired height and retighten
to secure. The hood and bracket assembly can be
moved forwards or backwards by loosening the rod
adjustment clamp, once in the desired position retighten
to secure.
7. If needed the height of the entire bracket assembly
can be adjusted by using the alternative holes in the key
hole plate. Two positions are available. To move the
plate remove the screws and re-fix using the alternative
holes.
5. Ensure that the bracket
set is secured in position
by tightening the keyhole
locking disc.
4. Mount the hood and
bracket set onto the rods
using the keyhole mounting
holes.
3. Replace the Gold Plate on
the tripod head ensuring that
the keyhole locking discs are
facing forward.
2. Remove the hot shoe
from your tripod head and
fix it to the underside of
the Gold Plate ideally
using both 1/4” and 3/8”
BSW fixing screws.
A
B
Adjustment
Rods
Rod
Clamp
Keyhole
C
Locking Disc
3/8” BSW
D
Fixing Hole
1/4” BSW
E
Fixing Hole
Camera
F
Screw
 Loading...