

Page 1
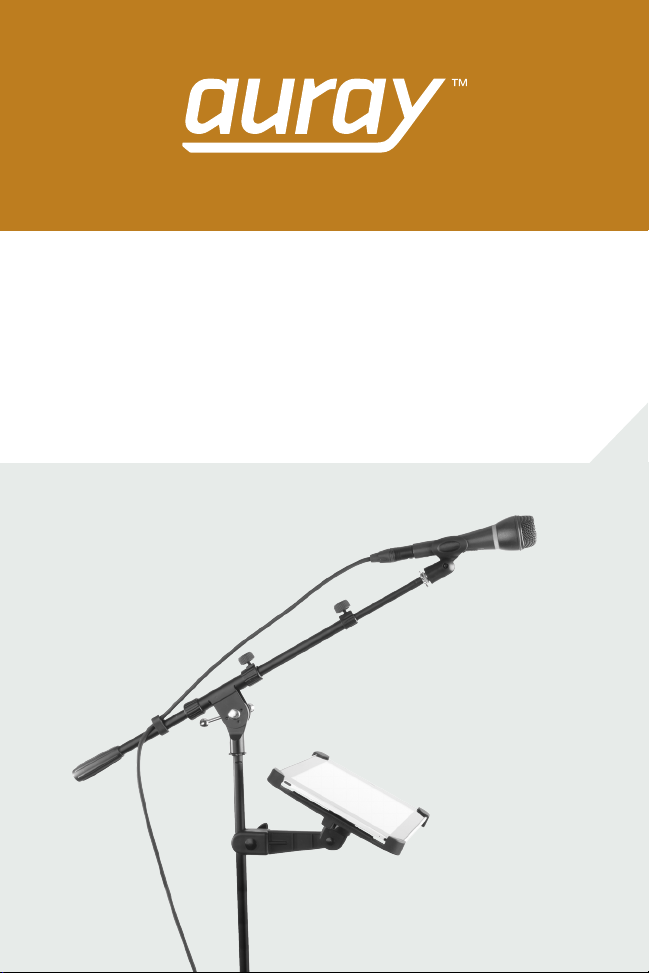
IPM-102
iPad® Mini
Microphone Stand Adapter
Owner’s Manual
1IPM-102 Owner’s Manual
Page 2

Introduction
Thank you for choosing Auray.
The Auray IPM-102 iPad Mini Microphone
Stand Adapter mounts your iPad mini onto a
microphone stand’s shaft or threaded mount, so
you can view your iPad mini hands-free onstage
or in the studio. The adjustable bracket ensures
safe and easy support for your iPad mini, and the
unique positioning system provides 180° tilt and
360° rotation for optimal landscape and portrait
positioning. The IPM-102 is ideal for using your
iPad mini for music scores, lyric charts, or apps
during performances and recording sessions.
iPad is a registered trademark of Apple, Inc.
2 IPM-102Owner’s Manual
Page 3
Overview
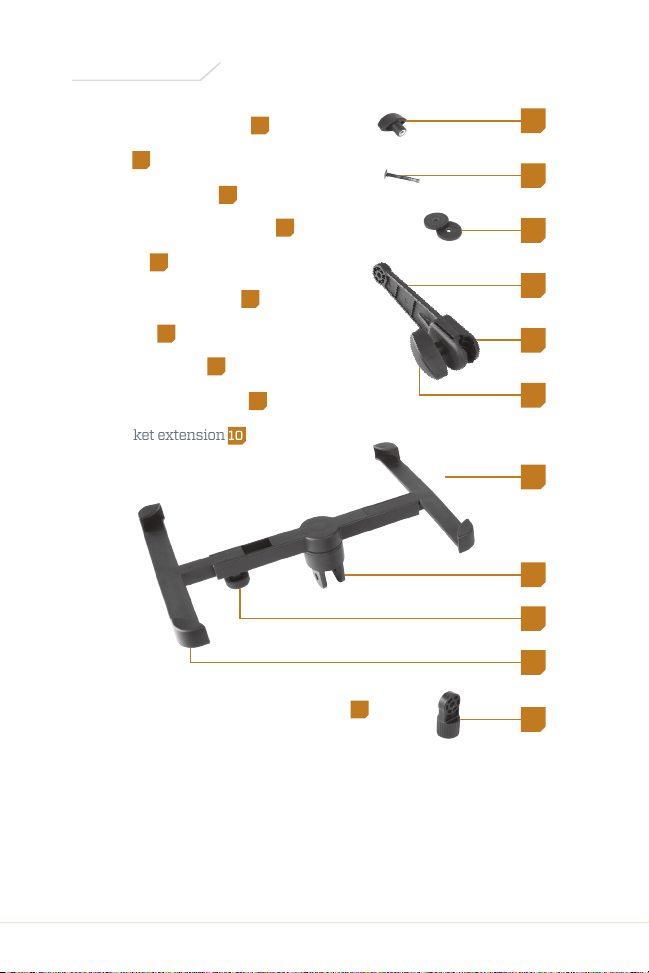
Adapter locking knob
Bolt
2
Two (2) washers
1
3
Clamp mounting adapter
5
Clamp
Clamp locking knob
Bracket
7
Adapter socket
Bracket locking knob
Bracket extension
6
8
9
10
1
2
4
3
4
5
6
7
8
9
10
5/8˝-27 threaded mounting adapter
11
11
3IPM-102 Owner’s Manual
Page 4
Instructions
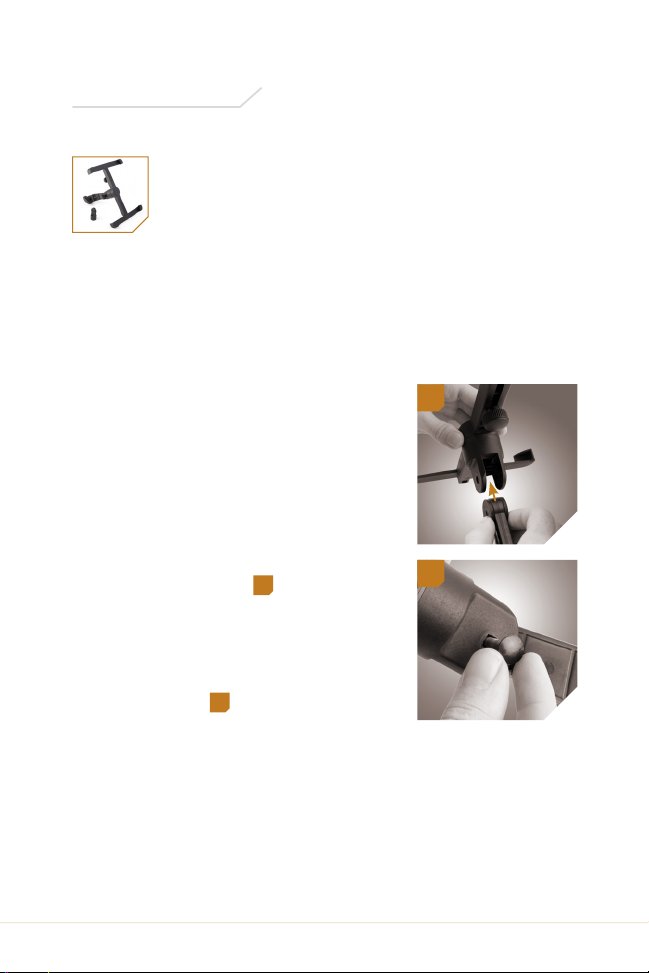
Switching Mounting Adapters
The IPM-102 comes with the threaded mounting adapter
attached, but you can switch it with the clamp mounting
adapter to mount your iPad mini on a microphone stand shaft.
To switch mounting adapters, follow these steps:
1. Unscrew the adapter locking knob
all the way and remove the bolt,
washers, and threaded mounting
adapter.
2. Insert the clamp mounting
adapter into the adapter socket,
with the washers on either side
of the adapter. Make sure the
holes in the adapter, washers, and
socket line up.
3. Insert the bolt into the square
hole in the adapter socket, so the
square bottom of the bolt head
mates with the square shape of
the hole.
4. Screw the adapter locking knob
onto the bolt until secure.
4 IPM-102Owner’s Manual
1
2
1
2
Page 5
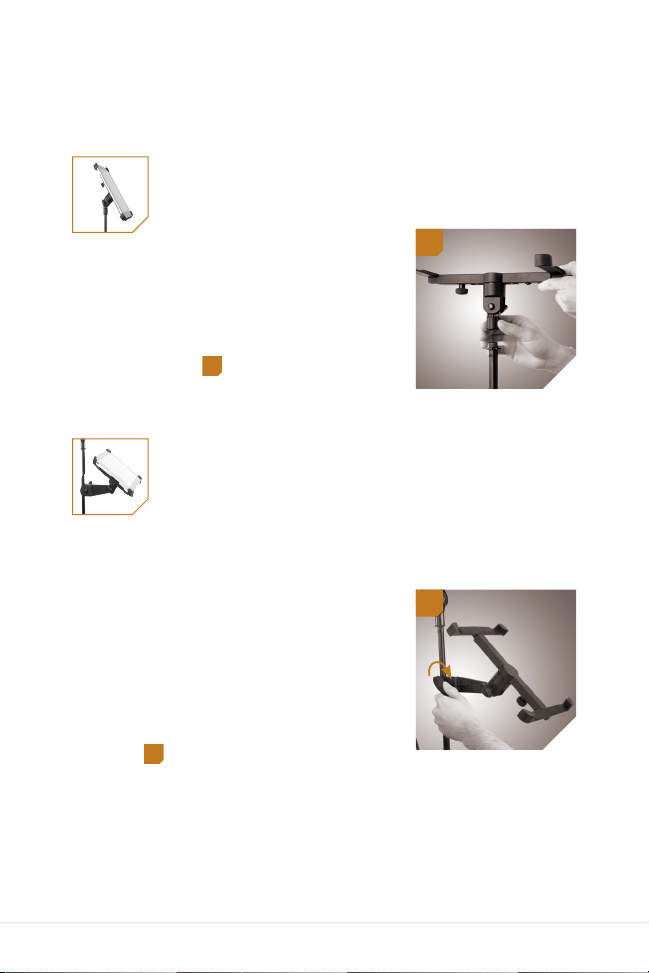
Mounting the IPM-102 to a Microphone
Stand’s Threaded Mount
3
To mount the IPM-102 to the threaded
mount of a microphone stand, align
the adapter’s threaded socket with the
microphone stand’s threaded mount,
and screw on the iPad mini adapter
until secure.
3
Mounting the IPM-102 to a Microphone
Stand Shaft
To mount your IPM-102 to a microphone stand shaft via the
clamp mounting adapter, follow these steps:
1. Open the clamp by loosening the
clamp locking knob.
2. Fit the clamp around the microphone stand shaft.
3. Close the clamp by tightening the
clamp locking knob until secure.
4
4
5IPM-102 Owner’s Manual
Page 6
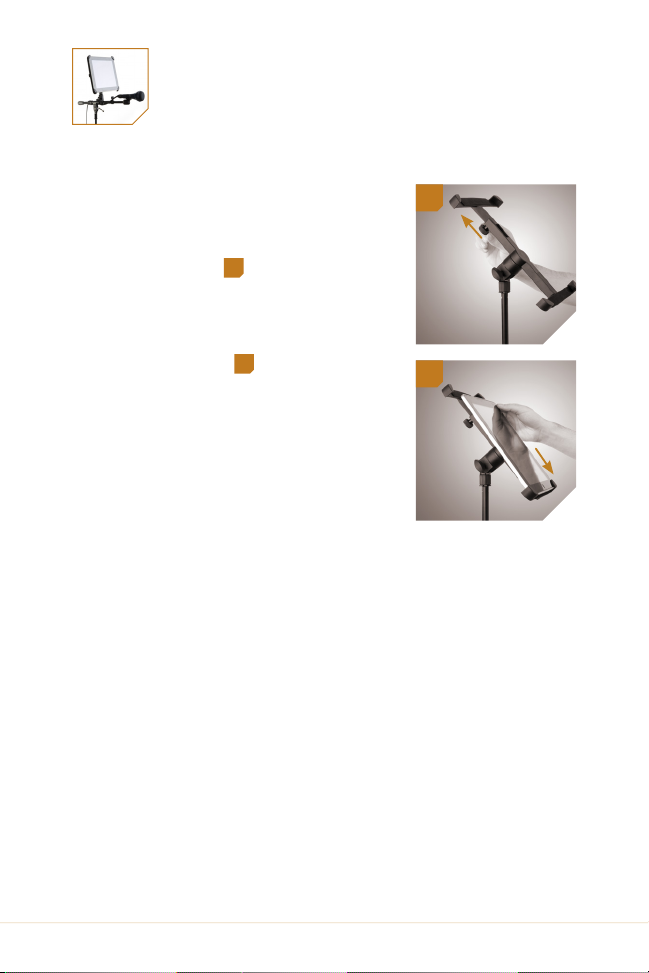
Inserting Your iPad mini into the Bracket
To insert your iPad mini into the bracket of the IPM-102,
follow these steps:
1. Loosen the bracket locking knob
and open the bracket to its widest
extension.
2. If your iPad mini is in a case,
remove it from the case. Insert
your iPad mini bottom-first into
the bracket.
3. Close the bracket extension so it
fits over the top corners of your
iPad mini and firmly holds it in
place.
4. Tighten the bracket locking knob
until secure.
Important! Do not insert your iPad mini into the bracket until
after you have successfully mounted the IPM-102 on to the
microphone stand.
5
6
5
6
Positioning the IPM-102
The rubber washers in the IPM-102 allow you to adjust the
orientation and angle of the bracket without loosening and
retightening the adapter locking knob. Make sure the adapter
locking knob is tight enough to hold your iPad mini in place but
not so tight that you cannot adjust the angle of the bracket.
6 IPM-102Owner’s Manual
Page 7

Specifications
Compatibility: iPad mini
Attachments: clamp and 5/8˝-27 thread
Weight (with clamp mounting adapter): 8.8 oz. (250 g)
Precautions
Please read and follow these instructions and keep this
manual in a safe place.
• Do not attempt to disassemble or repair this product.
• Clean this product with only a soft, dry cloth.
• Use only parts provided by the manufacturer.
• Make sure everything is secure before proceeding.
• Make sure that this product is intact and that there are
no missing parts.
• Unless instructed otherwise, make sure not to unscrew
any of the locking knobs all the way, or they will fall o.
• To avoid damage to this product, be careful not to
overtighten or improperly thread any of the threaded
fittings.
• Do not insert your iPad mini into the bracket until after
you have successfully mounted the IPM-102 on to the
microphone stand.
• All photos are for illustrative purposes only.
!
7IPM-102 Owner’s Manual
Page 8

One-Year Limited Warranty
Auray provides a limited warranty to the original purchaser that this
product is free from defects in materials and workmanship under
normal consumer use for a period of one (1) year from the original
purchase date or thirty (30) days after replacement, whichever
occurs later. Auray’s responsibility with respect to this limited
warranty shall be limited solely to repair or replacement, at Auray’s
discretion, of any product that fails during normal consumer use.
Inoperability of the product or part(s) shall be determined by Auray. If
the product has been discontinued, we reserve the right to replace it
with a model of equivalent quality and function.
To obtain warranty coverage, contact Auray to obtain a return
merchandise authorization (“RMA”) number, and return the defective
product to Auray, along with the RMA number and proof of purchase.
Shipment of the defective product is at the purchaser’s own risk.
This warranty does not cover damage or defect caused by misuse,
neglect, accident, alteration, abuse, improper installation or
maintenance. EXCEPT AS PROVIDED HEREIN, AURAY MAKES
NEITHER ANY EXPRESS WARRANTIES NOR ANY IMPLIED
WARRANTIES, INCLUDING BUT NOT LIMITED TO ANY IMPLIED
WARRANTY OF MERCHANTABILITY OR FITNESS FOR A
PARTICULAR PURPOSE. This warranty provides you with specific
legal rights, and you may also have additional rights that vary from
state to state.
© Copyright 2013 Gradus Group
www.AurayAudio.com
 Loading...