

August Smart Lock, Smart Lock HomeKit Edition Installation Manual

Installation Guide

Installation Guide
2
Go to august.com/install
to watch a video version
of this installation guide.

3
Welcome!
This guide will get you up and running with
your August Smart Lock. Installation generally
takes less than 15 minutes. If you have any
trouble, please check our support section
(august.com/support), contact our installer
network (august.com/installers) or call
844-AUGUST1 (284-8781) for help.

Installation Guide
4
Preparation
Make sure your existing deadbolt is compatible
with the August Smart Lock. Only standard
deadbolts are supported. Use our compatibility
assistant to double-check: august.com/compatibility
TOOLS NEEDED
You will need a standard
Phillips screwdriver.
Alternately, we have a network of installers who can
help with installation. august.com/installers
5
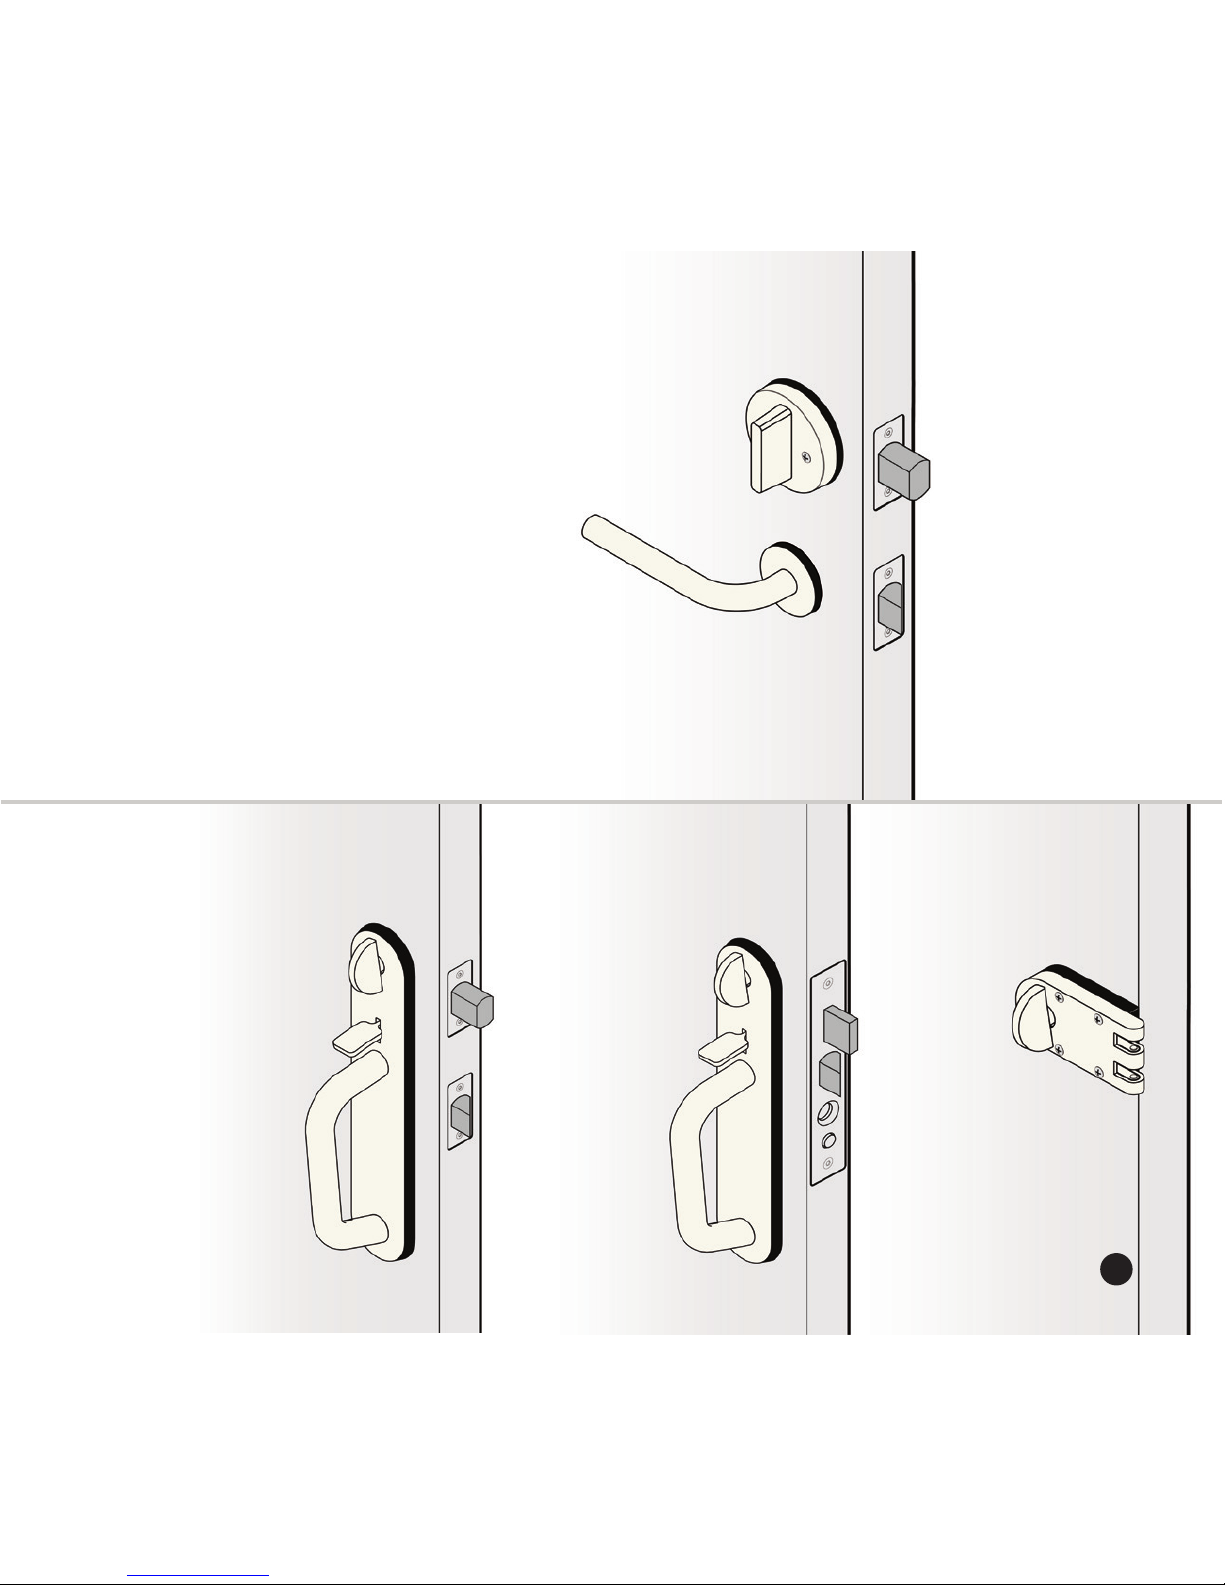
Compatibility
YES
Standard
Deadbolt is mounted and operates
independently of the door handle.
Integrated
Lock & Handle
Handle and lock
thumb-latch are
both mounted
together on a
metal plate
NO
Mortise
An integrated
door handle
and deadbolt
in a single
metal unit
Rim
Cylinder
Mounted on
the inside,
on top of the
door and
door jamb
NO NO
5
Installation Guide
6
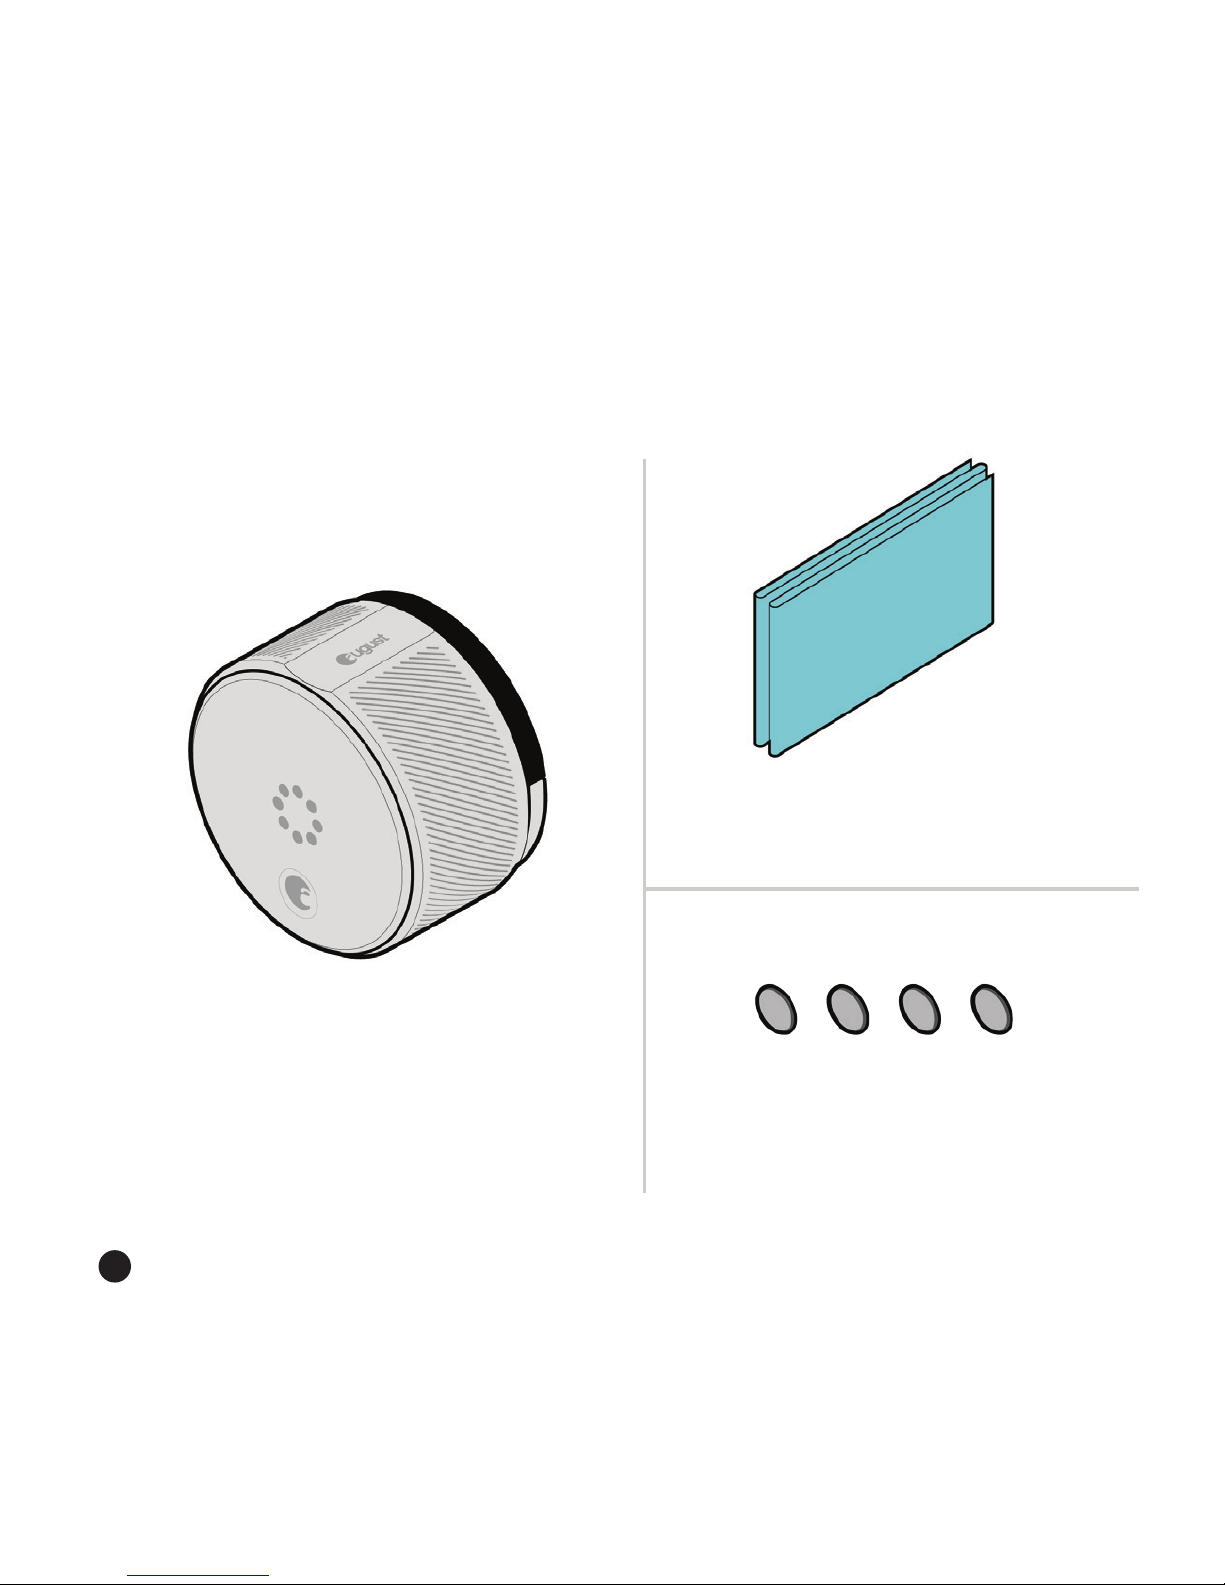
1 August Smart Lock
(4 AA Batteries Pre-installed)
1 Adhesive Strip
(Inside Envelope)
Package Contents
4 Adhesive Rubber Bumpers
(Inside Envelope)
7
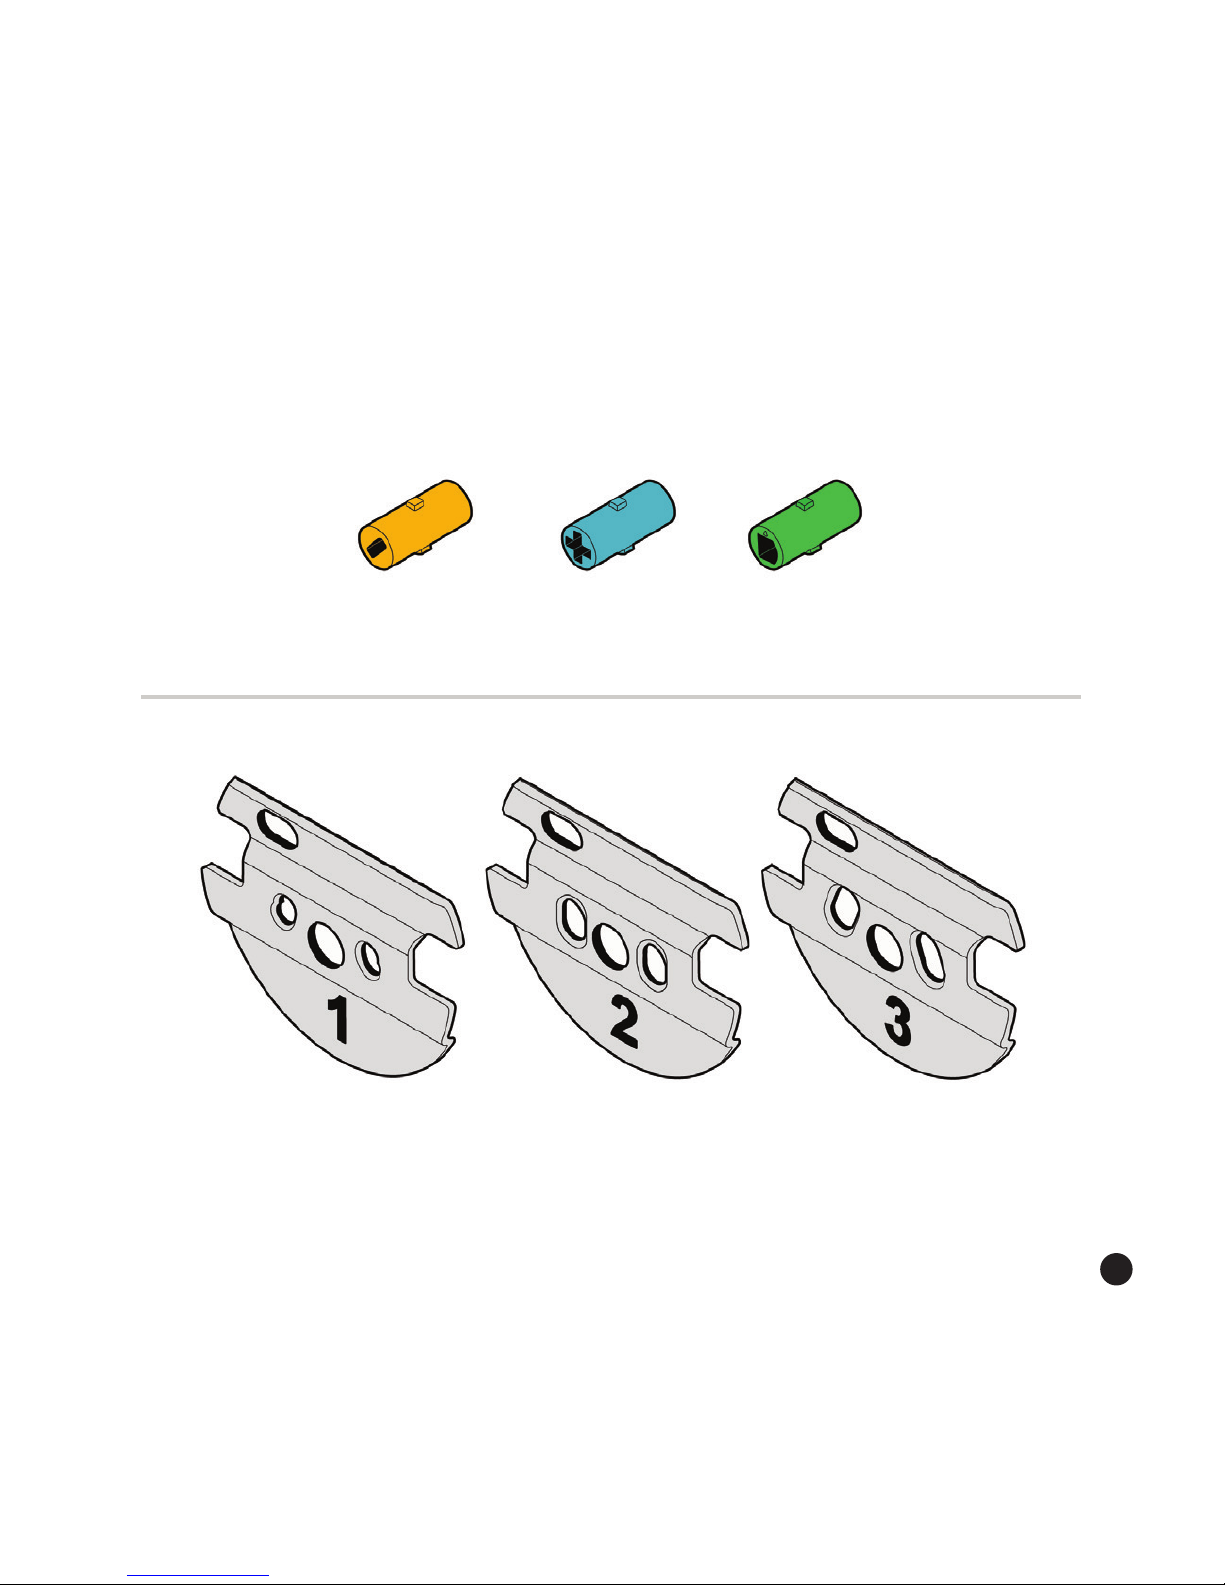
3 Mounting Plates
3 Adapters

Installation Guide
8
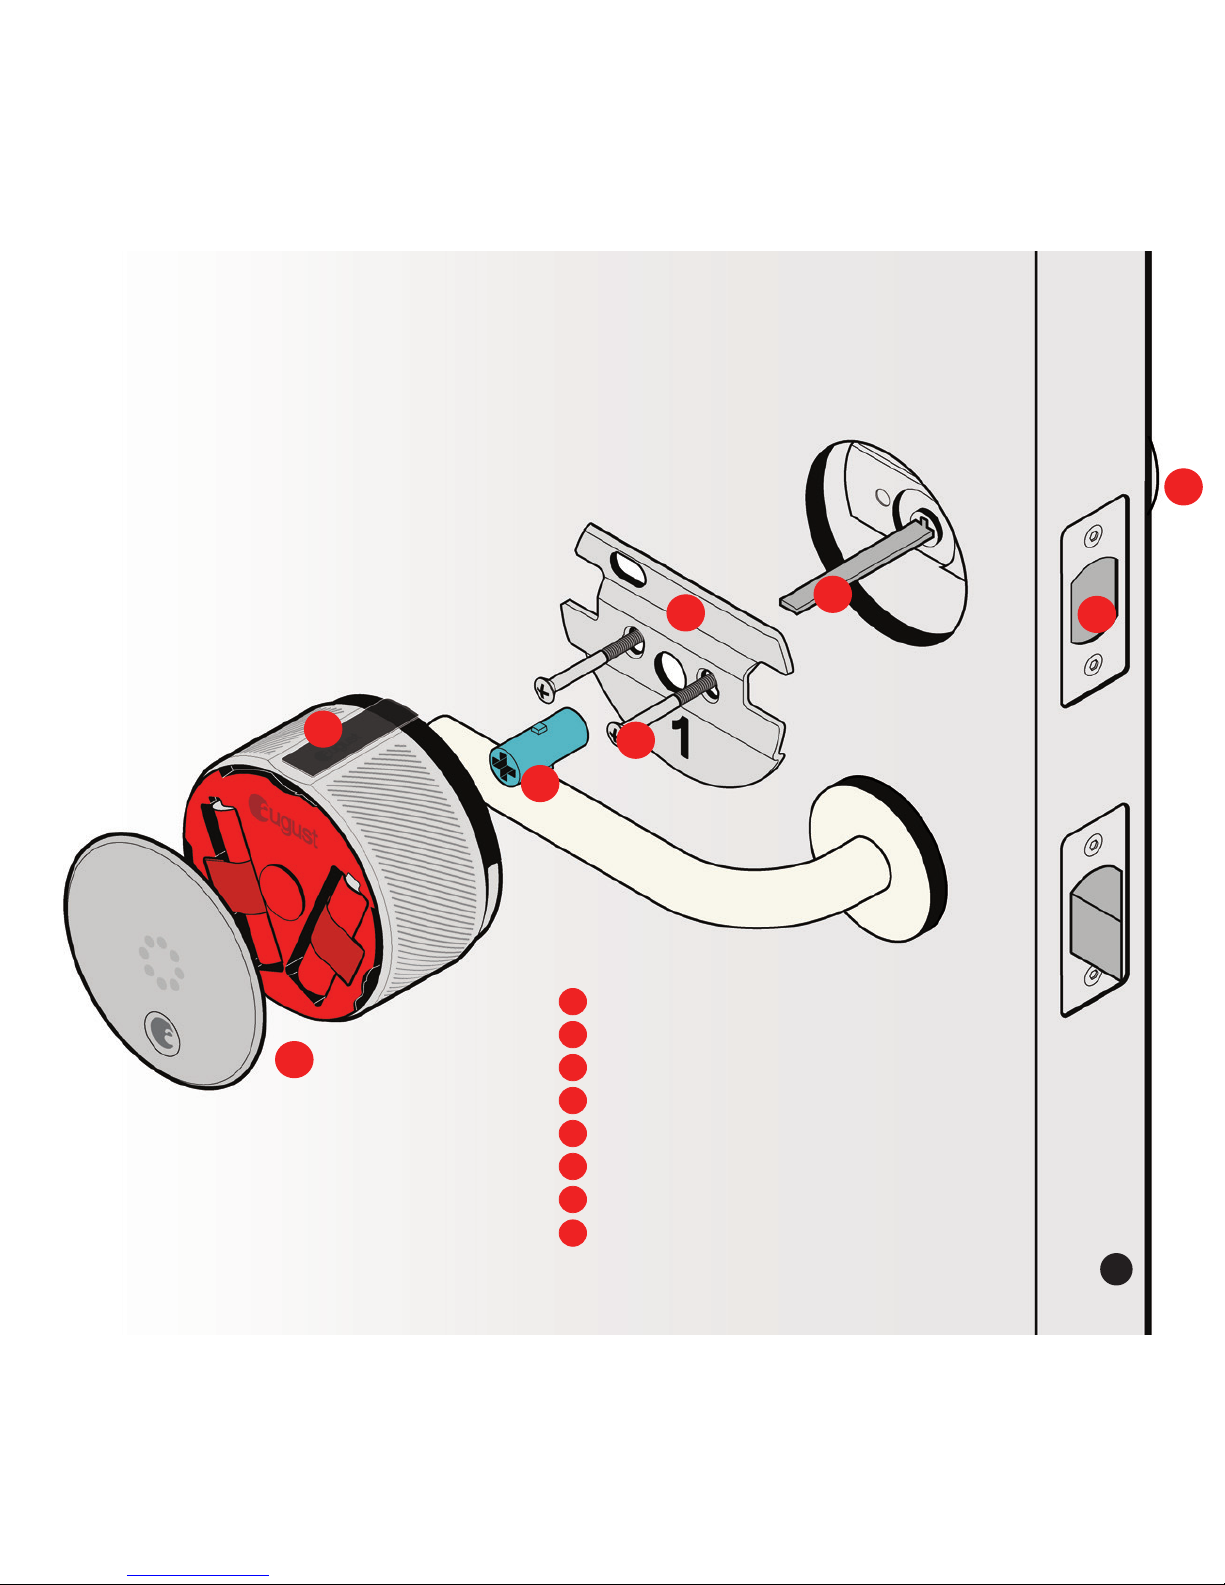
Installation Overview
Before Installation
Key Hole
Deadbolt
Tail Piece
Thumb-latch
Screws
1
2
3
4
5
1
2
3
4
5
8
Installation Guide
9
After Installation
Key Hole
Deadbolt
Tail Piece
Mounting Plate
Screws
Tail Piece Adapter
August Smart Lock & Faceplate
Calibration Tape
1
2
3
4
5
6
7
1
2
3
4
5
6
7
9
8
8
 Loading...