

Augen Prizm User Manual

- 1 -
AUGEN PRIZM
Portable Digital Music Player
User Manual
Version: V4.0W

- 2 -
Thank you for purchasing an AUGEN PRISM digital music player. Please read the following user
instructions and safety guide before attempting to operate your player.
The Digital Music Player Safety Guide
This safety guide contains important safety and handling
Information for AUGEN PRIZM digital music players.
Keep the digital music player Safety Guide
for your digital music player handy for future
reference.
Important Safety Information
Avoiding hearing damage
Permanent hearing loss may occur if earbuds or
Headphones are used at high volume. Set the volume to a safe level. You can adapt
over time to a higher volume of sound that may sound normal but can be damaging to
your hearing. If you experience ringing in your ears or muffled speech, stop listening
and have your hearing checked. The louder the volume, the less time is required before
your hearing could be affected. Hearing experts suggest that to protect your hearing:
• Limit the amount of time you use earbuds or headphones at high volume.
• Avoid turning up the volume to block out noisy surroundings.
• Turn the volume down if you can’t hear people speaking near you.

- 3 -
Handling the digital music player
Do not bend, drop, crush, puncture, incinerate, or open the digital music player.
Avoiding water and wet locations
Do not use the digital music player in rain, or near washbasins or other
wet locations. Take care not to spill any food or liquid into the digital music player. In case the digital music player gets wet,
unplug all cables, turn the digital music player off and allow it to dry thoroughly before turning it on again.
Repairing the digital music player
Never attempt to repair the digital music player yourself. The digital music player does not contain any user serviceable
parts.
The rechargeable battery in the digital music player
should be replaced only by PRIZM authorized service providers.

- 4 -
This player is a new generation portable digital audio & video product, which supports multi-format
music files, such as MP3, WMA, WAV, etc.
General preview
● Display: 65K full-color CSTN/TFT screen.
● Multi-format support: MP3, WMA, WAV etc. music & image files.
● Cartoon movie function: Play AMV format movie and music files.
● Browse pictures: Browse JPG, BMP format pictures.
● E-book: Display TXT format files for reading.
● FM stereo radio: Search stations both automatically and manually.
● USB drive without driver: No need for management program software, operates directly through
“moveable disk” in” My PC”,
● “Private Space” Memory management MENU: Refers to the memory of the player as a USB drive.
Users may divide the memory into two parts in any proportion by accessing accessory tools. One

- 5 -
part can be encrypted as a “Private Space” which needs a password to access. (If users do not
encrypt both parts, the player may be treated as two individual USB drives)
● Record / Repeat: Using the microphone, you can record voice and save them as WAV or ACT
format files. Repeat a segment of the file with comparison.
● 7 equalizer MENUs: Natural, Rock, Popular, Classic, Soft, Jazz, Dbb.
● Multi-play MENU: Normal, Repeat ONE, Folder, Repeat Folder, Repeat all, Random.
● Automatic shut off:
You can set sleep timer to save battery time.
GETTING STARTED
• Attach the player to your computers USB connector with the provided USB
cable
• Please set the power switch to the “ON” position to charge the player,
otherwise, the player cannot be charged.

- 6 -
• Very important: The MENU button is the ENTER or SELECT button and the
arrow buttons are the scrolling buttons as well as track skip and fast forward
and rewind. Scroll with the ARROW buttons and choose function by hitting the
MENU button. Center button is PLAY.
General preview …………………………………………………….. 2
Declaration ………………………………………………………….… 3
Battery …………………………………………………………………. 4
Basic function ………………………………………………………… 6
Button operation …………………………………………………… 8
Play movies ………………………………………………………….. 12
Play music …………………………………………………………….. 13
Voice recording ………………………………………………………. 15
Voice MENU ……………………………………………………………. 16
FM radio ……………………………………………………………….. 19

- 7 -
Browse photos ……………………………………………………….. 20
E-book …………………………………………………………………. 20
System setting ……………………………………………………….. 21
USB drive function …………………………………………………… 24
Other setting …………………………………………………………. 25
Troubleshooting …………………………………………………….. 34
Specification …………………………………………………………. 35
Convert video files into AMV format files ……………………….. 36
Battery
The PRISM comes with a built-in Li-polymer rechargeable battery. It can charged using
either the supplied USB cable or an optional AC charger adapter.
★ Set the power switch to “ON” position ( Switch ON the player ) to charge the battery,
otherwise the player cannot be charged.
★ Unit will display
when the battery is fully charged.

- 8 -
★ When the battery is nearly drained, the battery icon will show empty. This indicates
it is time to re-charge your battery.
Basic function
Enter Menus
Press MENU button to enter the menu which you desire. There are 3 basic menus,
1- Main-menu ( press & hold MENU button to enter main menu to choose basic function of device
such as music, picture, movie, etc… ),
2-Play menu ( Press MENU button while playing to adjust EQ, repeat MENU, etc…)
3-Stop menu ( Press MENU button to stop play ).
Browse operation
• Use arrow buttons to browse and select a song, or a menu.

- 9 -
• Press MENU button to select a song
• To move backward use left arrow , to move forward use right arrow.
• Use same procedure to skip forward or skip backward while song is playing.
• Press and hold arrow buttons to fast forward or rewind while song is playing.
Enter function MENUs
● Scroll with arrow buttons to search for the desired menu and hit menu button to select the menu you
wish to enter.
• To return to main menu, press and hold the menu button for a few seconds.
• The main menu consists of 8 choices:
01 Music / 02 video / 03 Recorder / 04 playback / 05 FM Radio / 06 Photo /
07 E-book / 08 setting
● To adjust volume:
Press button VOL first, then press button left arrow to decrease the volume, press right arrow
- 10 -
button to increase the volume.
● Electrical system ON/OFF (This is different from power ON/OFF )
Press and hold the play button for electrical system power on/off.
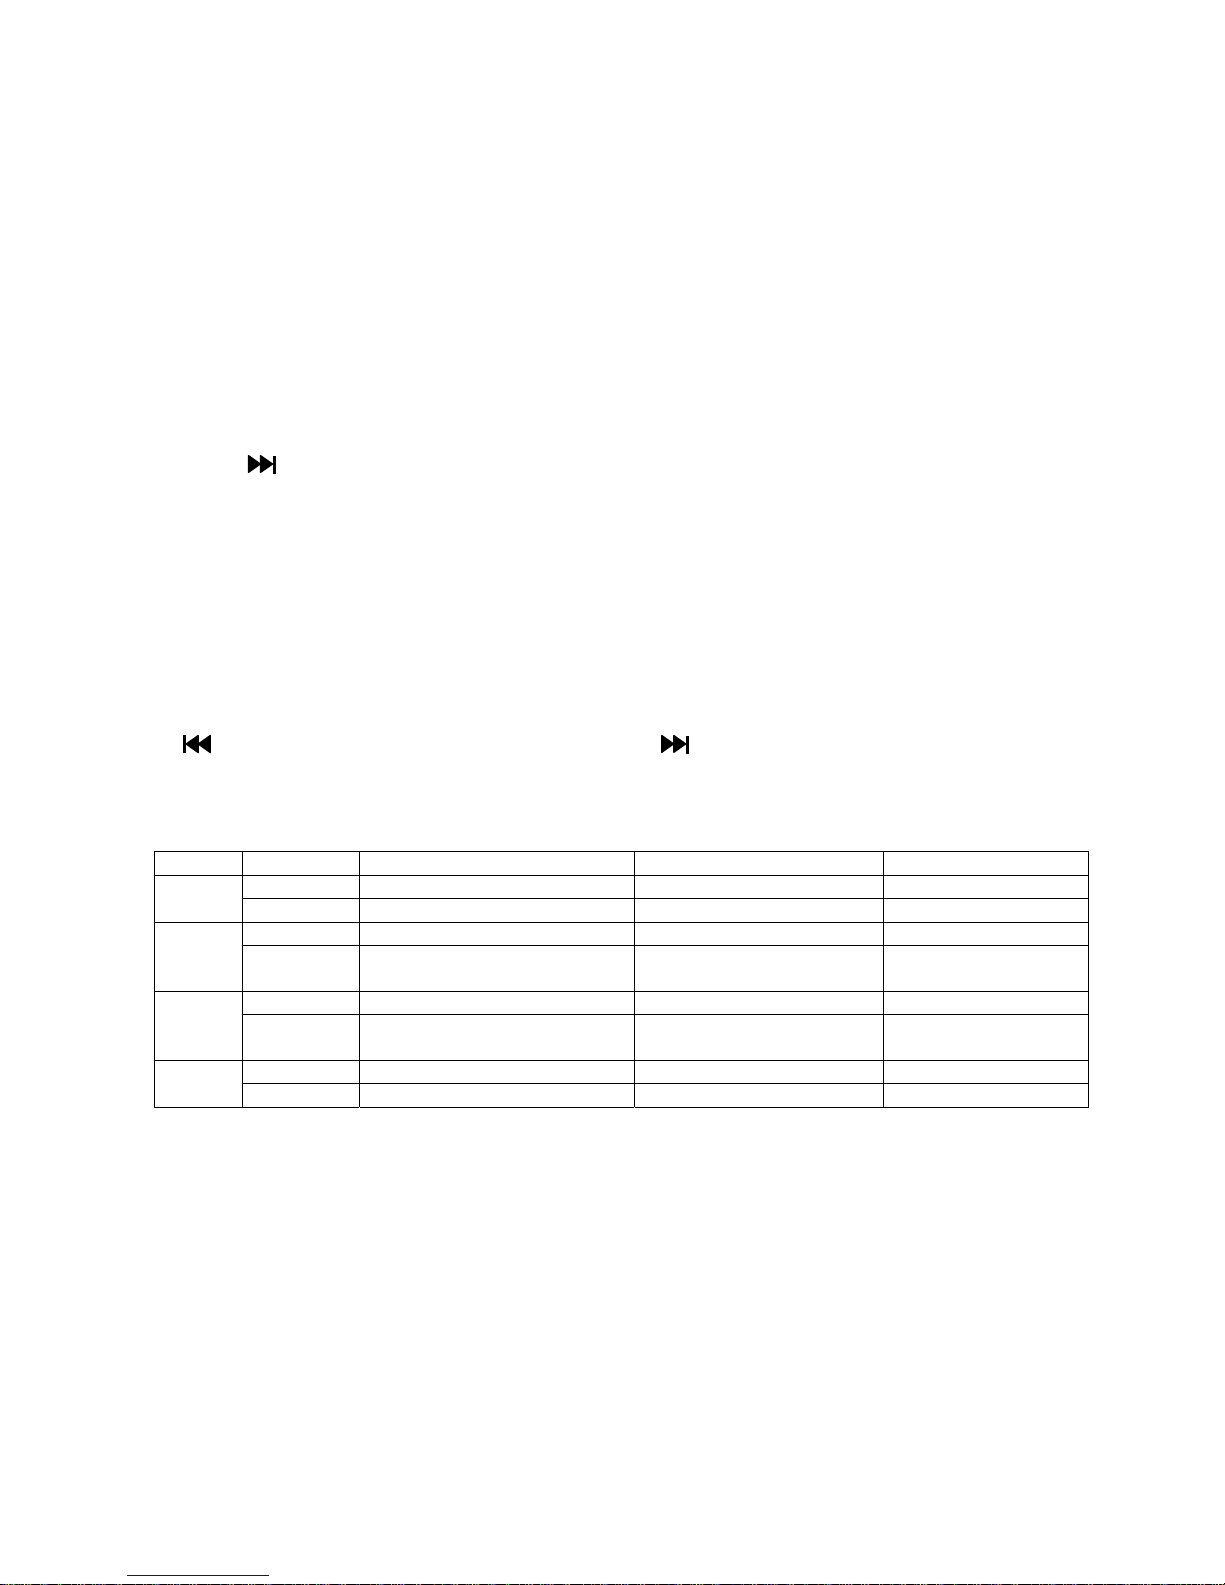
Button operation
Button function introduction:
Left arrow stands for Last, or Vol-. Right arrow stands for NEXT or Vol+, Vol for volume
Video MENU
Button Operation Stop status Play status Stop-submenu
Long press Switch off Switch off Switch off
Play
Press Play Stop Exit from menu
Long press Enter Main-menu Enter Main-menu Enter Main-menu
MENU
Press Enter Stop-submenu
X
Confirm the choice or
further step
Press Right arrow button song Play right arrow button song Select a submenu
Right
arrow
button
Long press
forward browse continuously Fast forward forward continuously
Press Last song Play last song Select a submenu
Last
Long press Backward browse continuously Fast backward backward continuously
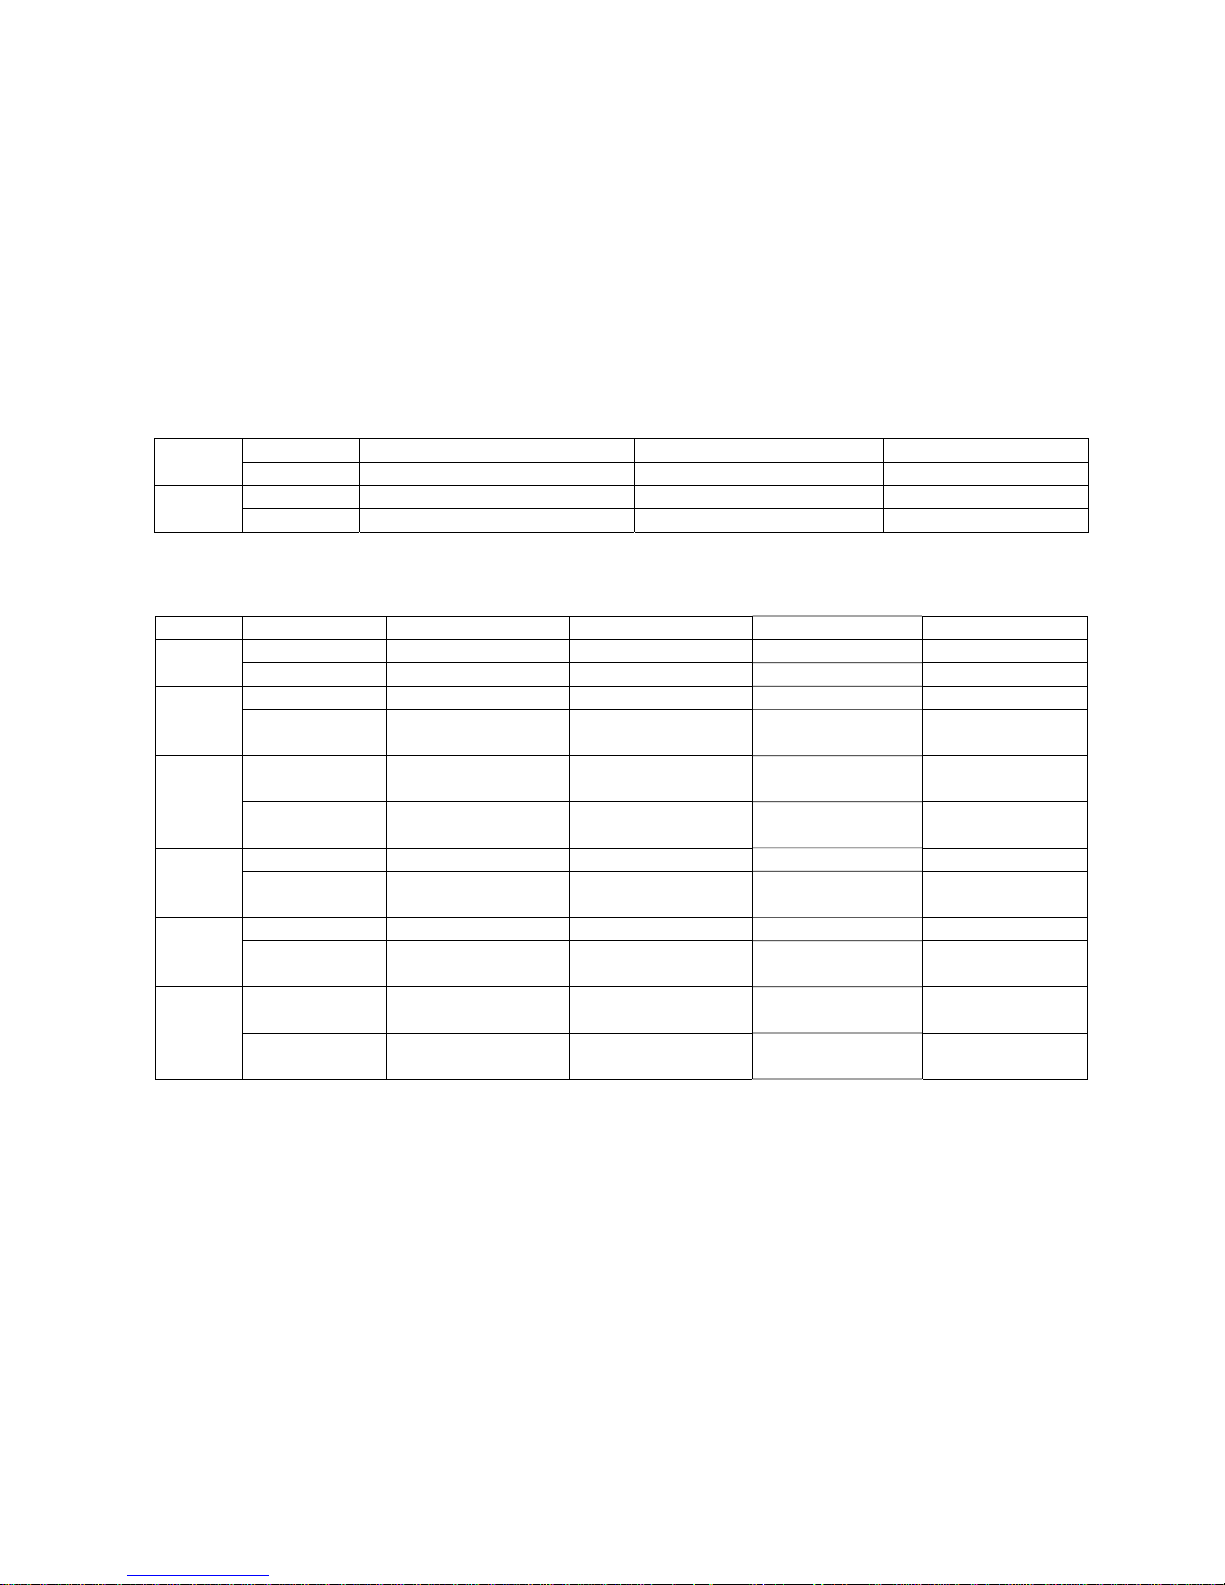
- 11 -
Press Increase volume by step Play right arrow button song
X
Vol+
Long press Increase volume continuously Fast forward
X
Press Decrease volume by step Play last song
X
Vol-
Long press Decrease volume continuously Fast backward
X
Music MENU and Play MENU
Button Operation Stop status Play status Play-submenu Stop-submenu
Long time press Switch off Switch off Switch off Switch off
Play
Press Play Stop Exit from menu Exit from menu
Long time press Enter Main-menu Enter Main-menu Enter Main-menu Enter Main-menu
MENU
Press Enter Stop-submenu Enter Play-submenu
Confirm your choice
and enter it
Confirm your choice
and enter it
Press
Right arrow button song Play right arrow button
song
Select a submenu Select a submenu
Right
arrow
button
Press and hold
Browse forward
continuously
Fast forward
Move forward
continuously
Move forward
continuously
Press Last song Play last song Select a submenu Select a submenu
Last
Press and hold
Browse backward
continuously
Fast backward Move backward
continuously
Move backward
continuously
Press Increase volume by step Increase volume by step X X
Vol+
Press and hold
Increase volume
continuously
Increase volume
continuously
X X
Press
Decrease volume by
step
Decrease volume by
step
X X
Vol-
Press and hold
Decrease volume
continuously
Decrease volume
continuously
X X
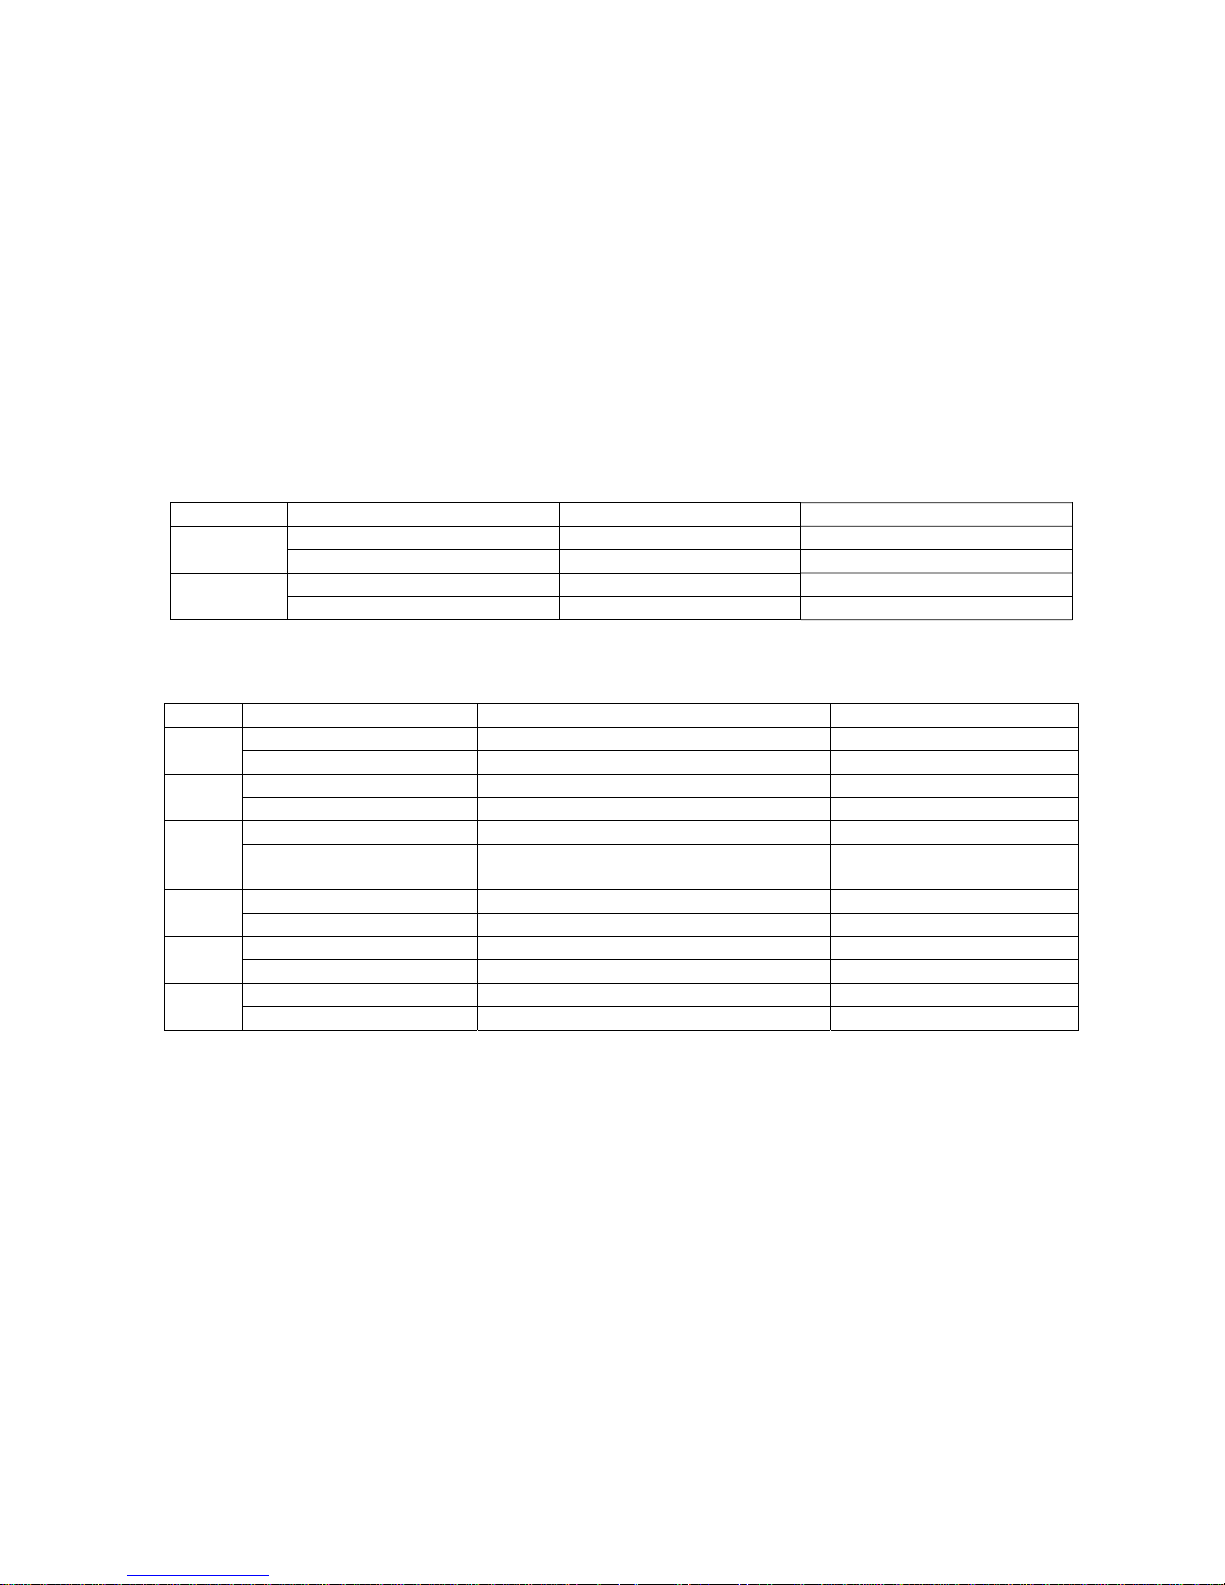
- 12 -
Record MENU
Button Operation Stop status Record status
Long press Switch off Stop recording
Play
Press Start recording Pause recording
Long press Enter Main-menu Save recorded file
MENU
Press Enter Record-submenu X
FM MENU
Button Operation FM radio status FM submenu
Long time press
Switch off
Switch off
Play
Press Right arrow button channel Exit from menu
Long time press Enter Main-menu Enter Main-menu
MENU
Press Enter a submenu Confirm your choice and enter it
Press
Increase by step 100KHz,or stop searching
Select a submenu
Right
arrow
button
Press and hold
Increase step by step 100KHz automatically Move forward continuously
Press
Decrease by step 100KHz,or stop searching
Select a submenu
Last
Press and hold Decrease step by step 100KHz automatically Move backward continuously
Press Increase volume by step X
Vol+
Press and hold Increase volume continuously X
Press Decrease volume by step X
Vol-
Press and hold Decrease volume continuously X
 Loading...