

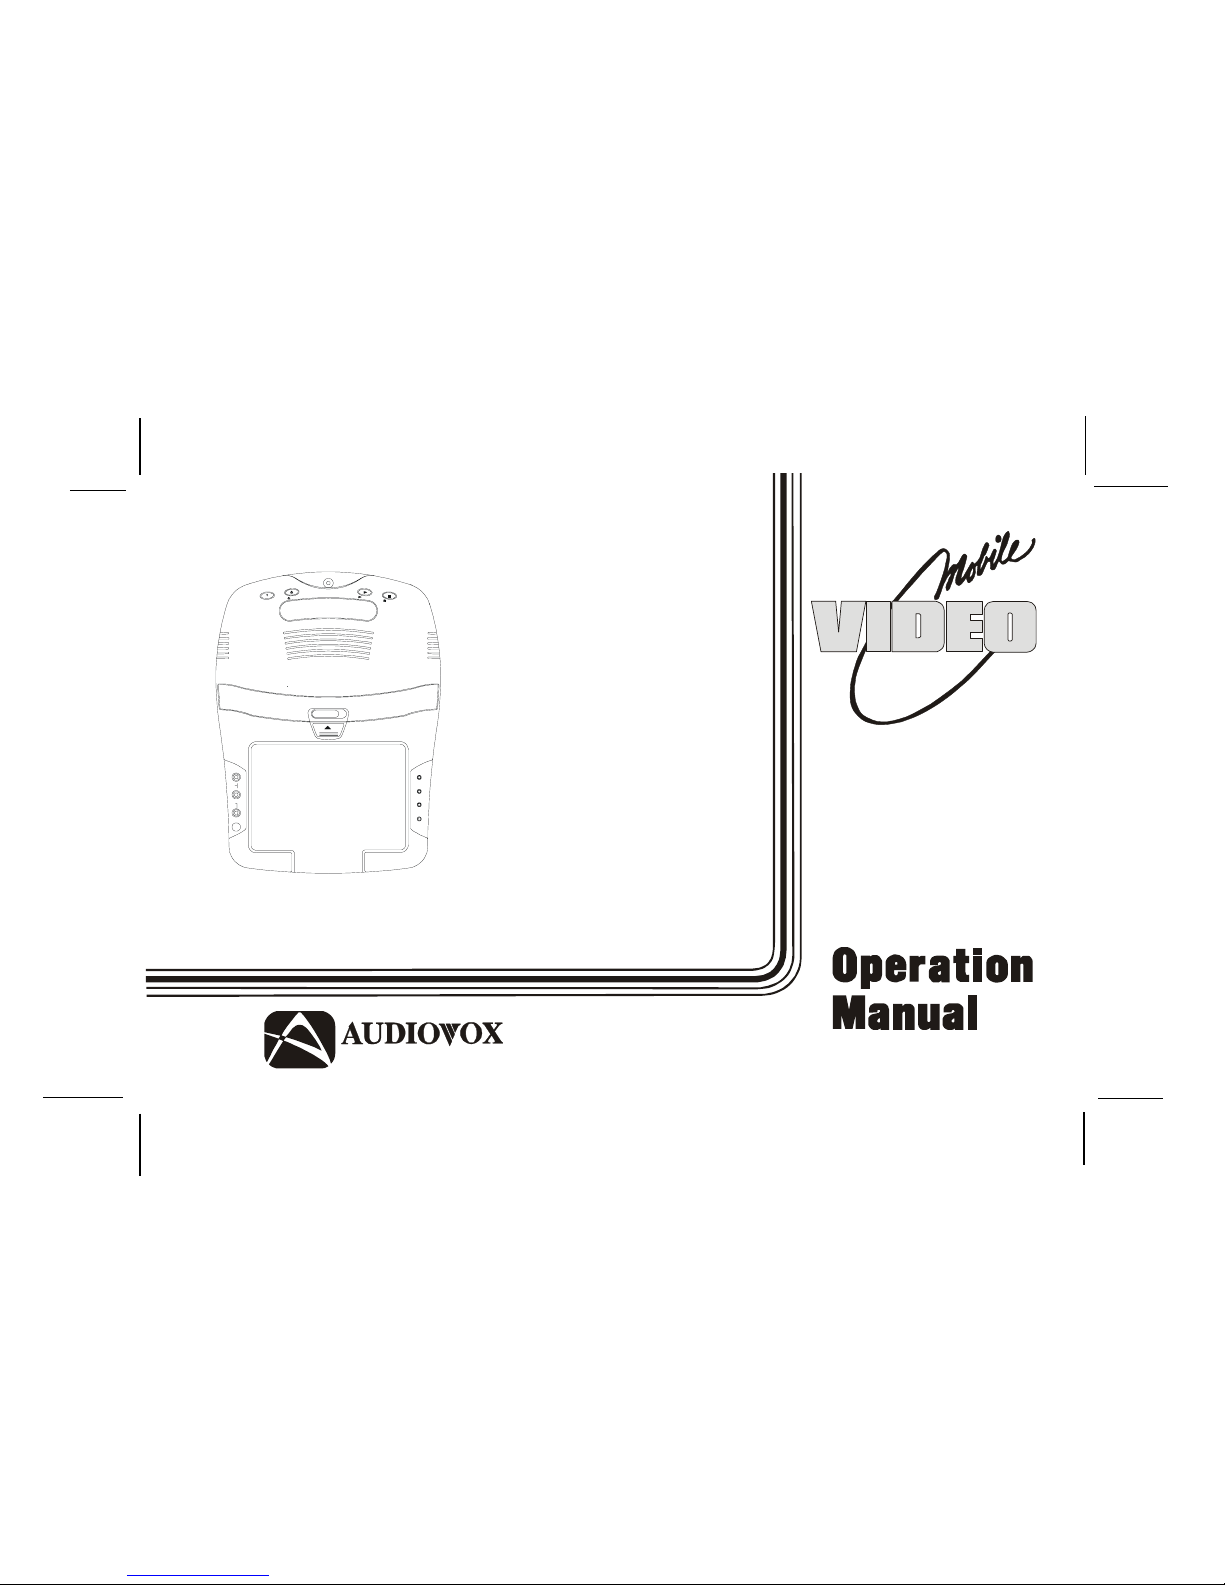
Audiovox VOD705DL, VOD705DLS Operation Manual
128-6247B
1 of 24
VOD705
ELECTRONICS CORP .
®
4-R2.0
IR VIDEO
RL
AUDIO
INPUT
OPEN
HEADPHONES SOURCE SELECT
FM SELECT HEADPHONES
P
L
A
Y
E
J
E
C
T
P
O
W
E
R
S
T
O
P
VOD705 DL
VOD705 DLS
VOD705 DLP
DVD PLA YER
WITH
DROP-DOWN
VIDEO MONITOR
128-6247B
Revision B: Add DLS and DLP models 6-04-02.
Released 03-08-02.
Revision A: Incoporated LCD switch 03-22-02.

128-6247B
2 of 24
Important Notice
It is unlawful in most jurisdictions for a person to drive a motor
vehicle which is equipped with a television viewer or screen that
is located in the motor vehicle at any point forward of the back of
the driver’s seat, or that is visible, directly or indirectly, to the
driver while operating the vehicle. In the interest of safety, the
VOD705 DL/VOD705 DLS/VOD705 DLP should never be
installed where it will be visible, directly or indirectly, by the
operator of the motor vehicle.
Warnings
Do not use any solvents or cleaning materials when cleaning the
video monitor.
Do not use any abrasive cleaners, they may scratch the screen.
Use only a lightly dampened lint free cloth to wipe the screen if it
is dirty.
Lock the LCD screen in the fully closed position when not in use.
Before putting on headphones always adjust the volume setting
to the lowest position.
Remember to leave the dome light switch in the off or auto
positions when the vehicle is unattended, as the dome lights, if
left on, can drain the vehicle’s battery.
Do not put pressure on the screen.
Caution children to avoid touching or scratching the screen, as it
may become dirty or damaged.

128-6247B
3 of 24
Congratulations on your purchase of the Audiovox
VOD705 DL/VOD705 DLS/VOD705 DLP DVD Player
with Drop-Down Video Monitor. The VOD705 DL/
VOD705 DLS/VOD705 DLP has been designed to
give you and your family many years of video
entertainment in the mobile environment. Please read
the directions that follow to familiarize yourself with
the product and to ensure that you obtain the best
results from your equipment.
Please note: Installation options vary, see the
individual owner’s manuals for each component in
your system to obtain a full understanding of each
component’s operation.
Safety Precaution
For safety reasons, when changing video media it is
recommended that the vehicle is not in motion, and
that you do not allow children to unfasten seat-belts
to change video media or make any adjustments to
the system. System adjustments can be
accomplished using the remote control unit, while
seat-belts remain fastened. Enjoy your Audiovox
entertainment system but remember-safety of all
passengers remains the number one priority.
Features
••
••
• 7 Inch TFT (Thin Film Transistor) Active
Matrix LCD (Liquid Crystal Display) Monitor
••
••
• OSD (On Screen Display) for Control of
Picture Quality and Functions
••
••
• Full Function Remote Control
••
••
• Three Frequency FM Modulator with
remote control and OSD
••
••
• Infrared Transmitter for IR Wireless
Headphones
••
••
• Three Audio / Video Inputs
••
••
• Headphone / Speaker Amplifier
••
••
• T wo Headphone Jacks
••
••
• Forward and Side Remote Sensor
••
••
• Dome Lights with Switch
••
••
• Backlit Controls for Low Light Operation
128-6247B
4 of 24
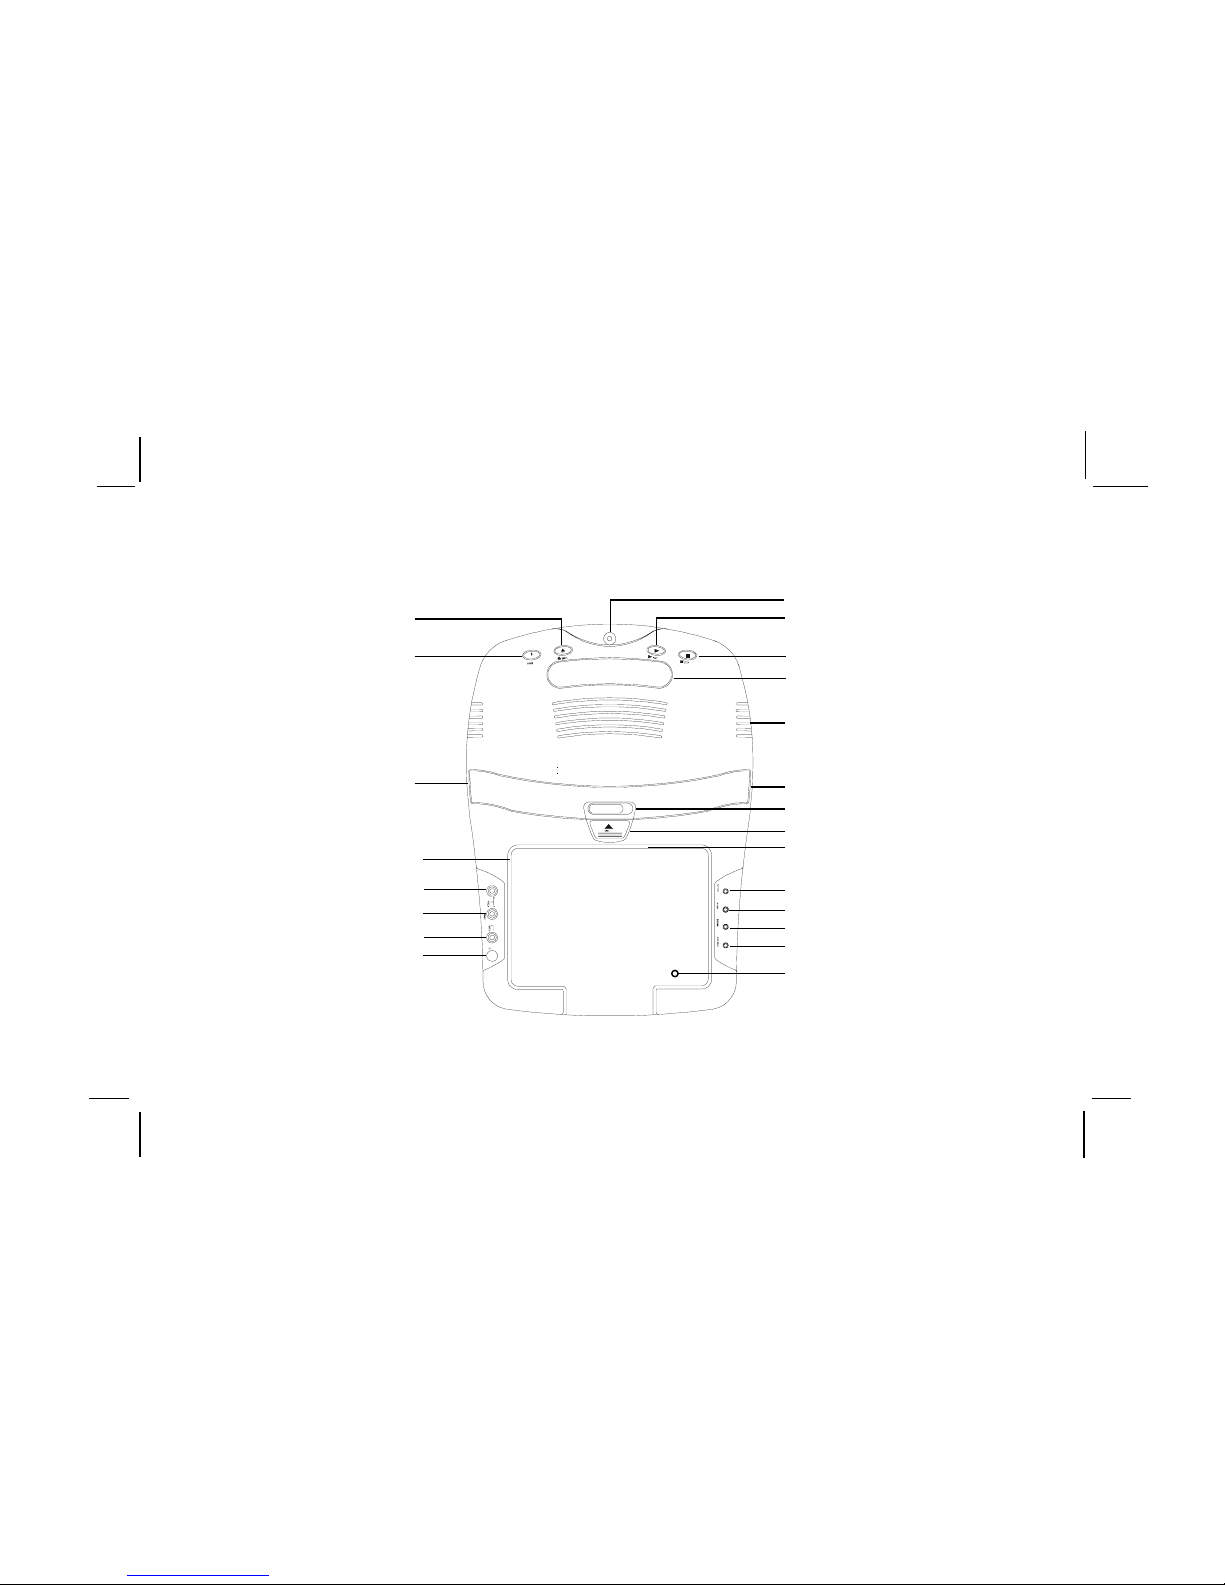
Controls and Indicators Diagram
-1-
NOTE: Screen Mode Button
Located on Inside With the Screen
in the Closed Position.
NOTE: LCD Backlight Control
Switch located on Inside With the
Screen in the Closed Position.
1
2
3
4
7
8
9
10
21
11
12
13
14
15
5
6
8
16
17
18
19
20

128-6247B
5 of 24
NOTE: Audiovox recommends the use of the Audiovox
HP275 Headphones when using wired headphones.
Main Function Descriptions
1. DVD disc insertion slot.
2. Play (
) Button
3. Stop ( ) Button.
4. Infrared Transmitter and Sensor – Use to
transmit audio to wireless headphones. Also
allows the remote control to operate the VOD705
DL/VOD705 DLS/VOD705 DLP OSD (On Screen
Display) and to control other accessories in the
system
5. Eject (
) Button.
6. Power Button – (Bright red when system is on
dim when off).
7. VOD705 DL /VOD705 DLS/VOD705 DLP
Ventilation Opening.
8. Dome Lights – provide additional Interior
illumination.
9. Three position Dome Light Switch
• Auto – Automatically switches on the dome
lights in conjunction with the vehicle’s interior
illumination.
• Off – The dome lights will not turn on in this
position.
• On – Turns on the dome lights.
10. Screen Release – Moves in direction of the arrow
to release the drop down screen.
11. Headphone Jack - Allows the use of wired
headphones with a 1/8” plug for listening to video
program audio.
12. FM Transmitter Channel Select (Channel 1,
88.3MHz, Channel 2, 88.7MHz, Channel 3,
89.1MHz).
13. Headphone Jack - Allows the use of wired
headphones with 1/8” plug for listening to video
program audio.
14. Source Select (A V1, A V2, DVD, AUX).
15. Screen Mode Button - Allows the user to change
screen format (Aspect Ratio, 4:3 or 16:9).
16. Drop Down LCD Panel.
17. Auxiliary Audio Right Input.
18. Auxiliary Audio left Input.
19. Auxiliary Video Input.
20. Side Remote Sensor Eye – Allows the remote
control to operate the VOD705 DL/VOD705 DLS/
VOD705 DLP and control other accessories in the
system.
21. LCD Panel Backlight Switch – This switch turns
off the LCD backlighting when the screen is in the
closed position.
-2-

128-6247B
6 of 24
REMOTE CONTROL OPERATION
4-R2.0
4
16
15
14
13
12
11
10
9
8
7
6
5
32
31
30
29
28
27
26
25
24
23
22
21
3
2
1
20
19
18
17
33
9
7
8
MENU
A-B
VOLUME
PIX
RETURN
SLOW
STOP
PAUSE
ENTER
ZOOM
AUDIO
0
SET UP
REPEAT
PLAY
SOURCE
MUTE
FM TRANSMITTER
ON/OFF
DVD
POWER
SELECT
EJECT
3
6
1
4
DISPLAY
SUBTITLE
ANGLE
2
5
BATTERY INSTALLATION
Before attempting to operate your Remote Control,
install the batteries as described below.
1) T urn the Remote Control face down. Using a
fingernail, lift the battery cover off.
2) Install two “AAA” batteries as shown. Make
sure that proper polarity (+ or -) is observed.
3) Align the cover tabs with the remote control
and press down until the cover clicks.
The remote control will operate the VOD705 DL/
VOD705 DLS/VOD705 DLP. It is not a universal
remote control and will not control equipment from
other manufacturers.
-3-

128-6247B
7 of 24
6. UP (
▲▲
▲▲
▲) Button
Allows the user to scroll upwards in the menu
options.
7. LEFT (
) Button
Allows the user to shift left in the menu options.
8. MENU Button
Allows the user to access the main menu.
9. RETURN Button
Allows the user to exit the set up menu.
10. VOLUME DOWN (-) Button
Use these buttons to decrease the volume level of
the headphone jacks. They are also used to make
picture adjustments in picture select mode.
11. VOLUME UP (+) Button
Use these buttons to raise the volume level of the
headphone jacks, They are also used to make picture
adjustments in picture select mode.
NOTE: These buttons will not affect the volume of
wireless headphones or a wired RF modulator.
When using these devices the volume must be
adjusted with the wireless headphone volume
control or with your radio’s volume control (see page
8, Headphones, or page 9, Wired FM Modulator).
DVD Function Descriptions
*Function control is available on the unit and the remote
control.
1. DVD POWER ON/OFF Button*
Press this button to turn the VOD705 DL/
VOD705 DLS / VOD705 DLP on. The DVD or
selected video source will be displayed on screen
and the picture will appear in a few seconds.
Press the button again to turn the VOD705 DL/
VOD705 DLS/VOD705 DLP off.
2. DISPLAY Button
Display Menu, This includes Title, Chapter, T ime,
Audio, Subtitle, Angle, Repeat Bookmark and other
information.
3. ANGLE Button
Allows the user to select the DVD angle if the DVD
contains this feature.
4. SUBTITLE Button
Allows the user to select the DVD subtitle feature.
Use cursor keys to highlight desired item, use ENTER
to switch.
5. AUDIO Button
Allows the user to enter the Audio menu features
(language spoken etc.) Use the (
) buttons to
highlight desired item, use the
(
▼▲▼▲
▼▲▼▲
▼▲) buttons to
switch.
-4-

128-6247B
8 of 24
-5-
12. SLOW Button
The DVD viewing speed will be reduced at 1/2,
1/4,1/8 times of normal speed.
13. PIX Button (PICTURE SELECT)
Each time this button is pressed, the on screen
picture adjustment display cycles through
“adjustment bars” for BRIGHTNESS, CONTRAST,
COLOR and TINT . Once the desired adjustment bar
is displayed, use the VOLUME UP/DOWN buttons
to adjust the setting. The display will automatically
turn off if no adjustments are made within 6 seconds,
or if any other button is depressed.
14. PAUSE ( ) Button *
DVD disc play will be paused. During Disc Playback,
momentarily press the PLAY Button to Pause the
Disc from the unit.
15. STOP (
) Button *
DVD disc play will be stopped.
16. EJECT(
▲▲
▲▲
▲) Button *
The disc will be ejected disc from disc compartment.
17. FM SELECT Button *
Selects the FM modulator Frequency (Frequency 1,
88.3MHz, Frequency 2, 88.7MHz, Frequency 3,
89.1MHz).
18. FM ON/OFF Button *
Turns FM Modulator power on/off.
19. NUMBERS Buttons
Allows the user to enter the numbers 0 to 9 for
selection of CD tracks, dvd chapters, and
password setting.
20. SOURCE Button*
Video signals from video equipment connected
to the audio / video inputs can be displayed on
the monitor by pressing this button. Each time
the button is pressed, the audio / video source
will change in the following sequence: DVD, A V1,
AV2 and AUX.
21. MUTE Button
Press this button to mute the audio while using
wired headphones.
Pressing the button again restores sound to the
previously set level.
22. ENTER Button
Used to select or switch a highlighted selection.
23. RIGHT (
) Button
Allows the user to shift to the right in the menu
options.
24. SETUP Button
Allows the user to select the DVD options
(Language, Video, Audio, Rating, Exit). The setup
display can be viewed only when the player is in
stop mode.
* Function control is available on the unit and the remote control.

128-6247B
9 of 24
25. DOWN (
▼▼
▼▼
▼) Button
Allows the user to scroll downward in the menu
options.
26. REPEAT Button
Allows the user to repeat various positions of a
DVD, CD or MP3 and displays the repeat menu.
27. A-B REPEAT Button
Allows the user to repeat play of a DVD or CD
from point A to point B.
28. NEXT ( | ) Button
Allows the user to skip to the next chapter or track.
29. PREVIOUS ( |
) Button
Allows the user to return to the previous chapter
or track.
30. Scan Forward (
) Button
Allows the user to search in a forward direction
at 2,4, and 8 times the normal speed.
31. Scan Backward ( ) Button
Allows the user to search in a backward
direction at 2,4, and 8 times the normal speed.
32. PLAY Button (
)Button*
Press this button to activate the play mode while
a disc is loaded into the disc compartment.
33. ZOOM Button
Allows the user to view a scene in a close-up mode.
*Function control is available on the unit and the remote control.
-6-
 Loading...