

Page 1
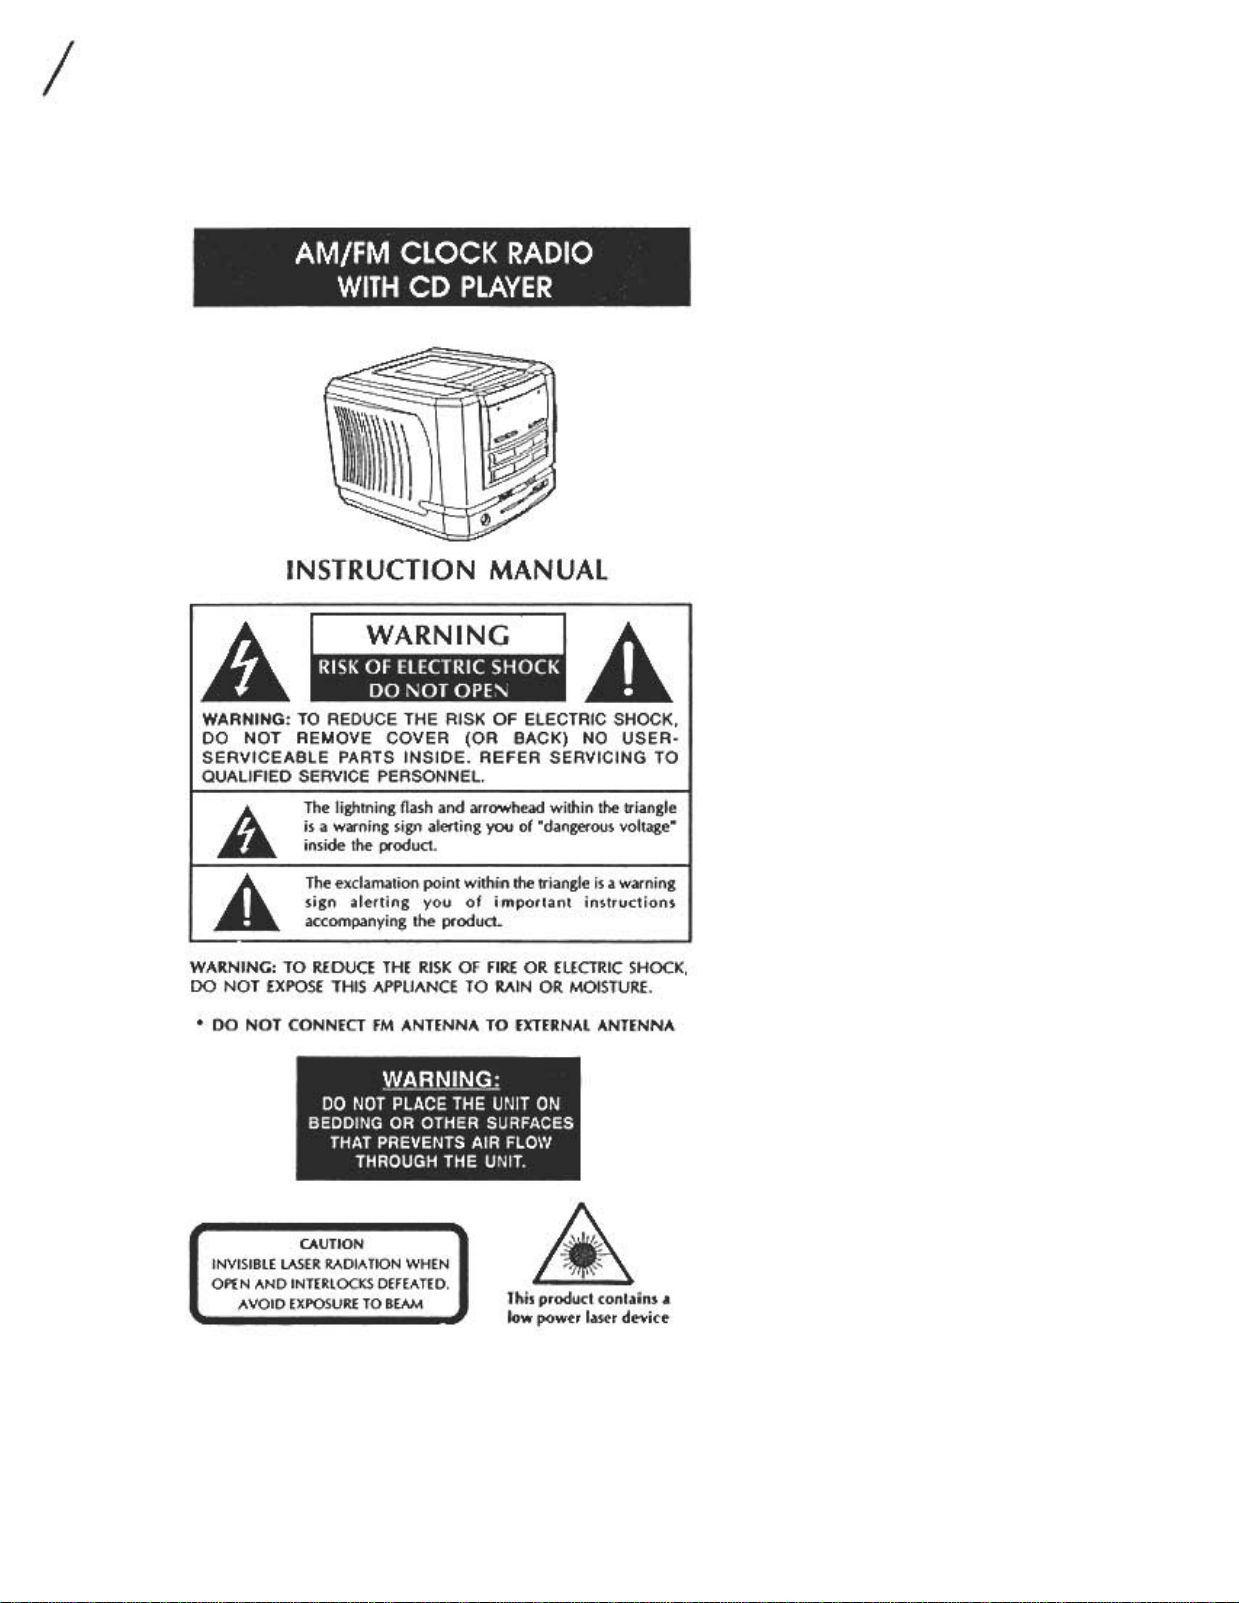
INSTRUCTION MANUAL
WARNING: TO REDUCE THE RISK OF FIRE OR ElECTRIC SHOCK,
DO NOT EXPOSE THIS APPliANCE TO RAIN OR MOISTURE.
.DO NOT CONNECT FM ANTENNA TO EXTERNAL ANTENNA
This product contains a
low power laser device
Page 2
.To disconnect the cord, pull it out by the grasping plug. Never pull
it by the cord.
.Avoid exposure to temperature extremes, direct sunlight, moisture,
sand, dust or mechanical shock.
Allow adequate air circulation to prevent internal heat build-up. Do
not place the unit on surfaces (rugs, blankets, etc.) or near materials
(curtains, draperies) that may block the ventilation holes.
.Should any solid object or liquid fall into the unit, unplug the unit
and have it checked by qualified personnel before operating it any
further .
.When cleaning the casing, use a soft cloth dampened with a mild
detergent solution. Never use abrasive cleaners or chemical solvents.
FCC information
This device complies with Part 15 of FCC Rules. Operations are subject
to the following two conditions: (1) this device may not cause harmful
interference, and (2) this device must accept any interference received,
including interference that may cause undesirable operation.
USING HOUSE CURRENT
Before use, check that the rated voltage of your unit matches your
local voltage.
CAUTION: To prevent
electrical shock, match wide "
blade of plug to wide slot, j
fully insert.
AC cord To
AC outlet
~
POWER BACK UP DURING
POWER INTERRUPTION
~
Insert one "6F22" battery
Be sure to install an optional 9V battery (6F22) for the power back-up
function. If the AC power supply is interrupted, the battery supplies power
to keep the clock operating and holding the alarm time setting.
.During power interruption, the backup battery will keep track of the
time and store the alarm setting until the power returns. The battery
will not operate the LED clock display, radio, CD player, or alarm
function.
.After a power interruption, the displayed time may not be always correct
(it may gain or lose less than ten minutes per hour).
When to replace the battery
T o check the battery condition, unplug the AC power cord from the wall
outlet and plug it in again after a few minutes. If the displayed time is
incorrect, replace the battery with a new one.
Caution
.Be sure to install the battery before disconnecting the AC power cord.
.When the unit is left unplugged for a long time, remove the battery to
avoid undue battery discharge and unit damage from battery leakage.
Page 3
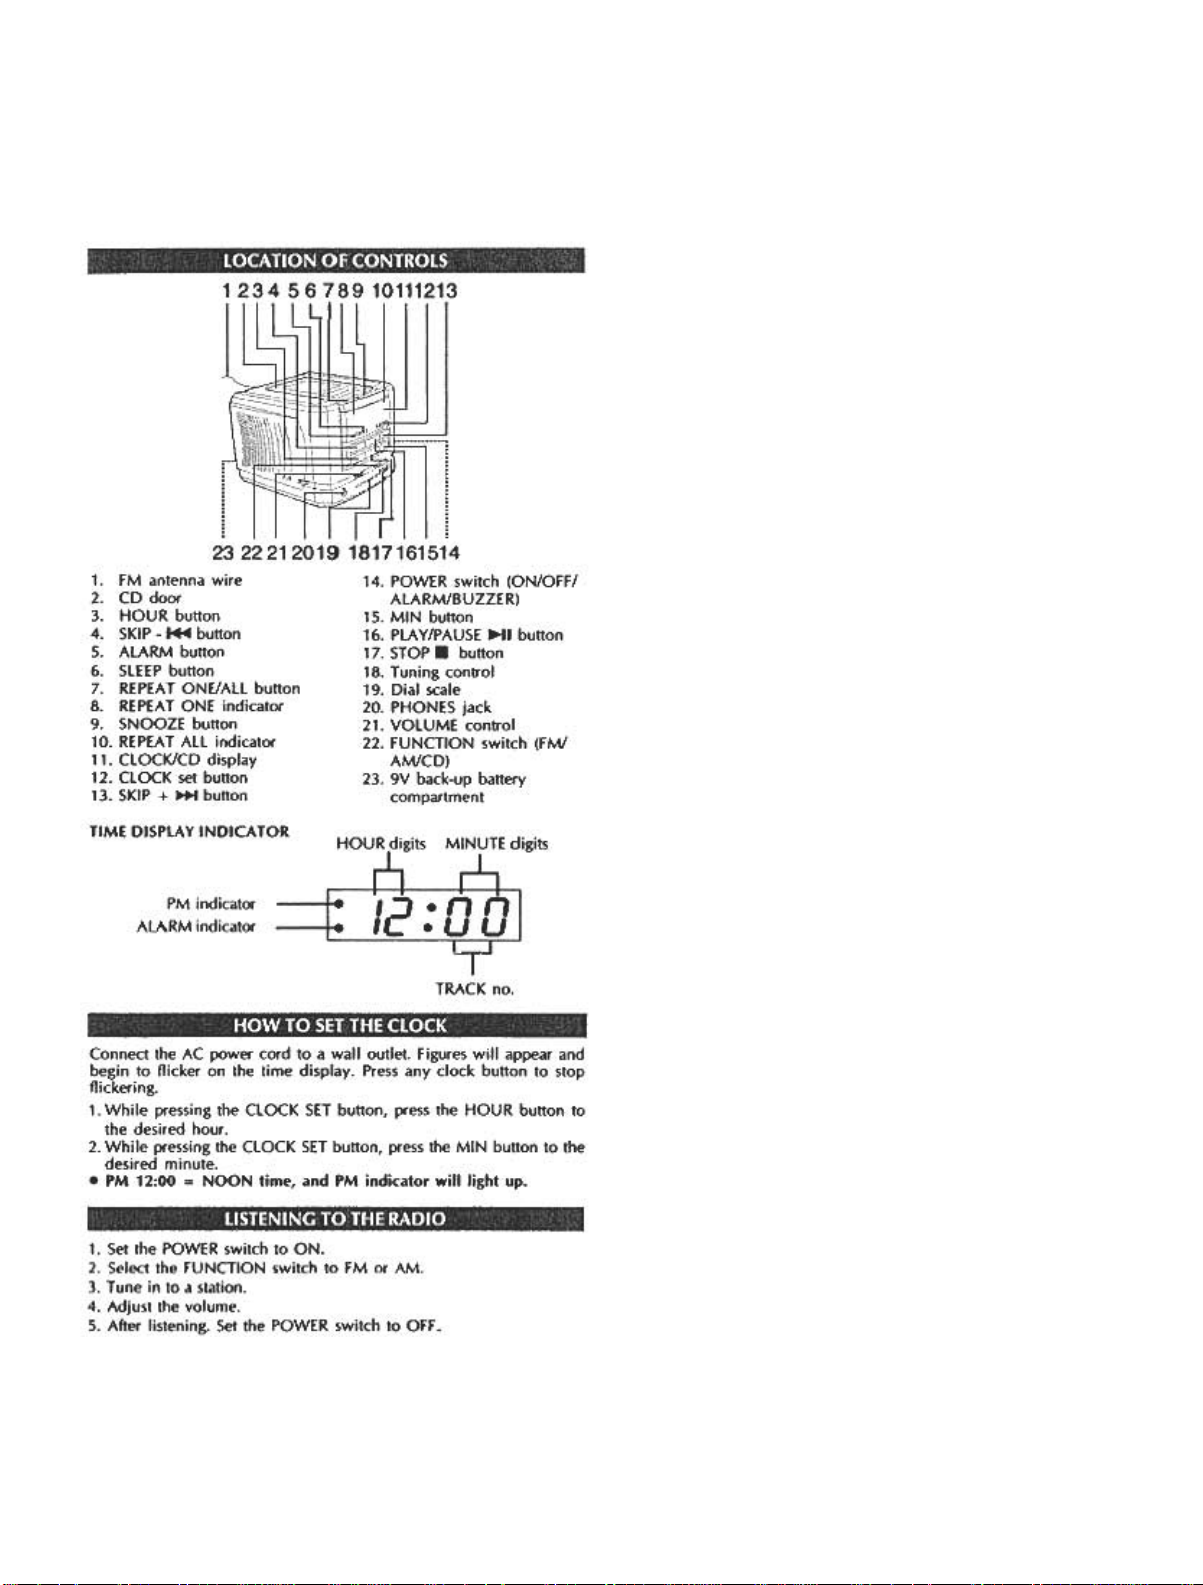
123456 78910111213
LI
i r
23222120191817161514
1. FM antenna wire 14. POWER switch (ON/OFF/
2. CD door ALARM/BUZZER)
3. HOUR button 15. MIN button
4. SKIP -~ button 16. PLAY/PAUSE ...1 button
5. ALARM button 17. STOP. button
6. SLEEP button 18. Tuning control
7. REPEAT ONE/ALL button 19. Dial scale
8. REPEAT ONE indicator 20. PHONES jack
9. SNOOZE button 21. VOLUME control
10. REPEAT ALL indicator 22. FUNCTION switch (FM/
11. CLOCK/CD display AM/CD)
12. CLOCK set button 23. 9V back-up battery
13. SKIP + ~ button compartment
TIME DISPLAY INDICATOR
PM indicator
ALARM indicator
HOUR digits MINUTE digits
-L -L
I
TRACK no.
Connect the AC power cord to a wall outlet. Figures will appear and
begin to flicker on the time display. Press any clock button to stop
flickering.
1. While pressing the ClOCK SET button, press the HOUR button to
the desired hour .
2. While pressing the ClOCK SET button, press the MIN button to the
desired minute.
.PM 12:00 = NOON time, and PM indicator will light up.
1. Set the POWER switch
2. Select the FUNCTION
3. Tune in to a station.
4. Adjust the volume.
5. After listening. Set the
to ON.
switch to FM or AM.
POWER switch to OFF.
Page 4

To improve the radio reception
FM: Extend the external antenna
wire.
Caution: DO NOT CONNECT
TO OUTSIDE ANTENNA.
For private listening
Connect headphones (03.5mm mini plug) to the PHONES jack.
When the headphones are connected, speakers are automatically
disconnected.
1. Set the FUNCTION switch to CD. " -" is shown in the display.
2. Open the CD door, "--" is shown. Place a disc in the center with the
printed label facing up. Close the CD door gently, the total track no.
will be shown a few minutes.
3. Use the SKIP H-4 ~ buttons to choose a track.
4. Press the PLAY/PAUSE 1 button to begin play. The PLAY/PAUSE
indicator will light up. I :0: II
5. Press the STOP. button to stop disc play.
NOTE: The clock display will be shown after a few minutes.
PAUSING CD PLAY
1. Press the PLAY/PAUSE .-II button while a CD is playing to pause
play. The track no. will light up.
AM: Rotate the unit horizontally.
r ..:: \ 11-
I ~ , ~\.::r
2. Press the PlAY/PAUSE .-II button again to continue play.
REPEATING PLAY
.Press the REPEA T button once during playback, the REPEA T ONE
indicator will light up.
REPEATONE -
indicator
.Press the REPEAT button a second time to repeat all tracks, the
REPEAT All indicator will light up.
REPEAT All ~
indicator ~t- fl
.Press the REPEAT button until the REPEAT indicator is turned off.
r~~
I~ -0:.- N~.o- 11
~
-.-
Page 5

1. While pressing the ALARM button, press the HOUR button to the
desired hour .
2. While pressing the ALARM button, press the MIN button to the
desired minute.
3. For RADIO
First tune in the desired station, adjust the volume. Set the POWER
switch to ALARM.
For buzzer alarm
Set the POWER switch to BUZZER
For CD alarm
Set the desired track no. (refer to USING THE CD PLAYER)
4. The Alarm indicator will light up.
.Set to FM/AM/CD or BUZZER, alarm will come on at the preset
time, and shut off automatically after 119 minutes.
1.lf you want to snooze a few more minutes
Pressing the SNOOZE button will deactivate the sound for 9 minutes.
You can repeat this function as many times as desired within 119
minutes from the preset alarm time.
2. To reset alarm for following day
Press the ALARM button, and it will resume after 24 hours.
3. To completely cancel alarm mode
Set the POWER switch to STANDBY position.
1. Set the POWER switch to STANDBY position. Set the FUNCTION
switch to the desired source.
2. Press the SlEEP button.
If AM(MW) or FM is selected, the radio will turn on. If CD is selected,
you must then press the PlAY/PAUSE -..II button.
3. The radio or CD will automatically turn off after 59 minutes.
To adjust the length of time before the radio or CD automatically
turns off.
Hold down the SlEEP button while pressing the MIN or HOUR buttons.
The SlEEP timer can be adjusted to between 1 and 119 minutes.
T o turn off the radio or CD before the SlEEP time expires.
Press the SNOOZE button
GENERAL GUIDELINES
.Do not touch the laser lens on the CD player .
.Temperature changes can cause condensation to form on the laser lens.
If condensation forms on the lens, leave the disc compartment door
open (without disc) for an hour to remove condensation.
.Exposure to direct sunlight or extreme heat (such as inside a car parked
in the sun) can cause damage or malfunction-
.To prevent dust from reaching internal parts, keep the compartment
door close when not using (except when necessary to remove
condensation).
Page 6

HANDLING THE COMPACT DISC
It's important that you periodically clean
the laser lens:
1. Turn off the unit's power and disconnect
the AC power .
2. Open the CD door and remove the disc.
3. Clean the lens with a soft cloth or use an
air blower brush designed for cameras.
~
,...
laser lens
4. If you still are not able to remove dirt
particles, moisten a cotton swab with
isopropyl alcohol and gently apply to the
face of the laser lens, rubbing gently until r ,,~
all traces of d..t are removed. ~ ~ -
Although the music tracks in the disc are ~
covered with a protective layer, it is still ~ >-..'~
advisable to treat the disc carefully. Always
pick up discs by the edge and put them
back in their holders immediately after use.
-
CD
Problems
System does not turn
on
Disc in place but unit
won't play
SoJurions
.Make sure the POWER switch is set to ON
position
.Make sure the FUNCTION switch is set to
CD position.
.Make sure disc is clean and undamaged-
.Make sure printed side of disc is facing up.
.Make sure PAUSE mode is not activated.
RADIO
Poor FM reception
.Make sure FM antenna wire is fully
extended.
.Electrical interference in your home can
cause poor reception. Move the unit away
from them (especially those with motors
and transformers).
Poor AM(MW)
reception
.Reposition or turn the unit for better
reception.
CLOCK
Clock does not show
the correct time
Alarm does not come
on at the preset time.
.There has been an electrical power
interruption. (Is the figure of the time
display flickering?)
To turn on the radio, buzzer or CD alarm,
check the following points:
.Is the current time correctly set on the
time display? Check the AM/PM
indication.
.Is the alarm time correctly sell Check the
AMfPM indication.
.Is the ALARM switch correctly set to AM,
FM or CD?
.Is the desired station or song tuned in?
Power output: Max. SOOmW
Power requirements:AC-120V 60 Hz
DC 9V (6F22 xl) back-up battery (not included)
Specification subjects to change without notice.
P/N.811.116891-011 Prinledin China
 Loading...