

Page 1

DO NOT
PRINT
THIS
PAGE
cdm-100(audiovox)11/5 2001.11.7 10:6 AM Page 1
Page 2

TABLE OF CONTENTS
CHAPTER 1 BEFORE USING YOUR PHONE . . . . . . . . .1
Package Includes . . . . . . . . . . . . . . . . . . . . . . . . . . . . . . . . . .2
Handset Description . . . . . . . . . . . . . . . . . . . . . . . . . . . . . . . .3
Basic Functions . . . . . . . . . . . . . . . . . . . . . . . . . . . . . . . . . . .4
The Function Keys . . . . . . . . . . . . . . . . . . . . . . . . . . . . . . . .4
Display Indicators . . . . . . . . . . . . . . . . . . . . . . . . . . . . . . . . .5
Screen Status, Display and Function . . . . . . . . . . . . . . . . . . .5
Using the Battery . . . . . . . . . . . . . . . . . . . . . . . . . . . . . . . . . .6
Installing the Battery . . . . . . . . . . . . . . . . . . . . . . . . . . . . . . .6
Removing the Battery . . . . . . . . . . . . . . . . . . . . . . . . . . . . . .6
Charging the Battery . . . . . . . . . . . . . . . . . . . . . . . . . . . . . . .7
Power Connection . . . . . . . . . . . . . . . . . . . . . . . . . . . . . . . . .7
Battery Charging Time (Power Off) . . . . . . . . . . . . . . . . . . . .7
Battery Life (for New Battery) . . . . . . . . . . . . . . . . . . . . . . . .7
Charging the Battery with the Handset . . . . . . . . . . . . . . . . .8
Charging the Battery Only . . . . . . . . . . . . . . . . . . . . . . . . . . .8
How to Use the Battery More Efficiently . . . . . . . . . . . . . . .9
CHAPTER 2 BASIC OPERATION . . . . . . . . . . . . . . . . . .11
Turning the Phone On and Off . . . . . . . . . . . . . . . . . . . . . . .12
Turning the Phone On . . . . . . . . . . . . . . . . . . . . . . . . . . . . .12
Turning the Phone Off . . . . . . . . . . . . . . . . . . . . . . . . . . . . .12
How to Use the Menu . . . . . . . . . . . . . . . . . . . . . . . . . . . . . .13
Menu Summary . . . . . . . . . . . . . . . . . . . . . . . . . . . . . . . . . . .14
Basic Functions . . . . . . . . . . . . . . . . . . . . . . . . . . . . . . . . . .16
Making a Call . . . . . . . . . . . . . . . . . . . . . . . . . . . . . . . . . . .16
Pause Feature . . . . . . . . . . . . . . . . . . . . . . . . . . . . . . . . . . .17
How to Answer Calls . . . . . . . . . . . . . . . . . . . . . . . . . . . . . .18
Caller ID Function . . . . . . . . . . . . . . . . . . . . . . . . . . . . . . . .18
Call Waiting Function . . . . . . . . . . . . . . . . . . . . . . . . . . . . . .18
Missed Call Display . . . . . . . . . . . . . . . . . . . . . . . . . . . . . . .19
How to Adjust Volume . . . . . . . . . . . . . . . . . . . . . . . . . . . . .19
Functions During a Call . . . . . . . . . . . . . . . . . . . . . . . . . . . .20
Sending Your Number to a Pager . . . . . . . . . . . . . . . . . . . .20
Scratch Pad . . . . . . . . . . . . . . . . . . . . . . . . . . . . . . . . . . . .20
Mute . . . . . . . . . . . . . . . . . . . . . . . . . . . . . . . . . . . . . . . . . .21
View Phone Number . . . . . . . . . . . . . . . . . . . . . . . . . . . . . .21
Voice Privacy . . . . . . . . . . . . . . . . . . . . . . . . . . . . . . . . . . .21
Lock Mode . . . . . . . . . . . . . . . . . . . . . . . . . . . . . . . . . . . . . .22
Lock Mode . . . . . . . . . . . . . . . . . . . . . . . . . . . . . . . . . . . . .22
[ i]
cdm-100(audiovox)11/5 2001.11.7 10:6 AM Page 2
Page 3

[iii][ii]
TABLE OF CONTENTS (CONT’D.) TABLE OF CONTENTS (CONT’D.)
Change NAM . . . . . . . . . . . . . . . . . . . . . . . . . . . . . . . . . . .42
Auto NAM . . . . . . . . . . . . . . . . . . . . . . . . . . . . . . . . . . . . . .43
Preferred Roaming List ID . . . . . . . . . . . . . . . . . . . . . . . . . .43
Force AMPS . . . . . . . . . . . . . . . . . . . . . . . . . . . . . . . . . . . .43
My Number . . . . . . . . . . . . . . . . . . . . . . . . . . . . . . . . . . . . . .44
Checking the Phone Number . . . . . . . . . . . . . . . . . . . . . . . .44
CHAPTER 5 SECURITY FEATURES . . . . . . . . . . . . . . .45
How to Lock Your Phone . . . . . . . . . . . . . . . . . . . . . . . . . . .46
Auto Lock . . . . . . . . . . . . . . . . . . . . . . . . . . . . . . . . . . . . . .46
How to Change Lock Code . . . . . . . . . . . . . . . . . . . . . . . . .47
Lock Code Change . . . . . . . . . . . . . . . . . . . . . . . . . . . . . . .47
How to Change Your Banner . . . . . . . . . . . . . . . . . . . . . . . .48
Banner Change . . . . . . . . . . . . . . . . . . . . . . . . . . . . . . . . . .48
How to Restrict Your Phone . . . . . . . . . . . . . . . . . . . . . . . . .49
Restriction Functions . . . . . . . . . . . . . . . . . . . . . . . . . . . . . .49
Restricting Incoming Calls . . . . . . . . . . . . . . . . . . . . . . . . . .49
Restricting Outgoing Calls . . . . . . . . . . . . . . . . . . . . . . . . . .50
Restricting the Phone Book . . . . . . . . . . . . . . . . . . . . . . . . .50
Restricting Long Distance Calls . . . . . . . . . . . . . . . . . . . . . .51
Restricting Calls to 900 Numbers . . . . . . . . . . . . . . . . . . . . .51
How to Reset Your Phone . . . . . . . . . . . . . . . . . . . . . . . . . .52
How to Clear Your Phone Memory . . . . . . . . . . . . . . . . . . . .53
Clearing Phonebook . . . . . . . . . . . . . . . . . . . . . . . . . . . . . .53
Memory Clearing Function . . . . . . . . . . . . . . . . . . . . . . . . . .54
Clearing Schedules . . . . . . . . . . . . . . . . . . . . . . . . . . . . . . .54
Clearing Dialed Numbers in Call Logs . . . . . . . . . . . . . . . . . 54
Clearing Air Time In Home Service Area . . . . . . . . . . . . . . .54
Clearing Roam Calls . . . . . . . . . . . . . . . . . . . . . . . . . . . . . .55
Version . . . . . . . . . . . . . . . . . . . . . . . . . . . . . . . . . . . . . . . . .56
CHAPTER 6 SUPPLEMENTARY FUNCTIONS . . . . . . .57
Schedule . . . . . . . . . . . . . . . . . . . . . . . . . . . . . . . . . . . . . . . . 58
Input Schedule List . . . . . . . . . . . . . . . . . . . . . . . . . . . . . . .58
View Schedule List . . . . . . . . . . . . . . . . . . . . . . . . . . . . . . .59
Pause All Schedules . . . . . . . . . . . . . . . . . . . . . . . . . . . . . .59
Stopwatch . . . . . . . . . . . . . . . . . . . . . . . . . . . . . . . . . . . . . . .60
Stopwatch . . . . . . . . . . . . . . . . . . . . . . . . . . . . . . . . . . . . . .60
Calculator . . . . . . . . . . . . . . . . . . . . . . . . . . . . . . . . . . . . . . .61
Calculator . . . . . . . . . . . . . . . . . . . . . . . . . . . . . . . . . . . . . .61
Biorhythm . . . . . . . . . . . . . . . . . . . . . . . . . . . . . . . . . . . . . . .62
CHAPTER 3 MEMORY FUNCTION . . . . . . . . . . . . . . . .23
How to Store a Phone Number . . . . . . . . . . . . . . . . . . . . . .24
How to Enter Letters and Characters Using the Keypad . . . .25
How to Make a Call Using A Stored Phone Number . . . . . .26
One-Touch/Two-Touch Dialing . . . . . . . . . . . . . . . . . . . . . . .26
How to Find Your Call Logs . . . . . . . . . . . . . . . . . . . . . . . . .27
Missed Calls . . . . . . . . . . . . . . . . . . . . . . . . . . . . . . . . . . . .27
Answered Received Calls . . . . . . . . . . . . . . . . . . . . . . . . . .28
Dialed Calls . . . . . . . . . . . . . . . . . . . . . . . . . . . . . . . . . . . . .28
How to Find Your Phone Book . . . . . . . . . . . . . . . . . . . . . . .29
Recalling by Memory Location Number . . . . . . . . . . . . . . . .29
Recalling by Name . . . . . . . . . . . . . . . . . . . . . . . . . . . . . . .30
CHAPTER 4 MENU . . . . . . . . . . . . . . . . . . . . . . . . . . . .31
Settings . . . . . . . . . . . . . . . . . . . . . . . . . . . . . . . . . . . . . . . . .32
Auto Retry . . . . . . . . . . . . . . . . . . . . . . . . . . . . . . . . . . . . . .32
Auto Answer . . . . . . . . . . . . . . . . . . . . . . . . . . . . . . . . . . . .33
One-Touch Dialing . . . . . . . . . . . . . . . . . . . . . . . . . . . . . . . .34
Voice Privacy . . . . . . . . . . . . . . . . . . . . . . . . . . . . . . . . . . .34
Backlight . . . . . . . . . . . . . . . . . . . . . . . . . . . . . . . . . . . . . . .35
Contrast . . . . . . . . . . . . . . . . . . . . . . . . . . . . . . . . . . . . . . .36
Tone . . . . . . . . . . . . . . . . . . . . . . . . . . . . . . . . . . . . . . . . . . .37
Ring Mode . . . . . . . . . . . . . . . . . . . . . . . . . . . . . . . . . . . . .37
Ring Type . . . . . . . . . . . . . . . . . . . . . . . . . . . . . . . . . . . . . .37
Keypad . . . . . . . . . . . . . . . . . . . . . . . . . . . . . . . . . . . . . . . .38
Ringer . . . . . . . . . . . . . . . . . . . . . . . . . . . . . . . . . . . . . . . . .38
Timer . . . . . . . . . . . . . . . . . . . . . . . . . . . . . . . . . . . . . . . . . . .39
Last Call . . . . . . . . . . . . . . . . . . . . . . . . . . . . . . . . . . . . . . .39
All Calls . . . . . . . . . . . . . . . . . . . . . . . . . . . . . . . . . . . . . . . .39
Home Calls . . . . . . . . . . . . . . . . . . . . . . . . . . . . . . . . . . . . .39
Roam Calls . . . . . . . . . . . . . . . . . . . . . . . . . . . . . . . . . . . . .39
Alerts . . . . . . . . . . . . . . . . . . . . . . . . . . . . . . . . . . . . . . . . . .40
Min Alert . . . . . . . . . . . . . . . . . . . . . . . . . . . . . . . . . . . . . . .40
Roam Alert . . . . . . . . . . . . . . . . . . . . . . . . . . . . . . . . . . . . .40
Fade Alert . . . . . . . . . . . . . . . . . . . . . . . . . . . . . . . . . . . . . .41
Low Signal Alert . . . . . . . . . . . . . . . . . . . . . . . . . . . . . . . . .41
Connect Alert . . . . . . . . . . . . . . . . . . . . . . . . . . . . . . . . . . .41
Systems . . . . . . . . . . . . . . . . . . . . . . . . . . . . . . . . . . . . . . . .42
Preferred System . . . . . . . . . . . . . . . . . . . . . . . . . . . . . . . .42
cdm-100(audiovox)11/5 2001.11.7 10:6 AM Page 4
Page 4

Please read this chapter before using this product.
u
Package Includes
v
Handset Description
w
Basic Functions
x
Display Indicators
y
Using the Battery
z
Charging the Battery
{
How to Use the Battery More Efficiently
CHAPTER 1
BEFORE USING YOUR PHONE
[1]
TABLE OF CONTENTS (CONT’D.)
[iv]
CHAPTER 7 VOICE MAIL AND TEXT MESSAGES . . . .63
Viewing a Text Message . . . . . . . . . . . . . . . . . . . . . . . . . . . .64
Direct View Set . . . . . . . . . . . . . . . . . . . . . . . . . . . . . . . . . .64
Direct View Release . . . . . . . . . . . . . . . . . . . . . . . . . . . . . .64
Checking Received Message . . . . . . . . . . . . . . . . . . . . . . . .65
Checking Received Voice Mail Message . . . . . . . . . . . . . . .65
Incoming Text Message . . . . . . . . . . . . . . . . . . . . . . . . . . . .66
Checking Received Text Message . . . . . . . . . . . . . . . . . . . .66
Outgoing Text Message . . . . . . . . . . . . . . . . . . . . . . . . . . . .67
Sending Text Message . . . . . . . . . . . . . . . . . . . . . . . . . . . .67
Direct View . . . . . . . . . . . . . . . . . . . . . . . . . . . . . . . . . . . . . .68
Direct View Setting . . . . . . . . . . . . . . . . . . . . . . . . . . . . . . .68
Bell Type . . . . . . . . . . . . . . . . . . . . . . . . . . . . . . . . . . . . . . . .69
Bell Type Setting . . . . . . . . . . . . . . . . . . . . . . . . . . . . . . . . .69
CHAPTER 8 MAKING AN EMERGENCY CALL . . . . . .71
Making an Emergency Call . . . . . . . . . . . . . . . . . . . . . . . . .72
E911 In Lock Mode . . . . . . . . . . . . . . . . . . . . . . . . . . . . . . .72
E911 Using Any Available System . . . . . . . . . . . . . . . . . . . .73
CHAPTER 9 SAFETY . . . . . . . . . . . . . . . . . . . . . . . . . .75
Safety Information for Wireless Handheld Phones . . . . . . .76
Driving Safety . . . . . . . . . . . . . . . . . . . . . . . . . . . . . . . . . . .77
Electronic Devices . . . . . . . . . . . . . . . . . . . . . . . . . . . . . . . .78
Other Safety Guidelines . . . . . . . . . . . . . . . . . . . . . . . . . . . .80
Precautions . . . . . . . . . . . . . . . . . . . . . . . . . . . . . . . . . . . . .81
Warning . . . . . . . . . . . . . . . . . . . . . . . . . . . . . . . . . . . . . . .82
Safety Information for FCC RF Exposure . . . . . . . . . . . . . .83
Cautions . . . . . . . . . . . . . . . . . . . . . . . . . . . . . . . . . . . . . . .83
SAR Information . . . . . . . . . . . . . . . . . . . . . . . . . . . . . . . . . .84
CHAPTER 10 WARRANTY . . . . . . . . . . . . . . . . . . . . . . 87
Protect Your Warranty . . . . . . . . . . . . . . . . . . . . . . . . . . . . .88
12 Month Limited Warranty . . . . . . . . . . . . . . . . . . . . . . . . .89
cdm-100(audiovox)11/5 2001.11.7 10:6 AM Page 6
Page 5
[2]
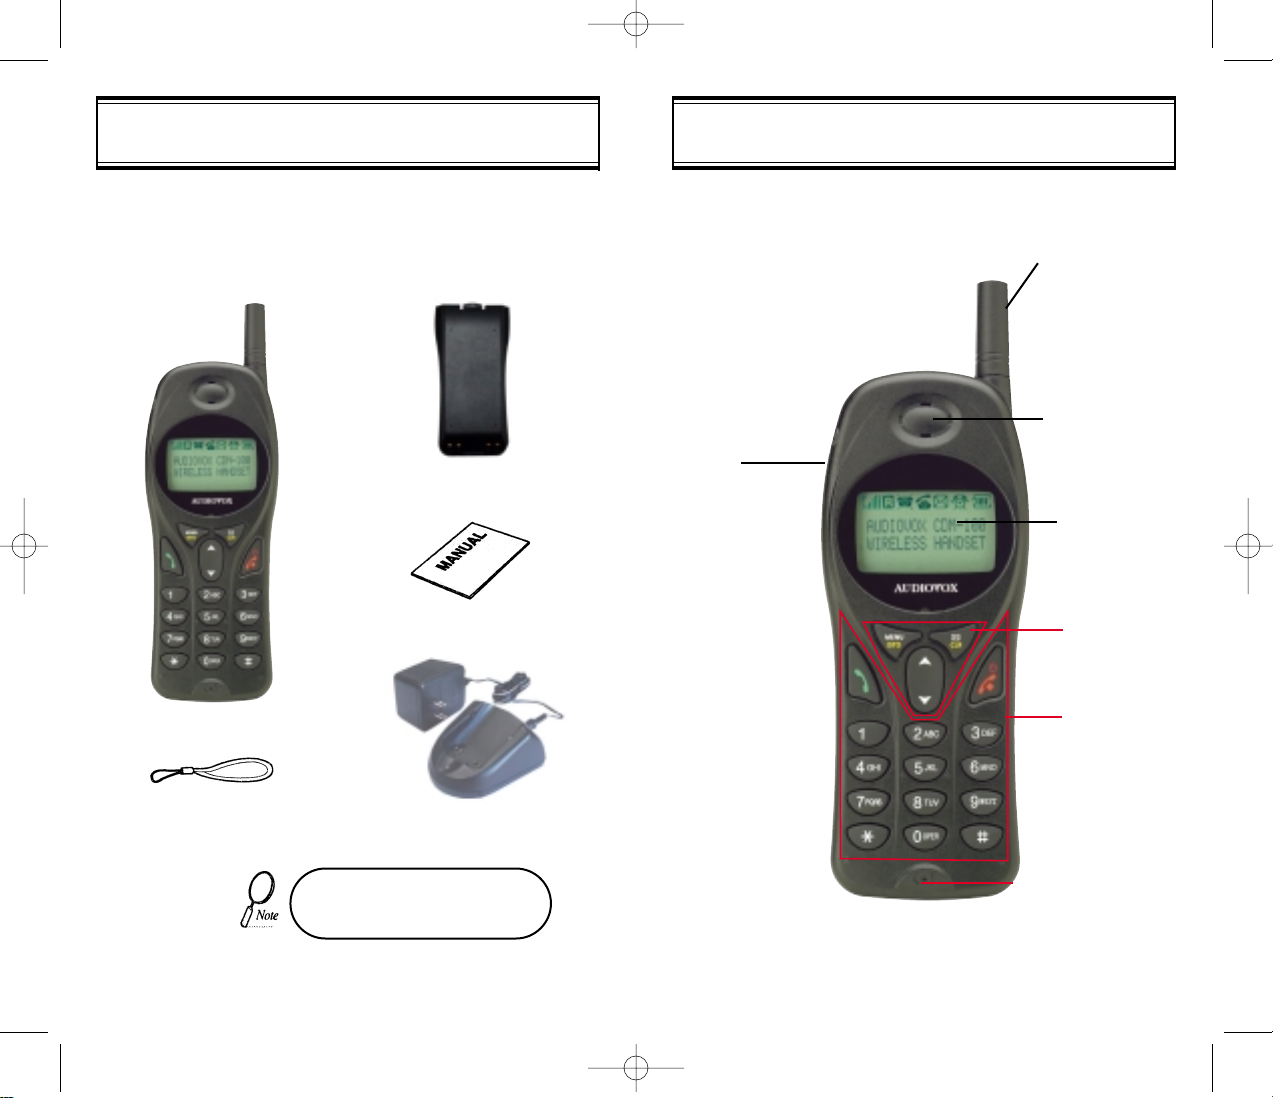
HANDSET DESCRIPTIONPACKAGE INCLUDES
In case there are any product
defects, please report them to the
place of purchase immediately.
[3]
Handstrap
User Manual
Desktop Charger
Handset
Earjack
Antenna
Earpiece
LCD Screen
Function
Keys
Keypad
Microphone
Standard Battery
Thank you for purchasing this product. Please check the product
contents by comparing them with the following pictures.
cdm-100(audiovox)11/5 2001.11.7 10:7 AM Page 8
Page 6
[4] [5]
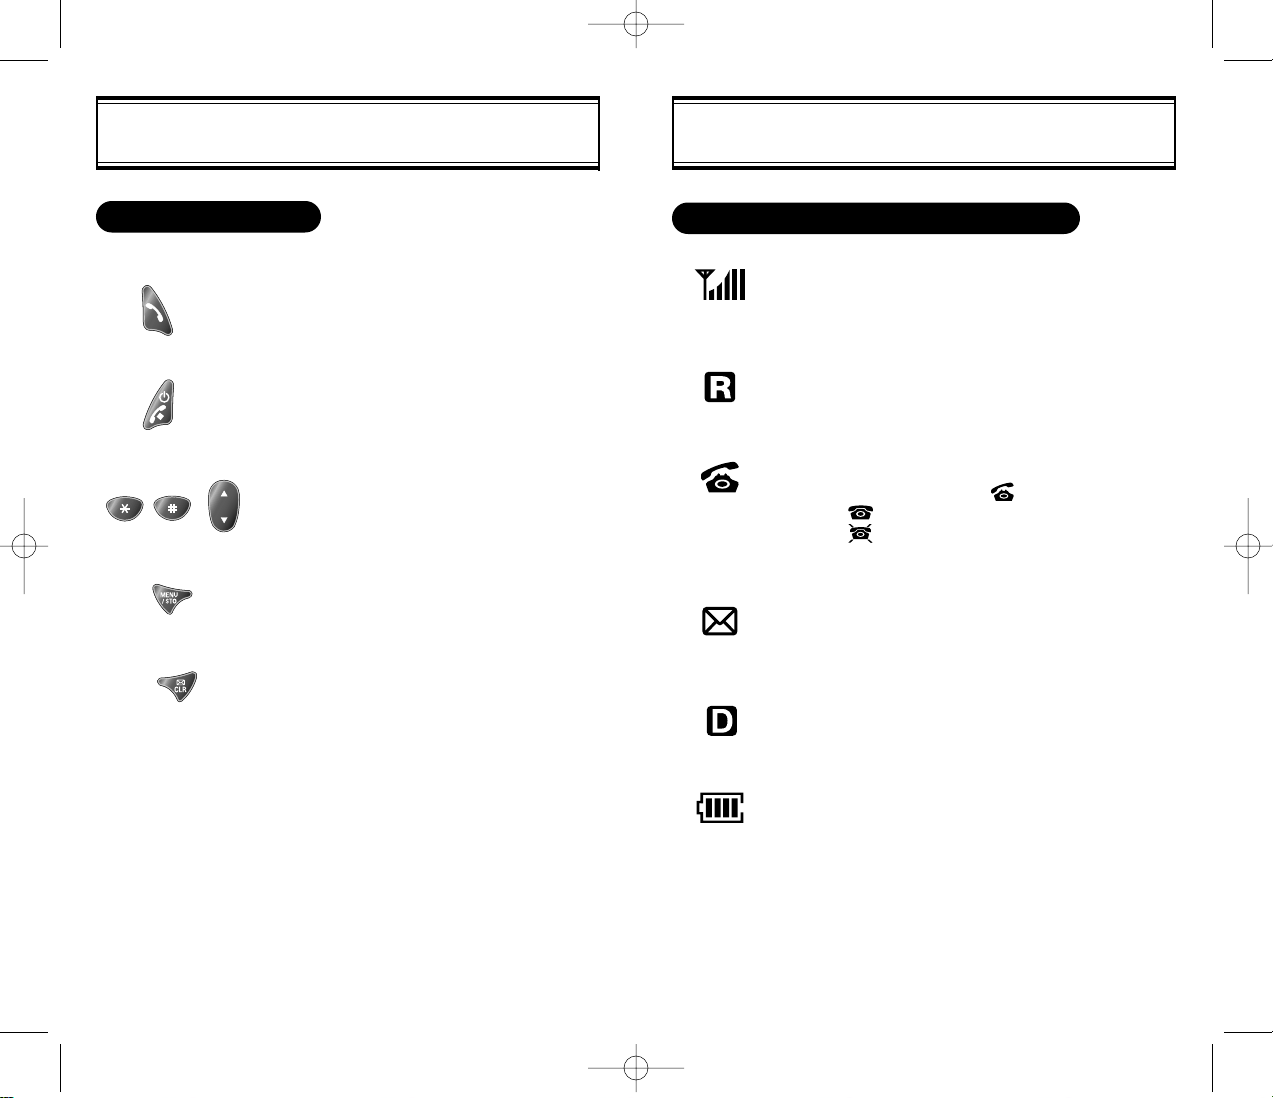
DISPLAY INDICATORSBASIC FUNCTIONS
This key is used to make or receive a call.
This key is used to terminate a call or exit
the current menu. It is also used to turn the
handset on or off.
These keys are used to scroll through the
contents of the menu.
(Soft 1) This key is used to access the Menu .
(Soft 2) This key is used to access voice or
text messages.
THE FUNCTION KEYS
Signal Strength
Indicates current signal strength. The more lines, the
stronger the signal.
Roaming
Indicates the phone is outside of its home area.
Service Indicator
When a call is in progress, is displayed.
When is displayed, the phone is in idle mode.
When is displayed, the phone is not receiving a
signal from the system.
Message
Indicates a text message or voice mail message is
waiting.
Digital
Indicates the phone is operating in digital mode.
Battery
Indicates battery charge level status. The more black
you see, the greater charge.
SCREEN STATUS, DISPLAY AND FUNCTION
cdm-100(audiovox)11/5 2001.11.7 10:7 AM Page 10
Page 7
[6] [7]
USING THE BATTERY
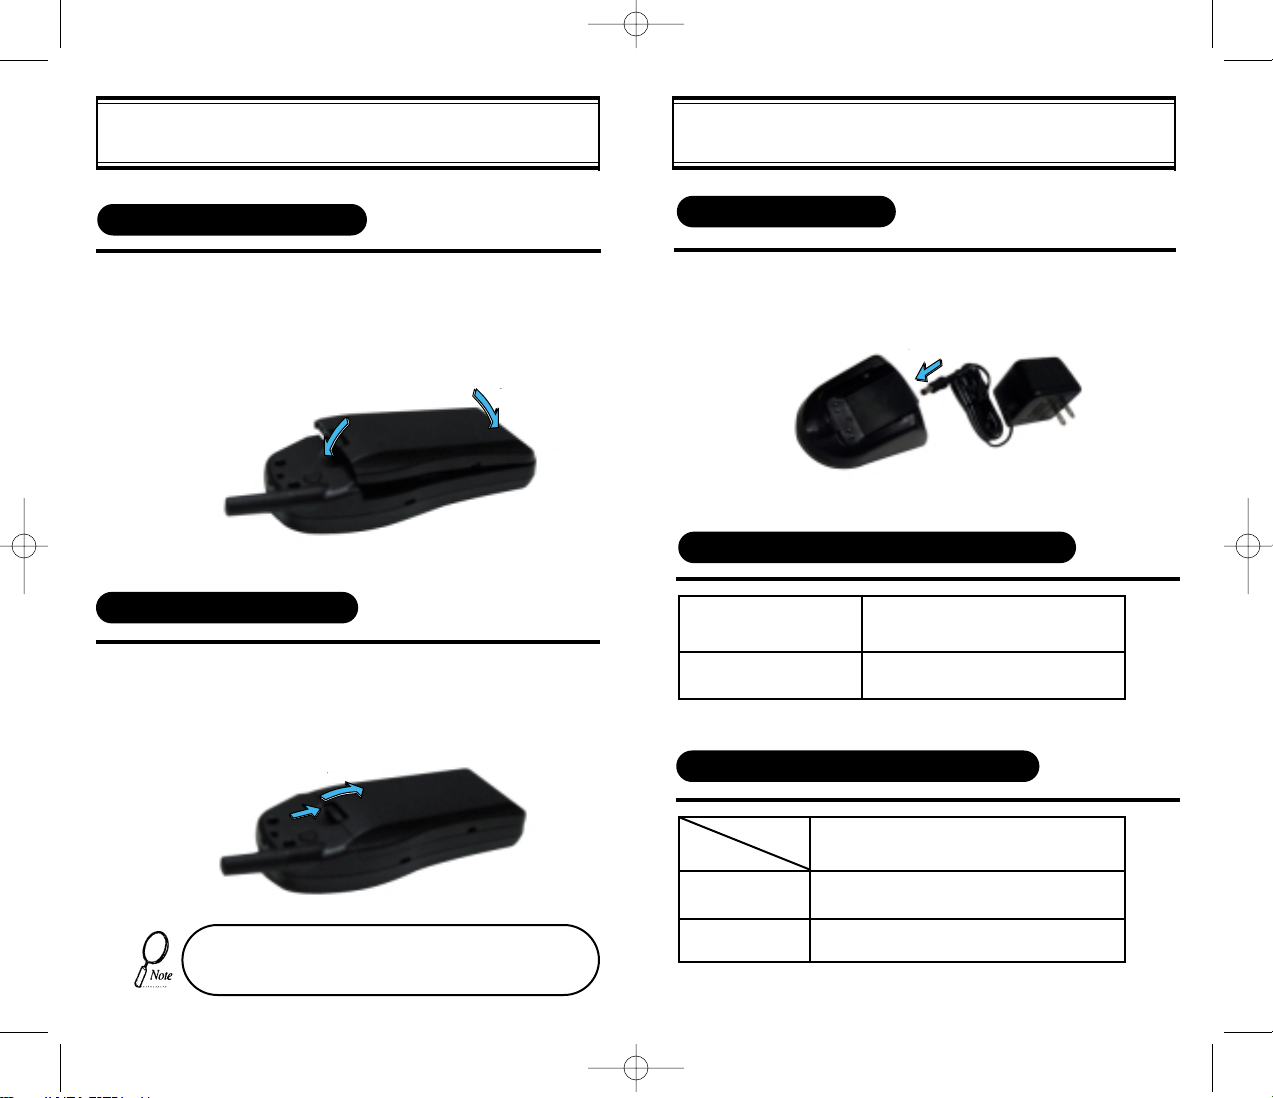
u
Insert the bottom of the battery into the groove
at the bottom of the handset. Then vpress in the
top of the battery until it snaps.
INSTALLING THE BATTERY
REMOVING THE BATTERY
Push the tab uwith one hand and lift the top
of the battery vto separate.
The battery must be correctly placed in the battery compartment. If battery is incorrectly inserted, the handset
will not turn on or the battery may slip out during use.
1
1
CHARGING THE BATTERY
1
POWER CONNECTION
Connect the charger to a standard 120V AC outlet.
Insert the jack in the direction of arrow.
1
2
1
2
BATTERY LIFE (FOR NEW BATTERY)
BATTERY CHARGING TIME (POWER OFF)
Battery Type
Standard Battery
(1000 mAh)
300
Charging Time (Min)
Status
(CDMA)
Type
Standard Battery
150
150
Talk (min)
Stand by (hrs)
(1000 mAh)
cdm-100(audiovox)11/5 2001.11.7 10:7 AM Page 12
Page 8
[9][8]
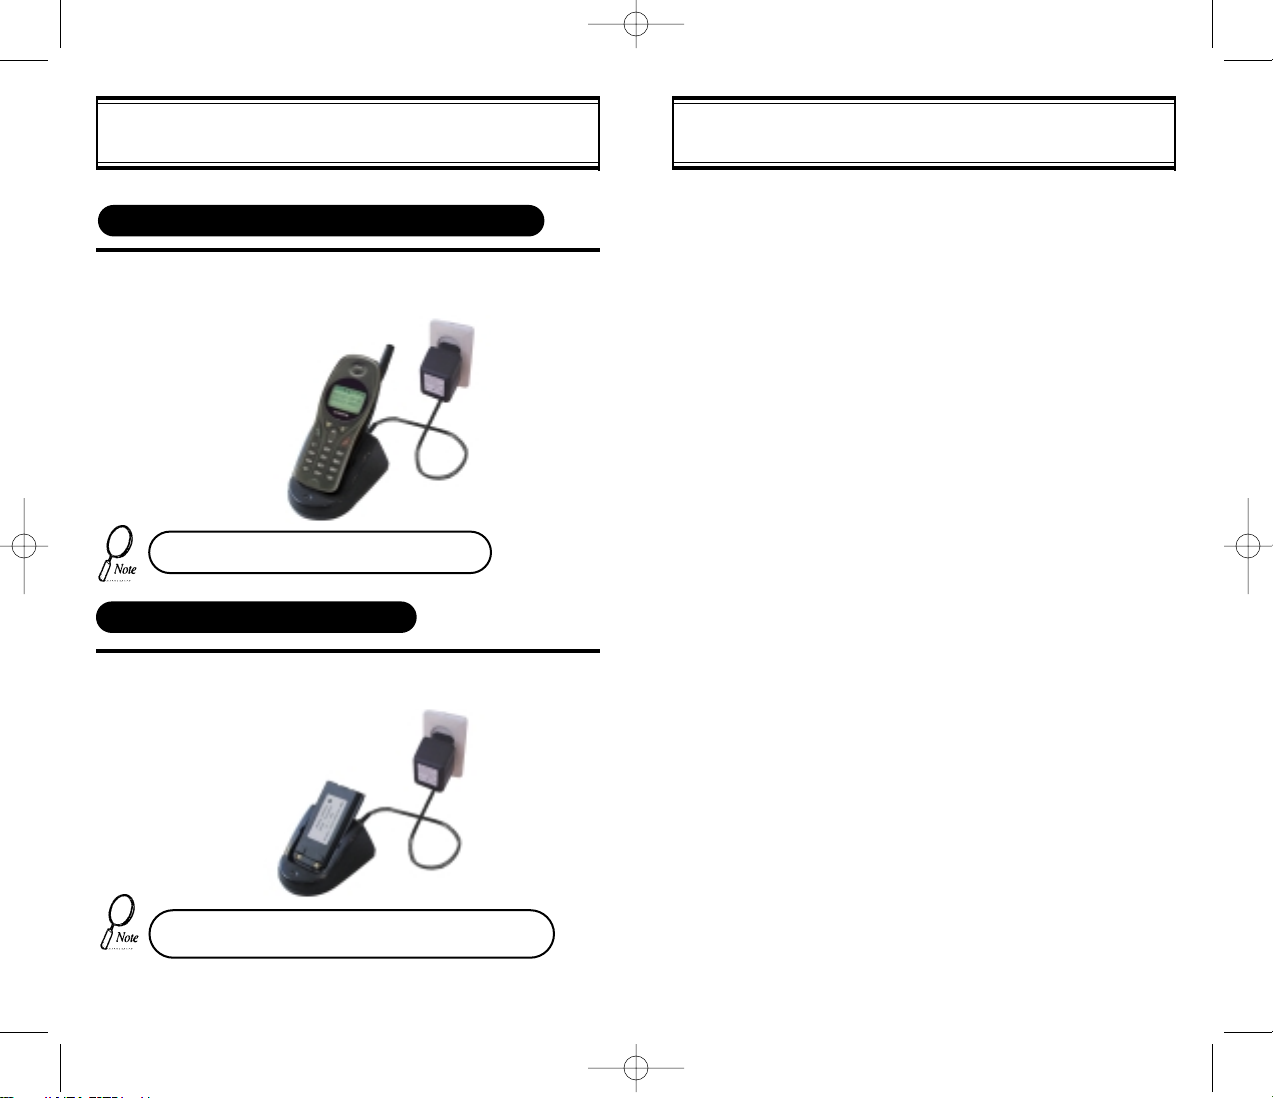
CHARGING THE BATTERY
To charge the battery with the handset, insert the
handset into the charger.
CHARGING THE BATTERY ONLY
1
1
Charging the battery with the power on is less
efficient than charging it with the power off.
CHARGING THE BATTERY WITH THE HANDSET
• Battery is not charged when you purchase the product.
• Fully charge the battery before use.
To charge the battery only, insert the battery pack
charging slot on the charger.
Use only batteries and chargers approved by the phone manufacturer.
When a charger is not in use, disconnect it from the power source. Do
not leave the battery connected to a charger for longer than a week;
overcharging may shorten its life.
Never use any charger or battery that is damaged or worn out.
Use the battery only for its intended purpose.
Do not short circuit the battery. Accidental short circuiting can occur
when a metallic object (e.g. coin, clip or pen) causes direct connection
of the two terminals of the battery (metal strips on the back of the battery). For example, when you carry a spare battery in your pocket or
purse. Short circuiting the terminals may damage the battery or the
connecting object.
Leaving the battery in hot or cold places, such as in a closed car in
summer or winter conditions, reduces the capacity and lifetime of the
battery. Always try to keep the battery between 41…F and 95…F (5…C
and 35…C). A phone with a hot or cold battery may temporarily not work
(or charge) even if the battery is fully charged.
Temperature extremes affect the ability of your battery to charge; allow
it to cool down or warm up first.
When the battery is not in use, store it uncharged in a cool, dark and
dry place.
The battery is a sealed unit with no serviceable parts. Do not attempt
to open the case.
The battery can be charged and discharged hundreds of times but will
eventually wear out. When the operating time is shorter than normal,
it is time to buy a new battery.
Do not discard the battery into fire!
Dispose of used batteries in accordance with local regulations.
Recycle!
HOW TO USE THE BATTERY MORE EFFICIENTLY
cdm-100(audiovox)11/5 2001.11.7 10:7 AM Page 14
Page 9

[10] [11]
u
Turning the Phone On and Off
v
How to Use the Menu
w
Menu Summary
x
Basic Functions
y
Functions During a Call
z
Lock Mode
CHAPTER 2
BASIC OPERATION
cdm-100(audiovox)11/5 2001.11.7 10:7 AM Page 16
Page 10
[13][12]
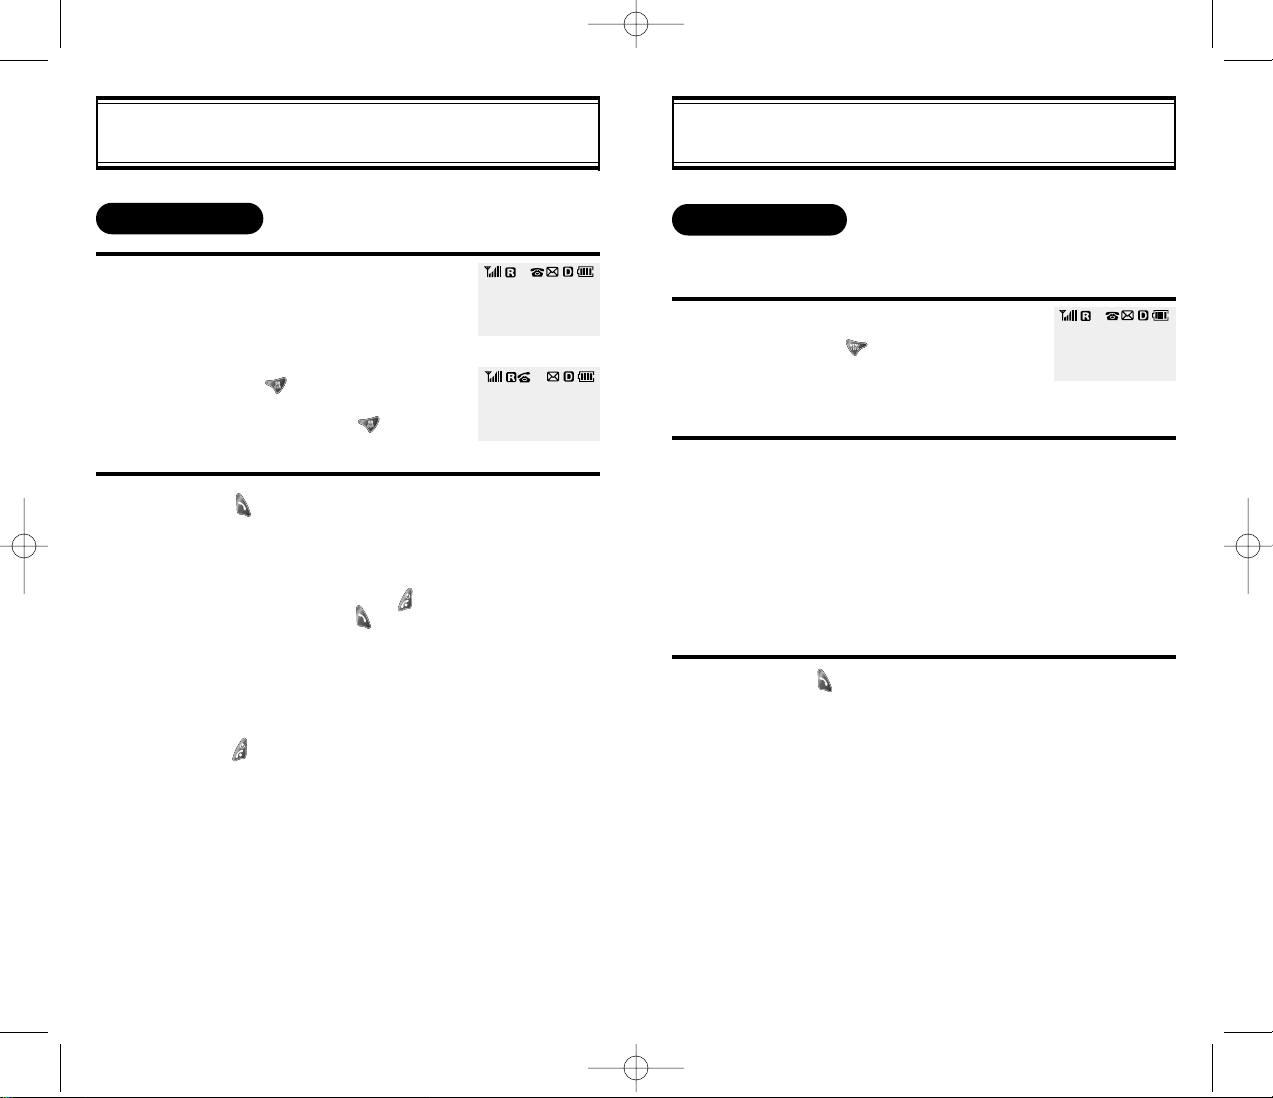
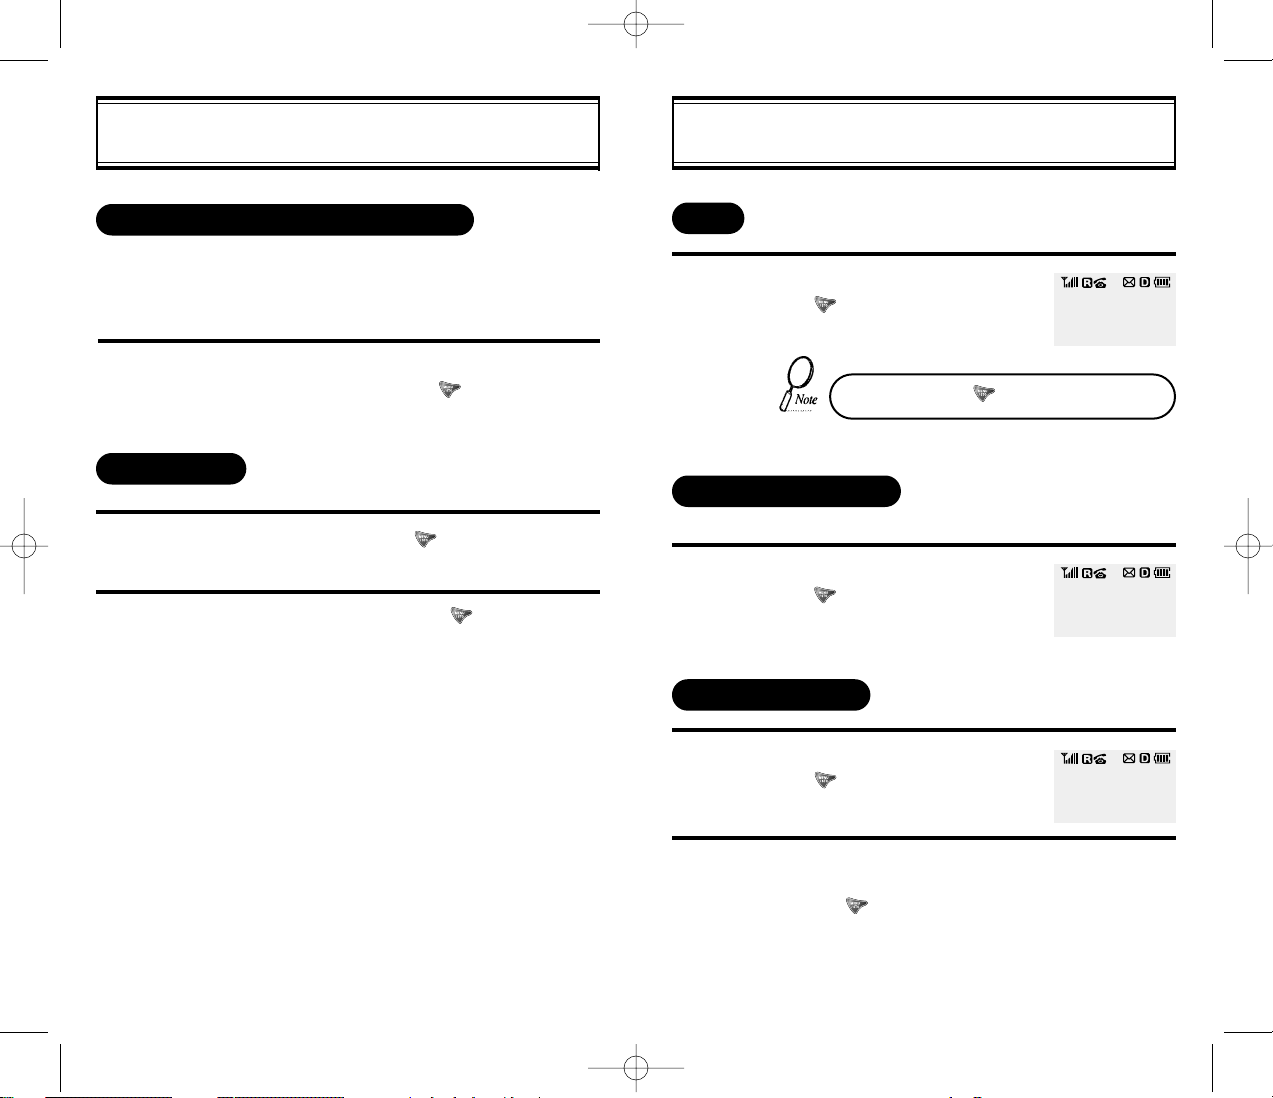
HOW TO USE THE MENU
In the standby screen, press [ ].
In the menu, use the navigation keys to view
the menu selections. If you press and hold the
navigation keys, the menu scrolls automatically.
To go back to previous screen, press [ ], or
to the exit menu, press [ ].
To go into submenu, press the corresponding
number. To select an option like Yes or No ,
press [ ].
[ ], [ ], and [ ] can be used while
using the menu.
1
2
3
4
5
TURNING THE PHONE ON AND OFF
l Press [ ].
l The phone is locked if PASSWORD is
displayed on the screen. When PASSWORD is displayed, enter the 4-digit
password to unlock the phone.
l The default password is the last 4 digits of
your phone number.
l Press [ ] until Power Off Goodbye is
displayed.
1
TURNING THE PHONE ON
TURNING THE PHONE OFF
1
• If the “LOW BATTERY WARNING POWER
OFF” is displayed and the power goes off,
there is a possibility of damaging the memory.
Change or charge the battery immediately.
• If the battery is removed while the phone is
on, information about the last call may be
erased.
cdm-100(audiovox)11/5 2001.11.7 10:7 AM Page 18
Page 11
MENU SUMMARY
5 : SPECIAL
6 : ALERTS
0 : SECURITY
u
u
7 : CHANGE
SYS.
u
PAUSES
1 : MIN ALERT
2 : ROAM ALERT
3 : FADE ALERT
4 : LOW SIGNAL
5 : CONNECT
1 : PREF. SYS.
2 : CHANGE NAM
3 : AUTO NAM
4 : PRL ID
5 : FORCE AMPS
1 : AUTO LOCK
2 : CHG. CODE
3 : CHG. BANNER
4 : RESTRICT
5 : RESET
6 : CLEAR
7 : VERSION
MENU SUMMARY
[15]
[14]
1 : PHONE BOOK
2 : SETTING
3 : TONE
4 : TIMER
u
u
u
u
1 : MISS CALL
2 : ANS. CALL
3 : DIAL CALL
1 : CALL LOGS
2 : BY LOCATION
3 : BY NAME
1 : AUTO RETRY
2 : AUTO ANS.
3 : ONE-TOUCH
4 : VOICE PRIV.
5 : BACKLIGHT
6 : CONTRAST
1 : RING MODE
2 : RING TYPE
3 : KEYPAD
4 : RINGER
1 : LAST CALL
2 : ALL CALLS
3 : HOME CALLS
4 : ROAM CALLS
1 : SCHEDULE
2 : STOPWATCH
3 : CALCULATOR
4 : BIORHYTHM
u
1 : INCOMING
2 : OUTGOING
3 : MEMORY
4 : LONG DIST.
5 : 900# ’ S
1 : CLR PH.BOOK
2 : CLR SCHEDU.
3 : CLR CALL
4 : CLR HOME
5 : CLR ROAM
8 : MY NUMBER
1 : LIST ALL
2 : INPUT SCHE.
3 : PAUSE ALL
1 : TODAY
2 : SOMEDAY
3 : BIRTHDAY
cdm-100(audiovox)11/5 2001.11.7 10:7 AM Page 20
Page 12
[16] [17]
BASIC FUNCTIONS
Enter phone number,
then press [ ].
Select desired pause.
Press [ ] to dial.
- When in receiving call status:
1 : SEND PHONE#
2 : SCRATCH PAD
3 : MUTE
4 : VIEW PHONE#
5 : VOICE PRIV.
- When in idling status:
1 : STORE
2 : BY NUMBER
3 : HARD PAUSE
4 : ONE HYPHEN
1
PAUSE FEATURE
Pauses are used for automated systems (i.e., voice mail and
calling cards). To insert pauses:
2
3
BASIC FUNCTIONS
Enter the phone number.
To modify the phone number you have
entered:
l To erase the last number entered:
Press [ ].
l To erase all numbers entered and
start again: Press [ ] and hold
for more than half of a second.
Press [ ].
l CALL FAILED message is dis-
played when the call does not connect.
l If the line is busy, press [ ].
Retry by pressing [ ].
l If you select the AUTO RETRY
function, the call will be retried
automatically for the time you have
selected.
Press [ ] to end the call.
1
MAKING A CALL
2
00:00:01
XXX-XXX-XXXX
XXPXXXXXXXXP
CALLING...
XXX-XXX-XXXX
cdm-100(audiovox)11/5 2001.11.7 10:7 AM Page 22
Page 13
[18] [19]
BASIC FUNCTIONS
Displays the number of missed
calls and the time the call was
missed.
l The message will be
cleared when you press
the [ ] key.
1
MISSED CALL DISPLAY
Adjust volume by using the volume control keys
during the following operation.
l During a Call : Earpiece volume adjustment.
l When the Phone Rings : Ringer volume
adjustment.
l Call status in hands-free : Hands-free volume
adjustment. Press [ ] when the phone
rings and it will mute the ringer.
1
HOW TO ADJUST VOLUME
You can adjust the volume in two ways: by using the [ ]
and [ ] key, or by using the menu.
BASIC FUNCTIONS
When there is an incoming call, the caller s phone number is
displayed on the screen.
When phone rings, press any key
except [ ],[ ],[ ].
To end the call, press [ ].
This function notifies you that there is an
incoming call when you are on the phone.
l To answer the call, press [ ]
when you hear the beep.
l To switch back to the first caller,
press [ ] again.
1
1
HOW TO ANSWER CALLS
2
If you set up the AUTO ANSWER function in
advance, the call will be answered after the
selected number of rings. (Refer to page 33)
CALLER ID FUNCTION
The Caller ID number is saved in the call log.
CALL WAITING FUNCTION
MISSED XX CALL
XX:XX PM
XXX-XXX-XXXX
cdm-100(audiovox)11/5 2001.11.7 10:7 AM Page 24
Page 14
[20] [21]
FUNCTIONS DURING A CALL
While on a call,
press [ ], then [3] Mute .
1
MUTE
To unmute, press [ ],then [3] “Mute” again.
FUNCTIONS DURING A CALL
After calling a pager, when you are asked to
enter your number, press and hold [ ] then
[1] SEND PHONE # .
While on a call, press and hold [ ], then [2]
SCRATCH PAD .
Enter the phone number, then press [ ].
1
SENDING YOUR NUMBER TO A PAGER
This function enables the phone number of the handset to be
transmitted automatically to a pager, depending on pager service.
You can see your phone number during a call.
SCRATCH PAD
2
1
00:00:38
-MUTE-
XXX-XXX-XXXX
While on a call,
press [ ], then [4].
1
VIEW PHONE NUMBER
While on a call,
press [ ], then [5].
Select the parameter (enhanced mode,
standard mode) by using the navigation keys,
then press [ ].
1
2
VOICE PRIVACY
VOICE PRIV
>>
STANDARD
DIGITAL 000
000-0000
cdm-100(audiovox)11/5 2001.11.7 10:7 AM Page 26
Page 15
CHAPTER 3
MEMORY FUNCTION
u
How to Store a Phone Number
v
How to Make a Call Using a Stored Phone Number
w
How to Find Your Call Logs
x
How to Find Your Phone Book
[23][22]
LOCK MODE
Press the [ ] key and hold for more than 1
second.
Then, Entering Lock State... will be displayed.
If you want to go back normal phone mode,
input the your lock code. See Chapter 5, How
to Lock Your Phone, on page 46.
1
LOCK MODE
You can enable the lock mode by pressing one button.
If you want to go back to normal phone mode, input your lock code.
cdm-100(audiovox)11/5 2001.11.7 10:7 AM Page 28
Page 16

[24]
[25]
HOW TO STORE A PHONE NUMBER
How To Enter Letters And Characters Using The Keypad
Keypad
1
2ABC
3DEF
4GHI
:
9WXYZ
1 Repetition
1
A
D
G
:
W
2 Repetitions
B
E
H
:
X
3 Repetitions
C
F
I
:
Y
4 Repetitions
2
3
4
:
Z
5 Repetitions
:
9
1. Select characters you wish to enter using the key pad.
HOW TO STORE A PHONE NUMBER
1
4
3
2
You can store up to 100 frequently used phone numbers in memory.
Enter the phone number (more than 3
digits) you want to store and
press [ ], then [1] Store .
l The first available empty memory
location number is displayed. Press
[ ] again to accept first available
location. If there are no empty locations, MEMORY IS FULL! is displayed with a warning sound.
l If there is a desired memory location
number, enter the number.
If the XX LOCATION IS USED message appears after entering the memory
location number, it means there is another stored phone number in that location
already.
Enter the person s name and
press[ ].
Select mobile/office/home type and then
press [ ].
To make secret, select Yes and
press [ ].
The stored number will only be displayed
after the lock code is entered.
l Press [ ] : to toggle between uppercase/lowercase.
l When entering special characters such as 0 @ / - : ? . , ( ) ;
press [ ] repeatedly. The special characters will be displayed
in order.
2. Press [ ] to enter the next character.
l Cursor moves to the next column automatically two seconds after
character is entered.
3. Repeat until all the characters you want are entered.
l You can store up to 12 characters.
4. Erasing Entry.
l To erase one letter, press [ ].
l To erase the entire entry, press and hold [ ].
XX LOCATION
IS USED
LOCATION:XX
NAME? [a]
__
PHONE TYPE?
>>
MOBILE
5
MAKE SECRET
>>
NO
LOCATION:XX
XXX-XXX-XXXX
cdm-100(audiovox)11/5 2001.11.7 10:7 AM Page 30
Page 17

[26]
[27]
HOW TO MAKE A CALL USING A
STORED PHONE NUMBER
HOW TO FIND YOUR CALL LOGS
Press [ ] then [1], then [1], then [1].
Press [ ] to check the detail
information about phone number.
l The last missed call, its
phone number, time and
date are displayed.
To check your missed calls using the
navigation keys:
l [ ],[ ] Scrolls up the phone
numbers.
l [ ],[ ] Scrolls down the phone
numbers.
Press [ ] to dial desired missed call
number.
1
Your phone can display the 10 most recent missed, answered, and
dialed calls. You can call those numbers without dialing their whole
number. The last missed call, its phone number, time and date are
displayed.
MISSED CALLS
4
2
3
ONE-TOUCH/TWO-TOUCH DIALING
This feature allows the phone book entries to be dialed via the keypad.
ONE-TOUCH DIALING:
1-9 : Press corresponding memory number and hold for more than 1
second.
TWO-TOUCH DIALING:
00,10-99 : press the first digit and second digits of the memory number short and long respectively.
l If no phone number is stored in memory location entered, Empty
Location will appear on the screen.
l If a phone number is stored in a secret location, the number is not
displayed when making a call.
One-touch dialing must be turned on in the
handset. See page 34.
>>
[01]XXXXXXXX
[02]XXXXXXXXXX
[03]XXXXX
11:27AM 08/10
[01]
XXX-XXX-XXXX
cdm-100(audiovox)11/5 2001.11.7 10:7 AM Page 32
Page 18

[29]
HOW TO FIND YOUR PHONE BOOK
Press [ ], then [1], then [2].
Enter the memory location number.
Search for phone numbers using the navigation keys:
l []/[]
search for the phone numbers.
l [ ] edit the phone#.
l [ ] erase the phone#.
l []/[]
search mobile/office/home number.
Press [ ] to dial desired phone book number.
l If you don t enter a specific
memory location number,
use the navigation keys to
search from the first memory
location number.
1
RECALLING BY MEMORY LOCATION NUMBER
2
4
3
SEARCH
LOCATION?
__
Press [ ], then [1], then [1], then [2].
Press [ ] to dial desired answered call number.
l The last answered call, its phone number, time and date are
displayed.
[28]
HOW TO FIND YOUR CALL LOGS
ANSWERED RECEIVED CALLS
DIALED CALLS
Press [ ], then [1], then [1], then [3].
Press [ ] to dial desired dialed call number.
l The last outgoing call, its phone number, time and
date are displayed.
(Refer to previous page)
(Refer to previous page)
cdm-100(audiovox)11/5 2001.11.7 10:7 AM Page 34
Page 19

[31]
Please read this chapter before using this product.
u
Settings
v
Tone
w
Timer
x
Alerts
y
Systems
z
My Number
CHAPTER 4
MENU
[30]
HOW TO FIND YOUR PHONE BOOK
Press [ ], then [1], then [3].
Enter the name (or part of the name),
then press [ ].
To locate the phone number using the navigation keys:
l []/[ ] search phone number.
l [ ] edit the phone#.
l [ ] erase the phone#.
l []/[]
search mobile/office/home number.
Press [ ] to dial desired phone book number.
1
RECALLING BY NAME
2
4
3
SEARCH
NAME? [a]
__
cdm-100(audiovox)11/5 2001.11.7 10:7 AM Page 36
Page 20

[33]
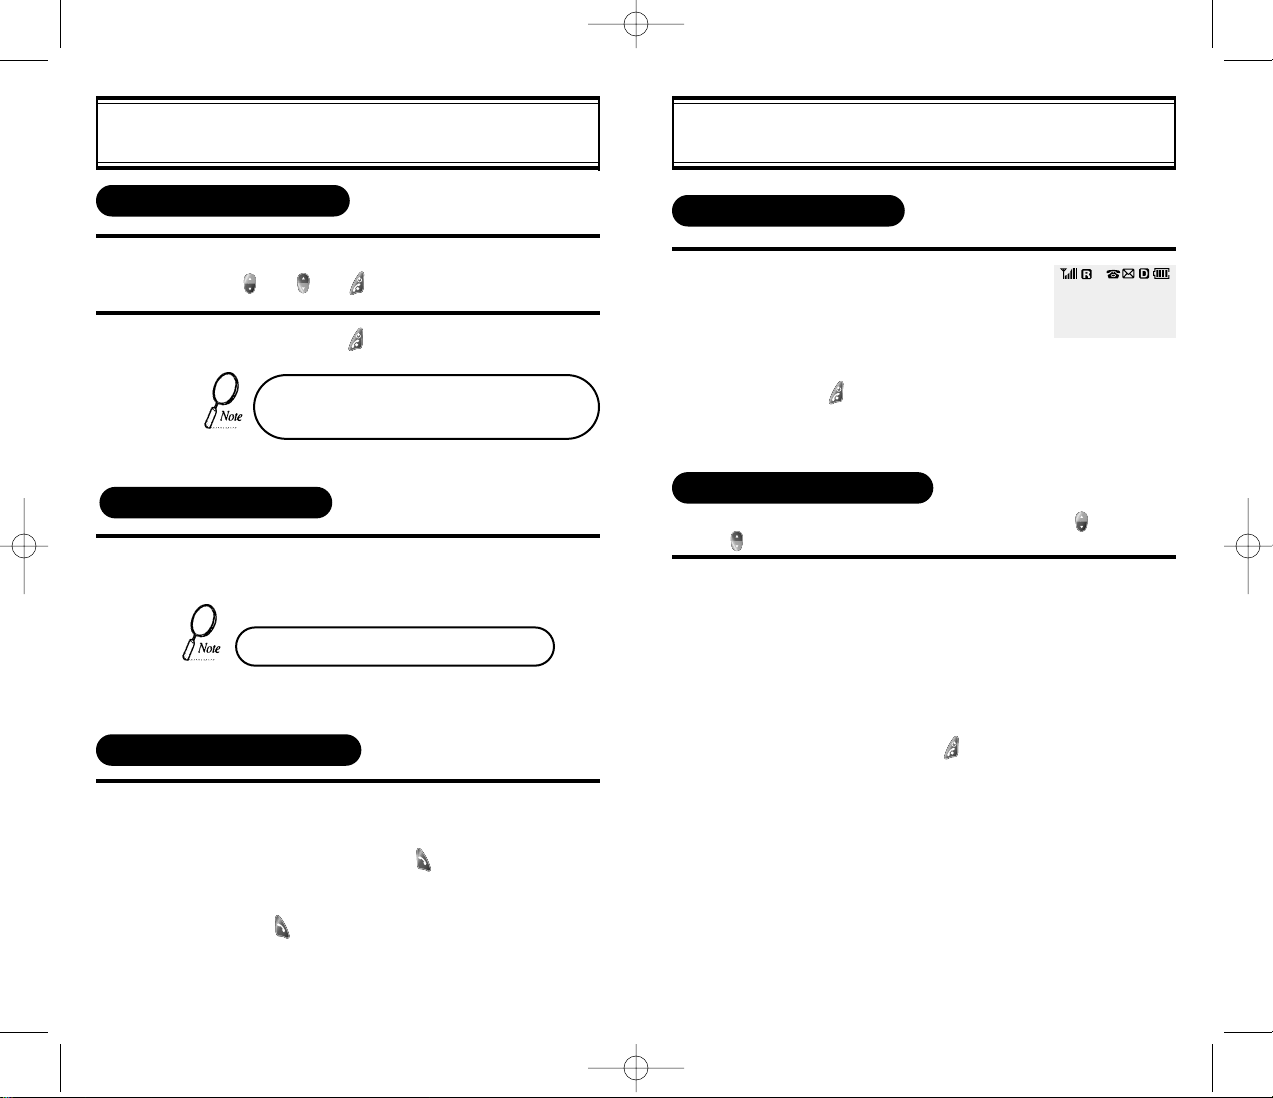
SETTINGS
Press [ ], then [2], then [2].
Select the parameter
(OFF, 1, 3, RINGS)
by using the navigation keys.
Press [ ] to set.
1
2
This function answers an incoming call automatically after a
number of rings that the user sets.
AUTO ANSWER
AUTO ANSWER
>>
OFF
[32]
AUTO RETRY
SETTINGS
Press [ ], then [2], then [1], then [1].
Select the parameter
(OFF, 3 , 5 , 7 , 10 SECONDS) by using the
navigation keys.
Press [ ].
1
2
When a call is not connected, this function retries the call
automatically after a set number of rings.
INTERVAL
1
2
REPEAT
Press [ ], then [2], then [1], then [2].
Select the parameter
( 1 , 3 , 5 TIMES) by using the navigation keys.
Press [ ].
cdm-100(audiovox)11/5 2001.11.7 10:7 AM Page 38
Page 21

[35]
SETTINGS
Press [ ], then [2], then [5].
Select the parameter (OFF IN DAY, OFF, 10SECS,
20SECS, 30SECS) by using the navigation keys.
Press [ ].
1
2
BACKLIGHT
This function allows you to adjust time that the screen is lit so
that you can conveniently use the phone, even in dark places.
[34]
SETTINGS
Press [ ], then [2], then [3].
Select the parameter (NO, YES)
by using the navigation keys.
Press [ ].
1
2
ONE-TOUCH DIALING
This function allows the phone book entries to be dialed via
the keypad.
Press [ ], then [2], then [4].
Select the parameter (STANDARD, ENHANCED)
by using the navigation keys.
Press [ ].
1
2
VOICE PRIVACY
Press [ ], then [2], then [6].
Select the contrast level by using the navigation keys.
Press[ ].
This function adjusts the LCD screen contrast.
1
2
LCD CONTRAST
LCD CONTRAST
>>
cdm-100(audiovox)11/5 2001.11.7 10:7 AM Page 40
Page 22

[37]
TONE
Press [ ], then [3], then [2].
Select the parameter (1-13) by using the
navigation keys.
l Different tones (1-6).
l Different melodies (7-13).
Press [ ].
Press [ ], then [3], then [1].
Select the parameter (RINGER,SLIDE
BELL,SILENT) by using the navigation keys.
Press [ ].
1
2
RING MODE
3
1
2
RING TYPE
RINGER
>>
RINGER 1
3
[36]
Press [ ], then [3], then [3] for keypad volume.
l If the warning alarm sounds because of low battery,
the sound will not be heard even if the user presses the button.
Select the volume level by using the navigation keys.
l []/[ ] scroll up to increase volume.
l []/[ ] scroll down to lower volume or
to set to Silent.
Press [ ].
1
KEYPAD
2
TONE
3
Press [ ], then [3], then [4] for ringer volume.
Select the volume level by using the navigation keys.
l []/[ ] scroll up to increase volume.
l []/[ ] scroll down to lower volume or
to set to Silent.
Press [ ].
1
RINGER
2
3
cdm-100(audiovox)11/5 2001.11.7 10:7 AM Page 42
Page 23

TIMER
Press [ ], then [4], then [1].
Press [ ], then [4], then [2].
Press [ ], then [4], then [3].
Press [ ], then [4], then [4].
1
LAST CALL
1
ALL CALLS
HOME CALLS
ROAM CALLS
1
1
[39]
[38]
ALERTS
Press [ ], then [6], then [1].
Select the parameter (ON, OFF) by using the
navigation keys. Press [ ].
1
2
MIN ALERT
MIN ALERT
>>
OFF
Press [ ], then [6], then [2].
Select the parameter (ON, OFF) by using the
navigation keys. Press [ ].
1
2
ROAM ALERT
This function sounds an alert and gives out a message when the
handset enters a new service area, when it enters another service
area, or then it leaves the user s home service area.
ROAM ALERT
>>
OFF
This function sounds an alert in every minute, letting you know the call
elapse time.
cdm-100(audiovox)11/5 2001.11.7 10:7 AM Page 44
Page 24

ALERTS
Press [ ], then [6], then [3].
1
FADE ALERT
This function sounds an alert when the phone can t make calls due
to poor signal strength during a call.
FADE ALERT
>>
OFF
Press [ ], then [6], then [4].
1
LOW SIGNAL ALERT
This function sounds an alert when the signal of a received call is
weak during an idle mode.
LOWSIG ALERT
>>
OFF
Press [ ], then [6], then [5].
1
CONNECT ALERT
This function sounds an alert when the call is connected.
CONNECT TONE
>>
OFF
[40] [41]
SYSTEMS
Press [ ], then [7], then [1].
Select the system (AUTOMATIC B, AUTOMATIC A,
HOME ONLY) by using the navigation keys.
Press [ ].
1
2
PREFERRED SYSTEM
PREF SYSTEM
>>
AUTOMATIC B
Press [ ], then [7], then [2].
Select the NAM (NAM 1, NAM2) by using the
[ ] or [ ] keys. Press [ ].
1
2
CHANGE NAM
This is a function to change NAM.
This is a function to select the Preferred System.
NAM 1
AUDIOVOX
cdm-100(audiovox)11/5 2001.11.7 10:7 AM Page 46
Page 25

SYSTEMS
Press [ ], then [7], then [3].
1
AUTO NAM
This is a function to activate Auto NAM.
AUTO NAM?
>>
NO
Press [ ], then [7], then [4].
1
PREFERRED ROAMING LIST ID
This function identifies the current Preferred Roaming List ID.
PRL ID
0
Press [ ], then [7], then [5].
Press [ ].
1
FORCE AMPS
This function changes the system mode to Analog while the phone is on.
FORCE ANALOG
>>
YES
[42] [43]
CHECKING THE PHONE NUMBER
This function checks the telephone number of the handset currently
in use.
MY NUMBER
Press [ ], then [8].
1
DIGITAL 000
000-0000
cdm-100(audiovox)11/5 2001.11.7 10:7 AM Page 48
Page 26

u
How to Lock Your Phone
v
How to Change Lock Code
w
How to Change Your Banner
x
How to Restrict Your Phone
y
How to Reset Your Phone
z
How to Clear Your Phone Memory
{
Memory Clearing Function
|
Version
CHAPTER 5
SECURITY FEATURES
[44] [45]
cdm-100(audiovox)11/5 2001.11.7 10:7 AM Page 50
Page 27

[47]
HOW TO CHANGE LOCK CODE
Press [ ], then [0], then enter [PASSWORD],
then [2] .
l The default lock code is the last 4-digit of
your phone number.
Enter new 4-digit PASSWORD . Press [ ].
Re-enter the new PASSWORD . Press [ ].
1
LOCK CODE CHANGE
2
3
This function is used to change the 4-digit lock code.
[46]
HOW TO LOCK YOUR PHONE
Press [ ], then [0], then
enter [PASSWORD], then [1].
l The default password is the
last 4 digits of your phone number.
Select the parameter (OFF, POWER ON, ON )
by using the navigation keys. Press [ ].
l POWER ON locks the handset upon pow-
ering on the handset each time.
l OFF unlocks the handset and leaves it
unlocked.
1
AUTO LOCK
This function prevents any other person from using the handset without permission. When it is locked, the handset can not make any calls
or use any other function.
2
Incoming calls, emergency dialing and alarm functions
are enabled when the handset is locked.
AUTO LOCK?
>>
OFF
cdm-100(audiovox)11/5 2001.11.7 10:7 AM Page 52
Page 28

[49]
HOW TO RESTRICT YOUR PHONE
Press [ ], then [0], then
enter [PASSWORD], then [4].
l The default password is the
last 4 digits of your phone number.
Using the navigation keys, select YES .
Press [ ].
1
RESTRICTION FUNCTIONS
You can restrict five different functions.
2
RESTRICTING INCOMING CALLS
Press [1] INCOMING .
Select the parameter by using the navigation keys.
RESTRICT: restricts incoming calls.
ALLOW: allows incoming calls.
Press [ ].
1
When this function is enabled, the phone does not respond to incoming calls. However, outgoing calls can still be made.
2
3
RESTRICT?
>>
NO
INCOMING?
>>
ALLOW
[48]
HOW TO CHANGE YOUR BANNER
Press [ ], then [0], then
[PASSWORD], then [3].
l The default password is the last 4
digits of your phone number.
Enter a banner using instructions for entering letters
and characters on page 25.
1
BANNER CHANGE
This function changes the banner displayed on the LCD.
You can enter a banner up to 12 characters long.
2
BANNER [a]
AUDIOVOX_
cdm-100(audiovox)11/5 2001.11.7 10:7 AM Page 54
Page 29

[51]
HOW TO RESTRICT YOUR PHONE
RESTRICTING LONG DISTANCE CALLS
Press [4] LONG DIST .
Select the parameter by using the navigation keys.
RESTRICT: restricts long distance calls.
ALLOW: allows long distance calls.
Press [ ].
1
2
3
LONG DIST?
>>
ALLOW
RESTRICTING CALLS TO 900 NUMBERS
Press [5] 900# s .
Select the parameter by using the navigation keys.
RESTRICT: restricts 900 service.
ALLOW: allows 900 service.
Press [ ].
1
2
3
900#’s?
>>
ALLOW
[50]
HOW TO RESTRICT YOUR PHONE
RESTRICTING OUTGOING CALLS
Press [2] OUTGOING .
Select the parameter by using the navigation keys.
RESTRICT : restricts outgoing calls.
ALLOW : allows outgoing calls.
Press [ ].
1
When this function is enabled, incoming calls can be answered, but
outgoing calls cannot be made. It is still possible to make emergency
calls.
2
3
OUTGOING?
>>
ALLOW
RESTRICTING THE PHONE BOOK
Press [3] MEMORY .
Select the parameter by using the navigation keys.
RESTRICT: restricts phone book use.
ALLOW: allows phone book use.
Press [ ].
This function blocks the storage of phone numbers or the use of
stored phone numbers.
2
3
1
MEMORY ONLY?
>>
ALLOW
cdm-100(audiovox)11/5 2001.11.7 10:7 AM Page 56
Page 30

[53]
HOW TO CLEAR YOUR PHONE MEMORY
Press [ ], then [0], then enter
[PASSWORD], then [6], then [1].
The default password is the last 4
digits of your phone number.
Select the parameter (NO, YES) by
using the navigation keys. Press [ ].
1
2
CLEARING PHONEBOOK
This function clears all stored numbers.
CLR PHONE NO
>>
NO
Press [ ], then [0], then
enter [PASSWORD], then [5].
l The default password is the last 4
digits of your phone number.
Select the parameter by using the navigation keys.
Press [ ].
l If you select YES , the screen returns to the
original idle display and the power on alter
sounds.
1
This function resets each value set in the memory to its default value.
2
RESET PHONE?
>>
NO
[52]
HOW TO RESET YOUR PHONE
cdm-100(audiovox)11/5 2001.11.7 10:7 AM Page 58
Page 31

Press [ ], then [0], then enter
[PASSWORD], then [6], then [2].
l The default lock code is the last 4
digits of your phone number.
Select the parameter (NO, YES) by
using the navigation keys. Press [ ].
1
2
This function clears stored schedule lists
CLR SCHEDU?
>>
NO
CLEARING SCHEDULES
MEMORY CLEARING FUNCTION
Press [ ], then [0], then enter
[PASSWORD], then [6], then [5].
l The default lock code is the last 4
digits of your phone number.
Select the parameter (NO, YES) by
using the navigation keys. Press [ ].
1
2
CLEARING ROAM CALLS
This function clears air time used in other service areas.
CLR ROAM?
>>
NO
[55]
MEMORY CLEARING FUNCTION
Press [ ], then [0], then enter
[PASSWORD], then [6], then [3].
l The default lock code is the last 4
digits of your phone number.
Select the parameter (NO, YES) by
using the navigation keys. Press [ ].
1
2
CLEARING DIALED NUMBERS IN CALL LOGS
This function clears all the dialed numbers in the call logs.
Press [ ], then [0], then enter
[PASSWORD], then [6], then [4].
l The default lock code is the last 4
digits of your phone number.
Select the parameter (NO, YES) by
using the navigation keys. Press [ ].
1
2
This function clears air time used in home service area.
CLEARING AIR TIME IN HOME SERVICE AREA
CLR CALL LOGS
>>
NO
CLR HOME?
>>
NO
[54]
cdm-100(audiovox)11/5 2001.11.7 10:7 AM Page 60
Page 32

u
Schedule
v
Stopwatch
w
Calculator
x
Biorhythm
CHAPTER 6
SUPPLEMENTARY FUNCTIONS
[57][56]
VERSION
Press [ ], then [0],
then enter [PASSWORD], then [7].
l The default lock code is the last 4
digits of your phone number.
1
VERSION
This function checks the version of the handset currently in use.
VERSION
SW : XXX
HW : XXX
cdm-100(audiovox)11/5 2001.11.7 10:7 AM Page 62
Page 33

SCHEDULESCHEDULE
VIEW SCHEDULE LIST
Press [ ] then [5], then [1], then [1].
By pressing the [ ] you can view
the more details about each item.
By pressing the [ ] you can view
the more details about each item.
1
2
uu
9/12/2001
9/12/2001
AM 12:10
ALARM
08/03/2001
AM 12:12 ON
PAUSE ALL SCHEDULES
Press [ ] then [5], then [1], then [3].
Select the parameter (NO,YES) by
using the navigation keys.
Press [ ].
You can make all schedule pause temporarily.
1
2
PAUSE ALL?
>>
NO
INPUT SCHEDULE LIST
Press [ ] then [5], then [1], then [2].
Input the date, and
press [ ].
Press [1], and select the parameter
(one time or daily).
To set alarm, press [2] and input the
schedule title.
To set reserved call, press [3] and
input the phone number.
And, press [ ].
Input the time and press [ ].
1
2
3
4
1:ALARM TYPE
2:TITLE
3:PHONE #
-INPUT DATEXXXX YEAR
XX MON XX DAY
INPUT DATE
08/03/2001
PM 12:12
[59][58]
cdm-100(audiovox)11/5 2001.11.7 10:7 AM Page 64
Page 34

[61]
CALCULATOR
CALCULATOR
Press [ ], then [5], then [3].
1
Using the calculator.
l Definitions:
: [ ], : [ ], : [ ]
: [ ], : [ ], : [ ]
l Up to 8 integer digits and up to 2 deci-
mals can be displayed. If the calculated
result has more than 8 digits, the result
is displayed in 8 digits logarithm
l There is no (-)sign. To express a nega-
tive number, use 0-value
l EXAMPLE
To calculate 128 32
1. Enter 128
2. Press [ ]
3. Enter 32
4. Press [ ]
2
CALCULATOR
0.
[60]
STOPWATCH
Press [ ], then [5], then [2].
1
STOPWATCH
Press [ / ] to control the stopwatch.
l [ ] controls Start/Stop.
l [ ] controls Split/Split Release
/Reset.
l The time unit displayed on the LCD in
1/100 of a second.
2
0:00:00:00
STAR PRE
cdm-100(audiovox)11/5 2001.11.7 10:7 AM Page 66
Page 35

[63]
VOICE MAIL AND TEXT MESSAGE
This chapter describes convenient functions that allow you to check
voice mail and receive text messages with the handset.
u
Viewing a Text Message
v
Checking Received Message
w
Incoming Text Message
x
Outgoing Text Message
y
Direct View
z
Bell Type
CHAPTER 7
[62]
BIORHYTHM
Press [ ], then [5], then [4].
Press [3] BIRTHDAY .
l Enter your solar calendar birthday
in year/month/date, and then
press [ ].
To find out today s biorhythm, select TODAY.
To find our the biorhythm for a specific day,
select SOMEDAY.
l Biorhythm function is available only
when the phone can register the
current time from the network system.
l For Some Day Bio, you cannot enter
the dates before your birthday.
l For Birthday, you cannot enter the
dates later than today date.
2
1
3
This function identifies the biorhythms of today or a specific day using
solar calendar.
l Physical, Emotional and Intelligent quotients appear with a number showing
how many days have passed since your birth date for the date you want to
find out. Biorhythm is displayed on the top portion of the screen.
l What is Biorhythm?
Biorhythm is a life rhythm which is governed by three rhythm curves called
physical, emotional, and intelligent and starts from our body from our birth to
death.
j Physical rhythm
l This rhythm controls wide-ranging physical elements related to resistance to
diseases, physical strength, adjustment of muscle exercise, speed, physiology and other basic physical functions with a cycle of 23 days.
k Emotional rhythm.
l This rhythm adjusts creativity, sensitivity, mental health and recognition
about world and humans with a cycle of 28 days.
l Intelligent rhythm.
l This rhythm affects our memory, susceptibility to fright, acceptance of knowl-
edge and logical and analytic power with a cycle of 33 days.
1:TODAY
2:SOMEDAY
3:BIRTHDAY
cdm-100(audiovox)11/5 2001.11.7 10:7 AM Page 68
Page 36

[65]
Press [ ].
Press [1] VOICE MAIL .
l The number of voice mail messages
currently received in your voice
mailbox is displayed.
l To access your voice mailbox,
press [ ].
1
CHECKING RECEIVED VOICE MAIL MESSAGE
2
X VOICE MSG
08/10 PM 02:34
TO LISTEN
CHECKING RECEIVED MESSAGE
[64]
VIEWING A TEXT MESSAGE
When a message is received,
the following message is displayed.
[ ][ ][ ][ ]-display text
[ ]-delete message
[ ]-make a call received phone number
When a message is received,
the following message is displayed.
You can view the message in the
SMS menu.
1
DIRECT VIEW RELEASE
1
DIRECT VIEW SET
NEW MESSAGE
ARRIVED
08/10 PM 02:32
✻TEXT MSG✻
✻NORMAL MSG✻
08/10 PM 02:32
The procedure described here may not work on all
carrier networks. If it does not work in your area, please
check with your carrier to find out what number you
must dial to access your voice mail. You may then
program this number into one of your phone’s memory
locations for convenient dialing.
If you set up the “DIRECT VIEW FUNCTION” text
message is displayed directly on the screen.
(Refer to page 68)
cdm-100(audiovox)11/5 2001.11.7 10:7 AM Page 70
Page 37

[67][66]
INCOMING TEXT MESSAGE
Press [ ], then [2] TEXT MAIL .
To read new mail, press [1].
Then press [ ] and you can view
the details.
To read stored mail, press [2].
To erase stored mail, press [3].
1
CHECKING RECEIVED TEXT MESSAGE
2
1:INBOX(XX)
2:STORED(XX)
3:ERASE
✻TEXT MSG✻
✻NORMAL MSG✻
08/10 PM 02:32
N[01]: ABCDEF
N[02]: 333333
N[03]: HI...
OUTGOING TEXT MESSAGE
Press [ ], then [3] SEND MAIL
For receiving phone number, press [1],
then press [ ].
To write the message, press [2],
then press [ ].
To send your phone number, press [3],
then press [ ].
To select priority, press [4].
Select the parameter (NORMAL, URGENT)
using the navigation keys.
Press [ ].
Press [5] or [ ] to send the message.
When your message has been successfully
sent, the display will read MESSAGE IS
SENT .
1
2
SENDING TEXT MESSAGE
Phone No.?
3
MESSAGE? [a]
4
Phone No.?
XXXXXXXXXX
5
6
The outgoing text message feature (Mobile Originated
SMS) depends on the cellular system and may not be
available in all areas.
Please check with your carrier to find out if this feature
is available to you.
cdm-100(audiovox)11/5 2001.11.7 10:7 AM Page 72
Page 38

Press [ ], then press [5].
Select the parameter (RINGER, SILENT)
by using the navigation keys.
Press [ ].
1
2
BELL TYPE SETTING
When a text message is received, your selected bell type will sound
to alert you.
SET BELL
>>
RINGER
BELL TYPE
[69][68]
Press [ ], then press [4].
Select the parameter (ON, OFF) by using
the navigation keys.
Press [ ].
1
2
DIRECT VIEW SETTING
When a text message is received, the text is displayed directly on the
screen.
DIRECT VIEW
>>
ON
DIRECT VIEW
cdm-100(audiovox)11/5 2001.11.7 10:7 AM Page 74
Page 39

[71][70]
CHAPTER 8
MAKING AN EMERGENCY CALL
u
Making an Emergency Call
cdm-100(audiovox)11/5 2001.11.7 10:7 AM Page 76
Page 40

Enter 911 and press [ ].
l When a call ends, the phone
returns to the Emergency Mode.
l The phone tries to make an emer-
gency call using any available system.
Reserve Emergency Mode during
5 minutes.
1
2
E911 USING ANY AVAILABLE SYSTEM
EMERGENCY
WED AUG 8
10:07 AM
AUDIOVOX
WED AUG 8
10:07 AM
00:00:23
911
MAKING AN EMERGENCY CALL
Enter 911 and press [ ].
l When a call ends, the phone
returns to the Emergency Mode.
Reserve Emergency Mode during
5 minutes.
1
2
E911 IN LOCK MODE
This is the enhanced 911 feature.
EMERGENCY
08/08 10:08
LOCKED
- - - -
AUDIOVOX
08/08 10:08
LOCKED
- - - -
00:00:23
911
MAKING AN EMERGENCY CALL
[73][72]
cdm-100(audiovox)11/5 2001.11.7 10:7 AM Page 78
Page 41

SAFETY
u
Safety Information for Wireless Handheld Phones
v
Safety Information for FCC RF Exposure
w
SAR Information
CHAPTER 9
[75][74]
cdm-100(audiovox)11/5 2001.11.7 10:7 AM Page 80
Page 42

[77]
DRIVING SAFETY
SAFETY INFORMATION FOR
WIRELESS HANDHELD PHONES
Talking on the phone while driving is extremely dangerous and is illegal
in some states. Remember, safety comes first. Check the laws and
regulations on the use of phones in the areas where you drive. Always
obey them.
Also, if using your phone while driving please:
l Give your full attention to driving. Driving safely is your first
responsibility.
l Use hands-free operation, if available.
l Pull off the road and park before making or answering a call, if
driving conditions require.
If you must use the phone while driving, please use one-touch, speed
dialing, and auto answer modes.
An airbag inflates with great force. DO NOT place objects, including
both installed or portable wireless equipment, in the area over the
airbag or in the air bag deployment area. If in-vehicle wireless equipment is improperly installed and the air bag inflates, serious injury could
result.
WARNING: Failure to follow these instructions may lead to serious personal injury and possible property damage.
[76]
EXPOSURE TO RADIO FREQUENCY SIGNALS
Your wireless handheld portable telephone is a low power radio transmitter and receiver. When it is ON, it receives and also sends out radio
frequency (RF) signals.
In August 1996, the Federal Communications Commissions (FCC)
adopted RF exposure guidelines with safety levels for handheld wireless phones. Those guidelines are consistent with the safety standards
previously set by both U.S. and international standards bodies:
ANSI C95.1 (1992) *
NCRP Report 86 (1986) *
ICNIRP (1996) *
Those standards were based on comprehensive and periodic evaluations of the relevant scientific literature. For example, over 120 scientists, engineers, and physicians from universities, government health
agencies, and industry reviewed the available body of research to
develop the ANSI Standard (C951).
The design of your phone complies with the FCC guidelines (and those
standards).
ANTENNA CARE
Use only the supplied or an approved replacement antenna.
Unauthorized antennas, modifications, or attachments could damage
the phone and may violate FCC regulations.
˙
American National Standards Institute;
National Council on Radiation Protection and Measurements;
International Commission on Nonionizing Radiation Protection.
Read This Information Before Using Your Handheld Portable
Cellular Telephone
SAFETY INFORMATION FOR
WIRELESS HANDHELD PHONES
cdm-100(audiovox)11/5 2001.11.7 10:7 AM Page 82
Page 43

[79]
Other Medical Devices
If you use any other personal medical device, consult the manufacturer of your device to determine if they are adequately shielded from
external RF energy Your physician may be able to assist you in obtaining this information.
Turn your phone OFF in healthcare facilities when any regulations posted in these areas instruct you to do so. Hospitals or healthcare facilities may be using equipment that could be sensitive to external RF
energy.
Vehicles
RF signals may affect improperly installed or inadequately shielded
electronic systems in motor vehicles. Check with the manufacturer or
its representative regarding your vehicle. You should also consult the
manufacturer of any equipment that has been added to your vehicle.
Posted Facilities
Turn your phone OFF where posted notices so require.
ELECTRONIC DEVICES
SAFETY INFORMATION FOR
WIRELESS HANDHELD PHONES
[78]
Most modern electronic equipment is shielded from RF energy.
However, certain electronic equipment may not be shielded against the
RF signals from your wireless phone.
Pacemakers
The Health Industry Manufacturers Association recommends that a
minimum separation of six (6 ) inches be maintained between a handheld wireless phone and a pacemaker to avoid potential interference
with the pacemaker. These recommendations are consistent with the
independent research by and recommendations of Wireless
Technology Research.
If you have a pacemaker:
l ALWAYS keep the phone more than six inches from your pace-
maker when the phone is turned on.
l Do not carry the phone in a breast pocket.
l Use the ear opposite the pacemaker to minimize the potential for
interference.
l If you have any reason to suspect that interference is taking place,
turn your phone OFF immediately.
Hearing Aids
Some digital wireless phones may interfere with some hearing aids. In
the event of such interference, you may want to consult your service
provider (or call the customer service line to discuss alternatives).
ELECTRONIC DEVICES
SAFETY INFORMATION FOR
WIRELESS HANDHELD PHONES
cdm-100(audiovox)11/5 2001.11.7 10:7 AM Page 84
Page 44

[81]
Your handheld portable telephone is a high quality piece of equipment.
Before operating the equipment, read all instructions and cautionary
markings on (1) AC Adaptor (2) Battery and (3) Product Using Battery.
1. DO NOT use this equipment in an extreme environment where
high temperature or high humidity exists.
2. DO NOT abuse the equipment. Avoid striking, shaking or shocking. When not using the unit, lay down the unit to avoid possible
damage due to instability.
3. DO NOT expose this equipment to rain or spilled beverages.
4. DO NOT use unauthorized accessories.
5. DO NOT disassemble the phone or its accessories. If service or
repair is required, return unit to an authorized Audiovox cellular
service center. If unit is disassembled, the risk of electric shock or
fire may result.
6. DO NOT short-circuit the battery terminals with metal items etc.
PRECAUTIONS
SAFETY INFORMATION FOR
WIRELESS HANDHELD PHONES
[80]
Aircraft
FCC Regulations prohibit using your phone while in the air. Switch
OFF your phone before boarding an aircraft.
Blasting Areas
To avoid interfering with blasting operations, turn your phone OFF
when in a blasting area or in areas posted: Turn off two-way radio.
Obey all signs and instructions.
Potentially Explosive Atmospheres
Turn your phone OFF when in any area with a potentially explosive
atmosphere and obey all signs and instructions. Sparks in such areas
could cause an explosion or fire resulting in bodily injury or even death.
Areas with a potentially explosive atmosphere are often, but not
always, clearly marked. They include fueling areas such as gas
stations; below deck on boats; fuel or chemical transfer or storage
facilities; vehicles using liquefied petroleum gas (such as propane or
butane); areas where the air contains chemicals or particles, such as
grain, dust, or metal powders; and any other area where you would
normally be advised to turn off your vehicle s engine.
OTHER SAFETY GUIDELINES
SAFETY INFORMATION FOR
WIRELESS HANDHELD PHONES
cdm-100(audiovox)11/5 2001.11.7 10:7 AM Page 86
Page 45

[82]
The following offenses are punishable by fine, imprisonment, or both:
l Using obscene, indecent, or profane language.
l Using the unit to give off false distress calls.
l Wiretapping or otherwise intercepting a telephone call, unless that
person has first obtained the consent of the parties participating in
the call.
l Making anonymous calls to annoy, harass, or molest other people.
l Charging to an account without authorization to avoid payment for
service.
l Refusing to yield a party line when informed that it is needed for
an emergency call (It is also unlawful to take over a party line by
stating falsely that it is needed for an emergency).
WARNING
SAFETY INFORMATION FOR
WIRELESS HANDHELD PHONES
In August 1996 the Federal Communications Commission (FCC) of
the United States with its action in Report and Order FCC 96-326
adopted an updated safety standard for human exposure to radio frequency electromagnetic energy emitted by FCC regulated transmitters. Those guidelines are consistent with the safety standard previously set by both U.S. and international standards bodies. The design
of this phone complies with the FCC guidelines and these international standards.
Use only the supplied or an approved antenna. Unauthorized antennas, modifications, or attachments could impair call quality, damage
the phone, or result in violation of FCC regulations.
Do not use the phone with a damaged antenna. If a damaged antenna comes into contact with the skin, a minor burn may result. Please
contact your local dealer for replacement antenna.
Body-worn Operation
This device was tested for typical body-worn operation with the back
of the phone kept 0.5 inchs (1.27cm) from the body. To comply with
FCC RF exposure requirements, a minimum separation distance of
0.5 inchs (1.27cm) must be maintained between the user s body and
the back of the phone, including the antenna, whether extended or
retracted. All belt-clips, holsters and similar accessories used by this
device must not contain any metallic components. Body-worn accessories that do not meet these requirements may not comply with FCC
RF exposure limits and should be avoided.
Vehicle Mounted External Antenna(optional, if available)
A minimum separation distance of 7.9 inches (20cm) must be maintained between the user/bystander and the vehicle mounted external
antenna to satisfy FCC RF exposure requirements.
Note: For more information about RF exposure, please visit the FCC website at www.fcc.gov
CAUTIONS
SAFETY INFORMATION FOR
FCC RF EXPOSURE
WARNING! Read this Information before using your phone
[83]
cdm-100(audiovox)11/5 2001.11.7 10:7 AM Page 88
Page 46

SAR INFORMATION
THIS MODEL PHONE MEETS THE GOVERNMENT S
REQUIREMENTS FOR EXPOSURE TO RADIO WAVES.
Your wireless phone is a radio transmitter and receiver. It is
designed and manufactured not to exceed the emission limits
for exposure to radiofrequency (RF) energy set by the Federal
Communications Commission (FCC) of the U.S. Government.
These limits are part of comprehensive guidelines and establish permitted levels of RF energy for the general population.
The guidelines are based on standards that were developed by
independent scientific organizations through periodic and thorough evaluation of scientific studies. The standards include a
substantial safety margin designed to assure the safety of all
persons, regardless of age and health.
The exposure standard for wireless mobile phones employs a
unit of measurement known as the Specific Absorption Rate, or
SAR. The SAR limit set by the FCC is 1.6 W/kg. * Tests for SAR
are conducted with the phone transmitting at its highest certified power level in all tested frequency bands. Although the
SAR is determined at the highest certified power level, the actual SAR level of the phone while operating can be well below
the maximum value. This is because the phone is designed to
operate at multiple power levels so as to use only the power
required to reach the network. In general, the closer you are to
a wireless base station antenna, the lower the power output.
Before a phone model is available for sale to the public, it must
be tested and certified to the FCC that it does not exceed the
limit established by the government-adopted requirement for
safe exposure. The tests are performed in positions and locations (e.g., at the ear and worn on the body) as required by the
FCC for each model. The highest SAR value for this model
[84]
[85]
SAR INFORMATION
phone when tested for use at the ear is 1.31 W/kg and when
worn on the body, as described in this user guide, is 0.41 W/kg.
(Body-worn measurements differ among phone models,
depending upon available accessories and FCC requirements).
While there may be differences between the SAR levels of various phones and at various positions, they all meet the government requirement for safe exposure.
The FCC has granted an Equipment Authorization for this
model phone with all reported SAR levels evaluated as in compliance with the FCC RF exposure guidelines. SAR information on this model phone is on file with the FCC and can be
found under the Display Grant section of http://www.fcc.gov/
oet/fccid after searching on PP4 DX-20B.
Additional information on Specific Absorption Rates (SAR) can
be found on the Cellular Telecommunications Industry Association (CTIA) website at http://www.wow-com.com.
* In the United States and Canada, the SAR limit for mobile
phones used by the public is 1.6 watts/kg (W/kg) averaged over
one gram of tissue. The standard incorporates a sub-stantial
margin of safety to give additional protection for the public and
to account for any variations in measurements.
cdm-100(audiovox)11/5 2001.11.7 10:7 AM Page 90
Page 47

CHAPTER 10
WARRANTY
u
Protect Your Warranty
v
12 Month Limited Warranty
[87][86]
cdm-100(audiovox)11/5 2001.11.7 10:7 AM Page 92
Page 48

12 MONTH LIMITED WARRANTYPROTECT YOUR WARRANTY
Read your Warranty carefully, with the special consideration
to paragraph seven of the Limited Warranty for your unit.
Warranty does not apply to... or to any product or part
thereof which has suffered through alteration... mishandling
misuse, neglect or accident .
Many companies are making look alike accessories and in
some cases, promoting that their product is equal to or better than the Audiovox product. Be careful. Some of these
products may not be compatible to use with your Audiovox
product and may damage the unit or cause it to malfunction.
If service is required on your unit and it is determined that a
non-Audiovox accessory has created the problem with your
unit, the Warranty will not apply. In addition, if the unit has
already suffered irreversible damage by reason of a noncompatible accessory, the Warranty will be voided. To protect your Warranty, use only compatible accessories which
cannot damage or interfere with the functioning of your
Audiovox product.
Audiovox Communications Corp. (the Company) warrants to
the original retail purchaser of this Audiovox handheld portable
cellular telephone, that should this product or any part thereof
(except the items listed below) during normal consumer usage
and conditions, be proven defective in material or workmanship
that results in the failure within the first twelve (12) month period from the date of purchase, such defect(s) will be repaired or
replaced (with new or rebuilt parts) at the Company s option,
without charge for parts or labor directly related to the defect(s).
The antenna, rechargeable battery and battery charger, if
included, are similarly warranted for twelve (12) months from
date of purchase and the key pad and display are also warranted for ninety (90) days from the purchase date.
This warranty extends only to consumers who purchase the
product in the United States or Canada and it is not transferable or assignable.
This Warranty does not apply to:
(a) Product subjected to abnormal use or conditions, accident,
mishandling, neglect, unauthorized alteration, misuse,
improper installation or repair or improper storage;
(b) Produce whose mechanical serial number or electronic
serial number has been removed, altered or defaced.
(c) Damage from exposure to moisture, humidity, excessive
temperatures or extreme environmental conditions;
(d) Damage resulting from connection to, or use of any
accessory or other product not approved or authorized
by the Company;
(e) Defects in appearance, cosmetic, decorative or structural
items such as framing and non-operative parts;
AUDIOVOX COMMUNICATIONS CORP.
555 Wireless Blvd., Hauppauge, New York 11788, 800-229-1235
16808 Marquardt Avenue, Cerritos, California 90703, 562-802-5100
Audiovox Canada
5155 Spectrum Way, Unit #5, Mississauga, Ontario
Canada L4W 5A1, 800-465-9672
[89][88]
cdm-100(audiovox)11/5 2001.11.7 10:7 AM Page 94
Page 49

12 MONTH LIMITED WARRANTY
[90]
12 MONTH LIMITED WARRANTY
(f) Product damaged from external causes such as fire,
flooding, dirt, sand, weather conditions, battery leakage,
blown fuse, theft or improper usage of any electrical source.
The Company disclaims liability for removal or reinstallation of
the product, for geographic coverage, for inadequate signal
reception by the antenna or for communications range or operation of the cellular system as a whole.
To obtain repairs or replacement within the terms of this
Warranty, the product should be delivered with proof of
Warranty coverage (e.g. dated bill of sale), the consumers
return address, daytime phone number and/or fax number and
complete description of the problem, transportation prepaid,
to the Company at the address shown below or to the place
of purchase for repair or replacement processing. In the
United States, you may also call toll free (800) 229-1235,
and in Canada (800) 465-9672 for reference to an authorized
Warranty station in your area.
THE EXTENT OF THE COMPANY S LIABILITY UNDER THIS
WARRANTY IS LIMITED TO THE REPAIR OR REPLACEMENT PROVIDED ABOVE AND, IN NO EVENT, SHALL THE
COMPANY S LAIBILITY EXCEED THE PURCHASE PRICE
PAID BY PURCHASER FOR THE PRODUCT.
ANY IMPLIED WARRANTIES, INCLUDING ANY IMPLIED
WARRANTY OF MERCHANTABILITY OR FITNESS FOR A
PARTICULAR PURCHASE SHALL BE LIMITED - TO THE
DURATION OF THIS WRITTEN WARRANTY, ANY ACTION
FOR BREACH OF ANY WARRANTY MUST BE BROUGHT
WITHING A PERIOD OF 18 MONTHS FROM DATE OF
ORIGINAL PURCHASE.
IN NO CASE SHALL THE COMPANY BE LIABLE FOR AN
SPECIAL CONSEQUENTIAL OR INCIDENTAL DAMAGES
FOR BREACH OF THIS OR ANY OTHER WARRANTY,
EXPRESS OR IMPLIED, WHATSOEVER. THE COMPANY
SHALL NOT BE LIABLE FOR THE DEALY IN RENDERING
SERVICE UNDER THIS WARRANTY OR LOSS OF USE
DURING THE TIME THE PRIDUCT IS BEING REPAIRED OR
REPLACED.
No person or representative is authorized to assume for the
Company any liability other than expressed herein in connection with the sale of this product.
Some states or provinces do not allow limitations on how long
an implied warranty lasts or the exclusion or limitation of incidental or consequential damage so the above limitation or
exclusions may not apply to you. This Warranty gives you
specific legal rights, and you may also have other rights which
very from state to state or provinces to provinces.
IN USA : AUDIOVOX COMMUNICATIONS CORP.
555 Wireless Blvd.
Hauppauge, NY 11788
(800) 229-1235
IN CANADA : AUDIOVOX CANADA LTD.
5155 Spectrum Way, Unit #5
Mississauga, Ontario L4W 5A1
(800) 465-9672
[91]
cdm-100(audiovox)11/5 2001.11.7 10:7 AM Page 96
 Loading...