

Page 1
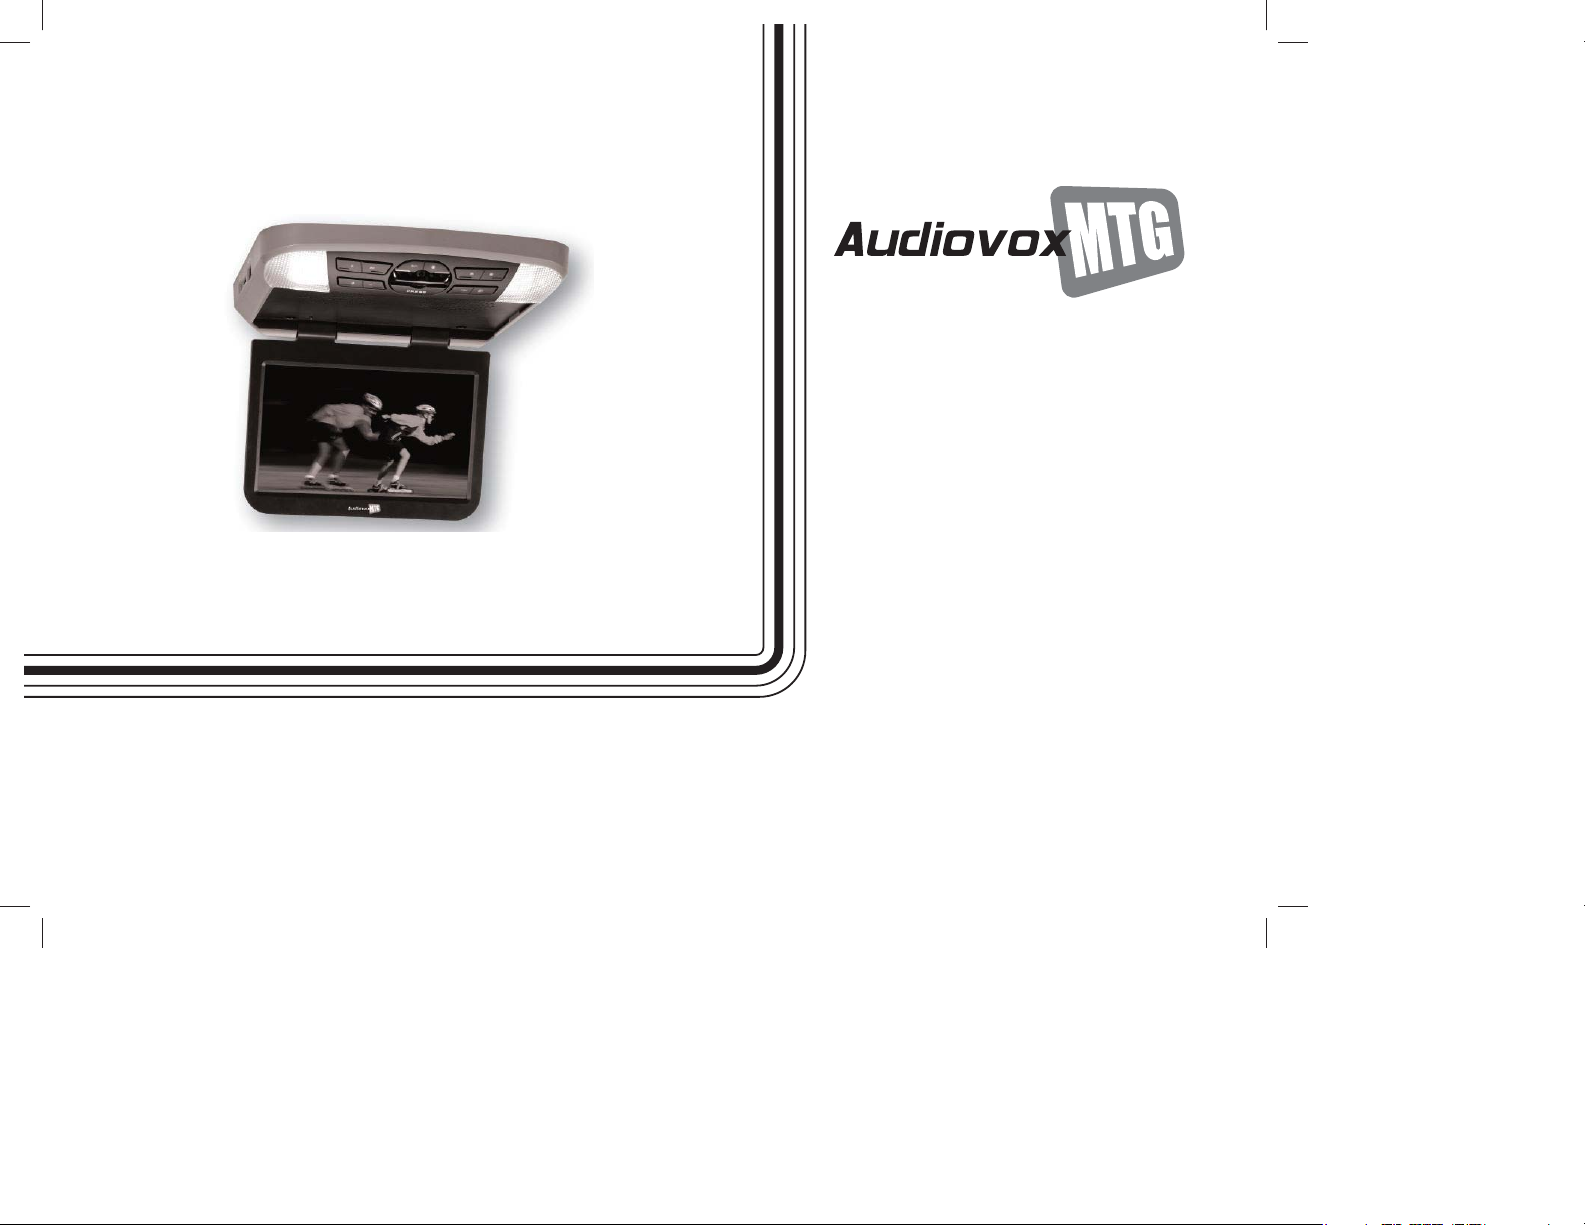
10-Inch Roof-Mount DVD Player
With DVD/CD/MP3 SYSTEM
AVXMTG10U
INSTALLATION
GUIDE
Page 2

Page 3

TABLE OF CONTENTS
Important Notices ......................................................................................................................................... 2
Materials Included in this Package ..................................................................................................... 3
Removing and Installing Snap On Covers ..................................................................................... 4
General Vehicle Installation Approach ............................................................................................. 7
Connecting the Dome Lights ..............................................................................................................10
1
Page 4

IMPORTANT NOTICES
Installation of overhead products requires careful planning and preparation.
Be extremely careful when working on a vehicle with side curtain air bags.
Do not route wires near any portion of the side curtain air bag assemblies.
This includes anchor points in A, B, C or D pillars of the vehicle. Routing wires
in these areas or running wires by the side curtain air bags can prevent the
side curtain air bag from fully deploying which can result in personal injury
to vehicle occupants. If you have any question regarding routing in a vehicle,
please contact Audiovox Technical support at 1-800-225-6074.
An LCD panel and/or video monitor may be installed in a motor vehicle and
visible to the driver only if the LCD panel or video monitor is used for vehicle
information, system control, rear or side observation or navigation. If the
LCD panel or video monitor is used for television reception, video or DVD
play, the LCD panel or video monitor must be installed so that these features
will only function when the vehicle is in “park” or when the vehicle’s parking
brake is applied.
When connecting power and ground in a mobile video installation, insure
that the ACC wire is fused at the point where it is connected to the vehicle’s
ACC wiring. Failure to do so can result in damage to the vehicle if a short
circuit develops between the vehicle connection point and the mobile video
product.
An LCD panel and/or video monitor used for television reception, video or
DVD play that operates when the vehicle is in gear or when the parking
brake is not applied must be installed to the rear of the driver seat where it
will not be visible, directly or indirectly, to the operator of the motor vehicle.
WARNINGS
• Do not use any solvents or cleaning materials when cleaning the video
monitor.
• Do not use any abrasive cleaners, they may scratch the screen.
• Use only lightly dampened lint free cloth to wipe the screen if it is dirty.
• Lock the LCD screen in fully closed position when not in use.
• Before putting on headphones, always adjust the volume setting to OFF or
lowest position.
• Remember to leave the dome light switch in the off or auto position when
the vehicle is unattended, as the dome lights, if left on, can drain the
vehicle battery.
• Do not put pressure on the screen.
• Caution children to avoid touching or scratching the screen, as it may
become dirty or damaged.
Safety Precautions
For safety reasons, when changing video media, it is recommended that
the vehicle is not in motion, and that you do not allow children to unfasten
seat-belts to change video media or make any adjustments to the system.
System adjustments can be accomplished using the remote control, while
seat-belts remain fastened. Enjoy your AUDIOVOX entertainment system but
remember that the safety of all passengers remains the number one priority.
Licensed under one or more of the following patents, Patent Numbers
5,775,762, 5,927,784, and 6,678,892.
2
Page 5
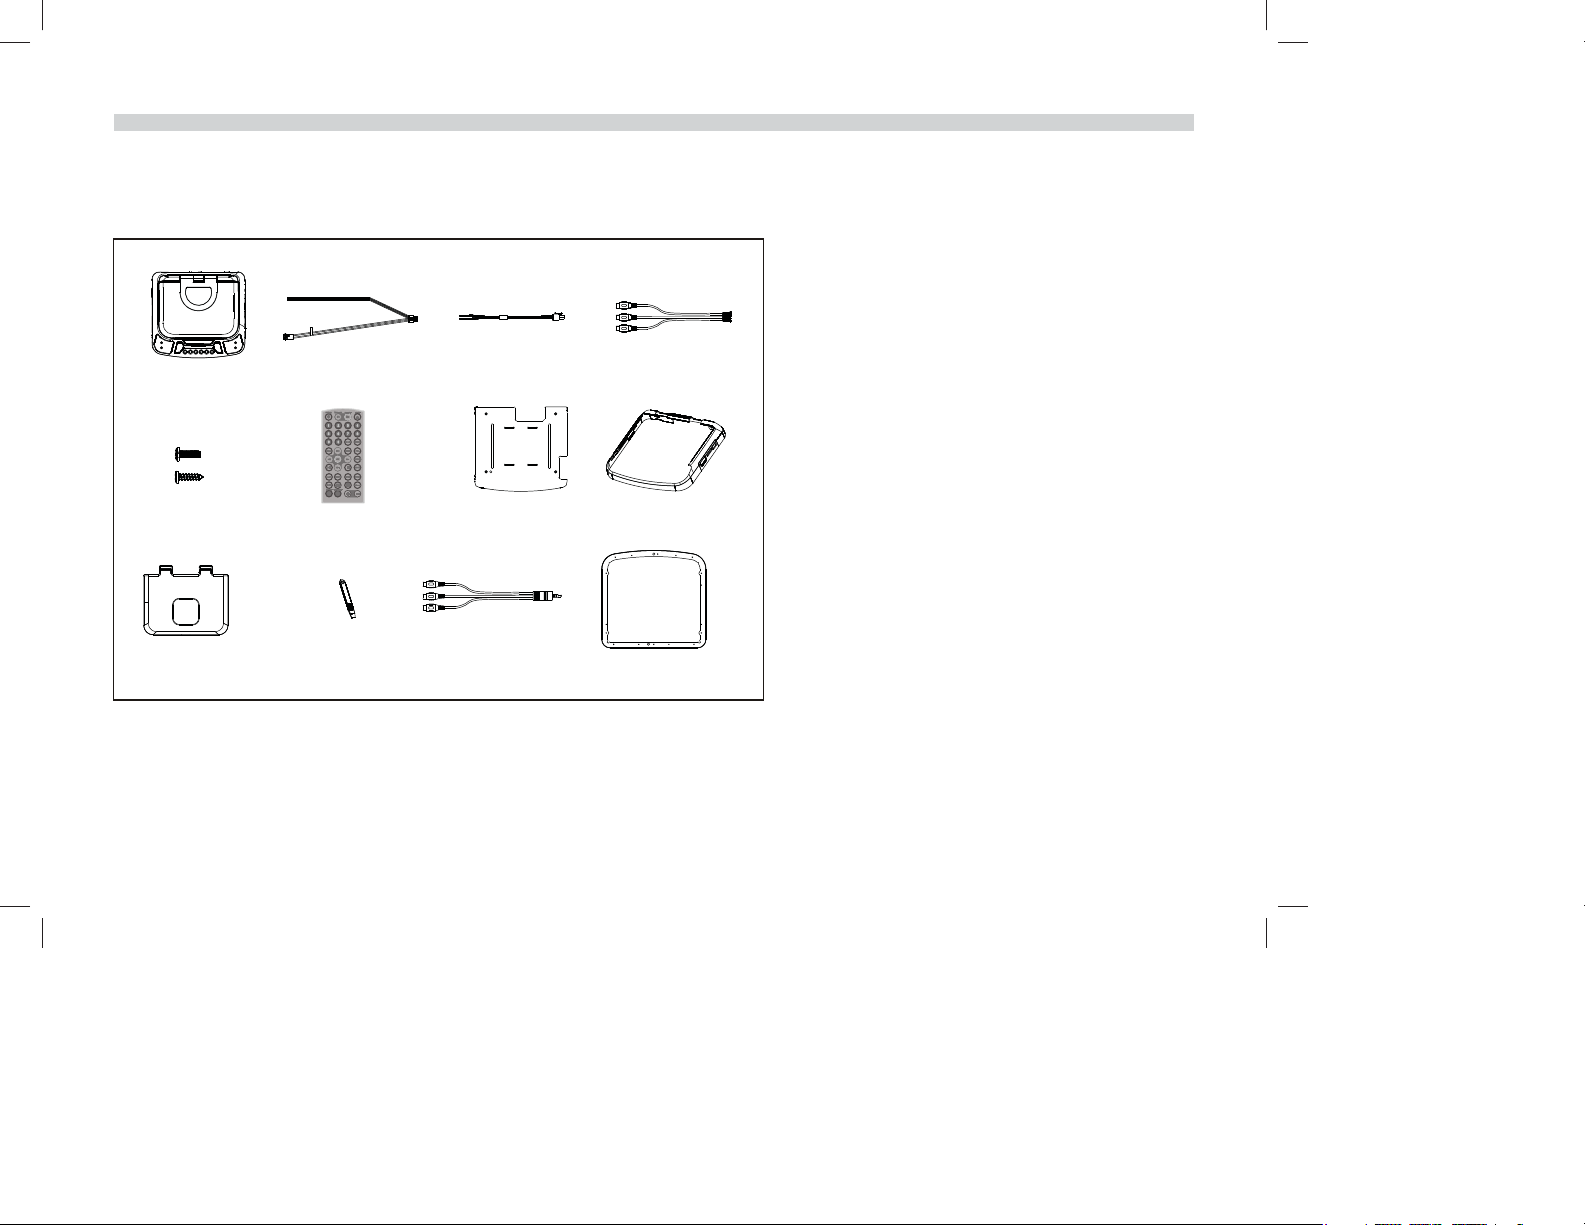
MATERIALS INCLUDED IN THIS PACKAGE
12 3
5
91011 12
6
1. 10” LCD Overhead Monitor with DVD player (1 pc)
2. 6 Pin Power Harness (1 pc)
4
3. 2 Pin Power / Wire Harness with Choke (1 pc)
4. 3 RCA Jack Pigtail (1 pc)
5. Hardware Package
M5*9 (4 pcs)
TA4*9 (6 pcs)
6. Remote Control (1 pc)
7. Mounting Bracket (1 pc)
7
8
8. Snap-on Shroud (2 pcs)*
9. Snap-on Screen Cover (2 pcs)*
10. Pry Tool (1 pc)
11. 3.5mm TIP/3RCA JACK PIG TAIL (1 pc)
12. Trim Ring (3 pcs)
*Note: The AVXMTG10U is supplied with a black snap-on shroud and screen cover. To install the pewter or shale snap-on shroud or screen cover, the black snapon shroud and screen cover must be removed fi rst. See the following page for the removal process.
3
Page 6

REMOVING AND INSTALLING SNAPON COVERS
Preparation
Place the unit on a soft surface to avoid damaging the plastic.
Materials Required
1. 2. 3.
10” Overhead LCD Monitor
with DVD Player
Shroud Screen Cover Pry Tool
4.
Disconnecting the Screen Cover
“A”
“B”
“C”
1. Open the LCD screen.
2. Insert the supplied pry tool between the LCD screen and snap on screen cover at locations “A”, “B”, and “C” and gently pry the cover away from the screen.
“C”
4
Page 7

Installing the Screen Cover
“D” “D”
“D”
“D”
1. Open the LCD screen.
2. Hook the two tabs “D” at the bottom edge of the screen cover into the notches on the bottom edge of the LCD screen.
3. Snap the opposite side of the screen cover over the hinges..
Disconnecting the Shroud
“E” (fastener)
1. Open the LCD screen.
2. Insert the supplied pry tool between the unit and shroud at fastener location “E” and gently pry the shroud away from the unit.
5
Page 8

Installing the Shroud
“F”
“F”
Expanded view
1. Open the LCD screen.
2. Slide the shroud over the unit. The shroud will snap into place at locations “F”.
“F”
6
Page 9

GENERAL VEHICLE INSTALLATION APPROACH
1. Decide upon the system confi guration and options that will be installed.
2. Review all manuals to become familiar with electrical requirements and hookups.
3. Decide upon the mounting locations of all components and the method of mounting.
4. Prep the vehicle. Remove any interior trim necessary to gain access to vehicle's wiring, as well as all areas where interconnecting wire harnesses will be
located. If any access holes need to be cut into the vehicle, do this now.
5. Route the wiring harnesses in the vehicle as necessary. Refer to the wiring diagrams in this manual, as well as the wiring instructions for the individual
components and accessory options being installed. Ensure that the wiring is protected from sharp edges. Ensure that all wiring is not pinched when all
components and interio trim are fully installed. Leave enough slack in the wiring at each component to allow working room.
6. Remove all A/V system components from their packaging and place them loosely in the vehicle at their respective locations.
7. Connect all components together and verify the proper operation of all system functions.
Note: This is best done BEFORE components have been permanently mounted.
8. After verifying proper operation of the system, proceed to mount each component.
9. When all components are mounted, recheck the function of the entire system. Ensure that no wiring was pinched or connected improperly during
fi nal installation.
7
Page 10

GENERAL VEHICLE INSTALLATION APPROACH
Installing Unit to Roof
Roof
Roof Support
Headliner
Mounting Bracket
Self-drilling Screws
Video Unit
M5 Screw
8
Page 11

GENERAL VEHICLE INSTALLATION APPROACH
To Dome Lights
See “Connecting
the Dome Lights”
2 Pin
Power Wire
Harness
with Choke
*Optional
Relay Box
Signal
Harness
6 Pin
Power Harness
AV IN 3 RCA Jack Pigtail
9
Page 12

CONNECTING THE DOME LIGHTS
The dome lights in the video monitor require three connections to the vehicle's wiring. There are two common types of dome light circuits used, positive or
negative switched. Positive systems supply voltage to the interior lights to turn them on. Negative switched systems apply ground to illuminate the bulbs.
To determine which system you have, you must locate the wires at the dome light. On a positive switched system, with all the doors closed and lights out,
both wires at the dome light will rest at ground. When the light is activated, one of these wires will switch to +12 VDC. This is the vehicle's switching wire. On a
negative switched system, with all the doors closed and lights out, both wires at the dome light will rest at +12 VDC. When the light is activated, one of these
wires will switch to ground. This is the switching wire.
For positive systems, connect the purple/brown (Lamp auto) wire to the vehicle's switched wire. Then connect the red/black (Lamp on) wire to a fused constant
12 volt source and the black/red (Lamp common) wire to a good ground. Positive systems are commonly found on Ford vehicles.
For negative systems, connect the purple/brown (Lamp auto) wire to the vehicle's switched wire. Then connect the red/black (Lamp on) wire to a good ground
and the black/red (Lamp common) wire to fused constant 12 volt source. Negative systems are commonly found on General Motors and import vehicles.
Note: Some vehicles which incorporate transistorized control of the dome light circuit, such as the 1999 Dodge Caravan, may require that the purple/brown
(Lamp auto) wire be connected to the door pin switch wire, as the additional current draw of the Monitor's lights may not be supported by the output of
the vehicle’s body control computer..
10
Page 13

Positive Switched Dome Lighting
To 6 pin
connector
on Monitor
To
constant
+12 VDC
Red/black-Lamp on
Black/red-Lamp common
Purple/brown-Lamp Auto
Factory Door Ajar
Switch or Body
Control Computer
11
To
constant
+12 VDC
Page 14

Negative Switched Dome Lighting
To 6 pin
connector
Red/black-Lamp on
Black/red-Lamp common
Purple/brown-Lamp Auto
To
constant
+12 VDC
To
constant
+12 VDC
Factory Door Ajar
Switch or Body
Control Computer
12
Page 15

This page intentionally left blank.
13
Page 16

© 2010 AUDIOVOX,150 Marcus Blvd. Hauppauge, NY 11788
128-8902
 Loading...