

Page 1
:'llE copy!
AA -9093 !
MINI MICROPHONE
GLASS-BREAK DETECTOR
INSTALLATION GUIDE !
Form No. 128-4320A I
AUDIOVOX SECURITY
Printed in U.S.A.
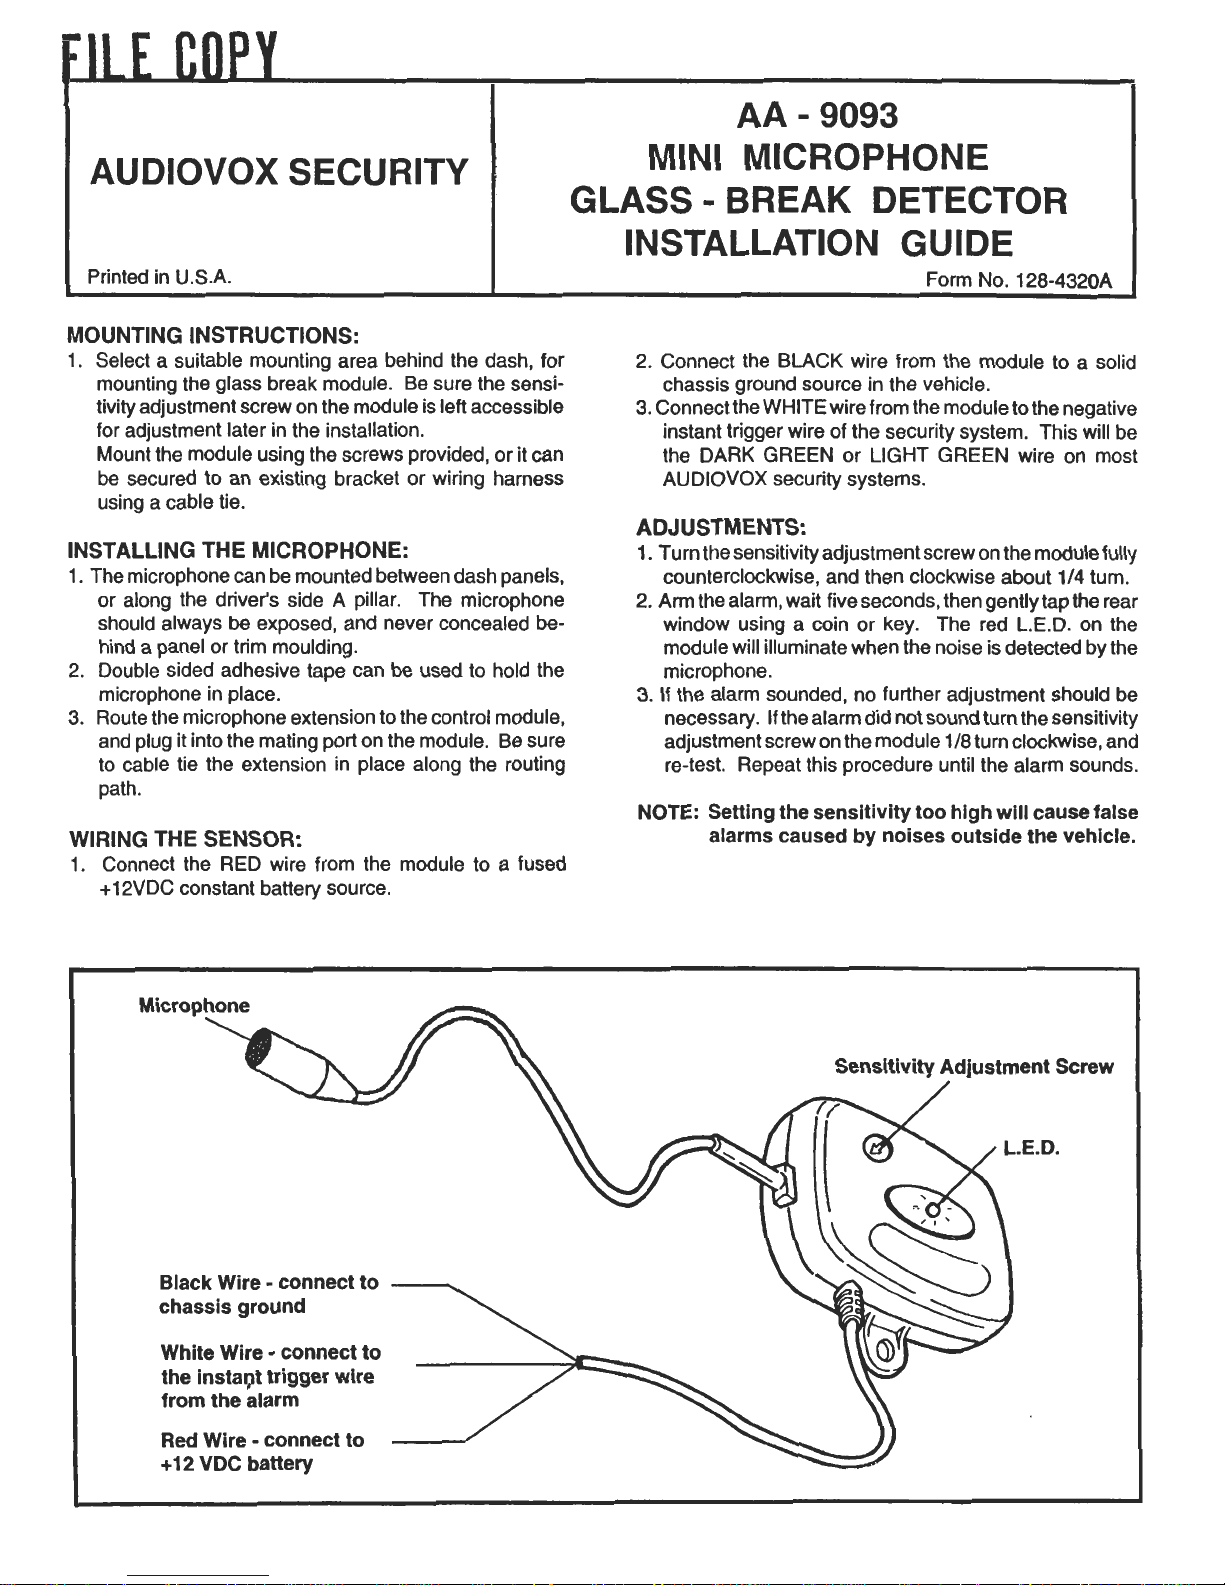
2. Connect the BLACK wire from the module to a solid
chassis ground source in the vehicle.
3. Connect the WHITE wire from the module to the negative
instant trigger wire of the security system. This will be
the DARK GREEN or LIGHT GREEN wire on most
AUDIOVOX security systems.
MOUNTING INSTRUCTIONS:
1. Select a suitable mounting area behind the dash, for
mounting the glass break module. Be sure the sensitivity adjustment screw on the module is left accessible
for adjustment later in the installation.
Mount the module using the screws provided, or it can
be secured to an existing bracket or wiring harness
using a cable tie.
ADJUSTMENTS:
1. Turn the sensitivity adjustment screw on the module fully
counterclockwise, and then clockwise about 114 turn.
2. Arm the alarm, wait five seconds, then gently tap the rear
window using a coin or key. The red L.E.D. on the
module will illuminate when the noise is detected by the
microphone.
3. If the alarm sounded, no further adjustment should be
necessary .If the alarm did not sound turn the sensitivity
adjustment screw on the module 118 turn clockwise, and
re-test. Repeat this procedure until the alarm sounds.
INSTALLING THE MICROPHONE:
1. The microphone can be mounted between dash panels.
or along the driver's side A pillar. The microphone
should always be exposed, and never concealed behind a panel or trim moulding.
2. Double sided adhesive tape can be used to hold the
microphone in place.
3. Route the microphone extension to the control module,
and plug it into the mating port on the module. Be sure
to cable tie the extension in place along the routing
path.
NOTE: Setting the sensitivity too high will cause false
alarms caused by noises outside the vehicle.
WIRING THE SENSOR:
1. Connect the RED wire from the module to a fused
+ 12VDC constant battery source.
 Loading...