

Page 1
ATW-CHG3 / ATW-CHG3N
User Manual
TWO-BAY CHARGING STATION
Page 2
Introduction
Thank you for purchasing this Audio-Technica product.
Before using the product, read through this user manual to ensure that you will use the product correctly. Please keep this manual for future
reference.
Supported models
This product supports the following models. *
• 3000 Digital Series (ATW-DT3101, ATW-DT3102)
• 3000 Series (ATW-T3201, ATW-T3202)
*There are differences in the handled products depending on the country where they are sold.
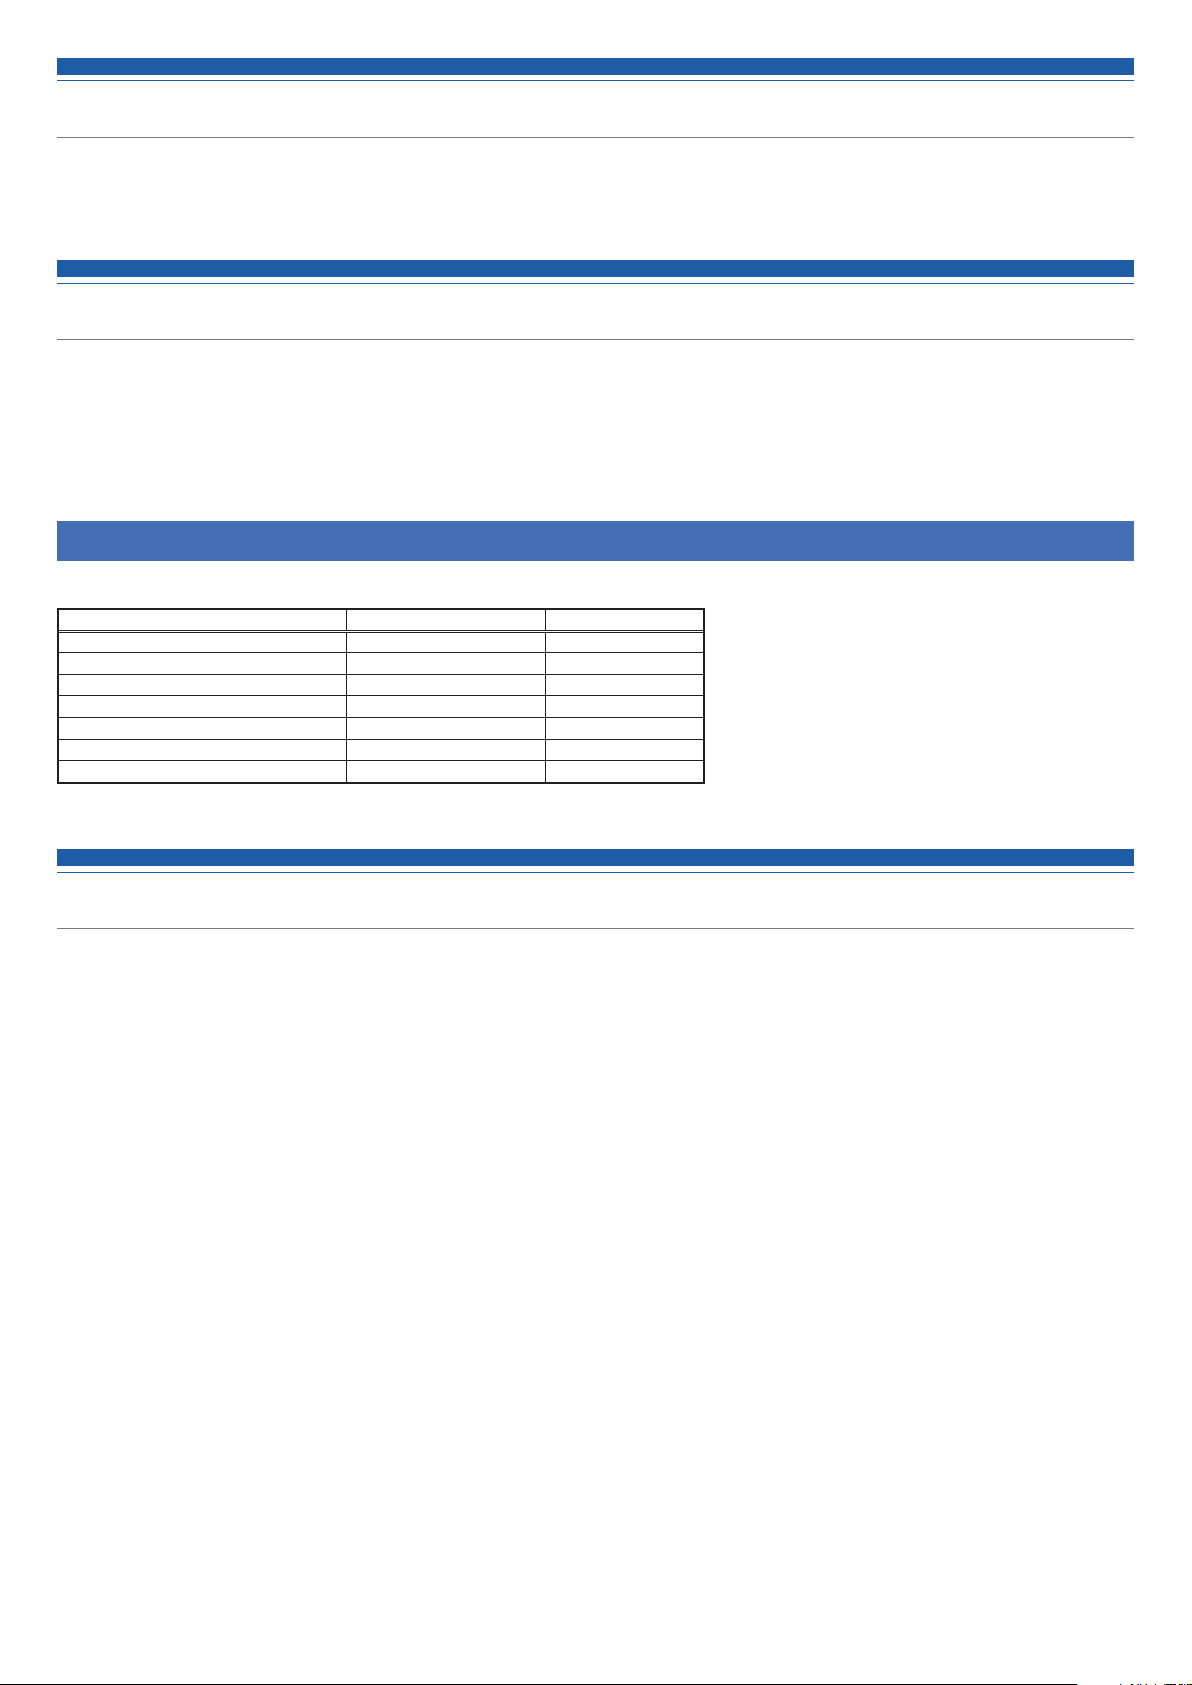
Recommended batteries
The following batteries can be charged with this product.
Name Manufacturer Capacity
eneloop Panasonic 1900 mAh
eneloop pro Panasonic 2500 mAh
Duracell Rechargeable Duracell 1950 mAh
Energizer Energizer 2300 mAh
Ansmann Ansmann 2850 mAh
VARTA VARTA 2100 mAh
GP ReCyko+ 2700 Series GP Batteries 2600 mAh
• All other company and product names that appear in this document are trademarks or registered trademarks of their respective owners.
Important information
Warning:
• To prevent fire or shock hazard, do not expose this apparatus to rain or
moisture.
Caution:
• Do not expose this apparatus to drips or splashes.
• To avoid electric shock, do not open the cabinet.
• Refer servicing to qualified personnel only.
• Do not expose this apparatus to excessive heat such as that generated
by sunshine, fire or other heat sources.
• Do not subject this apparatus to strong impact.
• This apparatus should be located close enough to the AC outlet so
that you can easily grasp the AC adapter at any time.
• In case of emergency, disconnect the AC adapter quickly.
• Do not place any objects filled with liquids, such as vases, on this
apparatus.
• To prevent fire, do not place any naked flame sources (such as
lighted candles) on this apparatus.
• Do not install this apparatus in a confined space such as a bookcase
or similar unit.
• Install this apparatus only in the places with good ventilation.
• The rating label is put on the bottom of this apparatus.
Battery caution:
• Do not expose the battery to excessive heat such as sunshine, fire or
the like.
• Always consider the environment issues and follow local
regulations when disposing of batteries.
For customers in the USA
FCC Notice
Warning:
This device complies with Part 15 of the FCC Rules. Operation is
subject to the following two conditions: (1) This device may not cause
harmful interference, and (2) this device must accept any interference
received, including interference that may cause undesired operation.
Caution:
You are cautioned that any changes or modifications not expressly
approved in this manual could void your authority to operate this
equipment.
Note: This equipment has been tested and found to comply with
the limits for a Class B digital device, pursuant to part 15 of the FCC
Rules. These limits are designed to provide reasonable protection
against harmful interference in a residential installation. This equipment
generates, uses and can radiate radio frequency energy and, if not
installed and used in accordance with the instructions, may cause
harmful interference to radio communications. However, there is no
guarantee that interference will not occur in a particular installation. If
this equipment does cause harmful interference to radio or television
reception, which can be determined by turning the equipment off and
on, the user is encouraged to try to correct the interference by one or
more of the following measures:
- Reorient or relocate the receiving antenna.
- Increase the separation between the equipment and receiver.
- Connect the equipment into an outlet on a circuit different from that
to which the receiver is connected.
- Consult the dealer or an experienced radio/TV technician for help.
For customers in Canada
IC statement
CAN ICES-3(B)/NMB-3(B)
1
Page 3

Notes on use
• Be sure to read the user manual for any device that you attach to the product.
• Disconnect the AC adapter from the outlet when this product is not in use.
• Be sure to use this product in combination with components specified by our company.
• When connecting cables, make sure they are inserted all the way up to the plug.
• Over time, discoloration may occur due to ultraviolet rays (especially direct sunlight) and friction.
• Charge on flat areas. Devices will not be charged when the product is tilted.
• If you repeatedly charge rechargeable batteries without completely exhausting them, a phenomenon called the memory effect occurs, where the
power capacity of the batteries is reduced. To prevent this, completely exhaust rechargeable batteries before charging them. If you continue to
have problems recharging the batteries, you may need to replace them with new rechargeable batteries.
• When using the product as a stand without charging, unplug the AC adapter.
• Heat is generated from the AC adapter while charging. Do not place the product near the AC adapter or in places of high temperature.
Rechargeable batteries may not fully charge.
• The capacity of the rechargeable batteries decreases as you repeatedly charge them. If the operation time becomes shorter, we recommend
replacing the batteries with new ones as soon as possible.
• If the product or the charging terminals of charging devices are dirty, the devices may not be able to charge sufficiently. Remove the dirt from the
charging terminals before inserting devices into the product.
• When charging for the first time or when not using the product for long periods, the power capacity of rechargeable batteries may decrease. In
such cases, the batteries will recharge normally (to full capacity) after they have been charged and discharged several times.
• Charge rechargeable batteries every six months even if you have not used them much during that time. Excessive discharging may decrease the
capacity of rechargeable batteries or cause them to no longer be rechargeable.
Maintenance
• If the product becomes stained or covered with dust, be sure to disconnect the power plug before wiping it off with a dry and soft cloth.
• Do not use benzine, thinner or electrical contact cleaner, etc. They may deform or otherwise damage the product, or cause operational failure.
2
Page 4
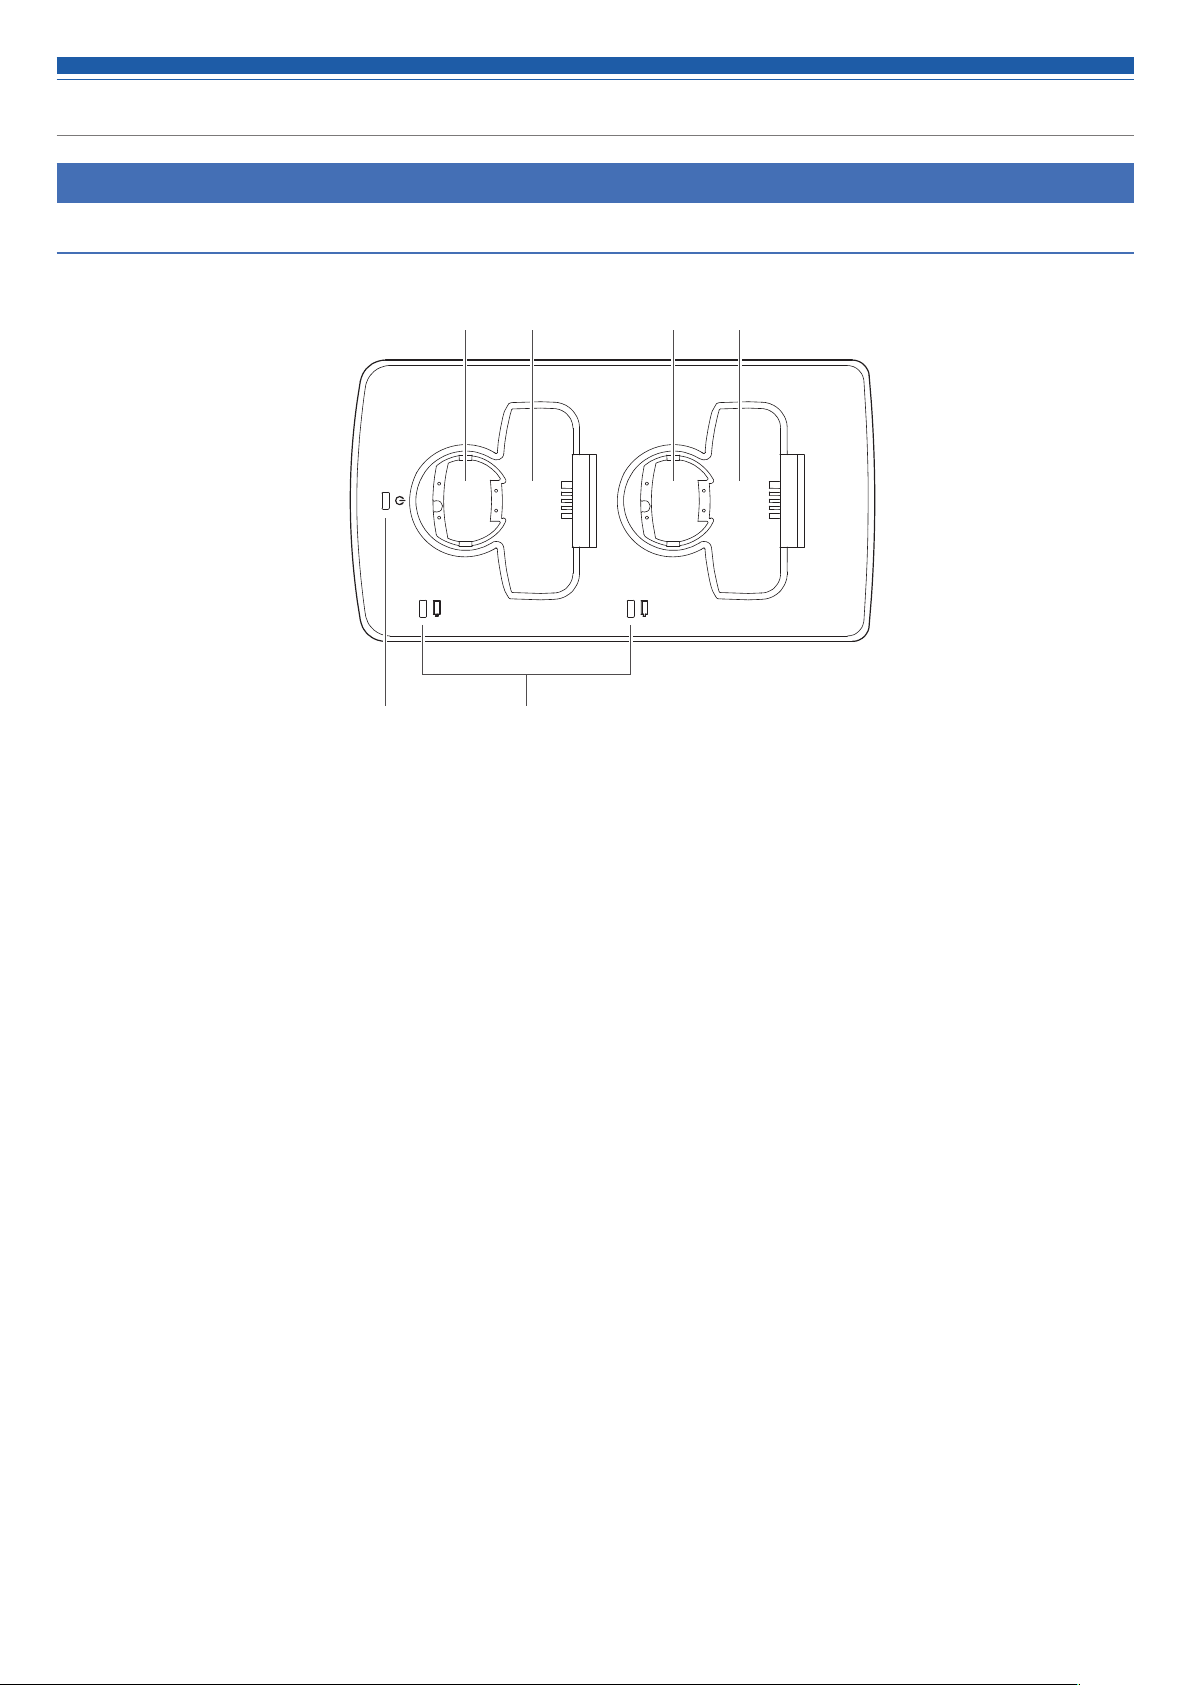
Part names and functions
ATW-CHG3
To p
❹❸ ❹❸
Power indicator
❶
Lights up when the AC adapter is connected and the power is on.
Status indicator
❷
Shows the charging status.
Charging port (for handheld transmitters)
❸
Charging port (for body-pack transmitters)
❹
❷❶
3
Page 5
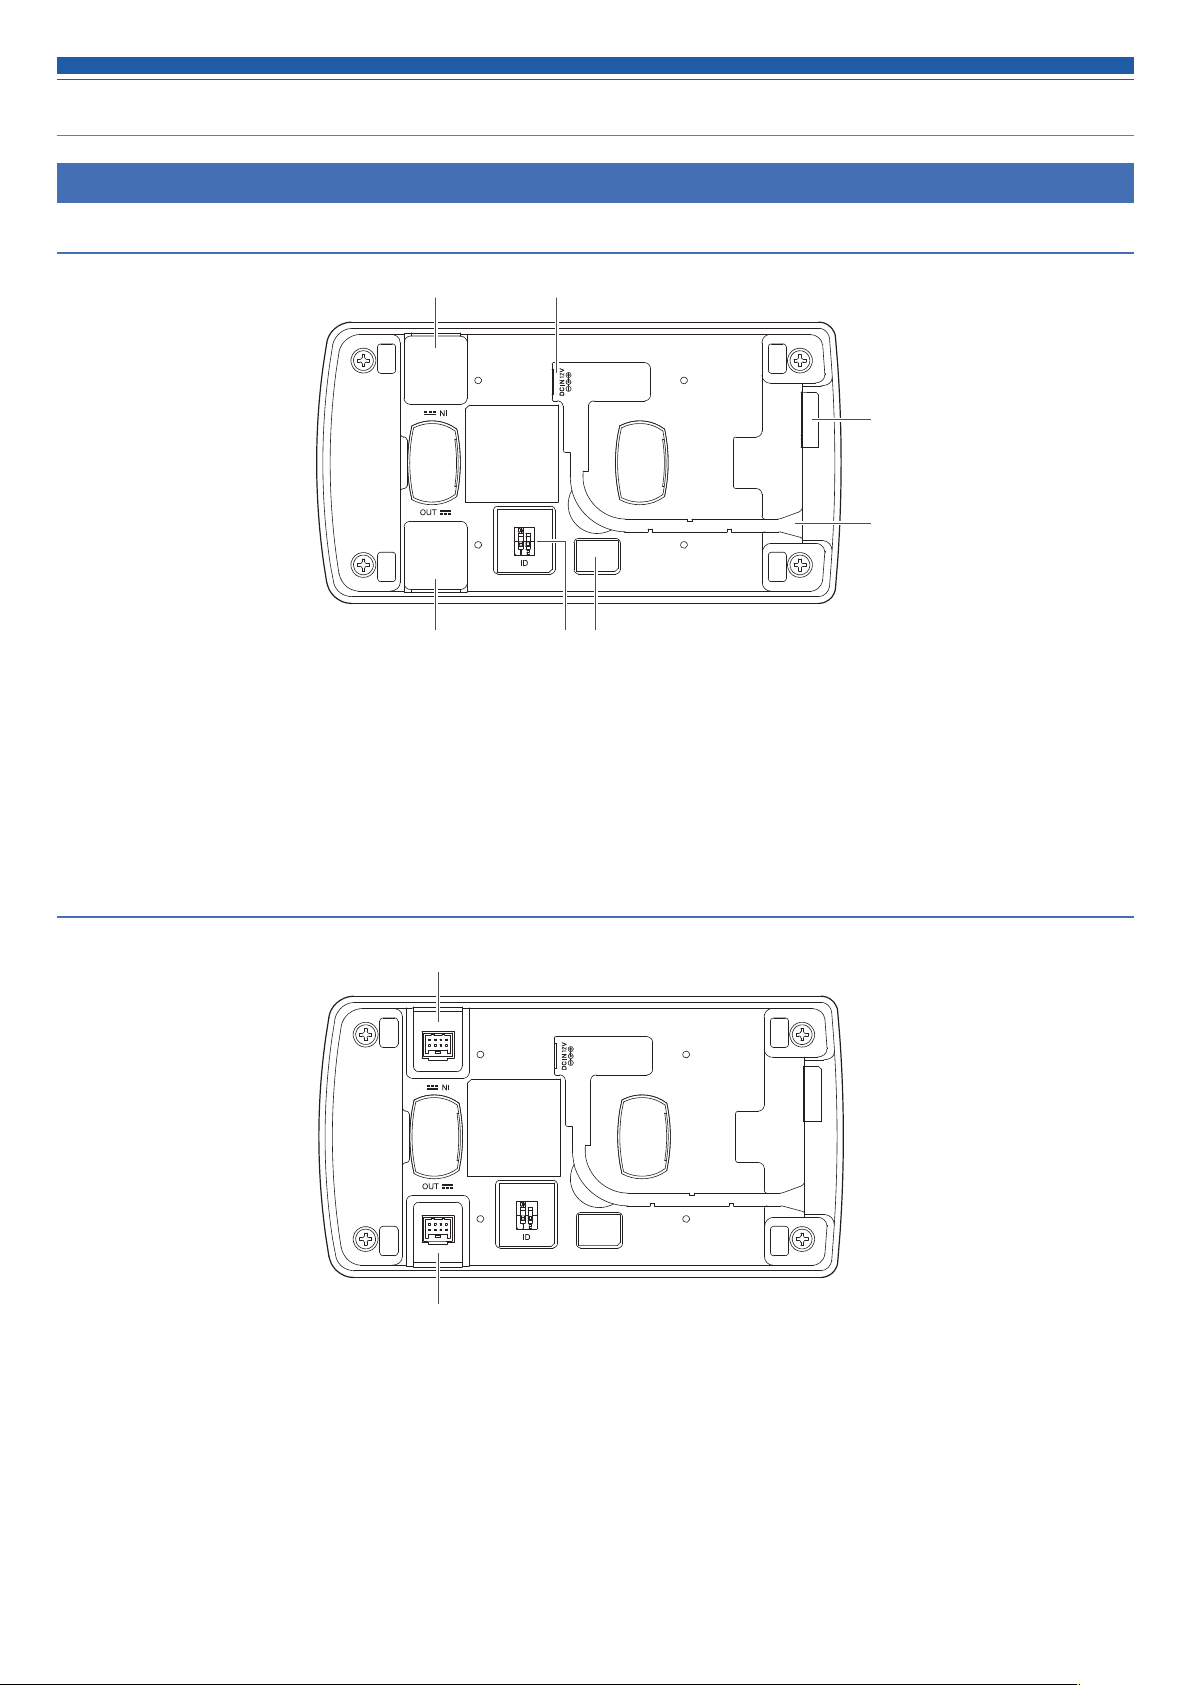
Part names and functions
ATW-CHG3
Bottom
❶
❹
❺
❸❷❹❶
Cap for DC jack
❶
Removed when linking multiple units of this product (see below).
DC input jack
❷
Connects the AC adapter.
Bottom (caps for DC jacks removed)
❻
ID selector switch
❸
Used for switching when linking multiple units and configuring
network settings.
Blind seal
❹
Cord outlet
❺
Passes the AC adapter cord.
❼
DC input jack for linking
❻
Used when linking multiple units of this product. Power is supplied from linked products.
DC output jack for linking
❼
Used when linking multiple units of this product. Supplies power to linked products.
4
Page 6

Part names and functions
ATW-CHG3N
To p
❸ ❸❹ ❹
❶
Power indicator
❶
Lights up when the AC adapter is connected and the power is on.
Status indicator
❷
Shows the charging status.
Charging port (for handheld transmitters)
❸
Charging port (for body-pack transmitters)
❹
❷
5
Page 7

Part names and functions
ATW-CHG3N
Bottom
❶
❸
Blind cap
❶
DC input jack
❷
Connects the AC adapter.
Cap for DC jack
❸
Removed when linking multiple ATW-CHG3 units (see below).
Blind seal
❹
❹
❷❷
❻
❼
❺
Reset button
❺
Resets network settings.
Network port
❻
Used when connecting a network cable (Type: RJ45) to use the
dedicated app on a computer.
Cord outlet
❼
Passes the AC adapter cord.
Bottom (caps for DC jacks removed)
❽
DC output jack for linking
❽
Used when linking multiple ATW-CHG3 units. Supplies power to linked products.
6
Page 8

Using the product
1. Connect the AC adapter.
• Pass the cord along the groove on the product and bring it out from the
cord outlet.
Connect the AC adapter
2. The power indicator lights up and the power turns on.
3. Turn off the device that will be charged and insert it into a
charging port on the product.
4. The status indicator lights up and the charging status is
displayed.
• For more about indicators' lighting sequences, refer to “Indicators”
(
p.9).
• Charging completes in about 6.5 hours (when using 1900 mAh
rechargeable batteries).
Status indicator
Turn off
• You can charge up to two devices at the same time.
• Check the orientation of the device that will be charged before inserting
it. It cannot charge if the orientation is incorrect.
• When charging a handheld transmitter, attach the microphone capsule.
• Although we recommend that you charge a device while it is off, you
can also charge while it is on. In such cases, the device will turn off
automatically.
• Use devices after they are fully charged.
• If the rechargeable batteries are close to full capacity, charging will
complete in a short period of time.
• If you insert a device and the status indicator flashes, there may be a
charging defect.
• Non-rechargeable batteries cannot be charged. If non-rechargeable
batteries are inserted, a charging defect may be displayed.
• If a charging defect occurs, unplug the AC adapter to turn off the
product, and then restart it. If the indicator still flashes even after
restarting the product, the rechargeable batteries may no longer have
any life. Replace them with new rechargeable batteries.
7
Page 9

Connections
Example system configuration
Connect while referring to the figure below.
AC adapter (AD-SA1230XA)*¹
Network cable
ATW-CHG3 / ATW-CHG3N ATW-CHG3
(Type: RJ45)*²
Connect to outlet
Up to 5 units
(4additional units
connected)
Linking (when using multiple units)
1. Remove the caps for DC jacks.
2. Connect the AC adapter to the first unit, and connect the link
cable to the DC output jack for linking. Next, connect the link
cable to the DC input jack for linking on the second unit.
• Connecting an AC adapter to the second unit or any unit thereafter is not
necessary.
• You can add up to four ATW-CHG3 units, for a total of 5 connected units.
Link cable
(First unit)(Second unit)
ATW-CHG3 Link kit (AT8687)*¹
Contents
• Link cable
• Link plate
*1 Sold separately.
*2 Used when connecting to a network. Only ATW-CHG3N can be connected.
• Set of link plate screws
AC adapter
3. Fasten the link plate with link plate screws.
Set of link plate screws
Link plate
Set of link plate screws
8
Page 10

Indicators
The indicators of the product flash and shine continuously to indicate the following operation statuses.
Power indicator
Operation status Indicator display pattern Blue
Network cable connected Blue changes to green.
Mode
confirmation
Status indicator
Operation status Indicator display pattern Red Green
Charging complete
Charging defect
Power on
Auto (automatic IP address
acquisition)
Static (fixed IP address)
Resetting
Charging
Lights solid blue
Flashes twice, then changes to the indicator display for power on.
Flashes three times, then changes to the indicator display for
power on.
Flashes for about two seconds, then changes to the indicator
display for power on.
Lights solid red
Lights solid green
Flashing red
9
Page 11

Network settings
You can use the dedicated app to monitor and control the ATW-CHG3N and linked chargers from a computer.
Setting the ID (ATW-CHG3)
When linking chargers, you can use the dedicated app to monitor and
control all of them by setting different IDs for each charger.
• The default setting is "2".
• The ID of ATW-CHG3N is fixed at “1”.
• If ATW-CHG3N is not linked, setting the ID is not necessary.
1. Refer to the table below and set the ID selector switch while the
product is off.
Switch position
ON
ON
2. Connect the AC adapter and turn on the product.
• The setting is complete.
• If you set the ID while the product is on, turn it off and then turn it on
again.
ID number
Switch position
ON
2 4
ON
3 5
ID number
Confirming the mode (ATW-CHG3N)
You can confirm whether the mode is set to “Auto” or “Static”.
• “Auto” is a mode in which the IP address is acquired automatically,
while in “Static”, the IP address is fixed.
• The dedicated app is used to change the mode.
• The default setting is "Auto".
1. Quickly press the reset button.
2. The power indicator flashes twice for Auto or three times for
Static, and then shines continuously.
• For more about indicators' lighting sequences, refer to “Indicators”
(p.9).
Resetting (ATW-CHG3N)
You can return the network settings to their factory defaults.
1. Press and hold (about 2 seconds) the reset button.
2. The power indicator flashes for about two seconds, and then
shines continuously.
• Resetting is complete.
• For more about indicators' lighting sequences, refer to “Indicators”
(p.9).
10
Page 12

Troubleshooting
Issue Cause/Solution Reference
The product does not turn on. Check if the AC adapter is connected properly.
-
The device does not charge. Check if the charging terminals are dirty.
Check if batteries are inserted in the device or if the batteries are alkaline batteries.
Check if there is a charging defect. p.7
Dimensions
99
-
-
(Units: mm)
68.5
185
11
Page 13

Specifications
Power supply DC12V 3.0A
Charging output DC3.6V 500mA×2
4.9W (CHG3) (when 2 transmitters are charging)
Power consumption
Charging time Approx. 6.5 hours (1,900 mAh rechargeable battery)*
Operating temperature 0 °C to 40 °C (32 °F to 104 °F)
Dimensions 185 mm (7.28") × 99 mm (3.90") × 68.5 mm (2.70") (W × D × H)
Weight
Sold separately AC adapter (AD-SA1230XA), ATW-CHG3 Link kit (AT8687)
*The time may vary depending on usage conditions.
5.3W (CHG3N) (when 2 transmitters are charging)
27.4W (CHG3×5) (5 units are connected and 10 transmitters are charging)
27.8W (CHG3N×1) (CHG3×4) (5 units are connected and 10 transmitters are charging)
400 g (14.1 oz) (ATW-CHG3)
410 g (14.5 oz) (ATW-CHG3N)
12
Page 14

Audio-Technica Corporation
2-46-1 Nishi-naruse, Machida, Tokyo 194-8666, Japan
www.audio-technica.com
©2018 Audio-Technica Corporation
Global Support Contact: www.at-globalsupport.com
ver.1 2018.09.01232900910-02-01
 Loading...