

Page 1

Zusätzlicher Handapparat für alle
DECT-GAP Telefone
Additional handset for all
DECT-GAP phones
Bedienungsanleitung
Operating Instructions
Page 2

- Inhaltsverzeichnis -
1 Allgemeine Hinweise......................................................... 3
2 Bedienelemente ............................................................... 5
3 Inbetriebnahme ............................................................... 6
3.1 Sicherheitshinweise ...............................................................6
3.2 Verpackungsinhalt prüfen .......................................................6
3.3 Farbige Abdeckkappen ...........................................................6
3.4 Gürtelclip anbringen...............................................................6
3.5 Portable Freisprecheinrichtung (Headset) anschliessen ............... 6
3.6 Zusammenbau der Schale als Ladeschale .................................7
3.7 Aufladen des Akkus................................................................ 7
3.8 Handapparat an eine GAP-fähige Basisstation anmelden ............. 8
4 Bedienung....................................................................... 9
4.1 Externe Anrufe entgegennehmen............................................. 9
4.2 Externe Anrufe führen............................................................9
4.3 Intern telefonieren................................................................. 9
4.4 Externe Gespräche auf einen anderen Handapparat verbinden .. 10
4.5 Konferenzgespräche führen................................................... 10
4.6 Hinweise zur Reichweite ....................................................... 11
4.7 Mikrofon im Handapparat stummschalten ............................... 11
4.8 Einstellen der Hör-Lautstärke ................................................ 11
4.9 Wahlwiederholung ............................................................... 12
4.10 R-Signaltaste ...................................................................... 12
5 Telefonnummern speichern...............................................13
5.1 Rufnummern zur Kurwahl speichern....................................... 13
5.2 Gespeicherte Kurzwahlnummern anwählen ............................. 13
5.3 Gespeicherte Kurzwahlnummern löschen ................................ 13
6 Sonderfunktionen............................................................14
6.1 Tastenklick ein-/ausschalten ................................................. 14
6.2 Rufsignale am Handapparat einstellen (Klingelmelodien) .......... 14
6.3 Lautstärke des Tonrufs am Handapparat................................. 15
6.4 Abmelden von Handapparaten............................................... 15
6.5 Kontrollieren der internen Rufnummer.................................... 15
6.6 Arbeiten mit mehreren Basisstationen .................................... 16
7 Fehlerbeseitigung............................................................18
8 Wichtige Informationen....................................................19
8.1 Akku austauschen................................................................ 19
8.2 Technische Daten ................................................................ 20
8.3 Garantie............................................................................. 20
8.4 Konformitätserklärung.......................................................... 21
Operating Instruction in English ____________________ 23
2
Page 3

- Allgemeine Hinweise -
1 Allgemeine Hinweise
Das miniDECT5000 ist als Erweiterung für schnurlose DECT-GAP
Telefonsysteme entwickelt worden. Durch den genormten GAP-Standard kann
der Handapparat auch an Basisstationen anderer Hersteller angeschlossen
werden.
Aufladbarer Akku
Keine anderen aufladbaren Akkus verwenden. Diese können möglicherweise
einen Kurzschluss verursachen.
Verwenden Sie beim Austauschen immer nur einen Original AUDIOLINE
Akkupack Ni-MH 2.4V, 280mAh. Einen Ersatzakku erhalten Sie über den
AUDIOLINE Ersatzteilverkauf unter Tel. 040 / 3258440.
Akkus nicht ins Feuer werfen oder ins Wasser tauchen. Alte oder defekte
Batterien nicht mit dem normalen Hausmüll entsorgen.
Sollte sich der Handapparat beim Laden erwärmen, so ist dies normal und
ungefährlich.
Laden Sie den Handapparat oder den Akku nicht mit fremden Aufladeger äten,
da sonst Beschädigungen auftreten können.
Verwenden Sie nur das mitgelieferte AUDIOLINE Steckernetzteil, da andere
Netzteile das Telefon zerstören können.
Aufstellort
Am Aufstellort muss sich eine Netzsteckdose 230Volt befinden.
Stellen Sie die Ladeschale auf eine ebene und rutschfeste Fläche.
Normalerweise hinterlassen die Füsse der Ladeschale keine Spuren auf der
Aufstellfläche. Wegen der Vielzahl der verwendeten Lacke und Oberflächen
kann es jedoch nicht ausgeschlossen werden, dass durch die Gerätefüsse
Spuren auf der Abstellfläche entstehen.
Verwenden Sie den Handapparat nicht in explosionsgefährdeten Bereichen.
Übermässige Belastungen durch Rauch, Staub, Erschütterungen, Chemikalien,
Feuchtigkeit, Hitze oder direkte Sonneneinstrahlung müssen vermieden
werden.
3
Page 4

- Allgemeine Hinweise -
Medizinischer Hinweis
Das Telefon arbeitet mit einer sehr geringen Sendeleistung. Diese geringe
Sendeleistung schliesst eine gesundheitliche Gefährdung nach dem derzeitigen
Stand von Forschung und Technik aus. Es hat sich aber gezeigt, dass
eingeschaltete tragbare Telefone medizinische Geräte beeinflussen können.
Halten Sie deshalb bei medizinischen Geräten einen Abstand von mindestens
einem Meter ein.
Entsorgung
Ist die Gebrauchszeit des Akkus oder der gesamten Anlage abgelaufen,
entsorgen Sie diese bitte umweltfreundlich gemäss den gesetz lichen
Bestimmungen.
Temperatur und Umgebungsbedingungen
Das Telefon ist für den Betrieb in geschützten Räumen mit einem
Temperaturbereich von +5 °C bis 45 °C ausgelegt.
Die Basisstation darf nicht in Feuchträumen wie Bad oder Waschküche
aufgestellt werden. Vermeiden Sie die Nähe zu Wärmequellen wie Heizkörpern
und setzen Sie das Gerät keiner direkten Sonnenbestrahlung aus.
Reinigung und Pflege
Die Gehäuseoberflächen können mit einem trockenen, weichen und
fusselfreien Tuch gereinigt werden. Niemals Reinigungsmittel oder gar
aggressive Lösungsmittel verwenden. Ausser einer gelegentlichen
Gehäusereinigung ist keine weitere Pflege erforderlich. Die Gummifüsse der
Ladestation sind nicht gegen alle Reinigungsmittel beständig. Der Hersteller
kann daher nicht für evtl. Schäden an Möbeln o. ä. haftbar gemacht werden.
4
Page 5

- Bedienelemente -
2 Bedienelemente
6
5
4
1
2
3
1 Taste für interne Gespräche
2 Taste zur Wahlwiederholung und zur Einstellung der Hör-Lautstärke
3 Gesprächstaste
4 Taste zum Abrufen der gespeicherten Rufnummern , Stummschaltung
des Mikrofons, während eines Gesprächs und zur Programmierung
5 R-Signaltaste für T-NET und Nebenstellenanlagen
6 Betriebszustandsanzeige (LED)
5
Page 6
- Inbetriebnahme -
3 Inbetriebnahme
3.1 Sicherheitshinweise
ACHTUNG! Lesen Sie vor der Inbetriebnahme unbedingt die a llgemeinen
Hinweise am Anfang dieser Bedienungsanleitung.
3.2 Verpackungsinhalt prüfen
Zum Lieferumfang gehören:
ein Handapparat mit Akkupack ein Stromanschlusskabel
eine portable Freisprecheinrichtung (Headset) Gürtelclip
drei farbige Abdeckkappen eine Bedienungsanleitung
3.3 Farbige Abdeckkappen
Zum Lieferumfang gehören auch drei farbige Abdeckkappen. Sie können so
das Erscheinungsbild Ihres miniDECT5000 nach Ihren Wünschen verändern.
Sollten Sie mehrere miniDECT5000 an Ihrer Basisstation betreiben, können Sie
durch die verschiedenen Farben die Handapparate besser auseinander halten.
Die Abdeckkappe lässt sich einfach vom Handapparat entfernen, indem Sie an
einer Seite die Kappe etwas aus der Führung herausziehen.
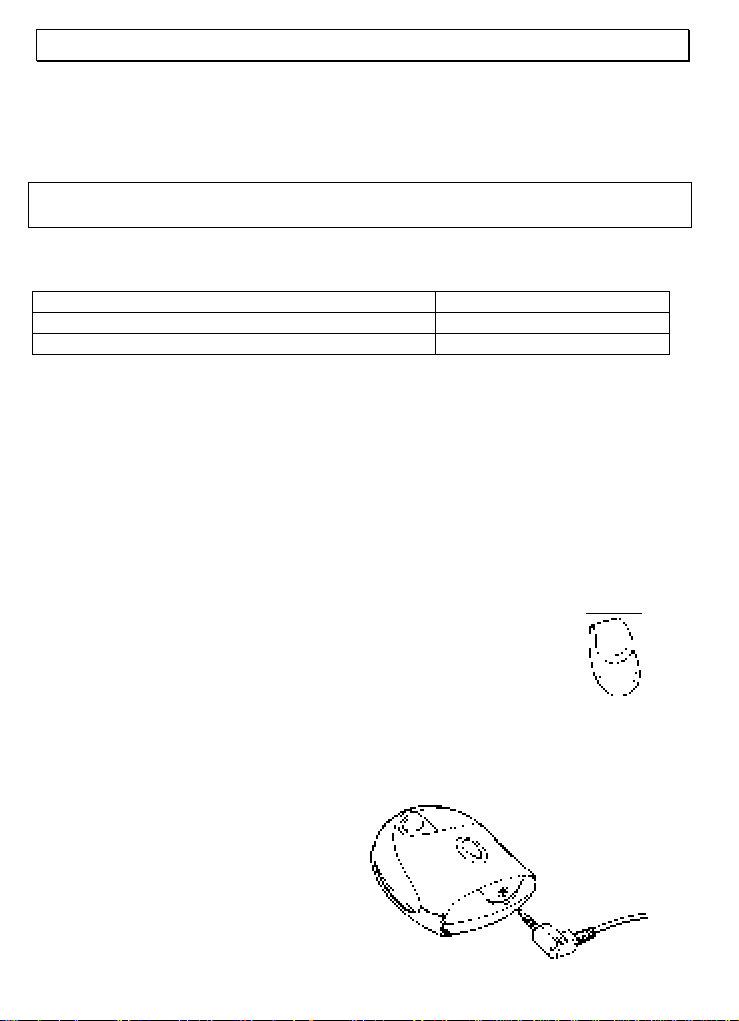
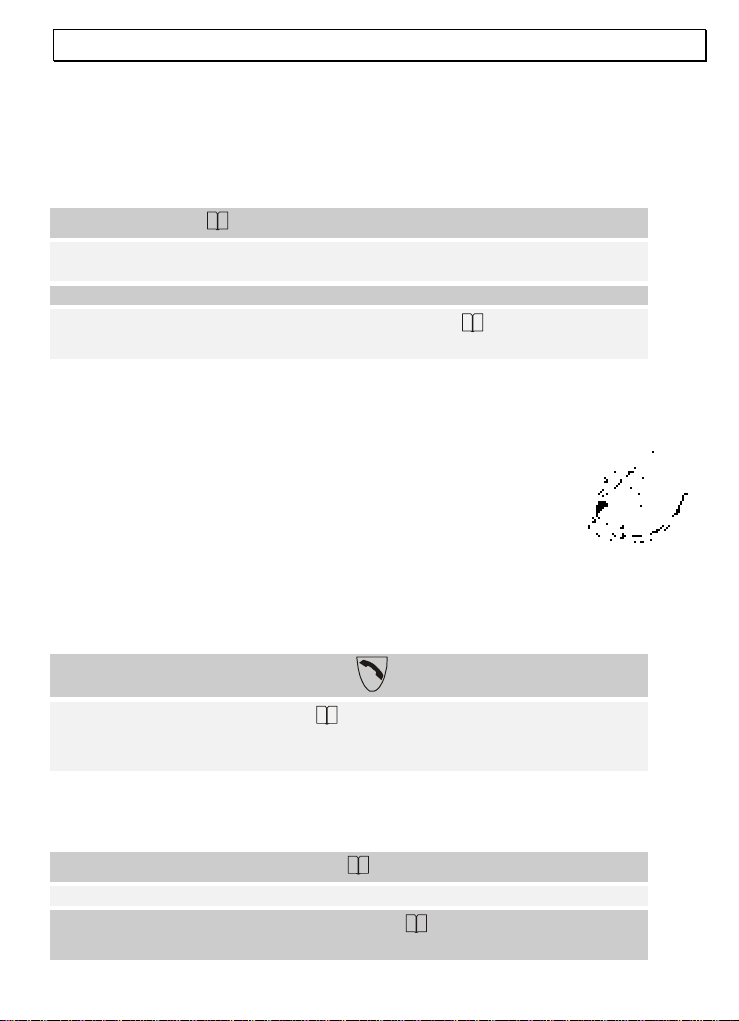
3.4 Gürtelclip anbringen
Mit dem mitgelieferten Gürtelclip können Sie den Handapparat
immer bei sich tragen. Um den Gürtelclip zu befestigen,
stecken Sie den Gürtelclip in waagerechter Position in den
Handapparat und drehen ihn dann in eine senkrechte Position.
Hinweis: Mit aufgestecktem Gürtelclip können Sie den
Handapparat nicht auf die Ladestation setzen.
3.5 Portable Freisprecheinrichtung (Headset)
anschliessen
Verbinden Sie die portable
Freisprecheinrichtung mit dem
Handapparat.
6
Page 7
- Inbetriebnahme -
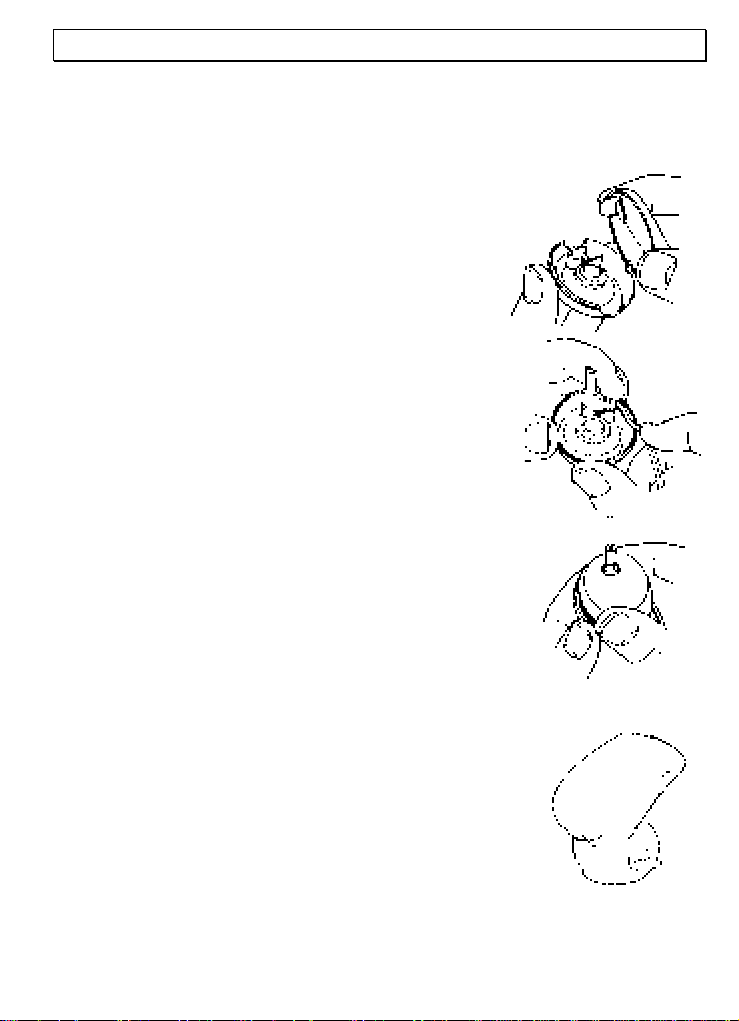
3.6 Zusammenbau der Schale als Ladeschale
Hinweis: Möchten Sie die Ladeschale nicht benutzen, können S ie den kleinen
Stecker des Netzteils auch direkt in den Handapparat stecken.
Zum Öffnen der Schale drücken Sie seitlich auf die
Oberschale und ziehen Sie die beiden Teile
auseinander.
Positionieren Sie nun den kleinen Stecker in die dafür
vorgesehene Halterung an der Unterschale und führen
Sie das Kabel durch die kleine Öffnung.
Schließen Sie die Schale, indem Sie das Oberteil wieder
aufsetzen. Drücken Sie die beiden Teile fest
zusammen, bis sie hörbar einrasten.
Verbinden Sie nun das Steckernetzteil mit einer Steckdose.
3.7 Aufladen des Akkus
Der wiederaufladbare Akku Ihres Telefons besitzt eine
Standby-Zeit bei Zimmertemperatur von max. 150
Stunden und eine maximale Gesprächsdauer von bis zu
12 Stunden.
Ist die Akkukapazität zu gering, hören Sie alle 10
Sekunden einen Warnton und die
Betriebszustandsanzeige am Handapparat blinkt
gleichzeitig.
Zum Laden des Akkus verbinden Sie den Handapparat mit der Ladestation.
7
Page 8
- Inbetriebnahme -
Hinweis: Vor der ersten Inbetriebnahme muss der Akku für mindestens 16
Stunden geladen werden. Der aufladbare Akku unterliegt genau wie Ihre
Autobatterie unvermeidlich einer gewissen Alterung. Allerdings können Sie auf
diesen Alterungsprozess Einfluss nehmen, indem Sie den Akku
gewissermassen "trainieren". Wenn Sie bei regelmässiger Benutzung Ihres
Telefons den Akku zyklisch aufladen und dann wieder "leer" telefonieren, bis
die Ladeanzeige blinkt, wird der Akku gefordert und dankt dies durch volle
Leistungsfähigkeit und eine lange Lebensdauer. Dauerladung und
Dauerentladung schaden dagegen sowohl der Kapazität wie auch der
Lebensdauer des Akkus.
3.8 Handapparat an eine GAP-fähige Basisstation
anmelden
Bevor Sie Ihren neuen Handapparat an Ihrer vorhandenen Telefonanlage
verwenden können, muss der Handapparat an die Basisstation angemeldet
werden.
1. Schauen Sie in der Bedienungsanleitung Ihres vorhandenen Telefons
nach, wie Sie die Basisstation auf das Anmelden von neuen
Handapparaten vorbereiten. Haben Sie die nötigen Eingaben
vorgenommen, fahren Sie mit Punkt 2. fort.
2. Drücken Sie die Taste am Handapparat.
3. Drücken Sie nacheinander die Tasten * und # am Handapparat.
4. Geben Sie nun über das Zahlenfeld die Nummer der Basisstation ein.
Benutzen Sie eine Basisstation, drücken Sie die Zahl 1.
5. Geben Sie nun den PIN-Code der Basisstation ein.
6. Drücken Sie jetzt die Taste und Sie hören nach einigen Sekunden
einen Signalton. Der Handapparat ist nun angemeldet und kann für
externe und interne Gespräche benutzt werden.
7. Dem Handapparat wurde nun automatisch eine interne Rufnummer
vergeben. Der bereits angemeldete Haupthandapparat hat die interne
Nummer 1. Alle weiteren angemeldeten Handapparate werden in der
Reihenfolge Ihrer Anmeldung nummeriert (interne Rufnummer 2 bis 5).
Diese interne Rufnummer können Sie jederzeit kontrollieren. Siehe dazu
Punkt 6.5.
8
Page 9
- Bedienung -
4 Bedienung
4.1 Externe Anrufe entgegennehmen
Erreicht Sie ein Anruf, ertönt der Tonruf am Handapparat.
Die Betriebszustandsanzeige am Handapparat blinkt. Drücken Sie die kle i ne
Gesprächstaste am Headset oder die Gesprächstaste
und die Verbindung wird hergestellt.
Um das Gespräch zu beenden, drücken Sie die kleine Gesprächstaste am
Headset oder die Gesprächstaste
Hinweis: Durch eine Prioritätenvergabe der Basisstation kann ein anderer
angeschlossener Handapparat zuerst läuten, bevor der externe Anruf an das
miniDECT5000 weitergeleitet wird. Beachten Sie dazu die Hinweise der
entsprechenden Bedienungsanleitung.
am Handapparat.
am Handapparat
4.2 Externe Anrufe führen
Drücken Sie die Gesprächstaste und Sie erhalten das Freizeichen.
Geben Sie die gewünschte Telefonnummer über das Tastenfeld ein.
Um das Gespräch zu beenden, drücken Sie die kleine Gesprächstaste am
Headset oder die Gesprächstaste
Hinweis: Durch das Schließen der Abdeckung des Handapparates wird das
Gespräch nicht beendet.
am Handapparat.
4.3 Intern telefonieren
Drücken Sie dazu die Taste
Handapparates.
INT
und dann die Nummer des gewünschten
Das Gespräch wird mit der Gesprächstaste
entgegengenommen.
am gerufenen Handapparat
9
Page 10
- Bedienung -
4.4 Externe Gespräche auf einen anderen Handapparat
verbinden
Haben Sie ein externes Gespräch an einem Handappara t entgegengenommen,
können Sie das externe Gespräch auf einen anderen Handapparat
weiterverbinden.
Drücken Sie dazu die Taste
Handapparates. Nachdem das interne Gespräch an dem anderen Handapparat
entgegengenommen wurde, haben Sie folgenden Möglichkeiten:
A. Rücksprache / Makeln:
Sie können nun mit dem internen Teilnehmer sprechen, und durch das
Drücken der Taste
können so beliebig oft, zwischen dem externen und internen Gespräch
wechseln.
B. Gespräch weiterleiten:
Durch das Drücken der Gesprächstaste
externe Gespräch an den gerufenen Handapparat weitergeleite t.
Sie können das externe Gespräch auch direkt ohne Rücksprache auf einen
Handapparat weiterleiten, indem Sie die interne Nummer über die Taste
INT
wählen und dann die Gesprächstaste drücken.
INT
INT
und dann die Nummer des gewünschten
zum externen Gesprächspartner zurückkehren. Sie
am Handapparat, wird das
4.5 Konferenzgespräche führen
Ein externes Gespräch kann mit einem weiteren internen Teilnehmer zum
Konferenzgespräch geschaltet werden. So können zwei Handapparate
gleichzeitig mit dem externen Teilnehmer sprech en.
Stellen Sie die gewünschte Verbindung zu dem externen Teilnehmer her.
Drücken Sie dann die Taste
zweiten Handapparates.
INT
und die interne Nummer des gewünschten
Hat der zweite, interne Teilnehmer das Gespräch entgegengenommen,
drücken Sie die Taste # und alle drei Teilnehmer sind zu einer Konferenz
zusammengeschaltet.
Hinweis: Konferenzgespräche funktionieren nur dann, wenn die verwendete
Basisstation diese Funktion unterstützt.
10
Page 11
- Bedienung -
4.6 Hinweise zur Reichweite
Die Reichweite des Handapparates beträgt ca. 50 Meter in geschlossenen
Räumen und ca. 300 Meter im Freien.
Haben Sie sich zu weit von der Basisstation entfernt, höre n Sie mehrere
Signaltöne. Gehen Sie in diesem Fall wieder näher an die Basisstation, da
ansonsten das Gespräch unterbrochen wird.
4.7 Mikrofon im Handapparat stummschalten
Mit der Taste (Sec.) können Sie während eines Telefongespräches das
Mikrofon des Handapparates abschalten. So ist es möglich zu sprechen, ohne
dass der Gesprächspartner Sie hört. Der Lautsprecher im Handapparat bleibt
eingeschaltet, und Sie können den Gesprächspartner weiterhin verstehen.
Die Stummtaste funktioniert nur, wenn bereits eine Verbindung über das
Zahlenfeld oder die Kurzwahlspeicher hergestellt wurde.
1. Drücken Sie einmal die Taste (Sec.) während eines Gesprächs. Die
Betriebszustandsanzeige am Handapparat blinkt.
2. Um das Mikrofon wieder einzuschalten, drücken Sie erneut die Taste
(Sec.). Die Betriebszustandsanzeige leuchtet wieder und Sie können das
Gespräch normal fortsetzen.
4.8 Einstellen der Hör-Lautstärke
Ist Ihnen die Hör-Lautstärke zu leise oder zu laut, können Sie die se Ihren
Bedürfnissen anpassen.
Drücken Sie während eines Gesprächs mehrmals die Taste
die gewünschte Lautstärke eingestellt haben. Insgesam t stehen die drei
Lautstärken „leise – mittel – laut“ zur Verfügung.
Das Ändern der Hör-Lautstärke funktioniert nur, wenn bereits eine Verbindung
hergestellt wurde.
(Vol.) bis Sie
11
Page 12

- Bedienung -
4.9 Wahlwiederholung
Die Wahlwiederholung nutzen Sie, wenn der angerufene Teilnehmer besetzt ist
oder sich nicht meldet.
1. Drücken Sie nun die Gesprächstaste .
2. Drücken Sie nun die Taste der Wahlwiederholung und die
Telefonnummer wird automatisch gewählt.
4.10 R-Signaltaste
Die "R" Signaltaste Ihres Telefons können Sie an Nebenstellenanlagen und bei
der Verwendung der T-Net Funktionen der DEUTSCHEN TELEKOM nutzen.
Weitere Informationen erhalten Sie in der Bedienungsan leitung der
Basisstation.
12
Page 13
- Telefonnummern speichern -
5 Telefonnummern speichern
10 Rufnummern können zur schnellen Anwahl als Kurzwahl gespeicher t
werden. Die maximale Länge einer Rufnummer beträgt 24 Stellen.
5.1 Rufnummern zur Kurwahl speichern
1. Kurwahltaste drücken. Die Betriebszustandsanzeige blinkt.
2. Wählen Sie auf dem Zahlenfeld einen Speicherplatz von 1-9 oder 0
aus.
3. Geben Sie die gewünschte Telefonnummer über das Zahlenfeld ein.
4. Zum speichern drücken Sie die Kurwahltaste . Die
Betriebszustandsanzeige blinkt nicht mehr.
Um weitere Rufnummern zu speichern, wiederholen Sie die Punkte 1 bis 4.
Bereits belegte Speicherplätze können durch Überschreiben geändert werden.
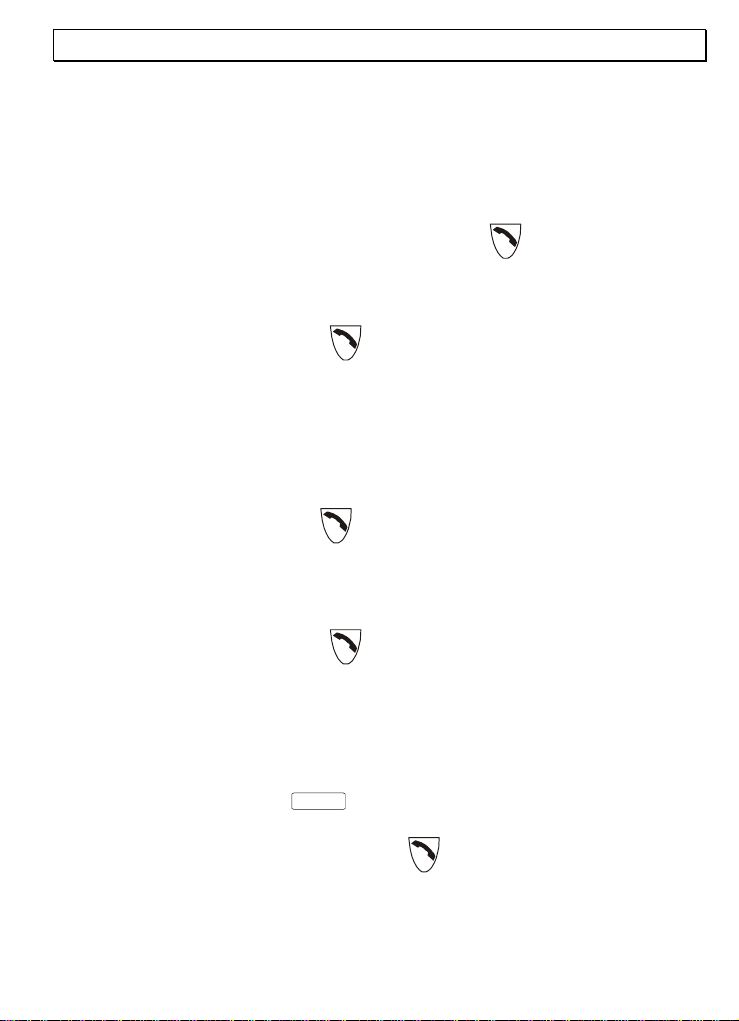
Index beschriften: Unter dem Handapparat befindet sich ein
Index. Hier können Sie die gespeicherten Rufnummern
eintragen. Öffnen Sie das Akkufach und entfernen Sie die
durchsichtige Abdeckung. Nachdem Sie den Index beschriftet
haben, befestigen Sie die durchsichtige Abdeckung und
schließen Sie das Akkufach.
5.2 Gespeicherte Kurzwahlnummern anwählen
Nachdem Sie einige Telefonnummern gespeichert haben, können Sie diese
sehr schnell und einfach abrufen.
1. Drücken Sie die Gesprächstaste .
2. Danach die Kurzwahltaste und den gewünschten Speicherplatz
von 1-9 oder 0 drücken. Sie werden nun automatisch mit der
gespeicherten Rufnummer verbunden.
5.3 Gespeicherte Kurzwahlnummern löschen
Gespeicherte Kurzwahlnummern können einzeln wieder gelöscht werden.
1. Drücken Sie die Kurzwahltaste .
2. Drücken Sie den zu löschenden Speicherplatz von 1-9 oder 0 .
3. Drücken Sie erneut die Kurzwahltaste , um die Rufnummer zu
löschen.
13
Page 14
- Sonderfunktionen -
6 Sonderfunktionen
6.1 Tastenklick ein-/ausschalten
Jeder Tastendruck wird vom Handapparat mit einem Tastenklick bestätigt. Der
Tastenklick kann ein- oder ausgeschaltet werden.
1. Drücken Sie die Taste .
2. Drücken Sie die Sterntaste * und die Zahl 1 auf dem Zahlenfeld.
3. Drücken Sie nun die Taste 0 um den Tastenklick auszuschalten
oder die Taste 1 um den Tastenklick einzuschalten.
4. Beenden Sie die Programmierung mit der Taste .
6.2 Rufsignale am Handapparat einstellen
(Klingelmelodien)
Ihr Handapparat kann sich mit fünf verschiedenen Tonruf-Melodien melden,
wenn Sie ein Anruf erreicht. Interne Gespräche werden m i t einer eigenen
Melodie signalisiert. Diese Melodie kann nicht veränd ert werden.
1. Drücken Sie die Taste .
2. Drücken Sie die Sterntaste * und die Zahl 3 auf dem Zahlenfeld.
3. Wählen Sie nun mit den Tasten 1, 2, 3, 4 oder 5 die gewünschte
Melodie aus. Bei jedem Tastendruck auf die entsprechende Zahl ist
die gewählte Melodie hörbar.
4. Beenden Sie die Programmierung mit der Taste .
Interne Anrufe werden mit der Melodie 4 und der Lautstärke 2 signalisiert.
Diese Einstellung kann nicht verändert werden.
14
Page 15

- Sonderfunktionen -
6.3 Lautstärke des Tonrufs am Handapparat
Die Lautstärke des Tonrufs am Handapparat kann in drei Stufen eingestellt
werden. Möchten Sie einmal nicht gestört werden, können Sie den Tonruf auch
ganz abschalten. Ist der Tonruf ausgeschaltet, werden eingehende Anrufe nur
noch an der Basisstation und über die anderen Handapparate signalisiert.
1. Drücken Sie die Taste .
2. Drücken Sie die Sterntaste * und die Zahl 4 auf dem Zahlenfeld.
3. Wählen Sie nun mit den Tasten 1, 2 oder 3 die gewünschte
Lautstärke aus. Zum Ausschalten des Tonrufes drücken Sie die
Taste 3.
4. Beenden Sie die Programmierung mit der Taste .
6.4 Abmelden von Handapparaten
Ein Handapparat kann nur über einen anderen, noch angemeldeten
Handapparat abgemeldet werden. Es ist also nicht möglich diese Abmeldung
mit dem Handapparat durchzuführen, der abgemeldet werden soll. Möchten
Sie das AUDIOLINE miniDECT5000 abmelden, informieren Sie sich in der
Bedienungsanleitung für den Handapparat den Sie zum Abmelden verwenden
möchten. Möchten Sie einen anderen Handapparat mit dem AUDIOLINE
miniDECT5000 abmelden, gehen Sie wie folgt vor:
1. Drücken Sie die Taste .
2. Drücken Sie die Sterntaste * und die Zahl 9 auf dem Zahlenfeld.
3. Geben Sie nun die interne Rufnummer des abzumeldenden
Handapparates ein.
4. Über das Zahlenfeld den PIN Code der Basisstation eingeben und
mit bestätigen. Als Bestätigung hören Sie einen Signalton.
6.5 Kontrollieren der internen Rufnummer
Haben Sie die interne Rufnummer des Handapparates vergessen, können Sie
diese wie folgt kontrollieren.
1. Drücken Sie die Taste .
2. Drücken Sie die Sterntaste * und die Zahlen 7 und 1 auf dem
Zahlenfeld.
3. Drücken Sie nun wieder die Taste .
4. Die Anzahl der nun hörbaren Signaltöne zeigt Ihnen jetzt die
interne Rufnummer.
15
Page 16

- Sonderfunktionen -
6.6 Arbeiten mit mehreren Basisstationen
Sie können diesen Handapparat an insgesamt vier Basisstation anschliessen.
Somit lässt sich die Reichweite der Handapparate vergrössern. Um diesen
Effekt zu nutzen, müssen alle Basisstationen mit einem Telefonanschluss
belegt sein. Je nach Verwendungszweck können Sie jede Basisstation mit dem
gleichen Telefonanschluss belegen oder geben Sie den Basisstatio nen
unterschiedliche Telefonanschlüsse. Hier erhält der Handapparat immer eine
neue Rufnummer, sobald er sich in der Reichweite einer anderen Basisstation
befindet. Achten Sie darauf, dass sich alle Basisstationen in ihrer Reichweite
überschneiden. Bitte testen Sie vor jeder Inbetriebnahme einer neuen
Basisstation die Reichweite der Handapparate.
Laufende Gespräche können nicht von einer zur anderen Basisstation
übertragen werden.
Handapparat an eine weitere Basisstation anmelden
1. Schauen Sie in der Bedienungsanleitung Ihres vorhandenen Telefons
nach, wie Sie die Basisstation auf das Anmelden von neuen
Handapparaten vorbereiten. Haben Sie die nötigen Eingaben
vorgenommen, fahren Sie mit Punkt 2. fort.
2. Drücken Sie die Taste am Handapparat.
3. Drücken Sie nacheinander die Tasten * und # am Handapparat.
4. Geben Sie nun über das Zahlenfeld die Nummer der Basisstation ein.
Möchten Sie Ihr Telefon an eine zweite Basisstation anmelden, drücken
Sie die Zahl 2.
5. Geben Sie nun den PIN-Code der Basisstation ein.
6. Drücken Sie jetzt die Taste und Sie hören nach einigen Sekunden
einen Signalton. Der Handapparat ist nun an die gewählte Basisstation
angemeldet.
7. Dem Handapparat wurde nun automatisch eine interne Rufnummer
vergeben. Der bereits angemeldete Haupthandapparat hat die interne
Nummer 1. Alle weiteren angemeldeten Handapparate werden in der
Reihenfolge Ihrer Anmeldung nummeriert (interne Rufnummer 2 bis 5).
Diese interne Rufnummer können Sie jederzeit kontrollieren. Siehe dazu
Punkt 6.5.
16
Page 17

- Sonderfunktionen -
Auswahl der Basisstation
Nachdem Sie den Handapparat an mehrere Basisstationen ange meldet haben,
können Sie wählen, mit welcher Basisstation Ihr Handapparat arbeiten soll.
Bitte gehen Sie dazu wie folgt vor:
1. Drücken Sie die Taste .
2. Drücken Sie die Sterntaste * und die Zahlen 8 und 1 auf dem
Zahlenfeld.
3. Drücken Sie nun die Nummer der gewünschten Basisstation
zwischen 1 und 4.
4. Beenden Sie die Programmierung mit der Taste .
Kontrollieren der gerade ausgewählten Basisstation
Haben Sie die Nummer der Basisstation vergessen, an der Sie den
Handapparat angeschlossen haben, können Sie diese wie f o lgt kontrollieren.
1. Drücken Sie die Taste .
2. Drücken Sie die Sterntaste * und die Zahlen 7 und 2 auf dem
Zahlenfeld.
3. Drücken Sie nun wieder die Taste .
4. Die Anzahl der nun hörbaren Signaltöne zeigt Ihnen jetzt die
Nummer der Basisstation an.
17
Page 18

- Fehlerbeseitigung -
7 Fehlerbeseitigung
Haben Sie Probleme mit Ihrem AUDIOLINE miniDECT5000, kontrollieren Sie
bitte die folgenden Hinweise.
Bei auftretenden Fragen, wenden Sie sich bitte an uns ere Hotline unter der
Rufnummer 0180 5 00 13 88.
Bei Garantieansprüchen wenden Sie sich bitte an Ihren Fachhändler. Die
Garantiezeit beträgt 2 Jahre. Für die wiederaufladbaren Akku gilt eine
Garantiezeit von 12 Monaten.
Kein Telefongespräch
möglich
Verbindung abgehackt,
fällt aus
Nach ein paar Stunden
wird zu geringe
Akkukapazität angezeigt.
Der Handapparat wurde nicht richtig an die
Basisstation angemeldet.
Testen Sie mit einem anderen Telefon oder
einem anderen Handapparat, ob Ihr
Telefonanschluss in Ordnung ist.
Die aufladbaren Batterien sind leer oder defekt.
Sie haben sich zu weit von der Basisstation
entfernt.
Sie haben sich zu weit von der Basisstation
entfernt.
Verbinden Sie den Handapparat für 16 Stunden
mit der Ladestation.
Hilft dies nicht, erneuern Sie die das Akkupack.
18
Page 19

- Wichtige Informationen -
8 Wichtige Informationen
8.1 Akku austauschen
Müssen Sie den Akku einmal austauschen, verwenden Sie beim Austauschen
immer nur einen Original Akkupack Ni-MH 2.4V, 280mAh. Einen Ersatzakku
erhalten Sie über den AUDIOLINE Ersatzteilverkauf unter Tel. 040 / 3258440.
Um einen neuen Akku in einen Handapparat
einzubauen, öffnen Sie das Akkufach.
Ziehen Sie dann den Akku aus dem
Handapparat, indem Sie an der Lasche
ziehen und so den Akku mit herausziehen.
Schieben Sie nun den neuen Akku in den
Handapparat. Achten Sie dabei auf die
richtige Polung. Das +-Zeichen muss zum
rechten Rand des Handapparates zeigen.
Schieben Sie nun das Ende der Lasche über den Akku in den Handapparat und
schliessen Sie den Akkudeckel.
Wichtiger Hinweis: Verbinden Sie nun den Handapparat für mindestens 16
Stunden mit der Ladestation. Während der Akku geladen wird, blinkt die
Betriebszustandsanzeige am Handapparat alle 5 Sekunden. Bei nicht richtig
geladenem Akku kann es zu Fehlfunktionen des Telefons kommen.
19
Page 20

- Wichtige Informationen -
8.2 Technische Daten
Standard DECT-Standard, GAP-fähig
Frequenzen 1880MHZ bis 1900MHZ
Kanäle 120 Duplexkanäle
Stromversorgung 9Volt/DC, 300 mA
Reichweite Innen bis zu 50m
Reichweite Aussen bis zu 300m
Standby bis zu 150 Stunden
Max. Gesprächsdauer bis zu 12 Stunden
Aufladbarer Akku Akkupack Ni-MH 2.4V, 280mAh
Zulässige
Umgebungstemperatur
8.3 Garantie
AUDIOLINE - Geräte werden nach den modernsten Produktionsverfahren
hergestellt und geprüft. Ausgesuchte Materialien und hoch entwickelte
Technologien sorgen für einwandfreie Funktion und lange Lebensdauer. Sollte
Ihr Gerät dennoch einen Defekt innerhalb der Garantiezeit aufweisen, wenden
Sie sich bitte unter Vorlage Ihrer Kaufquittung ausschliesslich an das Geschäft,
in dem Sie Ihr AUDIOLINE - Gerät gekauft haben. Die Garantiezeit beträgt 24
Monate, gerechnet vom Tage des Kaufs zu nachfolgenden Bedingungen:
Innerhalb der Garantiezeit werden alle Mängel, die auf Material- oder
Herstellungsfehler zurückzuführen sind, ko stenlos beseitigt. Der
Garantieanspruch erlischt bei Eingriffen durch den Käufer oder durch Dritte.
Schäden, die durch unsachgemässe Behandlung oder Bedienung, durch
falsches Aufstellen oder Aufbewahren, durch unsachgemässen Anschluss oder
Installation sowie durch höhere Gewalt oder sonstige äussere Einflüsse
entstehen, fallen nicht unter die Garantieleistung. Wir behalten uns vor, bei
Reklamationen die defekten Teile auszubessern oder zu er setzen oder das
Gerät auszutauschen. Ausgetauschte Teile oder ausg etauschte Geräte gehen in
unser Eigentum über. Schadenersatzansprüch e sind ausgeschlossen, soweit
sie nicht auf Vorsatz oder grober Fahrlässigkeit des H erstellers beruhen. Alle
Gewährleistungsansprüche nach diesen Bestimmungen sind ausschliesslich
gegenüber Ihrem Fachhändler geltend zu machen. Nach Ablauf von 24
Monaten nach Kauf und Übergabe unserer Produkte können
Gewährleistungsrechte nicht mehr geltend gemacht werden.
+5°C bis 45°C
20
Page 21

- Wichtige Informationen -
8.4 Konformitätserklärung
WIR AUDIOLINE GmbH
IN PROMENADENSTR. 1
ALS INVERKEHRBRINGER IN DER EU ERKLÄREN VOLLVERANTWORTLICH,
DASS DAS PRODUKT
MODEL: miniDECT 5000
BESCHREIBUNG: DECT Handapparat
KONFORM IST MIT DEN GRUNDLIEGENDEN ANFORDERUNGEN DER
RICHTLINIE: 1999/5/EC
BEVOLLMÄCHTIGTER:
Unterschrift: ________________________________
Name: MANFRED ZINNOW
Position in der Firma: GESCHÄFTSFÜHRER
Datum der Ausstellung: 19.09.2001
Eine Kopie dieser Erklärung wird bis 10 Jahre nach der letzten Produktion
aufbewahrt.
D-41460 NEUSS
GERMANY
D-41460 NEUSS
LIEFERANT: AUDIOLINE GmbH, PRO MENADENSTR. 1,
PRODUKT: miniDECT 5000
21
Page 22

- Wichtige Informationen -
22
Page 23

- Contents -
1 General information ........................................................24
2 Operating elements......................................................... 26
3 Commissioning............................................................... 27
3.1 Safety information ............................................................... 27
3.2 Check contents of pack......................................................... 27
3.3 Coloured covers................................................................... 27
3.4 Attaching the belt clip .......................................................... 27
3.5 Connecting the portable handsfree unit (headset).................... 27
3.6 Assembling the charging pod................................................. 28
3.7 Charging the battery............................................................ 28
3.8 Logging on the handset to a GAP-enabled base station............. 29
4 Operation ...................................................................... 30
4.1 Receiving external calls ........................................................ 30
4.2 Making external calls............................................................ 30
4.3 Making internal calls ............................................................ 30
4.4 Connecting external calls to another handset .......................... 31
4.5 Making conference calls........................................................ 31
4.6 Range information ............................................................... 32
4.7 Muting the microphone in the handset.................................... 32
4.8 Adjusting the listening volume............................................... 32
4.9 Redial................................................................................. 33
4.10 R signal button.................................................................... 33
5 Storing telephone numbers ..............................................34
5.1 Saving numbers as speed dial numbers .................................. 34
5.2 Dialling stored speed dial numbers......................................... 34
5.3 Deleting stored speed dial numbers ....................................... 34
6 Special functions ............................................................ 35
6.1 Button click on/off ............................................................... 35
6.2 Setting the call signal on the handset (ring tones) ................... 35
6.3 Handset ring tone volume..................................................... 36
6.4 Logging off handsets............................................................ 36
6.5 Checking internal call numbers.............................................. 36
6.6 Working with more than one base station ............................... 37
7 Rectifying faults.............................................................. 39
8 Important information..................................................... 40
8.1 Changing the battery ........................................................... 40
8.2 Technical data..................................................................... 41
8.3 Warranty ............................................................................ 41
8.4 Declaration of Conformity .....................................................42
23
Page 24

- General Information -
1 General information
The miniDECT5000 has been designed as an extension for cordless DECT-GAP
telephone systems. The normalised GAP standard also enables the handset to
be connected to base stations from other manufacturers.
Rechargeable batteries
Do not use any other rechargeable batteries. These could possibly cause a
short circuit.
When changing the battery, always use a genuine AUDIOLINE Ni-MH 2.4V,
280mAh battery pack. You can obtain a replacement battery from the
AUDIOLINE Spare Parts Sales on Tel. 040 / 3258440.
Do not throw batteries in the fire or immerse them in water. Do not dispose of
old or defective batteries with normal domestic waste.
If the handset becomes warm when charging, this is quite normal and no
cause for alarm.
Only charge the handset on the base station. The use of other chargers may
cause lasting damage.
Use only the AUDIOLINE transformer plug supplied, other transformer plugs
can destroy your telephone.
Location of the base station
The base station must be located within reach of a 230Volt supply socket. To
avoid interference problems, do not place the base statio n in the immediate
proximity of other electronic equipment such as a microwave oven or hi-fi
system. The location of the base station can significantly influence the proper
function of the telephone.
Place the base station on a level, non-slip surface. The feet of the base station
will not normally mark the surface on which it stands. However, the wide
range of surface finishes in use renders it impossible to exclude marking of any
surface.
Do not use the handset in areas where there is a danger of explosion.
Avoid excessive exposure to smoke, dust, vibration, chemicals, humidity, high
temperature or direct sunlight.
24
Page 25

- General Information -
Medical notice
The telephone works with very low transmitted power. Present knowledge and
research indicate that, at this low power level, there is no possible danger to
health. It has, however, been shown that portable telephones, when switched
on, can affect medical equipment. Maintain a distance of at least one metre
from medical equipment.
Disposal
If the batteries or the complete system have reached the end of their useful
life, please dispose of them in an environmentally friendly manner and as
required by law.
Temperature and ambient conditions
The telephone is designed for indoor use and an operating temperature range
of -10 °C to 50 °C.
The base station must not be installed in humid areas such as bath or wash
rooms. Avoid proximity to sources of heat such as radiators and do not expose
the unit to direct sunlight.
Cleaning and care
The outer surfaces of the unit can be cleaned with a soft, dry, lint-free cloth.
Never use cleaning agents or aggressive solvents. Apart from occasionally
cleaning the outer surfaces, no further care is required. The rubber feet of the
base station are not resistant to all cleaning agents. The manufacturer cannot,
therefore, be held responsible for damage to furniture etc.
25
Page 26

- Operating Elements -
2 Operating elements
6
5
4
1
2
3
1 Button for internal calls
2 Button for redial and for adjusting the listening volume
3 Call button
4 Button for calling up stored telephone numbers, muting the
microphone during a call and for programming
5 R signal button for T-NET and private exchanges
6 Operating status indicator (LED)
26
Page 27

- Commissioning -
3 Commissioning
3.1 Safety information
NOTE! Before commissioning, it is essential that you read t he safety
information at the beginning of this manual.
3.2 Check contents of pack
The following items are supplied:
one handset with rechargeable battery pack one power cable
one portable handsfree unit (headset) belt clip
three coloured cover flaps one Operating Manual
3.3 Coloured covers
Three coloured covers are also included with the unit. You can thu s change the
appearance of your miniDECT5000 at will.
If you are using several miniDECT5000 handsets on your base station, you can
use the different colours to more easily tell the handsets apart.
The cover can easily be removed from the handset by pulling it slightly out of
the guide on one side.
3.4 Attaching the belt clip
With the belt clip supplied, you can keep the handset with you
at all times. To fit the belt clip, insert it into the handset in a
horizontal position and then turn it to a vertical position.
Note: The handset cannot be placed on the charging station
when the belt clip is attached.
3.5 Connecting the portable handsfree unit (headset)
Connect the portable handsfree unit
to the handset.
27
Page 28

- Commissioning -
3.6 Assembling the charging pod
Note: If you do not want to use the charging pod, you can also connect the
small plug of the power supply directly to the handset.
To open the pod, press on the sides of the upper
section and pull the two halves apart.
Now place the small plug in the retainer provided for the
purpose in the lower section of the pod and feed the
cable through the small opening.
Close the pod by replacing the upper section. Press the
two halves firmly together until they audibly engage.
Now connect the plug-in power supply to a mains socket.
3.7 Charging the battery
Your telephone's rechargeable battery has a standby time
of a maximum of 150 hours at room temperature and a
maximum talk time of up to 12 hours.
If the battery capacity is too low, you will hear a warning
tone every 10 seconds and at the same time the battery
condition indicator in the display will flash.
To charge the battery, connect the handset to the charging
station.
28
Page 29

- Commissioning -
Note: The handset must be charged for at least 16 hours before being used
for the first time. Exactly like your car battery, the rechargeable batteries are
unavoidably subject to a certain ageing. However, you can have an influence
on this ageing process by “training” the batteries to a certain extent. In
regular use of the phone, if you cyclically charge and fully discharge the
batteries by using the telephone until the charging indicator flashes, a demand
is placed on the batteries and they will repay you by giving maximum
performance and a long life. Extended charging and extended discharging on
the other hand will both degrade the capacity and shorten the life of the
batteries.
3.8 Logging on the handset to a GAP-enabled base
station
Before you can use your new handset on your existing telephone system, the
handset must first be logged on to the base station.
1. Look in the operating instruction manual for your existing telephone to
see how you set up the base station for logging on new handse ts. When
you have carried out the necessary steps, continue from point 2.
2. Press the button on the handset.
3. Press the * and # buttons on the handset, one after the other.
4. Now enter the base station number using the number pad. If you are
using one base station, enter the number 1.
5. Now enter the PIN code for the base station.
6. Now press the button and after a few seconds you will hear a signa l
tone. The handset is now logged on and can be used for external and
internal calls.
7. The handset will now automatically be assigned an internal call number.
The main handset already logged on has the internal number 1. All
further handsets are numbered in the order that th ey are logged on
(internal call numbers 2 to 5). You can check these internal call numbers
at any time. For more information, see Item 6.5.
29
Page 30

- Operation -
4 Operation
4.1 Receiving external calls
When a call comes through, the ringing tone will sound on the handset.
The operating status indicator on the handset will flash. Press the small call
button on the headset or the call button
connection will be made.
To end the call, press the small call button on the headset or the call button
on the handset.
Note: By assigning a priority at the base station, a different handset
connected to the base station can be made to ring first before an external call
is transferred to the miniDECT5000. For more information refer to the
appropriate instruction manual.
on the handset and the
4.2 Making external calls
Press the call button and you will obtain a dialling tone.
Enter the required telephone number using the number pad.
To end the call, press the small call button on the headset or the call button
on the handset.
Note: The call will not be ended by closing the handset cover.
4.3 Making internal calls
To do this, press the
handset.
INT
button and then the number of the required
The call is accepted by pressing
30
button on the handset called.
Page 31

- Operation -
4.4 Connecting external calls to another handset
If you have accepted an external call on one handset, you can transfer the
external call to another handset.
To do this, press the
handset. After the internal call has been accepted at the other hand set you
have the following alternatives:
A. Consultation / Brokering:
You can now talk to the internal party and revert to the external caller by
pressing the
calls as often as you wish.
B. Transferring the call:
The external call is transferred to the receiving handset by pressing the call
button
You can also transfer the external call directly to a handset without
consultation by dialling the internal number using the
pressing the call button
INT
on the first handset.
INT
button and then the number of the required
button. You can swap between the external and internal
INT
button and then
.
4.5 Making conference calls
An external call can be connected to another internal party to make a
conference call. In this way, two internal handsets can speak to the external
party at the same time.
Set up the required call to the external party. Then press
the internal number of the required handset.
When the second internal party has accepted the call, press the # button and
all three parties will be connected together on a conference call.
INT
button and
Note: Conference calls will only work if the base station used supports this
function.
31
Page 32

- Operation -
4.6 Range information
The range of the handset is about 50 metres in enclosed areas and about 300
metres in the open air.
If you are too far away from the base station, you will hear several signal
tones. In this case, go back closer to the base station, as otherwise the call
will be interrupted.
4.7 Muting the microphone in the handset
You can switch off the microphone in the handset during a call using th e
(Sec.) button. It is thus possible to speak without the other party hearing you.
The loudspeaker in the handset remains switched on and you can continue to
hear the other party.
The secrecy button is only operative when a connection has first been made
using the number pad or the speed dial memory.
1. Press the (Sec.) button while a call is being made. The operating
status indicator on the handset will flash.
2. To switch the microphone on again, press the (Sec.) button once
more. The operating status indicator comes on again and you can
continue the call as normal.
4.8 Adjusting the listening volume
If the receiver volume is too quiet or too loud for you, you can change this to
suit your requirements.
While a call is being made, repeatedly press the
required volume has been set. There are a total of three volume settings
available - "soft - medium - loud".
The facility for changing the listening volume is only operative when a
connection has first been made.
(Vol.) button until the
32
Page 33

- Operation -
4.9 Redial
Use the redial facility when the party called is engaged or does not reply.
1. First press the call button .
2. Now press the redial button and the telephone number will
be dialled automatically.
4.10 R signal button
You can use the “R” signal button on your telephone on private exchanges and
when using DEUTSCHE TELEKOM’s T-Net functions.
You will find more information in the operating instruction manual for the base
station.
33
Page 34

- Storing telephone numbers -
5 Storing telephone numbers
10 numbers can be stored as speed dial numbers for rapid dialling. The
maximum length of a number is 24 digits.
5.1 Saving numbers as speed dial numbers
1. Press the speed dial button . The operating status indicator will
flash.
2. Select a store location from 1-9 or 0 using the number pad.
3. Enter the required telephone number using the number pad.
4. Press the speed dial button to save the number. The operating
status indicator will cease to flash.
Repeat steps 1 to 4 to store further telephone numbers. Memory locations
already occupied can be changed by overwriting them.
Filling in the index: Underneath the handset you will find an
index where you can write in the stored telephone numbers.
Open the battery compartment and remove the transparent
cover. After you have filled in the index, secure the
transparent cover and close the battery compartment.
5.2 Dialling stored speed dial numbers
After you have stored a few telephone numbers, you can call these up v ery
quickly and easily.
1. Press the call button .
2. Next press the speed dial button and the required store
location from 1-9 or 0. You will now be automatically connected to
the stored number.
5.3 Deleting stored speed dial numbers
Stored speed dial numbers can be deleted one at a time.
1. Press the speed dial button .
2. Press the memory location to be deleted from 1-9 or 0.
3. Press the speed dial button again to delete the number.
34
Page 35

- Special functions -
6 Special functions
6.1 Button click on/off
Each press of a button is acknowledged by the handset with a button click. The
button click can be switched on or off.
1. Press the button.
2. Press the star button * and the number 1 on the number pad.
3. Now press the 0 button to switch the button click off or the 1
button to switch the button click on.
4. Exit programming with the button.
6.2 Setting the call signal on the handset (ring tones)
Your handset can respond with five different ringing tones when a call comes
through. Internal calls are signalled by their own tone. This tone cannot be
changed.
1. Press the button.
2. Press the star button * and the number 3 on the number pad.
3. Now select the ring tone required using the buttons 1, 2, 3, 4
or 5. The corresponding tone se lected will be heard each time a
button is pressed.
4. Exit programming with the button.
Internal calls are signalled by tone 4 and volume setting 2. This setting cannot
be changed.
35
Page 36

- Special functions -
6.3 Handset ring tone volume
The volume of the ring tone on the handset can be adjusted in three steps. If
you should not want to be disturbed, you can also switch off the ring tone
altogether. If the ring tone is switched off, incoming calls are signalled only at
the base station and the other handsets.
1. Press the button.
2. Press the star button * and the number 4 on the number pad.
3. Now select the required volume using the buttons 1, 2 or 3. To
switch the ring tone off, press 4.
4. Exit programming with the button.
6.4 Logging off handsets
A handset can only be logged off using another handset, which is still logged
on. It is therefore not possible to log off using the handset that is to be logged
off. If you want to log off the AUDIOLINE miniDECT5000, you must find out
how to do this from the instruction manual for the handset you are using for
logging off. If you want to use the AUDIOLINE miniDECT5000 to log off
another handset, proceed as follows:
1. Press the button.
2. Press the star button * and the number 9 on the number pad.
3. Now enter the internal call number for the handset to be logged
off.
4. Enter the PIN code for the base station using the number pad and
confirm with . You will hear a signa l tone in confirmation.
6.5 Checking internal call numbers
If you have forgotten the internal call number of the handset, you can check
this as follows:
1. Press the button.
2. Press the star button * and the numbers 7 and 1 on the number
pad.
3. Now press the button once more.
4. The number of signal tones that you will now hear tells you the
internal call number.
36
Page 37

- Special functions -
6.6 Working with more than one base station
A number of base stations can be used to extend the coverage available to the
handsets. To make use of this effect, all the base stations must have a
telephone connection. Depending o n your objectives, you can provide each
base station with its own telephone line or connect them all to the same line.
A new number will be allocated to the handset each time that it moves within
range of another base station.
You should ensure that the coverages of the base stations overlap. Before
adding a new base station to your system, check the range of the handsets.
If a handset is registered with the base station and automatic base station
selection is switched on (further information in this chapter), the handset will
be automatically handed on to the next base station. Calls in progress cannot
be passed from one base station to another.
Logging the handset on to an additional base station
1. Look in the operating instruction manual for your existing telephone to
see how you set up the base station for logging on new handse ts. When
you have carried out the necessary steps, continue from point 2.
2. Press the button on the handset.
3. Press the buttons * and # on the handset, one after the other.
4. Now enter the base station number using the number pad. If you want to
log your telephone on to a second base station, press the number 2.
5. Now enter the PIN code for the base station.
6. Now press the button and after a few seconds you will hear a signal
tone. The handset is now logged on to the selected base station.
7. The handset will now automatically be assigned an internal call number.
The main handset already logged on has the internal number 1. All
further handsets are numbered in the order that th ey are logged on
(internal call numbers 2 to 5). You can check these internal call numbers
at any time. For more information, see Item 6.5.
37
Page 38

- Special functions -
Selecting the base station
After you have logged your handset on to more than one base station, you can
choose which base station your handset is to be used with. Please proce ed as
follows:
1. Press the button.
2. Press the star button * and the numbers 8 and 1 on the number
pad.
3. Now press the number of the required base station between 1 and
4.
4. Exit programming with the button.
Checking the base station last selected
If you have forgotten the number of the base station to which you have
connected your handset, you can check this as follows:
1. Press the button.
2. Press the star button * and the numbers 7 and 2 on the number
pad.
3. Now press the button once more.
4. The number of signal tones that you will now hear tells you the
number of the base station.
38
Page 39

- Rectifying faults -
7 Rectifying faults
If you have problems with your AUDIOLINE miniDECT5000, please check the
points below.
If you have any questions, please call our Hotline on 0180 5 00 13 88.
If there should be any claims under the warranty, please contact your dealer.
The warranty period is two years. The warranty period for the rechargeable
battery is 12 months.
No calls possible The handset has not been properly logged on to
Call cut off or breaks up You are too far away from the base station.
Insufficient battery
capacity shown after a
few hours.
the base station.
Check whether your telephone connection is in
working order by using another telephone or
another handset.
The rechargeable batteries are flat or defective.
You are too far away from the base station.
Connect the handset to the charging station for
16 hours.
If this does not help, replace the battery pack.
39
Page 40

- Important information -
8 Important information
8.1 Changing the battery
If you ever have to change the battery, always use a genuine AUDIOLINE NiMH 2.4V, 280mAh battery pack. You can obtain a replacement battery from
the AUDIOLINE Spare Parts Sales on Tel. 040 / 3258440.
To fit a new battery into a handset, open the
battery compartment. Then remove the
battery from the handset by pulling on the
strap and thus pulling out the battery with it.
Now slide the new battery into the handset, at
the same time ensuring the polarity is correct.
The + sign must be pointing towards the
right-hand edge of the handset.
Now slip the end of the strap over the battery into the handset and close the
battery cover.
Important note: Now connect the handset to the charging station for at least
16 hours. While the battery is being charged, the operating status indicator on
the handset will flash every 5 seconds. If the battery is not correctly charged,
this can lead to the telephone malfunctioni ng.
40
Page 41

- Important information -
8.2 Technical data
Standard DECT Standard, GAP enabled
Frequencies 1880MHZ to 1900MHZ
Channels 120 duplex channels
Power supply 9Volt/DC, 300 mA
Range Indoors up to 50m
Range Outdoors up to 300m
Standby up to 150 hours
Max. talk time up to 12 hours
Rechargeable battery Battery pack Ni-MH 2.4V, 280mAh
Permissible ambient
temperature
8.3 Warranty
AUDIOLINE equipment is manufactured and tested in acco rdance with the
most up to date production methods. Selected materials and highly developed
technology ensure trouble-free operation and long life. If your unit should
develop a fault within the guarantee period, however, please contact the shop
where you bought your AUDIOLINE equipment exclusively and have your
purchase receipt available for inspection. The guarantee period is 24 months
from the day of purchase under the following conditions: within the guarantee
period, all defects due to material or manufacturing faults will be repaired free
of charge. The guarantee is invalidated if the equipment has been tampered
with by the purchaser or third parties. Any damage caused by improper
handling or operation, by incorrect positioning or storage, by improper
connection or installation or by excessive force or other external influences is
not covered by the guarantee. In the case of complaint, we reserve the right
to repair or replace defective parts or to exchange the equipment. Exchanged
parts or exchanged equipment become our property. Claims for compensation
are excluded insofar as they do not relate to criminal intent or gross
negligence on the part of the manufacturer. All guarantee claims according to
these conditions must be raised exclusively with your dealer. Rights under the
guarantee can no longer be enforced after the expiry of 24 months from
purchase and delivery of our products. In the case of unnecessary or
unjustified demands on the customer service department, we will levy our
usual service charges for materials, time, postage and packing. Any complaints
must be reported as soon as a problem is found. The guarantee is valid within
the German Federal Republic.
+5°C to 45°C
41
Page 42

- Important information -
8.4 Declaration of Conformity
WE AUDIOLINE GmbH
OF PROMENADENSTR. 1
DECLARE UNDER OUR SOLE RESPONSIBILITY AS EU DISTRIBUTOR THAT THE
PRODUCT
MODEL: miniDECT 5000
DESCRIPTION: CORDLESS DECT TELEPHONE
IS IN CONFORMITY WITH THE BASIC REQUIREMENTS OF DIRECTIVE:
1999/5/EC
AUTHORISED SIGNATORY:
Signature: ___________________
Name: MANFRED ZINNOW
Position in the company: MANAGING DIRECTOR
Date of issue: 19.09.2001
A copy of this declaration will be retained for 10 years after cessation of
production.
D-41460 NEUSS
GERMANY
SUPPLIER: AUDIOLINE GmbH, PROMENADENSTR. 1,
D-41460 NEUSS
PRODUCT: miniDECT5000
This product has been developed for use with an analogue telephone line
(PSTN) within Germany. However, no guarantee can be accepted for troublefree operation on all telecommunications terminal equipm ent connec tio n s due
to the differences between the different telecom munications network
operators.
42
Page 43

Page 44

AUDIOLINE GmbH
Promenadenstrasse 1
41460 Neuss
Service Hotline 0180 5 00 13 88
Internet: www.audioline.de
E-mail: info@audioline.de
 Loading...