

Page 1
Schnurloses digitales DECT-Telefon
Cordless digital DECT telephone
Bedienungsanleitung
Operating Instructions
DECT6500
Page 2

DECT6500
Bedienungsanleitung__________________________ 1
Operating instructions________________________ 39
2
Page 3

- Inhaltsverzeichnis -
Allgemeine Hinweise................................................................................................ 5
1
2 Bedienelemente........................................................................................................ 7
3 Inbetriebnahme......................................................................................................... 8
3.1 Sicherheitshinweise ................................................................................................. 8
3.2 Verpackungsinhalt prüfen ........................................................................................ 8
3.3 Basisstation anschließen ......................................................................................... 8
3.4 Batterien einsetzen/austauschen ............................................................................. 8
3.5 Batteriekapazität ...................................................................................................... 8
3.6 Uhrzeit einstellen...................................................................................................... 8
4 Bedienung................................................................................................................. 9
4.1 Das Display .............................................................................................................. 9
4.2 Die Bedienung über die Steuertasten ...................................................................... 9
4.3 Anrufe entgegennehmen........................................................................................ 10
4.4 Anrufe führen ......................................................................................................... 10
4.5 Freisprechen .......................................................................................................... 10
4.6 Anzeigen der Gesprächsdauer .............................................................................. 10
4.7 Anruferlisten + Rufnummernanzeige (CLIP).......................................................... 11
4.7.1 Anruferlisten einsehen ...............................................................................................12
4.7.2 Anruferlisten löschen .................................................................................................13
4.8 Mobilteil ein-/ausschalten....................................................................................... 13
4.9 Mikrofon im Mobilteil stummschalten ..................................................................... 13
4.10 Einstellen der Hörer- und Freisprechlautstärke .....................................................13
4.11 Tastatursperre........................................................................................................ 13
4.12 Hinweise zur Reichweite........................................................................................ 13
4.13 Paging von der Basisstation zum Mobilteil ............................................................14
4.14 Headsetanschluss.................................................................................................. 14
4.15 R-Signaltaste/T-Net................................................................................................ 14
4.15.1 “R” Taste an Nebenstellenanlagen ............................................................................14
4.15.2 “R” Taste und das T-Net der DEUTSCHEN TELEKOM............................................14
4.15.3 Pause benutzen.........................................................................................................14
5 Das Telefonbuch..................................................................................................... 15
5.1 Rufnummern mit Namen in das Telefonbuch eingeben......................................... 15
5.2 Gespeicherte Rufnummern aus dem Telefonbuch anwählen................................ 16
5.3 Weitere Funktionen in Telefonbüchern .................................................................. 17
5.4 Direktwahltasten..................................................................................................... 17
5.4.1 Direktwahltasten belegen/ändern/löschen .................................................................17
5.4.2 Direktwahltasten benutzen.........................................................................................18
5.5 Sondertelefonbuch einrichten ................................................................................18
5.5.1 Gespeicherte Rufnummern aus dem Sondertelefonbuch anwählen...........................18
6 Extras....................................................................................................................... 19
6.1 Alarm/Weckfunktion ............................................................................................... 19
6.2 Interne Raumüberwachung (Babyfon) ................................................................... 20
6.3 Walky-Talky............................................................................................................ 20
6.4 Timer ......................................................................................................................21
6.5 Integrierte Stoppuhr ............................................................................................... 21
6.6 Babyruf ................................................................................................................... 22
7 Displayeinstellungen.............................................................................................. 23
7.1 Uhrzeit eingeben ....................................................................................................23
7.2 Displaynamen ändern ............................................................................................ 23
7.3 Displaysprache einstellen ...................................................................................... 24
7.4 Displayhintergrund ändern .....................................................................................24
7.5 Displaymenüfarbe ändern ......................................................................................24
3
Page 4

- Inhaltsverzeichnis -
Ruftöne und Signaltöne einstellen........................................................................ 25
8
8.1 Ruftöne für das Mobilteil einstellen (Klingelmelodien)............................................25
8.2 Ruftöne für die Basisstation einstellen (Klingelmelodien) ......................................26
8.3 Tastenton ein-/ausschalten ....................................................................................26
8.4 Hinweistöne ein-/ausschalten.................................................................................26
9 Sonderfunktionen ................................................................................................... 27
9.1 Anrufe automatisch entgegennehmen ................................................................... 27
9.2 Ton (DTMF)- oder Impuls (IWV) - Wahlverfahren.................................................. 27
9.3 Flashzeit für Nebenstellenanlagen und T-NET ...................................................... 28
9.4 Pause beim Betrieb an Nebenstellenanlagen ........................................................28
9.5 Automatische Vorwahl............................................................................................28
9.6 Amtskennzahl beim Betrieb an Nebenstellenanlagen............................................ 29
9.7 Wahlsperre .............................................................................................................30
10 System ..................................................................................................................... 31
10.1 Anmelden von Mobilteilen...................................................................................... 31
10.2 Automatische Basiswahl ........................................................................................ 31
10.3 Abmelden von Mobilteilen...................................................................................... 31
10.4 System PIN-Code ändern ......................................................................................32
10.5 Werkseinstellungen wieder herstellen.................................................................... 32
11 Mehrere Mobilteile ..................................................................................................33
11.1 Intern telefonieren ..................................................................................................33
11.2 Externe Gespräche auf ein anderes Mobilteil verbinden........................................34
11.3 Konferenzgespräche führen ................................................................................... 34
11.4 An- und abmelden von Mobilteilen......................................................................... 35
11.4.1 Anmelden von DECT6500 Mobilteilen....................................................................... 35
11.4.2 Anmelden von anderen DECT-GAP Telefonen an die Basisstation........................... 35
11.4.3 Abmelden von Mobilteilen ......................................................................................... 35
12 Fehlerbeseitigung................................................................................................... 36
13 Wichtige Informationen.......................................................................................... 37
13.1 Technische Daten ..................................................................................................37
13.2 Telefonkabel austauschen .....................................................................................37
13.3 Garantie..................................................................................................................37
13.4 Konformitätserklärung/CE-Zeichen........................................................................ 38
4
Page 5

- Allgemeine Hinweise -
1 Allgemeine Hinweise
Bitte lesen Sie diese Bedienungsanleitung sorgfältig durch. Bei eventuell auftretenden
Fragen, wenden Sie sich bitte an unseren Service unter der Service-Hotline
0180 5 00 13 88 (Kosten Telekom bei Drucklegung: 12ct/min). Öffnen Sie das Gerät in
keinem Fall selbst und führen Sie keine eigenen Reparaturversuche aus. Bei
Gewährleistungsansprüchen wenden Sie sich bitte an Ihren Fachhändler.
Bestimmungsgemäße Verwendung - Dieses Telefon ist für den Betrieb an einem
analogen Telefonanschluss (PSTN) innerhalb Deutschlands entwickelt worden.
Allerdings kann, wegen der Unterschiede zwischen den verschiedenen TelekomNetzbetreibern, keine Garantie für einwandfreie Funktion an jedem TelekomEndgeräteanschluss übernommen werden. Das Telefon besitzt die Voraussetzung an
einer TAE-Steckdose mit F/N-Codierung gemeinsam mit anderen Anschlussgeräten wie
Fax, Anrufbeantworter oder einem Modem benutzt zu werden. Schließen Sie das
Anschlusskabel des Telefons nur an die dafür bestimmten Telefonsteckdosen an.
Wechseln Sie den Stecker des Anschlusskabels nicht aus.
Stromausfall - Bei einem eventuellen Stromausfall kann mit dem Telefon nicht
telefoniert werden. Halten Sie für eventuelle Notfälle ein schnurgebundenes Telefon
bereit, welches ohne eine externe Stromversorgung arbeitet.
Aufstellort - Am Aufstellort muss sich eine Netzsteckdose 230Volt befinden. Stellen Sie
die Basisstation nicht in die unmittelbare Umgebung von anderen elektronischen
Geräten wie z. B. Mikrowellen oder HIFI-Geräten, da es sonst zu gegenseitiger
Beeinflussung kommen kann. Der Aufstellort hat einen entscheidenden Einfluss auf
einen einwandfreien Betrieb des Telefons.
Stellen Sie die Basisstation auf eine ebene und rutschfeste Fläche. Normalerweise
hinterlassen die Füße der Basisstation keine Spuren auf der Abstellfläche. Wegen der
Vielzahl der verwendeten Lacke und Oberflächen kann es jedoch nicht ausgeschlossen
werden, dass durch die Gerätefüße Spuren auf der Abstellfläche entstehen.
Verwenden Sie das Mobilteil nicht in explosionsgefährdeten Bereichen.
Übermäßige Belastungen durch Rauch, Staub, Erschütterungen, Chemikalien,
Feuchtigkeit, Hitze oder direkte Sonneneinstrahlung müssen vermieden werden.
Netzteil - Verwenden Sie nur das mitgelieferte AUDIOLINE Steckernetzteil, da andere
Netzteile das Telefon zerstören können. Es besteht Lebensgefahr, wenn das
Steckernetzteil geöffnet und nicht vom Stromnetz getrennt wird.
Aufladbare Standard-Akkus- Keine anderen aufladbaren Standard-Akkus oder
Akkupacks verwenden. Diese können möglicherweise einen Kurzschluss verursachen.
Verwenden Sie beim Austauschen immer nur Standard-Akkus des Typs AAA 1,2V
750mAh. Standard-Akkus nicht ins Feuer werfen oder ins Wasser tauchen. Alte oder
defekte Standard-Akkus nicht mit dem normalen Hausmüll entsorgen. Die angegebenen
maximalen Standby- und Gesprächszeiten gelten für die mitgelieferten
wiederaufladbaren Standard-Akkus bei optimalen Bedingungen.
Umgebungstemperatur, Aufladezyklus und weitere äußere Einflussfaktoren, wie z.B.
Funkbelastung an der Einsatzumgebung können die Leistungszeiten erheblich
verringern. Die Ladekapazität reduziert sich darüber hinaus technisch bedingt im
Verlauf der Nutzung oder durch Lagerung bei sehr hohen oder niedrigen Temperaturen.
5
Page 6

- Allgemeine Hinweise -
Laden des Mobilteils - Sollte sich das Mobilteil beim Laden erwärmen, so ist dies
normal und ungefährlich. Laden Sie das Mobilteil nicht mit fremden Aufladegeräten, da
sonst Beschädigungen auftreten können.
Nebenstellenanlagen - Das Telefon kann auch an einer Nebenstellenanlage
angeschlossen werden. Ob Ihr Telefon an Ihrer Nebenstellenanlage einwandfrei
funktioniert, erfahren Sie bei dem Händler, bei dem die Anlage gekauft wurde. Durch
die große Anzahl verschiedener Nebenstellenanlagen kann eine Funktionsgarantie
nicht übernommen werden.
Entsorgung - Ist die Gebrauchszeit der Standard-Akkus oder der gesamten Anlage
abgelaufen, entsorgen Sie diese bitte umweltfreundlich gemäß den gesetzlichen
Bestimmungen.
Hinweis für medizinische Geräte - Das Telefon arbeitet mit einer sehr geringen
Sendeleistung. Diese geringe Sendeleistung schließt eine gesundheitliche Gefährdung
nach dem derzeitigen Stand von Forschung und Technik aus. Es hat sich aber gezeigt,
dass eingeschaltete tragbare Telefone medizinische Geräte beeinflussen können.
Halten Sie deshalb bei medizinischen Geräten einen Abstand von mindestens einem
Meter ein.
Temperatur und Umgebungsbedingungen - Das Telefon ist für den Betrieb in
geschützten Räumen mit einem Temperaturbereich von +10 °C bis +30 °C ausgelegt.
Die Basisstation darf nicht in Feuchträumen wie Bad oder Waschküche aufgestellt
werden. Vermeiden Sie die Nähe zu Wärmequellen wie Heizkörpern und setzen Sie das
Gerät keiner direkten Sonnenbestrahlung aus.
Reinigung und Pflege - Die Gehäuseoberflächen können mit einem trockenen,
weichen und fusselfreien Tuch gereinigt werden. Niemals Reinigungsmittel oder gar
aggressive Lösungsmittel verwenden. Außer einer gelegentlichen Gehäusereinigung ist
keine weitere Pflege erforderlich. Die Gummifüße der Basisstation sind nicht gegen alle
Reinigungsmittel beständig. Der Hersteller kann daher nicht für evtl. Schäden an
Möbeln o. ä. haftbar gemacht werden.
CE-Zeichen- Das Telefon stimmt mit den grundlegenden Anforderungen der R&TTEDirective überein. Dies wird durch das CE-Zeichen bestätigt.
6
Page 7
- Bedienelemente -
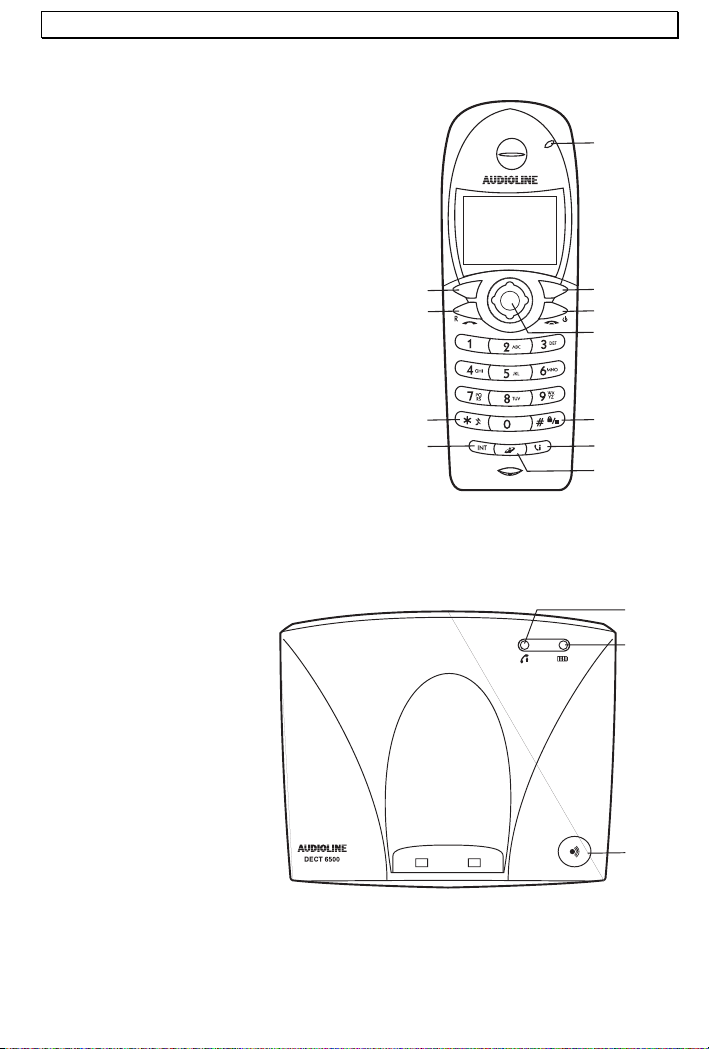
2 Bedienelemente
Mobilteil
1 Gesprächsanzeige
2 Displaytaste rechts
3 Gespräch beenden/Mobilteil ein-aus
4 4-Steuertasten
5 Tastensperre/Pause
6 Anruflisten für verpasste,
angenommene und gewählte
Rufnummern
7 Sondertelefonbuch
8 Taste für interne Gespräche
9 Rufton ein-/ausschalten
10 Gesprächstaste / R-Signaltaste
11 Displaytaste links
Basisstation
12 Gesprächsanzeige
13 Ladekontrollleuchte
14 PAGE-Taste
11
10
9
8
1
2
3
4
5
6
7
12
13
14
7
Page 8

- Inbetriebnahme -
3 Inbetriebnahme
3.1 Sicherheitshinweise
ACHTUNG! Lesen Sie vor der Inbetriebnahme unbedingt die Sicherheitshinweise am
Anfang dieser Anleitung.
3.2 Verpackungsinhalt prüfen
Zum Lieferumfang gehören:
eine Basisstation ein Steckernetzteil
ein Mobilteil mit Gürtelclip eine Bedienungsanleitung
ein Telefonanschlusskabel zwei Standard-Akkus
3.3 Basisstation anschließen
Stellen Sie das Telefon in der Nähe Ihrer Telefonanschlussdose und einer
Netzsteckdose auf.
1. Stecken Sie den Stecker des Netzteils in die Buchse auf der Unterseite der
Basisstation und das Steckernetzteil in eine vorschriftsmäßig installierte
Netzsteckdose mit 230V. Das Steckernetzteil der Basisstation muss immer
angeschlossen sein. Verwenden Sie aus Sicherheitsgründen nur das mitgelieferte
Steckernetzteil.
2. Verbinden Sie das beiliegende Telefonkabel mit der Telefonsteckdose und der
Telefonbuchse auf der Unterseite der Basisstation. Verwenden Sie nur das neue
beiliegende Telefonkabel.
3. Verlegen Sie zum Schluss die beiden Kabel durch die Kabelkanäle nach hinten.
3.4 Batterien einsetzen/austauschen
Öffnen Sie den Batteriefachdeckel in dem Sie den Deckel nach unten schieben und
legen Sie die neuen Batterien ein. Achten Sie auf die richtige Polung und schließen
Sie den Batteriefachdeckel.
Verwenden Sie nur wiederaufladbare Batterien des Typs AAA 2 x 1,2V, 750mAh.
3.5 Batteriekapazität
Die wiederaufladbaren Batterien Ihres Telefons besitzen eine Standby-Zeit bei
Zimmertemperatur von max. 120 Stunden und eine maximale Gesprächsdauer von bis
zu 8 Stunden.
Die aktuelle Batteriekapazität wird im Display über das Symbol angezeigt.
Muss das Mobilteil wieder geladen werden, hören Sie einen Warnton. Stellen Sie dann
das Mobilteil schnellstmöglich zum Laden in die Basisstation, da sich das Mobilteil
ansonsten ausschaltet. Liegt das Mobilteil korrekt auf der Basisstation, hören Sie eine
kurze Bestätigungsmelodie.
3.6 Uhrzeit einstellen
Bevor Sie das Telefon benutzen, sollten Sie noch die aktuelle Uhrzeit einstellen.
Weitere Informationen zur Einstellung der Uhrzeit finden Sie im Kapitel 7.1.
Wichtiger Hinweis: Stellen Sie das Mobilteil mit dem Display nach vorne für
mindestens 16 Stunden auf die Basisstation. Bei nicht richtig geladenen
Batterien kann es zu Fehlfunktionen des Telefons kommen. Die
Kontrollleuchte an der Basisstation
leuchtet immer, sobald das Mobilteil
geladen wird.
8
Page 9
- Bedienung -
4 Bedienung
4.1 Das Display
Das Display ist mit einer automatischen Hintergrundbeleuchtung ausgestattet, welche
das Display bei jedem Tastendruck für ca. 10 Sekunden beleuchtet. Mit einer beliebigen
Taste wird das Display wieder beleuchtet.
Wird das Mobilteil für länger als 30 Sekunden nicht benutzt, schaltet sich automatisch
der Bildschirmschoner in Form einer analogen Uhr ein. Mit den beiden Displaytasten
kann der Bildschirmschoner wieder ausgeschaltet werden. Alle anderen Tasten
beenden den Bildschirmschoner ebenfalls und gehen aber direkt in die angewählte
Funktion.
4.2 Die Bedienung über die Steuertasten
Alle Funktionen sind über ein sehr benutzerfreundliches Menü zu erreichen. Hier eine
kleine allgemeine Anleitung, wie Sie sich im Menü zurechtfinden können:
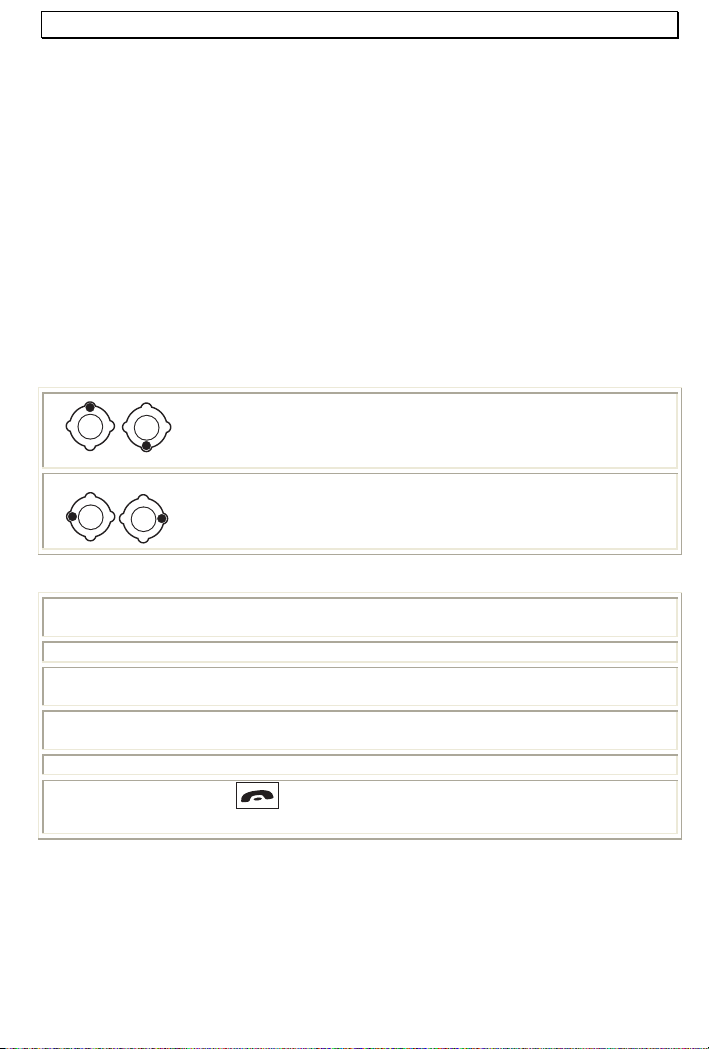
Im Standby-Modus (normaler Betrieb)
Im normalen Standby-Modus erreichen Sie mit der oberen und
unteren Steuertaste direkt das Telefonbuch im Mobilteil.
Im normalen Standby-Modus erreichen Sie mit der rechten und
Im Menü
Während der Programmierung können Sie mit der oberen und unteren Steuertaste den
gewünschten Menüpunkt aussuchen.
Mit der Displaytaste OK wird diese Ebene geöffnet.
Mit der oberen und unteren Steuertaste können Sie dann wieder die gewünschte
Funktion aussuchen, um dann wieder mit der Displaytaste OK zu bestätigen.
Die linke und rechte Steuertaste werden teilweise zur Veränderung von Werten
verwendet.
Mit der Displaytaste ABBRUCH gelangen Sie jeweils eine Ebene zurück.
linken Steuertaste die Liste der Wahlwiederholung.
Durch Drücken der Taste können Sie die Programmierung jederzeit wieder
verlassen, ohne Änderungen vorzunehmen.
9
Page 10
- Bedienung -
4.3 Anrufe entgegennehmen
Erreicht Sie ein Anruf, ertönt der Tonruf am Mobilteil und an der Basisstation. Nehmen
Sie das Mobilteil von der Basisstation oder drücken Sie die Gesprächstaste
Mobilteil und die Verbindung wird hergestellt.
Möchten Sie nicht gestört werden, drücken Sie die Displaytaste RUHE und das
Klingelsignal wird direkt für diesen einen Anruf abgeschaltet.
Die Gesprächsanzeige der Basisstation blinkt während des Gesprächs. Um das
Gespräch zu beenden, stellen Sie das Mobilteil zurück in die Basisstation oder drücken
Sie die Taste
Kann ein Anruf durch Abwesenheit nicht entgegengenommen werden, erscheint
im Display ein Hinweis. So können Sie erkennen, dass Sie während Ihrer
Abwesenheit einen Anruf erhalten haben. Weitere Informationen zu diesem Thema
finden Sie im Kapitel 4.7.
am Mobilteil.
4.4 Anrufe führen
Geben Sie die gewünschte Telefonnummer mit max. 20 Stellen über das Tastenfeld
ein. Die gedrückten Zahlen werden im Display angezeigt. Drücken Sie die
Gesprächstaste
Haben Sie eine falsche Zahl eingegeben, können Sie durch mehrmaliges Drücken der
Displaytaste LÖSCHEN die Telefonnummer löschen.
Hinweis: Sie können auch zuerst die Gesprächstaste
damit das Freizeichen. Durch Eingabe der Zahlen Ihrer gewünschten Rufnummer wählt
Ihr Telefon die Rufnummer direkt an. Eine Korrektur einzelner Zahlen der Rufnummer,
wie oben erwähnt, ist bei dieser Form des Gesprächaufbaus nicht möglich.
und die gewünschte Verbindung wird hergestellt.
drücken und erhalten
4.5 Freisprechen
Möchten Sie die Freisprecheinrichtung benutzen, stellen Sie zuerst wie gewohnt eine
Verbindung her. Drücken Sie während eines Gesprächs zweimal die linke Displaytaste
(MEHR –> FREISPRECHEN). Nun hören Sie den Gesprächspartner über den
Lautsprecher des Mobilteils. Durch zweimaliges Drücken der linken Displaytaste
können Sie während eines Gesprächs zwischen dem Normal- und Freisprechbetrieb
umschalten. Beenden Sie Gespräche über die Freisprecheinrichtung immer mit der
Taste
.
4.6 Anzeigen der Gesprächsdauer
Während eines Gesprächs wird die Gesprächszeit im oberen linken Display in Minuten
und Sekunden angezeigt. Nach Beendigung des Gesprächs bleibt die Anzeige noch für
einige Sekunden im Display erhalten. Mit der Displaytaste OK können Sie diese
Anzeige vorzeitig beenden.
Ihr Telefon speichert alle Gesprächszeiten, sodass Sie nachträglich das letzte
Gespräch und eine Zusammenfassung der Gesprächszeiten aller gewählten und
empfangenen Anrufe nachsehen können.
10
am
Page 11
- Bedienung -
Drücken Sie die Taste
Wählen Sie mit den Steuertasten, den Eintrag GESPR. ZEIT und drücken Sie OK.
Wählen Sie mit den Steuertasten eine der folgenden Funktionen und bestätigen
Sie mit OK.
o LETZTES GESP = Zeigt die Gesprächdauer des letzten Gesprächs.
o GEWÄHLT = Zeigt die Gesprächsdauer von allen gewählten
o ANGENOMMEN = zeigt die Gesprächsdauer von allen empfangenen
o ALLE = zeigt die Gesprächsdauer aller Gespräche
o ALLE LÖSCHEN = Setzt alle Listen wieder auf null.
Mit der Displaytaste ABBRUCH können Sie das Menü wieder verlassen.
4.7 Anruferlisten + Rufnummernanzeige (CLIP)
In den Anruferlisten werden eingehende und ausgehende Gespräche gespeichert.
Dabei stehen die Listen ANGENOMMEN, VERPASST und GEWÄHLT
(Wahlwiederholung) zur Verfügung.
Die Liste GEWÄHLT (Wahlwiederholung) kann 10 Anrufe speichern. In den Listen
ANGENOMMEN können 10 Rufnummern und unter VERPASST können insgesamt 20
Rufnummern gespeichert werden. Sobald die Listen voll sind, wird jeweils die älteste
Rufnummer aus der Liste gelöscht. Sind während Ihrer Abwesenheit entgangene
Anrufe registriert worden, erhalten Sie eine Displaymeldung.
.
Gesprächen.
Gesprächen.
Achtung!
Die Listen ANGENOMMEN und VERPASST arbeiten mit der
Rufnummernanzeige CLIP. Die Rufnummernanzeige CLIP ist ein optionaler
Service Ihres Telefonproviders.
Mit der Rufnummernanzeige CLIP zeigt Ihr Telefon die Rufnummern im Display,
wenn Ihr Telefonprovider diesen Service anbietet. Die Anzeige des Datums und
der Uhrzeit wird nicht von allen Telefonprovidern übertragen. Bitte Fragen Sie
Ihren Telefonprovider für weitere Informationen. Auch bei manchen
Nebenstellenanlagen ist eine Übertragung der Rufnummer oder auch des
Datums und der Uhrzeit nicht möglich.
Generelle Hinweise zur Rufnummernanzeige (CLIP)
Mit der Rufnummernanzeige können Sie bei eingehenden Gesprächen erkennen, wer
Sie anruft. Wenn diese Funktion an Ihrer Telefonleitung zur Verfügung steht, zeigt Ihnen
das Display bereits die Rufnummer des Anrufers, wenn das Telefon klingelt. Haben Sie
diese Rufnummer in Ihrem privaten Telefonbuch gespeichert, wird anstatt der
Rufnummer der Name angezeigt.
Es wird keine Rufnummer angezeigt, wenn der Anrufer die Übertragung der Rufnummer
gesperrt hat (Anzeige: Unterdrückt). Auch bei Anrufen aus dem Ausland kann teilweise
keine Rufnummer angezeigt werden (Anzeige: Keine Nummer).
11
Page 12
- Bedienung -
4.7.1 Anruferlisten einsehen
Hinweis: Sobald ein Anruf verpasst wurde, erhalten Sie eine entsprechende
Displaymeldung und Sie können über die Displaytaste ANSEHEN, direkt in die
entsprechende Liste gelangen.
Drücken Sie die Taste .
Wählen Sie mit den Steuertasten, welche Anruferliste Sie sehen möchten und
drücken Sie OK.
Anruflisten
Verpasst
Gewählt
Angenommen
Gespr. Zeit
Listen Lösch
Mit den Steuertasten können Sie nun die Liste durchblättern.
Um die Rufnummer anzuwählen, drücken Sie zweimal die linke Displaytaste
(MEHR => NR. VERWENDEN) und die Gesprächstaste .
TIP! Im normalen Standby-Modus erreichen Sie mit der rechten und linken Steuertaste
die Liste der Wahlwiederholung (GEWÄHLT).
Optionen
In allen Listen können Sie über MEHR folgende Funktionen abrufen.
Nr. verwenden = Die Rufnummer wird im Display angezeigt und kann über die
Details = Hier sehen Sie die Uhrzeit des Anrufes, die Telefonnummer und
Gesprächstaste
den Namen des Gesprächspartners, wenn dieser im Telefonbuch
gespeichert ist.
Zu Privat = Hier kann die ausgewählte Rufnummer in das private Telefonbuch
im Mobilteil gespeichert werden. Geben Sie den gewünschten
Namen ein und drücken Sie die Displaytaste SPEICH.
Zu Gemeinsam = Hier kann die ausgewählte Rufnummer in das gemeinsame
Telefonbuch in der Basisstation gespeichert werden. Geben Sie
den gewünschten Namen ein und drücken Sie die Displaytaste
SPEICH.
Löschen = Eintrag wird gelöscht
gewählt werden.
12
Page 13
- Bedienung -
4.7.2 Anruferlisten löschen
Mit dem Menüpunkt LISTEN LÖSCH können Sie eine bestimmte Liste oder alle Listen
löschen.
Drücken Sie die Taste
Wählen Sie mit den Steuertasten die Funktion LISTEN LÖSCH und drücken Sie
OK.
Wählen Sie welche Liste Sie löschen möchten oder löschen Sie allen Listen mit
ALLE und bestätigen Sie mit OK. Die Liste VMWI findet keine Verwendung
Bestätigen Sie erneut mit OK.
Drücken Sie die Taste
wählen Sie weitere Menüpunkte aus.
4.8 Mobilteil ein-/ausschalten
Durch längeres Festhalten der Taste können Sie das Mobilteil ausschalten. Ist
das Mobilteil ausgeschaltet, wird kein Batteriestrom verbraucht. Es können keine
Gespräche empfangen werden und die eingestellte Uhrzeit geht verloren.
Durch längeres Festhalten der Taste
einschalten. Das Mobilteil ist nach kurzer Zeit wieder betriebsbereit.
Hinweis: Wird das Mobilteil ausgeschaltet, muss nach dem Einschalten die Uhrzeit
erneut eingeben werden.
4.9 Mikrofon im Mobilteil stummschalten
Mit der Displaytaste STUMM können Sie während eines Telefongespräches das Mikrofon
des Mobilteils ab- und wieder einschalten. So ist es möglich zu sprechen, ohne dass
der Gesprächspartner Sie hört. Der Lautsprecher im Mobilteil bleibt eingeschaltet, und
Sie können den Gesprächspartner weiterhin verstehen.
4.10 Einstellen der Hörer- und Freisprechlautstärke
Ist Ihnen die Hörerlautstärke zu leise oder zu laut, können Sie diese Ihren Bedürfnissen
anpassen. Mit den Steuertasten können Sie während eines Gesprächs die Lautstärke
anpassen. Im Display wird die gewählte Lautstärke angezeigt.
4.11 Tastatursperre
Tragen Sie das Mobilteil öfter bei sich, können Sie die Tastatur sperren, damit nicht
ungewollt Tasten gedrückt werden. Bei eingeschalteter Tastatursperre können
eingehende Gespräche normal entgegengenommen werden.
Tastatursperre einschalten
Halten Sie am Mobilteil die Taste
erscheint ein Schlüsselsymbol und eine Displaytaste ist mit ENTSPER beschriftet.
Tastatursperre ausschalten
Um die Tastatursperre aufzuheben, drücken Sie die Displaytaste ENTSPER und dann
die Displaytaste OK.
4.12 Hinweise zur Reichweite
Die Reichweite des Mobilteils beträgt ca. 50 Meter in geschlossenen Räumen und ca.
300 Meter im Freien. Bei einer guten Verbindung zur Basisstation leuchtet im Display
das Antennensymbol. Haben Sie sich zu weit von der Basisstation entfernt, blinkt das
Antennensymbol. Gehen Sie in diesem Fall wieder näher an die Basisstation, da
ansonsten das Gespräch unterbrochen wird.
.
, um sofort zum Hauptdisplay zurückzukehren oder
, können Sie das Mobilteil wieder
für eine Sekunde gedrückt. Im Display
13
Page 14

- Bedienung -
4.13 Paging von der Basisstation zum Mobilteil
Wenn Sie sich nicht mehr erinnern können, wo Sie Ihr Mobilteil liegen gelassen haben,
drücken Sie die Taste
Tonsignale des Mobilteils hören und es so leicht wiederfinden. Mit der Displaytaste
STOP können Sie die Tonsignale vorher beenden.
4.14 Headsetanschluss
Auf der linken Seite des Mobilteils befindet sich unter einer Abdeckung eine
Anschlussmöglichkeit für ein Headset mit einem 2,5mm Stereoklinkenstecker. Durch die
große Anzahl verschiedener Headsets kann eine Funktionsgarantie nicht übernommen
werden.
4.15 R-Signaltaste/T-Net
Die "R" Signaltaste Ihres Telefons können Sie an Nebenstellenanlagen und bei der
Verwendung der T-Net Funktionen der DEUTSCHEN TELEKOM nutzen. Drücken Sie
dazu während eines Gesprächs die Displaytaste MEHR und wählen Sie SENDE R und
OK.
4.15.1 “R” Taste an Nebenstellenanlagen
Haben Sie Ihr Telefon mit einer Nebenstellenanlage verbunden, können Sie alle
Möglichkeiten, wie z.B. Anrufe weiterleiten, automatischen Rückruf usw. nutzen. Die „R“
Signaltaste verschafft Ihnen den Zugang zu diesen Möglichkeiten. An einer
Nebenstellenanlage wird die FLASH-Zeit "100ms" benötigt (Einstellung siehe 9.3). Ob
Ihr Telefon an Ihrer Nebenstellenanlage einwandfrei funktioniert, erfahren Sie bei dem
Händler, bei dem die Anlage gekauft wurde.
4.15.2 “R” Taste und das T-Net der DEUTSCHEN TELEKOM
Ihr AUDIOLINE-Telefon unterstützt die wichtigsten Mehrwertdienste der DEUTSCHEN
TELEKOM (z.B.: Makeln, Anklopfen, Dreier-Konferenz, u.a.). Das T-Net arbeitet mit der
Einstellung "FLASH 300ms" (Einstellung siehe 9.3). Zur Freischaltung der T-Net
Funktionen wenden Sie sich bitte an die DEUTSCHE TELEKOM.
4.15.3 Pause benutzen
Bei Nebenstellenanlagen ist es erforderlich, eine bestimmte Nummer zu wählen (z. B.
“9” oder “0”), um ein Freizeichen für eine Amtsleitung auf den Apparat zu bekommen.
Bei wenigen, älteren Nebenstellenanlagen dauert es einige Zeit bis das Freizeichen zu
hören ist. Speziell für diese Nebenstellenanlagen kann nach der Amtsholung eine
automatische Pause eingefügt werden, so dass Sie direkt weiter wählen können, ohne
das Freizeichen abzuwarten.
Pause beim manuellen Wählen eingeben
Halten Sie zwischen der Kennziffer für die Amtsholung und der eigentlichen
Telefonnummer für 2 Sekunden die Wahlwiederholungstaste
Display erscheint der Buchstabe P. Nach der Amtsholung wartet Ihr Telefon für 3
Sekunden mit dem Wählen der eigentlichen Telefonnummer. Die Pause kann auch bei
Rufnummern für das Telefonbuch mit gespeichert werden.
ACHTUNG: Wird eine automatische Amtkennzahl aktiviert, wird die Pause automatisch
eingefügt. Weitere Hinweise finden Sie im Kapitel 9.6.
14
der Basisstation. Sie werden für 30 Sekunden die
gedrückt. Im
Page 15

- Telefonbuch -
5 Das Telefonbuch
In das Telefonbuch im Mobilteil (PRIVAT) können 100 Rufnummern inklusive eines
Namens gespeichert werden. Die maximale Länge einer Rufnummer beträgt 20 Stellen.
Zusätzlich können 20 Telefonnummern in der Basisstation (GEMEINSAM) gespeichert
werden, die dann auch beim Betrieb von mehreren Mobilteilen an jedem Mobilteil zur
Verfügung stehen.
TIP! Das Telefonbuch im Mobilteil kann auch noch während eines Gesprächs
verwendet werden. Drücken Sie dazu die Displaytaste MEHR und wählen Sie
TELEFONBUCH. So können Sie Ihrem Gesprächspartner Rufnummern aus Ihrem
Telefonbuch durchgeben.
5.1 Rufnummern mit Namen in das Telefonbuch eingeben
Drücken Sie die Displaytaste NAMEN und das Display zeigt die
Auswahlmöglichkeit PRIVAT (Mobilteil) und GEMEINSAM (Basis) an.
Wählen Sie mit den Steuertasten in welches Telefonbuch Sie einen Eintrag
speichern möchten und drücken Sie die Displaytaste OK.
Wählen Sie mit den Steuertasten HINZUFÜGEN und wiederum OK.
Geben Sie nun in der ersten Zeile den Namen mit maximal 10 Buchstaben ein.
Hinweise zur Namenseingabe erhalten Sie im nächsten Abschnitt.
Wählen Sie mit den Steuertasten die zweite Displayzeile und geben Sie dort die
zugehörige Telefonnummer mit maximal 20 Stellen ein.
Wählen Sie mit den Steuertasten die dritte Displayzeile und wählen Sie dort eine
eigene Ruftonmelodie für diese Rufnummer aus, oder wählen Sie AUS.
Bestätigen Sie mit der Displaytaste SPEICH und der Telefonbucheintrag wird
gespeichert.
Hinweise:
o Zusätzlich kann jeder gespeicherten Rufnummer eine Ruftonmelodie zugeordnet
werden. Somit können Sie schon anhand der Ruftonmelodie erkennen, wer Sie
anruft. Diese Zuordnung funktioniert nur dann, wenn Ihr Telefonanschluss und
auch der Anrufer über die Rufnummernanzeige CLIP verfügt. Möglichweise läutet
in diesem Fall das Mobilteil zuerst einmal mit der normalen Ruftonmelodie, bevor
die zugeordnete Rufnummer zu hören ist.
o Rufnummern mit gleichem Namen lassen sich nicht speichern. In diesem Fall wird
auf Rückfrage der bereits eingegebene Name mit der neuen Rufnummer ersetzt.
o Sobald die Speicherkapazität eines der Telefonbücher erreicht ist, erscheint eine
entsprechende Displaymeldung.
Erklärung der Namenseingabe
9 Zur Eingabe des Namens sind die Zahlentasten mit Buchstaben beschriftet. Durch
mehrmaliges Drücken der entsprechenden Taste können Buchstaben sowie
Zahlen und Sonderzeichen eingegeben werden. Um von Großbuchstaben zu
Kleinbuchstaben oder umgekehrt zu wechseln, drücken Sie die Taste
9 Um ein Leerzeichen einzugeben, drücken Sie einmal die Taste 1.
9 Um den gleichen Buchstaben zweimal einzugeben, drücken Sie den
entsprechenden Buchstaben und warten Sie dann bis der Cursor automatisch eine
Stelle weiter springt.
9 Mit den Steuertasten nach links und rechts können Sie den Displaycursor
innerhalb des Namens oder der Nummer verschieben, um so Änderungen
vorzunehmen.
9 Mit LÖSCHEN können falsche Eingaben gelöscht werden.
.
15
Page 16
- Telefonbuch -
TIP! Ihr Telefon kann Rufnummern auch im Schnellspeichermodus speichern. Geben
Sie einfach die gewünschte Rufnummer ein und drücken Sie die Displaytaste SPEICH.
Geben Sie den zugehörigen Namen ein drücken Sie erneut die Displaytaste SPEICH.
Übersicht
Taste 1 Leerzeichen 1
Taste 2 A B C 2 À Ä Â ç
Taste 3 D E F 3 È É ∆
Taste 4 G H I 4 Ì ┌
Taste 5 J K L 5 Λ
Taste 6 M N O Ö 6 Ň Ò ö Ø Ω
Taste 7 P Q R S 7 П Φ Ψ Σ
Taste 8 T U V Ü 8 ù ü Ө
Taste 9 W X Y Z 9 Æ Ξ
Taste 0 0 . - , ? ! : “ ’
Taste º
º
5.2 Gespeicherte Rufnummern aus dem Telefonbuch anwählen
Nachdem Sie einige Telefonnummern gespeichert haben, können Sie diese sehr
schnell und einfach abrufen.
Rufnummer aus dem Mobilteil anwählen
Drücken Sie die Steuertaste nach unten oder nach oben und es wird direkt der
erste Eintrag in alphabetischer Reihenfolge angezeigt.
Wählen Sie mit den Steuertasten den gewünschten Telefonbucheintrag. Um eine
Rufnummer direkt alphabetisch anzuwählen, drücken Sie den entsprechenden
Buchstaben.
Drücken Sie die Gesprächstaste
TIP! Im normalen Standby-Modus erreichen Sie mit der oberen und unteren Steuertaste
direkt das Telefonbuch im Mobilteil.
Rufnummern aus der Basisstation anwählen
Drücken Sie die Displaytaste NAMEN.
Wählen Sie mit den Steuertasten die Einstellung GEMEINSAM und bestätigen Sie
mit zweimal OK.
Wählen Sie mit den Steuertasten den gewünschten Telefonbucheintrag. Um eine
Rufnummer direkt alphabetisch anzuwählen, drücken Sie den entsprechenden
Buchstaben.
Drücken Sie die Gesprächstaste
# @ & ( ) / _
.
.
16
Page 17

- Telefonbuch -
5.3 Weitere Funktionen in Telefonbüchern
Im Telefonbuch können Sie weitere Menüpunkte erreichen:
ANSEHEN = Mit den Steuertasten können die gespeicherten Einträge
HINZUFÜGEN = Speichern von Telefonbucheinträgen (siehe 5.1)
DIREKTWAHL = Direktwahltasten belegen, ändern, löschen (siehe 5.4.1)
STATUS = Zeigt die Anzahl der belegten und freien Speicherplätze an.
ALLE LÖSCHEN = Löschen des gesamten Telefonbuches.
Innerhalb der Telefonbücher erhalten Sie je nach gewählter Funktion weitere Optionen:
NR. VERWENDEN = Zeigt die Rufnummer im Display und die Rufnummer kann mit
DETAILS = Zeigt den Telefonbucheintrag mit Namen, Rufnummer und
BEARBEITEN = Hier können Name und Rufnummer bearbeitet werden.
ZU GEMEINSAM = Kopiert eine Rufnummer vom privaten Telefonbuch (Mobilteil)
ZU PRIVAT = Kopiert eine Rufnummer vom gemeinsamen Telefonbuch
LÖSCHEN = Löscht einzelne Einträge.
Hinweis: Wird eine Rufnummer im Telefonbuch gelöscht ,die auch auf den
Direktwahltasten benutzt wird, geht auch die Speicherung der Direktwahltaste verloren.
5.4 Direktwahltasten
Die Zahlen 1 bis 9 können jeweils mit einer Rufnummer aus dem Telefonbuch im
Mobilteil belegt werden. Durch das Festhalten einer dieser Tasten wird die gespeicherte
Rufnummer dann direkt angewählt.
5.4.1 Direktwahltasten belegen/ändern/löschen
Drücken Sie die Displaytaste NAMEN und bestätigen Sie mit OK.
Wählen Sie mit den Steuertasten die Einstellung DIREKTWAHL und bestätigen
Sie mit OK.
Wählen Sie mit den Steuertasten die gewünschte Direktwahltaste (Taste 1 bis 9),
die Sie belegen möchten. Ist eine Taste bereits belegt, wird die Rufnummer mit
Namen angezeigt. In diesem Fall können Sie die Belegung löschen oder ändern.
Drücken Sie dazu MEHR und wählen Sie ÄNDERN oder LÖSCHEN. Bei der
Auswahl LÖSCHEN bestätigen Sie mit OK. Bei ÄNDERN fahren Sie mit dem
übernächsten Punkt fort.
Drücken Sie die Displaytaste WÄHLE.
Wählen Sie mit den Steuertasten den gewünschten Telefonbucheintrag. Um eine
Rufnummer direkt alphabetisch anzuwählen, drücken Sie den entsprechenden
Buchstaben.
Bestätigen Sie die Auswahl mit DETAILS und es werden noch einmal weitere
Details zu dieser Rufnummer angezeigt.
Bestätigen Sie wieder mit OK und die Direktwahltaste ist belegt.
ansehen. Über MEHR erhalten Sie weitere Informationen wie
BEARBEITEN, LÖSCHEN usw.
der Gesprächstaste
zugeordneter Ruftonmelodie.
in das gemeinsame Telefonbuch (Basisstation).
(Basisstation) in das private Telefonbuch (Mobilteil).
direkt gewählt werden.
17
Page 18

- Telefonbuch -
5.4.2 Direktwahltasten benutzen
Halten Sie die entsprechende Direktwahltaste 1 bis 9 für 2 Sekunden gedrückt. Die
entsprechende Rufnummer wird im Display angezeigt und die Verbindung wird
hergestellt.
5.5 Sondertelefonbuch einrichten
Im Sondertelefonbuch Ihres Telefons können Sie weitere 10 Rufnummern speichern.
Das Sondertelefonbuch dient zur Speicherung wichtiger Rufnummern, von z.B: Ärzten,
Feuerwehr oder Polizei. Bei Bedarf können Sie auch das Drücken der R-Signaltaste in
die Rufnummer mit speichern. Rufnummern mit gleichem Namen lassen sich nicht
speichern. In diesem Fall wird auf Rückfrage der bereits eingegebene Name mit der
neuen Rufnummer ersetzt.
Drücken Sie die Taste
Wählen Sie mit den Steuertasten die Einstellung HINZUFÜGEN und bestätigen
Sie mit OK.
Geben Sie nun in der ersten Zeile den Namen mit maximal 10 Buchstaben ein.
Hinweise zur Namenseingabe erhalten Sie im Kapitel 5.1.
Wählen Sie mit den Steuertasten die zweite Displayzeile und geben Sie dort die
zugehörige Telefonnummer mit maximal 20 Stellen ein.
Drücken Sie die Displaytaste MEHR.
Möchten Sie das Drücken der R-Signaltaste in die Rufnummer integrieren, wählen
Sie R und OK. Wählen Sie SPEICHERN, um die Rufnummer direkt im
Sondertelefonbuch zu speichern.
Hinweise zu weiteren Optionen im Sondertelefonbuch wie löschen oder bearbeiten
erhalten Sie unter 5.3.
5.5.1 Gespeicherte Rufnummern aus dem Sondertelefonbuch anwählen
Drücken Sie die Taste
Eintrag in alphabetischer Reihenfolge angezeigt.
Wählen Sie mit den Steuertasten den gewünschten Telefonbucheintrag. Um eine
Rufnummer direkt alphabetisch anzuwählen, drücken Sie den entsprechenden
Buchstaben.
Drücken Sie die Gesprächstaste
.
und die Displaytaste OK. Es wird direkt der erste
.
18
Page 19
- Extras -
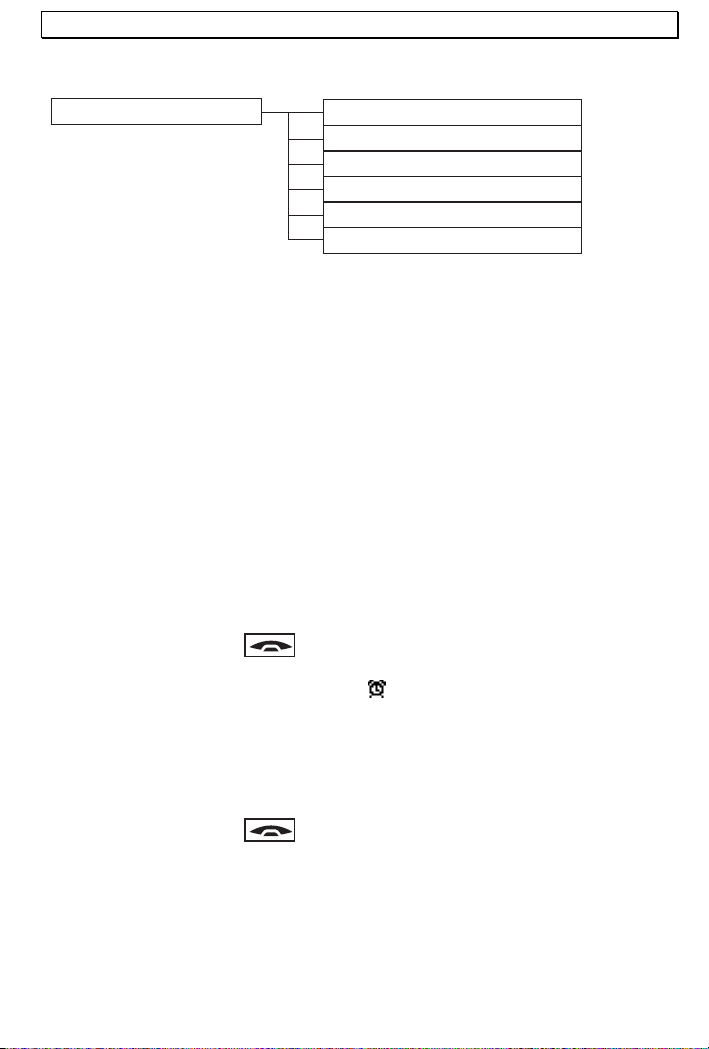
6 Extras
Extras
6.1 Alarm/Weckfunktion
Mit der eingebauten Weck- und Alarmfunktion können Sie eine Alarmzeit eingeben. Ist
diese Uhrzeit erreicht, hören Sie für eine Minute Signaltöne vom Mobilteil und das
Display zeigt die Meldung ALARM mit der aktuellen Uhrzeit. Um den Alarm zu
beenden, drücken Sie entweder die Displaytaste STOP oder die Displaytaste
SCHLUMM (Schlummern). Nach der Auswahl SCHLUMM wird nach 10 Minuten
automatisch ein zweiter Alarm ausgelöst. Die Lautstärke des Alarms lässt sich nicht
einstellen.
Wie Sie die Uhrzeit einstellen, erfahren Sie im Kapitel 7.1.
Alarm- und Weckfunktion aktivieren
Drücken Sie die Displaytaste MENÜ, wählen Sie mit den Steuertasten EXTRAS
und bestätigen Sie zweimal mit der Displaytaste OK.
Wählen Sie die gewünschte Einstellung EIN und drücken Sie die Displaytaste OK.
Wählen Sie nun über die Steuertasten in der ersten Displayzeile die gewünschte
Stundenangabe und in der zweiten Zeile die Minuten aus.
Drücken Sie die Displaytaste OK.
Drücken Sie die Taste
wählen Sie weitere Menüpunkte aus. Bei eingeschalteter Alarm/Weckfunktion
erscheint im Display das Weckersymbol
Alarm- und Weckfunktion vorzeitig ausschalten
Drücken Sie die Displaytaste MENÜ, wählen Sie mit den Steuertasten EXTRAS
und bestätigen Sie zweimal mit der Displaytaste OK.
Wählen Sie die gewünschte Einstellung AUS und drücken Sie die Displaytaste
OK.
Drücken Sie die Taste
wählen Sie weitere Menüpunkte aus.
Wecker
Babyfon
Walky-Talky
Timer
Stoppuhr
Babycall
, um sofort zum Hauptdisplay zurückzukehren oder
.
, um sofort zum Hauptdisplay zurückzukehren oder
19
Page 20

- Extras -
6.2 Interne Raumüberwachung (Babyfon)
Mit der internen Raumüberwachung können Sie mit einem zweiten Mobilteil, in einen
anderen Raum hineinhören. Dazu wird immer ein zweites Mobilteil benötigt. Weitere
Hinweise zur Benutzung von weiteren Mobilteilen erhalten Sie im Kapitel 11.
Babyfon am Mobilteil einschalten
Drücken Sie die Displaytaste MENÜ, wählen Sie mit den Steuertasten EXTRAS
und bestätigen Sie mit der Displaytaste OK.
Wählen Sie die Einstellung BABYFON und drücken Sie die Displaytaste OK.
Wählen Sie die Einstellung EIN und bestätigen Sie mit der Displaytaste OK. Die
interne Raumüberwachung ist nun eingeschaltet. Im Display erscheint eine
entsprechende Meldung.
Legen Sie das Mobilteil nun in den Raum, den Sie überwachen möchten. Um in
den Raum hineinzuhören, wählen Sie die interne Rufnummer des Mobilteils. Ohne
zu Klingeln, wird der Anruf direkt entgegengenommen und Sie können in den
Raum hineinhören. Um die Raumüberwachung zu beenden, beenden Sie das
Gespräch mit der Taste
hineinhören, indem Sie die interne Rufnummer des Mobilteils anwählen.
Babyfon am Mobilteil ausschalten
Mit der Displaytaste ABBRUCH und danach OK können Sie die Funktion
BABYFON ausschalten.
6.3 Walky-Talky
Bei der Verwendung von mehreren Mobilteilen des Typs DECT6500 können Sie die
Mobilteile als Sprechfunkgeräte benutzen. Während der Walky-Talky-Funktion werden
die Mobilteile von der Basisstation abgemeldet. Sie können Sie also so weit Sie
möchten von der Basisstation entfernen. Externe Gespräche können während dieser
Zeit nicht entgegengenommen werden. Um diese Funktion zu benutzen, müssen
mehrere Mobilteile auf die Walky-Talky Funktion geschaltet werden. Die Reichweite
zwischen zwei Mobilteilen beträgt Innen bis zu 50m und im Freien bis zu 300m.
Mobilteile vorbereiten
Um diese Funktion zu benutzen, müssen Sie jedes Mobilteil einzeln in die Funktion
WALKY-TALKY schalten.
Drücken Sie die Displaytaste MENÜ, wählen Sie mit den Steuertasten EXTRAS
und bestätigen Sie mit der Displaytaste OK.
Wählen Sie die Einstellung WALKY TALKY und drücken Sie die Displaytaste OK.
Wählen Sie nun welche Nummer das Mobilteil während der WALKY-TALKY
Funktion erhalten soll und bestätigen Sie mit OK. Wiederholen Sie den Vorgang
für die gewünschten Mobilteile. Die Displaytasten sind nun mit den Funktionen
SPRECHE und ABBRUCH belegt.
20
. Sie können nun jederzeit wieder in den Raum
Page 21
- Extras -
Zwischen den Mobilteilen sprechen
Drücken Sie an einem Mobilteil die Displaytaste SPRECHE.
Wählen Sie das gewünschte Mobilteil, welches Sie rufen möchten und drücken Sie
OK.
An dem gewählten Mobilteil ertönt ein Rufton. Das Gespräch kann dort mit der
Gesprächstaste
miteinander sprechen. Das Gespräch wird an beiden Mobilteilen mit der Taste
beendet.
Walky-Talky beenden
Um die Funktion zu beenden, drücken Sie an allen beteiligten Mobilteilen die Display
ABBRUCH und anschließend OK. Die Mobilteile werden wieder an die Basisstation
angemeldet.
6.4 Timer
Mit dem integrierten Timer können Sie sich nach einer bestimmten Zeit auf einen
Termin oder ähnliches hinweisen lassen.
Drücken Sie die Displaytaste MENÜ, wählen Sie mit den Steuertasten EXTRAS
und bestätigen Sie mit der Displaytaste OK.
Wählen Sie die Einstellung TIMER und drücken Sie die Displaytaste OK.
Geben Sie in den drei Zeilen ein, wie lange der Timer in Stunden, Minuten und
Sekunden laufen soll und bestätigen Sie mit OK. Der Timer ist eingeschaltet und
im Display wird die Restlaufzeit angezeigt.
Ist der Timer auf null zurückgelaufen, hören Sie für eine Minute einen Alarmton.
Mit der Displaytaste STOP kann der Alarm vorzeitig gestoppt werden.
6.5 Integrierte Stoppuhr
Mit der integrierten Stoppuhr können Sie Zeiten mit einer Auflösung von 10tel Sekunden
messen.
Drücken Sie die Displaytaste MENÜ, wählen Sie mit den Steuertasten EXTRAS
und bestätigen Sie mit der Displaytaste OK.
Wählen Sie die Einstellung STOPPUHR und drücken Sie die Displaytaste OK.
Über die Displaytaste START beginnt die Stoppuhr zu laufen.
Bei laufender Stoppuhr kann mit PAUSE eine Zwischenzeit genommen werden.
Mit WEITER wird die Zeitnahme fortgesetzt.
Über die Taste STOP wird die Zeitnahme beendet.
Mit RESET wird die Uhr auf null zurückgestellt.
Drücken Sie die Taste
wählen Sie ABBRUCH um weitere Menüpunkte auszuwählen.
entgegengenommen werden und beide Mobilteile können
, um sofort zum Hauptdisplay zurückzukehren oder
21
Page 22

- Extras -
6.6 Babyruf
Mit dem Babyruf können kleinere Kinder oder auch Senioren durch das Drücken einer
beliebigen Taste am Mobilteil einfach eine vorher bestimmte Telefonnummer wählen.
Ausgenommen sind die Tasten und ABBRUCH.
Babyruf einschalten
Drücken Sie die Displaytaste MENÜ, wählen Sie mit den Steuertasten EXTRAS
und bestätigen Sie mit der Displaytaste OK.
Wählen Sie die Einstellung BABYCALL und drücken Sie die Displaytaste OK.
Wählen Sie nun in der ersten Zeile die Einstellung EIN.
Selektieren Sie die zweite Zeile, und geben Sie dort über das Zahlenfeld die
gewünschte Telefonnummer mit max. 20 Stellen ein. Ist bereits eine Rufnummer
eingegeben, kann diese mit der Displaytaste LÖSCHEN gelöscht werden.
Bestätigen Sie mit der Displaytaste OK. Der Babyruf ist eingeschaltet und es
erscheint der entsprechende Hinweis WÄHLEN im Display. Durch das Drücken
einer beliebigen Taste (außer den Tasten
gespeicherte Rufnummer direkt angewählt.
Babyruf ausschalten
Drücken Sie die Displaytaste ABBRUCH.
Bestätigen Sie mit der Displaytaste OK und der Babyruf ist ausgeschaltet.
und ABBRUCH) wird die
22
Page 23
- Displayeinstellungen -
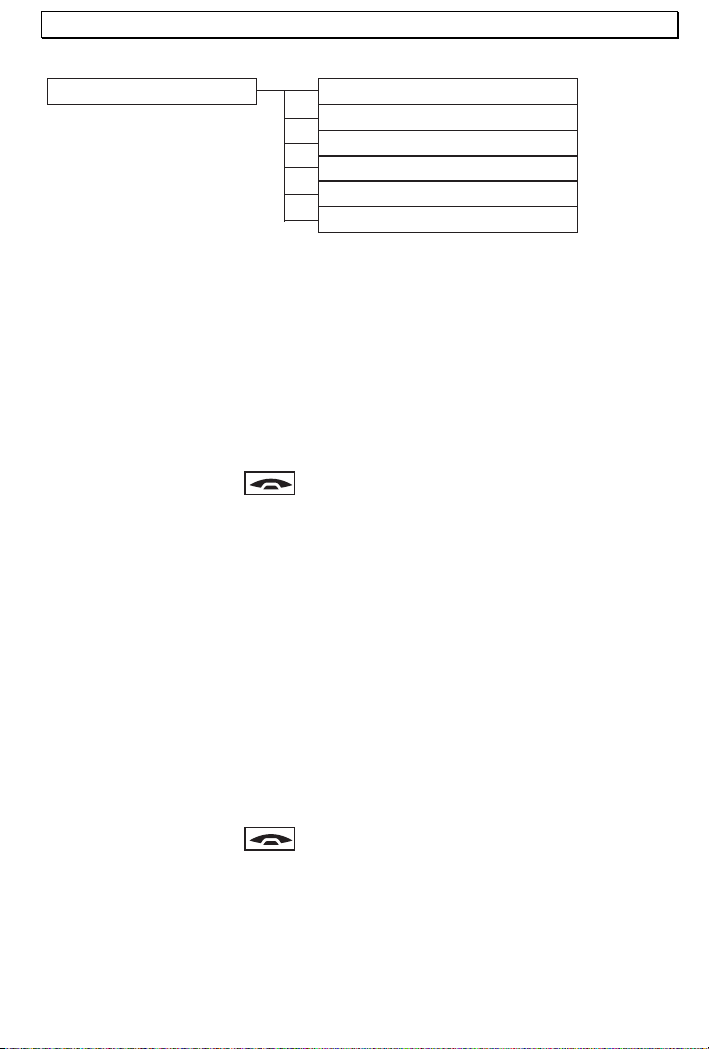
7 Displayeinstellungen
Display
7.1 Uhrzeit eingeben
Die interne Uhrzeit wird zur Anzeige auf dem Display und für die Anruferlisten
verwendet. So können Sie später immer auch die Uhrzeit erkennen, wann Sie
angerufen wurden.
Drücken Sie die Displaytaste MENÜ
Wählen Sie mit den Steuertasten DISPLAY und bestätigen Sie zweimal mit der
Displaytaste OK.
Mit den Steuertasten können Sie STUNDE und MINUTE anwählen.
Mit den linken und rechten Steuertasten können dann die gewünschten Werte
eingestellt werden.
Speichern Sie die Uhrzeit mit der Displaytaste OK.
Drücken Sie die Taste
wählen Sie weitere Menüpunkte aus.
Möchten Sie das Uhrformat verändern, stehen Ihnen die 24- und 12-Stundenanzeige
zur Verfügung. Die 24-Stundenanzeige ist bereits voreingestellt.
Hinweis: Wird das Mobilteil ausgeschaltet, muss nach dem Einschalten die Uhrzeit
erneut eingeben werden.
7.2 Displaynamen ändern
Im normalen Betrieb erscheint im Display die Anzeige „DECT6500“. Haben Sie mehrere
Mobilteile an einer Basisstation angemeldet, kann es nützlich sein, jedem Mobilteil
einen eigenen Namen zu geben (max. 10 Buchstaben). Die Nummer hinter dem Namen
zeigt, mit welcher Nummer das Mobilteil intern zu erreichen ist.
Drücken Sie die Displaytaste MENÜ, wählen Sie mit den Steuertasten DISPLAY
und bestätigen Sie mit OK.
Wählen Sie mit den Steuertasten MOBILT-NAME und bestätigen Sie mit OK.
Geben Sie nun den gewünschten Namen ein und bestätigen Sie mit OK.
Drücken Sie die Taste
wählen Sie weitere Menüpunkte aus.
Uhr
Uhrformat
Mobilt -Name
Sprache
Hintergrund
Farbe
, um sofort zum Hauptdisplay zurückzukehren oder
, um sofort zum Hauptdisplay zurückzukehren oder
23
Page 24

- Displayeinstellungen -
7.3 Displaysprache einstellen
Die Displayanzeigen sind in den Sprachen Deutsch und Englisch einstellbar.
Drücken Sie die Displaytaste MENÜ, wählen Sie mit den Steuertasten DISPLAY
und bestätigen Sie mit OK.
Wählen Sie mit den Steuertasten SPRACHE und bestätigen Sie mit OK.
Wählen Sie nun über die Steuertasten die gewünschte Sprache aus und
bestätigen Sie mit OK.
Drücken Sie die Taste
wählen Sie weitere Menüpunkte aus.
7.4 Displayhintergrund ändern
Für den Displayhintergrund stehen die drei Fotos Blume, Himmel und Schmetterling zur
Verfügung.
Drücken Sie die Displaytaste MENÜ, wählen Sie mit den Steuertasten DISPLAY
und bestätigen Sie mit OK.
Wählen Sie mit den Steuertasten HINTERGRUND und bestätigen Sie mit OK.
Wählen Sie nun über die Steuertasten den gewünschten Hintergrund aus und
bestätigen Sie mit OK.
Drücken Sie die Taste
wählen Sie weitere Menüpunkte aus.
7.5 Displaymenüfarbe ändern
Die Displayhintergrundfarbe für das Menü lässt sich in drei Farben einstellen.
Drücken Sie die Displaytaste MENÜ, wählen Sie mit den Steuertasten DISPLAY
und bestätigen Sie mit OK.
Wählen Sie mit den Steuertasten FARBE und bestätigen Sie mit OK.
Wählen Sie nun über die Steuertasten die gewünschte Farbe aus und bestätigen
Sie mit OK.
Drücken Sie die Taste
wählen Sie weitere Menüpunkte aus.
, um sofort zum Hauptdisplay zurückzukehren oder
, um sofort zum Hauptdisplay zurückzukehren oder
, um sofort zum Hauptdisplay zurückzukehren oder
24
Page 25

- Ruftöne und Signaltöne einstellen -
8 Ruftöne und Signaltöne einstellen
Töne
8.1 Ruftöne für das Mobilteil einstellen (Klingelmelodien)
Ihr Mobilteil kann sich mit 20 verschiedenen Tonruf-Melodien melden, wenn Sie ein
Anruf erreicht. Betreiben Sie das Telefonsystem mit mehreren Mobilteilen, können Sie
für externe und interne Anrufe unterschiedliche Melodien einstellen.
Drücken Sie die Displaytaste MENÜ, wählen Sie mit den Steuertasten TÖNE und
bestätigen Sie mit OK.
Wählen Sie mit den Steuertasten MOBILTEIL und bestätigen Sie mit OK.
In der ersten Displayzeile kann mit den Steuertasten links und rechts die
Lautstärke des Ruftons in fünf Stufen eingestellt werden. Mit der Auswahl
ANSTEIGEND beginnt der Rufton leise und wird mit jedem Klingelsignal lauter.
Möchten Sie einmal nicht gestört werden, können Sie den Tonruf auch ganz
abschalten. Ist der Tonruf ausgeschaltet, werden eingehende Anrufe nur noch an
der Basisstation und über das Display am Mobilteil signalisiert.
Gehen Sie nun über die Steuertasten in die zweite Displayzeile und wählen Sie
dann die gewünschte Ruftonmelodie für externe Anrufe.
Betreiben Sie das Telefonsystem mit mehreren Mobilteilen, können Sie in der
dritten Displayzeile die gewünschte Ruftonmelodie für interne Anrufe auswählen.
Bestätigen Sie mit OK.
Drücken Sie die Taste
wählen Sie weitere Menüpunkte aus.
TIP! Möchten Sie einmal nicht gestört werden, können Sie die Ruftöne am Mobilteil
ausschalten. Halten Sie die Taste
das Symbol
und nicht mehr über das Mobilteil signalisiert. Um die Ruftöne wieder einzuschalten,
halten Sie die Taste
. Eingehende Gespräche werden nun nur noch über die Basisstation
wieder für zwei Sekunden gedrückt.
Mobilteil
Basis
MT-Tastenton
MT-Töne
, um sofort zum Hauptdisplay zurückzukehren oder
für 2 Sekunden gedrückt. Im Display erscheint
25
Page 26

- Ruftöne und Signaltöne einstellen -
8.2 Ruftöne für die Basisstation einstellen (Klingelmelodien)
Drücken Sie die Displaytaste MENÜ, wählen Sie mit den Steuertasten TÖNE und
bestätigen Sie mit OK.
Wählen Sie mit den Steuertasten BASIS und bestätigen Sie mit OK.
In der ersten Displayzeile kann mit den Steuertasten links und rechts die
Lautstärke des Ruftons in fünf Stufen eingestellt werden. Mit der Auswahl
ANSTEIGEND beginnt der Rufton leise und wird mit jedem Klingelsignal lauter.
Möchten Sie einmal nicht gestört werden, können Sie den Tonruf an der
Basisstation auch ganz abschalten.
Gehen Sie nun über die Steuertasten in die zweite Displayzeile und wählen Sie
dann die gewünschte Ruftonmelodie.
Bestätigen Sie mit OK.
Drücken Sie die Taste
wählen Sie weitere Menüpunkte aus.
8.3 Tastenton ein-/ausschalten
Jeder Tastendruck wird vom Mobilteil mit einem Tastenton bestätigt. Der Tastenton
kann ein- oder ausgeschaltet werden.
Drücken Sie die Displaytaste MENÜ, wählen Sie mit den Steuertasten TÖNE und
bestätigen Sie mit OK.
Wählen Sie mit den Steuertasten MT-TASTENTON und bestätigen Sie mit OK.
Wählen Sie nun über die Steuertasten Sie die Funktion ein- oder ausschalten
möchten und bestätigen Sie mit OK.
Drücken Sie die Taste
wählen Sie weitere Menüpunkte aus.
8.4 Hinweistöne ein-/ausschalten
Sobald das Telefon auf die Basisstation gestellt oder eine Speicherung erfolgreich
abgeschlossen wurde, ertönt eine kurze Melodie. Diese Melodie kann ein- oder
ausgeschaltet werden.
Drücken Sie die Displaytaste MENÜ, wählen Sie mit den Steuertasten TÖNE und
bestätigen Sie mit OK.
Wählen Sie mit den Steuertasten MT-TÖNE und bestätigen Sie mit OK.
Wählen Sie nun über die Steuertasten Sie die Funktion ein- oder ausschalten
möchten und bestätigen Sie mit OK.
Drücken Sie die Taste
wählen Sie weitere Menüpunkte aus.
, um sofort zum Hauptdisplay zurückzukehren oder
, um sofort zum Hauptdisplay zurückzukehren oder
, um sofort zum Hauptdisplay zurückzukehren oder
26
Page 27

- Sonderfunktionen -
9 Sonderfunktionen
Sonderfunkt.
9.1 Anrufe automatisch entgegennehmen
Eingehende Anrufe werden automatisch entgegengenommen, wenn Sie das Mobilteil
von der Basisstation nehmen. Möchten Sie, dass Anrufe nur über die Taste
entgegengenommen werden, können Sie die automatische Annahme ausschalten.
Drücken Sie die Displaytaste MENÜ, wählen Sie mit den Steuertasten
SONDERFUNKT. und bestätigen Sie mit OK.
Wählen Sie mit den Steuertasten AUTO ANNAHME und bestätigen Sie mit OK.
Wählen Sie nun über die Steuertasten ob Sie die Funktion ein- oder ausschalten
möchten und bestätigen Sie mit OK.
Drücken Sie die Taste
wählen Sie weitere Menüpunkte aus.
9.2 Ton (DTMF)- oder Impuls (IWV) - Wahlverfahren
Dieses Merkmal ermöglicht Ihnen Ihr Telefon sowohl an den analogen
Vermittlungsstellen (IWV/IMPULS) als auch an den neuen Vermittlungsstellen
(DTMF/TON) zu betreiben. Als Werkseinstellung ist das MFV/TON-Wahlverfahren
eingestellt.
Drücken Sie die Displaytaste MENÜ, wählen Sie mit den Steuertasten
SONDERFUNKT. und bestätigen Sie mit OK.
Wählen Sie mit den Steuertasten WAHLMODUS und bestätigen Sie mit OK.
Wählen Sie nun über die Steuertasten welches Wahlverfahren Sie benötigen und
bestätigen Sie mit OK.
Drücken Sie die Taste
wählen Sie weitere Menüpunkte aus.
Auto Annahme
Wahlmodus
Flashzeit
Pause
Vorwählen
Amtskennzahl
Wahlsperre
, um sofort zum Hauptdisplay zurückzukehren oder
, um sofort zum Hauptdisplay zurückzukehren oder
27
Page 28

- Sonderfunktionen -
9.3 Flashzeit für Nebenstellenanlagen und T-NET
Haben Sie Ihr Telefon mit einer Nebenstellenanlage verbunden, können Sie alle
Möglichkeiten, wie z.B. Anrufe weiterleiten, automatischen Rückruf usw. nutzen. An
einer Nebenstellenanlage wird die FLASH-Zeit "100ms" (FLASH1, Werkseinstellung)
oder „300ms“ (FLASH2) für T-NET benötigt. Ob Ihr Telefon an Ihrer Nebenstellenanlage
einwandfrei funktioniert, erfahren Sie bei dem Händler, bei dem die Anlage gekauft
wurde.
Drücken Sie die Displaytaste MENÜ, wählen Sie mit den Steuertasten
SONDERFUNKT. und bestätigen Sie mit OK.
Wählen Sie mit den Steuertasten FLASHZEIT und bestätigen Sie mit OK.
Wählen Sie nun über die Steuertasten welche Flashzeit Sie benötigen und
bestätigen Sie mit OK.
Drücken Sie die Taste
wählen Sie weitere Menüpunkte aus.
9.4 Pause beim Betrieb an Nebenstellenanlagen
Bei Nebenstellenanlagen ist es teilweise erforderlich, eine bestimmte Nummer zu
wählen (z. B. “9” oder “0”), um ein Freizeichen für eine Amtsleitung auf den Apparat zu
bekommen. Bei wenigen, älteren Nebenstellenanlagen dauert es einige Zeit bis das
Freizeichen zu hören ist. Speziell für diese Nebenstellenanlagen wird nach der
Amtsholung (siehe Kapitel 9.6) eine automatische Pause eingefügt. Hier können zwei
unterschiedliche Pausenlängen von 2 Sekunden (Pause 1) und 4 Sekunden (Pause 2)
eingestellt werden.
Drücken Sie die Displaytaste MENÜ, wählen Sie mit den Steuertasten
SONDERFUNKT. und bestätigen Sie mit OK.
Wählen Sie mit den Steuertasten PAUSE und bestätigen Sie mit OK.
Wählen Sie nun über die Steuertasten welche Pausenlänge Sie benötigen und
bestätigen Sie mit OK.
Drücken Sie die Taste
wählen Sie weitere Menüpunkte aus.
9.5 Automatische Vorwahl
Ihr Telefon verfügt über die Funktion automatische Vorwahl. Hierbei wird beim Wählen
einer bestimmten Zahlenkombination automatisch eine vorher bereits gespeicherte
Rufnummer vor die eigentliche Rufnummer gesetzt.
So können Sie z.B. beim Wählen einer bestimmten Vorwahl automatisch eine
gewünschte Call-by-Call Nummer vor diese Rufnummer setzen. Oder ordnen Sie einer
Auslandsrufnummer automatisch die gewünschte Auslandsvorwahl hinzu.
Beispiel: Der Rufnummer 0221 (in diesem Fall eine Ortsvorwahl) wird die Call-by-Call
Nummer 0xxxx zugeordnet. Hier wird bei jeder gewählten Rufnummer, die mit 0221
beginnt, automatisch die Call-by-Call vorangestellt. Haben Sie die Rufnummer 0221987654321 gewählt, erkennt das Telefon die 0221 und wählt 0xxxx-0221-987654321.
28
, um sofort zum Hauptdisplay zurückzukehren oder
, um sofort zum Hauptdisplay zurückzukehren oder
Page 29

- Sonderfunktionen -
Drücken Sie die Displaytaste MENÜ, wählen Sie mit den Steuertasten
SONDERFUNKT. und bestätigen Sie mit OK.
Wählen Sie mit den Steuertasten VORWÄHLEN und bestätigen Sie mit OK.
Geben Sie den PIN-Code ein (Werkseinstellung 0 0 0 0) bestätigen Sie mit OK.
Wählen Sie nun über die Steuertasten die gewünschte Displayzeile.
: Ein/Aus In der ersten Displayzeile schalten Sie die Funktion ein oder aus.
: 0xxxx In der zweiten Displayzeile geben Sie die Zahlen ein, die der
Rufnummer vorangestellt werden sollen.
: 0221 Geben Sie in der dritten Displayzeile ein, bei welcher Vorwahl oder
Rufnummer diese Zahlen vorangestellt werden sollen.
Bestätigen Sie mit OK.
Drücken Sie die Taste
wählen Sie weitere Menüpunkte aus.
Zur Programmierung wird der PIN-Code benötigt (Werkseinstellung 0 0 0 0). Es können
drei Rufnummern (Vorwahl 1, 2 und 3) mit jeweils 5 Stellen gespeichert und zugeordnet
werden. Die vorangestellten Zahlen werden nicht im Display angezeigt. Auch die
Rufnummer der Telefonbücher und Anruferliste werden überwacht. Nachdem die
Gesprächstaste
gedrückt wurde, ist eine Überwachung nicht mehr möglich.
9.6 Amtskennzahl beim Betrieb an Nebenstellenanlagen
Bei Nebenstellenanlagen ist es teilweise erforderlich, eine bestimmte Nummer zu
wählen (z. B. “9” oder “0”), um ein Freizeichen für eine Amtsleitung auf den Apparat zu
bekommen. Diese Amtskennzahl kann automatisch bei jedem Wählvorgang eingefügt
werden. Zur Programmierung wird der PIN-Code benötigt (Werkseinstellung 0 0 0 0).
Drücken Sie die Displaytaste MENÜ, wählen Sie mit den Steuertasten
SONDERFUNKT. und bestätigen Sie mit OK.
Wählen Sie mit den Steuertasten AMTSKENNZAHL und bestätigen Sie mit OK.
Geben Sie den PIN-Code ein (Werkseinstellung 0 0 0 0) bestätigen Sie mit OK.
Wählen Sie nun über die Steuertasten die gewünschte Displayzeile.
: Ein/Aus In der ersten Displayzeile schalten Sie die Funktion ein oder aus.
: 0 In der zweiten Displayzeile geben Sie die Amtskennzahl mit max. 3
Bestätigen Sie mit OK.
Drücken Sie die Taste
wählen Sie weitere Menüpunkte aus.
Hinweis: Zwischen der Amtskennzahl und der eigentlichen Telefonnummer wird
zusätzlich noch eine Pause eingefügt. Siehe Kapitel 9.4.
Stellen ein.
, um sofort zum Hauptdisplay zurückzukehren oder
, um sofort zum Hauptdisplay zurückzukehren oder
29
Page 30

- Sonderfunktionen -
9.7 Wahlsperre
Mit den Wahlsperren können Sie bestimmte Rufnummern sperren. Die Wahlsperren
lassen sich bei mehreren Mobilteilen für jedes Mobilteil separat einstellen. Zur
Programmierung wird der PIN-Code benötigt (Werkseinstellung 0 0 0 0).
Drücken Sie die Displaytaste MENÜ, wählen Sie mit den Steuertasten
SONDERFUNKT. und bestätigen Sie mit OK.
Wählen Sie mit den Steuertasten WAHLSPERRE und bestätigen Sie mit OK.
Geben Sie den PIN-Code ein (Werkseinstellung 0 0 0 0) bestätigen Sie mit OK.
Wählen Sie nun für welches Mobilteil (nur bei mehreren Mobilteilen) Sie ein
Wahlsperre einrichten möchten und bestätigen Sie mit OK.
Wählen Sie mit den Steuertasten die gewünschte Funktion aus.
AUS Alle Rufnummern sind erlaubt
ALLE Alle Rufnummern außer den Notrufnummern 110 und 112 sind
AUSNAHME Alle Rufnummern sind gesperrt, außer einer frei programmierbaren
SPERREN Hier können Sie eine ganz bestimmte Vorwahl mit max. 5 Stellen
(z. B. 0190) sperren.
Haben Sie AUSNAHME oder SPERREN gewählt, drücken Sie einmal die
Steuertaste nach unten und geben die gewünschte Rufnummer ein.
Bestätigen Sie mit OK.
Drücken Sie die Taste
wählen Sie weitere Menüpunkte aus.
gesperrt.
Vorwahl mit max. 5 Stellen und den Notrufnummern 110 und 112.
, um sofort zum Hauptdisplay zurückzukehren oder
30
Page 31

- System -
10 System
System
10.1 Anmelden von Mobilteilen
Bevor Sie weitere Mobilteile benutzen können, müssen diese vorher angemeldet
werden. Weitere Hinweise zur Verwendung von mehreren Mobilteilen finden Sie im
Kapitel 11.
10.2 Automatische Basiswahl
Ist ein Mobilteil an mehrere Basisstationen angemeldet, können Sie hier auswählen, mit
welcher Basisstation das Mobilteil gerade verbunden wird. Bei der Einstellung AUTO
sucht sich das Mobilteil automatisch die nächstliegende Basisstation aus. Sobald der
Empfang nicht mehr ausreicht, sucht das Mobilteil dann nach den anderen
Basisstationen, an denen das Mobilteil angemeldet ist.
Drücken Sie die Displaytaste MENÜ, wählen Sie mit den Steuertasten SYSTEM
und bestätigen Sie mit OK.
Wählen Sie mit den Steuertasten BASISWAHL und bestätigen Sie mit OK.
Wählen Sie mit den Steuertasten mit welcher Basisstation das Mobilteil verbunden
werden soll. Zur automatischen Basiswahl wählen Sie AUTO.
Bestätigen Sie mit OK.
Drücken Sie die Taste
wählen Sie weitere Menüpunkte aus.
Allgemeine Hinweise zur Verwendung von mehreren Basisstationen: Bei der
Verwendung von mehreren Basisstationen können Sie die Reichweite der Mobilteile
vergrößern. Um diesen Effekt zu nutzen, müssen alle Basisstationen mit einem
Telefonanschluss belegt sein und das Mobilteil muss an alle verwendeten
Basisstationen angemeldet werden. Je nach Verwendungszweck können Sie jede
Basisstation mit der gleichen Telefonnummer belegen oder geben Sie den
Basisstationen unterschiedliche Rufnummern. Hier erhält das Mobilteil immer eine neue
Rufnummer, sobald es sich in der Reichweite einer anderen Basisstation befindet.
Achten Sie darauf, dass sich alle Basisstationen in ihrer Reichweite überschneiden.
Bitte testen Sie vor jeder Inbetriebnahme einer neuen Basisstation die Reichweite der
Mobilteile. Ist ein Mobilteil an den Basisstationen angemeldet, und wurde die
automatische Wahl der Basisstation eingeschaltet, wird das Mobilteil immer
automatisch an die nächste Basisstation weitergeleitet. Laufende Gespräche können
nicht von einer zur anderen Basisstation übertragen werden.
10.3 Abmelden von Mobilteilen
Bei der Verwendung von mehreren Mobilteilen, können hier beliebige Mobilteile wieder
abgemeldet werden. Weitere Hinweise zur Verwendung von mehreren Mobilteilen
finden Sie im Kapitel 11.
Anmelden
Basiswahl
MT abmelden
PIN ändern
Reset
, um sofort zum Hauptdisplay zurückzukehren oder
31
Page 32

- System -
10.4 System PIN-Code ändern
Einige Funktionen des Telefonsystems werden mit einem PIN Code vor unerlaubter
Benutzung geschützt. Der PIN-Code besteht aus bis zu 8 Zahlen. Im Lieferzustand
wurde der PIN-Code „0000“ eingestellt. Wird der alte Pin-Code nicht richtig eingegeben,
wird der Vorgang abgebrochen.
Drücken Sie die Displaytaste MENÜ, wählen Sie mit den Steuertasten SYSTEM
und bestätigen Sie mit OK.
Wählen Sie mit den Steuertasten PIN ÄNDERN und bestätigen Sie mit OK.
Geben Sie den aktuellen PIN-Code ein (Werkseinstellung 0 0 0 0) bestätigen Sie
mit OK.
Geben Sie nun den neuen PIN-Code ein und bestätigen Sie mit OK.
Wiederholen Sie die Eingabe des neuen PIN-Codes und bestätigen Sie mit OK.
Drücken Sie die Taste
wählen Sie weitere Menüpunkte aus.
Hinweis: Wenn Sie eine neue PIN vergeben, so müssen Sie diesen sicher für sich
aufbewahren. Sollten Sie dennoch den PIN-Code einmal vergessen, können Sie den
PIN-Code nur mit Hilfe unserer Service-Hotline 0180 5 00 13 88 (Kosten Telekom bei
Drucklegung: 12ct/min) wieder zurücksetzen.
10.5 Werkseinstellungen wieder herstellen
Mit dieser Funktion werden das Mobilteil und die Basisstation wieder auf die
Werkseinstellungen zurückgesetzt. Zur Programmierung wird der PIN-Code benötigt
(Werkseinstellung 0 0 0 0).
Drücken Sie die Displaytaste MENÜ, wählen Sie mit den Steuertasten SYSTEM
und bestätigen Sie mit OK.
Wählen Sie mit den Steuertasten RESET und bestätigen Sie mit OK.
Geben Sie den aktuellen PIN-Code ein (Werkseinstellung 0 0 0 0) bestätigen Sie
mit OK.
Bestätigen Sie erneut mit OK und die Werkseinstellungen werden wieder
hergestellt.
Sprache: Deutsch Name Mobilteil: DECT6500 PIN-Code: 0 0 0 0
Menüfarbe: Blau Automatische
FLASH-Zeit: 100ms Rufton extern: 2 Amtskennzahl: keine
Wahlverfahren: Tone/MFV Rufton intern: 3 Wahlsperren: aus
Hörerlautstärke: mittel Ruftonlautstärke Mobilteil:
Uhrzeitformat: 24 Stunden Ruftonmelodie Basis : 1 Tastenton: ein
Hintergrund: 1 Ruftonlautstärke Basis :
Menüfarbe: 1 Pausenlänge: 1 Alarm/Weckfunktion: aus
Raumüberwachung: aus Walky-Talky: aus Timer: aus
Stoppuhr: aus Babycall: aus Wahl der Basis: Auto
, um sofort zum Hauptdisplay zurückzukehren oder
Rufannahme: Ein
Medium
Aus
Vorwählen: aus
Belegung der
Direktwahltasten: aus
Hinweistöne: ein
32
Page 33

- Mehrere Mobilteile -
11 Mehrere Mobilteile
Es können bis zu drei weitere Mobilteile an Ihre Basisstation angemeldet werden. Ein
Mobilteil kann an bis zu drei weiteren Basisstationen angemeldet werden.
Bei der Benutzung von mehreren Mobilteilen erhalten Sie folgende Möglichkeiten:
Interne Gespräche zwischen den Mobilteilen (siehe 11.1).
Externe Gespräche können zwischen den Mobilteilen weitergeleitet werden (siehe
11.2)
Konferenzgespräche zwischen einem externen und zwei internen
Gesprächspartner (siehe 11.3).
Raumüberwachung (siehe 6.2).
Walky-Talky (siehe 6.3).
Eingehende externe Gespräche werden an allen Mobilteilen signalisiert.
Wichtige Informationen: Über den international genormten GAP Standard können
Mobilteile von Fremdherstellern in das Telefonsystem integriert werden. Allerdings
stehen nur in Verbindung mit einem DECT6500 Mobilteil alle Funktionen zur Verfügung,
die das DECT6500 unterstützt. Genauso können Sie ein DECT6500 Mobilteil an
Basisstationen anderer Hersteller anschließen, sofern diese Geräte mit dem GAP
Standard arbeiten.
Hinweis für die Verwendung des Mobilteils an anderen Basisstationen:
Durch die große Anzahl unterschiedlicher Hersteller kann bei der Verwendung des
Mobilteils an einer anderen Basisstation keine komplette Funktionsgarantie
übernommen werden. Möglicherweise stehen nicht alle Funktionen zur Verfügung, die
das DECT6500 Mobilteil unterstützt.
Hinweis: Benutzt bereits ein anderes Mobilteil die externe Leitung, erscheint im Display
eine entsprechende Meldung. Ein weiteres externes Gespräch ist in diesem Fall nicht
möglich.
11.1 Intern telefonieren
Sobald Sie mehrere Mobilteile an eine Basisstation angeschlossen haben, können Sie
INT
interne Gespräche führen. Drücken Sie dazu die Taste
Nummer des gewünschten Mobilteils. Sie können auch mit den Steuertasten das
gewünschte Mobilteil aussuchen und mit der Displaytaste OK die Verbindung
herstellen. Das Gespräch wird mit der Gesprächstaste
entgegengenommen und an beiden Mobilteilen mit der Taste
Hinweis: Erreicht Sie während einem internen Gespräch ein externer Anruf, hören Sie
das Klingeln der Basisstation und im Display der Mobilteilen wird bei vorhandener
Rufnummernanzeige (CLIP) die Rufnummer angezeigt. Beenden Sie das interne
Gespräch mit der Taste
Mobilteil mit der Gesprächstaste
und nehmen Sie das externe Gespräch an einem
entgegen.
und drücken Sie die
am gerufenen Mobilteil
beendet.
33
Page 34

- Mehrere Mobilteile -
11.2 Externe Gespräche auf ein anderes Mobilteil verbinden
Haben Sie ein externes Gespräch an einem Mobilteil entgegengenommen, können Sie
das externe Gespräch auf ein anderes Mobilteil weiterverbinden. Drücken Sie dazu die
INT
Taste
Gespräch an dem anderen Mobilteil entgegengenommen wurde, haben Sie folgende
Möglichkeiten:
A. Rücksprache: Sie können nun mit dem internen Teilnehmer sprechen. Um zum
externen Gespräch zurückzukehren, drücken Sie zweimal die linke Displaytaste (MEHR
-> EXTERNGESPR.)
B. Gespräch weiterleiten: Drücken Sie die Displaytaste MEHR. Wählen Sie die
Funktion WEITERLEITEN und drücken Sie die Displaytaste OK.
11.3 Konferenzgespräche führen
Ein externes Gespräch kann mit einem weiteren internen Teilnehmer zum
Konferenzgespräch geschaltet werden. So können zwei Mobilteile gleichzeitig mit dem
externen Teilnehmer sprechen.
Stellen Sie die gewünschte Verbindung zu dem externen Teilnehmer her.
Rufen Sie dann das interne Mobilteil an. Drücken Sie dazu die Displaytaste MEHR
Wird das interne Gespräch vom angewählten Mobilteil entgegengenommen,
Um die Konferenz zu beenden, drücken Sie an einem Mobilteil die Displaytaste
und dann die Nummer des gewünschten Mobilteils. Nachdem das interne
und wählen Sie die Funktion INTERN. Drücken Sie die Nummer des gewünschten
Mobilteils. Sie können auch mit den Steuertasten das gewünschte Mobilteil
aussuchen und mit der Displaytaste OK die Verbindung herstellen. Sollte das
interne Gespräch nicht entgegengenommen werden, drücken Sie die Displaytaste
ABBRUCH und Sie sind wieder mit dem externen Gesprächspartner verbunden.
drücken Sie wieder die Displaytaste MEHR und wählen Sie die Funktion
KONFERENZ. Die beiden internen Mobilteile sind nun mit dem externen
Gesprächspartner verbunden.
MEHR. Wählen Sie dann die Funktion ENDE KONF. und bestätigen Sie mit OK.
Damit ist nur noch ein Mobilteil mit dem externen Gesprächspartner verbunden.
Dort kann das Gespräch mit der Taste
beendet werden.
34
Page 35

- Mehrere Mobilteile -
11.4 An- und abmelden von Mobilteilen
11.4.1 Anmelden von DECT6500 Mobilteilen
Ist das Mobilteil noch an keine Basisstation angemeldet, drücken Sie die
Displaytaste ANMELD. Ansonsten drücken Sie die Displaytaste MENÜ. Wählen
Sie dann den Menüpunkt SYSTEM und bestätigen Sie mit OK.
Drücken Sie einmal die Displaytaste OK.
Halten Sie die Pagetaste
Signaltöne hören. Melden Sie das neue Mobilteil nun innerhalb von 60 Sekunden
an die Basisstation an.
Geben Sie nun den PIN-Code der Basisstation (Werkseinstellung 0 0 0 0) ein und
bestätigen Sie mit OK. Die Basisstation wird nun gesucht.
Sobald die Basisstation gefunden wurde, erscheint kurzzeitig im Display mit
welcher internen Rufnummer das Mobilteil registriert wurde. Das Mobilteil ist
angemeldet und kann für externe und interne Gespräche benutzt werden. Dem
Mobilteil wurde automatisch eine interne Rufnummer vergeben. Das bereits
angemeldete Hauptmobilteil hat die interne Nummer 1. Alle weiteren
angemeldeten Mobilteile werden in der Reihenfolge Ihrer Anmeldung nummeriert
(interne Rufnummer 2 bis 4). Diese interne Rufnummer wird im Display rechts
neben dem Namen angezeigt.
11.4.2 Anmelden von anderen DECT-GAP Telefonen an die Basisstation
Um ein DECT-GAP Mobilteil anzumelden, folgen Sie den Hinweisen in der
Bedienungsanleitung des Fremdherstellers und drücken dann die Taste
Sie mehrere Signaltöne hören.
Benutzen Sie zur Anmeldung den PIN-Code 0 0 0 0.
Durch die große Anzahl verschiedener Mobilteile kann eine Funktionsgarantie aller
angebotenen Funktionen nicht übernommen werden.
11.4.3 Abmelden von Mobilteilen
Drücken Sie die Displaytaste MENÜ und wählen Sie den Menüpunkt SYSTEM
Bestätigen Sie mit der Displaytaste OK und wählen Sie den Menüpunkt MT
ABMELDEN.
Wählen Sie, welches Mobilteil abgemeldet werden soll und bestätigen Sie mit der
Displaytaste OK.
Geben Sie nun den PIN-Code der Basisstation ein (Werkseinstellung 0 0 0 0) und
bestätigen Sie mit der Displaytaste OK. Das Mobilteil wird nun abgemeldet.
der Basisstation gedrückt, bis Sie mehrere
bis
35
Page 36

- Fehlerbeseitigung -
12 Fehlerbeseitigung
Haben Sie Probleme mit Ihrem Telefon, kontrollieren Sie bitte zuerst die folgenden
Hinweise. Bei technischen Problemen können Sie sich auch an unsere Hotline unter
Tel. 0180 5 00 13 88 (Kosten Telekom bei Drucklegung: 12ct/min) wenden.
Garantieansprüchen wenden Sie sich bitte an Ihren Fachhändler. Die Garantiezeit
beträgt 2 Jahre.
Kein Telefongespräch
möglich
Verbindung abgehackt,
fällt aus
Die Ladekontrollleuchte
leuchtet nicht
Im Display blinkt nach
ein paar Stunden das
Batterie-Symbol
Display-Anzeige dunkel Die Batterien sind entladen, bitte das Mobilteil auf der
Störende Geräusche bei
den Gesprächen
Die Telefonleitung ist nicht korrekt angeschlossen oder
gestört.
Verwenden Sie nur das mitgelieferte Telefonkabel.
Testen Sie mit einem anderen Telefon, ob Ihr
Telefonanschluss in Ordnung ist.
Das Steckernetzteil ist nicht eingesteckt oder es liegt ein
totaler Stromausfall vor.
Die aufladbaren Batterien sind leer oder defekt.
Sie haben sich zu weit von der Basisstation entfernt.
Die Basisstation ist nicht mit dem Stromnetz verbunden.
Sie haben sich zu weit von der Basisstation entfernt.
Falscher Aufstellort der Basisstation.
Legen Sie das Mobilteil richtig auf die Basisstation, reinigen
Sie die Kontaktflächen am Mobilteil und an der Basisstation
mit einem weichen, trockenen Tuch.
Die Basisstation ist nicht mit dem Stromnetz verbunden.
Legen Sie das Mobilteil für 16 Stunden auf die Basisstation.
Hilft dies nicht, erneuern Sie die aufladbaren Batterien.
Basisstation laden.
Ist das Mobilteil ausgeschaltet?
Verursacht durch direkte Sonnenbestrahlung, Mobilteil
abkühlen lassen.
Stellen Sie die Basisstation nicht in die unmittelbare
Umgebung von anderen elektronischen Geräten wie z.
B. Mikrowellen oder HIFI-Geräten, da es sonst zu
gegenseitiger Beeinflussung kommen kann.
Bei
36
Page 37

- Wichtige Informationen -
13 Wichtige Informationen
13.1 Technische Daten
Standard DECT-GAP
Kanalzahl 1880 bis 1900 MHz
Stromversorgung Basisstation 220/230V, 50 Hz
Reichweite Innen bis zu 50m
Reichweite Außen bis zu 300m
Standby bis zu 120 Stunden
Max. Gesprächsdauer bis zu 8 Stunden
Aufladbare Standard-Akkus 2 x 1,2V/750mAh, Typ AAA
Wählverfahren MFV oder IWV
Zulässige Umgebungstemperatur 10°C bis 30°C
Zulässige relative Luftfeuchtigkeit 20 bis 75%
Signaltastenfunktion 100ms oder 300ms
13.2 Telefonkabel austauschen
Müssen Sie Ihr Telefonkabel austauschen, finden Sie anhand der folgenden Zeichnung
das passende Kabel bei Ihrem Händler.
F-Codierung - IMPORT Standard
TAE -F
1
2
3
4
5
6
Rj11 6/4
2
3
4
5
6
1
6
5
1234
13.3 Garantie
37
Page 38

- Wichtige Informationen -
AUDIOLINE - Geräte werden nach den modernsten Produktionsverfahren hergestellt
und geprüft. Ausgesuchte Materialien und hoch entwickelte Technologien sorgen für
einwandfreie Funktion und lange Lebensdauer. Ein Garantiefall liegt nicht vor, wenn die
Ursache einer Fehlfunktion des Gerätes bei dem Telefonnetzbetreiber oder einer
eventuell zwischengeschalteten Nebenstellenanlage liegt. Die Garantie gilt nicht für die
in den Produkten verwendeten Standard-Akkus oder Akkupacks. Die Garantiezeit
beträgt 24 Monate, gerechnet vom Tage des Kaufs.
Innerhalb der Garantiezeit werden alle Mängel, die auf Material- oder Herstellungsfehler
zurückzuführen sind, kostenlos beseitigt. Der Garantieanspruch erlischt bei Eingriffen
durch den Käufer oder durch Dritte. Schäden, die durch unsachgemäße Behandlung
oder Bedienung, durch falsches Aufstellen oder Aufbewahren, durch unsachgemäßen
Anschluss oder Installation sowie durch höhere Gewalt oder sonstige äußere Einflüsse
entstehen, fallen nicht unter die Garantieleistung. Wir behalten uns vor, bei
Reklamationen die defekten Teile auszubessern oder zu ersetzen oder das Gerät
auszutauschen. Ausgetauschte Teile oder ausgetauschte Geräte gehen in unser
Eigentum über. Schadenersatzansprüche sind ausgeschlossen, soweit sie nicht auf
Vorsatz oder grober Fahrlässigkeit des Herstellers beruhen.
Sollte Ihr Gerät dennoch einen Defekt innerhalb der Garantiezeit aufweisen, wenden
Sie sich bitte unter Vorlage Ihrer Kaufquittung ausschließlich an das Geschäft, in dem
Sie Ihr AUDIOLINE - Gerät gekauft haben. Alle Gewährleistungsansprüche nach diesen
Bestimmungen sind ausschließlich gegenüber Ihrem Fachhändler geltend zu machen.
Nach Ablauf von zwei Jahren nach Kauf und Übergabe unserer Produkte können
Gewährleistungsrechte nicht mehr geltend gemacht werden.
13.4 Konformitätserklärung/CE-Zeichen
Das Telefon stimmt mit den grundlegenden Anforderungen der R&TTE-Directive
„1999/5/EC“ überein. Dies wird durch das CE-Zeichen bestätigt.
Für die komplette Konformitätserklärung nutzen Sie bitte den kostenlosen Download
von unserer Website www.audioline.de.
38
Page 39

- Contents -
1
General Information ............................................................................................... 41
2 User controls .......................................................................................................... 43
3 Setting up................................................................................................................ 44
3.1 Safety Information ..................................................................................................44
3.2 Check contents of pack.......................................................................................... 44
3.3 Connecting the base station................................................................................... 44
3.4 Fitting/changing batteries ....................................................................................... 44
3.5 Battery capacity...................................................................................................... 44
3.6 Setting the time ...................................................................................................... 44
4 Operation................................................................................................................. 45
4.1 The display............................................................................................................. 45
4.2 Operation with the cursor. ......................................................................................45
4.3 Receiving calls ....................................................................................................... 46
4.4 Making calls ........................................................................................................... 46
4.5 Handsfree facility.................................................................................................... 46
4.6 Call duration display............................................................................................... 46
4.7 Caller lists + Caller display (CLIP) ......................................................................... 47
4.7.1 Viewing the caller list .................................................................................................48
4.7.2 Delete caller list .........................................................................................................48
4.8 Switching the mobile unit on and off ...................................................................... 49
4.9 Muting the microphone in the mobile unit .............................................................. 49
4.10 Setting the receiver and handsfree volume ...........................................................49
4.11 Keypad lock............................................................................................................ 49
4.12 Range information.................................................................................................. 49
4.13 Paging from the base station to the mobile unit..................................................... 49
4.14 Headset connector................................................................................................. 49
4.15 R Signal button/T-NET........................................................................................... 50
4.15.1 "R" Button on private exchanges ...............................................................................50
4.15.2 "R" Button and the DEUTSCHE TELEKOM T-Net .....................................................50
4.15.3 Using Pause ..............................................................................................................50
5 The phone book...................................................................................................... 51
5.1 Entering numbers and names in the phone book .................................................. 51
5.2 Dialling stored numbers from the phone book ....................................................... 52
5.3 Other phone book functions................................................................................... 53
5.4 Quick dial buttons................................................................................................... 53
5.4.1 Assign/change/delete quick dialbuttons.....................................................................53
5.4.2 Using the quick dialbuttons........................................................................................54
5.5 Setting up the special phone book ......................................................................... 54
5.5.1 Dialling stored numbers from the special phone book ................................................54
6 Extras....................................................................................................................... 55
6.1 Alarm/Wake-up function......................................................................................... 55
6.2 Internal room monitoring (baby phone).................................................................. 56
6.3 Walkie-talkie........................................................................................................... 56
6.4 Timer ......................................................................................................................57
6.5 Integral stopwatch ..................................................................................................57
6.6 Baby call................................................................................................................. 58
7 Display settings ...................................................................................................... 59
7.1 Entering the time ....................................................................................................59
7.2 Changing display names........................................................................................ 59
7.3 Setting the display language .................................................................................. 59
7.4 Changing the display background.......................................................................... 60
7.5 Changing the display menu colour......................................................................... 60
39
Page 40

- Contents -
Setting up ring tones and signal tones ................................................................61
8
8.1 Setting up ring tones for the mobile unit................................................................. 61
8.2 Setting up ring tones for the base station ............................................................... 62
8.3 Activating/deactivating the button tone...................................................................62
8.4 Activating/deactivating warning tones ....................................................................62
9 Special functions .................................................................................................... 63
9.1 Accepting calls automatically ................................................................................. 63
9.2 Tone (TD) or pulse (PD) dialling.............................................................................63
9.3 Flash time for private exchanges ........................................................................... 64
9.4 Pause when using on private exchanges ............................................................... 64
9.5 Automatic dialling code .......................................................................................... 64
9.6 Outside line code when using on private exchanges ............................................. 65
9.7 Dialling block ..........................................................................................................66
10 System ..................................................................................................................... 67
10.1 Logging on mobile units .........................................................................................67
10.2 Automatic base unit selection.................................................................................67
10.3 Logging off mobile units .........................................................................................67
10.4 Changing the system PIN code.............................................................................. 68
10.5 Restoring factory settings.......................................................................................68
11 Multiple mobile units ..............................................................................................69
11.1 Making an internal call............................................................................................69
11.2 Connecting external calls to another mobile unit....................................................69
11.3 Holding conference calls ........................................................................................70
11.4 Logging on and logging off mobile units.................................................................70
11.4.1 Logging on DECT6500 mobile units.......................................................................... 70
11.4.2 Logging on other DECT-GAP telephones to the base station.................................... 70
11.4.3 Logging off mobile units ............................................................................................71
12 Troubleshooting .....................................................................................................72
13 Important information ............................................................................................ 73
13.1 Technical data........................................................................................................ 73
13.2 Changing the telephone cable................................................................................73
13.3 Warranty................................................................................................................. 74
13.4 Declaration of Conformity/CE mark........................................................................ 74
40
Page 41

- General information -
1 General Information
Please read these operating instructions carefully. If you should have any questions,
please contact our Service Department on the Hotline number 0180 5 00 13 88
(Telekom cost at the time of printing 12 cents/min). Under no circumstances open the
unit yourself and do not try to carry out your own repairs. For any claims under the
warranty, please refer to your dealer.
Intended use - This telephone has been designed for use on an analogue telephone
line (PSTN) within Germany. However, no guarantee can be accepted for trouble-free
operation on all telecommunications terminal equipment connections due to the
differences between the different telecommunications network operators. The telephone
requires a TAE socket with F/N coding in common with other plug-in units such as fax
machines, answering machines or modems. Connect the telephone cable to the phone
socket intended for the purpose only. Do not change the plug on the connecting cable.
Power failure - If the power should fail, it will not be possible to make calls using the
telephone. Keep a cord-connected phone handy, which works without an external
power supply, for possible emergencies.
Position - There must be a 230 Volt mains socket near to where the telephone is
positioned. Do not set up the base station in the immediate vicinity of other electrical
equipment such as microwaves or hi-fi systems, as this may result in mutual
interference. The location has a decisive influence on the trouble-free operation of the
telephone.
Place the base station on a flat and non-slip surface. The feet of the base station do not
normally leave any marks on the surface. However, due to the large number of
varnishes and surfaces in use, it may not be possible to prevent marks occurring on the
surface due to the feet of the unit.
Do not use the handset in areas where there is a risk of explosion.
Excessive exposure to smoke, dust, vibrations, chemicals, moisture, heat or the direct
rays of the sun must be avoided.
Power supply - Use only the AUDIOLINE plug-in power supply provided, as other
power supplies could damage the telephone. There is a risk to life if the power supply is
opened and not disconnected from the mains.
Standard rechargeable batteries - do not use any other rechargeable batteries or
battery packs. These could possibly cause a short circuit. When changing batteries,
always use standard batteries, Type AAA 1.2V 750mAh. Do not throw standard
batteries into the fire or immerse in water. Do not dispose of old or defective standard
batteries with the normal household waste.
The maximum standby and talk times quoted are applicable for the standard
rechargeable batteries supplied under optimum conditions. Ambient temperature,
charging cycle and other external factors, such as the radio loading in the area of use,
can considerably reduce the operating times. Furthermore, the charging capacity is
reduced for technical reasons during use or when stored at very high or low
temperatures.
41
Page 42

- General information -
Charging the handset - It is normal for the handset to become warm when charging
and is not dangerous. Do not use other manufacturer's charging equipment for charging
the handset, as otherwise damage could occur.
Private exchanges - The telephone can also be connected to a private exchange. You
can find out from the dealer from whom the equipment was purchased whether your
telephone will work on your private exchange without any problems. Due to the large
number of different private exchanges, it is not possible to guarantee this function.
Information regarding medical equipment - The telephone works with a very low
transmission power. This low transmission power prevents any risk to health according
to the current state of research and technology. However, it has been shown that
portable telephones can interfere with medical equipment when switched on. Therefore,
please maintain a distance of at least one metre from medical equipment.
Disposal - If the useful life of the standard batteries or the complete equipment has
expired, please dispose of these carefully in accordance with the statutory requirements
and in a manner friendly to the environment.
Temperature and Ambient Conditions - The telephone is designed for use in
protected rooms with a temperature range of +10 °C to +30 °C. The base station must
not be installed in damp rooms such as a bathroom or laundry room. Avoid proximity to
sources of heat such as radiators and do not expose the unit to direct sunlight.
Cleaning and care - The surface of the case can be cleaned with a soft, dry, lint-free
cloth. Never use cleaning agents, particularly aggressive solvents. No attention is
necessary apart from cleaning the case occasionally. The rubber feet of the base
station are not resistant to all cleaning agents. The manufacturer can therefore not
accept any liability for possible damage to furniture or the like.
CE mark - The telephone complies with the basic requirements of the R&TTE Directive
This is confirmed by the CE mark.
42
Page 43

- User controls -
2 User controls
Mobile unit
1 Call indicator
2 Display button right
3 End call/Mobile unit on-off
4 4-button cursor
5 Keypad lock/Pause
6 Caller lists for missed, accepted and
dialled numbers
7 Special phone book
8 Button for internal calls
9 Ring tone on/off
10 Call button / R signal button
11 Display button left
Base station
12 Call indicator
13 Charge monitoring lamp
14 PAGE button
11
10
9
8
1
2
3
4
5
6
7
12
13
14
43
Page 44

- Setting up -
3 Setting up
3.1 Safety Information
NOTE: Before setting up, it is essential that you read the safety information at the
beginning of this manual.
3.2 Check contents of pack
The following items are supplied:
one base station one mains cable
one mobile unit with belt clip one instruction manual
one telephone connecting cable two rechargeable batteries
3.3 Connecting the base station
Position the telephone near to your telephone connection socket and to a mains socket.
1. Insert the plug of the power supply into the socket on the underside of the base
station and plug the power supply into a properly installed 230 V mains socket. The
plug-in power supply for the base station must always be connected. For safety
reasons, use only the plug-in mains power supply provided.
2. Connect the telephone cable supplied to the telephone socket and the telephone
jack on the underside of the base station. Use only the new telephone cable
provided.
3. Finally, run the two cables through the cable channels to the rear.
3.4 Fitting/changing batteries
Open the battery compartment cover by sliding the cover
downwards and insert the new batteries. Take care to ensure that
the polarity is correct and close the battery compartment cover.
Use only rechargeable batteries, type AAA 2 x 1.2V, 750mAh.
3.5 Battery capacity
The rechargeable batteries for your telephone have a stand-by time of max. 120 hours
at room temperature and a maximum talk time of up to 8 hours.
The current battery capacity is shown in the display by means of the symbol
If the handset must be loaded again, you hear a warning tone. Place your phone on the
base unit for charging as soon as possible or it would turn off when it is out of battery.
When the mobile unit is correctly located on the base station, you will hear a short tune
in confirmation.
3.6 Setting the time
Before using the telephone, you should set the current time. You will find more
information in Chapter 7.1.
Important note: Place the mobile unit on the base station with the display to
the front for at least 16 hours. The telephone may malfunction if the batteries
are not properly charged. The indicator light on the base station
illuminates when the mobile unit is charged.
always
.
44
Page 45

- Operation -
4 Operation
4.1 The display
The display is provided with an automatic backlight, which illuminates the display for ca.
10 seconds every time a button is pressed. The display can be re-lit with any button.
If the mobile unit is not used for more than 30 seconds, the screensaver, in the form of
an analogue clock, will switch on automatically. The screensaver can be switched off
again by means of the two display buttons. All other buttons likewise switch off the
screensaver but also go directly to the selected function.
4.2 Operation with the cursor.
All functions can be accessed by means of a very user-friendly menu. Here are a few
general instructions to help you find your way around the menu:
In standby mode (normal operation)
In the normal standby mode, you can go into the phone book in the
mobile unit directly with the up and down cursor buttons.
In the normal standby mode, you can go into the redial list with the left
and right cursor buttons.
In the menu
You can find the required items in the menu when programming by using the up and
down cursor buttons.
This level is opened with the OK display button.
You can then again find the required function using the up and down cursor buttons
and again confirm with the OK display button.
The left and right cursor buttons are used, amongst other things, for changing values.
You can go back one level each time by pressing the CANCEL display button.
You can leave programming mode at any time without making any changes by
pressing the
button.
45
Page 46

- Operation -
4.3 Receiving calls
When a call arrives, the ring tone sounds on the mobile unit and on the base station. Lift
the mobile unit from the base station or press the call button
and the connection will be made.
If you do not want to be disturbed, press the SILENT display button and the ring tone for
this one call will be switched off directly.
The call indicator on the base station will flash during the call. To end the call, replace
the handset in the base station or press the
If it is not possible to accept a call because you are not there, a message will
appear in the display. In this way, you will be able to tell that you have received a
call during your absence. You will find further information on this topic in Chapter
4.7
button on the mobile unit.
4.4 Making calls
Enter the required telephone number with a maximum of 20 digits using the number
pad. The numbers pressed are shown in the display. Press the call button
the required connection will be made.
If you have entered a number incorrectly, you can delete the number by repeatedly
pressing the CLEAR button.
Note: You can also get a dialling tone by first pressing the call button
entering the digits of your required phone number, your telephone will dial the number
directly. With this method of making a call, it is not possible to correct individual digits in
the number in the manner described above.
4.5 Handsfree facility
If you want to use the hands-free facility, first set up the call in the usual way. During the
call, press the left display button twice (OPTIONS -> SPEAKER). You will now hear the
person you are speaking to over the loudspeaker in the mobile unit. By pressing the left
display button twice, you can change over between normal and handsfree mode during
a call. Always end calls made using the handsfree facility with the
4.6 Call duration display
The call duration in minutes and seconds is shown in the top left of the display during a
call. The call duration will still be retained in the display for a few seconds after the call
has been ended. This indication can be cancelled prematurely with the OK display
button.
Your telephone remembers the times of all the calls so that you can subsequently see
the duration of the last call and a summary of the call times for all calls that have been
dialled and received.
46
on the mobile unit
and
. On
button .
Page 47

- Operation -
Press the
Select the CALL TIMERS entry with the cursor and press OK.
Using the cursor, choose one of the following functions and confirm with OK.
o LAST CALL = Shows the duration of the last call.
o DIALLED = Shows the duration of all dialled calls.
o RECEIVED = Shows the duration of all received calls.
o ALL CALLS = Shows the duration of all calls.
o CLEAR ALL = Resets all lists to zero.
You can exit the menu with the CANCEL button.
4.7 Caller lists + Caller display (CLIP)
Incoming and outgoing calls are stored in the caller lists. Lists are available for
RECEIVED, MISSED and DIALLED (redial) calls.
The DIALLED list (redial) can store 10 calls. 10 numbers can be stored in the
RECEIVED list and a total of 20 numbers can be stored under MISSED. When the lists
are full, the oldest number is deleted from the respective list. If incoming calls have
been registered during your absence, there will be a message in the display.
button.
Note:
The RECEIVED and MISSED lists work with the caller display facility CLIP.
Caller display CLIP is an optional service from your telephone provider. In
Switzerland, this function is not offered by all network carriers.
With caller display CLIP, your telephone will show the number in the display if
your telephone provider offers this service. The display of date and time is not
transmitted by all telephone service providers. Please ask your telephone
provider for further information. Furthermore, transmission of the phone number
and also the date and time is not possible with many private exchanges.
General information on caller display (CLIP)
In the case of incoming calls, you can see who is calling you by means of the caller
display facility. If this function is available on your telephone, the display will show you
the caller's telephone number when the telephone rings. If you have stored this number
in your private phone book, the name will be displayed instead of the phone number.
A phone number will not be displayed when the caller has blocked the transmission of
the number (display: PRIVATE). Also, it is sometimes not possible to display the
number when calls are received from abroad (display: OUT OF AREA or
UNVAILABLE).
47
Page 48

- Operation -
4.7.1 Viewing the caller list
Note: If a call is missed, there will be a corresponding message in the display and you
can access the appropriate list directly by means of the VIEW display button.
Press the button.
Use the cursor to select which caller list you want to view and press OK.
Call Records
Missed
Dialled
Received
Call Timers
Delete Calls
You can now scroll through the list with the cursor.
To dial the number, press the left-hand display button twice (OPTIONS => USE
NUMBER) and then press the call button .
TIP! In the normal standby mode, you can go into the redial list with the left and right
cursor buttons (DIALLED).
Options
In all lists you can access the following functions by choosing OPTIONS.
Use number = The number will be shown in the display and can be dialled using
Details = Here you will see the time of the call and the phone number and
To private = Here, the selected phone number can be saved in the private
To shared = Here, the selected phone number can be saved in the SHARED
Delete = Entry will be deleted
4.7.2 Delete caller list
You can delete a particular list or all lists by choosing DELETE CALLS from the menu.
Press the
Select the DELETE CALLS function with the navigation keys and press OK.
Choose the list that you want to delete or delete all lists with ALL and confirm with
OK. The VMWI list is not used
Reconfirm with OK.
Press the
items from the menu.
48
the call button
name of the person called if this has been stored in the phone
book.
phone book in the mobile unit. Enter the required name and press
the SAVE display button.
phone book in the base station. Enter the required name and press
the SAVE display button.
button.
button to return to the main display immediately or choose other
.
Page 49

- Operation -
4.8 Switching the mobile unit on and off
You can switch off the mobile unit by pressing and holding the button. No battery
power is used if the mobile unit is switched off. It will not be possible to receive calls and
the handset lost your time settings.
You can switch the mobile unit on again by pressing and holding the
mobile unit will be ready to use again after a short time.
Note: If the mobile part is switched off, you should set the current time again after
switching on.
4.9 Muting the microphone in the mobile unit
With the MUTE display button you can switch the microphone in the mobile unit on and
off again during a call. It is thus possible to speak without the other person hearing you.
The loudspeaker in the mobile unit remains switched on and you can continue to hear
the other person.
4.10 Setting the receiver and handsfree volume
If the receiver volume is too quiet or too loud for you, you can change this to suit your
requirements.
You can adjust the volume during a call by means of the cursor. The selected volume
will be shown in the display.
4.11 Keypad lock
If you frequently carry the mobile unit with you, you can lock the keypad so that buttons
are not pressed unintentionally. When the keypad lock is switched on, incoming calls
can be received as normal.
Activating the keypad lock
Press and hold the
appear in the display and one of the display buttons will be labelled UNLOCK.
Deactivating the keypad lock
To deactivate the keypad lock, press the UNLOCK display button and then OK.
button on the mobile unit for one second. A key symbol will
4.12 Range information
The range of the mobile unit is ca. 50 metres in closed rooms and ca. 300 metres
outdoors. When there is a good contact with the base station, the aerial symbol will
come on in the display. If you are too far away from the base station, the aerial symbol
will flash. In this case, move nearer to the base station once more, as otherwise the call
will be interrupted.
4.13 Paging from the base station to the mobile unit
If you cannot remember where you have left your mobile unit, press the button on
the base station. You will hear the mobile unit audible signals for 30 seconds and thus
be able to find it again easily. You can cancel the audible signal prematurely by
pressing the STOP display button.
4.14 Headset connector
A connection facility for a headset with a 2.5 mm stereo jack plug is located on the lefthand side of the mobile unit underneath a cover. Due to the large number of different
headsets, it is not possible to guarantee this function.
button. The
49
Page 50

- Operation -
4.15 R Signal button/T-NET
You can use the "R" signal button on your telephone on private exchanges and when
using DEUTSCHE TELEKOM's T-Net functions. To do this, press the OPTION display
button and choose SEND R and OK during a call.
4.15.1 "R" Button on private exchanges
If you have connected your telephone to a private exchange, you can use all the
facilities such as call transfer, automatic recall, etc. The "R" signal button gives you
access to these facilities. The FLASH time "100ms" will be required on a private
exchange (Adjustment, see 9.3). You can find out from the dealer from whom the
equipment was purchased whether your telephone will work on your private exchange
without any problems.
4.15.2 "R" Button and the DEUTSCHE TELEKOM T-Net
Your AUDIOLINE telephone supports the most important DEUTSCHE TELEKOM
added value functions (e.g. brokering, call waiting, three-way conference, etc.). The TNet works using the "FLASH 300ms" setting. (Adjustment, see 9.3). Please contact
DEUTSCHE TELEKOM to gain access to T-Net functions.
4.15.3 Using Pause
With private exchanges, it is necessary to dial a certain number (e.g. "9" or "0") in order
to obtain a dialling tone for an outside line on the extension. With some, older private
exchanges, it takes some time before the dialling tone can be heard. Especially for
these private exchanges, an automatic pause can be inserted after connecting to the
outside line so that you can dial directly without waiting for the dialling tone.
Entering a pause when dialling manually
Press and hold the redial button
outside line and the actual telephone number. The letter P will appear in the display.
After connecting to an outside line your telephone will wait for 3 seconds before dialling
the actual telephone number.
The pause can also be saved with numbers in the phone book.
NOTE: If an automatic outside line code is activated, the pause will be inserted
automatically. You will find more information in Chapter 9.6.
for 2 seconds between the number for the
50
Page 51

- Phone book -
5 The phone book
100 numbers including a name can be stored in the phone book in the mobile unit
(PRIVATE). The maximum length for a number is 20 characters. In addition, 20
numbers can be stored in the base station (SHARED), which are then available to each
mobile unit when several mobile units are in use.
TIP! The phone book in the mobile unit can also be used during a call. To do this, press
the OPTIONS display button and choose PHONEBOOK. In this way, you can pass on
numbers from your phone book to the person you are calling.
5.1 Entering numbers and names in the phone book
Press the NAMES display button and the display will show the options PRIVATE
(mobile unit) and SHARED (base unit).
Using the cursor, choose which phone book you want to store the entry in and
press the OK display button.
Select ADD ENTRY with the cursor and again press OK.
Now enter the first line of the name with a maximum of 10 letters. You will find
information on how to enter names in the next section.
Select the second line of the display with the cursor and here enter the associated
telephone number with a maximum of 20 digits.
Select the third line of the display with the cursor and here choose your own call
tone for this number or select OFF.
Confirm with the SAVE display button and the phone book entry will be saved.
Note:
o In addition, a ring tone can be assigned to each phone number stored. In this way,
you can tell who is calling you simply from the ring tone. This assignment will only
work when your telephone line and also the caller has the CLIP caller display
facility. In this case, it is possible that the mobile unit may first ring once with the
normal ring tone before the allocated tone is heard.
o Numbers with the same name cannot be saved. In this case, the name that has
already been entered will be replaced with the new phone number following a
prompt.
o When the memory capacity of one of the phone books has been used up, an
appropriate message will appear in the display.
How to enter names
9 The number keys are also printed with letters for entering names. Letters, as well
as numbers and special characters, can be entered by repeatedly pressing the
appropriate button. To change from uppercase letters to lowercase letters or vice
versa, simply press the
9 To enter a space, press the 1 button once.
9 To enter the same letter twice, press the appropriate letter and then wait until the
cursor automatically jumps to the next position.
button.
51
Page 52

- Phone book -
9 You can move the display cursor within the name or number using the left and
right cursor buttons in order to make changes.
9 Incorrect numbers can be deleted with CLEAR.
TIP! Your phone can also store numbers in the rapid save mode. Simply enter the
required phone number and press the SAVE display button. Enter the associated name
and press the SAVE display button again.
Overview
1 Button Space 1
2 Button A B C 2 À Ä Â ç
3 Button D E F 3 È É ∆
4 Button G H I 4 Ì ┌
5 Button J K L 5 Λ
6 Button M N O Ö 6 Ň Ò ö Ø Ω
7 Button P Q R S 7 П Φ Ψ Σ
8 Button T U V Ü 8 ù ü Ө
9 Button W X Y Z 9 Æ Ξ
0 Button 0 . - , ? ! : “ ’
º Button
º
5.2 Dialling stored numbers from the phone book
After you have stored a few phone numbers, you can call these up very quickly and
easily.
Dialling numbers from the mobile unit
Press the up or down cursor button and the first entry in alphabetical order will be
displayed directly.
Select the required phone book entry with the cursor. To choose a phone number
directly alphabetically, press the appropriate letter.
Press the call button
TIP! In the normal standby mode, you can go to the phone book in the mobile unit
directly with the up and down cursor buttons.
Dialling numbers from the base station.
Press the NAMES display button.
Select the SHARED setting with the cursor and confirm by pressing OK twice.
Select the required phone book entry with the cursor. To choose a phone number
directly alphabetically, press the appropriate letter.
Press the call button
52
# @ & ( ) / _
.
.
Page 53

- Phone book -
5.3 Other phone book functions
Other items can be reached from the phone book menu:
VIEW = You can see the entries that have been saved by using the
ADD ENTRY = Saving phone book entries (see 5.1)
QUICK DIAL = Assign, change or delete QUICK DIALbuttons (see 5.4.1)
STATUS = Shows the number of occupied and free memory locations.
DELETE ALL = Deletes the whole phone book
Other options are available in the phone books depending on the function selected:
USE NUMBER = Shows the phone number in the display and the number can
DETAILS = Shows the phone book entry with name, number and
EDIT = Names and phone numbers can be edited here.
TO SHARED = Copies a phone number from the private phone book (mobile
TO PRIVATE = Copies a phone number from the SHARED phone book (base
DELETE = Deletes individual entries.
Note: If a call number in the phone book is deleted, which is used also on the quick dial
buttons, also the storage of the quick dial buttons is lost.
5.4 Quick dial buttons
A phone number from the phone book in the mobile unit can be allocated to each of the
numbers 1 to 9. The stored number is then dialled directly by pressing one of these
buttons.
5.4.1 Assign/change/delete quick dialbuttons
Press the NAMES display button and confirm with OK.
Select the QUICK DIALsetting with the cursor and confirm with OK.
Select the required quick dialbutton (button 1 to 9) that you want to assign by using
the cursor. If a button has already been assigned, the number and name will be
displayed. In this case, you can delete or change the assignment. To do this, press
OPTIONS and choose CHANGE or DELETE. If choosing DELETE, confirm with
OK. If choosing CHANGE, continue with the next but one step.
Press the SELECT display button.
Select the required phone book entry with the cursor. To choose a phone number
directly alphabetically, press the appropriate letter.
Confirm the selection with OK and more details on this number will again be
displayed.
Again confirm with OK and the quick dialbutton will be assigned.
cursor buttons. You can access other functions such as EDIT,
DELETE etc. by pressing OPTIONS
be dialled directly with the call button
associated ring tone.
unit) into the SHARED phone book (base station).
station) into the private phone book (mobile unit).
.
53
Page 54

- Phone book -
5.4.2 Using the quick dialbuttons
Hold the appropriate quick dialbutton 1 to 9 pressed for 2 seconds. The corresponding
phone number will be shown in the display and the connection will be made.
5.5 Setting up the special phone book
You can store a further 10 numbers in your telephone's special phone book. The special
phone book can be used to store important numbers such as those of doctors, fire
brigade or police. If you wish, you can also save the need to press the R signal button in
the phone number. Numbers with the same name cannot be saved. In this case, the
name that has already been entered will be replaced with the new phone number
following a prompt.
Press the
Select the ADD ENTRY setting with the cursor and confirm with OK.
Now enter the first line of the name with a maximum of 10 letters. You will find
information on entering names in Chapter 5.1.
Select the second line of the display with the cursor and here enter the associated
telephone number with a maximum of 20 digits.
Press the OPTIONS display button.
If you want to incorporate the R signal button into the number, choose R and OK.
Choose SAVE to save the number directly in the special phone book.
You will find information on other options in the special phone book, such as delete or
edit, under 5.3.
5.5.1 Dialling stored numbers from the special phone book
Press the
order will be displayed directly.
Select the required phone book entry with the cursor. To choose a phone number
directly alphabetically, press the appropriate letter.
Press the call button
button.
button and the OK display button. The first entry in alphabetical
.
54
Page 55

- Extras -
6 Extras
Extras
6.1 Alarm/Wake-up function
You can enter an alarm time using the integral wake-up and alarm function. When this
time is reached you will hear signal tones from the mobile unit for one minute and the
display will show the message ALARM with the current time. To stop the alarm, either
press the STOP display button or the SNOOZE display button. If SNOOZE is pressed, a
second alarm will be initiated automatically after 10 minutes. The volume of the alarm
cannot be adjusted.
You can find out how to set the time in Chapter 7.1.
Activating the alarm and wake-up function
Press the MENU display button, select EXTRAS with the cursor and confirm by
pressing the OK display button twice.
Select ON and press the OK display button.
Now select the required hours in the first line of the display with the cursor, and the
minutes in the second line.
Press the OK display button.
Press the
items from the menu. The alarm clock symbol
the alarm/wake-up function is switched on.
Switching the alarm and wake-up function on and off early
Press the MENU display button, select EXTRAS with the cursor and confirm by
pressing the OK display button twice.
Select OFF and press the OK display button.
Press the
items from the menu.
button to return to the main display immediately or choose other
button to return to the main display immediately or choose other
Alarm Clock
Baby Monitor
WalkieTalkie
Timer
Stopwatch
Touch&Dial
will appear in the display when
55
Page 56

- Extras -
6.2 Internal room monitoring (baby phone)
With room monitoring, you can listen in to another room using a second mobile unit. A
second mobile unit is always required for this purpose. You will find further information
on using additional mobile units in Chapter 11.
Switching on the baby phone on the mobile unit
Press the MENU display button, select EXTRAS with the cursor and confirm with
the OK display button.
Select the BABY MONITOR setting and press the OK display button.
Choose the ON setting and confirm with the OK display button. The internal room
monitoring is now activated. An appropriate message will appear in the display.
Now place the mobile unit in the room that you want to monitor. In order to listen in to
the room, dial the internal number of the mobile unit. The call will be accepted directly
without ringing and you will be able to listen in to the room. To cancel room monitoring,
terminate the call with the
time by dialling the internal number of the mobile unit.
Switching off the baby phone on the mobile unit
You can switch off the BABY PHONE function with the CANCEL display button and
then OK.
6.3 Walkie-talkie
When you use several Type DECT6500 handsets, you can use the mobile units as
walkie-talkies. In the walkie-talkie mode, the mobile units are logged off from the base
station. You can therefore be as far away from the base station as you like. It is not
possible to receive external calls during this time. In order to use this function, several
mobile units must be switched to the walkie-talkie function. The range between two
mobile units is up to 50 m indoors and up to 300 m outdoors.
Preparing the mobile units
In order to use this function, you must switch each mobile unit individually to the
WALKIE-TALKIE function.
Press the MENU display button, select EXTRAS with the cursor and confirm with
the OK display button.
Select the WALKIE-TALKIE setting and press the OK display button.
Now select the number that the mobile unit is to be allocated during the WALKIE-
TALKIE function and confirm with OK. Repeat the procedure for the required
mobile units. The display buttons are now allocated the functions TALK and
CANCEL.
56
button. You can listen in to the room again at any
Page 57

- Extras -
Calling between mobile units.
Press the TALK display button on one mobile unit.
Select the mobile unit you that you want to call and press OK.
A ring tone will sound on the selected mobile unit. The call can be accepted there
with the call button
another. The call is terminated on both mobile units with the
Switching off walkie-talkie mode
To cancel the function, press the CANCEL display button and then OK on all mobile
units concerned. The mobile units will be logged on to the base station once more.
6.4 Timer
You can use the integral timer to be reminded of an appointment or the like after a
certain time.
Press the MENU display button, select EXTRAS with the cursor and confirm with
the OK display button.
Select the TIMER setting and press the OK display button.
Enter how long the timer is to run in hours, minutes and seconds in the three lines
and confirm with OK. The timer will be switched on and the remaining time will be
indicated in the display.
When the timer has run down to zero, you will hear an alarm tone for one minute. The
alarm can be cancelled prematurely by pressing the STOP display button.
6.5 Integral stopwatch
You can measure times with a resolution of 1/10 of a second using the integral
stopwatch.
Press the MENU display button, select EXTRAS with the cursor and confirm with
the OK display button.
Select the STOPWATCH setting and press the OK display button.
The stopwatch will start to run when the START display button is pressed.
o When the stopwatch is running, an intermediate time can be read with
PAUSE. The time is resumed by pressing RESUME.
o The time is stopped by means of the STOP button.
o The stopwatch is reset to zero with RESET.
Press the
CANCEL to select other items from the menu.
and the two mobile units will be able to speak to one
button.
button to return immediately to the main display or choose
57
Page 58

- Extras -
6.6 Baby call
Small children or even older people can easily dial a previously defined telephone
number using the baby call feature by pressing any button on the mobile unit. Excluded
from this are the and CANCEL buttons.
Activating baby call
Press the MENU display button, select EXTRAS with the cursor and confirm with
the OK display button.
Select the TOUCH & DIAL setting and press the OK display button.
Now select the ON setting in the first line.
Select the second line and there enter the required telephone number with a
maximum of 20 digits using the number pad. If a number has already been
entered, this can be deleted with the CLEAR display button.
Confirm with the OK display button. Baby call will be switched on and will be
indicated with DIAL accordingly in the display. The stored phone number can be
dialled directly by pressing any button (apart from the
buttons).
Deactivating baby call
Press the CANCEL display button.
Confirm with the OK display button and baby call will be deactivated.
and CANCEL
58
Page 59

- Display settings -
7 Display settings
Display
7.1 Entering the time
Before using the telephone, you should set the current time. The internal time is used
for the display and for the caller lists. You can therefore always tell retrospectively at
what time you received a particular call.
Press the MENU display button.
Select DISPLAY with the navigation keys and confirm twice with the OK display
button.
You can select HOUR and MINUTE using the navigation keys.
The required values can then be set by means of the left and right navigation keys.
Save the time with the OK display button.
Press the
items from the menu.
The 24-hour and 12-hour formats are available if you should want to change the time
format. The 24-hour format is already preset.
Note: If the mobile part is switched off, you should set the current time again after
switching on.
button to return to the main display immediately or choose other
7.2 Changing display names
In normal operation, the message "DECT6500" appears in the display. If you have
logged on several mobile units to one base station, it can be useful to give each mobile
unit its own name (max. 10 letters). The number after the name shows with which
number the mobile unit can be called internally.
Press the MENU display button, choose DISPLAY by means of the navigation
keys and confirm with OK.
Select HANDSET NAME with the navigation keys and confirm with OK.
Now enter the required name and confirm with OK.
Press the
items from the menu.
button to return to the main display immediately or choose other
7.3 Setting the display language
The display messages can be set up in German and English.
Press the MENU display button, choose DISPLAY by means of the navigation
keys and confirm with OK.
Select LANGUAGE with the navigation keys and confirm with OK.
Now select the required language using the navigation keys and confirm with OK.
Press the
items from the menu.
button to return to the main display immediately or choose other
Clock
Time format
Handset Name
Language
Wallpaper
Colour
59
Page 60

- Display settings -
7.4 Changing the display background
Three photos are available for the display background; flower, sky and butterfly.
Press the MENU display button, choose DISPLAY by means of the navigation
keys and confirm with OK.
Select WALLPAPER with the navigation keys and confirm with OK.
Now select the required background using the navigation keys and confirm with
OK.
Press the
items from the menu.
7.5 Changing the display menu colour
The display background colour for the menu can be set to three different colours.
Press the MENU display button, choose DISPLAY by means of the navigation
keys and confirm with OK.
Select COLOUR with the navigation keys and confirm with OK.
Now select the required colour using the navigation keys and confirm with OK.
Press the
items from the menu.
button to return to the main display immediately or choose other
button to return to the main display immediately or choose other
60
Page 61

- Setting ring tones and signal tones -
8 Setting up ring tones and signal tones
Sounds
8.1 Setting up ring tones for the mobile unit
Your mobile unit can respond with 20 different ring tones when a call comes through. If
you are using the telephone system with several mobile units, you can set different ring
tones for external and internal calls.
Press the MENU display button, choose SOUNDS by means of the navigation
keys and confirm with OK.
Select HANDSET with the navigation keys and confirm with OK.
The volume of the ring tone can be adjusted in five steps in the first line of the
display using the left and right navigation keys. When CRESCENDO is selected,
the ring tone starts quietly and becomes louder with each ring. If at any time you
do not want to be disturbed, you can also turn the ring tone off altogether. If the
ring tone is turned off, incoming calls will only be signalled at the base station and
by means of the display on the mobile unit.
Now use the navigation keys to move to the second line of the display and then
select the required ring tone for external calls.
If you are using the phone system with several mobile units, you can choose the
required ring tone for internal calls in the third line of the display.
Confirm with OK.
Press the
items from the menu.
TIP! If at any time you do not want to be disturbed, you can turn off the ring tone on the
mobile unit. Press and hold the
in the display. Incoming calls will now only be signalled at the base station and no
longer at the mobile unit. To switch the ring tone on again, press and hold the
button again for 2 seconds.
button to return to the main display immediately or choose other
Handset
Base
HS Key Tones
HS Tones
button for 2 seconds. The symbol will appear
61
Page 62

- Setting ring tones and signal tones -
8.2 Setting up ring tones for the base station
Press the MENU display button, choose SOUNDS by means of the navigation
keys and confirm with OK.
Select BASE with the navigation keys and confirm with OK.
The volume of the ring tone can be adjusted in five steps in the first line of the
display using the left and right navigation keys. When CRESCENDO is selected,
the ring tone starts quietly and becomes louder with each ring. If at any time you
do not want to be disturbed, you can also turn off the ring tone on the base station
altogether.
Now use the navigation keys to move to the second line of the display and then
select the required ring tone.
Confirm with OK.
Press the
items from the menu.
8.3 Activating/deactivating the button tone
Each time a button is pressed, the mobile unit confirms with a button tone. The button
tone can be switched on or off.
Press the MENU display button, choose SOUNDS by means of the navigation
keys and confirm with OK.
Select HS KEY TONES with the navigation keys and confirm with OK.
Now select whether you want to activate or deactivate the function by using the
navigation keys and confirm with OK.
Press the
items from the menu.
8.4 Activating/deactivating warning tones
A short tune will sound when the phone is placed on the base station or a save
operation has been successfully completed. This tune can be switched on or off.
Press the MENU display button, choose SOUNDS by means of the navigation
keys and confirm with OK.
Select HS TONES with the navigation keys and confirm with OK.
Now select whether you want to activate or deactivate the function by using the
navigation keys and confirm with OK.
Press the
items from the menu.
button to return to the main display immediately or choose other
button to return to the main display immediately or choose other
button to return to the main display immediately or choose other
62
Page 63

- Special functions -
9 Special functions
Advanced
9.1 Accepting calls automatically
Incoming calls are accepted automatically when you lift the mobile unit from the base
station. If you only want calls to be accepted by means of the
deactivate the automatic acceptance facility.
Press the MENU display button, choose ADVANCED by means of the navigation
keys and confirm with OK.
Select AUTO ANSWER with the navigation keys and confirm with OK.
Now select whether you want to activate or deactivate the function by using the
navigation keys and confirm with OK.
Press the
items from the menu.
9.2 Tone (TD) or pulse (PD) dialling
This feature enables you to use your telephone both on analogue exchanges (PD) and
on the new exchanges (TD). The factory setting is TONE dialling.
Press the MENU display button, choose ADVANCED by means of the navigation
keys and confirm with OK.
Select DIAL MODE with the navigation keys and confirm with OK.
Now select the dialling method you require using the navigation keys and confirm
with OK.
Press the button to return to the main display immediately or choose other
items from the menu.
button to return to the main display immediately or choose other
Auto Answer
Dial Mode
Recall
Pause
Prefix
PABX
Call Barring
button, you can
63
Page 64

- Special functions -
9.3 Flash time for private exchanges
If you have connected your telephone to a private exchange, you can use all the
facilities such as call transfer, automatic recall, etc. The FLASH time "100ms" (FLASH1,
factory setting) will be required on a private exchange. You can find out from the dealer
from whom the equipment was purchased whether your telephone will work on your
private exchange without any problems.
Press the MENU display button, choose ADVANCED by means of the navigation
keys and confirm with OK.
Select RECALL with the navigation keys and confirm with OK.
Now select which flash time you require using the navigation keys and confirm with
OK.
Press the
items from the menu.
9.4 Pause when using on private exchanges
With private exchanges, it is sometimes necessary to dial a certain number (e.g. "9" or
"0") in order to obtain a dialling tone for an outside line on the extension. With some,
older private exchanges, it takes some time before the dialling tone can be heard.
Especially for these private exchanges, an automatic pause can be inserted after
connecting to the outside line (see Chapter 9.6). Two different pause lengths of 2
seconds (Pause 1) and 4 seconds (Pause 2) can be set.
Press the MENU display button, choose ADVANCED by means of the navigation
keys and confirm with OK.
Select PAUSE with the navigation keys and confirm with OK.
Now select which pause length you require using the navigation keys and confirm
with OK.
Press the
items from the menu.
9.5 Automatic dialling code
Your telephone has an automatic dialling code function. With this function, when
dialling a particular combination of numbers, a previously stored number is inserted in
front of the actual phone number.
In this way, when dialling a particular dialling code for example, you can automatically
insert a required call-by-call number in front of this phone number. Or, you can
automatically add the required country code to an international number.
Example: The number 0221 (in this case, an area dialling code) has the number 0xxxx
assigned to it. Here, the call-by-call will automatically be placed in front of every
number dialled that begins with 0221. If you have dialled the number 0221-987654321,
the telephone will recognise the 0221 and will dial 0xxxx-0221-987654321.
64
button to return to the main display immediately or choose other
button to return to the main display immediately or choose other
Page 65

- Special functions -
Press the MENU display button, choose ADVANCED by means of the navigation
keys and confirm with OK.
Select PREFIX with the navigation keys and confirm with OK.
Enter the PIN code (factory setting 0 0 0 0) and confirm with OK.
Now select the required display line using the navigation keys.
: On/Off The function can be switched on or off in the first line of the display.
: 0xxxx In the second line of the display, enter the numbers, which are to
be placed in front of the phone number.
: 0221 In the third line of the display, enter the dialling code or phone
Confirm with OK.
Press the
items from the menu.
The PIN code will be required for programming (factory setting 0 0 0 0). Three phone
numbers (dialling code 1, 2 and 3), each with 5 digits, can be stored and assigned. The
prefixed numbers will not be shown in the display. The phone numbers in the phone
books and the caller list are also monitored. After the call button
monitoring is no longer possible.
9.6 Outside line code when using on private exchanges
With private exchanges, it is sometimes necessary to dial a certain number (e.g. "9" or
"0") in order to obtain a dialling tone for an outside line on the extension. This outside
line code can be inserted automatically every time a number is dialled. The PIN code
will be required for programming (factory setting 0 0 0 0).
Press the MENU display button, choose ADVANCED by means of the navigation
keys and confirm with OK.
Select PABX with the navigation keys and confirm with OK.
Enter the PIN code (factory setting 0 0 0 0) and confirm with OK.
Now select the required display line using the navigation keys.
: On/Off The function can be switched on or off in the first line of the display.
: 0 Enter the outside line code with a maximum of 3 digits in the
Confirm with OK.
Press the
items from the menu.
Note: A pause will also be inserted between the outside line code and the actual phone
number. See Chapter 9.4.
number that these numbers are to be placed in front of.
button to return to the main display immediately or choose other
was pressed, a
second line of the display.
button to return to the main display immediately or choose other
65
Page 66

- Special functions -
9.7 Dialling block
You can block specific phone numbers by using the dialling blocks. When several
mobile units are used, the dialling blocks can be set separately for each mobile unit.
The PIN code will be required for programming (factory setting 0 0 0 0).
Press the MENU display button, choose ADVANCED by means of the navigation
keys and confirm with OK.
Select CALL BARRING with the navigation keys and confirm with OK.
Enter the PIN code (factory setting 0 0 0 0) and confirm with OK.
Now choose which mobile unit you want to set up a dialling block for (only when
multiple mobile units are used) and confirm with OK.
Select the required function by means of the navigation keys.
OFF All phone numbers are allowed
ALL All numbers are blocked except the emergency numbers 110 and
EXCEMPT All numbers are blocked except a freely programmable dialling
BAR Here, you can block a specific dialling code with a maximum of 5
If you have selected EXCEMPT or BAR, press the down navigation key once and
enter the required number.
Confirm with OK.
Press the
items from the menu.
112.
code with a maximum of 5 digits and the emergency numbers 110
and 112.
digits (e.g. 0190).
button to return to the main display immediately or choose other
66
Page 67

- System -
10 System
System
10.1 Logging on mobile units
Before you can use additional mobile units, these must first be logged on. You will find
further information on using additional mobile units in Chapter 11.
10.2 Automatic base unit selection
If a mobile unit is logged on to several base stations, you can choose here the base
station that the mobile unit is currently connected to. In the AUTO setting, the mobile
unit will automatically search for the nearest base station. When reception is no longer
adequate, the mobile unit will then search for the other base stations, which it is logged
on to.
Press the MENU display button, choose SYSTEM by means of the navigation keys
and confirm with OK.
Select BASE SELECT with the navigation keys and confirm with OK.
Use the navigation keys to select which base station the mobile unit is to be
connected to. For automatic base station selection, choose AUTO.
Confirm with OK.
Press the
items from the menu.
General information on using additional base stations: You can increase the range
of the mobile units by using several base stations. To make use of this effect, all base
stations must have a telephone connection and the mobile unit must be logged on to all
base stations used. Depending upon the application, you can allocate the same
telephone number to each base station or you can give the base stations different
numbers. In this case, the mobile unit will always be given a new phone number as
soon as it is within range of a different base station. Make sure that the ranges of all
base stations overlap. Please test the range of the mobile units before putting a new
base station into operation. If a mobile unit is logged on to the base station and if the
automatic base station selection is activated, the mobile unit is always forwarded
automatically to the nearest base station. Current calls cannot be transferred from
one base station to another.
10.3 Logging off mobile units
When several mobile units are used, any mobile unit can be logged off again here. You
will find further information on using additional mobile units in Chapter 11.
button to return to the main display immediately or choose other
Register
Base Select
Delete HS
Change PIN
Reset
67
Page 68

- System -
10.4 Changing the system PIN code
Some functions of the telephone system are protected against unauthorised use by a
PIN code. The PIN code consists of up to 8 numbers. As supplied, the PIN code is set
to "0000". If the old PIN code is not entered correctly, the process will be aborted.
The old PIN code will first be required for programming (factory setting 0 0 0 0). The
new PIN code must be entered twice under NEW PIN and CONFIRM.
Press the MENU display button, choose SYSTEM by means of the navigation keys
and confirm with OK.
Select CHANGE PIN with the navigation keys and confirm with OK.
Enter the current PIN code (factory setting 0 0 0 0) and confirm with OK.
Now enter the new PIN code and confirm with OK.
Enter the new PIN Code again and confirm with OK.
Press the
items from the menu.
Note: When you assign a new PIN, you must keep this safely.
10.5 Restoring factory settings
The mobile unit and the base station are reset to the factory settings using this function.
The PIN code will be required for programming (factory setting 0 0 0 0).
Language: German Name of mobile unit:
Menu colour: Blue Automatic call accept: on Dialling code: off
FLASH time: 100ms External ring tone: 2 Outside line code: none
Dialling mode: Tone/TD Internal ring tone: 3 Dialling blocks: off
Receiver volume:
medium
Time format: 24-hour Ring tone, base: 1 Button tone: on
Background: 1 Ring tone volume, base: off Warning tones: on
Menu colour: 1 Pause length: 1 Alarm/Wake-up function: off
Room monitoring: off Walkie-talkie: off Timer: off
Stopwatch: off Baby call: off Base selection: Auto
Press the MENU display button, choose SYSTEM by means of the navigation keys
and confirm with OK.
Select RESET with the navigation keys and confirm with OK.
Enter the current PIN code (factory setting 0 0 0 0) and confirm with OK.
Confirm again with OK and the factory settings will be restored.
button to return to the main display immediately or choose other
DECT6500
Ring tone volume, mobile
unit: medium
PIN code: 0 0 0 0
Assignment of quick
dialbuttons: off
68
Page 69

- Multiple mobile units -
11 Multiple mobile units
Up to three additional mobile units can be logged on to your base station. One mobile
unit can be logged on to up to three further base stations.
When you use multiple mobile units you will have the following options:
Internal calls between mobile units (see 11.1).
External calls can be forwarded between mobile units (see 11.2).
Conference calls between one external and two internal subscribers (see 11.3).
Room monitoring (see 6.2)
Walkie-talkie (see 6.3):
Incoming external calls are signalled on all mobile units.
Note: Mobile units from other manufacturers can be integrated into the telephone
system by means of the internationally adopted GAP standard. However, all functions
that are supported by the DECT6500 are only available in conjunction with a
DECT6500 mobile unit. In the same way, you can use a DECT6500 mobile unit on
base stations from other manufacturers, as long as these units work using the GAP
standard.
Information for using the mobile unit on other base stations:
Due to the large number of different manufacturers, it is not possible to guarantee all the
functions when using the mobile unit on another base station. It is possible that not all
the functions supported by the DECT6500 mobile unit will be available.
Note: If another mobile unit is already using the external line, an appropriate message
will appear in the display. In this case, it is not possible to make a further external call.
11.1 Making an internal call
When you have connected multiple mobile units to a base station, you will be able to
INT
make internal calls. To do this, press the
required mobile unit. You can also select the required mobile unit with the cursor and
make the connection with the OK display button. The call is accepted at the mobile unit
called with the call button
button.
Note: If an external call comes in while you are making an internal call, you will hear the
base station ringing and the caller's number will be shown in the display of the mobile
units, provided that caller display (CLIP) is available. End the internal call with the
button and accept the external call by means of the call button on one of
the mobile units.
and terminated on both mobile units with the
11.2 Connecting external calls to another mobile unit
If you have accepted an external call on one mobile unit, you can forward the external
call to another mobile unit. To do this, press the
required mobile unit. After the internal call has been accepted at the other mobile unit,
you have the following options:
A. Consultation: You can now speak to the internal subscriber. To return to the
external call, press the left display button twice (OPTIONS -> OUTSIDE CALL).
B. Forward the call: Press the OPTIONS display button. Select the TRANSFER
function and press the OK display button.
button and the internal number of the
INT
button and then the number of the
69
Page 70

- Multiple mobile units -
11.3 Holding conference calls
An external call can be connected to a further internal subscriber as a conference call.
In this way, two mobile units can talk to the external caller simultaneously.
Establish the required connection with the external subscriber.
Then call the internal mobile unit. To do this, press the OPTIONS display button
and choose the INTERCOM function. Press the number of the required mobile
unit. You can also select the required mobile unit with the cursor and make the
connection with the OK display button. If the internal call is not accepted, press the
CANCEL display button and you will be connected to the external subscriber once
more.
If the internal call is accepted by the selected mobile unit, press the OPTIONS
display button again and choose the CONFERENCE function. Both internal mobile
units will now be connected to the external subscriber.
To end the conference call, press the OPTIONS display button on one of the
mobile units. Then select the EXIT CONF. function and confirm with OK. Only one
mobile unit will then remain connected to the external subscriber. The call can be
terminated here with the
11.4 Logging on and logging off mobile units
11.4.1 Logging on DECT6500 mobile units
If the mobile unit has not yet been logged on to a base station, press the REG.
display button. Otherwise, press the MENU display button. Then select SYSTEM
from the menu and confirm with OK.
Press the OK display button once.
Press and hold the page button
signal tones. Now log on the new mobile unit to the base station within 60
seconds.
Now enter the PIN code of the base station (factory setting 0 0 0 0) and confirm
with OK. A search will now be carried out for the base station.
As soon as the base station has been found, the internal number that has been
allocated to the mobile unit will appear briefly in the display. The mobile unit is
logged on and can be used for external and internal calls. An internal number will
be automatically assigned to the mobile unit. The main mobile unit already logged
on has the internal number 1. All further mobile units that are logged on will be
numbered in the sequence in which they were logged on (internal phone numbers
2 to 4). This internal telephone number will be indicated on the right of the display
next to the name.
11.4.2 Logging on other DECT-GAP telephones to the base station
In order to log on a DECT-GAP mobile unit from another manufacturer, follow the
instructions in the other supplier's operating manual and then press the
until you hear several signal tones.
Use the PIN-Code 0 0 0 0 to log on.
Due to the large number of different mobile units, it is not possible to guarantee all
the functions provided.
70
button.
on the base station until you hear several
button
Page 71

- Multiple mobile units -
11.4.3 Logging off mobile units
Press the MENU display button and choose SYSTEM from the menu.
Confirm with the OK display button and choose DELETE HS from the menu.
Choose which mobile unit is to be logged off and confirm with the OK display
button.
Now enter the PIN code of the base station (factory setting 0 0 0 0) and confirm
with the OK display button. The mobile unit will now be logged off.
71
Page 72

- Troubleshooting -
12 Troubleshooting
If you have problems with your telephone, please check the following points first. For
technical problems, you can also contact our hotline on Tel. 0180 5 00 13 88 (Telekom
cost at the time of printing 12 cents/min).
refer to your dealer. The warranty period is 2 years.
No calls possible The telephone line is not correctly connected or is faulty.
Connection is cut off
or drops out
The charging light
does not come on
The battery symbol
flashes in the display
after a few hours
Display dark The batteries are flat. Please charge the mobile unit on the
Troublesome noises
when making a call
Use only the telephone cable provided.
Test whether your telephone connection is in order by using
another telephone.
The power supply is not plugged in or there is a total power
failure.
The rechargeable batteries are flat or defective.
You are too far away from the base station.
The base station is not connected to the mains supply.
You are too far away from the base station.
Incorrect position for the base station.
Place the mobile unit properly on the base station, clean the
contact surfaces on the handset and on the base station with
a soft, dry cloth.
The base station is not connected to the mains supply.
Place the mobile unit on the base station for 16 hours.
If this does not help, replace the rechargeable batteries.
base station.
Is the mobile unit switched off?
Caused by direct sunlight, allow the mobile unit to cool down.
Do not set up the base station in the immediate vicinity of
other electrical equipment such as microwaves or hi-fi
systems, as this may result in mutual interference.
For any claims under the warranty, please
72
Page 73

- Important Information -
13 Important information
13.1 Technical data
Standard DECT-GAP
Number of channels 1880 to 1900 MHz
Power supply Base station 220/230V, 50 Hz
Range Indoors up to 50 m
Range Outdoors up to 300 m
Standby up to 120 hours
Max. call duration up to 8 hours
Standard rechargeable batteries 2 x 1.2V/750mAh, Type AAA
Dialling method TD or PD
Permissible ambient temperature 10°C to 30°C
Permissible relative humidity 20 to 75%
Signal button function 100ms or 300ms
13.2 Changing the telephone cable
If you have to replace your telephone cable, you can locate the appropriate cable at
your dealer's with the help of the following diagram.
F-Coding - IMPORT Standard
TAE-F
1
2
3
4
5
6
Rj11 6/4
1
2
3
4
5
6
6
2
5
1
3
4
73
Page 74

- Important Information -
13.3 Warranty
AUDIOLINE units are manufactured and tested in accordance with the most up-to-date
manufacturing procedures. Selected materials and highly developed technologies
ensure trouble-free operation and long life. The situation, where the cause of a
malfunction of the unit is due to the telephone network provider or any private
exchanges that may be connected in between, is not covered by the warranty. The
warranty is not applicable to the batteries or battery packs used in the various products.
The warranty period is 24 months calculated from the day of purchase
All defects, which are the result of material or manufacturing faults, will be rectified free
of charge within the warranty period. Claims under the warranty shall not be considered
if the equipment has been tampered with by the purchaser or third parties. Damage,
which results from improper handling or use, incorrect positioning or storage,
inappropriate connection or Installation and through Act of God or other external
influences are not covered by the warranty. In the case of complaints, we reserve the
right to repair or to replace the defective parts or to exchange the unit. Parts or units
that have been exchanged shall become our property. Claims for damages shall not be
entertained unless they relate to intention or gross negligence on the part of the
manufacturer.
If, however, your unit should develop a fault within the warranty period, please contact
the shop where you bought your AUDIOLINE unit, taking with you your purchase
receipt. In accordance with these conditions, all claims under the warranty shall be
made exclusively to your dealer. Rights under the warranty can no longer be enforced
after the expiry of two years from the purchase and handing over of our products.
13.4 Declaration of Conformity/CE mark
The telephone complies with the basic requirements of the R&TTE Directive
"1999/5/EEC". This is confirmed by the CE mark.
For the complete Declaration of Conformity, please use the free download from our web
site www.audioline.de.
74
Page 75

Page 76

WICHTIGE GARANTIEHINWEISE
Die Garantiezeit für Ihr AUDIOLINE - Produkt beginnt mit dem Kaufdatum. Ein
Garantieanspruch besteht bei Mängeln, die auf Material- oder Herstellungsfehler
zurückzuführen sind. Der Garantieanspruch erlischt bei Eingriffen durch den Käufer
oder durch Dritte. Schäden, die durch unsachgemäße Behandlung oder Bedienung,
natürliche Abnutzung, durch falsches Aufstellen oder Aufbewahren, durch
unsachgemäßen Anschluss oder Installation sowie durch höhere Gewalt oder sonstige
äußere Einflüsse entstehen, fallen nicht unter die Garantieleistung.
BITTE WENDEN SIE SICH IM GARANTIEFALL AUSSCHLIESSLICH AN DEN
HÄNDLER, BEI DEM SIE DAS GERÄT GEKAUFT HABEN, UND VERGESSEN SIE
NICHT, DEN KAUFBELEG VORZULEGEN.
UM UNNÖTIG LANGE WARTEZEITEN ZU VERMEIDEN, SENDEN SIE
REKLAMATIONSGERÄTE BITTE NICHT AN UNSERE BÜROADRESSE.
BEI FRAGEN ZUR BEDIENUNG UND GARANTIELEISTUNG, LESEN SIE BITTE DIE
BEDIENUNGSANLEITUNG ODER WENDEN SIE SICH AN UNSERE HOTLINE:
Version 1 – 10/20 04
0180 500 13 88 (Kosten Telekom bei Drucklegung: 12ct/min)
AUDIOLINE GmbH
Neuss
Service Hotline 0180 5 00 13 88
(Kosten Telekom bei Drucklegung: 12ct/min)
Internet: www.audioline.de - E-mail: info@audioline.de
 Loading...