

Page 1

Installation, Operation and Maintenance Manual
AudioCodes One Voice Operations Center
OVOC
Installation, Operation and Maintenance
Version 7.8
Page 2

Notice
OVOC | IOM
Notice
Information contained in this document is believed to be accurate and reliable at the time
of printing. However, due to ongoing product improvements and revisions, AudioCodes
cannot guarantee accuracy of printed material after the Date Published nor can it accept
responsibility for errors or omissions. Updates to this document can be downloaded from
https://www.audiocodes.com/library/technical-documents.
This document is subject to change without notice.
Date Published: February-04-2021
WEEE EU Directive
Pursuant to the WEEE EU Directive, electronic and electrical waste must not be disposed of
with unsorted waste. Please contact your local recycling authority for disposal of this product.
Customer Support
Customer technical support and services are provided by AudioCodes or by an authorized
AudioCodes Service Partner. For more information on how to buy technical support for
AudioCodes products and for contact information, please visit our website at
https://www.audiocodes.com/services-support/maintenance-and-support.
Documentation Feedback
AudioCodes continually strives to produce high quality documentation. If you have any
comments (suggestions or errors) regarding this document, please fill out the Documentation
Feedback form on our website at https://online.audiocodes.com/documentation-feedback.
Stay in the Loop with AudioCodes
Related Documentation
Document Name
Mediant 500 MSBR User's Manual
Mediant 500L MSBR User's Manual
Mediant 500L Gateway and E-SBC User's Manual
- ii -
Page 3

Notice
OVOC | IOM
Document Name
Mediant 800B Gateway and E-SBC User’s Manual
Mediant 800B MSBR User’s Manual
Mediant 1000B Gateway and E-SBC User’s Manual
Mediant 1000B MSBR User’s Manual
Mediant 2600 E-SBC User's Manual
Mediant 3000 User’s Manual
Mediant 4000 SBC User's Manual
Mediant 9000 SBC User's Manual
Mediant Software SBC User's Manual
Migration from EMS and SEM Ver. 7.2 to One Voice Operations Center
One Voice Operations Center IOM Manual
One Voice Operations Center Product Description
One Voice Operations Center User’s Manual
Device Manager Pro Administrator's Manual
One Voice Operations Center Alarms Monitoring Guide
One Voice Operations Center Performance Monitoring Guide
One Voice Operations Center Security Guidelines
One Voice Operations Center Integration with Northbound Interfaces
Device Manager for Third-Party Vendor Products Administrator's Manual
Device Manager Agent Installation and Configuration Guide
ARM User’s Manual
- iii -
Page 4

Notice
OVOC | IOM
Document Revision Record
LTRT Description
94172 Updated Sections: Managed VoIP Equipment; OVOC Server Requirements;
Installing OVOCon Dedicated Hardware; Upgrading OVOC Server on
Dedicated Hardware; OVOC Server Restore; OVOCServer Platform; Viewing
Process Statuses; Deploying OVOC Image with VMware vSphere Hypervisor
(ESXi); Supplementary Security Procedures; Internet Explorer; Configuring
OVOC as the Email Server on Microsoft Azure
New Sections: Connecting Mediant Cloud Edition (CE) SBC Devices in Azure
Deployment; Configuration Restore; Full Restore; OVOC Cloud Architecture;
Configuring Firewall for Cloud Architecture; Cassandra Password; Virtual
Appliance and Cloud Options
Removed Section:Disable Statistical Report Web page Secured
Communication
94173 Updated Sections:OVOC Server Requirements; Performance and Data
Storage; OVOC Software Deliverables; Starting and stopping Web servers;
Viewing Process Statuses; Viewing General Information; Application
Maintenance; License; HTTP Security Settings; Configuring the Firewall;
Firewall Configuration Schema; OVOCServer Users; Step 2:Configuring the
OVOCServer (OVOC Server Manager) on Azure Cloud; Upgrade procedures
for DVDand ISOfile on Dedicated machine; Upgrade procedure for Virtual
machine; Configuring RAID-0; NTPand Clock Settings
Added Sections:Analytics API; Upgrading the OVOCServer on Cloud
Platforms
94174 Correction to the OVOC Server Requirements table
94175 Added Sections: Configuring the Virtual Machine on AWS; Configuring the
OVOC Server on AWS; Configuring Mediant Cloud Edition (CE) Devices on
AWS; Deploying Devices Behind a NAT; Configuring Firewall for NAT
Deployment
Updated Sections: NTP; NAT (Configuring OVOC Server with Public IP Address);
Installing OVOCServer on Cloud-based platforms; Upgrading the OVOC
Server on Amazon AWS and Microsoft Azure (removed step for OVOC
IPaddress configuration); Upgrading OVOC Server on VMware and Microsoft
Hyper-V Virtual Machines (removed step for OVOC IPaddress configuration);
Configuring RAID-0 (divided into two procedures)
94176 Added Sections:Specifications for Service Provider Cluster Mode; Service
Provider Cluster Mode; Viewing Process Statuses in Service Provider Cluster
Mode; Viewing General Information in Service Provider Cluster Mode;
Configuring Firewall for Service Provider Cluster Mode; Deploying OVOC
- iv -
Page 5

Notice
OVOC | IOM
LTRT Description
Image with VMware vSphere Hypervisor (ESXi) in Service Provider Cluster; ;
Step 2-1 Run the VQM Server Upgrade Script; Step 2-2 Run the PM Server
Upgrade Script; Configuring AWS SES Service; Self-signed certificates
(Microsoft Edge); Start and Restart in Service Provider Cluster Mode
Updated Sections:Managing VoIPEquipment; OVOC Server Requirements;
Standard Capacities; OVOC Software Deliverables; Launching Public OVOC
Image on Amazon Web Services (AWS); DVD2: Oracle DB Installation; DVD3:
OVOC Server Application Installation; Installing OVOCon VMware Version 6.5;
Deploying OVOC Image with VMware vSphere Hypervisor (ESXi); Connecting
OVOC Server to Network on VMware; Upgrading OVOC Server on Amazon
AWS and Microsoft Azure; Upgrading OVOC Server on VMware and Microsoft
Hyper-V Virtual Machines; Connecting to OVOC Server on VMware; Step 2:
Run the OVOC Server (Management Server) Upgrade Script; Upgrading the
OVOC Server-DVD; Upgrading the OVOC Server using an ISO File; OVOC
Server Backup Processes; Full Restore; 19 Viewing Process Statuses; Viewing
General Information; Collecting Logs; Server IP Address; OVOC Voice Quality
Package SBC Communication Server Manager option text updated from SEMAudioCodes Device Communication
94177 Added Section:Connecting Mediant Cloud (CE) Devices to OVOC with Internal
IP
Updated Section:Specifications for Service Provider Cluster Mode; OVOC
Software Deliverables; Deploying OVOC Image with VMware vSphere
Hypervisor (ESXi) in Service Provider Cluster; Configuring OVOC Cloud
Architecture mode; Specifications for Service Provider Cluster mode;
Configuring Mediant CE Communication Settings Using Web Interface (AWS);
Creating OVOC Virtual Machine on Azure; Configuring Mediant CE OVOC
Public IP Connection Settings using Web Interface; OVOC Server Backup
Processes; OVOC Server Restore
94178 Added Section:Managing Device Connection
Updated Section: Install VQM Server; Install PM Server; Deploying OVOC
Image with VMware vSphere Hypervisor (ESXi)
- v -
Page 6

Content
OVOC | IOM
Table of Contents
1 Overview 1
Part I 2
Pre-installation Information 2
2 Managed VoIP Equipment 3
3 Hardware and Software Specifications 8
OVOC Server Requirements 8
Specifications for Service Provider Cluster Mode 9
OVOC Client Requirements 11
Bandwidth Requirements 12
OVOC Bandwidth Requirements 12
Voice Quality Bandwidth Requirements 12
Standard Capacities 13
Skype for Business Monitoring SQL Server Prerequisites 16
4 OVOC Software Deliverables 18
Part II 20
OVOC Server Installation 20
5 Files Verification 21
Windows 21
Linux 21
OVOC Server Users 21
6 Installing OVOC Server on Virtual Machines on Cloud-based Platforms 23
Launching Public OVOCImage on Amazon Web Services (AWS) 23
Step 1 Launching Public Image on AWS 23
Step 2 Connecting Mediant Cloud Edition (CE) SBC Devices on AWS 28
Step 2-1 Configuring the OVOC Server (OVOC Server Manager) on AWS 29
Step 2-2 Configuring Mediant Cloud Edition (CE) SBC Devices on AWS 30
Step 3 Configuring AWS SES Service 32
Creating OVOC Virtual Machine on Microsoft Azure 34
Step 1:Creating Virtual Machine on Azure 35
Step 2:Configuring OVOC as the Email Server on Microsoft Azure 41
Step 2-1:Configuring OVOC as the Email Server on Microsoft Azure using Microsoft Office
365 41
Step 2-2 Configuring OVOC as the Email Server on Microsoft Azure using SMTP Relay 43
Step 3 Connecting Mediant Cloud Edition (CE) Devices 46
Option 1:Connecting Mediant Cloud Edition (CE) SBC Devices to OVOCon Azure using
Public IPAddress 46
Configuring Mediant CE SNMPPublic IP Connection using Stack Manager 48
Configuring Mediant CE OVOC Public IP Connection Settings using Web Interface 48
Option 2 Connecting Mediant Cloud Edition (CE) Devices to OVOC on Azure using Internal
49
- vi -
Page 7

Content
IP Address
Configuring Mediant CE SNMP Internal IP Connection with OVOC using Stack
Manager 51
Configuring Mediant CE OVOC Internal IP Connection Settings using Web Interface 52
OVOC | IOM
7 Installing OVOCServer on VMware Virtual Machine 54
Deploying OVOC Image with VMware vSphere Hypervisor (ESXi) 54
Deploying OVOC Image with VMware vSphere Hypervisor (ESXi) in Service Provider Cluster 56
Step 1 Upgrade Existing Virtual Machine 56
Step 2 Install Service Provider Cluster on Management Server 58
Step 3 Install VQM Server 59
Step 4 Install PM Server 59
Configuring the Virtual Machine Hardware Settings 60
Configuring OVOC Virtual Machines (VMs) in a VMware Cluster 61
VMware Cluster Site Requirements 61
Cluster Host Node Failure on VMware 64
Connecting OVOC Server to Network on VMware 65
8 Installing OVOC Server on Microsoft Hyper-V Virtual Machine 68
Configuring the Virtual Machine Hardware Settings 73
Expanding Disk Capacity 75
Changing MAC Addresses from 'Dynamic' to 'Static' 80
Configuring OVOC Virtual Machines in a Microsoft Hyper-V Cluster 81
Hyper-V Cluster Site Requirements 81
Add the OVOC VM in Failover Cluster Manager 82
Cluster Host Node Failure on Hyper-V 84
Connecting OVOC Server to Network on HyperV 84
9 Installing OVOC Server on Dedicated Hardware 87
DVD1: Linux CentOS 87
Installing DVD1 without a CD-ROM 90
DVD2: Oracle DB Installation 95
DVD3: OVOC Server Application Installation 97
10 Managing Device Connections 101
Establishing OVOC-Devices Connections 101
Configure OVOC Server with Public or NATIP Address 102
Establishing Devices - OVOC Connections 102
Automatic Detection 103
Configure OVOC Cloud Architecture Mode 103
Before Enabling Cloud Architecture Mode 104
Configuring Cloud Architecture Mode 105
Part III 106
OVOC Server Upgrade 106
11 Upgrading OVOC Server on Amazon AWSand Microsoft Azure 107
- vii -
Page 8

Content
OVOC | IOM
12 Upgrading OVOC Server on VMware and Microsoft Hyper-V Virtual
Machines 110
Step 1: Setup the Virtual Machine 110
Setting up VMware Platform for Upgrade 110
Setting up Using VMware Remote Console Application (VMRC) 114
Setting up Using VMware Server Host for Upgrade 116
Setting Up Microsoft Hyper-V Platform for Upgrade 117
Step 2: Run the Server Upgrade Script 123
Option 1:Standard Upgrade Script 123
Option 2: Service Provider Cluster Upgrade Scripts 125
Upgrade Management Server 126
Upgrade VQM Server 128
Upgrade PM Server 130
Step 3: Connect the OVOC Server to Network 132
Connecting to OVOC Server on VMware 132
Connecting to OVOCServer on Hyper-V 133
13 Upgrading OVOC Server on Dedicated Hardware 135
Upgrading the OVOC Server-DVD 135
Upgrading the OVOC Server using an ISO File 137
14 Installation and Upgrade Troubleshooting of the Operational
Environment 140
Part IV 143
OVOC Server Machine Backup and Restore 143
15 OVOC Server Backup Processes 144
Change Schedule Backup Time 145
16 OVOC Server Restore 146
Configuration Restore 146
Full Restore 148
Part V 150
OVOC Server Manager 150
17 Getting Started 151
Connecting to the OVOC Server Manager 151
Using the OVOC Server Manager 152
OVOC Server Manager Menu Options Summary 152
18 Viewing Process Statuses 157
Viewing Process Statuses in Service Provider Cluster Mode 158
19 Viewing General Information 162
Viewing General Information in Service Provider Cluster Mode 164
20 Collecting Logs 166
- viii -
Page 9

Content
OVOC | IOM
21 Application Maintenance 168
Start or Restart the Application 168
Start and Restart in Service Provider Cluster Mode 169
Stop the Application 170
Web Servers 170
Change Schedule Backup Time 171
License 171
OVOC License 172
Analytics API 175
Service Provider Cluster 176
Remove PMor VQMServer from Cluster 178
Force Remove PMor VQMServer from Cluster 179
Synchronize Cluster Node Servers 180
Shutdown the OVOC Server Machine 181
Reboot the OVOC Server Machine 181
22 Network Configuration 182
Server IP Address 183
Ethernet Interfaces 184
OVOC Client Login on all OVOC Server Network Interfaces 184
Add Interface 186
Remove Interface 187
Modify Interface 187
Ethernet Redundancy 188
Add Redundant Interface 189
Remove Ethernet Redundancy 190
Modify Redundant Interface 191
DNS Client 192
Static Routes 193
Proxy Settings 194
SNMP Agent 195
SNMP Agent Listening Port 196
Linux System Trap Forwarding Configuration 197
Server SNMPv3 Engine ID 197
23 NTP & Clock Settings 199
NTP 199
Stopping and Starting the NTP Server 201
Restrict Access to NTP Clients 202
Activate DDoS Protection 202
Authorizing Subnets to Connect to OVOC NTP 202
Timezone Settings 202
Date and Time Settings 204
25 Security 205
- ix -
Page 10

Content
OVOC | IOM
OVOC User 206
SSH 206
SSH Log Level 207
SSH Banner 207
SSH on Ethernet Interfaces 208
Add SSH to All Ethernet Interfaces 209
Add SSH to Ethernet Interface 209
Remove SSH from Ethernet Interface 209
Enable/Disable SSH Password Authentication 210
Enable SSH IgnoreUserKnownHosts Parameter 210
SSH Allowed Hosts 211
Allow ALL Hosts 211
Deny ALL Hosts 212
Add Hosts to Allowed Hosts 212
Remove Host/Subnet from Allowed Hosts 213
Oracle DB Password 214
Cassandra Password 214
OS Users Passwords 215
General Password Settings 215
Operating System User Security Extensions 216
File Integrity Checker 218
Software Integrity Checker (AIDE) and Pre-linking 219
USB Storage 219
Network Options 220
Auditd Options 221
HTTPS SSL TLS Security 221
Server Certificates Update 222
OVOC Voice Quality Package - SBC Communication 227
HTTPSecurity Settings 228
TLS Version 1.0 229
TLS Version 1.1 229
Show Allowed SSL Cipher Suites 230
Edit SSL Cipher Suites Configuration String 230
Restore SSL Cipher Suites Configuration Default 231
Manage HTTP Service Port (80) 231
Manage IPPFiles Service Port (8080) 231
Manage IPPs HTTP Port (8081) 232
Manage IPPs HTTPS Port (8082) 232
OVOC Rest (Port 911) 232
Floating License (Port 912) 232
OVOC WebSocket (Port 915) 233
SBC HTTPS Authentication Mode 233
Enable Device Manager Pro and NBIF Web Pages Secured Communication 234
Change HTTP/S Authentication Password for NBIF Directory 234
- x -
Page 11

Content
OVOC | IOM
26 Diagnostics 236
Server Syslog Configuration 236
Devices Syslog Configuration 238
Devices Debug Configuration 239
Server Logger Levels 240
Network Traffic Capture 241
Part VI 244
Configuring the Firewall 244
27 Configuring the Firewall 245
Configuring Firewall for Cloud Architecture Mode 256
Configuring Firewall for NAT Deployment 256
Configuring Firewall for Service Provider Cluster 257
Part VII 262
Appendix 262
28 Configuring RAID-0 for AudioCodes OVOC on HP ProLiant DL360p
Gen10 Servers 263
RAID-0Prerequisites 263
RAID-0 Hardware Preparation 263
Configuring RAID-0 263
Step 1 Create Logical Drive 263
Step 2 Set Logical Drive as Bootable Volume 264
29 Managing Clusters 266
Migrating OVOC Virtual Machines in a VMware Cluster 266
Moving OVOC VMs in a Hyper-V Cluster 267
30 Supplementary Security Procedures 271
Installing Custom Certificates on OVOCManaged Devices 271
Gateways and SBC Devices 271
Step 1: Generate a Certificate Signing Request (CSR) 271
Step 2: Receive the New Certificates from the CA 273
Step 3: Update Device with New Certificate 273
Step 4: Update Device’s Trusted Certificate Store 274
Step 5: Configure HTTPS Parameters on the Device 275
Step 6: Reset Device to Apply the New Configuration 276
MP-1xx Devices 277
Step 1: Generate a Certificate Signing Request (CSR) 277
Step 2: Receive the New Certificates from the CA 278
Step 3: Update Device with New Certificate 279
Step 4: Update Device’s Trusted Certificate Store 279
Step 5: Configure HTTPS Parameters on Device 282
Step 6: Reset Device to Apply the New Configuration 282
- xi -
Page 12

Content
OVOC | IOM
Cleaning up Temporary Files on OVOC Server 282
31 Transferring Files 283
32 Verifying and Converting Certificates 284
33 Self-Signed Certificates 285
Mozilla Firefox 285
Google Chrome 285
Microsoft Edge 286
34 Datacenter Disaster Recovery 287
Introduction 287
Solution Description 287
Initial Requirements 288
New Customer Configuration 288
Data Synchronization Process 288
Recovery Process 289
- xii -
Page 13

Content
OVOC | IOM
This page is intentionally left blank.
- xiii -
Page 14

CHAPTER1 Overview
1 Overview
The One Voice Operations Center (OVOC) provides customers with the capability to easily and
rapidly provision, deploy and manage AudioCodes devices and endpoints. Provisioning,
deploying and managing these devices and endpoints with the OVOC are performed from a
user-friendly Web Graphic User Interface (GUI). This document describes the installation of the
OVOC server and its components. It is intended for anyone responsible for installing and
maintaining AudioCodes’ OVOC server and the OVOC server database.
OVOC | IOM
- 1 -
Page 15

Part I
Pre-installation Information
This part describes the OVOC server components, requirements and deliverables.
Page 16

CHAPTER2 Managed VoIP Equipment
2 Managed VoIP Equipment
The following products (and product versions) can be managed by this OVOC release:
Table 2-1: Managed VoIP Equipment
Product Supported Software Version
Gateway, SBC and MSBR Devices
OVOC | IOM
Mediant 9000 SBC
Mediant4000 SBC
Mediant4000B SBC
Mediant 2600 E-SBC
Mediant 2600B E-SBC
Mediant Software (Server Edition) SBC
Mediant Software(Virtual Edition) SBC
Mediant3000 (TP-8410 and TP-6310) Versions 7.0 and 6.6
Mediant Cloud Edition
Mediant 2000 Media Gateways Version 6.6
Versions 7.4, 7.2 (including
support for MTC ), 7.0, 6.8
Versions 7.4, 7.2, 7.0 and 6.8
Version 7.4, 7.2, 7.0
Versions 7.4, 7.2, 7.0 and 6.8
Version 7.4, 7.2 and 7.0
Versions 7.4, 7.2, 7.0 and 6.8
Versions 7.4, 7.2 (including
support for MTC), 7.0 and 6.8
Version 7.4, 7.2
1
Mediant 1000 Gateway Version 6.6 (SIP)
Mediant 1000B Gateway and E-SBC
Mediant 800BGateway and E-SBC
Mediant 800C
Mediant 1000B MSBR Version 6.6
Mediant800 MSBR Versions 7.2, 6.8 and 6.6
Mediant500 MSBR Version 7.2 and 6.8
1
This product does not support Voice Quality Management.
- 3 -
Versions 7.4, 7.2, 7.0, 6.8 and
6.6
Versions 7.4, 7.2, 7.0, 6.8 and
6.6
Version 7.4, 7.2
Page 17

CHAPTER2 Managed VoIP Equipment
Mediant 500L MSBR Versions 7.2 and 6.8
OVOC | IOM
Product Supported Software Version
Mediant 500Li MSBR
Mediant 500 E-SBC
Mediant 500L E-SBC
1
Mediant 600 Version 6.6
Version 7.2, 7.20AN.4xx
Version 7.4, 7.2
Version 7.4, 7.2
MediaPack MP-11x series Version 6.6 (SIP)
MediaPack MP-124 Rev. D and E – version 6.6 (SIP)
MP-202 Version 4.4.9 Rev. B, D and R
MP-204 Version 4.4.9 Rev. B, D and R
MP-1288
2
SBA
Version 7.4, 7.2
Mediant 800B SBA Skype for Business SBA version 1.1.12.x and later
and gateway Version 7.2
Mediant 800C SBA Skype for Business SBA version 1.1.12.x and later
and gateway Version 7.2
Mediant 1000BSBA Skype for Business SBA version 1.1.12.x and later
and gateway Version 7.2
Mediant 2600B SBA Skype for Business SBA version 1.1.12.x and later
and gateway Version 7.0
Mediant800B SBA Lync Server SBA version 1.1.12.x and later
and gateway Version 6.8
Mediant 1000B SBA Lync Server SBA version 1.1.12.x and later
and gateway Version 6.8
Mediant 2000B SBA devices Lync Server SBA version 1.1.12.x and later
and gateway Version 6.8
1
As above
2
As above
- 4 -
Page 18

CHAPTER2 Managed VoIP Equipment
OVOC | IOM
Product Supported Software Version
CloudBond
1
CloudBond 365 Pro Edition Version 7.6 with
MediantServer version 7.2.100
and later
CloudBond 365 Enterprise Edition Version 7.6 with
MediantServer version 7.2.100
and later
CloudBond 365 Standard+ Edition Version 7.6 with
Mediant800BMediant 800CGX800C version 7.2.100 and later
CloudBond 365 Standard Edition Version 7.6 with Mediant 800B
version 7.2.100 and later
User Management Pack 365 ENT Version 8.0.0
User Management Pack 365 Version 7.8
CloudBond 365 Version 8.0.0 (Skype for
Business 2019 and Microsoft
Teams)
User Management Pack 365 SP Version 8.0.0
CCE Appliance
2
Mediant 800 CCE Appliance Version 2.1 with Mediant 800B
Mediant Server CCE Appliance Version 2.1 with Mediant
Server
Other Applications
SmartTAP360○Recording
Version 4.3, Version 5.0,
Version 5.1
IP Phones
Supported Software
Versions/Models
1
To support Voice Quality Management for these devices, customers must add the SBC/Media
Gateway platform of these products as standalone devices to OVOC. Once this is done, the
SBC/Gateway calls passing through the CloudBond 365 /CCE Appliances can be monitored.
2
As above.
- 5 -
Page 19

CHAPTER2 Managed VoIP Equipment
Skype for Business From Version 3.0.0: 420HD,
OVOC | IOM
Product Supported Software Version
430HD 440HD and 405HD
From Version 3.0.1: 420HD,
430HD 440HD, 405HD and
450HD
From Version 3.0.2: HRS 457
(with Jabra firmware support)
Native Teams
Third-party Vendor Devices
Spectralink
From
Version 3.1.0
: 445HD,
430HD 440HD, 405HD, 450HD
and HRSFrom
From Version 3.2.0: C450HD
From Version 3.2.1: C450HD,
445HD, 430HD 440HD,
405HD,450HD and HRS
From Version 3.4.2: RX50 Con-
ference Device
1
From Version 1.5: C448HD,
C450HD
From Version 1.8:C470HD
(including Android support)
Spectralink 8440
Polycom
Jabra Headset Support
1
This device is not yet supported
Polycom Trio 8800
Polycom VVX 410
Jabra BIZ, Jabra Coach, Jabra
DIAL, Jabra Eclipse, Jabra Elite,
Jabra Engage, Jabra Evolve,
Jabra Handset, Jabra LINK, Jabra
Motion, Jabra Pro, Jabra Pulse,
Jabra SPEAK, Jabra Sport, Jabra
STEALTH, Jabra Steel, Jabra
SUPREME. For a complete list of
supported Jabra phones, see
- 6 -
Page 20

CHAPTER2 Managed VoIP Equipment
● All versions VoIP equipment work with the SIP control protocol.
● Bold refers to new product support and version support.
OVOC | IOM
Product Supported Software Version
document Device Manager for
Third-Party Vendor Products
Administrator's Manual.
- 7 -
Page 21

CHAPTER3 Hardware and Software Specifications
3 Hardware and Software Specifications
This section describes the hardware and software specifications of the OVOC server.
OVOC Server Requirements
This table below lists the minimum requirements for running the different OVOC server
platforms.
Table 3-1: OVOCServer Dedicated Platform Requirements
Resource Specification
Hardware HP DL360p Gen10
Operating System Linux CentOS Version 7.7 64-bit Rev.19
OVOC | IOM
Memory 64 GB RAM
Disk space Disk: 2x 1.92 TB SSD configured in RAID 0
Processor CPU: Intel (R) Xeon(R) Gold 6126 (12 cores 2.60 GHz each)
Table 3-2: OVOC Server Virtual and Cloud Platform Minimum Requirements
Resource Specification
Platform
Type
Operating
System
Platform
Details
AWS Azure Virtual OVOC
Linux CentOS Version 7.7 64-bit
AWSEC2
Instance Type:
c4.4xlarge
■ High
Profile:VMSize:F16s
■ Low Profile: VM Size
D4s_v3
■ VMware: ESXi 6.7;
VMware HA cluster:
VMware ESXi 6.5
■ Microsoft Hyper-V
Server 2016;
Microsoft Hyper-V
Server 2016 HA
cluster
Memory 30GiB
(c4.4xlarge)
■ High Profile:32 GB RAM
(F16s)
■ Low Profile: 16 GB RAM
(D4s_v3)
- 8 -
■ High Profile:32 GB
RAM
■ Low Profile:16
GBRAM
Page 22

CHAPTER3 Hardware and Software Specifications
Resource Specification
OVOC | IOM
Disk Space AWS EBS:
General
■ High Profile: 2 TB SSD
■ Low Profile: 500 GB SSD
■ High Profile: 1.2 TB
■ Low Profile:500 GB
Purpose SSD
(GP2) 2TB
Processor 16 vCPUs
(c4.4xlarge)
■ High Profile:16 vCPUs
(F16s)
■ Low Profile: 4 vCPUs
(D4s_v3)
■ High Profile: 6 cores
with at least 2 GHz
■ Low Profile: 1 core
with at least 2.5 GHz
■ Low Profile: 2 core
each with at least
2.0 GHz
■ The OVOC server works with the Java Development Kit (JDK) version 1.8 (JDK 1.8 for
Linux™).
■ The Oracle database used is version 12.1.0.2.
● The JDK and Oracle database component versions mentioned above are provided
as part of the OVOC installation image.
● The installation and upgrade scripts validate the minimum requirements for the
Virtual CPU, Memory and Disk components as shown in the table above. Failure
to meet these requirements will lead to the aborting of the scripts.
Specifications for Service Provider Cluster Mode
This Appendix describes the specifications for supporting an enhanced customized platform
for service providers. Additional manual operations are required to be performed by
customers to support this enhancement (Required Updates). The following table describes the
machine specifications for this platform.
The table below describes the specifications for the Service Provide Cluster including three
servers:Management Server, VQMserver and PMserver. It is based on 50,000 devices with
3000 CAPs . For other parameters, refer to the tables below.
Table 3-3: Service Provide Cluster Mode Server Configuration
Item Machine Specification
Server VMware: ESXi 6.7; VMware HA cluster: VMware ESXi 6.5
Memory 256 GB
CPU 24 cores at 2.60 GHz
- 9 -
Page 23

CHAPTER3 Hardware and Software Specifications
Item Machine Specification
OVOC | IOM
Disk
■ SSD 20TB for Management Server
■ SSD 10TB for VQM/PM Servers
Ethernet
■ 1x10GB + 4x1 GB ports (through and through)
Note the following recommendations:
■ Use jumbo frames
■ Create a dedicated vswitch with dedicated uplinks
■ For software ISCSI, use 1 vmkernel nic per 1 physical NIC
■ In case of multiple vmkernel NICs and physical NICs, use port binding
Table 3-4: Service Provide Cluster Mode Capacities
Item Capacity
Topology-Management
OVOC managed devices 50,000
Tenants 5000
Devices per region 500
Links 10,000
Operators 25
Managed devices per tenant 5,000
Alarms– Management
Steady state 100 alarms per second
Total alarms 50,000,000
Performance Monitoring– Management
PMs per OVOCinstance (per polling interval)
■ 5,000,000 for Version 7.4
devices (REST interface)
■ 500,000 for Version 7.2
devices (SNMP interface)
PMs per device 500,000
- 10 -
Page 24

CHAPTER3 Hardware and Software Specifications
Item Capacity
Storage time One year
Voice Quality– applicable for QoE license only
CAPS per device 1000
OVOC QoE managed devices 25000
OVOC | IOM
CAPS per OVOC instance (SBC and Skype for Business
2500
and RFC SIP Publish 6035)
Call Details Storage - detailed information per call 400,000,000 or one year
Calls Statistics Storage - Statistic information storage
(per five minute interval).
1
750,000,000 or one year
QoE Call Flow (for SBC calls only)– applicable for QoE license only
CAPS per OVOC instance 1,000
CAPS per device 300
Maximum number of calls 10,000,000
Lync and ADServers– applicable for QoE license only
MS Lync servers Up to 2
AD Servers for Users sync Up to 2
Users sync Up to 150,000
Devices Management (Device Manager Pro)
Number of managed devices
■ 30,000
■ 4,000 Team devices
Disk space allocated for firmware files 20GB
OVOC Client Requirements
The table below lists the minimum requirements for running an OVOC web client.
1
For each managed entity: Device, Link, Site, Endpoint, User and URI. In addition to the
relevant number of statistics in corresponding hourly and daily summary tables per entity.
- 11 -
Page 25

CHAPTER3 Hardware and Software Specifications
Table 3-5: OVOC Client Minimum Requirements
Resource OVOC Client
Hardware Screen resolution: 1280 x 1024
Operating System Windows 7 or later
Memory 8 GB RAM
OVOC | IOM
Disk Space
Processor -
Web Browsers
Scripts
-
■ Mozilla Firefox version 39 and higher
■ Google Chrome version 79 and higher
■ Microsoft Edge Browser version 80 and higher
■ PHP Version 7.4
■ Angular 7.0
Bandwidth Requirements
This section lists the OVOC bandwidth requirements.
OVOC Bandwidth Requirements
The bandwidth requirement is for OVOC server <- > Device communication. The network
bandwidth requirements per device is 500 Kb/sec for faults, performance monitoring and
maintenance actions.
Voice Quality Bandwidth Requirements
The following table describes the upload bandwidth speed requirements for Voice Quality for
the different devices. The bandwidth requirement is for OVOC server <- > Device
communication.
Table 3-6: Voice Quality Bandwidth Requirements
SBC Sessions
Device
SBC
MP-118 _ _
(each session has two
legs)
- 12 -
Required Kbits/sec or Mbit/sec
Page 26

CHAPTER3 Hardware and Software Specifications
OVOC | IOM
SBC Sessions
Device
(each session has two
Required Kbits/sec or Mbit/sec
legs)
MP-124 _ _
Mediant 800 Mediant
850
Mediant 1000 150 330 Kbits / sec
Mediant 2000 _ _
Mediant 2600 600 1.3 Mbit/sec
Mediant 3000 1024 2.2 Mbit/sec
Mediant 4000 4,000 8.6 Mbit/sec
Gateway
MP-118 8 15 Kbits/sec
60 135 Kbits/sec
MP-124 24 45 Kbits/sec
Mediant 800 Mediant
850
Mediant 1000 120 220 Kbits/sec
Mediant 2000 480 880 Kbits/sec
Mediant 2600 _ _
Mediant 3000 2048 3.6 Mbit/sec
Mediant 4000 _ _
Endpoints _ 56 Kbits/sec
60 110 Kbits/sec
Standard Capacities
The following table shows the performance and data storage capabilities for the OVOC
managed devices for Voice Quality.
- 13 -
Page 27

CHAPTER3 Hardware and Software Specifications
Table 3-7: Standard Capacities
OVOC | IOM
Machine
Specifications
HP DL360p Gen10
VMware/Microsoft
Hyper-V – High
Profile
VMware/Microsoft
Hyper-V - Low Profile
OVOC Management Capacity
Managed devices 5,000 5,000 100
Device Manager Pro
Managed devices
■ 10,000
Microsoft
Lync/Skype
for Business
and thirdparty vendor
devices
■ 30,000 Microsoft
Lync/Skype for
Business and
third-party
vendor devices
1
■ 4,000 Microsoft
Teams devices
1,000
2
■ 4,000
Microsoft
Teams devices
Disk space
10 GB 10 GB 5 GB
allocated for
firmware files
Alarm and Journal Capacity
History alarms Up to 12 months or ten million alarms
Journal logs Up to 12 months
Alarm forwarding
Up to 1000 alarms
aggregation in a
single email
Performance Monitoring
1
Including phones, headsets and Conference Suite devices
2
In normal operation (when devices are remotely managed) 30,000 devices send Keep-alive
messages at five minute intervals; however, when managing devices behind a firewall or NAT
using the Device Manager agent, a 10% factor (3,000 devices) is deducted for the allocation for
these devices. In this case, 90% of the configuration (27,000) is checked every 15 minutes (for
remotely managed devices)and 10% is checked every five minutes (for devices managed
behind a firewall or NAT).
- 14 -
Page 28

CHAPTER3 Hardware and Software Specifications
OVOC | IOM
Machine
Specifications
Polled
HP DL360p Gen10
100,000 100,000 50,000
VMware/Microsoft
Hyper-V – High
Profile
VMware/Microsoft
Hyper-V - Low Profile
parameters per
polling interval
per OVOCmanaged device
Polled
500,000 500,000 50,000
parameters per
polling interval
per OVOC
instance
QoE Call Flow (for SBC calls only)
Managed devices 100 100 10
CAPS (calls
100 25 6
attempts per
second) per
OVOCinstance
OVOC QoE for Devices
QoE for managed
devices
QoE for devices
per region
QoE for number
of links
CAPS (calls
attempts per
second) per
device
CAPS per OVOC
instance (SBC and
Skype for
Business)
3,000 1,200 100
500 300 100
6,000 2,400 200
160 120 30
300 120 30
QoE concurrent 30,000 12,000 3,000
- 15 -
Page 29

CHAPTER3 Hardware and Software Specifications
OVOC | IOM
Machine
Specifications
sessions
Call Details
Storage - detailed
information per
call
Calls Statistics
Storage statistics
information
storage
OVOCQoE for Endpoints
CAPS for
managed
endpoints
HP DL360p Gen10
Up to one year or
80 million calls.
Up to one year or
150 million
intervals.
10 5 1
VMware/Microsoft
Hyper-V – High
Profile
Up to one year or 80
million rows.
Up to one year or 150
million rows.
VMware/Microsoft
Hyper-V - Low Profile
Up to one year or 6
million rows.
Up to one year or 12
million rows.
QoE Capacity with SBC Floating License Capability
CAPS (calls
attempts per
second) per
OVOCinstance
with SIP call flow
CAPS (calls
attempts per
second) per
OVOCinstance
without SIP call
flow
Managed devices
with floating
license
90 22 5
270 108 27
1,000 500 100
Skype for Business Monitoring SQL Server Prerequisites
The following are the Skype for Business Monitoring SQL Server prerequisites:
The server must be defined to accept login in 'Mix Authentication' mode.
- 16 -
Page 30

CHAPTER3 Hardware and Software Specifications
■ The server must be configured to collect calls before the OVOC can connect to it and
retrieve Skype for Business calls.
■ Call Detail Records (CDRs) and Quality of Experience (QoE) Data policies must be
configured to capture data.
■ Network administrators must be provisioned with the correct database permissions (refer
to the One Voice Operations Center User's Manual).
■ Excel macros must be enabled so that the SQL queries and reports can be run; tested with
Excel 2010.
■ Detailed minimum requirements for Skype for Business SQL Server can be found in the
following link:
http://technet.microsoft.com/en-us/library/gg412952.aspx
OVOC | IOM
- 17 -
Page 31

CHAPTER4 OVOC Software Deliverables
4 OVOC Software Deliverables
The following table describes the OVOC software deliverables.
OVOC | IOM
Installation/Upgrade
Platform
Installation
Dedicated
VMware
Media
■ DVD1-Linux CentOSOperating System
■ DVD2-Oracle Installation
■ DVD3-OVOCSoftware Installation
■ Standard mode:DVD5-OVOC Software Installation OVA file
■ Service Provider Cluster mode:
✔ Option 1:
● Management: DVD1-DVD2-DVD3
● VQM/PM: DVD1-DVD3
✔ Option 2:
● Management: DVD5-Management-OVA
● VQM: DVD5-VQM-OVA
HyperV
Amazon AWS
Microsoft Azure
Upgrade
Dedicated
VMware
Microsoft HyperV
Amazon AWS
● PM: DVD5-PM-OVA
■ DVD5-OVOC Software Installation 7z file
■ Create OVOC instance from Public AMI image provided by
AudioCodes
■ Create OVOC virtual machine from Azure Marketplace.
■ DVD3-OVOC Server Application DVD
OR
■ DVD3-OVOC Server Application ISOfile
■ DVD3-OVOC Server Application ISOfile (including separate
scripts for Management, VQMand PMservers)
■ DVD3-OVOC Server Application ISOfile
■ DVD3-OVOC Server Application ISOfile
- 18 -
Page 32

CHAPTER4 OVOC Software Deliverables
Note the following
■ DVD1: Operating System DVD (OVOC server and Client Requirements):
■ DVD2: Oracle Installation: Oracle installation version 12.1.0.2 DVD.
■ DVD3: Software Installation and Documentation DVD:
The DVD ‘SW Installation and Documentation’ DVD comprises the following folders:
● 'EmsServerInstall' – OVOC server software (including Management server, PM server
and VQMserver) to install on the dedicated OVOC server machine.
● Documentation – All documentation related to the present OVOC version. The
documentation folder includes the following documents and sub-folders:
◆ OVOC Release Notes Document – includes the list of the new features introduced
in the current software version as well as version restrictions and limitations.
◆ OVOC Server IOM Manual – Installation, Operation and Maintenance Guide.
◆ OVOC Product Description
OVOC | IOM
◆ OVOC User's Manual
◆ OVOC Integration with Northbound Interfaces
◆ OVOC Security Guidelines
◆ OVOC Alarms Monitoring Guide
◆ OVOC Performance Monitoring Guide
Installation and upgrade files can also be downloaded from the Website by registered customers at https://www.audiocodes.com/services-support/maintenance-and-support.
- 19 -
Page 33

Part II
OVOC Server Installation
This part describes the testing of the installation requirements and the installation of
the OVOC server.
Page 34

CHAPTER5 Files Verification
5 Files Verification
You need to verify the contents of the ISO file received from AudioCodes using an MD5
checksum. As an Internet standard (RFC 1321), MD5 has been used in a wide variety of security
applications, and is also commonly used to check the integrity of file, and verify download.
Perform the following verifications on the relevant platform:
■ Windows (Windows below)
■ Linux (Linux below)
Windows
Use the WinMD5 tool to calculate md5 hash or checksum for the file:
■ Verify the checksum with WinMD5 (see www.WinMD5.com)
OVOC | IOM
Linux
Copy the checksum and the files to a Linux machine, and then run the following command:
md5sum -c filename.md5
The “OK” result should be displayed on the screen (see figure below).
Figure 5-1: ISO File Integrity Verification
OVOC Server Users
OVOC server OS user permissions vary according to the specific application task. This feature is
designed to prevent security breaches and to ensure that a specific OS user is authorized to
perform a subset of tasks on a subset of machine directories. The OVOC server includes the
following OS user permissions:
■ 'root' user: User permissions for installation, upgrade, maintenance using OVOC Server
Managerand OVOC application execution.
■ acems user: The only available user for login through SSH/SFTP tasks.
■ emsadmin user: User with permissions for mainly the OVOC Server Manager and OVOC
application for data manipulation and database access.
- 21 -
Page 35

CHAPTER5 Files Verification
■ oracle user: User permissions for the Oracle database access for maintenance such as
installation, patches upgrade, backups and other Oracle database tasks.
■ oralsnr user: User in charge of oracle listener startup.
In addition the OVOCserver includes the following DBoperator permissions:
■ Analytics user:User used to connect to Northbound DBaccess clients
OVOC | IOM
- 22 -
Page 36

CHAPTER6 Installing OVOC Server on Virtual Machines on Cloud-based Platforms
6 Installing OVOC Server on Virtual Machines on
Cloud-based Platforms
This section describes how to install the OVOC server on the following Cloud-based platforms:
■ Launching Public OVOCImage on Amazon Web Services (AWS) below
■ Creating OVOC Virtual Machine on Microsoft Azure on page34
Launching Public OVOCImage on Amazon Web Services (AWS)
This chapter describes how to create the OVOC virtual machine in an AWS cloud deployment,
including the following procedures:
■ Step 1 Launching Public Image on AWS below
■ Step 2-2 Configuring Mediant Cloud Edition (CE) SBC Devices on AWS on page30
OVOC | IOM
Before proceeding, ensure that the minimum platform requirements are met (see
Hardware and Software Specifications on page8).
Step 1 Launching Public Image on AWS
This section describes how to setup and load the AWS image.
➢ To setup and load the AWSimage:
1. Log into your AWS account.
2. Choose one of the following regions:
● us-west-1 (N. California)
● us-west-2 (Oregon)
● us-east-1 (N. Virginia)
● eu-west-1 (Ireland)
● eu-central-1 (Frankfurt)
● ap-south-1 (Asia Pacific-Mumbai)
For verifying AMI IDs, refer tohttps://services.AudioCodes.com..
- 23 -
Page 37

CHAPTER6 Installing OVOC Server on Virtual Machines on Cloud-based Platforms
Figure 6-1: Select Region
OVOC | IOM
3. In the “Services” menu, choose EC2.
- 24 -
Page 38

CHAPTER6 Installing OVOC Server on Virtual Machines on Cloud-based Platforms
Figure 6-2: Services Menu - EC2
OVOC | IOM
4. In the Dashboard, navigate to IMAGES > AMIs.
- 25 -
Page 39

CHAPTER6 Installing OVOC Server on Virtual Machines on Cloud-based Platforms
Figure 6-3: Images
OVOC | IOM
5. In the search bar, choose Public images and apply the following filter:
AMI ID : ami-00000000000 replacing ami-00000000000 with the AMI ID you received from
AudioCodes according to the region you have chosen.
6. Right-click the AMI and choose Launch.
- 26 -
Page 40

CHAPTER6 Installing OVOC Server on Virtual Machines on Cloud-based Platforms
Figure 6-4: Launch Public Images
OVOC | IOM
7. Choose an Instance type according to the requirements specified in OVOC Server
Requirements on page8.
8. Configure Instance (Optional). Using this option, you can edit network settings, for
example, placement.
9. Configure a Security Group; you should select an existing security group or create a new
one according to the firewall requirements specified in the table below:
Table 6-1: Firewall for Amazon AWS
Protocol Port Description
UDP 162 SNMP trap listening port on the OVOC server.
UDP 1161 Keep-alive - SNMP trap listening port on the OVOC server used for
NAT traversal.
TCP 5000 Communication for control, media data reports and SIP call flow
messages
TCP (TLS) 5001 TLS secured communication for control, media data reports and
SIP call flow messages
NTP 123 NTP server port (also configure the AWS IP address/Domain Name
as the NTP server on both the managed device and OVOC server;
see relevant procedures in
Step 3 Configuring Mediant Cloud Edi-
tion (CE) SBC Devices on AWS
10. Click Review and Launch > Review > Launch.
- 27 -
Page 41

CHAPTER6 Installing OVOC Server on Virtual Machines on Cloud-based Platforms
11. In the dialog shown in the figure below, from the drop-down list, choose Proceed without
a key pair, check the “I acknowledge …” check box, then click Launch Instances.
Figure 6-5: Select an Existing Key Pair
OVOC | IOM
12. Click View Instances and wait for the instance to change the state to “running” and the
status checks to complete. In the description, note the Public IP address of the instance as
highlighted in the figure below.
Figure 6-6: Instance State and Status Checks
Note the AWS public IP address as its later configured in Step 2-1 Configuring the
OVOC Server (OVOC Server Manager) on AWS on the next page
Step 2 Connecting Mediant Cloud Edition (CE) SBC Devices on AWS
This section describes the procedure for establishing a secure connection between the OVOC
server which is installed in the AWS Cloud and Mediant Cloud Edition (CE) SBC devices which
- 28 -
Page 42

CHAPTER6 Installing OVOC Server on Virtual Machines on Cloud-based Platforms
are also deployed in the AWS Cloud. Communication between OVOC and Mediant CE SBC
devices is carried over the public IP addresses on both sides, requiring NAT translation from
internal to public IP addresses. This can be performed by either configuring the OVOC server
with the public IP address of the AWS platform where the OVOCserver is deployed (see Con-
figure OVOC Server with Public or NATIP Address on page102)or by configuring OVOC Cloud
Architecture mode (seeConfigure OVOC Cloud Architecture Mode on page103
The Mediant CE SBC devices must be added to OVOC using Automatic Detection.
Refer to Section "Adding AudioCodes Devices Automatically"in the OVOCUser's
Manual.
This section includes the following procedures:
■ Step 2-1 Configuring the OVOC Server (OVOC Server Manager) on AWS below
■ Step 2-2 Configuring Mediant Cloud Edition (CE) SBC Devices on AWS on the next page
Step 2-1 Configuring the OVOC Server (OVOC Server Manager) on AWS
OVOC | IOM
This section describes the required configuration actions on the OVOC server deployed in the
AWS Cloud.
Restart the OVOC server where specified in the referenced procedures for changes to
take effect.
➢ To configure the OVOC server:
1. Login to the OVOC Server Manager (see Connecting to the OVOC Server Manager on
page151).
2. Change the following default passwords:
● acems OS user (see OS Users Passwords on page215)
● root OSuser (see OS Users Passwords on page215)
Unless you have made special configurations, the AWS instance is in the public cloud
and therefore is accessible over the Internet. Consequently, it is highly recommended
to change theses default passwords to minimize exposure to password hacking.
3. Load OVOC license (see License on page171).
4. Configure the OVOC server with AWS Public IPaddress to enable devices deployed behind
a NAT to connect to OVOC server (see Configure OVOC Server with Public or NATIP
Address on page102). See the setup of the virtual machine Step 1:Creating Virtual
Machine on Azure on page35 to find the AWS Public IP.
5. Configure the AWSPublic IP address/Domain Name (where OVOC is installed) as the
external NTPclock source (see NTP on page199).
- 29 -
Page 43

CHAPTER6 Installing OVOC Server on Virtual Machines on Cloud-based Platforms
The same clock source should be configured on the managed devices (see Step 2-2-2
Configuring Mediant CE Communication Settings Using Web Interface on the next
page).
Step 2-2 Configuring Mediant Cloud Edition (CE) SBC Devices on AWS
This step describes the following configuration procedures on the Mediant CE SBC devices to
connect them to the OVOC server that is deployed in the AWS Cloud:
■ Step 2-2-1:Configuring Mediant CE SNMPConnection with OVOC in Cloud using Stack
Manager below
■ Step 2-2-2 Configuring Mediant CE Communication Settings Using Web Interface on the
next page
Step 2-2-1:Configuring Mediant CE SNMPConnection with OVOC in Cloud using Stack
Manager
OVOC | IOM
This step describes how to configure the SNMPcommunication between the OVOC server
deployed in the Azure Cloud and the Mediant CEusing the Stack Manager.
➢ To configure the Stack Manager:
1. Log in to the Web interface of the Stack Manager that was used to create Mediant Cloud
Edition (CE) SBC. Refer to Stack Manager for Mediant CE SBC User's Manual.
2. Click the "Mediant CE stack".
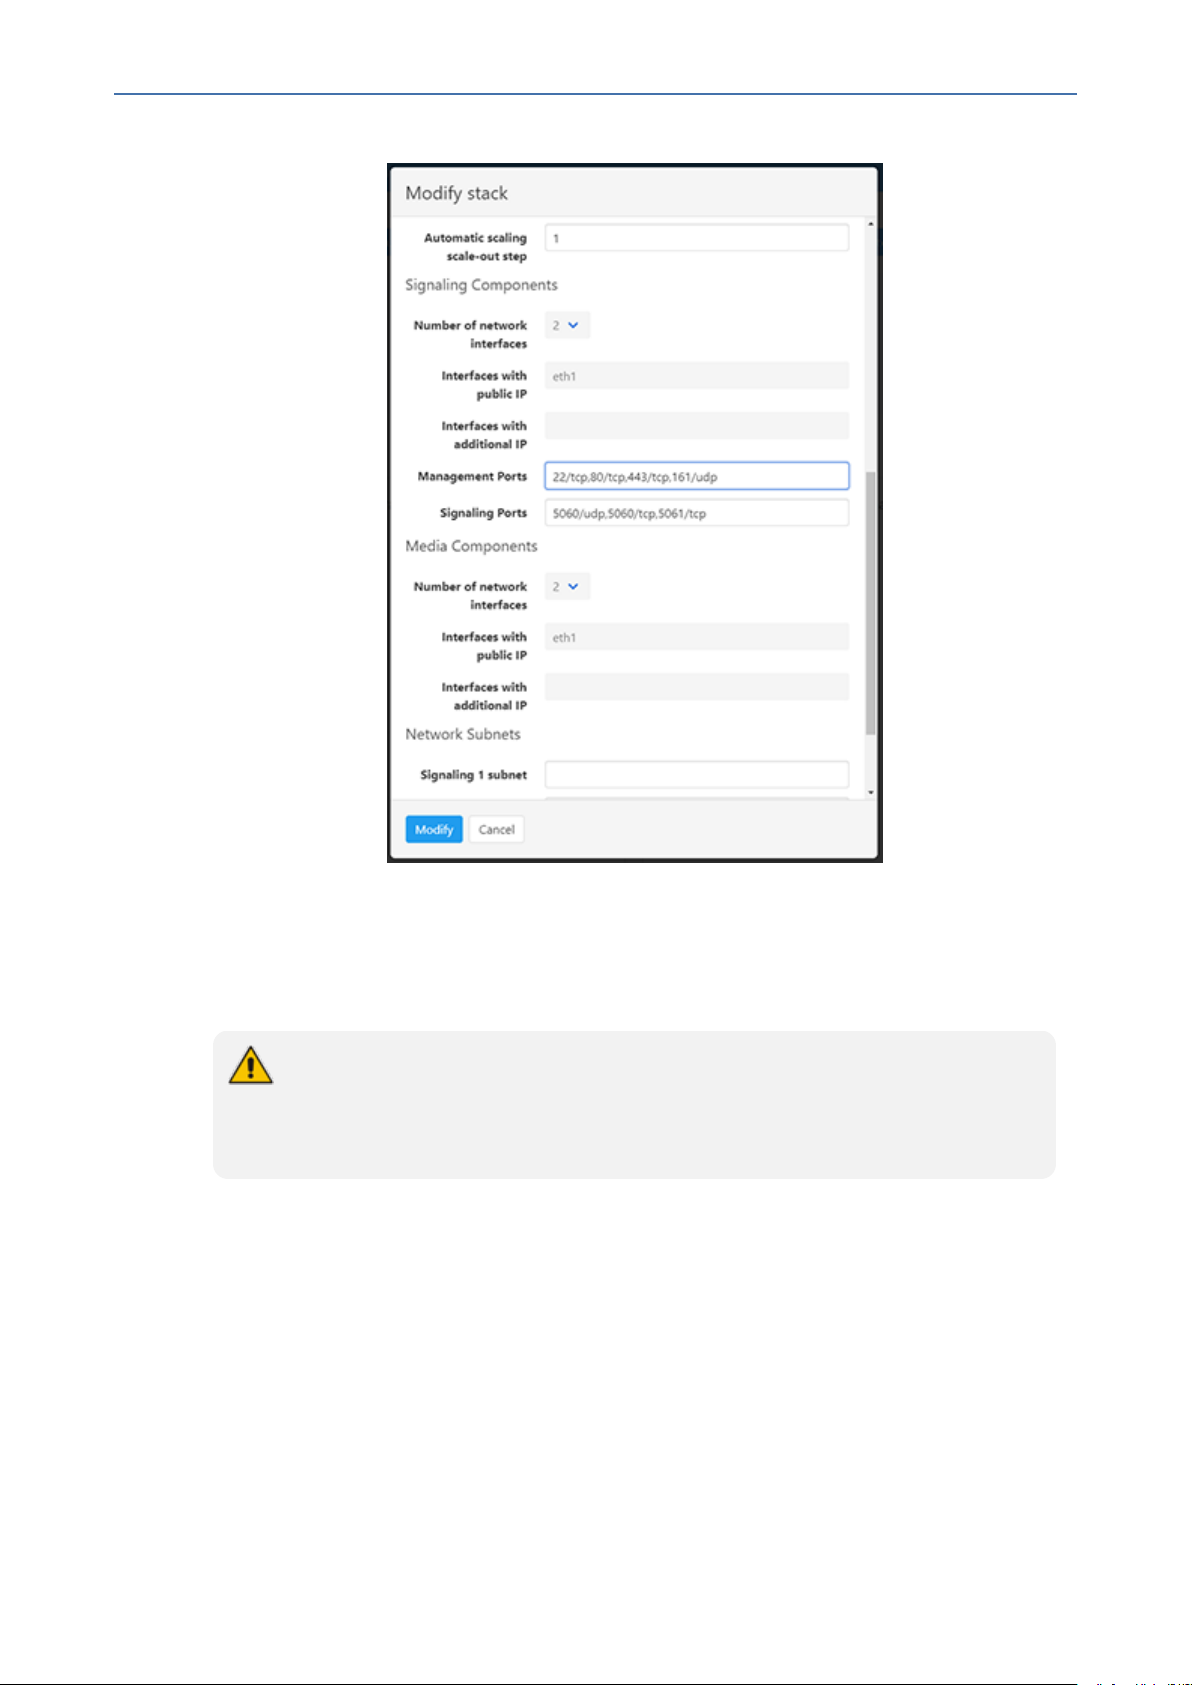
3. Click the Modify button and append 161/udp port (for SNMP traffic) to "Management
Ports" parameter.
4. Click Update to apply the new configuration.
- 30 -
Page 44
CHAPTER6 Installing OVOC Server on Virtual Machines on Cloud-based Platforms
Figure 6-7: Modify Stack
OVOC | IOM
Step 2-2-2 Configuring Mediant CE Communication Settings Using Web Interface
This section describes how to configure the communication settings between the Mediant CE
device and the OVOC server deployed in the AWS Cloud.
The following procedure describes the required configuration for a single CESBC
device. For mass deployment, you can load configuration files to multiple devices using
'Full' or 'Incremental' INIfile options (refer to the relevant SBCUser's Manual for more
information).
➢ To configure the Mediant Cloud Edition (CE) SBCfor AWS:
1. Login to the Mediant Cloud Edition (CE) SBC Web interface or connect from the Devices
page in the OVOC Web interface.
2. Open the Quality of Experience Settings screen (Setup Menu > Signaling & Media tab
>Media folder >Quality of Experience > Quality of ExperienceSettings).
3. Click Edit and configure the Keep-Alive Time Interval to 1.
4. Click Apply to confirm changes.
- 31 -
Page 45

CHAPTER6 Installing OVOC Server on Virtual Machines on Cloud-based Platforms
5. Open the TIME &DATEpage (Setup menu > Administration tab ) and configure the AWS
site IPaddress/FQDNDomain Name(where the OVOCserver is installed) as the NTP server
clock source.
6. Click Apply to confirm changes.
7. Open the SNMP Community Settings Page (Setup menu > Administration tab
>SNMPfolder).
8. Set parameter SNMP Disable to No ('Yes' by default).
9. Click Apply to confirm changes.
10. Open the Mediant Cloud Edition (CE) SBC AdminPage (deviceIPaddress/AdminPage) and
configure the following ini parameters:
HostName = <Load Balancer IP>
SendKeepAliveTrap = 1
KeepAliveTrapPort = 1161
SNMPManagerIsUsed_0 = 1
SNMPManagerTableIP_0 = <OVOC Public IP Address>
OVOC | IOM
11. Reset the device for your settings to take effect (Setup menu > Administration tab
>Maintenance folder >Maintenance Actions).
Step 3 Configuring AWS SES Service
This section describes how to configure the OVOCserver as the Email server on Amazon AWS.
These steps are necessary in to overcome Amazon security restrictions for sending emails outside of the AWS domain.
If AWS Simple Email Service (SES) runs in Sandbox mode, both sender and recipient
addresses should be verified (see
https://docs.aws.amazon.com/ses/latest/DeveloperGuide/request- productionaccess.html)
➢ To configure OVOC as email server on AWS SES:
1. Login to the OVOC server with root permissions.
2. Open file /root/.muttrc:
cat .muttrc
3. Replace "OVOC@audiocodes.com" with authenticated source email.
4. Open file /etc/exim/exim.conf and using a text editor, find the respective "begin …"
statements and paste the below configuration accordingly
- 32 -
Page 46

CHAPTER6 Installing OVOC Server on Virtual Machines on Cloud-based Platforms
● Replace : AWS_SES_LOGIN : AWS_SES_PASSWORD with the credentials received from
AWS
● Replace : SOURCE_EMAIL with an authenticated source email address
● Replace: HOSTNAME with the VM hostname
===================================================
begin routers
send_via_ses:
driver = manualroute
domains = ! +local_domains
OVOC | IOM
transport = ses_smtp
route_list = * email-smtp.eu-central-1.amazonaws.com;
===================================================
begin transports
ses_smtp:
driver = smtp
port = 587
hosts_require_auth = *
hosts_require_tls = *
===================================================
begin authenticators
- 33 -
Page 47

CHAPTER6 Installing OVOC Server on Virtual Machines on Cloud-based Platforms
ses_login:
driver = plaintext
public_name = LOGIN
client_send = : AWS_SES_LOGIN : AWS_SES_PASSWORD
===================================================
begin rewrite
^root@HOSTNAME SOURCE_EMAIL SFfrs
OVOC | IOM
===================================================
5. Remove old unsent emails from buffer and restart exim service:
systemctlrestart exim
exim -bp | exiqgrep -i | xargs exim -Mrm
rm -rf /var/spool/exim/db/*
6. Send test email using mutt:
echo "Hello!" > ~/message.txt
mutt -s "Test Mail from OVOC" -F /root/.muttrc EMAIL_ADDRESS < ~/message.txt
7. Verify in the exim log in /var/log/exim/main.log to check that the email was sent correctly.
Creating OVOC Virtual Machine on Microsoft Azure
This chapter describes how to install the OVOCserver on a virtual machine in a Cloud-based
deployment from the Microsoft Azure Marketplace, including the following procedures:
■ Step 1:Creating Virtual Machine on Azure on the next page
■ Step 2:Configuring OVOC as the Email Server on Microsoft Azure on page41
- 34 -
Page 48

CHAPTER6 Installing OVOC Server on Virtual Machines on Cloud-based Platforms
■ Option 1:Connecting Mediant Cloud Edition (CE) SBC Devices to OVOCon Azure using
Public IPAddress on page46
Before proceeding, ensure that the minimum platform requirements are met (see
Hardware and Software Specifications on page8).
Step 1:Creating Virtual Machine on Azure
This section describes how to setup and load the virtual image.
➢ To install OVOC from the Microsoft Azure Marketplace:
1. In the Azure Marketplace, search for "AudioCodes One Voice Operations Center (OVOC)"
and click Get It Now.
Figure 6-8: Get it Now
OVOC | IOM
2. Click Continue.
Figure 6-9: Create this App in Azure
3. You are now logged in to the Azure portal; click Create.
- 35 -
Page 49

CHAPTER6 Installing OVOC Server on Virtual Machines on Cloud-based Platforms
Figure 6-10: Create Virtual Machine
4. Configure the following:
a. Choose your Subscription.
OVOC | IOM
b. Choose your Resource Group or create a new one
c. Enter the name of the new Virtual Machine.
d. Choose the Region.
e. Choose the VM Size (F16s is the VM size that is recommended for High performance).
f. Choose Authentication Type "Password" and enter username and user-defined
password or SSHPublic Key.
- 36 -
Page 50

CHAPTER6 Installing OVOC Server on Virtual Machines on Cloud-based Platforms
Figure 6-11: Virtual Machine Details
OVOC | IOM
5. Click Next until Networking section to configure the network settings,
- 37 -
Page 51

CHAPTER6 Installing OVOC Server on Virtual Machines on Cloud-based Platforms
Figure 6-12: Network Settings
OVOC | IOM
a. From the Virtual Network and Subnet drop-down lists, select an existing virtual
network/subnet or click Create new to create a new virtual network/subnet.
b. From the Public IP drop-down list, configure "none", use the existing Public IP or
create a new Public IP.
If you do not wish the public IP address to change whenever the VM is stopped/started,
choose Static SKU or Basic SKU + Static.
c. Under Configure network security group, click Create new to configure a Network
Security Group. Configure this group according to the Firewall rules shown in the table
below.
- 38 -
Page 52

CHAPTER6 Installing OVOC Server on Virtual Machines on Cloud-based Platforms
By default, only ports 22 and 443 are open for inbound traffic; open other ports for
managing devices behind a NAT (outside the Azure environment) as described in the
table below.
Table 6-2: Microsoft Azure Firewall
Protocol Port Description
UDP 162 SNMP trap listening port on the OVOC server.
UDP 1161 Keep-alive - SNMP trap listening port on the OVOC server used for
NAT traversal.
This rule is required if Auto-detection is used to add devices in
OVOC. See Option 1:Connecting Mediant Cloud Edition (CE) SBC
Devices to OVOCon Azure using Public IPAddress on page46
TCP 5000 Communication for control, media data reports and SIP call flow
messages sent from Mediant Cloud Edition (CE) SBC.
OVOC | IOM
TCP (TLS) 5001 TLS secured communication for control, media data reports and
SIP call flow messages sent from Mediant Cloud Edition (CE) SBC.
This rule is used if the OVOC Server and managed devices (specifically Mediant CEdevices) are deployed in separate Azure Virtual
networks communicating behind a firewall. See Option
1:Connecting Mediant Cloud Edition (CE) SBC Devices to OVOCon
Azure using Public IPAddress on page46
NTP 123 NTP server port (set the Microsoft Azure site IPaddress/Domain
Name(where the OVOCserver is installed) as the NTP server clock
source. Referenced in procedures in
Step 3 Connecting Mediant
Cloud Edition (CE) Devices on page46
6. Click Next until Review+Create tab, make sure all the settings are correct and click Create.
- 39 -
Page 53

CHAPTER6 Installing OVOC Server on Virtual Machines on Cloud-based Platforms
Figure 6-13: Review and Create
OVOC | IOM
7. Navigate to the "Virtual machines" section, where you can, for example, monitor the
Virtual Machine creation process and find the Public or Private (Internal) IP addresses to
access the Virtual Machine.
Note the public or private (Internal) IPaddresses as you need to configure them in
Configuring the OVOCServer Manager on Azure (Public IP) on page47 and
Configuring the OVOC Server Manager on Azure (Internal IP) on page50 respectively.
- 40 -
Page 54

CHAPTER6 Installing OVOC Server on Virtual Machines on Cloud-based Platforms
Figure 6-14: Azure Deployment Process Complete
Step 2:Configuring OVOC as the Email Server on Microsoft Azure
OVOC | IOM
This section describes how to configure the OVOCserver as the Email server on Microsoft
Azure. These steps are necessary in to overcome Microsoft Azure security restrictions for sending emails outside of the Microsoft Azure domain. The following options can be configured:
■ Configuring Alarm Forwarding by Email on Microsoft Azure using Microsoft Office 365
■ Configuring Alarm Forwarding by Email on Microsoft Azure using SMTP Relay
Step 2-1:Configuring OVOC as the Email Server on Microsoft Azure using
Microsoft Office 365
This section describes how to configure the OVOC server to forward alarms by email through
the configuration of a user account on the Microsoft Office 365 platform. Replace OFFICE365_
USERNAME and PASSWORD with an existing customer's Office 365 username and password.
The Office 365 user name is not necessarily the email address.
➢ Do the following:
1. Configure the Exim service on the OVOC server:
a. Login into the OVOC server by SSH, as ‘acems’ user and enter password acems.
b. Switch to 'root' user and provide root password (default password is root):
su - root
c. Backup the exim configuration file:
- 41 -
Page 55

CHAPTER6 Installing OVOC Server on Virtual Machines on Cloud-based Platforms
cp /etc/exim/exim.conf /etc/exim/exim.conf.bak
d. Edit the exim configuration file:
vim /etc/exim/exim.conf
e. After the line "begin routers:" add the following configuration:
begin routers
send_via_outlook:
driver = manualroute
domains = ! +local_domains
transport = outlook_smtp
route_list = "* smtp.office365.com::587 byname"
host_find_failed = defer
no_more
OVOC | IOM
f. After the line "begin transports", add the following configuration:
begin transports
outlook_smtp:
driver = smtp
hosts = smtp.office365.com
hosts_require_auth = <; $host_address
hosts_require_tls = <; $host_address
g. After the line "begin authenticators", replace Username and Password with your Office
365 username and password:
begin authenticators
outlook_login:
driver = plaintext
public_name = LOGIN
client_send = : OFFICE365_USERNAME : PASSWORD
h. Restart the exim service:
systemctlrestart exim
- 42 -
Page 56

CHAPTER6 Installing OVOC Server on Virtual Machines on Cloud-based Platforms
If following the restart, the alarm forwarding is still not working, edit /root/.muttrc,
and replace the default email address set from = OVOC@audiocodes.com
with the proper email address of the owner of the OFFICE365_USERNAME
account, because the Outlook SMTP server may block this default address if it
verifies that the sender email does not match the specified mailbox user name.
Step 2-2 Configuring OVOC as the Email Server on Microsoft Azure using SMTP
Relay
This section describes how to configure the OVOC server to forward alarms by email using
SMTP Relay. This setup is recommended by Microsoft, and SendGrid is one of the available
options. SendGrid service can be easily configured in the Azure Portal and in addition, includes
a free tier subscription, supporting up to 25,000 emails per month.
➢ Do the following:
1. Create SendGrid service on the Azure platform:
OVOC | IOM
a. Open portal.azure.com
b. Go to "SendGrid Accounts" section, (via Search or in "All services" section).
c. Click Add.
d. Fill in the following fields:
◆ Name: Choose a name
◆ Password
◆ Subscription
◆ Resource Group (create a new one or choose existing)
◆ Pricing tier: choose Free or one of the other plans
◆ Contact Information
◆ Read legal terms
e. Click Create.
f. Wait for the service to be created.
g. Go back to "SendGrid Accounts", click on the new account name
h. Click the"Configurations" section in the Settings tab.
i. Copy the Username – it will be used in the next step along with the password (format
azure_xxxxxxxx@azure.com)
2. Configure the Exim service on the OVOC server:
a. Login into the OVOC server by SSH, as ‘acems’ user and enter password acems.
b. Switch to 'root' user and provide root password (default password is root):
- 43 -
Page 57

CHAPTER6 Installing OVOC Server on Virtual Machines on Cloud-based Platforms
su - root
c. Backup the exim configuration file:
cp /etc/exim/exim.conf /etc/exim/exim.conf.bak
d. Edit the exim configuration file:
vim /etc/exim/exim.conf
OVOC | IOM
- 44 -
Page 58

CHAPTER6 Installing OVOC Server on Virtual Machines on Cloud-based Platforms
e. After the line "begin transports", add the following configuration:
begin transports
sendgrid_smtp:
driver = smtp
hosts = smtp.sendgrid.net
hosts_require_auth = <; $host_address
hosts_require_tls = <; $host_address
f. After the line "begin routers", add the following configuration:
begin routers
send_via_sendgrid:
driver = manualroute
domains = ! +local_domains
transport = sendgrid_smtp
route_list = "* smtp.sendgrid.net::587 byname"
host_find_failed = defer
no_more
OVOC | IOM
g. After the line "begin authenticators", add the following configuration, replacing
Username and Password with your SendGrid User/Pass:
begin authenticators
sendgrid_login:
driver = plaintext
public_name = LOGIN
client_send = : Username : Password
h. Save the file and exit back to the command line.
i. Restart the Exim service.
systemctlrestart exim
j. Check that the alarm forwarding by email functions correctly.
You can access the SendGrid Web interface using the same username/password,
where among other features you can find an Activity log, which may be useful for
verifying issues such as when emails are sent correctly; however, are blocked by a
destination email server.
- 45 -
Page 59

CHAPTER6 Installing OVOC Server on Virtual Machines on Cloud-based Platforms
Step 3 Connecting Mediant Cloud Edition (CE) Devices
This section describes how to connect Mediant Cloud Edition (CE) devices to OVOC using one
of the following options:
■ Option 1:Connecting Mediant Cloud Edition (CE) SBC Devices to OVOCon Azure using
Public IPAddress below
■ Option 2 Connecting Mediant Cloud Edition (CE) Devices to OVOC on Azure using Internal
IP Address on page49
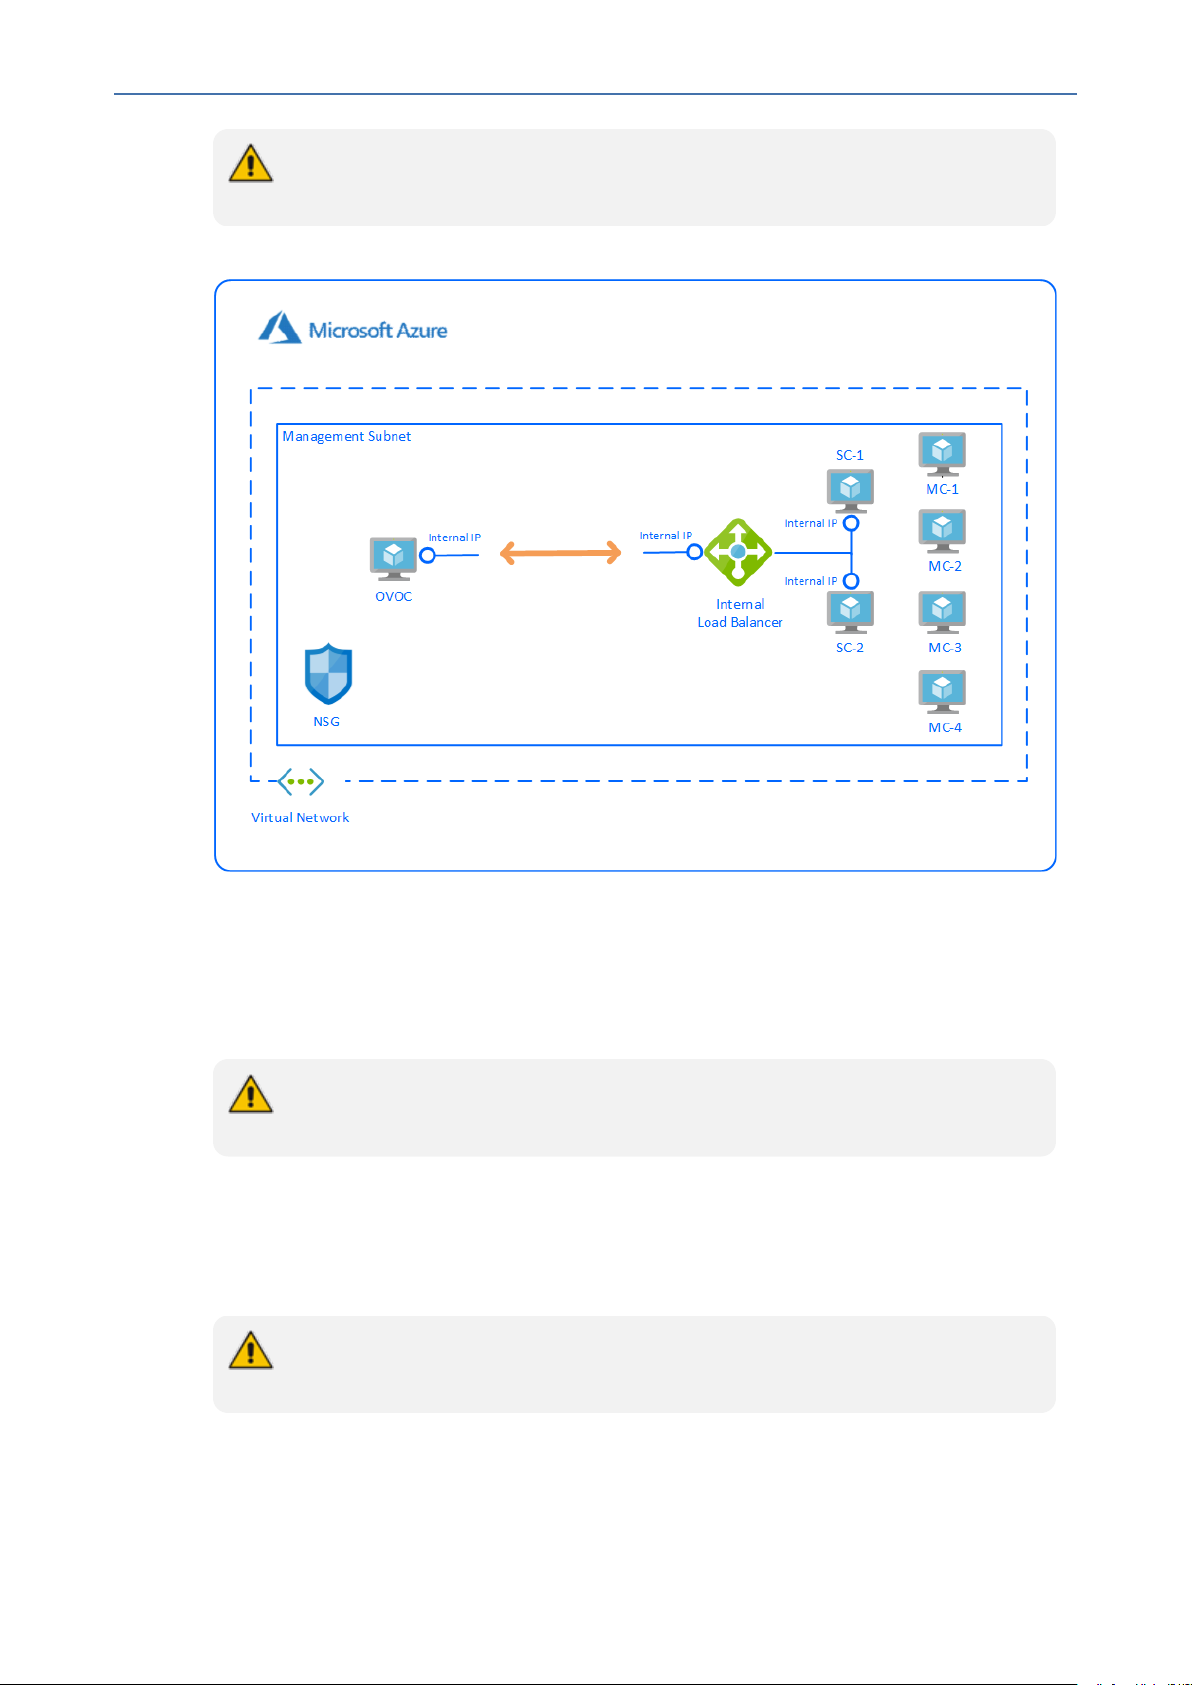
Option 1:Connecting Mediant Cloud Edition (CE) SBC Devices to OVOCon Azure
using Public IPAddress
This section describes how to establish a secure connection between the OVOC server and
Mediant Cloud Edition (CE) SBC devices which are both deployed in the Azure Cloud in separate Virtual networks. Communication between OVOC and Mediant CE SBC devices is carried
over the public IP addresses on both sides, requiring NAT translation from internal to public IP
addresses. This is performed by configuring the OVOCserver with the public IPaddress of the
Azure platform where the OVOC server is installed (see Configure OVOC Server with Public or
NATIP Address on page102). The figure below illustrates this topology.
OVOC | IOM
The Mediant CE SBC devices must be added to OVOC using Automatic Detection.
Refer to Section "Adding AudioCodes Devices Automatically"in the OVOCUser's
Manual.
Figure 6-15: Microsoft Azure Topology
This section includes the following procedures:
1. Configuring the OVOCServer Manager on Azure (Public IP) on the next page
- 46 -
Page 60

CHAPTER6 Installing OVOC Server on Virtual Machines on Cloud-based Platforms
2. Configuring Mediant Cloud Edition (CE) SBCDevices on Azure (Public IP) below
Configuring the OVOCServer Manager on Azure (Public IP)
This section describes the required configuration actions on the OVOC server deployed in the
Azure Cloud.
Restart the OVOC server where specified in the referenced procedures for changes to
take effect.
➢ To configure the OVOCserver:
1. Login to the OVOC Server Manager (see Connecting to the OVOC Server Manager on
page151).
2. Change the following default passwords:
● acems OS user (see OS Users Passwords on page215)
OVOC | IOM
● root OSuser (see OS Users Passwords on page215)
Unless you have made special configurations, the Azure instance is in the public cloud
and therefore is accessible over the Internet. Consequently, it is highly recommended
to change theses default passwords to minimize exposure to password hacking.
3. Load the OVOC license (see License on page171).
4. Configure the OVOC server with Azure Public IPaddress to enable devices deployed
behind a NAT to connect to OVOC (see Configure OVOC Server with Public or NATIP
Address on page102). See the setup of the virtual machine to find the Azure Public IP (see
Creating OVOC Virtual Machine on Microsoft Azure on page34
5. Configure the Azure IP address/Domain Name (where OVOC is installed) as the external
NTPclock source (see NTP on page199).
The same clock source should be configured on the managed devices (see Configuring
Mediant CE OVOC Public IP Connection Settings using Web Interface on the next
page).
Configuring Mediant Cloud Edition (CE) SBCDevices on Azure (Public IP)
This step describes the following configuration procedures on the Mediant CE to connect to
the OVOC server that is deployed in the Azure Cloud:
1. Configuring Mediant CE SNMPPublic IP Connection using Stack Manager on the next page
2. Configuring Mediant CE OVOC Public IP Connection Settings using Web Interface on the
next page
- 47 -
Page 61

CHAPTER6 Installing OVOC Server on Virtual Machines on Cloud-based Platforms
Configuring Mediant CE SNMPPublic IP Connection using Stack Manager
This step describes how to configure the SNMPcommunication between the OVOC server
deployed in the Azure Cloud and the Mediant CEusing the Stack Manager.
➢ To configure the Stack Manager:
1. Log in to the Web interface of the Stack Manager that was used to create Mediant Cloud
Edition (CE) SBC. Refer to Stack Manager for Mediant CE SBC User's Manual.
2. Click the "Mediant CE stack".
3. Click the Modify button and append 161/udp port (for SNMP traffic) to "Management
Ports" parameter.
4. Click Update to apply the new configuration.
Figure 6-16: Modify Stack
OVOC | IOM
Configuring Mediant CE OVOC Public IP Connection Settings using Web Interface
This section describes how to configure the communication settings between the Mediant CE
device and the OVOC server deployed in the Azure Cloud.
- 48 -
Page 62

CHAPTER6 Installing OVOC Server on Virtual Machines on Cloud-based Platforms
The following procedure describes the required configuration for a single CESBC
device. For mass deployment, you can load configuration files to multiple devices using
'Full' or 'Incremental' INIfile options (refer to the relevant SBCUser's Manual for more
information).
➢ To configure the Mediant Cloud Edition (CE) SBC:
1. Login to the Mediant Cloud Edition (CE) SBC Web interface or connect from the Devices
page in the OVOC Web interface.
2. Open the Quality of Experience Settings screen (Setup Menu > Signaling & Media tab
>Media folder >Quality of Experience > Quality of ExperienceSettings).
3. Click Edit and configure the Keep-Alive Time Interval to 1.
4. Click Apply to confirm the changes.
5. Open the TIME &DATEpage (Setup menu > Administration tab ) and in the NTPServer
Address field, set the Microsoft Azure site IPaddress/Domain Name(where the
OVOCserver is installed) as the NTP server clock source.
OVOC | IOM
6. Click Apply to confirm the changes.
7. Open the SNMP Community Settings Page (Setup menu > Administration tab
>SNMPfolder).
8. Set parameter SNMP Disable to No ('Yes' by default).
9. Click Apply to confirm changes.
10. Open the Mediant Cloud Edition (CE) SBC AdminPage (deviceIPaddress/AdminPage) and
configure the following ini parameters:
HostName = <Load Balancer IP>
SendKeepAliveTrap = 1
KeepAliveTrapPort = 1161
SNMPManagerIsUsed_0 = 1
SNMPManagerTableIP_0 = <OVOC Public IP Address>
11. Reset the device for your settings to take effect (Setup menu > Administration tab
>Maintenance folder >Maintenance Actions).
Option 2 Connecting Mediant Cloud Edition (CE) Devices to OVOC on Azure using
Internal IP Address
This section describes how to establish a secure connection between the OVOC server and
Mediant CEdevices which are both deployed in the Azure Cloud in the same Virtual network.
Communication between OVOC and Mediant CE SBC devices is carried over internal IP
addresses (Private IPaddresses)on both sides. The figure below illustrates this topology.
- 49 -
Page 63
CHAPTER6 Installing OVOC Server on Virtual Machines on Cloud-based Platforms
The Mediant CE SBC devices must be added manually to OVOC. Refer to Section
"Adding AudioCodes Devices Manually "in the OVOCUser's Manual.
Figure 6-17: Internal IP Connection
OVOC | IOM
This section includes the following procedures:
■ Configuring the OVOC Server Manager on Azure (Internal IP) below
■ Configuring Mediant Cloud Edition (CE) SBC Devices on Azure (Internal IP) on the next
page
The Mediant CE SBC devices must be added to OVOC manually. Refer to Section
"Adding AudioCodes Devices Manually"in the OVOCUser's Manual.
Configuring the OVOC Server Manager on Azure (Internal IP)
This section describes the required configuration actions on the OVOC server deployed in the
Azure Cloud when CE devices are deployed in the same Virtual network.
Restart the OVOC server where specified in the referenced procedures for changes to
take effect.
- 50 -
Page 64

CHAPTER6 Installing OVOC Server on Virtual Machines on Cloud-based Platforms
➢ To configure the OVOCserver:
1. Login to the OVOC Server Manager (see Connecting to the OVOC Server Manager on
page151).
2. Change the following default passwords:
● acems OS user (see OS Users Passwords on page215)
● root OSuser (see OS Users Passwords on page215)
Unless you have made special configurations, the Azure instance is in the public cloud
and therefore is accessible over the Internet. Consequently, it is highly recommended
to change theses default passwords to minimize exposure to password hacking.
3. Load the OVOC license (see License on page171).
4. Configure the OVOC server with its internal (private) IPaddress to enable devices deployed
in the same Azure Virtual network to connect to OVOC (see Server IP Address on
page183). See the setup of the virtual machine Step 1:Creating Virtual Machine on Azure
on page35to find the Azure Internal IP.
OVOC | IOM
5. Configure the Azure IP address/Domain Name (where OVOC is installed) as the external
NTPclock source (see NTP on page199).
The same clock source should be configured on the managed devices (see Configuring
Mediant CE OVOC Internal IP Connection Settings using Web Interface on the next
page
Configuring Mediant Cloud Edition (CE) SBC Devices on Azure (Internal IP)
This step describes the following configuration procedures on the Mediant CE to connect to
the OVOC server that is deployed in the Azure Cloud in the same Virtual network by connecting through internal IPaddresses on both sides:
■ Configuring Mediant CE SNMP Internal IP Connection with OVOC using Stack Manager
below
■ Configuring Mediant CE OVOC Internal IP Connection Settings using Web Interface on the
next page
Configuring Mediant CE SNMP Internal IP Connection with OVOC using Stack Manager
This step describes how to configure the SNMPcommunication between the OVOC server and
Mediant CE devices using the Stack Manager when both are deployed in the same Azure Virtual network.
➢ To configure the Stack Manager:
1. Log in to the Web interface of the Stack Manager that was used to create Mediant Cloud
Edition (CE) SBC. Refer to Stack Manager for Mediant CE SBC User's Manual.
- 51 -
Page 65

CHAPTER6 Installing OVOC Server on Virtual Machines on Cloud-based Platforms
2. Click the "Mediant CE stack".
3. Click the Modify button and append 161/udp port (for SNMP traffic) to "Management
Ports" parameter.
4. Click Update to apply the new configuration.
Figure 6-18: Modify Stack
OVOC | IOM
Configuring Mediant CE OVOC Internal IP Connection Settings using Web Interface
This section describes how to configure the connection settings between the Mediant CE
device and the OVOC server deployed in the Azure Cloud in the same Virtual network.
- 52 -
Page 66

CHAPTER6 Installing OVOC Server on Virtual Machines on Cloud-based Platforms
The following procedure describes the required configuration for a single CESBC
device. For mass deployment, you can load configuration files to multiple devices using
'Full' or 'Incremental' INIfile options (refer to the relevant SBCUser's Manual for more
information).
➢ To configure the Mediant Cloud Edition (CE) SBC:
1. Login to the Mediant Cloud Edition (CE) SBC Web interface or connect from the Devices
page in the OVOC Web interface.
2. Open the TIME &DATEpage (Setup menu > Administration tab ) and in the NTPServer
Address field, set the Microsoft Azure site IPaddress/Domain Name(where the
OVOCserver is installed) as the NTP server clock source.
3. Click Apply to confirm the changes.
4. Open the SNMP Community Settings Page (Setup menu > Administration tab
>SNMPfolder).
OVOC | IOM
5. Set parameter SNMP Disable to No ('Yes' by default).
6. Click Apply to confirm changes.
7. Open the Mediant Cloud Edition (CE) SBC AdminPage (deviceIPaddress/AdminPage) and
configure the following ini parameters:
HostName = <Load Balancer IP>
SNMPManagerIsUsed_0 = 1
SNMPManagerTableIP_0 = <OVOC Server Internal IP>
8. Reset the device for your settings to take effect (Setup menu > Administration tab
>Maintenance folder >Maintenance Actions).
- 53 -
Page 67

CHAPTER7 Installing OVOCServer on VMware Virtual Machine
7 Installing OVOCServer on VMware Virtual
Machine
This describes how to install the OVOC server on a VMware vSphere machine. This procedure
takes approximately 30 minutes. This time is estimated on the HP DL 360 G8 platform (with
CPU, disk and memory as specified in Configuring the Virtual Machine Hardware Settings on
page73). The upgrade time depends on the hardware machine where the VMware vSphere
platform is installed.
● Before proceeding, ensure that the minimum platform requirements are met (see
Hardware and Software Specifications on page8). Failure to meet these
requirements will lead to the aborting of the installation.
● For obtaining the installation files, see OVOC Software Deliverables on page18
✔ Note that you must verify this file, see Files Verification on page21
OVOC | IOM
Deploying OVOC Image with VMware vSphere Hypervisor (ESXi)
This section describes how to deploy the OVOCimage with the VMware ESXi Web client. This
procedure is run using the VMware OVF tool that can be installed on any Linux machine.
● This procedure describes how to deploy the image using the OVF tool, which can
be downloaded from:https://www.vmware.com/support/developer/ovf/
● The OVOC image can also be deployed using the vSphere web client GUI.
➢ To run VMware OVF tool:
1. Transfer the 7z file containing the VMware Virtual Machine installation package that you
received from AudioCodes to your PC (see Appendix Transferring Files on page283 for
instructions on how to transfer files).
2. Open the VMware OVF tool.
3. Enter the following commands and press Enter:
ovftool --disableVerification --noSSLVerify --name=$VMname -datastore=$DataStore -dm=thin --acceptAllEulas --powerOn $ovaFilePath
vi://$user:$password@$vCenterIP/$dataCenterName/host/$clusterName/$E
SXIHostName
Where:
● $VMname(--name): is the name of the deployed machine
● $DataStore: data store for deployment
- 54 -
Page 68

CHAPTER7 Installing OVOCServer on VMware Virtual Machine
● $user:$password is the user and password of the VMware Host machine
● $vCenterIP: vCenter IP Address
● $dataCenterName: data center name inside the vCenter
● $clusterName: cluster name under data center tree
● $ESXIHostName: deployed ESXI IP Address
Example:
ovftool --disableVerification --noSSLVerify --name=ovoctest -datastore=Netapp04.lun1 -dm=thin --acceptAllEulas --powerOn
c:\tmp\OVOC_VMware_7.8.2241.ova
vi://vmware:P@ssword123@10.3.94.68/QASWDatacenter/host/qaswCluster
01/10.3.180.211
Figure 7-1: OVF Example
OVOC | IOM
Command parameters depend on vCenter and customer environment; refer to VMware
documentation for additional options.
The following progress is displayed:
Opening OVA source: /data1/7.8.2000/DVD5/7.8.2000.xxxx/OVOC-VMware-
7.8.2000.xxxx.ova
Opening VI target: vi://root@172.17.135.9:443/
Deploying to VI: vi://root@172.17.135.9:443/
Disk progress: 10%
Transfer Completed
The manifest validates
Powering on VM: FirstDeploy
Task Completed
Warning:
- No manifest entry found for: 'OVOC-VMware-7.8.2000.xxxx-disk1.vmdk'.
Completed successfully
- 55 -
Page 69

CHAPTER7 Installing OVOCServer on VMware Virtual Machine
Deploying OVOC Image with VMware vSphere Hypervisor (ESXi) in
Service Provider Cluster
This procedure describes how to deploy the OVOC image with VMware vSphere Hypervisor
(ESXi) in Service Provider Cluster. The procedure requires you to perform the following steps:
1. On existing OVOC server VM, perform full backup and upgrade to version 7.8.2000 (see
Step 1 Upgrade Existing Virtual Machine below)
2. On a new VM, install version 7.8.2000 Service Provider Cluster Management OVA and
restore the backup created in step 1 (seeStep 2 Install Service Provider Cluster on
Management Server on page58)
3. On a new VM, install version 7.8.2000 Service Provider Cluster VQM OVA (seeStep 3 Install
VQM Server on page59)
4. On a new VM, install version 7.8.2000 Service Provider Cluster PM OVA (see Step 4 Install
PM Server on page59)
OVOC | IOM
Step 1 Upgrade Existing Virtual Machine
Before installing the Service Provider Cluster, you must upgrade your existing virtual machine
to OVOC Version 7.8.2000
Before starting the installation, it is highly recommended to configure the SSH client
(e.g. Putty application) to save the session output into a log file.
➢ To upgrade existing OVOC server VM:
1. Using the WinSCP utility (see Transferring Files on page283), copy the DVD3.ISO file for
OVOC Version 7.8.2000 that you saved to your PC in Step 1: Setup the Virtual Machine on
page110 to the OVOC server acems user home directory: /home/acems
2. Open an SSH connection or the VM console.
3. Login into the OVOC server as ‘acems’ user with password acems (or customer defined
password).
4. Switch to 'root' user and provide root password (default password is root):
su – root
5. Mount the CDROM to make it available:
mount /home/acems/DVD3_OVOC_7.8.2000.iso /mnt
cd /mnt/EmsServerInstall/
- 56 -
Page 70

CHAPTER7 Installing OVOCServer on VMware Virtual Machine
6. Run the installation script from its location:
./install
Figure 7-2: OVOC server Installation Script
OVOC | IOM
7. Enter y, and then press Enter to accept the License agreement.
Figure 7-3: OVOC server Upgrade – License Agreement
8. The upgrade process installs OS packages updates and patches. After the patch
installation, reboot might be required:
- 57 -
Page 71

CHAPTER7 Installing OVOCServer on VMware Virtual Machine
● If you are prompted to reboot, press Enter to reboot the OVOC server and then
repeat steps 2-7 (inclusive).
● If you are not prompted to reboot, proceed to step Wait for the installation to
complete and reboot the OVOC server by typing reboot. below
Figure 7-4: OVOC Server Installation Complete
9. Wait for the installation to complete and reboot the OVOC server by typing reboot.
10. Schedule full backup of the OVOC server to the nearest possible time (see Change
Schedule Backup Time on page145) and then verify that all necessary files have been
generated (see OVOC Server Backup Processes on page144).
Step 2 Install Service Provider Cluster on Management Server
OVOC | IOM
This procedure describes how to deploy the OVOC image with VMware vSphere Hypervisor
(ESXi) in a Service Provider Cluster configuration on the new virtual machine that is designated
as the Management server. The procedure describes how to deploy the OVOCimage with the
VMware ESXi Web client using the OVF tool, which can be downloaded
from:https://www.vmware.com/support/developer/ovf/ and installed on any Linux machine.
● The OVOC image can also be deployed using the vSphere web client GUI.
● You must install the Management server prior to installing the VQMand
PMservers.
● Refer to OVOC Software Deliverables on page18 for information on media
deliverables.
➢ To install Service Provider Cluster (Management server):
1. On the new virtual machine:Transfer the 7z file containing the VMware Virtual Machine
Management installation package that you received from AudioCodes to your PC (see
Appendix Transferring Files on page283 for instructions on how to transfer files).
2. Run the VMware OVF tool (see Deploying OVOC Image with VMware vSphere Hypervisor
(ESXi) on page54
3. After the VM has been created, Inflate Thin Virtual Disk. For
Instructions:https://docs.vmware.com/en/VMware-
vSphere/6.0/com.vmware.vsphere.storage.doc/GUID-C371B88F-C407-4A69-8F3BFA877D6955F8.html
4. Restore the backup that you created in Step 1 Upgrade Existing Virtual Machine on
page56 (see OVOC Server Restore on page146).
5. Configure Service Provider Cluster mode (see Service Provider Cluster on page176).
- 58 -
Page 72

CHAPTER7 Installing OVOCServer on VMware Virtual Machine
6. Install VQMand PMservers (see Step 3 Install VQM Server below and Step 4 Install PM
Server below).
Step 3 Install VQM Server
This procedure describes how to install the Service Provider Cluster mode on the new virtual
machine that is designated for the VQMServer.
● The OVOC image can also be deployed using the vSphere web client GUI.
● Refer to OVOC Software Deliverables on page18 for information on media
deliverables.
● You must install the Management server prior to installing the VQMserver (see
Step 2 Install Service Provider Cluster on Management Server on the previous
page).
➢ To install VQMserver:
1. On the new virtual machine:Transfer the 7z file containing the VMware Virtual Machine
VQM installation package that you received from AudioCodes to your PC (see Appendix
Transferring Files on page283 for instructions on how to transfer files).
OVOC | IOM
2. Run the VMware OVF tool (see Deploying OVOC Image with VMware vSphere Hypervisor
(ESXi) on page54
3. After the VM has been created, Inflate Thin Virtual Disk. For
Instructions:https://docs.vmware.com/en/VMware-
vSphere/6.0/com.vmware.vsphere.storage.doc/GUID-C371B88F-C407-4A69-8F3BFA877D6955F8.html
Step 4 Install PM Server
This procedure describes how to install the Service Provider Cluster mode on the new virtual
machine that is designated for the PM Server.
● The OVOC image can also be deployed using the vSphere web client GUI.
● Refer to OVOC Software Deliverables on page18 for information on media
deliverables.
● You must install the Management server prior to installing the PMserver (seeStep
2 Install Service Provider Cluster on Management Server on the previous page)
➢ To install the PM server:
1. On the new virtual machine:Transfer the 7z file containing the VMware Virtual Machine
PM installation package that you received from AudioCodes to your PC (see Appendix
Transferring Files on page283 for instructions on how to transfer files).
2. Run the VMware OVF tool (see Deploying OVOC Image with VMware vSphere Hypervisor
(ESXi) on page54).
- 59 -
Page 73
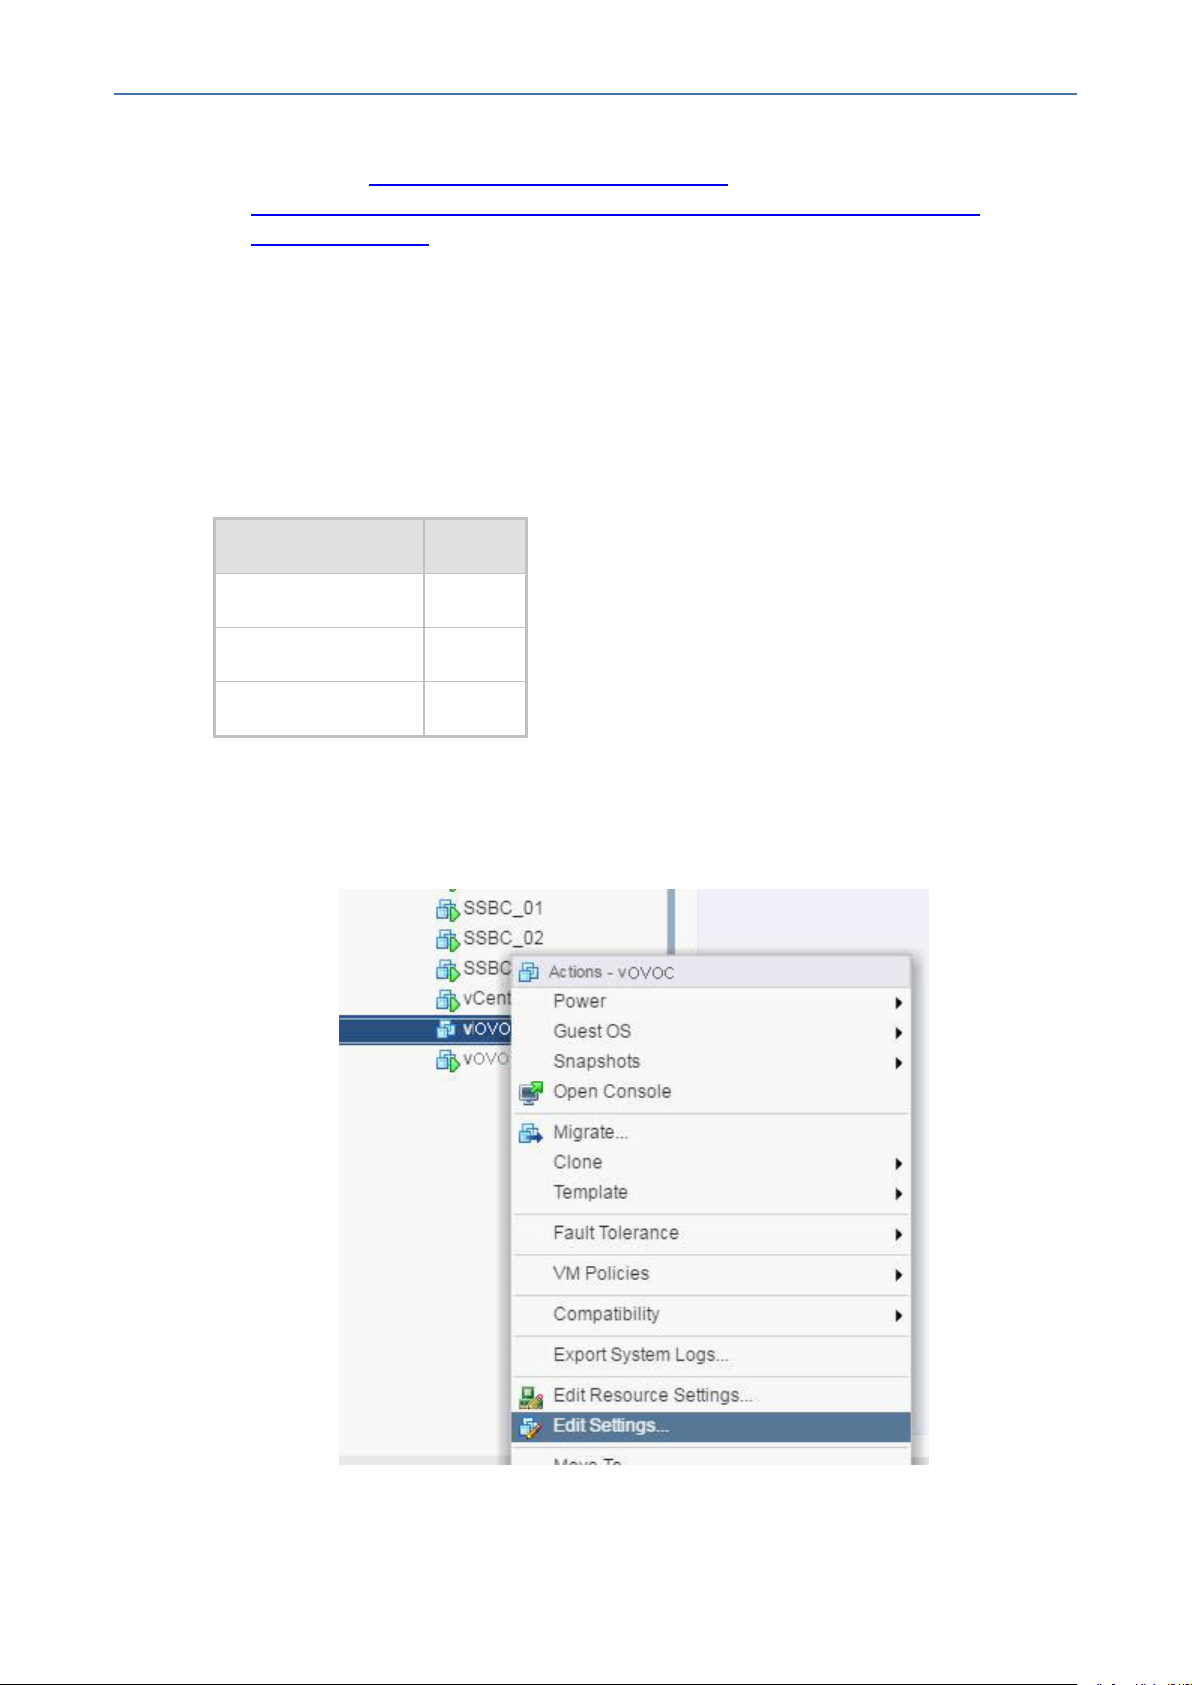
CHAPTER7 Installing OVOCServer on VMware Virtual Machine
3. After the VM has been created, Inflate Thin Virtual Disk. For
Instructions:https://docs.vmware.com/en/VMware-
vSphere/6.0/com.vmware.vsphere.storage.doc/GUID-C371B88F-C407-4A69-8F3BFA877D6955F8.html
Configuring the Virtual Machine Hardware Settings
This section shows how to configure the Virtual Machine’s hardware settings.
Before starting this procedure, select the required values for your type of installation (high or
low profile) and note them in the following table for reference. For the required VMware Disk
Space allocation, CPU, and memory, see Hardware and Software Specifications on page8.
Table 7-1: Virtual Machine Configuration
Required Parameter Value
Disk size
OVOC | IOM
Memory size
CPU cores
➢ To configure the virtual machine hardware settings:
1. Before powering up the machine, go to the virtual machine Edit Settings option.
Figure 7-5: Edit Settings option
- 60 -
Page 74
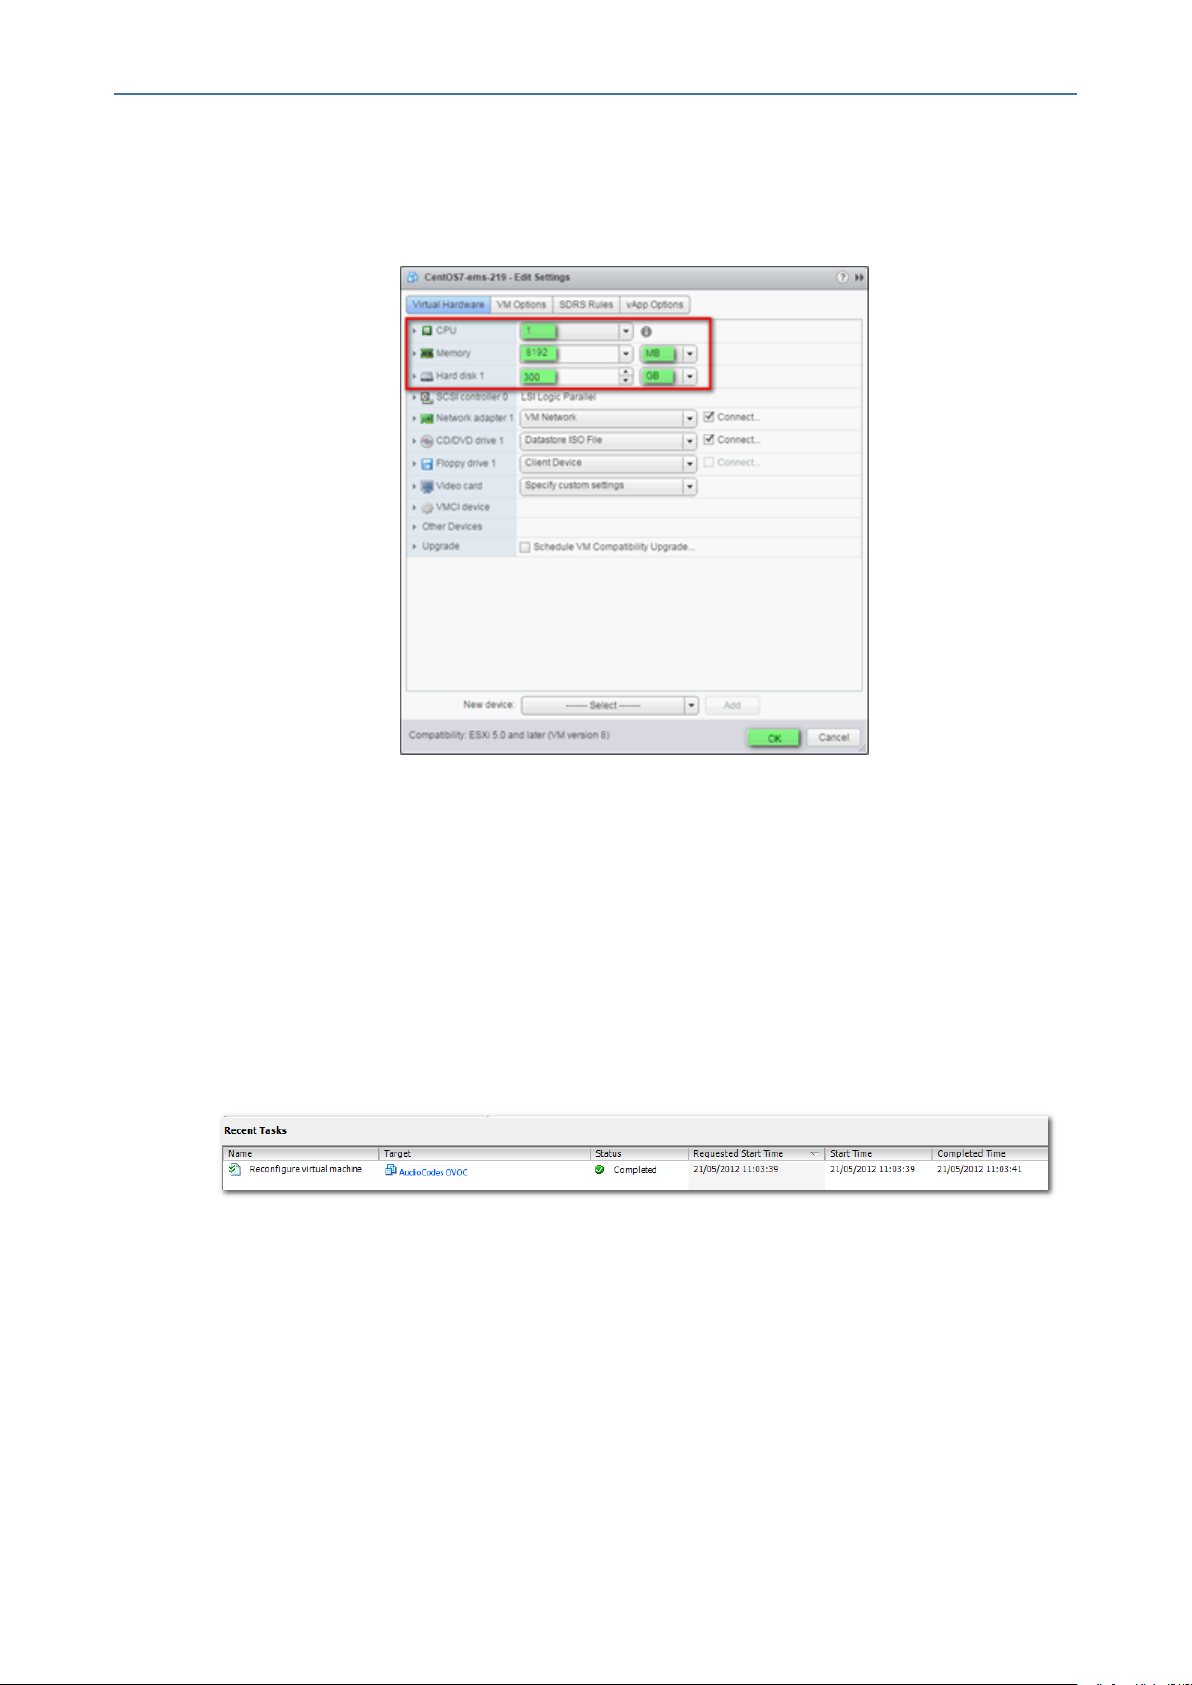
CHAPTER7 Installing OVOCServer on VMware Virtual Machine
2. In the CPU, Memory and Hardware tabs set the required values accordingly to the
desired OVOC server VMware Disk Space allocation. (Hardware and Software
Specifications on page8), and then click OK.
Figure 7-6: CPU, Memory and Hard Disk Settings
OVOC | IOM
● Once the hard disk space allocation is increased, it cannot be reduced to a lower
amount.
● If you wish to create OVOC VMs in a cluster environment supporting High Availability
and you are using shared network storage, then ensure you provision a VM hard drive
on the shared network storage on the cluster (Configuring OVOC Virtual Machines
(VMs) in a VMware Cluster below).
3. Wait until the machine reconfiguration process has completed.
Figure 7-7: Recent Tasks
Configuring OVOC Virtual Machines (VMs) in a VMware Cluster
This section describes how to configure OVOC VMs in a VMware cluster.
VMware Cluster Site Requirements
Ensure that your VMware cluster site meets the following requirements:
■ The configuration process assumes that you have a VMware cluster that contains at least
two ESXi servers controlled by vCenter server.
- 61 -
Page 75
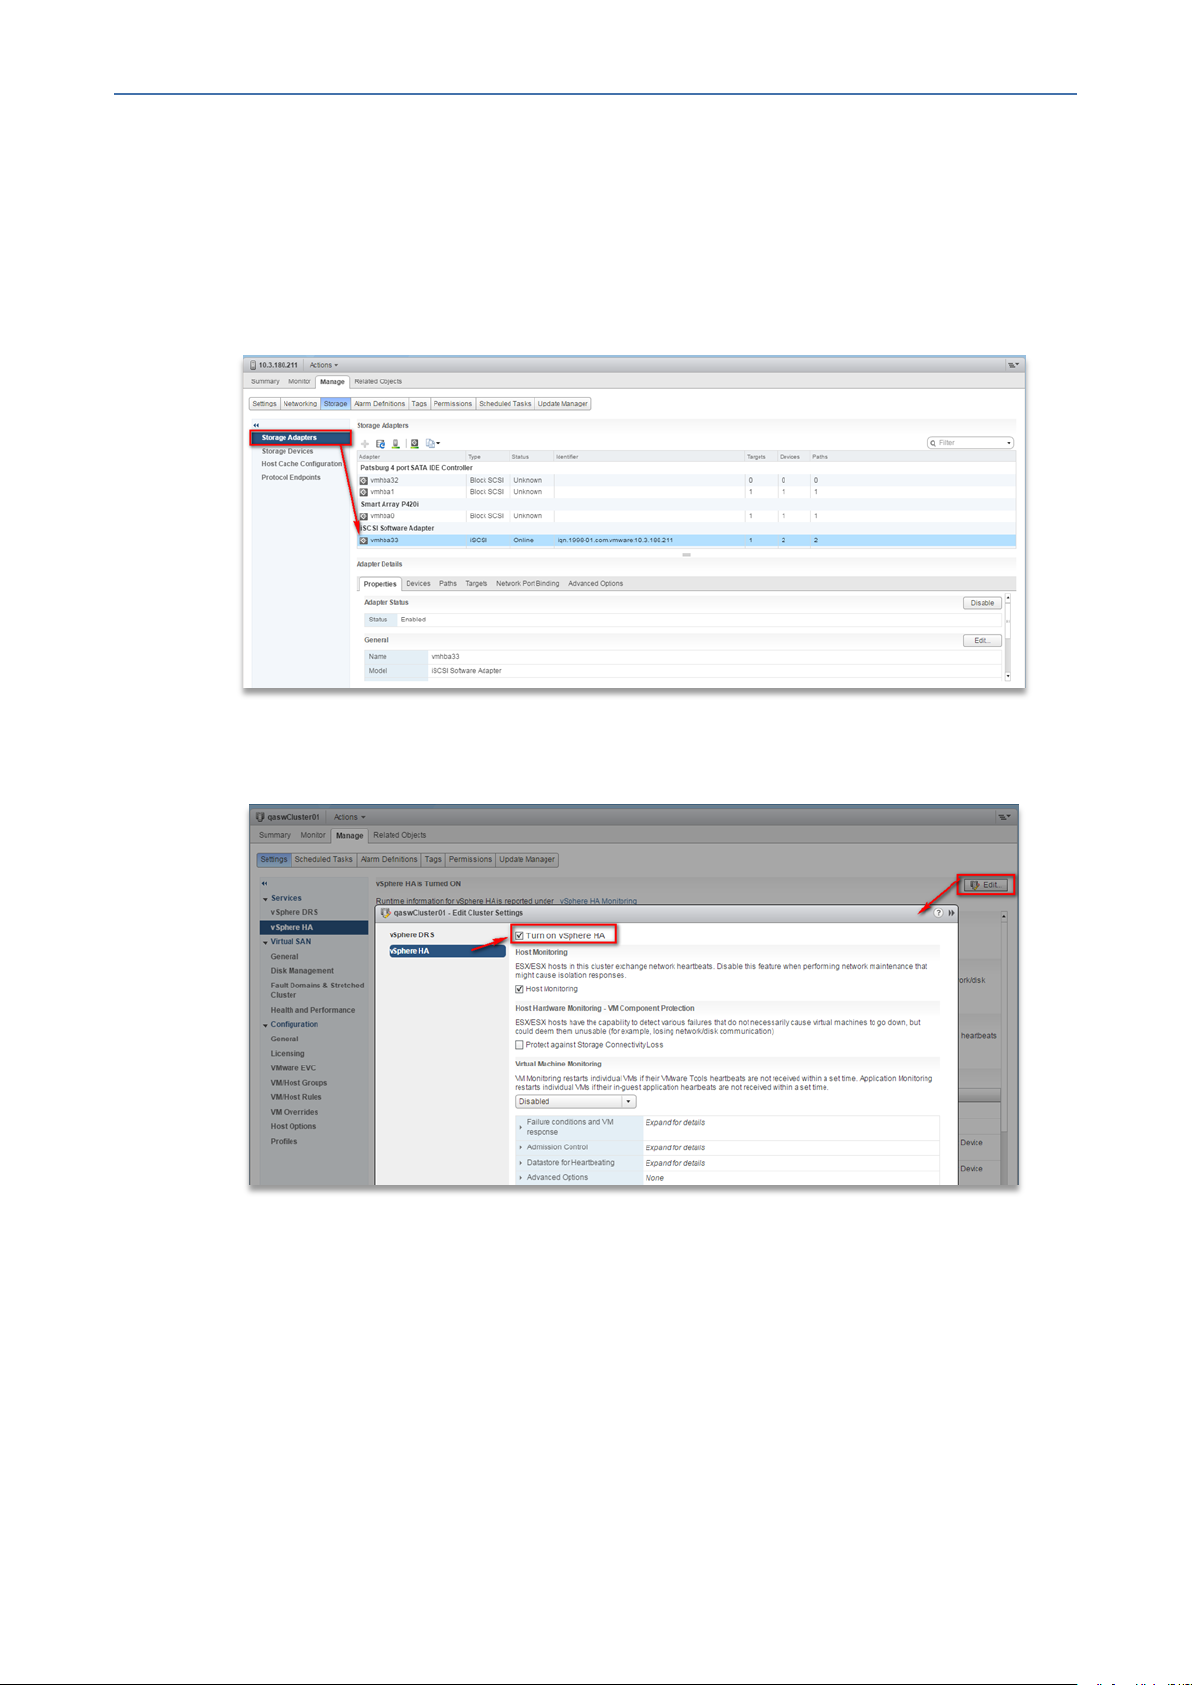
CHAPTER7 Installing OVOCServer on VMware Virtual Machine
■ The clustered VM servers should be connected to a shared network storage of type iSCSI
or any other types supported by VMware ESXi.
For example, a datastore “QASWDatacenter” which contains a cluster named
“qaswCluster01” and is combined of two ESXi servers (figure below).
■ Verify that Shared Storage is defined and mounted for all cluster members:
Figure 7-8: Storage Adapters
OVOC | IOM
■ Ensure that the 'Turn On vSphere HA' check box is selected:
Figure 7-9: Turn On vSphere HA
■ Ensure that HA is activated on each cluster node:
- 62 -
Page 76

CHAPTER7 Installing OVOCServer on VMware Virtual Machine
Figure 7-10: Activate HA on each Cluster Node
OVOC | IOM
■ Ensure that the networking configuration is identical on each cluster node:
Figure 7-11: Networking
■ Ensure that the vMotion is enabled on each cluster node. The recommended method is to
use a separate virtual switch for vMotion network (this should be defined in all cluster
nodes and interconnected):
- 63 -
Page 77

CHAPTER7 Installing OVOCServer on VMware Virtual Machine
Figure 7-12: Switch Properties
■ A VM will be movable and HA protected only when its hard disk is located on shared
network storage on a cluster. You should choose an appropriate location for the VM hard
disk when you deploy the OVOC VM. If your configuration is performed correctly, a VM
should be marked as “protected” as is shown in the figure below:
OVOC | IOM
Figure 7-13: Protected VM
If you wish to manually migrate the OVOC VMs to another cluster node, see Managing
Clusters on page266.
Cluster Host Node Failure on VMware
In case a host node where the VM is running fails, the VM is restarted on the redundant cluster
node automatically.
- 64 -
Page 78

CHAPTER7 Installing OVOCServer on VMware Virtual Machine
When one of the cluster nodes fail, the OVOC VM is automatically migrated to the
redundant host node. During this process, the OVOC VM is restarted and consequently
any active OVOC process is dropped. The migration process may take several
minutes.
Connecting OVOC Server to Network on VMware
After installation, the OVOC server is assigned a default IP address that will most likely be
inaccessible from the customer's network. This address is assigned to the first virtual network
interface card connected to the 'trusted' virtual network switch during the OVOC server
installation. You need to change this IP address to suit your IP addressing scheme.
➢ To connect to the OVOC server:
1. Power on the machine; in the vCenter tree, right-click the AudioCodes One Voice
Operations Center node (vOC) and in the drop-down menu, choose Power > Power On.
Upon the initial boot up after reconfiguring the disk space, the internal mechanism
configures the server installation accordingly to version specifications (Hardware and
Software Specifications on page8).
OVOC | IOM
Figure 7-14: Power On
2. Wait until the boot process has completed, and then connect the running server through
the vSphere client console.
3. Login into the OVOC server by SSH, as ‘acems’ user and enter acems password.
4. Switch to 'root' user and provide root password (default password is root):
su - root
5. Proceed to the network configuration using the OVOC Server Manager.
6. Type the following command and press Enter.
#EmsServerManager
- 65 -
Page 79

CHAPTER7 Installing OVOCServer on VMware Virtual Machine
7. Verify that all processes are up and running (Viewing Process Statuses on page157) and
verify login to OVOC Web client is successful.
8. Set the OVOC server network IP address to suit your IP addressing scheme (Server IP
Address on page183).
9. If you are installing the Service Provider Cluster mode, see Service Provider Cluster on
page176
10. Perform other configuration actions as required using the OVOC Server Manager (Getting
Started on page151).
OVOC | IOM
- 66 -
Page 80

CHAPTER7 Installing OVOCServer on VMware Virtual Machine
This page is intentionally left blank.
OVOC | IOM
- 67 -
Page 81

CHAPTER8 Installing OVOC Server on Microsoft Hyper-V Virtual Machine
8 Installing OVOC Server on Microsoft Hyper-V
Virtual Machine
This section describes how to install the OVOC server on a Microsoft Hyper-V virtual machine.
● Before proceeding, ensure that the minimum platform requirements are met (see
.Hardware and Software Specifications on page8). Failure to meet these
requirements will lead to the aborting of the installation.
● For obtaining the installation files, see OVOC Software Deliverables on page18
✔ Note that you must also verify the ISOfile, see Files Verification on page21
➢ To install the OVOC server on Microsoft Hyper-V:
1. Transfer the ISO file containing the Microsoft Hyper-V Virtual Machine installation package
that you received from AudioCodes to your PC (see Appendix Transferring Files on
page283 for instructions on how to transfer files).
OVOC | IOM
2. Open Hyper-V Manager by clicking Start > Administrative Tools > Hyper-V Manager; the
following screen opens:
Figure 8-1: Installing the OVOC server on Hyper-V – Hyper-V Manager
3. Start the Import Virtual Machine wizard: click the Action tab, and then select Import
Virtual Machine from the menu; the Import Virtual Machine screen shown below opens:
- 68 -
Page 82

CHAPTER8 Installing OVOC Server on Microsoft Hyper-V Virtual Machine
Figure 8-2: Installing OVOC server on Hyper-V – Import Virtual Machine Wizard
OVOC | IOM
4. Click Next; the Locate Folder screen opens:
- 69 -
Page 83
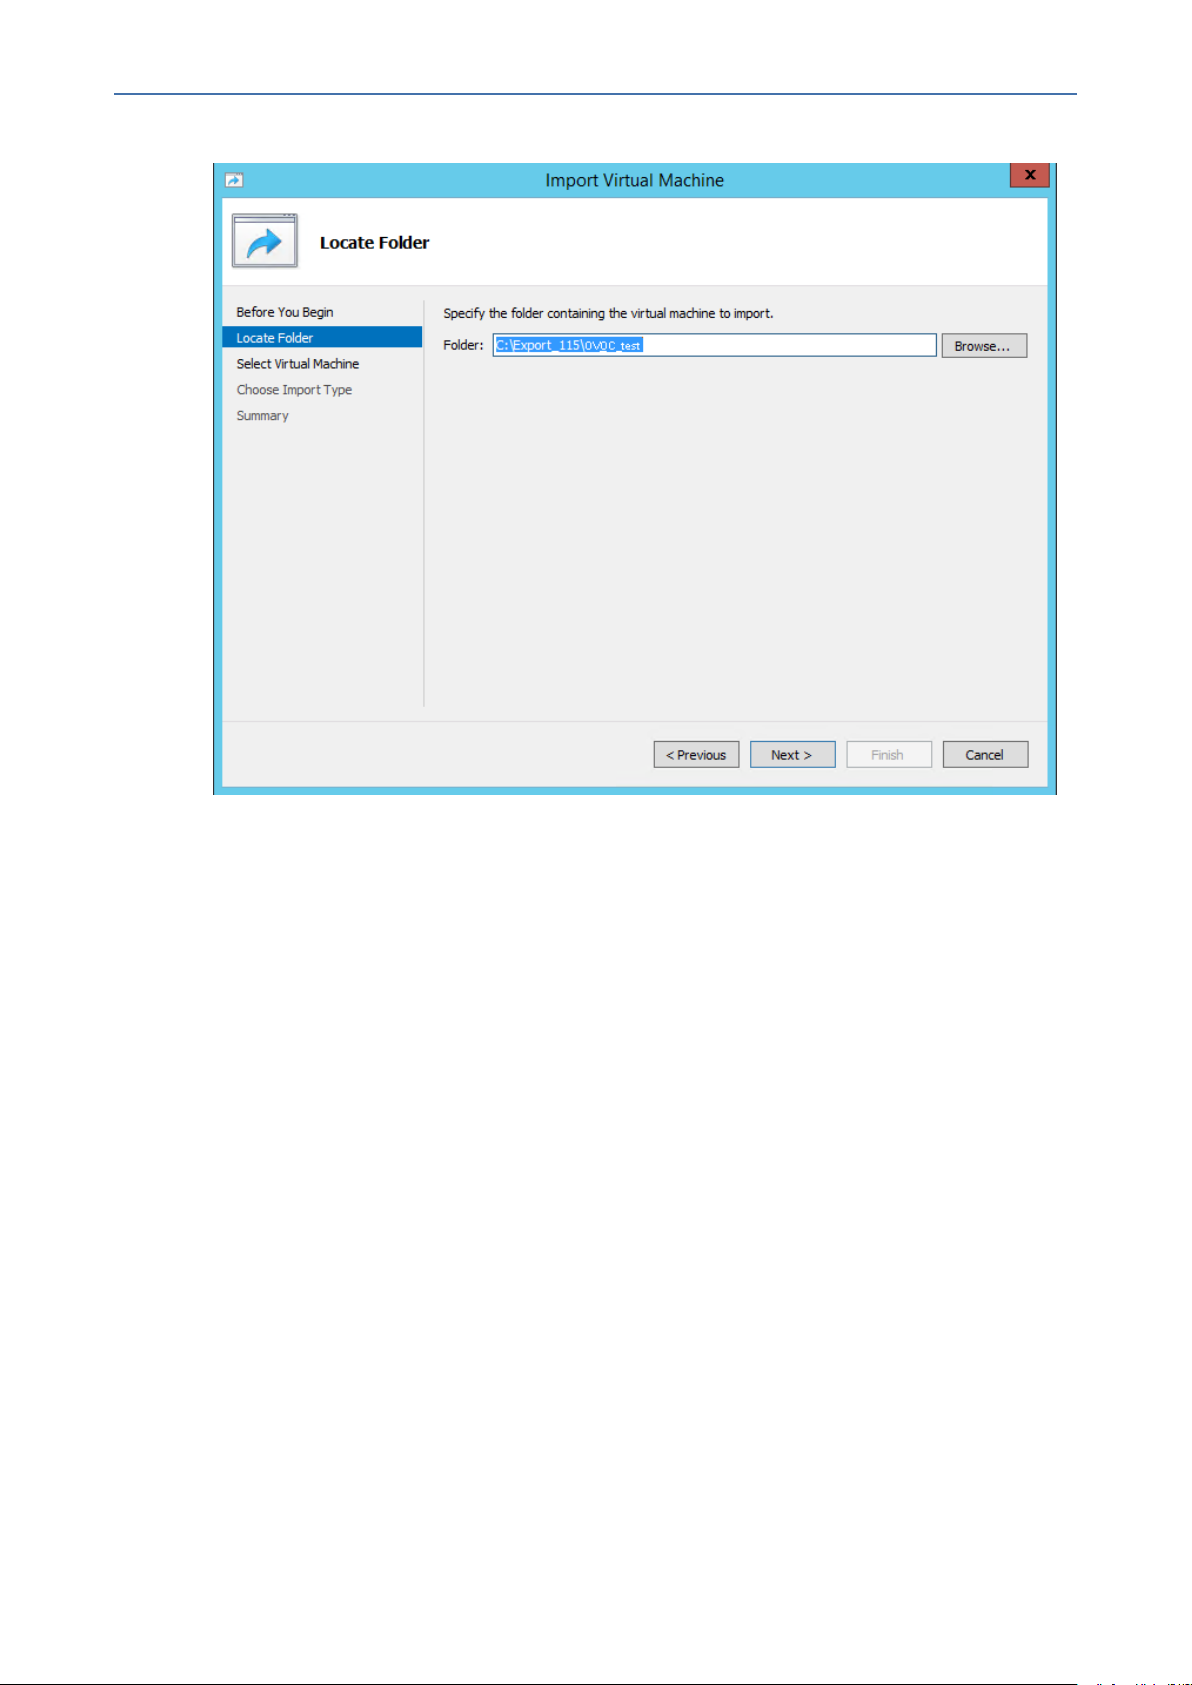
CHAPTER8 Installing OVOC Server on Microsoft Hyper-V Virtual Machine
Figure 8-3: Installing OVOC server on Hyper-V – Locate Folder
OVOC | IOM
5. Enter the location of the VM installation folder (extracted from the ISO file), and then click
Next; the Select Virtual Machine screen opens.
6. Select the virtual machine to import, and then click Next; the Choose Import Type screen
opens:
- 70 -
Page 84

CHAPTER8 Installing OVOC Server on Microsoft Hyper-V Virtual Machine
Figure 8-4: Installing OVOC server on Hyper-V – Choose Import Type
OVOC | IOM
7. Select the option ''Copy the virtual machine (create a new unique ID)'', and then click Next;
the Choose Folders for Virtual Machine Files screen opens:
- 71 -
Page 85
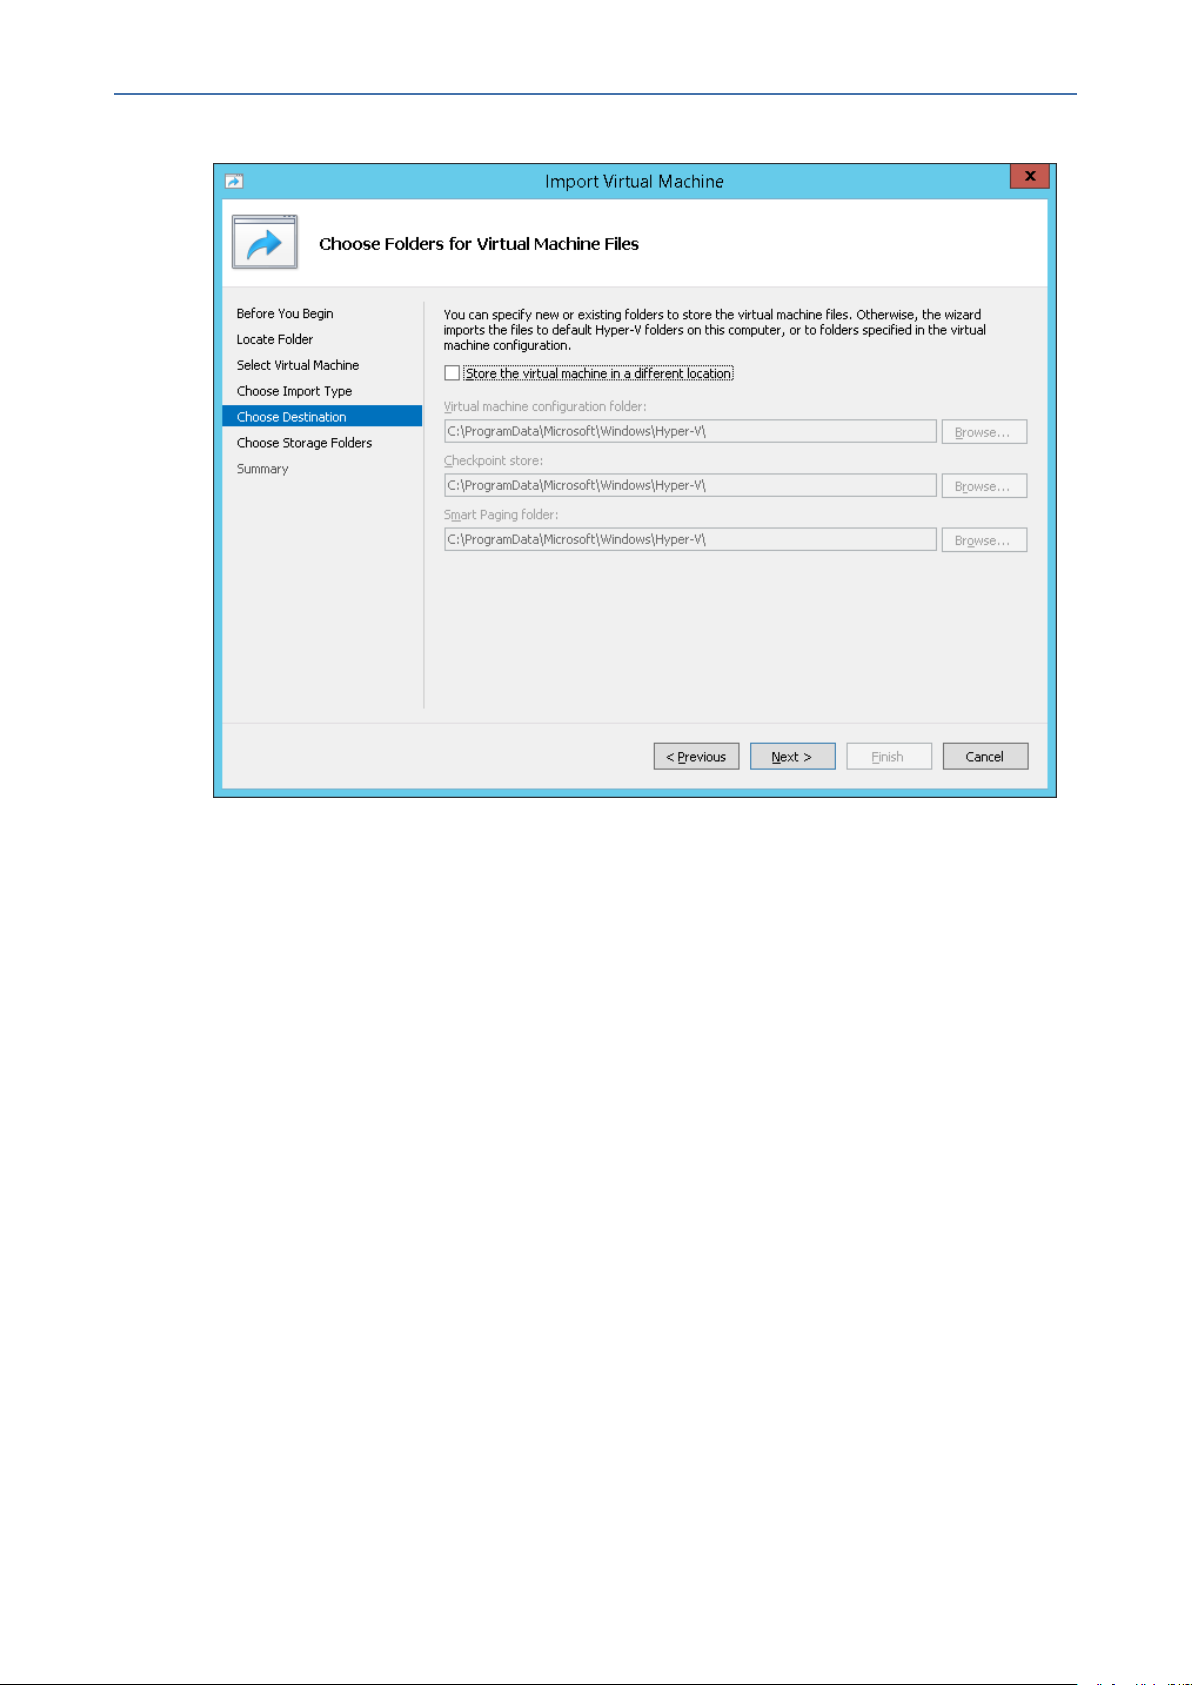
CHAPTER8 Installing OVOC Server on Microsoft Hyper-V Virtual Machine
Figure 8-5: Installing OVOC server on Hyper-V – Choose Destination
OVOC | IOM
8. Select the location of the virtual hard disk, and then click Next; the Choose Storage
Folders screen opens:
- 72 -
Page 86

CHAPTER8 Installing OVOC Server on Microsoft Hyper-V Virtual Machine
Figure 8-6: Installing OVOC server on Hyper-V – Choose Storage Folders
OVOC | IOM
9. Select the Storage Folder for the Virtual Hard Disk, and then click Next; the Summary
screen opens.
10. Click Finish to start the creation of the VM; a similar installation progress indicator is
shown:
Figure 8-7: File Copy Progress Bar
This process may take approximately 30 minutes to complete.
11. Proceed to Configuring the Virtual Machine Hardware Settings below.
Configuring the Virtual Machine Hardware Settings
This section shows how to configure the Virtual Machine’s hardware settings.
Before starting this procedure, select the required values for your type of installation (high or
low profile) and note them in the following table for reference. For the required VMware Disk
Space allocation, CPU, and memory, see Hardware and Software Specifications on page8.
- 73 -
Page 87

CHAPTER8 Installing OVOC Server on Microsoft Hyper-V Virtual Machine
Table 8-1: Virtual Machine Configuration
Required Parameter Value
Disk size
Memory size
CPU cores
➢ To configure the VM for OVOC server:
1. Locate the new OVOC server VM in the tree in the Hyper-V Manager, right-click it, and then
select Settings; the Virtual Machine Settings screen opens:
Figure 8-8: Adjusting VM for OVOC server – Settings - Memory
OVOC | IOM
2. In the Hardware pane, select Memory, as shown above, enter the 'Startup RAM’
parameter as required, and then click Apply.
- 74 -
Page 88

CHAPTER8 Installing OVOC Server on Microsoft Hyper-V Virtual Machine
3. In the Hardware pane, select Processor; the Processor screen shown in the figure below
opens.
Figure 8-9: Adjusting VM for OVOC server - Settings - Processor
OVOC | IOM
4. Set the 'Number of virtual processors' parameters as required.
5. Set the 'Virtual machine reserve (percentage)' parameter to 100%, and then click Apply.
● Once the hard disk space allocation is increased, it cannot be reduced.
● If you wish to create OVOC VMs in a Cluster environment that supports High
Availability and you are using shared network storage, then ensure you provision a
VM hard drive on the shared network storage on the cluster (Configuring OVOC
Virtual Machines in a Microsoft Hyper-V Cluster on page81).
Expanding Disk Capacity
The OVOC server virtual disk is provisioned by default with a minimum volume. In case a
higher capacity is required for the target OVOC server then the disk can be expanded.
- 75 -
Page 89

CHAPTER8 Installing OVOC Server on Microsoft Hyper-V Virtual Machine
➢ To expand the disk size:
1. Make sure that the target OVOC server VM is not running - Off state.
2. Select the Hard Drive, and then click Edit.
Figure 8-10: Expanding Disk Capacity
OVOC | IOM
The Edit Virtual Disk Wizard is displayed as shown below.
- 76 -
Page 90

CHAPTER8 Installing OVOC Server on Microsoft Hyper-V Virtual Machine
Figure 8-11: Edit Virtual Hard Disk Wizard
OVOC | IOM
3. Click Next; the Choose Action screen is displayed:
- 77 -
Page 91

CHAPTER8 Installing OVOC Server on Microsoft Hyper-V Virtual Machine
Figure 8-12: Edit Virtual Hard Disk Wizard-Choose Action
OVOC | IOM
4. Select the Expand option, and then click Next; the Expand Virtual Hard Disk screen opens.
- 78 -
Page 92

CHAPTER8 Installing OVOC Server on Microsoft Hyper-V Virtual Machine
Figure 8-13: Edit Virtual Hard Disk Wizard-Expand Virtual Hard Disk
OVOC | IOM
5. Enter the required size for the disk, and then click Next; the Summary screen is displayed.
- 79 -
Page 93
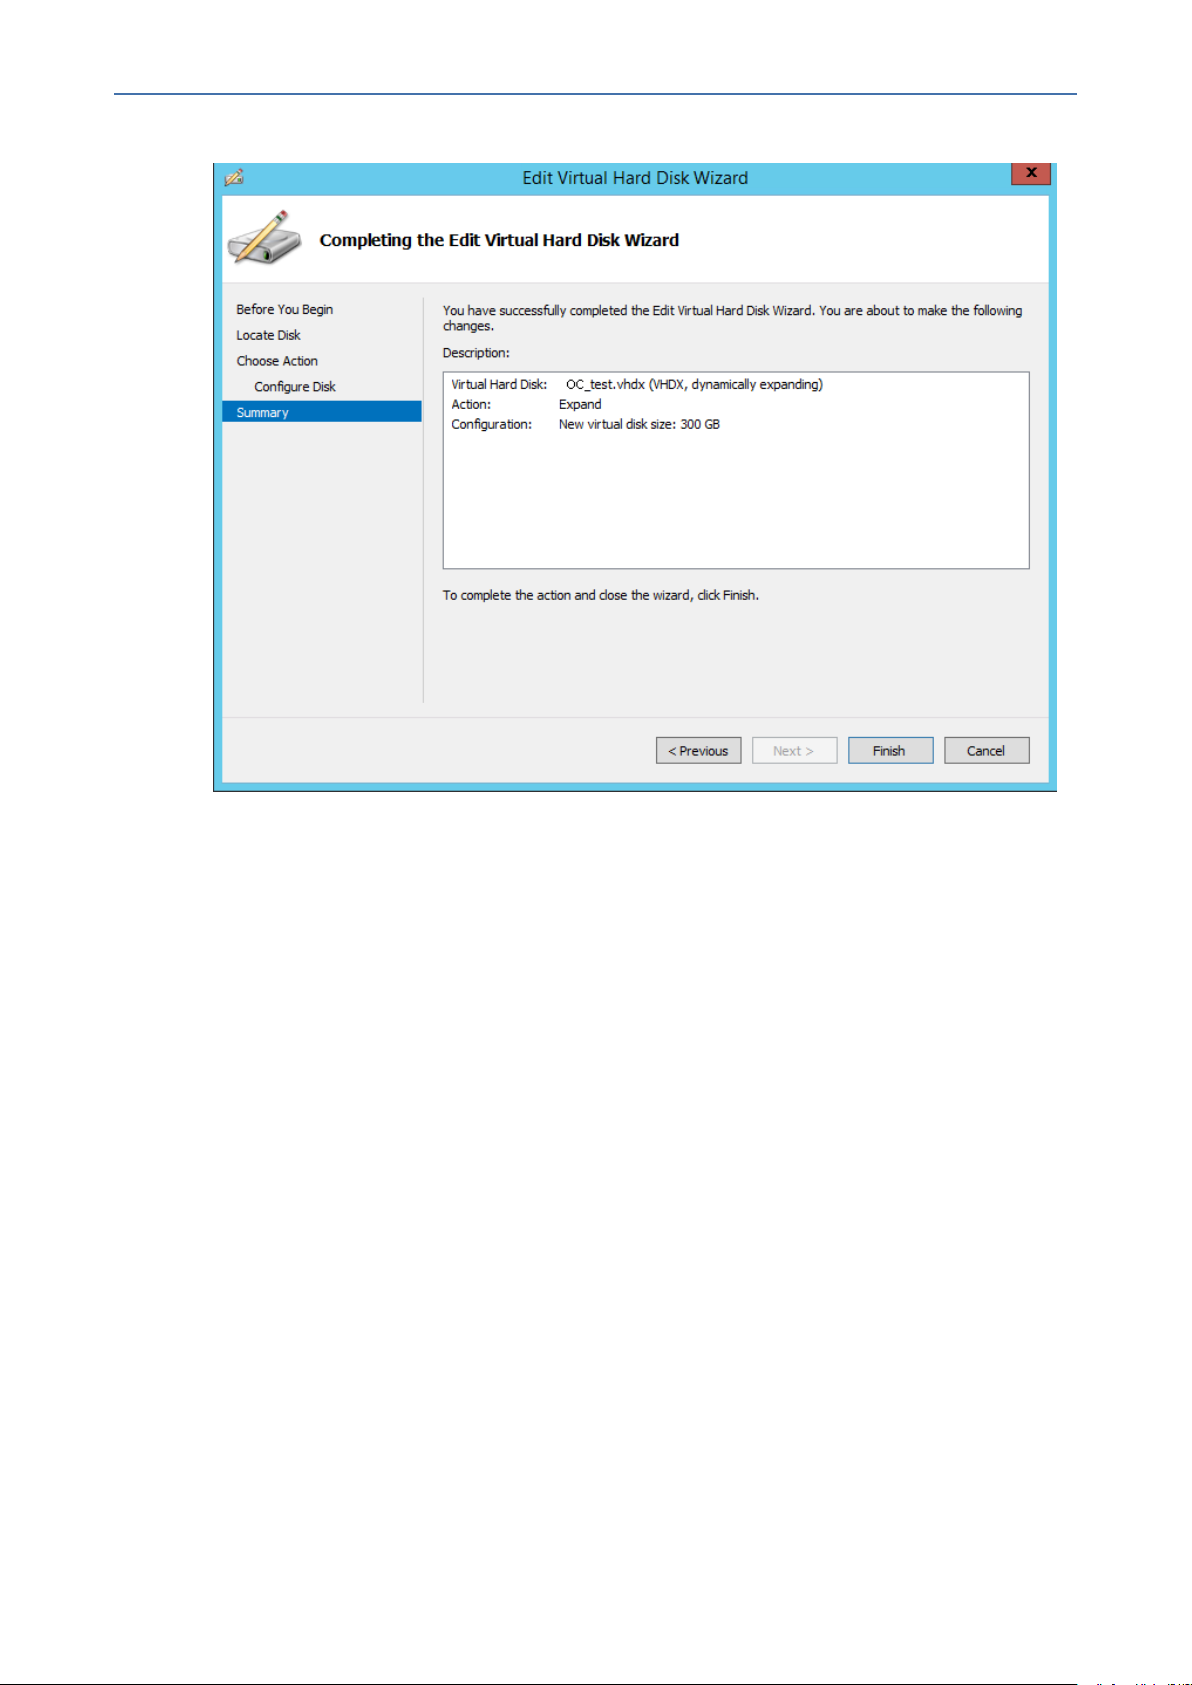
CHAPTER8 Installing OVOC Server on Microsoft Hyper-V Virtual Machine
Figure 8-14: Edit Virtual Hard Disk Wizard-Completion
OVOC | IOM
6. Verify that all of the parameters have been configured, and then click Finish. The settings
window will be displayed.
7. Click OK to close.
Changing MAC Addresses from 'Dynamic' to 'Static'
By default, the MAC addresses of the OVOC server Virtual Machine are set dynamically by the
hypervisor. Consequently, they might be changed under certain circumstances, for example,
after moving the VM between Hyper-V hosts. Changing the MAC address may lead to an
invalid license.
To prevent this from occurring, MAC Addresses should be changed from 'Dynamic' to 'Static'.
➢ To change the MAC address to 'Static' in Microsoft Hyper-V:
1. Shutdown the OVOC server ( Shutdown the OVOC Server Machine on page181).
2. In the Hardware pane, select Network Adapter and then Advanced Features.
3. Select the MAC address 'Static' option.
4. Repeat steps 2 and 3 for each network adapter.
- 80 -
Page 94

CHAPTER8 Installing OVOC Server on Microsoft Hyper-V Virtual Machine
Figure 8-15: Advanced Features - Network Adapter – Static MAC Address
OVOC | IOM
Configuring OVOC Virtual Machines in a Microsoft Hyper-V Cluster
This section describes how to configure OVOC VMs in a Microsoft Hyper-V cluster for HA.
Hyper-V Cluster Site Requirements
Ensure that your Hyper-V cluster site meets the following requirements:
■ The configuration process assumes that your Hyper-V failover cluster contains at least two
Windows nodes with installed Hyper-V service.
■ The cluster should be connected to a shared network storage of iSCSI type or any other
supported type. For example, “QAHyperv” contains two nodes.
- 81 -
Page 95

CHAPTER8 Installing OVOC Server on Microsoft Hyper-V Virtual Machine
Figure 8-16: Hyper-V-Failover Cluster Manager Nodes
OVOC | IOM
■ The OVOC VM should be created with a hard drive which is situated on a shared cluster
storage.
Add the OVOC VM in Failover Cluster Manager
After you create the new OVOC VM, you should add the VM to a cluster role in the Failover
Cluster Manager.
➢ To add the OVOC VM in Failover Cluster Manager:
1. Right-click “Roles” and in the pop up menu, choose Configure Role:
Figure 8-17: Configure Role
2. In the Select Role window, select the Virtual Machine option and then click Next.
- 82 -
Page 96

CHAPTER8 Installing OVOC Server on Microsoft Hyper-V Virtual Machine
Figure 8-18: Choose Virtual Machine
OVOC | IOM
A list of available VMs are displayed; you should find the your new created OVOC VM:
Figure 8-19: Confirm Virtual Machine
- 83 -
Page 97

CHAPTER8 Installing OVOC Server on Microsoft Hyper-V Virtual Machine
3. Select the check box, and then click Next.
At the end of configuration process you should see the following:
Figure 8-20: Virtual Machine Successfully Added
OVOC | IOM
4. Click Finish to confirm your choice.
Now your OVOC VM is protected by the Windows High Availability Cluster mechanism.
If you wish to manually move the OVOC VMs to another cluster node, see Appendix
Managing Clusters on page266.
Cluster Host Node Failure on Hyper-V
In case a host node where the VM is running fails, then the VM is restarted on the redundant
cluster host node automatically.
When one of the cluster hosts fails, the OVOC VM is automatically moved to the
redundant server host node. During this process, the OVOC VM is restarted and
consequently any running OVOC process are dropped. The move process may take
several minutes.
Connecting OVOC Server to Network on HyperV
After installation, the OVOC server is assigned, a default IP address that will most likely be
inaccessible from the customer's network. This address is assigned to the first virtual network
- 84 -
Page 98
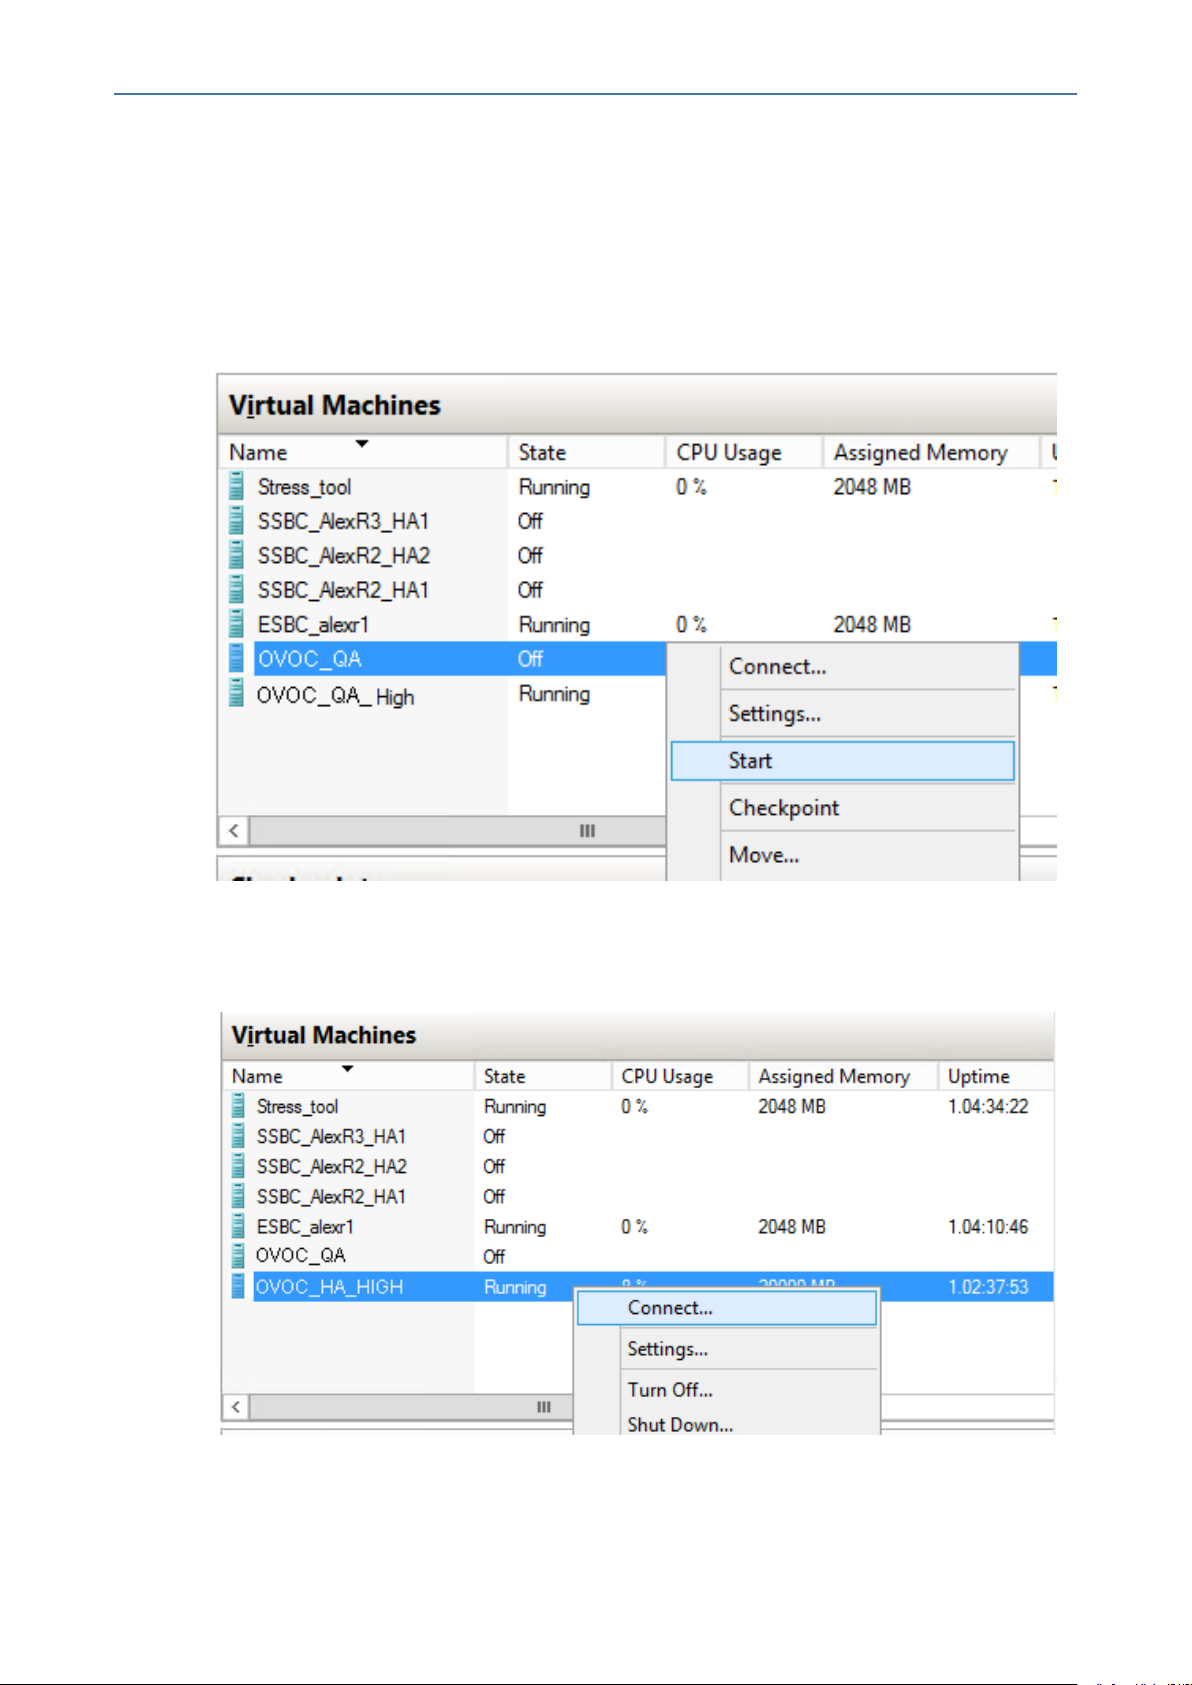
CHAPTER8 Installing OVOC Server on Microsoft Hyper-V Virtual Machine
interface card connected to the 'trusted' virtual network switch during the OVOC server
installation. You need to change this IP address to suit your IP addressing scheme.
➢ To reconfigure the OVOC server IP address:
1. Start the OVOC server virtual machine, on the Hyper-V tree, right-click the OVOC server,
and then in the drop-down menu, choose Start.
Figure 8-21: Power On Virtual Machine
OVOC | IOM
2. Connect to the console of the running server by right-clicking the OVOC server virtual
machine, and then in the drop-down menu, choose Connect.
Figure 8-22: Connect to OVOC server Console
3. Login into the OVOC server by SSH, as ‘acems’ user and enter password acems.
- 85 -
Page 99

CHAPTER8 Installing OVOC Server on Microsoft Hyper-V Virtual Machine
4. Switch to 'root' user and provide root password (default password is root):
su - root
5. Start the OVOC Server Manager utility by specifying the following command:
# EmsServerManager
6. Verify that all processes are up and running (Viewing Process Statuses on page157) and
verify login to OVOC Web client is successful.
7. Set the OVOC server network IP address to suit your IP addressing scheme (Server IP
Address on page183).
8. Perform other configuration actions as required using the OVOC Server Manager (Getting
Started on page151).
OVOC | IOM
- 86 -
Page 100

CHAPTER9 Installing OVOC Server on Dedicated Hardware
9 Installing OVOC Server on Dedicated Hardware
The OVOC server installation process supports the Linux platform. The installation includes
four separate components, where each component is supplied on a separate DVD:
■ DVD1: OS installation: OS installation DVD
■ DVD2: Oracle Installation: Oracle installation DVD platform
■ DVD3: OVOC application: OVOC server application installation DVD
● Ensure that the minimum platform requirements are met (see Hardware and
Software Specifications on page8). Failure to meet these requirements will lead to
the aborting of the installation.
● Installation of OVOC Version 7.8 and later must be performed on HP DL Gen10
machines. Installation on HP DL G8 machines is not supported.
● For obtaining the installation files, see OVOC Software Deliverables on page18
✔ Note that you must verify this file, see Files Verification on page21
OVOC | IOM
DVD1: Linux CentOS
The procedure below describes how to install Linux CentOS. This procedure takes
approximately 20 minutes.
Before commencing the installation, you must configure RAID- 0 (see Appendix
Configuring RAID-0 for AudioCodes OVOC on HP ProLiant DL360p Gen10 Servers on
page263).
➢ To perform DVD1 installation:
1. Insert the DVD1 into the DVD ROM.
2. Connect the OVOC server through the serial port with a terminal application and login
with 'root' user. Default password is root.
3. Perform OVOC server machine reboot by specifying the following command:
reboot
4. Press Enter; you are prompted whether you which to start the installation through the RS-
232 console or through the regular display.
5. Press Enter to start the installation from the RS-232 serial console or type vga, and then
press Enter to start the installation from a regular display.
- 87 -
 Loading...