

Page 1
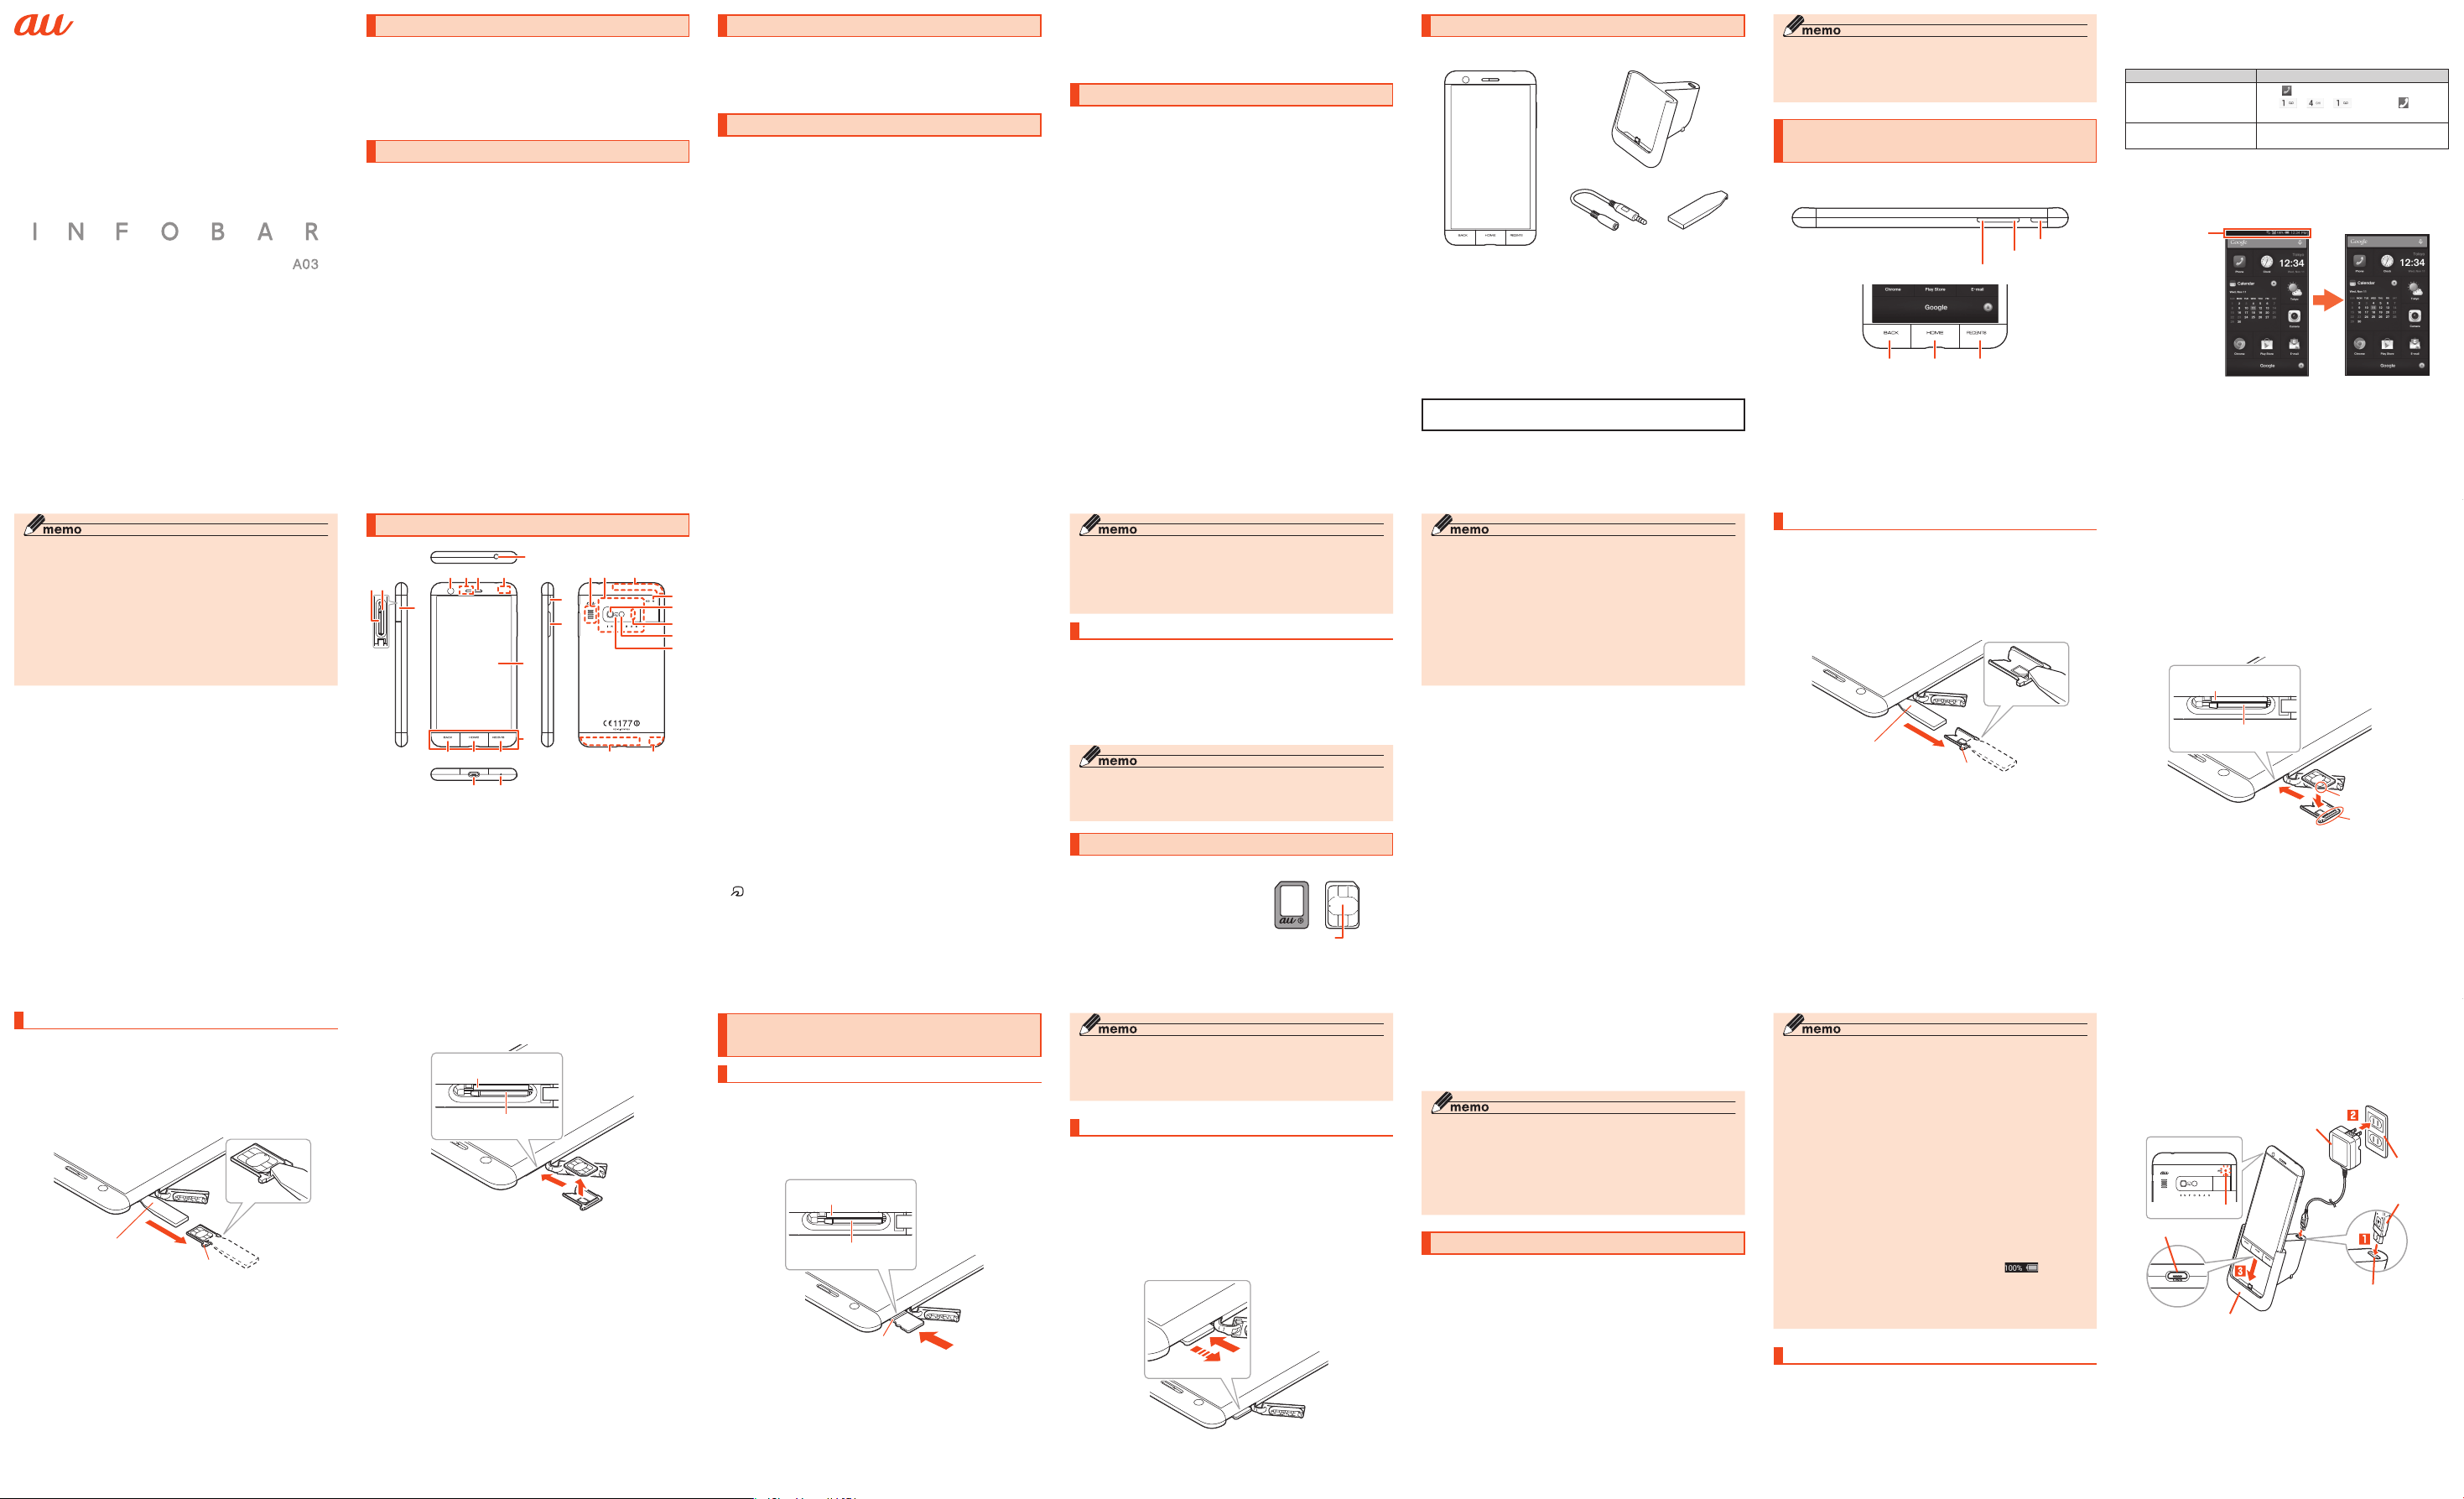
BasicManual
January2015,1stEdition
Preface
Thank you for buying the "INFOBAR A03" (simply called the "product" or "main
unit" from here on).
Before using the product, be sure to read the "Basic Manual" (this manual) to
ensure correct use.
After you have finished reading this PDF and the printed manuals, be sure to
store them in safe places so that you can retrieve them whenever needed. If
you lose the printed manuals, contact an au shop or Customer Service Center.
About Operating Instructions
■"Basic Manual" (This manual)/"Setting Guide"
Handles only basic operations for main features.
For detailed descriptions on various functions,
application (Japanese) installed on
Instruction Manual)" (Japanese) available on the au homepage.
http://www.au.kddi.com/support/mobile/guide/manual/
•
Company names and product names referred to in this manual are trademarks
or registered trademarks of respective companies.
■"Instruction Manual" (Japanese) Application
You can use the "Instruction Manual" application (Japanese) on the product to
confirm detailed operational procedures.
Certain functions can be directly activated from the application screens on
which their operations are described.
On the iida Home, tap [Basic Manual].
• When you activate for the first time, follow the onscreen instructions to
download and install application.
■
Downloading Manuals
You can download the English version of the Setting Guide, Basic Manual
and Notes on Usage from the au website (available from approximately one
month after the product is released).
Download URL:
http://www.au.kddi.com/english/support/manual/
refer to the "Instruction Manual"
the product or "取扱説明書詳細版 (Full
-1-
Safety Precautions
Before you start using the product, make sure to read the "Notes on Usage" to
ensure correct use.
Before you assume that the product is malfunctioning, check for possible
remedies in the following au Customer Support site of au homepage:
http://www.au.kddi.com/english/support/
When using the product
• Communication is not possible even inside the service area in places
where the signal does not reach (e.g. tunnels and basements). Also,
communication is sometimes not possible in poor reception areas.
Communication is sometimes interrupted if you move into a poor reception
areas during communications.
• Since this product uses radio waves, the possibility of communication
intercepts by third parties cannot be eliminated. (Though LTE/WiMAX 2+/
GSM/UMTS system has highly secure confidential communication features.)
• When connecting to emergency services in Japan, use au VoLTE (LTE
network). You cannot connect through 3G (circuit switching network).
• This product is compatible with the international roaming service. Each
network service described in this manual varies depending on the area and
service content. For detailed descriptions, refer to the "Instruction Manual"
application installed on the product or "取扱説明書詳細版 (Full Instruction
Manual)" (Japanese) available on the au homepage.
• Since this product is a radio station under the Radio Law, you may be asked
to temporarily submit the product for inspection in accordance with the
Radio Law.
• IMEI information of your cell phone is automatically sent to KDDI
CORPORATION for maintenance and monitoring operational status of your
cell phone.
• The battery is built into the product and it is not user replaceable. For the
exchanging battery, contact an au shop or Customer Service Center.
• Take care not to inconvenience people around you when you use the
product in a public place.
-2-
• Before you start using the product overseas, check the relevant laws and
regulations of the country/region you visit.
• When the product is used by a child, parents or guardians should thoroughly
read the "Notes on Usage" or "Basic Manual" (this manual) and teach the
child how to use it.
Cell Phone Etiquette
■ Use of cell phones is not allowed in some places.
• Do not use a cell phone while driving a car or riding a motorbike or bicycle.
It might cause a traffic accident. Use of a cell phone while driving a car or
motorbike is prohibited by law. Use of a cell phone while riding a bicycle
may be punishable by some regulations.
• Use of cell phones on board is restricted. Follow the instructions of each
airline.
■ Pay attention to the place of use and volume of your
voice!
• To prevent ringtone from bothering other people, not only refrain from making
a call but also power off or use Silent mode at a movie theater, theater,
museum, library, etc.
• In a city area, use in a place where you do not bother people walking.
• It is extremely dangerous to walk while looking at the screen of the cell
phone. Do not make calls or operate a cell phone while walking or by
stopping suddenly.
• Move to a place where you do not disturb others while you are in shinkansen,
a hotel lobby, etc.
• Be careful not to be loud while talking.
• Ask permission if you take photos with your cell phone camera.
■ Consider people around you!
• There may be a person with a cardiac pacemaker nearby at a place filled
with people such as in a crowded train. Set "Airplane mode" or turn off
beforehand.
• When a medical institution has laid down designated areas where use of
the product is prohibited or is not allowed to be brought in, abide by the
instructions of that medical institution.
-3-
List of Packaged Items
Before your start using the product, make sure that you have all the following
packaged with the product.
Desktop Holder (KYV33PUA)
Main unit
● 取扱説明書 (Instruction
Manual) (Japanese)
● ご利用にあたっての注意事項
(Notes on usage) (Japanese)
● 設定ガイド (Setting Guide)
(Japanese)
● 本体保証書 (Warranty for the
main unit) (Japanese)
The following items are not included in the package.
・AC adapter ・microSD memory card
・microUSB cable ・Earphones
Kyocera TV
antenna
cable 02
(02KYHSA)
* Desktop Holder (KYV33PUA) and Kyocera
TV antenna cable 02 (02KYHSA) are not
waterproof/dustproof.
-4-
IC Card Tray
Ejecting Tool for
INFOBAR A03
(sample)
◎ Please purchase a specified charger (sold separately).
◎ The illustrations of cell phone in the manual are used only for
explaining. They may differ from the actual product.
◎ The battery is built into the product.
Regarding notations used in this
document
■ Note on key illustrations
In this manual, keys are represented by simplified as shown below.
F(Power key)
r (Volume UP key)
l (Volume DOWN key)
CHN
-5-
■
Description of operations for selecting item/icon/key etc.
Notations used for operation procedures in this manual are as follows.
Tapping is to select a panel, icon, or touch sensor key displayed on the screen
by lightly tapping it with your finger.
Description Explanation
On the iida Home,
[Phone]→[1][4][1]→[Call]
In sleep mode, press F
(Power key)
■
Notes on illustrations/screenshots
Screen illustrations shown in this manual may look different from the actual
screens.
In some cases, minor details or a part of a screen may be omitted.
In this manual,
some icons on
a screen are
omitted.
Tap " (Phone)" on the iida Home top. And
", " ", " ", then tap " " (Call)
tap "
at the end.
In sleep mode, press F (Power key)
Actual screen
Notations used in this
manual
-6-
◎ Operations from the vertical display are mainly described. Menu items/
icons/keys on a screen may be different from the ones in the horizontal
display.
◎ Menu items/layers/icons may be different depending on functions,
conditions, etc.
◎ In this manual, screenshots for body color "NISHIKIGOI" are provided
as examples.
◎ In this manual, "microSD™ memory card", "microSDHC™ memory card"
and "microSDXC™ memory card" are abbreviated as "microSD memory
card" or "microSD".
◎ All of the indicated amounts exclude tax unless otherwise specified.
-7-
Names and functions of parts
⑦
②③
⑥⑤⑧⑳
④
⑪
⑫
① Earphone microphone terminal
Use for connecting an earphone (commercially available), Kyocera TV
antenna cable 02 (02KYHSA), etc.
② au Nano IC Card 04 slot
③ microSD memory card slot
④ Card slot cover
⑤ In camera ( lens)
⑥ Receiver
Hear the other party's voice on call, play sound of answer memo, etc.
⑦ Proximity sensor/ Light sensor
Proximity sensor prevents from erroneous operation of touch panel during a call.
Light sensor detects the ambient light level to adjust the display brightness.
⑧ Built-in GPS/Bluetooth®/Wi-Fi® Antenna
⑨ Display (Touch panel)
⑭
①
⑱⑲
⑯
⑰
⑨
⑩
⑬
㉖㉗
⑮
*
-8-
⑩ Touch sensor key (▶P. 10)
⑪ C BACK key
Return to the previous screen.
⑫ H HOME key
Display the iida Home. Long-touch to activate "Google".
⑬ N RECENTS key
㉑
㉒
㉓
㉔
㉕
Show recently-used applications. On the iida Home, long-touch to display
iida Home settings.
⑭ External connection terminal
Used for connecting Desktop Holder (KYV33PUA), Common AC Adapter
05 (sold separately), microUSB Cable 01 (sold separately), etc.
⑮ Microphone
Transmits your voice to the other party during a call. Or used for recording
the voice sound. Take care not to cover the microphone with your fingers
during a call or recording a video.
⑯ F Power key
Power ON/OFF, activate/deactivate Sleep mode, etc.
⑰ lr Volume DOWN/UP key
Adjusts sound volume.
least one second to set/cancel "Silent mode".
⑱ Speaker
Ringtone or alarm sound can be heard from here.
⑲ NFC (FeliCa compatible) antenna
⑳ Built-in Sub/Wi-Fi® Antenna
㉑ Incoming (Charging ) light
Lights in red while charging.
Blinks according to the settings for incoming call/mail.
㉒ Photo light/Simple light
㉓ Infrared port
Send or receive data via infrared communication.
㉔ Out camera (lens)
㉕
mark
Hold the mark over the reader/writer when using Osaifu-Keitai
receive data via IC transmission.
㉖ Built-in Main Antenna
㉗ WiMAX 2+ Antenna
*
Do not cover antennas with your hand or put stickers etc. It might affect
communication quality.
Press and hold l (Volume DOWN key)
*
*
*
*
-9-
for at
®
. Send or
◎ The back cover of the product is not removal. Removing the back cover
with force may cause damage or malfunction.
◎ The battery is built into the product and it is not user replaceable. For
force shutdown and restarting, see "Forcing shut down and restarting"
(▶P. 26).
Touch sensor key
C (BACK key), H (HOME key), and N (RECENTS key) are the
touch sensor keys. Tap or long-touch them to operate.
■ Smart switch
When Smart switch is ON, in sleep mode, slide C→H→N in
the order to display the start screen.
• To use Smart switch, operate from the iida Home,
[Settings]→[Display]→[Smart switch].
◎ To use Smart switch, hold C firmly and then slowly slide your
finger horizontally. Smart switch may not be response if it is touched
lightly.
Attaching/Removing au Nano IC Card 04
Before attaching/removing the au Nano
IC Card 04, make sure to turn the
product off.
The product is compatible with au Nano
IC Card 04 only. You cannot use the
product with an IC card other than au
Nano IC Card 04.
-10-
au Nano IC Card 04
IC (metal) part
◎ Note the following points, otherwise handling the au Nano IC Card 04
may cause malfunction or damage to the card, the tray or the product.
• Do not touch the IC (metal) part of the au Nano IC Card 04 or the IC
card terminal inside the product.
• Insert in the correct direction.
• Do not use force to attach or remove.
◎ Before attaching/removing au Nano IC Card 04, be sure to remove a
power plug of specified AC adapter etc. from the product.
◎ When the au Nano IC Card 04 is not attached properly or the au Nano
IC Card 04 is abnormal, an error message appears.
◎ Do not lose the au Nano IC Card 04 after it has been removed.
-11-
Attaching au Nano IC Card 04
• When installing au Nano IC Card 04, be sure to use the supplied IC Card
Tray Ejecting Tool for INFOBAR A03 (sample).
• Before installing the au Nano IC Card 04, make sure to remove microSD
memory card.
Turn the power off and open the card slot cover
Hook the IC Card Tray Ejecting Tool for INFOBAR A03
(sample) on the edge of the tray and pull it out
IC Card Tray Ejecting Tool
for INFOBAR A03 (sample)
Tray
-12-
Check the orientation of the notch of the au Nano IC Card
04 and put it on the tray. Then insert the tray straight into
the au Nano IC Card 04 slot (inferior)
After the tray is inserted, hook the IC Card Tray Ejecting Tool for INFOBAR
A03 (sample) on the edge of the tray and press it all the way.
• Take care so that the au Nano IC Card 04 does not get over the tray. Do
not apply excessive force and insert it all the way straight into the slot. If
the tray does not fit into the slot, do not press it with force. Pull the tray
out and insert it again with the front edge raised. If the au Nano IC Card
04 gets over the tray, the product might not recognize the au Nano IC
Card (LTE).
microSD memory card
slot (upper)
au Nano IC Card 04
slot (lower)
Notch
Edge of tray
Close the card slot cover
-13-
Removing au Nano IC Card 04
• When removing au Nano IC Card 04, be sure to use the supplied IC Card
Tray Ejecting Tool for INFOBAR A03 (sample).
• Before removing the au Nano IC Card 04, make sure to remove microSD
memory card.
Turn the power off and open the card slot cover
Hook the IC Card Tray Ejecting Tool for INFOBAR A03
(sample) on the edge of the tray and pull it out
IC Card Tray Ejecting Tool
for INFOBAR A03 (sample)
Tray
-14-
Remove au Nano IC Card 04, then insert the tray straight
into the au Nano IC Card 04 slot (inferior)
microSD memory card
slot (upper)
au Nano IC Card 04
slot (lower)
Close the card slot cover
-15-
Attaching/Removing microSD memory
card
Attaching microSD memory card
Open the card slot cover
Confirm the direction of the microSD memory card and
slowly insert it into the slot until it clicks
Insert a microSD memory card until you hear a click and confirm it is
locked. Releasing the microSD memory card before it is locked may
cause it to jump-out.
microSD memory card
slot (upper)
au Nano IC Card 04
slot (lower)
With the side of contacts
facing up
Close the card slot cover
-16-
◎ Insert a microSD memory card with the right side up in the appropriate
direction. Inserting a microSD memory card forcefully into the slot could
result in failure to remove the microSD memory card or damage to the
microSD memory card.
Removing microSD memory card
On the iida Home→[Settings]→[Storage]→[Unmount SD
card]→[OK]
Open the card slot cover
Slowly push the microSD memory card toward the slot
until it clicks
When a click sound is heard, pull back the microSD memory card with
your fingers on it. Keep putting your finger on the microSD memory card
until it comes out a little. Releasing the microSD memory card when
pushed hard may cause it to jump-out.
-17-
Slowly pull the microSD memory card
Slowly pull the microSD memory card straight out.
Sometimes microSD memory card cannot be unlocked and may not come
out smoothly. In such case, pull it out with your finger.
Close the card slot cover
◎
Do not touch the terminal part of microSD memory card.
◎ Do not remove the microSD memory card forcefully. It may result in
damage to the microSD memory card or the data loss.
◎ The microSD memory card may be warm after a long time use. It is
normal.
◎ When removing the microSD memory card, be sure to unmount to
prevent data from loss (deletion).
Charging
When you purchase your product, the internal battery is not fully charged.
Make sure to charge the product before use. When the incoming (charging)
light in red turns off, charging is complete.
-18-
◎ The product may become warm while charging, but this is not
abnormal.
◎ Charging while using camera etc. may take longer.
◎ When you operate the product with the specified charger (sold
separately) connected, the product may repeat short-time charging/
discharging resulting in short battery life.
◎
When temperature of environment or the product is extremely high or low,
charging may be stopped. Try to charge the battery as far as possible at
room temperature.
◎ When the incoming (Charging) light does not turn on, remove and
then install the product again. If the product is inserted inadequately,
charging my not start.
◎ If the incoming (charging) light blinks in red, check if the product is
correctly connected. Even if the light keeps blinking, stop charging and
then contact an au shop or Keitai Guarantee Service Center.
◎ Clean the external connection ter minal with dry cotton swabs, etc.
When it is dirty, the battery may not be charged normally.
◎ If charging is stopped while the incoming (charging) light is still turned
on, the battery may not be fully charged even with "
displayed. In that case, available time will be short.
◎ Do not allow metal accessories or conductive foreign objects (metal
fragments, pencil leads, etc.) to come into contact with or get inside the
external connection terminal.
" (Full)
Charging with Desktop Holder (KYV33PUA)
Charging with supplied Desktop Holder (KYV33PUA) and Common AC
Adapter 05 (sold separately) is explained.
Check the orientation of the microUSB plug of Common
AC Adapter 05 (sold separately) and insert it straight
into the external connection terminal of Desktop Holder
KYV33PUA)
-19-
Connect the power plug of Common AC Adapter 05 to an
outlet (100V - 240V AC)
Install the product deeply into Desktop Holder (KYV33PUA)
Check that the incoming (charging) light on the back side of product
lights in red. When the incoming (Charging) light does not turn on, remove
and then install the product again.
When charging ends, the incoming (charging) light turns off.
Common AC Adapter 03
(sold separately)
Back side
100V
AC outlet
Incoming (charging) light
microUSB plug
External connection terminal
External connection
terminal
Desktop Holder (KYV33PUA)
When charging is complete, remove the product from
Desktop Holder (KYV33PUA)
Connect the power plug of Common AC Adapter 05 (sold
separately) to an outlet
-20-
Page 2
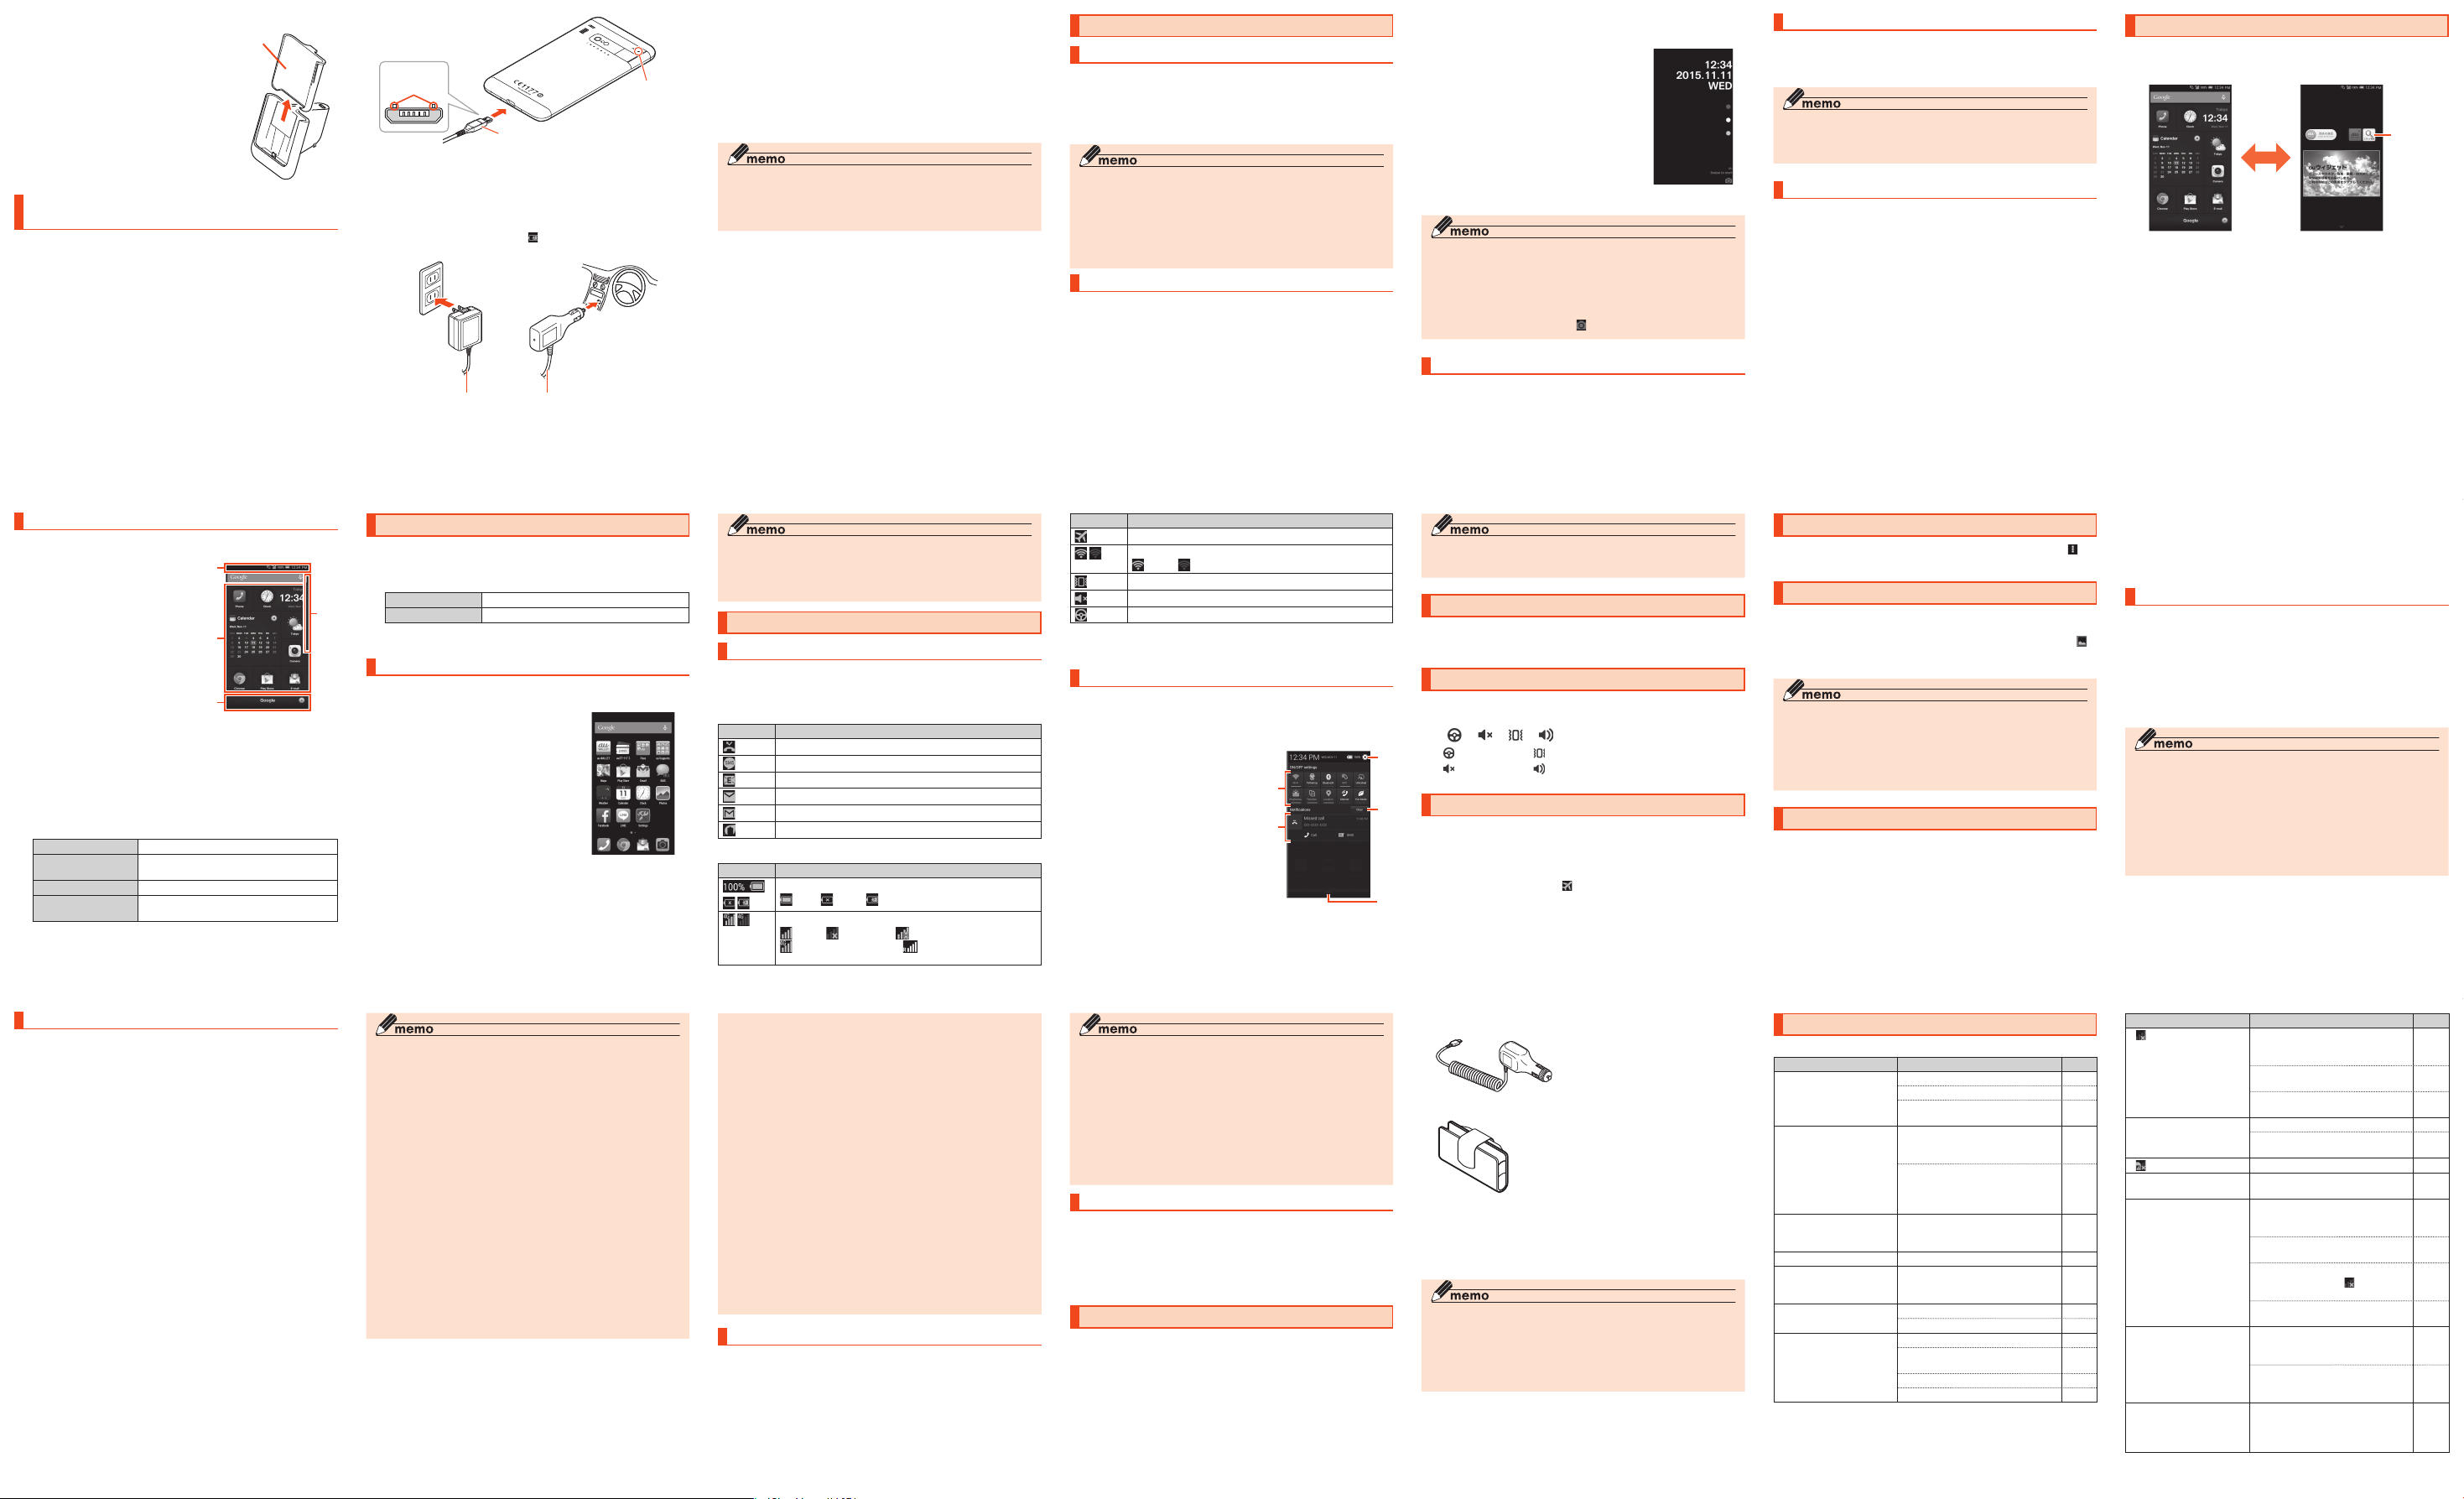
■Cover adapter
By removing the cover adapter, charging
the product is available even with a
phone cover (commercially available)
with 純正卓上ホルダ対応 (Compatible
with genuine desktop holders) or "卓上
ホルダ対応 (Compatible with desktop
holder)" marked attached. Remove the
cover adapter as shown.
By default, the cover adapter is attached
to the desktop holder.
Cover adapter
Charging with specified AC Adapter (sold
separately)/DC Adapter (sold separately)
Charging with Common AC Adapter 05 (sold separately)/Common DC Adapter
03 (sold separately) is explained. For information on the specified Common
AC adapter (sold separately)/Common DC adapter (sold separately), see
"Introduction of related accessories" (▶P. 38).
Check the orientation of the microUSB plug of Common
AC Adapter 05 (sold separately)/Common DC Adapter 03
(sold separately) and insert it straight into the external
connection terminal
With the projection
facing up
Common AC Adapter 05 (sold separately)
Common DC Adapter 03 (sold separately)
Insert the power plug of Common AC Adapter 05 (sold
separately) into an outlet (10 0 VAC to 240 VAC)/Insert the
Incoming
(charging)
light
plug of Common DC Adapter 03 (sold separately) into a
cigarette lighter socket
Check that the incoming (charging) light on the product lights in red.
When the battery power turns on, "
When charging ends, the incoming (charging) light turns off.
Common AC Adapter 05
(sold separately)
" appears on the status bar.
Common DC Adapter 03
(sold separately)
When charging is complete, pull out the microUSB plug
of Common AC Adapter 05 (sold separately)/Common
DC Adapter 03 (sold separately)straight from the external
connection terminal
Pull out the power plug of Common AC Adapter 05 (sold
separately) from the outlet/Pull out the plug of Common
DC Adapter 03 (sold separately) from the cigarette lighter
socket
◎ Note that applying unnecessary force with the external connection
terminal connected to the external device might cause damage.
◎ When charging starts with the battery empty, the incoming (charging)
light may not light immediately. But charging has started.
Turning the power on/off
Turning the power on
Press and hold F (Power key) until the incoming
(charging) light turns on
When the start screen appears, unlock it (▶P. 25).
• For the first time the product turns ON, the initial settings such as "au
Easy Setting" activate. Make the settings as required.
◎ While logos are displayed after the power is on, initial settings for touch
panel are in process. Do not touch the screen. The touch panel may not
work properly.
◎ "au Easy Setting" can be set up later even though it is skipped.
◎
If the incoming (charging) light blinks in yellow when you turn the power
on, the remaining battery is not sufficient for activating the product.
Charge the battery before use.
Sleep mode
While screen backlight is turned on, press F (Power key) or leave the
product for a certain period of time without any operations to turn off the
screen temporarily and the product goes into sleep mode. To cancel sleep
mode, operate the following steps.
In sleep mode, press F (Power key)
The start screen appears.
• The start screen background varies by the product color.
● Canceling security on the start screen
When the start screen appears, cancel the security as follows.
Swipe (Flick) the screen
The iida Home appears (P. 27).
Start screen
《
◎ Do not touch the screen when pressing F (Power key) in sleep mode
or displaying the screen with Smart switch (P. 10). The touch panel may
not work properly.
◎ If missed calls or new arrival mails exist, notifications appear on the
start screen. Swipe (Flick) the notification to cancel the security, then
corresponding application activates.
◎ On the start screen, swipe (flick)
to activate Camera.
Turning the power off
Press and hold F (Power key) for at least one second
[Power Off]→[OK]
Forcing shut down and restarting
Force shutdown and restart the product when the screen freezes or the power
cannot be turned off.
Press and hold F (Power key) for 11 seconds or longer
◎ If the product is forced shutdown and restarted, unsaved data will be
erased. Do not force shutdown except when the product becomes
inoperative.
》
Switching to English display
On the iida Home→[設定 (Settings)]→[言語と入力
(Language & input)]→[言語 (Language)]→"English"
Home screen
There are two types Home screen, iida Home and widget Home. you can
paste applications or shortcuts for iida Home and widgets for widget Home.
Switch iida Home and widget Home by flicking left or right.
Widget
Flick
iida Home
《
》《
widget Home
》
-21-
Using iida Home
Applications and shortcuts are displayed in panels by section. Tap each panel
to activate the application.
① Status bar
Display the notification icons and the
status icons (P. 30). Slide down the status
bar to open the notification panel (P. 31).
② Panels
Tap to activate the application. Also,
photos or information can be added.
③ Section bar
Indicates a section for applications or
shortcuts. Tap to open/close the section
bar. Long-touch the section bar with the
section bar closed to display in a list.
Drag a section bar and release your
finger to rearrange it. When the section
bar list is displayed, tap a section bar to
edit the section name.
④ Scroll bar
■ Setting iida Home
On the iida Home, long-touch N
The iida Home setting screen appears.
Tap an item to set
Theme Change the background of panels.
Wallpaper Change wallpapers of widget Home and start
Add Panel Add a panel to the iida Home.
Quick Search Box Set whether to show Google Search on the
screen.
iida Home.
-28-
①
④
②
③
iida Home
《
》
-22-
Switching the home app
Switch the home application of the product.
On the iida Home, [Settings]→[Change home]
The Home list appears.
iidaHome ▶P. 28 "Using iida Home"
au Basic Home ▶P. 29 "Using au Basic Home"
[OK]
Using au Basic Home
It is a Home screen only with frequently-used applications shown for using
smartphone more simply.
On the iida Home,
[Settings]→[Change home]→[au
Basic Home]
[OK]
au Basic Home screen appears.
Slide/flick left or right to switch screens.
• When you activate for the first time, a usage
confirmation appears. Verify the content,
follow the onscreen instructions.
《au Basic Home》
-29-
-23-
◎
To go back to iida Home, from the au Basic Home, [Settings]→[Change
home]→Select "iidaHome"→[OK]
◎ Hidden applications are contained into "パス (Pass)", "au サポート (au
support)", "その他アプリ (Other apps)" folders.
.
Monitoring the product's status
Icons
Notification icons appear on the left of the status bar, showing missed calls,
new mail, operations in progress, etc., and status icons appear on the right,
showing the status of the product.
■ Examples of main notification icon
Icon Description
Missed call
New mail message (SMS)
New mail message (E-Mail)
New mail message (PC-mail)
New mail message (Gmail)
Eco Mode ON
■ Examples of main status icon
Icon Description
Battery level
100%/ empty/ charging
Signal strength/Signal condition (LTE/WiMAX 2+)
level 4/ out of range/ in communication
LTE/WiMAX 2+ available*/ Roaming (Communication
mode according to the network is also shown)
-30-
-24-
Icon Description
Airplane mode is activated
Wi-Fi® signal strength
*
In Japan, you can use "LTE" and "WiMAX 2+" networks. "4G" is displayed for both
networks. According to the signal congestion etc., the product is connected to the
less congested network.
level 4/ level 0
Silent mode (Vibrate) set
Silent mode (Mute) set
Silent mode (Drive) set
Notification panel
Slide down the status bar to display the notification panel.
You can check details of notification icons or start corresponding applications.
Also, you can set frequently-used functions, add shortcuts and activate
applications from shortcuts.
① Function icons
Enable/Disable frequently-used functions.
② Notification area
You can check the status of the product or
details of notification. For some information,
tap to activate the corresponding
application.
③ Setting menu icon
Select "Notification setting" to edit the
notification panel. Select "Phone settings" to
display settings menu.
④ Clear notifications
Tap to clear all notifications.
⑤ Close tab
Slide up to end the notification panel
display.
-31-
①
②
③
④
⑤
-25-
◎ You can also end the notification panel display by tapping the top area
of the screen, where date, time and battery icon are displayed.
Checking your own phone number
On the iida Home, [Settings]→[Profile]
Profile screen appears.
Setting Silent mode
Set the silent mode not to inconvenience people around you in a public place.
Press and hold F
[ ]/[ ]/[ ]/[ ]
: Drive : Vibrate
: Mute : Silent mode off
(Power key) for at least one second→
Setting Airplane mode
When Airplane mode is set, wireless functions are disabled (telephone, packet
transmission, wireless LAN (Wi-Fi®), Bluetooth®).
Press and hold F (Power key) for at least one
second→[Airplane mode]
When Airplane mode is set, " " appears on the status bar.
-32-
-26-
Displaying menu
There are two types of methods to display a menu screen; by tapping " "
and by long-touching entry field or item.
Capturing screenshots
Press and hold F (Power key) and l (Volume DOWN key) at the same
time for at least one second to capture the current displayed screen and save
it (Screenshots) While saving and when the completion, a message and "
appears on the status bar. Open the notification panel after saving is complete
to check the saved image.
◎ Alternatively, use a screenshot sharing application, or pressing and
holding F (Power key) for at least one second→[Screenshot].
◎ Screenshot images are saved to the internal storage. Check saved
images with a photo viewer application.
◎ Capturing screenshots may not be available during Camera use, or on
the TV watching screens.
au Disaster Countermeasure
au災害対策 (au Disaster Countermeasure) is an application with which you can
use 災害用伝言板 (Disaster Message Board), 緊急速報メール (Emergency Rapid
Mail) (緊急地震速報 (Earthquake Early Warning), 災害・避難情報 (Disaster and
Evacuation Information), 津波警報(Tsunami War ning)) and 災害用音声お届けサー
ビス (Disaster Voice Messaging Service).
-33-
-27-
On the iida Home, [au災害対策 (au Disaster
Countermeasure)]
au災害対策 (au Disaster Countermeasure) menu appears. When
activating the application for the first time, the agreement for use and
initial settings appear. Follow the onscreen instructions.
Using Disaster Message Board
Disaster Message Board service enables you to register information of wellbeing from an area of distress via LTE NET in case of large-scale disaster such
as earthquake with a seismic intensity of over 6 lower. Registered information
"
can be viewed on any cell phones and PCs besides by au cell phone users.
For details, refer to "Disaster Message Board" of au homepage.
au災害対策 (au Disaster Countermeasure) menu
screen→[災害用伝言板 (Disaster Message Board)]
Follow the onscreen instructions to register/confirm.
◎ To register infor mation of well-being, E-mail address (〜ezweb.ne.jp) is
required. Set up E-mail address beforehand.
◎ Deleting or changing the setting for information of well-being is
unavailable during wireless LAN (Wi-Fi®) connection.
◎ The Company makes no guarantees about the quality of this service.
The Company is not liable in the event of any nonconformities about
registration of well-being information or damages by loss of well-being
information arising from intense access to this service or equipment
failure or damages caused by registered well-being information.
-34-
Using Emergency Rapid Mail
Emergency Rapid Mail is a service that distributes Earthquake Early Warning
or Tsunami Warning delivered from the meteorological bureau or Disaster
and Evacuation Information delivered from the government or local public
organization to all au cell phones in specified areas simultaneously.
When you purchase the product, "受信設定 (Receive options)" of the
Emergency Rapid Mail is set to "受信する (Receive)". Reception setting of
Tsunami Warning is available in the settings of Disaster and Evacuation
Information.
When you receive Earthquake Early Warning, ensure your safety and take
proper action according to the situation around you. When you receive a
Tsunami Warning, draw away from sea coast immediately and evacuate to safe
place such as upland or well-built high building.
au災害対策 (au Disaster Countermeasure) menu→[緊急速報
メール (Emergency Rapid Mail)]
Inbox appears.
Select a mail you want to view to check the detail.
-35-
◎ The service is available only in Japan (it cannot be used overseas).
◎ No information fee or communication charge is required for receiving
Emergency Rapid Mail.
◎ When you receive Emergency Rapid Mail during a call, the warning
tone does not sound.
◎ You cannot receive Emergency Rapid Mail when your cell phone is
turned off.
◎ Emergency Rapid Mail may not be received if you are in a place
where signal does not reach even in the service area (e.g. in a tunnel,
basement) or in a place with a poor reception.
◎ You cannot receive Emergency Rapid Mail once the reception is failed.
◎ Reception of Emergency Rapid Mail is notified by a special warning
tone and vibration. It is not possible to change the warning tone.
*Reception of Earthquake Early Warning is notified by a special warning tone,
voice ("地震です" (An earthquake)) and vibration.
◎
Information from someplace other than your current location may be
received.
◎ KDDI is not liable for damages suffered by customers resulting from
the service's information, lack or delay in the information caused by
transmission or system breakdowns, or other events that are outside
the responsibility of KDDI.
◎ Refer to the Japan Meteorological Agency web page for details about
distribution of Earthquake Early Warning.
http://www.jma.go.jp/
-36-
Earthquake Early Warning
◎ Earthquake Early Warning is sent to areas where strong quakes (over
4 degrees) are expected when the earthquake whose the maximum
seismic intensity 5 lower is anticipated occurs.
◎ Immediately after an earthquake occurs, quakes (P waves and initial
tremors) near the epicenter are detected and position, scale, and
expected strength are automatically calculated and notification is sent
as soon as possible within a few seconds to tens of seconds before the
strong quakes (S waves and major tremors) caused by the earthquake
start.
◎ Earthquake Early Warning may not arrive before strong tremors in
arrears near the epicenter.
◎ This delivery system is different from Earthquake Early Warning
provided through TV, radio, or other communication procedures, which
means that the time the Earthquake Early Warning arrives may vary.
Tsunami Warning
◎ Tsunami Warning is a notification delivered from the meteorological
bureau (major tidal wave, seismic sea wave) to the area including
target coast.
Disaster and Evacuation Information
◎ Disaster and Evacuation Information is a service that distributes
bulletins concerning residents safety including evacuation advisories,
evacuation orders and other warnings issued by the national and local
governments.
Using Disaster Voice Messaging Service
Disaster Voice Messaging Service is a service which allows you to record
your voice and send someone you want to inform your well-being in case of a
large-scale disaster.
au災害対策 (au Disaster Countermeasure) menu
screen→[災害用音声お届けサービス (Disaster Voice
Messaging Service)]
Follow the onscreen instructions to register.
-37-
◎ For use over Wi-Fi®, it is necessary to carry out initial setting over 4G
(LTE/WiMAX 2+) network.
◎ Voice message can be recorded for up to 30 seconds.
◎
Messages can be sent and received to or from au cell phones, other
network operators' cell phones and PHS.
◎ Voice message may be difficult to hear if the media volume is low or
Silent mode is set.
◎ Saving or playing Voice messages may fail if a phone does not have
available memory.
◎ Some cell phones do not support receiving voice messages. For
details, refer to au homepage.
Using Disaster information
You can check history of Disaster and Evacuation Information delivered by local
government, disaster information portal, etc.
au災害対策 (au Disaster Countermeasure) menu
screen→[災害情報 (Disaster information)]
Follow the onscreen instructions
Introduction of related accessories
■ Desktop Holder (KYV33PUA)
■ Kyocera TV antenna cable 02 (02KYHSA)
■ Common AC Adapter 05 (0501PWA) (sold separately)
■ Common AC Adapter 03 (0301PQA) (sold separately)
■ Common AC Adapter 03 Navy (0301PBA) (sold separately)
■ Common AC Adapter 03 Green (0301PGA) (sold separately)
■ Common AC Adapter 03 Pink (0301PPA) (sold separately)
■ Common AC Adapter 03 Blue (0301PLA) (sold separately)
AC Adapter JUPITRIS (White) (L02P001W) (sold separately)
■
■ AC Adapter JUPITRIS (Red) (L02P0 01R) (sold separately)
■ AC Adapter JUPITRIS (Blue) (L02P001L) (sold separately)
■ AC Adapter JUPITRIS (Pink) (L02P001P) (sold separately)
-38-
■ AC Adapter JUPITRIS (Champagne) (L02P001N) (sold separately)
■ Common DC Adapter 03 (0301PEA) (sold separately)
■ au Carrying Case F Black (0105FCA) (sold separately)
■ au Carrying Case G Black (0106FCA) (sold separately)
■ au Carrying Case G Black (0106FCA) (sold separately)
■ Portable charger 02 (0301PFA) (sold separately)
■ microUSB cable 01 (0301HVA) (sold separately)
■ microUSB cable 01 Navy (0301HBA) (sold separately)
■ microUSB cable 01 Green (0301HGA) (sold separately)
■ microUSB cable 01 Pink (0301HPA) (sold separately)
■ microUSB cable 01 Blue (0301HLA) (sold separately)
◎ Please purchase the specified charging equipment (sold separately).
◎ For the latest information on accessories, visit the au homepage (http://
www.au.kddi.com/english) or contact the Customer Service Center.
◎ Accessories on this page can be purchased from au online shop (http://
auonlineshop.kddi.com/). Some accessories may not be purchased
due to the availability.
-39-
Troubleshooting
Before you assume that the product is malfunctioning, check the following:
Symptom Whatyoushouldcheck
Cannot turn on power.
Cannot charge the product Is the specified charger (sold
Cannot operate/The screen
freezes/Cannot turn off
power.
The power goes off.
The power is going off
while the activation logo is
displaying.
Cannot make calls.
Cannot receive calls.
Is the internal battery charged? P. 18
F (Power key) pressed and held? P. 24
Is the incoming (charging) light
blinking yellow?
separately) or Desktop Holder
(KYV33PUA) connected correctly?
Is the temperature of the product or
battery high or low? Charging may
stop due to the temperature of the
product.
Press and hold F (Power key)
for 11 seconds or longer to force
shutdown and restart.
Is the internal battery fully charged? P. 18
Is the internal battery fully charged?
Is the power turned on? P. 24
Is your au Nano IC Card 04 inserted? P. 12
Is signal strong enough? P. 30
Is the product out of the service
area?
Is the power turned on? P. 24
Is your au Nano IC Card 04 inserted? P. 12
-40-
Page
P. 24
P. 19
P. 21
P. 19
P. 26
P. 18
P. 30
Symptom Whatyoushouldcheck
"
" (out of service area)
appears.
Cannot operate key/touch
panel/touch sensor key.
"
" appears.
A message such as charge
the battery appears.
Battery usage time is short. Is the product fully charged?
Cannot connect to the party
and the phone beeps even
though a call is made.
Display is dark. Is the temperature of the product
Is the product out of the service area
or in an area where the signal is
weak?
Is the built-in antenna covered with
finger etc.?
Is a card other than au Nano IC Card
04 inserted?
Is the power turned on? P. 24
Turn off the power and then turn it on
again.
Is your au Nano IC Card 04 inserted?
The battery is almost dead.
• Charge the product until the red
incoming (charging) light goes off.
Is the internal battery end-of-life? -
Is the product left in the place for
a long period where "
service area) appears?
End/Stop the applications or
functions which are not used.
Is the product out of the service area
or in an area where the signal is
weak?
The wireless line is extremely busy or
the party is calling. Retry later. -
or battery high? The display may
become dark depending on the
temperature of the product.
" (out of
-41-
Page
P. 30
P. 8
P. 10
P. 24
P. 12
P. 18
P. 18
P. 30
-
P. 30
-
Page 3
Symptom Whatyoushouldcheck
Cannot hear/hard to hear
the other party's voice
Settings made for specified
contacts do not work.
If you cannot find the solution to your problem in the above items, refer to the
au homepage or au Customer Support on the website shown below.
http://www.au.kddi.com/english/support/
Place your ear hole to the receiver.
Is the caller ID notified? If the caller
does not notify the caller ID, ringtone
setting in Contacts is not effective.
Group ringtone settings in Contacts
is not effective, either.
Page
P. 8
-
Updating Software or OS
You can update the product to the most recent software for optimal
performance and to get the latest enhancements.
There are several methods to update software.
■ Notes
• You are charged for data communication when connecting to the Internet
from the product using packet communication.
• You are recommended to back up your data before updating software.
• For detailed descriptions on various functions, refer to the "取扱説明書
(Instruction Manual)" application (Japanese) installed on the product or "取
扱説明書詳細版 (Full Instruction Manual)" (Japanese) available on the au
homepage.
• Fully charge before update. If the update is started with the battery power
low or battery power becomes low during update, software update cannot
be done.
• Check the radio wave condition. Software update may fail in poor reception
area.
• Any operations are not available during software update. Calling 110 (Police),
119 (Fire/Ambulance), 118 (Maritime rescue) is not available. Alarm does not
work, either.
• If software update has failed or stopped, perform the same procedure again.
• Update is unavailable during international roaming.
-42-
• If you fail to update software, it may become impossible to operate the
product. If this happens, bring it to an au shop or PiPit (not accepted by
some shops).
Downloading software into the product to update
Update files can be downloaded from the Internet web site into the product
directly.
Selecting "Start major update" downloads the OS for the product.
On the iida Home, [Settings]→[About phone]→[Software
update]
[Start updating software]/[Start major update]
From here on, follow the onscreen instructions.
After-sales service
■ When asking for repair
For repair, contact Keitai Guarantee Service Center.
During the
warranty
period
Outside the
warranty
period
Repairs will be done based on the terms of services of the
free-of-charge repair warranty described on the warranty
card.
We shall repair the product for a charge as requested by
the customer if repair renders it usable.
-43-
◎ Before handing in the product for repair, make a backup of the
contents of memory since they may disappear during repair. Note that
the Company shall not be liable for any damages and loss of income
should the contents of memory be altered or lost.
◎ Recycled parts that meet the Company's quality standards are
sometimes used for repair.
◎ Collected au cell phones by Replacement cell phone delivery service
which you used before are recycled to cell phones for replacement
after repairs. Also replaced parts by au after-sales service are collected
and recycled by KDDI. They are not returned to customers.
■ Performance parts for repair
The Company retains performance parts for repair of the product main
unit and its peripherals for 4 years after discontinuation of production.
"Performance parts for repair" refers to parts required for maintaining the
functions of the product.
■ Warranty card
At the store of purchase, thoroughly check and read the name of the retailer,
date of purchase and other necessary details filled in on the warranty card,
and be sure to keep it in a safe place.
■
Keitai Guarantee Service plus LTE
An after-sales service membership program on a monthly basis called "Keitai
Guarantee Service Plus LTE" (monthly fee: 380 yen, tax excluded) is available
for using your au cell phone for a long time without worries. This service
expands coverage for many troubles including malfunction, theft and loss.
For details of this service, refer to au homepage or contact Keitai Guarantee
Service Center.
-44-
◎ You can apply for membership only at the time of purchasing your au
cell phone.
◎
Once you cancel the membership, you cannot reapply for it until you
purchase an au cell phone next time.
◎ Note that when changing the model or purchasing an extra cell phone,
this service only covers the most recently purchased au cell phone.
◎ When an au cell phone is handed over to you or someone else, the
"Keitai Guarantee Service plus LTE" membership is also handed over to
the successor of the cell phone.
◎ When you get a new au cell phone by changing the model or
purchasing an extra cell phone, the "Keitai Guarantee Service
plus"/"Keitai Guarantee Service plus LTE" membership for the old au
cell phone is automatically canceled.
◎ Service contents are subject to change without notice.
■ au Nano IC Card 04
The au Nano IC Card 04 is lent to you by au. In case of loss or damage, the
card will be replaced at your expense. When malfunction is suspected, or in
case of theft or loss, contact an au shop or PiPit.
■ After-sales service
If you are unsure about anything regarding after-sales service, contact the
following service contact.
Customer Service Center (for service canceling procedure in case of loss or
theft)
From a land-line
phone,
From an au cell
phone,
Business hours 24-hour (7 days a week)
0 077-7-113 (toll free)
113 without area code (toll free)
-45-
Keitai Guarantee Service Plus (for loss, theft, damage)
From a land-line phone/an au cell phone,
Business hours 9:00 - 21:00 (7 days a week)
Online Repair Desk (24 hours a day over the Internet)
*Only available from PCs or smartphones
https://cs.kddi.com/support/n_login.html
• The Application for the Internet acceptance, if "damage", "wet", "theft" and
"loss" are eligible. In the case of spontaneous failure (not the cause damage,
such as water wet, but does not power on, the screen does not function or
other), it will be accepted by phone for interview is required.
• To apply for the Internet, you need the e-mail address.
0120-925-919 (toll free)
■ au after-sales service information
Keitai Guarantee Service plus LTE
Members Others
Customer
charge
1st:5,000
yen
2nd:8,000
yen
-46-
No
recompense
Replacement
cell phone
delivery
service
Service
Spontaneous
failure
Partially damage,
water soak, irreparable
damage, theft or loss
1st year Freeofcharge
2nd year or
later
Service
Spontaneous
failure
Holding
over and
repair
*Charge amounts are all tax excluded.
Water soak, irreparable
damage
Theft, loss
1st year Freeofcharge
2nd year or
later
Keitai Guarantee Service plus LTE
Members Others
Freeofcharge
(three-year
warranty)
Customer
charge
Upperlimit:
5,000yen
Customer
charge
10,000yen
No
recompense
-47-
Freeof
charge
ActualcostPartially damage
No
recompense
(model
change)
Replacement cell phone delivery service
◎ When you have trouble with your au cell phone, replacement cell
phone (same model, same color) is delivered by calling to. Return your
damaged cell phone within 14 days after replacement cell phone is
delivered.
◎ Available up to twice in a year from the day you use this service
as a start day. If you do not use this service in the past year at the
subscription to this service, it will be 1st and if you use, it will be 2nd.
* For details, refer to au homepage.
Holding over and repair
◎ Damages and malfunctions intentionally caused by the customer as
well as those due to modification (e.g. disassembly, change of parts,
painting, etc.) by the customer are not covered by this service.
◎ You cannot receive a refund for replacement of the outer casing due to
stains, scratches, paint removal, etc. on the outer casing.
Main specifications
Display Approx. 4.5 inches, Approx. 16,770,000 colors,
Weight Approx. 130 g
Charging times
(estimate)
Continuous call
time
Transparent TFT
1,920×1,080 dots (FHD)
Common AC Adapter 05 (sold separately): Approx. 160
minutes
Common DC Adapter 03 (sold separately): Approx. 320
minutes
In Japan Approx. 1,020 minutes
Overseas
(GSM/UMTS/
LTE)
Approx. 600 minutes
-48-
Continuous
stand-by time
Continuous
tethering time
Maximum number
of Wi-Fi tethering
connection
devices
Dimensions
(W x H x D)
Internal memory
Number of effective pixels: Outcamera
Number of effective pixels: Incamera
Wireless LAN (Wi-Fi
Bluetooth
function
Continuous 1Seg
watching time
Continuous Full
Seg watching
time
In Japan Approx. 500 hours
Overseas
(GSM/UMTS/
LTE)
Approx. 590 minutes
10
Approx. 68 × 131 × 8.9 mm
*1
®
) function IEEE802.11a/b/g/n/ac compatible
®
Compatible
version
Output Bluetooth® standards Class 1
Communication
*3
range
Supported
Bluetooth
*4
profile
Frequency
bands
Approx. 6 hours 30 minutes
Approx. 4 hours 10 minutes
Approx. 550 hours
ROM: Approx. 16 GB
RAM: Approx. 2 GB
Approx. 13,000,000 pixels
Approx. 2,000,000 pixels
Bluetooth® standards Ver.4.0
compatible *
Within 10 m with no obstacles in the
range
SPP/A2DP/AVRCP/HSP/HFP/OPP/
PBAP/HID/PAN/PAN-NAP/PAN USER/
HOGP/MAP/SCMS-T/DUN
2.4 GHz band
2
*5
-49-
*1 Since the storage is shared by data and applications, storage space may be
reduced depending on the usage of applications.
*2 It is confirmed that the product and all Bluetooth® devices are compliant with
Bluetooth® standards designated by Bluetooth SIG, and they are authenticated.
However, procedures may differ or data transfer may not be possible depending
on the device's characteristics or specifications.
*3 Changes according to objects obstructing devices and signal reception.
*4 Specifications provided in Bluetooth® standards for making communication
between Bluetooth®-compatible devices in accordance with their intended use.
*5 The profile supports part of car navigation systems. Refer to the au homepage for
use.
◎
The continuous talk time and continuous standby time may drop to less
than half depending on the battery charging status, usage environment
such as temperature, reception condition at the location where the
product is used, and the function settings.
-50-
For inquiries, call: Customer Service Center
For general, charge, operations (toll free)
Business hours 9:00㹼20:00 (7 days a week)
From fixed-line phones:
0077-7-111 15 7
PRESSING ZE RO WILL CONNECT YO U TO AN OPERATOR
AFTER CALL ING 157 ON YOUR au CELL PH ONE
For service canceling procedure in case of loss or theft
(toll free)
Business hours 24-hour (7 days a week)
From fixed-lin e phones: From au cell phone s:
-7-
0077
In case above numbers are not available,
0120-977-033
-
0120
977-699
From au cell phones:
113 113
(except Okinawa)
(Okinawa)
area code not requ ired
area code not require d
Keitai Guarantee Service Center
For loss, theft or damage (toll free)
From fixed-li ne phones/au cell phone s,
0120-925-919
Business hour s 9:00 – 21:00 (7 days a week)
Cell phone and PHS op erators collect and recycle unu sed
telephones, batteries and battery chargers at stores
bearing the logo regardless of brand and manufacturer
to protect the environment and reuse valuable resources.
Sales:KDDICORPORATION•
OKINAWACELLULARTELEPHONECOMPANY
Manufacturedby:KYOCERACorporation
 Loading...