

Page 1
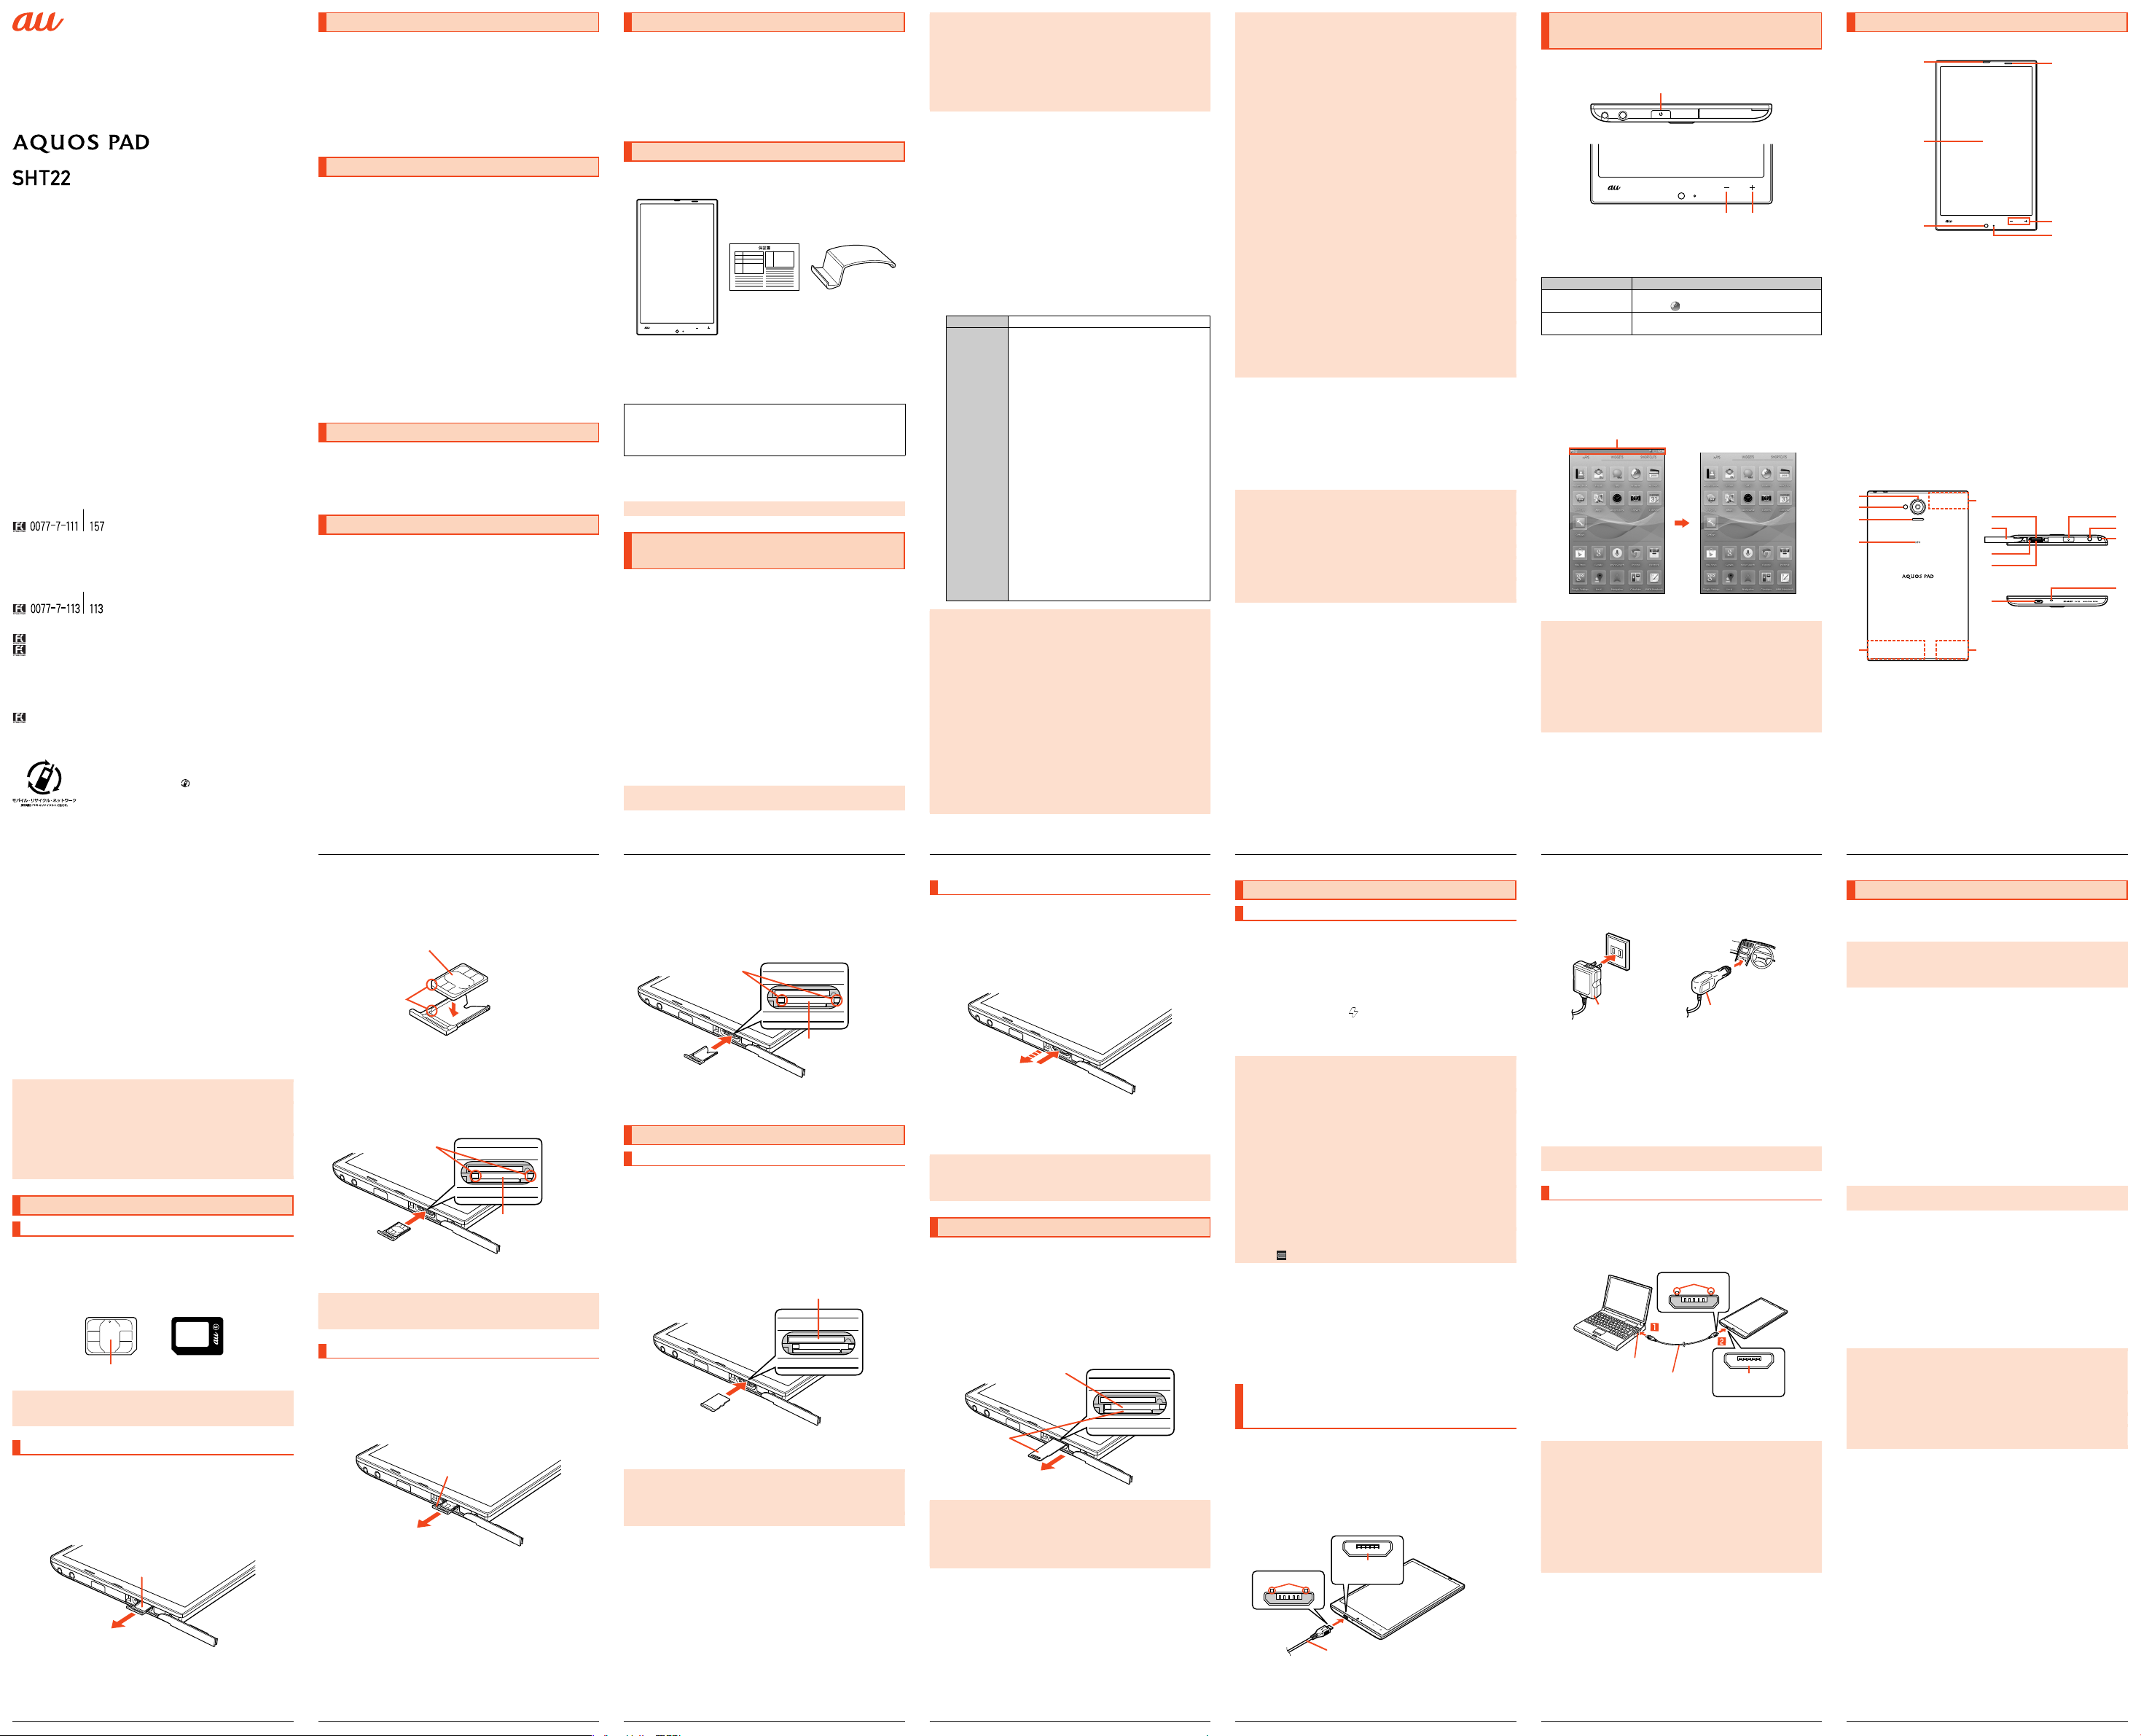
BasicManual
The company names and product names appearing in this manual are
•
trademarks or registered trademarks of their respective holders.
For exemptions, refer to “Notes on Usage” available on the au homepage.
•
February2014,1stEdition
Forinquiries,call:
CustomerServiceCenter
Forgeneralinformationandcharges(tollfree)
Fromfixed-linephones: Fromaucellphones:
areacodenotrequired
TappingDIALandzerowillconnectyoutoanoperatoraftercalling
157onyouraucellphone.
Forservicecancelingprocedureoroperationincaseoflossor
(tollfree)
theft
Fromfixed-linephones: Fromaucellphones:
Incaseabovenumbersarenotavailable,calltoll-free:
0120-977-033
0120-977-699(Okinawa)
KeitaiGuaranteeServiceCenter
Forloss,theftordamage(tollfree)
Fromfixed-linephones/aucellphones:
0120-925-919
Businesshours:9:00to21:00(7daysaweek)
Soldby:KDDICORPORATION,
OKINAWACELLULARTELEPHONECOMPANY
Manufacturedby:SHARPCORPORATION
areacodenotrequired
(exceptOkinawa)
CellphoneandPHSoperatorscollectandrecycle
unusedtelephones,batteriesandbattery
chargersatstoresbearingthe
ofbrandandmanufacturertoprotectthe
environmentandreusevaluableresources.
logoregardless
Preface
Thank you for buying the “AQUOS PAD SHT22” (simply called the “SHT22” or
the “product” from here on).
Before using the product, be sure to read the “Basic Manual” (this manual)
and “Notes on Usage”/“Setting Guide” available on the au homepage to
ensure correct use. After you have finished reading the manuals, be sure to
keep them accessible and store the printed manuals (“取扱説明書” (Basic
Manual), “ご利用にあたっての注意事項” (Notes on Usage) and “設定ガイド”
(Setting Guide)) (Accessories) in safe places so that you can refer to them
whenever you need them. If you lose the printed manuals (Accessories),
contact an au shop or Customer Service Center
.
Operating Instructions
■ “Basic Manual” and “Setting Guide”
The “Basic Manual” (this manual) and “Setting Guide” available on the au
homepage describe basic operations of major functions.
For detailed descriptions of various functions, refer to the “Instruction Manual
application” (Japanese version) that can be used on the product or “Full
Instruction Manual” (Japanese) available on the au homepage:
(http://www.au.kddi.com/english/support/manual/)
■ “Instruction Manual Application” (Japanese/English
Version)
You can use the “Instruction Manual application” (Japanese version) on the
product to check detailed operational procedures.
Also, you can activate intended functions from an explanation screen
depending on the functions.
On the home screen, tap [アプリ] (APPS) → [取扱説明書] (Instruction Manual).
Also, you can use the “Instruction Manual application” (English version) on the
product to check operational procedures.
On the home screen, tap [APPS] → [Basic Manual] after switching the display
language to English (▶P. 15).
•To use the application for the first time, you need to download and install it
by following on-screen instructions.
Safety Precautions
Before you start using the product, be sure to read the “Notes on Usage”
available on the au homepage to ensure correct use.
Before you assume that the product is malfunctioning, check for possible
remedies in the following au Customer Support site of au homepage:
(http://www.au.kddi.com/english/support/)
When Using the Product
•Communication is not possible even inside the service area in places where
the signal does not reach (e.g. tunnels and basements). Also,
communication may not be possible in poor reception areas. Communication
may be interrupted if you move into a poor reception areas during
communications.
•Since this product uses radio waves, the possibility of communication
intercepts by third parties cannot be eliminated. (Though the LTE/CDMA
system has highly secure confidential communication features.)
•Since the product is a radio station under the Radio Law, you may be asked
to temporarily submit the product for inspection in accordance with the
Radio Law.
•The IMEI information of the product is automatically sent to KDDI
CORPORATION for maintenance and monitoring operational status of the
product.
•Since the battery is built into the product, you cannot replace it yourself. For
replacing the battery, contact an au shop or Customer Service Center.
•Take care not to inconvenience people around you when you use the
product in a public place.
•If you are using the product overseas, check the relevant laws and
regulations of the country/region you visit.
•When the product is used by a child, parents or guardians should thoroughly
read the “Basic Manual” (this manual) or “Notes on Usage”/“Setting Guide”/
“Full Instruction Manual” (Japanese) available on the au homepage and
teach the child how to use it.
Cell Phone Etiquette
■ Use of the product is not allowed in the following
places!
•Do not use the product while driving a car or riding a motorbike or bicycle. It
may cause a traffic accident. Use of the product while driving a car or
motorbike is prohibited by law. Use of the product while riding a bicycle may
be punishable by some regulations.
•Be sure to turn off the product while you are aboard an airplane. Otherwise,
safety of your flight may be compromised.
List of Packaged Items
Before you start using the product, make sure that you have all the following
packaged items with the product.
Warranty
(Japanese)
SHT22
•取扱説明書 (Basic Manual) (Japanese)
•ご利用にあたっての注意事項 (Notes on Usage) (Japanese)
•設定ガイド (Setting Guide) (Japanese)
The following items are not included in the package.
•microSD memory card
•AC adapter
•Earphone
•microUSB cable
•Purchase a specified charger (sold separately).
•Illustrations in this manual are only for reference. They may look different
from the actual product.
◎ The battery is built into the product.
Using au Disaster Countermeasure
Application
au Disaster Countermeasure is an application in which you can use Disaster
Message Board, Emergency Rapid Mail (Earthquake Early Warning, Disaster
and Evacuation Information, and Tsunami Warning), Disaster Voice Messaging
Service and Disaster Information/Donation website.
On the home screen, [APPS] → [au災害対策] (au Disaster
Countermeasure).
The au Disaster Countermeasure menu is displayed.
■ Using Disaster Message Board
Disaster Message Board is a service to enable customers in disaster areas to
register their safety information via LTE NET when large-scale disasters, such
as an earthquake whose Japan seismic scale is approximately 6-lower or
more, occur. The registered safety information can be checked by customers
using au terminals, and also from other carriers’ cell phones, PCs, etc.
For details, refer to “Disaster Message Boar
From the au Disaster Countermeasure menu, [災害用伝言板]
(Disaster Message Board).
Follow the on-screen instructions for registration/confirmation.
◎ To register the safety information, an e-mail address (〜ezweb.ne.jp) is
required. Set the e-mail address in advance.
1
d Service” on the au homepage.
Stand
(Sample)
◎ Deletion of the safety information and configurations for Safety
Notification Mail are not available during wireless LAN (Wi-Fi
connection.
◎ The Company does not guarantee the quality of this service. The
Company, regardless of the cause, shall not be liable for any problems
related to registration of safety information due to the concentration of
access to this service or equipment errors, any loss due to the damage,
ruination, etc. of safety information or any loss arising fr
safety information.
■ Using Emergency Rapid Mail
Emergency Rapid Mail is a service to collectively deliver Earthquake Early
Warning and Tsunami Warning provided by the Japan Meteorological Agency,
and Disaster and Evacuation Information provided by the national government
or the local governments to au terminals in the specified areas.
•At the time of purchase, r
(Earthquake Early Warning, and Disaster and Evacuation Information) is set
to “受信する” (Receive). You can receive Tsunami Warning by setting 災害・
避難情報 (Disaster and Evacuation Information).
When receiving Earthquake Early Warning, secure your safety and act
composedly according to the surrounding situations.
When receiving T
evacuate to safe places such as hills and strongly-built tall buildings.
From the au Disaster Countermeasure menu, [緊急速報メー
ル] (Emergency Rapid Mail).
The inbox is displayed.
Select a mail to check to display the details of the mail.
削除 (Delete) Delete received mails.
設定 (Settings) 緊急地震速報 (Earthquake Early Warning)
◎ This service is available only in Japan (Not available overseas).
◎ Emergency Rapid Mail is free of both information charges and
communication charges.
◎ Emergency Rapid Mail cannot be received while the power is turned off.
◎ Emergency Rapid Mail may not be received during communication such
as while sending and receiving e-mails/SMSs and while using the
browser or when you are in a place where th
(e.g. tunnels and basements) or the signal is weak, even within the
service area.
◎ Emergency Rapid Mail which failed to be r
received again.
◎ When you receive Emergency Rapid Mail, you will be notified by the
dedicated alarm tone and the vibrator. The alarm tone cannot be
changed.
* When you receive Earthquake Early Warning, you will be notified by the alarm
tone, voice (“地震です” (Jishin-desu)) meaning that an earthquake has
occurred and the vibrator.
◎ Information intended for the areas of other than your present location
may be received.
eceiving setting of Emergency Rapid Mail
sunami Warning, leave sea coasts immediately and
Set whether to receive Earthquake Early Warning.
•Tap [受信する] (Receive)/[受信しない] (Not
receive) → [OK].
災害・避難情報 (Disaster and Evacuation
Information)
Set whether to receive Disaster and Evacuation
Information, and Tsunami Warning.
•Tap [受信する] (Receive)/[受信しない] (Not
receive) → [OK].
音量 (Volume)
Set the volume of the receiving sound.
バイブ (Vibr
マナー時の鳴動 (Linkage to the manner mode)
緊急地震速報 (Earthquake Early Warning)
災害・避難情報 (Disaster and Evacuation
Information)
ator)
Set whether to activate the vibrator at the time of
reception.
Set whether to notify you with the manner mode
settings applied in the manner mode.
Check the receiving sound and vibration of the
product for Earthquake Early Warning.
Check the receiving sound and vibration of the
product for Disaster and Evacuation Information,
and Tsunami War ning.
e signal cannot be received
eceived will not be able to be
2
®
)
om registered
◎ As for this service, the Company shall not be liable for any damage
incurred on the users resulted from failure or delay of information delivery
due to communication disturbance or system failure, contents of the
information or other problems that are not supposed to be blamed on the
Company.
◎ For details on Earthquake Early Warning and Tsunami War ning provided
by the Japan Meteorological Agency, refer to the agency’s homepage.
(http://www
Earthquake Early Warning
Tsunami Warning
Disaster and Evacuation Information
■ Using Disaster Voice Messaging Service
Disaster Voice Messaging Service is a service to record voices with a
smartphone, tablet, etc. and deliver them as a voice message to people to
whom you want to deliver the information that you are safe when large-scale
disasters occur.
■ Using Disaster Information/Donation Website
You can check the histories of Disaster and Evacuation Information delivered
by the local governments, Disaster Information portal and donation website.
.jma.go.jp/jma/indexe.html)
◎ Earthquake Early Warning notifies areas where a strong shaking (Japan
seismic scale 4 or more) is expected when an earthquake whose
maximum Japan seismic scale is predicted of 5-lower or more has been
detected.
◎ This service detects an earthquake (P-wave, preliminary tremors) near
the seismic center i
automatically calculates its location, scale and predicted str
shaking. After that, you will be notified of the earthquake as soon as
possible within a few seconds to dozens of seconds before a strong
shaking from the earthquake (S-wave, principal shock) occurs.
◎ In the vicinity of the seismic center, a strong shaking may reach you
before Earthquake Early Warning.
◎ The Ear
service is different from that provided by TV, radio and other
communication media and thus the arriving time of Earthquake Early
Warning may be different among those media.
◎ Tsunami War ning notifies areas including target sea coasts of Major
Tsunami War ning and Tsunami War ning provided by the J
Meteorological Agency
◎ Disaster and Evacuation Information notifies information related to the
safety of citizens, such as evacuation advisories, evacuation orders or
various alarms delivered by the national government or the local
governments.
mmediately after the earthquake occurs and
thquake Early Warning distribution system provided by this
.
From the au Disaster Countermeasure menu, [災害用音声お
届けサービス] (Disaster Voice Messaging Service).
Follow the on-screen instructions.
◎ To use this service via Wi-Fi®, making initial settings via LTE/3G networks
is required.
◎ Voice messages can be recorded for up to 30 seconds.
◎ Voice messages can be exchanged among au terminals as well as other
carriers’ cell phones and PHS devices.
◎ Voices may not be heard when the media sound volume is set to low.
◎ When no free space is left on the internal memory, voice messages may
not be s
aved or played.
◎ Some cell phones cannot receive voice messages. For details, r
the au homepage.
From the au Disaster Countermeasure menu, [災害情報/義
援金サイト] (Disaster Information/Donation website).
Select an item to check.
3
ength of the
apan
efer to
Illustrations and Descriptions in This
Manual
■ Note on Key Illustrations
In this manual, the key illustrations are simplified as shown below.
f
ud
■ Description of Operations for Selecting Item/Icon/Key
etc.
In this manual, operation procedures are described as below.
Description Explanation
On the home screen,
[APPS] → [Browser].
f
(hold down for at
least 2 seconds).
* Tapping is to select a key or icon displayed on the screen by lightly tapping it with
your finger.
■ Notes on Illustrations/Screenshots
The screenshots in this manual are simplified and may look different from the
actual screens. Also, part of the screen may be omitted.
In this manual, part of the
screen such as icons are
omitted.
Actual screen In this manual
◎ Explanations of this manual are based on the case when the product is
held vertically. If you hold it horizontally, menu items/icons/on-screen keys
etc. may be different.
◎ Menu items, layers and icons described in this manual may be different
according to functions being used and conditions.
◎ In this manual, “microSD™ memory card (commercially available)”,
“microSDHC™ memory card (commercially a
“microSDXC™ memor
as “microSD memory card” or “microSD”.
◎ All of the indicated amounts exclude tax unless otherwise specified.
4
Tap “APPS” at the top of the 3-Line Home screen
and tap “
Hold f down for at least 2 seconds.
y card (commercially available)” are abbreviated
Browser”.
vailable)” and
Names and Functions of Parts
■ Front
①
②
③
① Earpiece (Receiver)
You can hear the other party during a call*.
② Display (Touch panel)
③ In camera lens
④ Proximity sensor/Light sensor
Proximity sensor prevents inadvertent operations of the touch panel during
*
.
a call
Light sensor detects the ambient brightness and adjusts the brightness of
display.
⑤ ud Volume up/down key
Adjust the volume.
Long touch “u” on the Welcome Sheet (Lock Screen) to turn on the
mobile light.
Long touch “d” on the home scr
set/disable the manner mode. Alternatively, to disable the manner mode,
tap “u” on the home screen.
⑥ Charging/Notification indicator
* Voice calling using a telephone connection is not available. Voice calling is available
only with a voice call application using an Internet connection.
een or Welcome Sheet (Lock Screen) to
■ Back/Top and Bottom
⑦
⑧
⑨
⑩
⑪
⑬ ⑰
⑭ ⑱
⑮
⑯
⑳
⑪ ⑫
⑦ Out camera lens
⑧ Mobile light
⑨ Speaker
⑩ NFC mark
Hold it over a reader/writer when using NFC.
Send and receive data using Android beam.
⑪ Internal antennas
®
/Bluetooth® antenna
⑫ Wi-Fi
⑬ IMEI tray
Allows you to confirm the product’s IMEI.
⑭ au Nano IC Card (LTE)/microSD memory card cover
⑮ au Nano IC Card (LTE) tray slot
⑯ microSD memory card slot
5
④
⑤
⑥
⑲
㉑
6
⑰ f Power key
Turn the screen on/off.
Hold it down to turn on/off the power, set the manner mode, etc.
⑱ Earphone jack
⑲ TV antenna
⑳ External connection jack
When you connect the common AC adapter 04 (sold separately), the
microUSB cable 01 (sold separately), etc. to the product, some applications
may not function properly since the geomagnetic sensor is affected by the
magnetism of connected device
cable.
㉑
Mouthpiece (Microphone)
Transmits your voice to the other party during a call
recording sounds. Take care not to cover the microphone with your fingers
etc. when using it.
* Voice calling using a telephone connection is not available. Voice calling is available
only with a voice call application using an Internet connection.
◎ The back cover of the product cannot be removed. Removing it forcibly
may cause damage or a fault.
◎ The battery is built into the product, and cannot be removed by the
customer. To force the power off, refer to “Turning the Power Off Forcibly”
(▶P. 13).
Internal antennas, Wi-Fi
◎ Antennas are built into the product. Do not cover with hand during data
communication, or place stickers over antennas. Doing so may affect
communication quality.
s. Use the product after removing the
®
/Bluetooth® antenna
*
. It is also used for
Using the au Nano IC Card (LTE)
au Nano IC Card (LTE)
The au Nano IC Card (LTE) records your personal information such as phone
numbers.
The product is compatible with au Nano IC Card (LTE) only. You cannot use
the product by inserting the au IC-Card, micro au IC-Card or au Micro IC Card
(LTE) for au phones and smartphones instead.
au Nano IC Card (LTE)
IC (metal) part
◎ Make sure to unplug the microUSB plug of the common AC adapter 04
(sold separately) etc. from the product when attaching or removing the
au Nano IC Card (LTE).
Attaching the au Nano IC Card (LTE)
Before attaching the au Nano IC Card (LTE), turn the product off and remove
the microSD memory card.
Open the au Nano IC Card (LTE)/microSD memory card
cover.
Slowly pull the au Nano IC Card (LTE) tray straight out by
hooking a finger on it.
au Nano IC
Card (LTE) tray
Put the au Nano IC Card (LTE) on the au Nano IC Card (LTE)
tray.
Make sure the notches on the au Nano IC Card (LTE) and au Nano IC
Card (LTE) tray face the proper orientation and put the card slowly on the
tray.
IC (metal) part up
au Nano IC Card (LTE)
Notches
au Nano IC Card (LTE) tray
Slowly insert the au Nano IC Card (LTE) tray into the au
Nano IC Card (LTE) tray slot, taking care not to let the tray
be caught on the metal parts on both sides of the slot.
Confirm the position of the au Nano IC Card (LTE) tray slot and the
orientation of the au Nano IC Card (LTE) tray carefully, and insert the tray
all the way into the slot in the direction of the arrow. Inserting the tray
forcibly may damage the tray.
Metal parts
au Nano IC Card (LTE)
tray slot
Close the au Nano IC Card (LTE)/microSD memory card
cover.
◎ Inserting the au Nano IC Card (LTE) tray not deeply enough may prevent
the product from functioning properly.
◎ Take care not to lose or damage the removed au Nano IC Card (LTE) tray.
Removing the au Nano IC Card (LTE)
Before removing the au Nano IC Card (LTE), turn the product off and remove
the microSD memory card.
Open the au Nano IC Card (LTE)/microSD memory card
cover.
Slowly pull the au Nano IC Card (LTE) tray straight out by
hooking a finger on it.
au Nano IC
Card (LTE) tray
Remove the au Nano IC Card (LTE) from the au Nano IC
Card (LTE) tray.
Slowly insert the au Nano IC Card (LTE) tray into the au
Nano IC Card (LTE) tray slot, taking care not to let the tray
be caught on the metal parts on both sides of the slot.
Confirm the position of the au Nano IC Card (LTE) tray slot and the
orientation of the au Nano IC Card (LTE) tray carefully, and insert the tray
all the way into the slot in the direction of the arrow. Inserting the tray
forcibly may damage the tray.
Metal parts
au Nano IC Card (LTE)
tray slot
Close the au Nano IC Card (LTE)/microSD memory card
cover.
Using a microSD Memory Card
Attaching a microSD Memory Card
Before attaching a microSD memory card, turn the product off.
Open the au Nano IC Card (LTE)/microSD memory card
cover.
Slowly insert the microSD memory card into the microSD
memory card slot.
Confirm the orientation for inserting, then insert in the direction of the
arrow until it clicks and is locked.
Releasing the microSD memory card before it is locked may cause it to
pop out.
microSD memory card slot
Close the au Nano IC Card (LTE)/microSD memory card
cover.
◎ Make sure that the top/bottom and front/rear of the microSD memory card
are facing correctly.
Trying to force a wrongly oriented card into the slot could make it
impossible to remove the card or result in damage.
◎ Do not touch the terminal part of a microSD memory card.
Removing the microSD Memory Card
Before removing the microSD memory card, turn the product off.
Open the au Nano IC Card (LTE)/microSD memory card
cover.
Slowly push the microSD memory card in all the way.
After it clicks, let the microSD memory card come back out a little without
releasing it. Releasing the card when it is pushed deeply into the slot may
cause it to pop out.
Slowly pull the microSD memory card straight out.
Close the au Nano IC Card (LTE)/microSD memory card
cover.
◎ Do not remove the microSD memory card forcefully. Doing so may result
in damage or data loss.
◎ The microSD memory card may become warm after a long time use, but
this is not a fault.
Checking the IMEI
An IMEI (international mobile station equipment identity) is a special
identification code assigned to each phone. You can pull the IMEI tray out to
confirm the IMEI of the product.
Turn the product off and remove the au Nano IC Card (LTE)
tray.
For details on removing the au Nano IC Card (LTE) tray, refer to
“Removing the au Nano IC Card (LTE)” (▶P. 8).
Slowly pull the IMEI tray straight out by hooking a finger
on it.
au Nano IC Card (LTE)
tray slot
IMEI tray
◎ The IMEI is information required when requesting servicing or repairs.
◎ The IMEI tray cannot be removed from the main unit. Take care not to
apply force when handling.
◎ You can also operate the product to confirm the IMEI.
On the home screen, tap [APPS] → [Settings] → [Device info] → [Status]
and confirm the IMEI field.
Charging
Charging
When you purchase the product, the internal battery is not fully charged. Be
sure to charge the internal battery before use.
•If the performance of the battery does not recover (e.g. the usable time after
each charge has become extremely short), the internal battery may be at the
end of service life. On the home screen, tap [APPS] → [Settings] → [Device
info] → [Status] → [Battery status] to check the charging performance of the
internal battery.
•While charging, the charging/notification indicator illuminates in red, and the
battery icon is displayed with superimposed. When the batter y is
charged to approximately 95%, the charging/notification indicator illuminates
in green. When charging is finished, the charging/notification indicator goes
out.
◎ Depending on the operation procedure and usage environment, the
temperature inside the product may get high and the product may even
get heated. In such case, charging may stop for security reasons.
◎ Charging the internal battery while using the camera function etc. may
lengthen the charging time.
◎ If you perform various operations with a specified charger (sold
separately) connected to the prod
place repeatedly in a shor
shortens its service life.
◎ If you charge the internal battery when the battery has run out, the
charging/notification indicator may not illuminate soon. However,
charging is in progress.
◎ If the charging/notification indicator flashes in red, force the power off
(▶P. 13) and turn the prod
stop charging the internal batter
Guarantee Service Center.
◎ If you stop charging while the charging/notification indicator still
illuminates during charging, the cell phone may be left not fully charged
even if
is displayed on it. In such case, the usage times shorten.
■ Charging Other Models
You can connect this product and a commercially available USB host cable or
USB communication cable to charge a supported AQUOS PHONE or similar
device.
•Conversion cable with USB host function capability and USB-microUSB
communication cable are sold separately.
•For supported models and recommended cables, refer to the following
manufacturer’s site for product information.
http://3sh.jp/
Charging with the Specified AC Adapter (Sold
Separately)/Specified DC Adapter (Sold
Separately)
The followings are the explanation of how to connect the common AC adapter
04 (sold separately)/common DC adapter 03 (sold separately) to charge. For
details on the specified AC adapter (sold separately)/specified DC adapter
(sold separately), refer to “Introduction of Peripheral Devices” (▶P. 19).
Confirm the direction of the microUSB plug of the common
AC adapter 04 (sold separately)/common DC adapter 03
(sold separately) and insert it in the direction of the arrow
to the external connection jack of the product.
Protruding edges
uct, charging/discharging may take
t time. Frequently charging the internal battery
uct on again. If the indicator continues to flash,
y and contact an au shop or the Keitai
External
connection jack
Plug the common AC adapter 04 (sold separately) power
plug into a 100 V AC power outlet/Plug the common DC
adapter 03 (sold separately) plug into a cigarette lighter
socket.
Common AC adapter
04 (sold separately)
When charging is finished, pull the microUSB plug of the
common AC adapter 04 (sold separately)/common DC
Common DC adapter
03 (sold separately)
adapter 03 (sold separately) straight out from the external
connection jack of the product.
Unplug the common AC adapter 04 (sold separately) power
plug from the power outlet/Unplug the common DC
adapter 03 (sold separately) plug from the cigarette lighter
socket.
◎ Although you can charge the internal battery while the power is turned
on, charging time lengthens.
Charging with a PC
The followings are the explanation of how to charge the internal battery by
connecting the product to a USB port of a PC through which the battery can
be charged.
Connect the microUSB cable 01 (sold separately) to a USB
port of a PC after the PC is activated completely.
Protruding edges
USB port of a PC
microUSB cable 01
(sold separately)
Connect the microUSB cable 01 (sold separately) to the
product after the product is activated completely.
◎ If you use the microUSB cable to charge the internal battery, it may take
the internal battery longer to be fully charged than if you use the
specified AC adapter (sold separately).
◎ Turn the protruding side of the microUSB plug up and insert the
microUSB plug to the external connection jack of the product straightly.
Inserting the microUSB plug in the wrong direction may result in damage
to the external connection jack of the product.
◎ The product is tur
turned off.
◎ If you charge the internal battery when the battery has run out, the
charging/notification indicator may not illuminate. In such case, use the
specified AC adapter (sold separately) for charging.
ned on when it is connected to a PC while the power is
External
connection jack
Turning the Power On/Off
■ Turning the Power On
f (hold down for at least 2 seconds).
◎ The initial setting of the touch panel will be executed until “AQUOS PAD”
disappears from the screen after the power is turned on. Do not touch
the screen, otherwise touch panel operations may not be performed
properly.
■ Turning the Power Off
f (hold down for at least 2 seconds).
[Power off] → [OK].
■ Restarting the Product
You can restart the product after turning it off.
f (hold down for at least 2 seconds).
[Reboot] → [OK].
■ Turning the Power Off Forcibly
You can force the product to turn off if the screen freezes or you are unable to
turn the product off.
f (hold down for at least 8 seconds).
Release your finger after the product vibrates to turn the power off.
◎ If the power is turned off forcibly, unsaved data will be deleted. Do not
turn the power off forcibly unless you cannot operate the product.
■ Booting in Safe Mode
Turn the product off then boot it in a state close to that at time of purchase.
If operation of the product is unstable, it may be due to applications installed
after purchasing the product. If symptoms improve when booted in safe mode,
uninstalling the applications you installed may remedy symptoms.
f (hold down for at least 2 seconds).
Long touch “Power off” → [OK].
“Safe mode” is displayed at the bottom of the screen when the product is
booted in safe mode.
To end safe mode, reboot the product.
◎ When the product is turned off, you can boot it in safe mode by f
(hold down for at least 2 seconds) to turn it on, and then long touching
“d” until the Welcome Sheet (Lock Screen) is displayed after the au
logo disappears.
◎ It is recommended that you back up your data on the product before
booting in safe mode.
◎ Widgets that you yourself created may be deleted.
◎ Safe mode is not a normal state
mode before nor
mal use.
for the product to be booted in. End safe
Common AC adapter 04 (sold separately)/
Common DC adapter 03 (sold separately)
7
8
9
10
11
12
13
Page 2
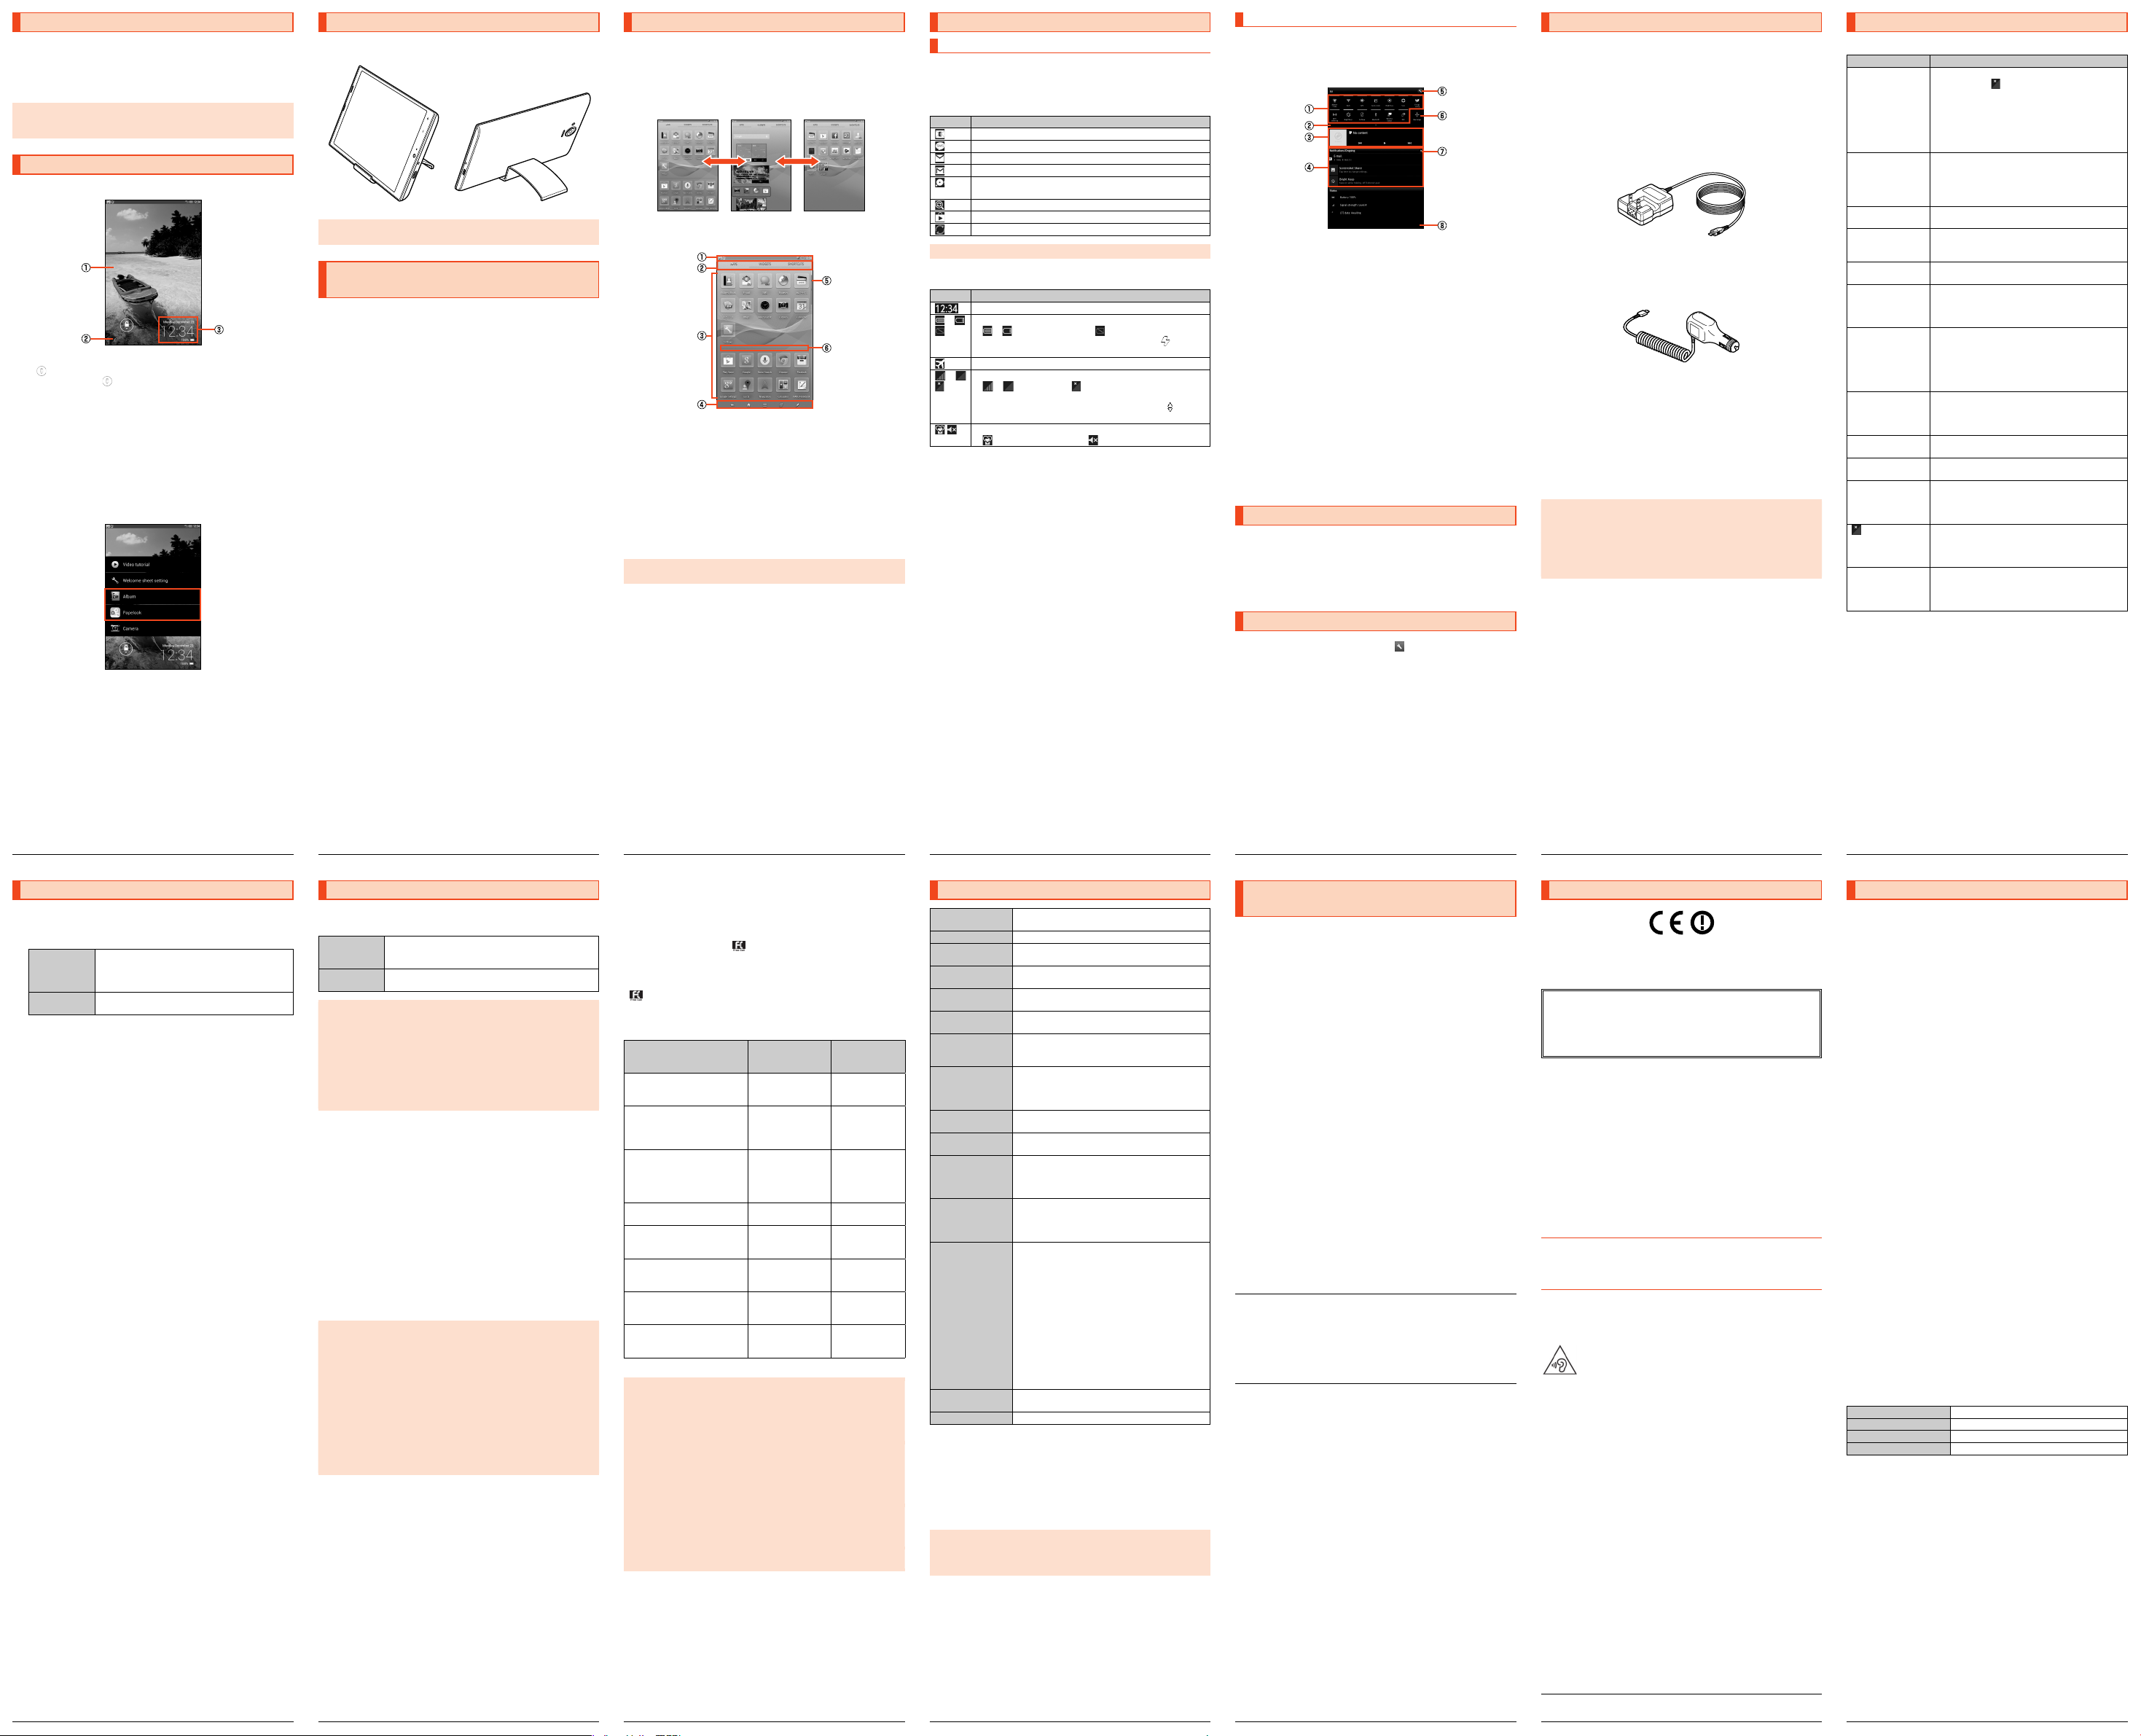
Turning the Screen On/Off
If you press f or no operation is made for a specified time, the screen is
turned off.
■ Turning the Screen On
f while the screen is turned off.
◎ When you put the product in your pocket, bag, etc., turn the screen off.
Putting the product in while the screen is turned on may cause
inadvertent operations.
Welcome Sheet (Lock Screen)
The Welcome Sheet (Lock Screen) is displayed if you turn the screen on.
《Welcome Sheet (Lock Screen)》
Slide “ ” to the bottom of the screen to unlock.
Tap, long touch or slide “ ” up to display “Video tutorial”, “Welcome sheet
setting” and shortcuts.
① Wallpaper
② Owner info key
Tap to display texts according to items set for “Owner info” in “Lock &
Security”.
③ Info Area
Flick to the left/right to switch the weather, stock prices information,
SHMemoWidget, Clock & information and widgets.
■ Welcome Sheet (Lock Screen) Shortcuts
Displayed shortcuts and their functions differ with the type of wallpaper that is
set.
“Album”: Tap for thumbnails of images in Album.
“Papelook”: Tap for the Papelook top page.
By setting wallpaper that can be edited from “Images (Select folders)” to the
Welcome Sheet (Lock Screen), the following are displayed.
“View pictures”: Tap for a single-image view of images in Album.
“Photo editing”: Tap for the Papelook image editing screen.
Using the Stand (Sample)
When propping the unit on the stand (sample), gently place it sideways. Use
the stand (sample) placed on a stable surface.
◎ When using the product propped on the stand (sample), tapping
forcefully to operate the product may cause it to fall over.
Switching the Display Language to
English
You can switch the display language for function names and other items to
English.
On the home screen, [アプリ] (APPS).
[設定] (Settings).
[言語と文字入力] (Language & input).
[言語(Language)を選択] (Select language).
[English].
Using the 3-Line Home
The 3-Line Home is a home screen which consists of the Apps Sheet, the
Widgets Sheet and the Shortcuts Sheet. You can use the function by tapping
an icon/a widget/shortcut on each sheet.
•You can switch each sheet by tapping “APPS”, “WIDGETS” or
“SHORTCUTS” on the Sheet Switcher, or sliding/flicking the home screen to
the left/right.
■ Viewing the 3-Line Home
① Status bar
② Sheet Switcher
Long touch Sheet Switcher, drag it to the destination and release your
finger to move it.
③ Apps Sheet/Widgets Sheet/Shortcuts Sheet
④ Navigation Bar
⑤ Scroller
Displayed when the screen is scrolled. You can scroll the screen by sliding
the displayed scroller up/down.
⑥ Separator
Pinch out vertically on the home screen to add a separator. You can delete
the separator by pi
◎ A separator cannot be added if there are no applications, etc. between
separators.
■ Arranging the Home Screen
When the top of any sheet of the home screen is displayed,
slide the sheet down.
Alternatively, tap “e” on any sheet.
[Home settings].
Switching sheets
《Widgets Sheet》《Shortcuts Sheet》《Apps Sheet》
nching it in vertically.
Using the Status Bar
Icons
The notification icons to notify you of a new mail message, a running
operation, etc. are displayed on the left side of the status bar, while the status
icons to show the status of the product are on the right side.
■ Main Notification Icons
Icon Description
New mail message (E-mail)
New mail message (SMS)
New mail message (PC-mail)
New mail message (Gmail)
Space on the internal memory available less than approx. 275
MB
Reading the internal memory/a microSD memory card
Installation of application completed, update available
Software update available
◎ Some icons are displayed with their number superimposed on them.
■ Main Status Icons
Icon Description
Time
〜 Battery level
〜 Signal strength (Receiving electric field)
〜 : Battery level display : No battery
•While charging, the battery icon is displayed with
superimposed.
Airplane mode set
〜 : Level display : Out of service area
•The icon indicating network is displayed at the upper left.
•During a communication, the icon is displayed with
superimposed.
Manner mode status
: Standard manner mode : Silent manner mode
Using the Notification/Status Panel
In the notification/status panel, you can check the details on notification icons
and status icons or activate an application corresponding to the icon.
You can also set the manner mode, VeilView, etc.
Slide the status bar down.
《Notification/Status panel》
① Function buttons
Switch settings of the frequently used function by one touch.
② Function button displaying/hiding bar
Tap it to display/hide function buttons on the second row.
③ Music controller
Play music with LISMO.
④ Notification area
Check the status of the product and contents of notifications.
Depending on the information, you can pinch out/pinch in to enlarge/
shrink notifications or tap notifi
corresponding application.
•Flick a notification to the left/right to delete it. Y
delete a notification depending on the notification.
⑤ Settings key
Tap it to make various settings for the product.
⑥ Rearrange key
Sort function buttons.
⑦ Clear
Tap it to clear all the notifications. You may not be able to delete a
notification depending on the notif
⑧ Close bar
Slide it up to hide the notification/status panel.
cations/functions to activate a
ou may not be able to
ication.
Switching Input Methods
You can switch input methods for character entry.
•Following operation explanations use “Japanese - iWnn IME - SH edition”.
While the keyboard is displayed, open the notification
panel.
[Choose input method] → [English (US)]/[Japanese].
Switching Software Keyboards
On the character entry screen, [ ] → [Change input UI] →
[Set 12 keyboard]/[Set QWERTY keyboard].
Introduction of Peripheral Devices
■Common AC Adapter 03 (0301PQA) (sold separately)
Common AC Adapter 04 (0401PWA) (sold separately)
Common AC Adapter 03 Navy (0301PBA) (sold separately)
Common AC Adapter 03 Green (0301PGA) (sold separately)
Common AC Adapter 03 Pink (0301PPA) (sold separately)
Common AC Adapter 03 Blue (0301PLA) (sold separately)
AC Adapter JUPITRIS (White) (L02P001W) (sold separately)
AC A
dapter JUPITRIS (Red) (L02P001R) (sold separately)
AC Adapter JUPITRIS (Blue) (L02P001L) (sold separately)
AC Adapter JUPITRIS (Pink) (L02P001P) (sold separately)
AC Adapter JUPITRIS (Champagne) (L02P001N) (sold separately)
Common AC adapter 04
•Illustrations and forms may not match depending on the AC adapter you
use.
■Common DC adapter 03 (0301PEA) (sold separately)
■Portable charger 02 (0301PFA) (sold separately)
■microUSB cable 01 (0301HVA) (sold separately)
microUSB cable 01 Navy (0301HBA) (sold separately)
microUSB cable 01 Green (0301HGA) (sold separately)
microUSB cable 01 Pink (0301HPA) (sold separately)
microUSB cable 01 Blue (0301HLA) (sold separately)
■SHARP microUSB conversion cable 01 for TV antenna input
(SHL23HKA) (sold separately)
■SHARP TV antenn
(sold separat
◎ For the latest information about available peripheral devices, check the
au homepage (http://www.au.kddi.com/english/) or contact Customer
Service Center.
◎ The product does not support ASYNC/Fax transmission.
◎ The above-mentioned peripheral devices can be purchased from au
Online Shop.
(http://auonlineshop.kddi.com/)
a conversion and charging cable 01 (01SHHKA)
ely)
Troubleshooting
Before you assume that the product is malfunctioning, check the following:
Trouble Detail
Battery usage time
is short.
Cannot recognize a
microSD memory
card/Cannot find
target data.
Cannot operate the
keys/touch panel.
Cannot charge the
battery.
Cannot turn on the
power.
Cannot operate/The
screen does not
respond/Cannot turn
off the power.
Cannot operate the
touch panel as
intended.
Screen response is
slow when you tap
on the screen/press
the keys.
auIC card(UIM)
err
or. is displayed.
The power is turned
off automatically.
The power is turned
off while the
wake-up logo is
displayed.
(out of service
area icon) is
displayed.
A message indicating
that charging is
necessary is
displayed.
If symptoms do not improve after checking each of the above, information is
provided through au Customer Supp
.au.kddi.com/english/support/)
(http://www
•Make sure you do not often use the product in
places where
(▶P. 17)
•Make sure the internal battery does not approach
the end of its service life. Check the battery status.
(▶P. 11)
•Is the internal battery charged enough? (▶P. 11)
•Suspend the functions not being used. (▶P. 18)
•Is a microSD memory card inserted properly?
(▶P. 9)
•Make sure data is not saved on the internal
memory
memory besides a microSD memory card.
•Turn off the power and then turn it on.
•Is the power turned on? (▶P. 13)
•Is the power plug of the specified charger (sold
separately) securely plugged into an outlet or a
cigarette lighter socket? (▶P. 11)
•Is
the internal battery charged? (▶P. 11)
•Did you hold f down? (▶
•You can force the power off by holding down f
for at least 8 seconds and releasing your finger
after the product vibrates. Turn the product on
again after a while. (▶P. 13)
•Make sure you are not operating with hands
wearing gloves etc.
•Make sure you ar
fingernail or with foreign object between the screen
and your fingers.
•Restart the product. (▶P. 13)
•Screen response may be slowed down when a
large amount of data is stored in the product or
being transmitted between the internal memory
and a microSD memory card.
•Is an au Nano IC Card (LTE) inserted? (▶P. 7)
•Make sure the battery has not run out. (▶P. 11)
•Make sure the battery has not run out. (▶P. 11)
•Is reception good enough? (▶P. 17)
•Is the product within the service area? (▶P. 17)
•Is your hand off the area around the internal
antenna? (▶P. 6)
•The battery is almost empty. (▶P. 11)
(out of service area) is displayed.
. Data can be saved on the internal
P. 13)
e not operating with the tip of a
ort on the au homepage below.
Updating Software
The product supports the software update.
On the home screen, [APPS] → [Settings] → [Device info]
→ [Software update].
Software update Check whether software update is necessary or not.
Auto-check
settings
■ Notes on Software Update
•You are charged for data communication when connecting to the Internet
from the product by using packet communication.
•When software update is necessary, you will be informed on au homepage,
etc. For details, contact an au shop or Customer Service Center (call toll-free
157). In addition, users of the SHT22 will receive a notice from au, when
software update is necessary to improve the functionality of the SHT22.
•It is recommended to back up your data before updating software.
•If the software update is performed, the product will restart before and after
the update.
•If the software update has failed or stopped, perform the same procedures
again.
•If the software update fails, it may become impossible to operate the
product. If this happens, bring it to an au shop or PiPit (not accepted by
some shops).
•Charge the battery sufficiently before starting update. If the battery level is
insufficient or the battery runs out during the update, the software update will
fail.
•Check out the signal reception status. The software update may fail if the
product is in a place with bad signal reception status.
•Various data registered on the product (address books, mails, still pictures,
music data, etc.) and information of settings will not be changed even after
software is updated. However, note that data may not be protected
depending on the state of the product (fault, damage, getting wet with water,
etc.).
•After software is updated, the download of next update software may
automatically start (consecutive update).
Do not conduct the following operations during the software update
•Do not move during software update.
The following operations are not available during the software update
•Operations are not available during software update. Also, the alarm etc.
does not function.
The confirmation starts when you tap “Yes”. When it
is necessary, you can download data for software
update.
Set whether to regularly check presence of data for
software update available.
14
After-Sales Service
■ When Asking for Repair
For repair, contact Keitai Guarantee Service Center.
During the
warranty period
Outside the
warranty period
◎ Before handing in the product for repair, make a backup of the contents
of memory since they may disappear during repair. Note that the
Company shall not be liable for any damages and loss of income should
the contents of memory be altered or lost.
◎ Recycled parts that meet the Company’s quality standards are
sometimes used for repair.
◎ au terminals collected by Replacement cell phone delivery s
you used before ar
Also parts replaced by au after-sales service are collected and recycled
by the Company. They are not returned to customers.
■ Performance Parts for Repair
The Company retains performance parts for repair of the SHT22 main unit and
its peripheral devices for 4 years after discontinuation of production.
“Performance parts for repair” refers to parts required for maintaining the
functions of the product.
■ Warranty Card
At the store of purchase, thoroughly check and read the name of the retailer,
date of purchase and other necessary details filled in on the warranty card,
and be sure to keep it in a safe place.
■ Keitai Guarantee Service Plus LTE
An after-sales service membership program on a monthly basis called “Keitai
Guarantee Service Plus LTE” (monthly fee: 380 yen, tax excluded) is available
for using your au terminal for a long time without worries.
This service expands coverage for many troubles including malfunction, theft
and loss. For details of this service, check on the au homepage or contact
Keitai Guarantee Service Center.
◎ You can apply for membership only at the time of purchasing your au
terminal.
◎ Once you cancel the membership, you cannot reapply for it until you
purchase an au terminal next time.
◎ Note that when changing the model or purchasing an extra terminal, this
service only covers the most recently purchased au terminal.
◎ When an au terminal is handed over to you or someone else, the “Keitai
Guarantee
successor of the terminal.
◎ When you get a new au ter
extra terminal, etc., the “Keitai Guarantee Service Plus” or “Keitai
Guarantee Service Plus LTE” membership for the old au terminal is
automatically canceled.
◎ Service contents are subject to change without notice.
■ au Nano IC Card (LTE)
The au Nano IC Card (LTE) is lent to you by au. In case of loss or damage, the
card will be replaced at your expense. When malfunction is suspected, or in
case of theft or loss, contact an au shop or PiPit.
21
Repairs will be done based on the <<terms of services of
the free-of-charge repair warranty>> described on the
warranty card.
We shall repair the product for a charge as requested by
the customer if repair renders it usable.
e recycled to terminals for replacement after repairs.
Service Plus LTE” membership is also handed over to the
minal by changing the model, purchasing an
ervice which
15
■ After-Sales Service
If you are unsure about anything regarding after-sales service, contact the
following service counter.
Customer Service Center (for service canceling procedure or operation in
case of loss or theft)
From a fixed-line phone,
From an au cell phone, 113 without area code (toll free)
Keitai Guarantee Service Center (for loss, theft or damage)
From a fixed-line phone/an au cell phone,
0120-925-919 (toll free)
Business hours 9:00 to 21:00 (7 days a week)
0077-7-113 (toll free)
■ au After-Sales Service Information
Service contents
Replacement cell phone
delivery service
(spontaneous failure: 1st year)
Replacement cell phone
delivery service
(spontaneous failure: 2nd year
and later)
Replacement cell phone
delivery service
(partial damage, water soak,
irreparable damage, thef
loss)
Holding over and repair
(spontaneous failur
Holding over and repair
(spontaneous failure: 2nd year
and later)
Holding over and repair
(partial damage)
Holding over and repair
(water soak and irreparable
damage)
Holding over and repair
(theft and loss) N/A
* Charge amounts are all tax excluded.
Replacement cell phone delivery service
◎ When you have trouble with your au terminal, you can have a terminal for
replacement (same model and color as your old one) delivered to any
destination that you specify by calling us. Please return your old faulty au
terminal within 14 days after the terminal for replacement is delivered to
you.
◎ You can use this service up to twice within one year starting from the day
when you first use this service. If you have not used this service over the
past one year at the time of your application for this service, the
application will be regar
will be regarded as your second time.
* For details, check on the au homepage.
Holding over and repair
◎ Damages and malfunctions intentionally caused by the customer as well
as those due to modification (e.g. disassembly, change of parts, painting,
etc.) by the customer are not covered by this service.
◎ You cannot receive a refund for replacement of the outer casing due to
stains, scratches, paint removal, etc. on the outer casing.
t and
e: 1st year)
Keitai Guarantee
Service Plus LTE
member
Free N/A
Customer charge
1st: 5,000 yen
2nd: 8,000 yen
Customer charge
1st: 5,000 yen
2nd: 8,000 yen
Free Free
Free (three-year
warranty)
Customer charge
Upper limit: 5,000
yen
Customer charge
10,000 yen
ded as your first time. If you have, the application
22
Non-Keitai
Guarantee Service
Plus LTE member
N/A
N/A
Actual cost
Actual cost
Ac
tual cost
N/A
(By model
eplacement)
r
16
Main Specifications
Display Approx. 7.0 inches, approx. 16.77 million colors,
Weight Approx. 263 g (including the internal battery)
Size (W×H×D) Approx. 104 mm×173 mm×9.9 mm (thickest part
Memory (built-in) ROM: Approx. 16 GB
Continuous standby
time (in Japan)
Continuous tethering
time
Maximum Wi-Fi
tethered
connections
Charging time Common AC adapter 04 (sold separately): Approx.
Full-Seg continuous
watching time
1Seg continuous
watching time
Camera device Out camera
Effective pixels Out camera
®
Bluetooth
function Communication method: Bluetooth® Standard Ver. 4.0
Network
environment
Interface microUSB jack, 3.5φ (quadrupoles) earphone jack
*1 The Full-Seg/1Seg continuous watching time varies depending on the usage.
*2 It changes according to objects obstructing devices and signal reception.
*3 This is the specification provided in Bluetooth® standards for making
communication between Bluetooth®-compatible devices in accordance with their
intended use.
*4 Some contents of address books data may not be properly displayed on the
device of the other party.
*5 This profile supports Bluetooth® Standard Ver.4.0.
*6 Supported for Wi-Fi CERTIFIED™ ac. Refer to the respective companies’ websites
for information on supported products.
◎ The continuous standby time may drop to less than half depending on
the battery charging status, usage environment such as temperature,
reception condition at the location where the product is used, and the
function settings.
23
IGZO, 1,200×1,920 (WUXGA)
approx. 10.8 mm)
RAM: Approx. 2 GB
Approx. 980 hours (while LTE is used)
Approx. 1,170 hours (while 3G is used)
Approx
. 840 min. (LTE on WAN)
ox. 1,190 min. (3G on WAN)
Appr
®
10 devices
200 min.
Common DC adapter 03 (sold separately): Approx.
520 min.
Approx. 6 hours and 50 min. (earphone)
*1
Approx. 6 hours and 40 min. (speaker)
Approx. 8 hours and 20 min. (earphone)
*1
Approx. 8 hours and 10 min. (speaker)
CMOS image sensor
In camera
CMOS image sensor
Approx. 13.10 million pixels
In camera
Approx. 2.10 million pixels
Output: Bluetooth® Standard Power Class 2
Communication distance*2: Within 10 m with no
obstacles in the range
Compatible Bluetooth® profiles*3: A2DP (Advanced
Audio Distribution Profile), AVRCP (Audio/Video
Remote Control Profile) Ver.1.3, OPP (Object Push
Profile), SPP (Serial Port Profile), PBAP (Phone Book
Access Profile)*4, HID (Human Interface Device
Profile), HDP (Health Device Profile), PAN (Personal
Area Networking Profile), PXP (Proximity Profile)*5,
FMP (Find Me Profile)*5, ANP (Alert Notification
Profile)*5, TIP(Time Profile)
Frequency bands: 2.4 GHz band
Wireless LAN (Wi-Fi
(2.4 GHz/5 GHz)/ac*6 conformant
*5
®
) function: IEEE802.11a/b/g/n
17
Specific Absorption Rate (SAR) of Cell
Phones
This model 【SHT22】 mobile phone complies with Japanese technical
regulations and international guidelines regarding exposure to radio waves.
This mobile phone has been designed in observance of the Japanese
technical regulations regarding exposure to radio waves (*1) and limits to
exposure to radio waves recommended by equivalent international guidelines.
These international guidelines were set out by the International Commission on
Non-Ionizing Radiation Protection (ICNIRP), which is in collaboration with the
World Health Organization (WHO), and the permissible limits include a
substantial safety margin designed to assure the safety of all persons,
regardless of age and health condition. The Japanese technical regulations
and international guidelines define the limits using a unit of measurement
known as the Specific Absorption Rate (SAR), which represents the average
amount of radio frequency energy absorbed by the human head. The SAR
limit for mobile phones is 2.0 W/kg. The highest SAR value for this mobile
phone when tested for use at the ear is 0.173 W/kg. There may be slight
differences in SAR levels among individual products, but they all satisfy the
limit. The actual SAR of this mobile phone while talking on the phone can be
well below that indicated above. This is due to automatic changes in the
power level of the mobile phone to ensure it only outputs the minimum power
required to communicate with a base station. Therefore in general, the closer
you are to a base station, the lower the power output of the mobile phone.
This mobile phone can be used in positions other than against your ear. Use a
carrying case or similar accessory that holds the phone at least 1.5 cm
separated from the body and ensure no metal parts are located between you
and the mobile phone. Under these conditions, this mobile phone satisfies
international guidelines for radio wave protection (*2).
The World Health Organization has stated that “a large number of studies
have been performed over the last two decades to assess whether mobile
phones pose a potential health risk. To date, no adverse health effects have
been established as being caused by mobile phone use”. If you would like to
know more detailed information, please refer to the WHO website.
(http://www.who.int/docstore/peh-emf/publications/facts_press/
fact_english.htm)
Please refer to the websites listed below if you would like to know more
detailed information regarding SAR.
○ Ministry of Internal Affairs and Communications website:
(http://www.tele.soumu.go.jp/e/sys/ele/index.htm)
○ Association of Radio Industries and Businesses website:
(http://www.arib-emf.org/index02.html)
○ au homepage:
(http://www.au.kddi.com/english/)
○ SHARP homepage:
(http://www.sharp.co.jp/products/menu/phone/cellular/sar/index.html)
*1 Technical regulations are defined by the Ministerial Ordinance Related to the
Radio Law (Article 14-2 of Radio Equipment Regulations).
*2 Regarding the method of measuring SAR when using mobile phones in positions
other than against the ear, international standards (IEC62209-2) were set in March
of 2010.
On the other hand, regarding the technical standards of Japan, ministerial
ordinance to revise part of the Ministerial Ordinance related to Radio Law (Article
14-2 of Radio Equipment Regulations) has been issued in August 2013, and will
be enforced on April 1, 2014.
24
18
CE Declaration of Conformity
In some countries/regions including Europe, there are restrictions on the
use of 5GHz WLAN that may limit the use to indoors only.
If you intend to use 5GHz WLAN on the device, check the local laws and
regulations beforehand.
Hereby, Sharp Telecommunications of Europe Ltd, declares that this SHT22 is
in compliance with the essential requirements and other relevant provisions
of Directive 1999/5/EC.
A copy of the original declaration of conformity can be found at the following
Internet address:
(http://www.sharp.co.jp/k-tai/)
■ Mobile Light
Do not point the illuminated light directly at someones eyes.
Be especially careful not to shoot small children from a ver
Do not use Mobile light near people’s faces. Eyesight may be temporarily
affected leading to accidents.
■ AC Adapter
Any AC adapter used with this handset must be suitably approved with a 5Vdc
SELV output which meets limited power source requirements as specified in
EN/IEC 60950-1 clause 2.5.
■ Battery - CAUTION
Use specified Charger only.
Non-specified equipment use may cause malfunctions, electric shock or fire
due to battery leakage, overheating or bursting.
The battery is embedded inside the product. Avoid removing the embedded
battery since this may cause overheating or bursting.
Do not dispose of the product with ordinary refuse. Take the product to an au
Shop, or follow the local disposal regulations.
Charge battery in ambient temperatures between 5°C and 35°C; outside this
range, batter
The maximum output voltage for the music player function, measured in
accordance with EN 50332-2, is 125 mV.
Your mobile device is a radio transmitter and receiver. It is designed not to
exceed the limits for exposure to radio waves recommended by international
guidelines. These guidelines were developed by the independent scientific
organization ICNIRP and include safety margins designed to assure the
protection of all persons, regardless of age and health.
The guidelines use a unit of measurement known as the Specific Absorption
Rate, or SAR. The SAR limit for mobile devices is 2 W/kg and the highest SAR
value for this device when tested at the ear is 0.022 W/kg
the body is 0.046 W/kg*.
For body-worn operation, this mobile device has been tested and meets the
RF exposure guidelines when used with an accessory containing no metal and
positioning the handset a minimum of 1.5 cm from the body. Use of other
accessories may not ensure compliance with RF exposure guidelines.
As SAR is measured utilizing the devices highest tran
SAR of this device while operating is typically below that indicated above. This
is due to automatic changes to the power level of the device to ensure it only
uses the minimum level r
The World Health Organization has stated that present scientific information
does not indicate the need for any special precautions for the use of mobile
devices. They note that if you want to reduce your exposure then you can do
so by limiting the length of calls or using a hands-fr
tablet away from the head.
* The tests are carried out in accordance with international guidelines for testing.
25
y may leak/overheat and performance may deteriorate.
■ Volume Level Caution
To prevent possible hearing damage, do not listen at high volume
levels for long periods.
■ Headphone Signal Level
■ European RF Exposure Information
smitting power the actual
equired to reach the network.
ee device to keep the
y close distance.
*
and when worn on
19
FCC Notice
- This device complies with part 15 of the FCC Rules. Operation is subject to
the following two conditions:
(1) This device may not cause harmful interference, and (2) this device must
accept any interference received, including interference that may cause
undesired operation.
- Changes or modifications not expressly approved by the manufacturer
responsible for compliance could void the user’s authority to operate the
equipment.
■ Information to User
This equipment has been tested and found to comply with the limits of a Class
B digital device, pursuant to Part 15 of the FCC Rules. These limits are
designed to provide reasonable protection against harmful interference in a
residential installation. This equipment generates, uses and can radiate radio
frequency energy and, if not installed and used in accordance with the
instructions, may cause harmful inter
However, there is no guarantee that interference will not occur in a particular
installation; if this equipment does cause harmful interference to radio or
television reception, which can be determined by turning the equipment off
and on, the user is encouraged to try to correct the interference by one or
more of the following measur
1. Reorient/relocate the receiving antenna.
2. Increase the separation between the equipment and receiver.
3. Connect the equipment into an outlet on a circuit different from that to which
the receiver is connected.
4. Consult the dealer or an experienced radio/TV technician for help.
■ 5 GHz WLAN Operation in USA
Within the 5.15-5.25 GHz band, UNII devices are restricted to indoor
operations to reduce any potential for harmful interference to co-channel
Mobile Satellite Services (MSS) operations.
■ FCC RF Exposure Information
Your handset is a radio transmitter and receiver. It is designed and
manufactured not to exceed the emission limits for exposure to radio
frequency (RF) energy set by the Federal Communications Commission of the
U.S. Government.
The guidelines are based on standards that were developed by independent
scientific organizations through periodic and thorough evaluation of scientific
studies. The standards include a substantial safety margin designed to assure
the safety of all persons, regardless of age and health.
The exposure standard for wireless handsets employs a unit of measurement
known as the Specific Absorption Rate
.
is 1.6 W/kg
Highest SAR value:
Model SHT22
FCC ID APYHRO00200
At the Ear 0.04 W/kg
On the Body 0.33 W/kg
This device was tested for typical body-worn operations with the back of the
handset kept 1.0 cm from the body. To maintain compliance with FCC RF
exposure requirements, use accessories that maintain a 1.0 cm separation
distance between the user’s body and the back of the handset. The use of belt
clips, holsters and similar accessor
in its assembly.
The use of accessories that do not satisfy these r
with FCC RF exposure requirements, and should be avoided.
The FCC has granted an Equipment Authorization for this model handset with
all reported SAR levels evaluated as in compliance with the FCC RF emission
guidelines. SAR information on this model handset is on
can be found at (http://transition.fcc.gov/oet/ea/fccid/
section after searching on the corresponding FCC ID (see table above).
Additional information on Specific Absorption Rates (SAR) can be found on
the FCC website at (http://www.fcc.gov/encyclopedia/radio-frequency-safety).
26
ference to radio communications.
es:
, or SAR. The SAR limit set by the FCC
ies should not contain metallic components
equirements may not comply
file with the FCC and
) under the Display Grant
20
27
 Loading...