

ATV NVR4P, NVR16P Quick Setup Manual
NVR Quick Setup Guide
>INSTALLATION AND OPERATION (1)
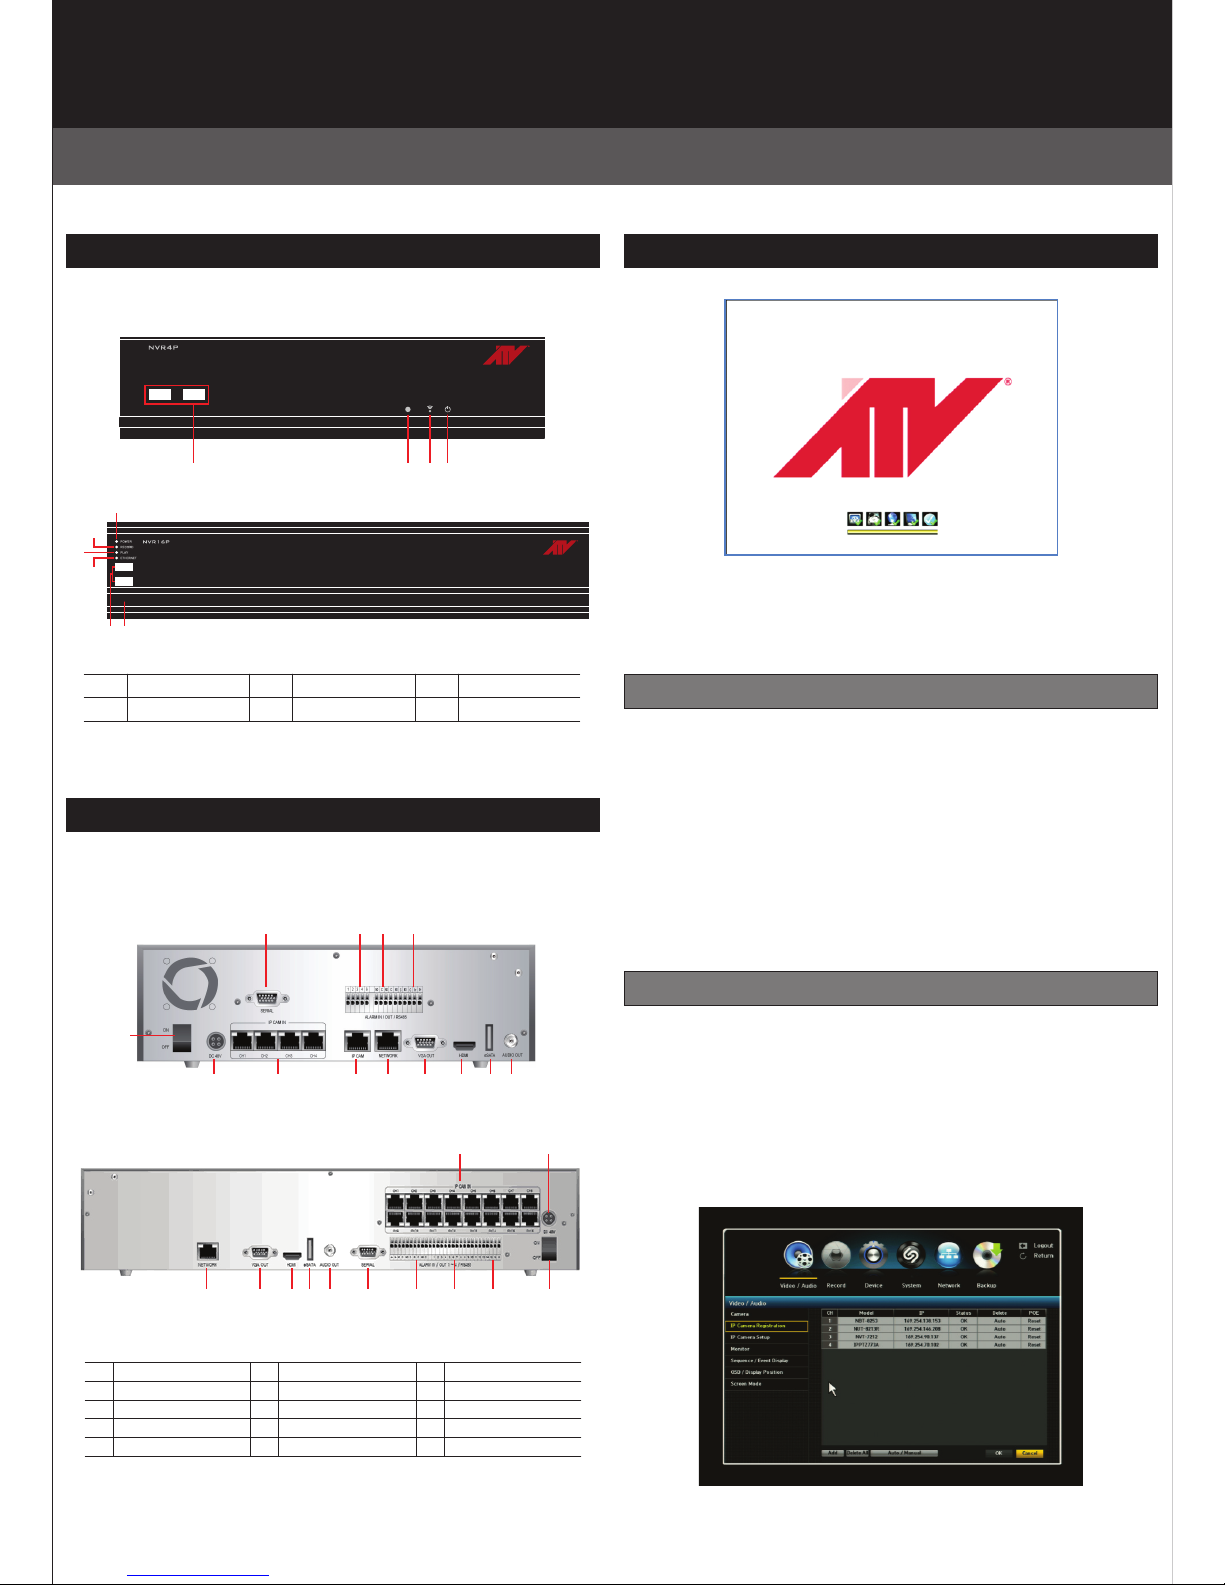
Front Panel
Rear Panel
SYSTEM SETUP
Easy Setup Wizard
1 Power LED
4 Network LED
2 Record LED
5 USB 2.0 Port
3 Playback LED
6 IR Remote Sensor
1 6
2 7
11
12
3 8
4 9
13
5 10
Ip camera input
Power adapter input
Network port
VGA out
HDMI
eSATA
Audio out
Serial port
Alarm/sensor input
Alarm out
RS485 port
Power switch
Ext. ip camera input
When power is turned on, you will see the initializing screen and
it may take up to one minute to complete. After initializing is
complete, an Easy Setup screen will appear.
An Easy Setup screen will appear. If you don’t want to go through
the setup steps at this time click the Exit button and the system
will go to the main live screen. When you want to set up the system
just click the Easy Setup Menu or Main menu in the right-click mouse
menu. If the Easy Setup is nished and returns to the live screen,
the auto connected camera image will be displayed on the live screen.
The NVR system will record automatically as regular recording.
* For basic system setup and conguration it is recommended to
complete all the setup steps.
IP Camera Registration
You can check the IP camera list and register the desired IP cameras
automatically or manually. If the cameras are connected directly
to the IP CAM port, the NVR system will register the cameras
automatically. If the cameras are connected to the switch/hub,
the NVR system will discover the cameras automatically and then
you can register the cameras to the NVR by clicking the "Registration".
*4 PoE NVR
*16 PoE NVR
5 2 6 1
1
2
5 6
4
3
⑧
⑫
② ① ⑬ ③ ④ ⑤ ⑥ ⑦
⑨ ⑩ ⑪
⑫
②①
③ ④ ⑤ ⑥ ⑦ ⑧ ⑨ ⑩ ⑪
NVR Quick Setup Guide
>INSTALLATION AND OPERATION (2)
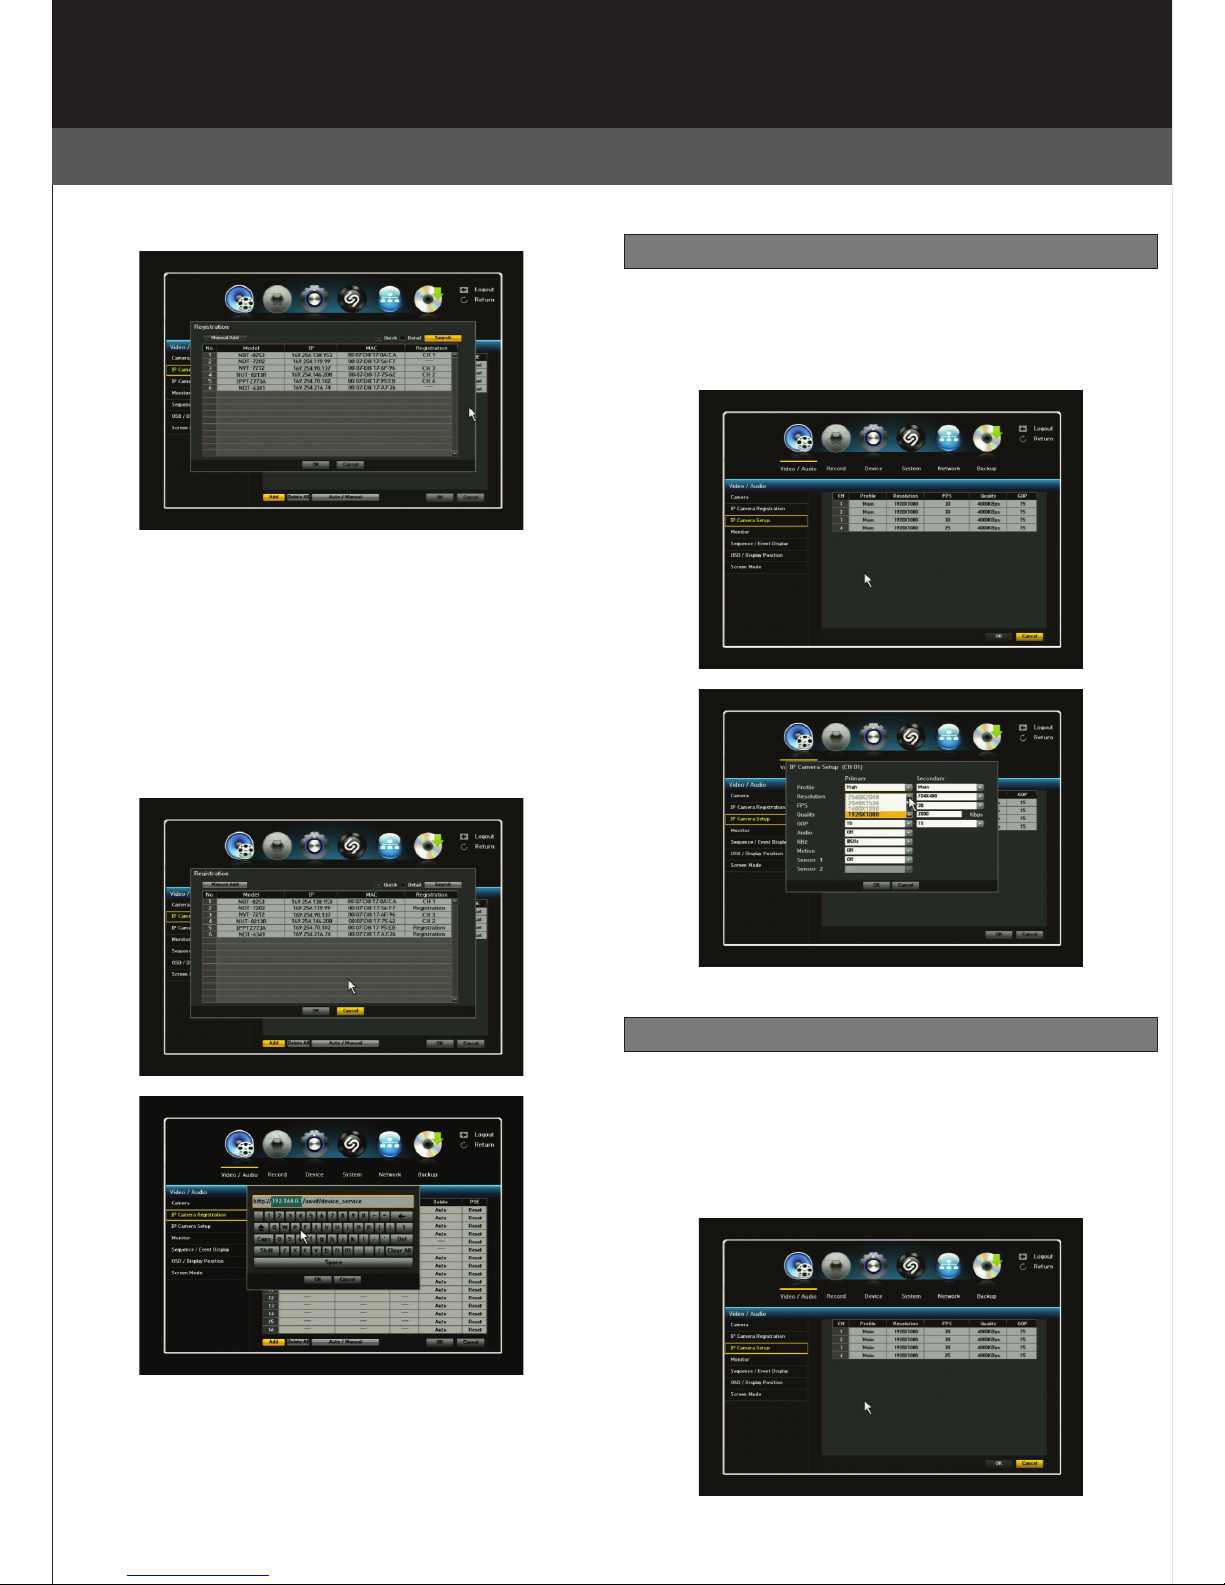
Quick search: To search quickly for cameras the user must enter
the camera ID and Password.
Detail search: In this case the system will automatically check
for all camera ID's and passwords and will generally take
longer than "Quick Search".
Manual add: To manually add an ONVIF compliant camera
the user must enter the full IP address.
Ex. “http://xxx.xxx.xx.xx/onvif/device_service”.
In this case, the IP camera must support Onvif.
IP Camera Setup
The user can set up the IP camera details: Prole, Resolution,
FPS, Quality, GOP, Motion, Sensor and Audio.
For motion detection and event recording function, the user
select the Motion as ON position.
Record Quality Setup
The user must set the recording quality for each camera for both
Normal and Event conditions. The user can set the “Secondary”
Stream for the normal condition and the “Primary” Stream for the
event condition. This function allows the user to save the HDD
recording size. If you click the Setup Tab, the IP Camera Setup
window will be appeared.
 Loading...