

Page 1
Page 2

Page 3
3
CAUTION
TO REDUCE THE RISK OF ELECTRIC SHOCK DO NOT
REMOVE COVER (OR BACK).
NO USER-SERVICEABLE PARTS INSIDE.
REFER SERVICING TO QUALIFIED SERVICE PERSONNEL.
The lightning flash with arrowhead symbol, within an equilateral triangle, is
intended to alert the user to the presence of uninsulated “dangerous voltage”
within the product’s enclosure that may be of suf ficient magnitude to constitute
a risk electric shock.
The exclamation point within an equilateral triangle is intended to alert the user
to the presence of important operating and servicing instructions in the literature
accompanying the appliance.
DISPOSAL OF USED ELECTRICAL & ELECTRONIC EQUIPMENT
The meaning of the symbol on the product, its accessory or packaging indicates that this
product shall not be treated as household waste. Please, dispose of this equipment at
your applicable collection point for the recycling of electrical & electronic equipments
waste. In the European Union and Other European countries which there are separate
collection systems for used electrical and electronic product. By ensuring the correct
disposal of this product, you will help prevent potentially hazardous to the environment
and to human health, which could otherwise be caused by unsuitable waste handling of
this product. The recycling of materials will help conserve natural resources. Please do
not therefore dispose of your old electrical and electronic equipment with your household
waste. For more detailed information about recycling of this product, please contact your
local city office, your household waste disposal service or the shop where you purchased
the product.
WARNING: To reduce the risk of fire or electric shock hazard, do not expose this appliance to
rain or moisture.
Caution
Page 4
4
1. Cleaning
Unplug the LCD monitor from the AC power outlet before cleaning. Do not use
liquid cleaner or aerosol cleaner. Use a soft and damp cloth for cleaning.
2. Attachments
Do not use attachments not recommended by the LCD monitor equipment
manufacturer as they may result in the risk of fire, electronic shock or other
injury.
3. Water and Moisture
Do not place the LCD monitor near water, for example:- near a bathtub, kitchen
sink, laundry tub, in a wet basement or near a swimming pool, or the like.
4. Heat
Keep the LCD monitor away from heat sources such as radiator, heater, stoves
and other heat-generating products.
5. Setting
Do not place the LCD monitor on an unstable platform, for example:- a stand or
table. Placing the LCD monitor on an unstable base can cause the LCD monitor
to fall resulting in personal injuries as well as damage to the LCD monitor. Use
only a platform recommended by the manufacturer.
6. Wall or Ceiling Mount
When mounting the product on a wall or ceiling be sure to install the product
using the designated mounting tools according to the method recommended by
the manufacturer.
7. Power
The LCD monitor should be operated only from the type of power source
indicated on the marking label. If you are not sure of the type of power supplied
to your home consult your monitor dealer or local power company.
8. Pixels
The LCD monitor panel is a high technology product with thousands of thin film
transistors which give you super-fine picture detail. Occasionally a few nonactive pixels may appear on the screen as a fixed point of blue, green or red.
Please note that this does not affect the performance of your product and can
be very difficult to even see.
9. Moving
When moving the product place your fingers of one hand in the socket on the
back of the LCD monitor and support the front of the LCD monitor with the other
hand. Please make sure no pressure is applied to the screen itself as it can and
will damage the sensitive LCD pixels within the screen.
Safety Precautions
Page 5
Important Safeguards 6
Supplied Accessories 8
Functional Overview 9
Preparation Case 11
Start Up
OSD Menu Structure 12
Picture Menu 13
Function Menu 14
PC Menu 15
OSD Menu 16
Troubleshooting 17
5
Contents
Page 6

6
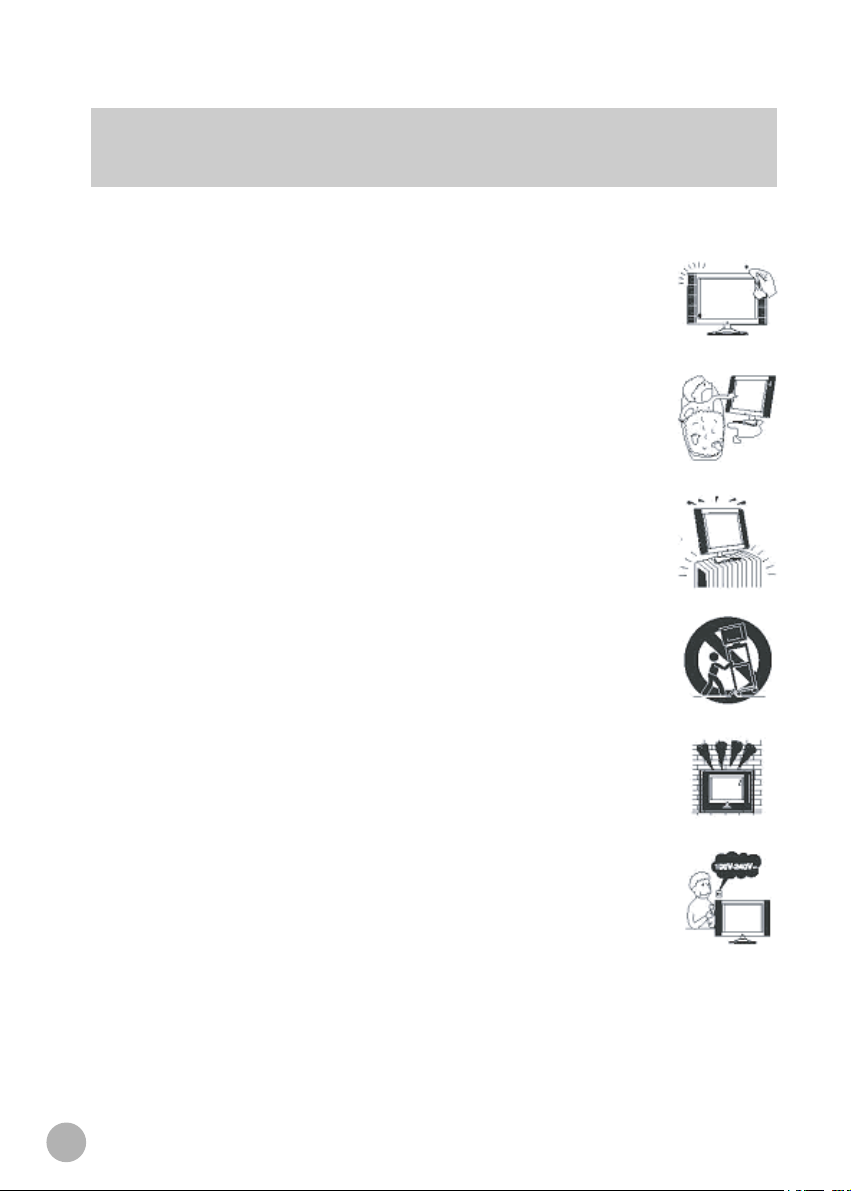
Location
Heat, Moisture, Dust, Vibration Position your LCD monitor so that bright light or
sunlight doesn’t fall directly onto the screen. Care should be taken not to expose the
set to any unnecessary vibration, moisture, dust or heat. Do not expose the set to
dripping or splashing.
Ventilation
Also ensure that the set is placed in a position to allow a free flow of air.
Do not cover the ventilation openings on the back cover.
Leave at least 10 cm around each side of the monitor set.
Mounting
This set can be positioned by using the table top stand or wall mounting bracket.
When you install the set using the wall mounting bracket, fix it carefully so it is secure.
Object Entry
Do not insert foreign objects, such as needles and coins, into the ventilation openings.
Lightning Strikes
You should disconnect your set from the mains and the aerial system during
thunderstorms.
Cleaning
Unplug the set from the mains before cleaning.
Dust the set by wiping the LCD screen and the cabinet with a soft, clean cloth.
If the screen requires additional cleaning, use a clean, damp cloth.
Do not use liquid cleaners or aerosol cleaners.
Do not rub or strike the LCD with anything hard as this may scratch or damage the
LCD permanently.
Service
Never remove the back cover of the set as this can expose you to high voltage and
other hazards.
If the set does not operate properly,unplug it and call your dealer.
Important Safeguards
Page 7

7
Important Safeguards
WARNING: FOR CONTINUED SAFETY, REPLACE POWER ADAPTOR ONLY WITH
MANUFACTURER'S RECOMMENDED MODELS
FEDERAL COMMUNICATIONS COMMISSION
RADIO FREQUENCY INTERFERENCE STATEMENT
NOTE : This equipment has been tested and found to comply with the limits for a
Class A digital device, pursuant to Part 15 of the FCC Rules. These limits are designed
to provide reasonable protection against harmful interference in a commercial
installation. This equipment generates, uses and can radiate radio frequency energy
and, if not installed and used in accordance with the instructions, may cause harmful
interference to radio communications. However, there is no guarantee that interference
will not occur in a particular installation. If this equipment does cause harmful
interference to radio or television reception, which can be determined by turning the
equipment off and on, the user is encouraged to try to correct the interference by one or
more of the following measures :
- Reorient or relocate the receiving antenna.
- Increase the separation between the equipment and receiver.
- Connect the equipment to an outlet on a circuit different from that to
which the receiver is connected.
- Consult the dealer or an experienced radio or TV technician for help.
CAUTION : Any changes or modifications not expressly approved by the
party responsible for compliance could void the user’s authority to operate the
equipment.
CANADIAN NOTICE
AVIS CANADIEN
This Class A digital apparatus meets all requirements of the Canadian
Interference-Causing Equipment Regulations.
Cet appareil numérique de la Class A respecte toutes les exigences du
Règlement sur le matériel brouilleur du Canada.
European Union Notice
Products with the CE Marking comply with both the EMC Directive (89/336/EEC) issued by
the Commission of the European Community.
Compliance with these directives implies conformity to the following European Norms (in
brackets are the equivalent international standards):
• EN55022 (CISPR 22) - Electromagnetic Interference
• EN55024 - Immunity Test for ITE Product
• EN61000-3-2 (IEC555-2) - Power Line Harmonics
Page 8

8
Supplied Accessories
Make sure that the following accessories are provided with the product.
CCTV MONITOR Power Cord
15 Pin Signal Cable(option) Adapter
User's Guide
If any item is missing or damaged, please contact your dealer.
Please keep the box and packaging materials so that you may properly store or
transport your CCTV monitor.
Page 9

9
The CCTV monitor is designed for use in a small environment or for those who
need more space.
The convenient and user-friendly on-screen display allows for easy and accurate
adjustments of the various features.
The CCTV monitor complies with the VESA Display Data Channel (DDC)
specification for Plug and Play compatibility.
The CCTV monitor features Advanced Colour Controls and fine-tuning to meet your
own personal settings or application requirements.
PC MODE - use the on-screen controls to adjust the colour temperature for the best
possible screen colour and intensity.
Selecting the Reset button in PC Mode will activate the Auto Colour to determine
whether your monitor is functioning normally, not receiving a signal, or is receiving a
signal that is out of scanning range.
The CCTV monitor has a native resolution of 800 X 600. Optimal for any PC
configuration you require.
The CCTV monitor can be connected to various types of video devices with
supporting video input signals like Composite video(CVBS), VGA
The CCTV monitor is equipped with a remote controller enabling function control for
PC modes.
Functional Overview
Page 10

10
① Turn off the computer and monitor.
② Connect the 15 pin signal cable to the output port of the video card in your computer
and monitor.
③ Connect the audio cable to the output port of the sound card in your computer.
(Optional)
④ Plug the DC jack into the DC in port located on the back of the monitor.
⑤ Plug the power cord into the AC receptacle of the Adapter.
⑥ Plug the other end of the power cord into the AC outlet.
Functional Overview
Power Cord
Signal Cable
DC 12V
CAM
OUT
CAM
IN
Page 11

11
Preparation Case #1
Operation & Adjustment (Front Control Panel)
1 POWER Indicator Shows both normal operation and power management
status with power indicator light.
2 Source Selects input source and after pressing SOURCE sets
menu functions
3 Down Selects menu
4 Up Selects menu
While the PC mode, launches the AUTO COLOUR
function directly.
5 POWER Switches the monitor on and off.
6 Menu Turns the OSD window on / Turns the OSD window off -
and moves from sub menu to top menu in the OSD
window to adjust picture features for installation and
functions
7 Left Decreases the value of selected function
8 Right Increases the value of selected function
Page 12

12
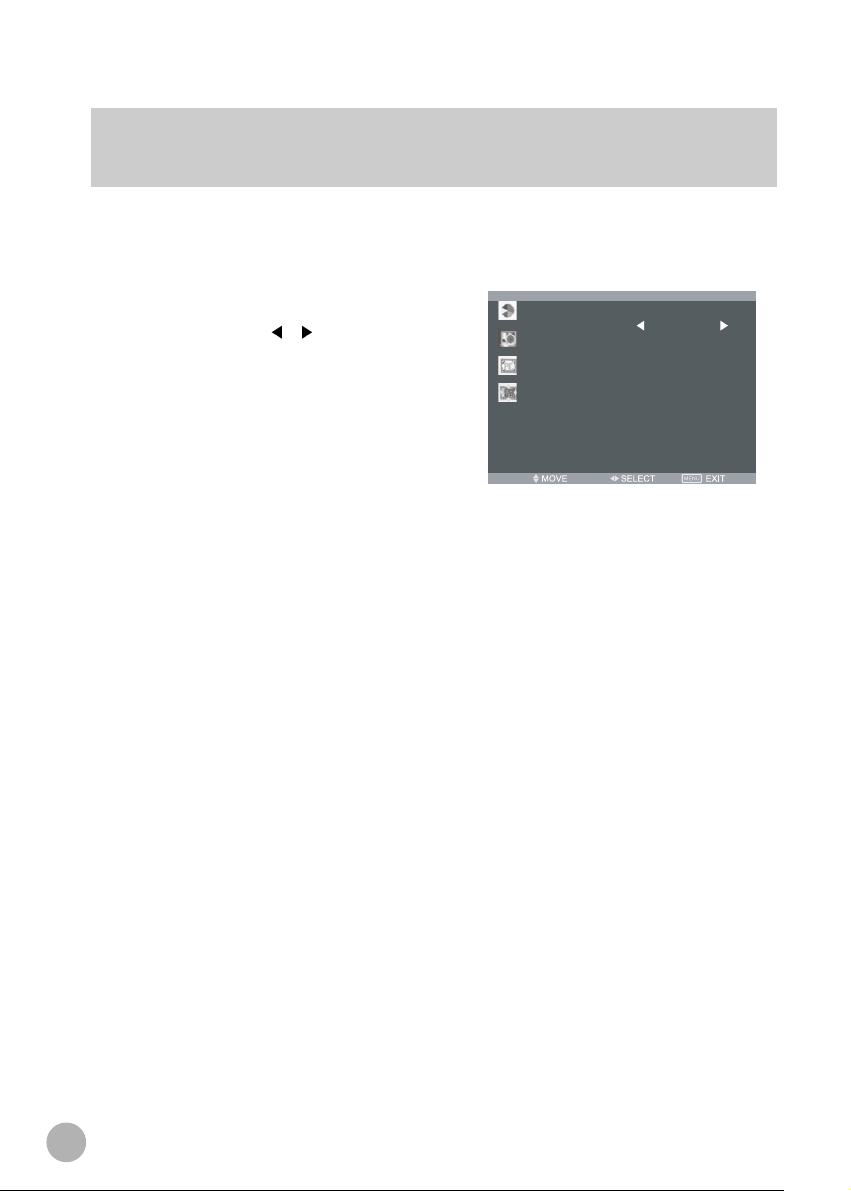
OSD Menu Structure
OSD(On Screen Display) menu allows use to control or adjust various features and
setting in Accordance with his/her preferences.
Start Up
PICTURE
CONTRAST
BRIGHTNESS
HUE
COLOUR
SHARPNESS
COLOUR TEMP. Normal
SCALING
PICTURE MODE
CONTRAST
BRIGHTNESS
H-POSITION
V-POSITION
CLOCK
COLOUR MODE
AUTO COLOUR
FULL
User
PC
FUNCTION
SLEEP TIMER 45
LANGUAGE
H-POSITION
V-POSITION
OSD TIMER
TRANSPARENT
Information
RECALL
OSD
English
Page 13

13
Start Up
1.Picture Menu (CAM mode only)
1) Press MENU button to activate OSD.
2) Press UP/DOWN( / ) button to get into
Picture menu.
3) The contrast, Brightness, HUE, Colour,
Sharpness, Colour Temp,Scaling, Picture
Mode can be adjusted.
Press LEFT/RIGHT( / ) button to adjust
parameters.
a. Contrast
This control allows you to adjust the contrast level of the picture.
b. Brightness
This control allows you to adjust the brightness level of the picture.
c. HUE
This control allows you to adjust the hue
d. Colour
This control allows you to adjust the edge definition of the picture.
e. Sharpness
This control allows you to compensate for the Colour variation of the picture.
f. Colour Temp.
Select the colour temperature of screen image from Normal/Warm/Cool.
g. Scaling
Not used.
h. Picture mode
The picture mode feature allows you to choose different modes
(Standard/Movie/Vivid/User) of picture mode settings.
Choose the one that best suits the type of program that you want to watch.
CONTRAST
BRIGHTNESS
HUE
COLOUR
SHARPNESS
COLOUR TEMP. Normal
SCALING
PICTURE MODE
PICTURE
FULL
User
Page 14
14
Start Up
2. Function Menu
Sleep Timer
Press LEFT/RIGHT( / )button, you can
select your desirable setting
time to turn off the LCD Screen.
The timer will start to count down just after you
select.
FUNCTION
SLEEP TIMER 45
Page 15

15
Start Up
3. PC Menu (PC Mode only)
Press LEFT/RIGHT( / ) button, you can see
below picture.
Move by UP/DOWN (
/ ) where you want to
adjust.
1) Contrast
This control allows you to adjust the contrast
level of the picture in PC mode.
2) Brightness
This control allows you to adjust the brightness level of the picture in PC mode.
3) H-Position
Press LEFT/RIGHT( / ) button, you can adjust the horizontal position of display.
4) V-Position
Press LEFT/RIGHT( / ) button, you can move the center of display image.
After selecting position menu, you can move the image.
5) Clock
Press LEFT/RIGHT( / ) button, you can adjust the horizontal size of display.
6) Phase
Press LEFT/RIGHT( / ) button, you can select fine tuning of display accuracy on
the screen.
7) Colour mode
Press LEFT/RIGHT( / ) button, you can see the Colour mode adjust OSD Menu.
a. Colour temp
Press LEFT/RIGHT(
/ ) button, you can select Colour temperature
presetting.
b. Red, Green, Blue
You can adjust the Colour temperature R/G/B individually.(User mode only)
8) Auto Colour
Automatically eliminate any unstable image.
CONTRAST
BRIGHTNESS
H-POSITION
V-POSITION
CLOCK
COLOUR MODE
AUTO COLOUR
PC
Page 16

16
Start Up
4. OSD Menu
Adjust the OSD Language, H-Position, VPosition, OSD Timer, Transparent, Recall.
1) Language
Press LEFT/RIGHT( / ) button, you can
select the OSD Language.
2) H-Position
Press LEFT/RIGHT( / ) button, you can
move the OSD window left and right.
3) V-Position
Press LEFT/RIGHT( / ) button, you can move the OSD window up and down.
4) OSD Timer
Press LEFT/RIGHT( / ) button, you can adjust OSD Time.
5) Transparent
Press LEFT/RIGHT( / ) button, you can adjust OSD Transparent.
6) Information
Allows the monitor display settings.
7) Recall
Press LEFT/RIGHT( / ) button, you can system recall.
LANGUAGE
H-POSITION
V-POSITION
OSD TIMER
TRANSPARENT
Information
RECALL
OSD
English
Page 17

17
Troubleshooting
Symptom Check
No Video or S-Video mode
Check Video cable is connected to the monitor and set
to Video mode
Poor colour in Video
Adjust AUTO COLOR on the OSD menu.
Blurred picture in Video Adjust CLOCK in the OSD menu.
Picture jitter (VGA mode)
Adjust clock to set the screen position and adjust until no
noise is detected in the OSD Menu.
No picture (VGA mode) Check mains switch and the PC power switch are ON
Power LED not lit (VGA mode)
Check main switch is ON. Check if the power cord is
connected
Image is unstable (VGA mode)
Check signal cable is connected to video card correctly
Image not centred, too small Adjust clock or H&V POSITION
or too large (VGA mode)
Picture bounce or wave Magnetic interference from electrical devices are too close to
pattern (VGA mode) the monitor
Picture is blurred (VGA mode)
Adjust contrast and brightness
Page 18

MEMO
Page 19

Page 20

S/N:9978641906B
 Loading...