

Page 1

Page 2

UNIX
PC
3.51
Telephone
Manager
Software
This
section
Telephone
information
it
with
Guide.
in
this
NEW
FEATURES:
1
Manager
your
Page
guide.
Page
Screen
the
Screen
To
the
a
b
c
contains
version
before
AT&T
using
UNIJ(Bl
numbers
4-13.
or
the
Telephone
appeC\rs.
change
the
Telephone
Select
press
be
displayed.
Select / Phone
showing
form.
Highlight
field.
important
3.51.
the
PC
below
You
refer
can
Directory
Manager.
screen
Manager:
/Preferences/
<Enter>.
the
Telephone
the
information
Please
Telephone
Manager,
Telephone
to
related
choose
whether
appears
By
default,
that
appears
in
The
Preferences
Manager / and
Manager
First
Screen
review
Manager
when
when
your
press
for
using
this
and
keep
User's
information
the
Call
you
open
the
Call
you
open
Office
menu
will
<Enter>,
preferences
Displayed
and
d
e
As
before,
from
Screen,
to
the
Press
Screen
Press
the
and
Directory.
<Mark>
or
<Enter>
you
top
<Page>
to
Directory.
to
may
press
of
the
to
select
save
either
the
<Shift>-<Page>
Directory
move
from
change.
to
the
Call
the
the
Call
to
move
Call
Screen
1
Page 3

~elephone
Manager
2
Page
available
typed
3.51
4-53.
from
Important
for
selecting
a UNIX
A
new
shell,
Information
command,
telephone
phtoggle,
lines.
is
When
switches
PC
as
follows:
Single-line
from
to
or
from
to
Two-line
from
to
or
from
to
Two-line
from
to
phtoggle
telephone
systems
VOICE
DATA
DATA
VOICE
1
1
systems
VOICE
VOICE
VOICE
VOICE
systems
VOICE
VOICE
<Return>
lines
1:
IDLE
1:
IDLE
set
1:
IDLE
1:
IDLE
1:
IDLE
1:
IDLE
set
1:
IDLE VOICE 2 : IDLE
1:
IDLE
to
to
VOICE
VOICE
connected
It
DATA
2
VOICE
VOICE
DATA
2
It
VOICE
2:
2:
2:
to
the
DATA
2
IDLE
IDLE
VOICE 2
IDLE
UNIX
or
PC
access
VOICE
VOICE
Owner's
from
VOICE
to
VOICE
See
the
AT&T
information
2
on
1:
1:
UNIX
how
IDLE
IDLE
to
2:
2 : IDLE
a UNIX
IDLE
Manual
shell.
for
Page 4

Telephone
3
Page
for
UNIX
4-55.
placing
shell,
Manager
A
new
voice
3.51
Important
command,
calls.
phdial,
When
Information
is
available
typed
from
a
dials
you
Directory.
appears,
call
History"
of
4
Page
You
just
mouse
end
a
b
To
anywhere
shell:
phdial
the
telephone
had
allowing
as
described
in
this
guide.
4-59.
may
place
the
Call
and
of
the
Point
and
press
pointer
magic
with
the
that
appears
press
automatically
place
a
on
nnn-nnnn
selected
The
the
using
Dialing
voice
Screen
the
new
status
to
the
will
wand.
magic
<Bl>.
voice
your
number
Take
you
under
calls
telephone
line.
telephone
<Bl>.
change
on
dials
call
UNIX
<Enter>
nnn-nnnn
the
number
Notes
to
keep a record
"Keeping
Telephone
with
the
from
or
Directory,
To
The
to
wand,
point
your
The
the
to a number
PC
screen
just
from
on
Call?
Call
Manager
Telephone
any
window,
icon
use
icon
on
this
with
arrow-shaped
a
hand
to
any
UNIX
PC
screen
Telephone
number.
while
as
your
window
of
Notes
the
and
section
Icon.
using
the
left
feature:
the
mouse
mouse
holding
number
Manager
appearing
in
a UNIX
if
not
the
a
and
a
Using
icon
mouse
holding
b
Point
and
the
and
pointer
to
press
press
a
magic
the
<Bl>.
mouse,
number
point
to
<Bl> . The
will
change
wand.
with
the
telephone
arrow-shaped
to
the
magic
a
hand
wand
3
Page 5

Telephone
Manager
You
may
and
place
the
telephone
mouse
a
Point
and
Press
are
icon.
wand
as
b
with
digit
<Bl>.
the
3.51
Important
also
and
you
display
a
voice
icon
dial
to
the
press
<Bl>
not
still
A
dial
becomes a hand
move
the
in
Each
window.
call
and
pad:
telephone
<Bl>.
again,
pointing
pad
it
pointing
the
telephone
digit
Information
a
picture
to
any
the
mouse.
The
over
icon
magic
or
press
appears,
with a pointing
the
finger,
appears
of a dial
number
with
wand
at
the
and
pad.
point
number
at
by
To
the
appears.
<B2>
telephone
the
and
the
using
use
mouse
if
magic
finger
to
press
top
pad
the
you
each
of
c When
Three
[WAIT]
backspace
made
the
before
sign
dialed
be
redialed.
5
On
single
mode,
console,
automatically
After
switches
telephone
press
other
and
key,
while
call
to
proceeding,
( =
).
at
the
line
when
the
back
you
number,
<Bl>.
keys
[LAST
and
entering
wait
[LAST
top
systems
you
the
switch
data
VOICE
have
are
on
#].
lets
numbers.
for
and
#]
of
the
place
Telephone
call
mode.
entered
point
the
[BACK]
you
a
secondary
is
shows
window,
that
a
the
is
the
to
dial
correct
shown
the
which
are
da
ta
call
Manager
line
complete,
to
[DIAL]
pad:
works
[WAIT]
dial
as
an
last
set
DATA
the
complete
mistakes
to
from
[BACK],
like
causes
tone
equals
number
may
then
VOICE
will
mode.
line
and
the
a
4
Page 6

Telephone
Manager
3.51
Important
Information
6 When
TECHNICAL
1
2
3
terminal
you
single
up
you
phone
"New
may
PC
TIPS:
Page
telep~one
as a data
may
line
Features",
also
to
switch
2-7.
connected
reconfigure
Setup
Page
form.
4-33.
special
history
and
telephone
suppressed.
other
Page
the
can
fields
4-59.
magic
only
place
connected
line.
use
the
from
press
the
Ensure
to
your
telephone
When
dialing
for
a
Call
still
You
wand
be
used
a
data
to
line,
phtoggle
VOICE
Page 2 of
[LINE
line
UNIX
you
character
telephone
number
history
appear
cannot
or
dial
to
a UNIX
that
From
command
to
SELECT]
into
that
PC
lines
use
of
the
place
pad.
place
call
PC
line
the
remote
DATA
this
on
DATA
all
telephone
are
idle
with
the
hyphen
to
call,
person
information
in
the
a
data
voice
from
host
must
to
switch
mode
section).
the
mode.
before
the
suppress
only
dialed
History
call
These
calls.
a
remote
with
be
set
terminal,
the
(Item
You
host
UNI~
lines
you
Telephone
( - )
as
call
the
name
are
in
the
List.
using
features
a
2 f
a
4
Page
processing
the
feature
4-62.
Call
Allow
if
Screen
to
an
the
you
are
or
Directory
external
UNIX
placing
modem.
PC
a
using
ample
data
the
time
call
autodial
for
from
5
Page 7

elephone
Manager
5
Pages
list,
in a file.
a
3.51
Important
4-80,
you
4-82.
must
To
Select
the \ Save
the \ Save,
warning
command.
save
do
In
this:
then
Information
order
the
contents
History
clear
to
print
List
History
the
History
of
this
\ command
list
or
List\
b
Enter
contain
"Save
c
Press
Filecabinet.
d
Return
saved
e
Press
This
procedure
History
Manager
3.51
of
the
the
History
<Enter>
to
history
<Print>
List
options
releases
Telephone
name
saved
the
is
necessary
have
Manager.
of
the
history
List"
to
window.
save
Filecabinet
list.
to
print
found
been
in
removed
file
this
and
the
file.
because
earlier
that
list
list
select
the
Telephone
from
will
in
the
in
the
the
Print
Version
6
Page 8

©1985, 1986
All
Rights Reserved
Printed
in
AT&T
USA
NOTICE
The information
assumes no responsibility for any errors that may appear
in
this document is subject to change without notice.
AT&T
in
this document.
Page 9

Preface
Welcome
~.
up
and
is
organized
How
to
You
should
UNIX
PC.
Getting
guide.
begin
with
acquainted
familiar
Telephone
the
UNIX PC
to
the
This
use
the
o
Introducing
features
need
o
Setting
install
set
o
Getting
information
with
o
Using
information
Telephone
o
Appendix
Manager
o
Glossary
Telephone
Proceed
already
I f
Started
If
you
Getting
with
with
Manager
AT&T
guide
UNIX PC
into
the
to
get
Up
the
up
the
Started
Telephone
Telephone
file
you're
Guide
are
the
Telephone
for
Telephone
UNIX ® PC
provides
Telephone
following
Telephone
of
Telephone
started.
Telephone
software,
telephone,lines.
provides
and
exercises
Manager.
Manager
and
detailed
Manager
A
lists
suffixes
names.
contains
Manager
be
familiar
not,
turn
before
new
to
Started
UNIX PC
in
basics.
Manager,
complete
Manager
Telephone
information
Manager.
sections:
Manager
Manager
Manager
and
how
introductory
to
contains
procedures
features.
definitions
terminology.
with
to
the
the
continuing
Telephone
this
Once
guide
you've
refer
information
features.
for
AT&T
Manager
on
how
This
describes
and
what
describes
to
connect
get
you
reference
Telephone
of
Office
basics
UNIX ® PC
with
Manager,
to
become
become
to
Using
about
for
this
User's
to
set
guide
the
you'll
how
started
all
and
of
the
all
to
and
For
see
more
the
detailed
AT&T
UNIX®
information
PC
Owner's
about
Manual.
using
the
UNIX
PC,
i
Page 10

Preface
Also
recommended
setup
and
included
Management
o
o
use
in
binder:
AT&T
~
AT&T
during
your
are
AT&T
UNIX
UNIX
the
data
UNIX®
® PC
® PC
guides
describing
communications,
PC
Communications
Terminal
Remote
Emulation
Access
which
User's
terminal
are
User's
Guide
ii
Page 11

Contents
1
Introducing
What
You
Telephone
Will
Need
Manager
Conventions
2
Setting
Getting
Installing
Up
Telephone
Ready
Telephone
Manager
Manager
Software
Identifying
Manager
Connecting
Setting
Configuring
Getting
the
Telephone
Hardware
Telephone
Up
Telephone
the
Modem
Reacquainted
Lines
Lines
with
Your
Telephone
3
Getting
Opening
Started
and
Using
Telephone
Manager
Using
Using
the
the
Telephone
Call
Screen
and
Directory
Keeping
Track
of
Calls
Summary
1-1
1-2
1-2
2-1
2-1
2-1
2-3
2-4
2-5
2-9
2-10
3-1
3-3
3-7
3-13
3-19
3-21
iii
Page 12
Contents
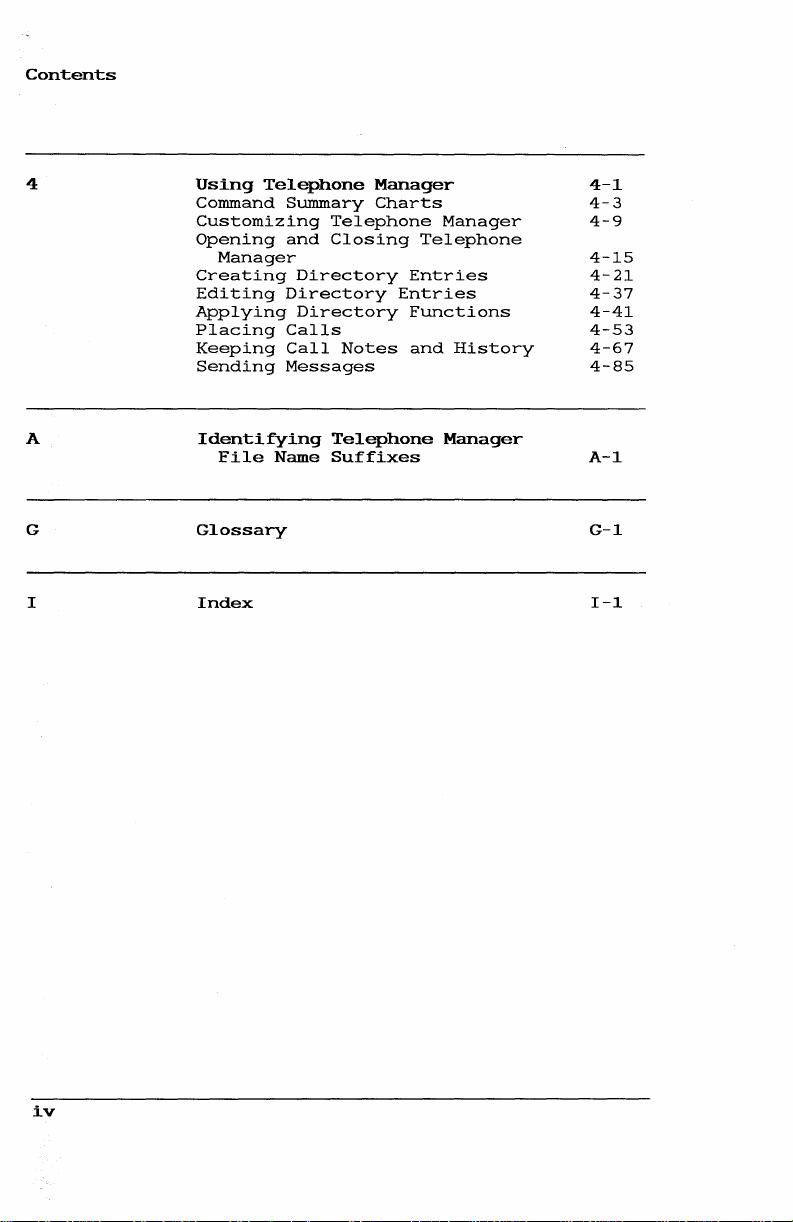
4
A
G
I
Using
Telephone
Command
Customizing
Opening
Manager
Creating
Editing
Applying
Placing
Keeping
Sending
Identifying
File
Name
Glossary
Index
Summary
Telephone
and
Closing
Directory
Directory
Directory
Calls
Call
Notes
Messages
Telephone
Suffixes
Manager
Charts
Telephone
Entries
Entries
Functions
and
Manager
History
Manager
4-1
4-3
4-9
4-15
4-21
4-37
4-41
4-53
4-67
4-85
A-I
G-l
1-1
iv
Page 13
1
Introducing
What
You
Will
Telephone
Need
Manager
1-1
1-2
Conventions
1-2
Page 14

Page 15

This
which
gUide
let
you
o
Create
lets
touch
o
Easily
selecting
timing
automatically
selecting
o
Take
pad"
are
for
o
Keep a record
the
called,
easy
that
o
Send
purchase
can
Manager
written
1
Introducing
discusses
perform
you
of a single
notes
that
easy
future
date,
to
can
electronic
send
all
Telephone
the
a
custom,
make
voice
manage
a
a
call,
telephone
line,
disconnecting
redialing
on-scraen
on
telephone
appears
to
display
reference.
of
total
and
telephone
display
be
used
AT&T
UNIX PC
written
to
another
communication
Telephone
following:
on-screen
and
key.
placing
key
automatically.
and
all
calls.
time
of
number.
and
can
for
reference
mail
messages.
Electronic
messages
user's
is
Manager
Manager
directory
data
calls
functions
a
call
a
the
last
functions.
calls
are
saved
The
the
call,
be
stored
from
UNIX PC
preferred.
features,
at
such
on
call
number
using
These
in a file
log
person
This
as a file
or
billing.
When
Mail,
Telephone
when
that
the
hold,
and
a
"note
records
log
you
as
by
notes
is
you
o
Place
an
easy
through
using
modem) .
If
you
data
the
AT&T
(ATE)
communications
data
calls.
way
to
set
UNIX
to
serial
use
an
want
the
RS-232
communications,
Asynchronous
software
or
package
Telephone
up
PC's
Note
Telephone
you
some
and
make
built-in
connection
must
Terminal
other
software.
Manager
data
modem
Manager
install
Emulator
provides
calls
or
(cable
for
by
or
1-1
Page 16

Introducing
Telephone
Manager
Depending
enabled,
features
Refer
in
guide
to
the
to
hardware
What
You
To
use
will
need
connected.
Manager
line
to
Telephone
AT&T
Asynchronous
some
other
on
whether
you
might
described
o
If
your
hardware
Canada),
telephone
procedure
lines
o
If
your
enabled,
directory
Your
communications
"Identifying
Setting
determine
is
enabled.
Will
Need
UNIX PC
a UNIX PC
To
features,
use
for
Manager
communications
your
or
in
UNIX PC
(primarily
you
lines.
lets
for
voice
UNIX PC
you
lookup
system
Up
Telephone
whether
Telephone
with
take
full
you
data
calls.
for
Terminal
might
this
can
you
can
does
the
may
data
UNIX PC
not
guide:
has
working
in
take
The
set
and
data
telephone
still
and
not,
functions.
Telephone
Manager
your
Manager
at
least
advantage
also
If
calls,
Emulator
package
telephone
be
able
to
telephone
the
United
advantage
flexible
up
line
the
communication
calls.
hardware
take
advantage
notetaking
however,
support
Manager
section
UNIX PC
for
one
voice
of
telephone
telephone
the
want a second
you
plan
you
to
must
(ATE)
software.
hardware
use
all
States
of
two
setup
is
not
of
features.
Hardware"
of
this
calls,
line
Telephone
telephone
use
install
software
is
the
and
the
you
the
or
Conventions
This
guide
and
displays
Information
boldfaced
Information
example:
1-,2
uses
that
displayed
type.
Please
you
Type
the
can't
For
login:
type
meeting
following
be
on
the
example:
is
shown
notation
duplicated
screen
in
boldfaced
is
to
in
shown
simulate
print:
type.
keys
in
For
Page 17

Keys
used
The
on
in
mouse
the
keyboard
procedures.
<Exit>
buttons
are
For
are
Introducing
shown
example:
represented
enclosed
as
Telephone
in
follows:
<>'s
Manager
when
Screen
Items
I
I's.
Key
combinations
separated
To
type
press
The
exit
shown
The
help
is
shown
The
symbol
changes
Left
Middle
Right
keys
are
[HOLD]
to
select
For
example:
I
Telephone
by a hyphen.
<Shift>-<Call>
this
<Call>,
symbol
as:
[X]
symbol
as:
[7]
at
is
shown
mouse
mouse
mouse
enclosed
(highlight)
are
key
and
in
in
the
button
button
button
in
I
represented
For
combination,
then
release
the
lower-left
the
upper-right
bottom
as:
of a form
<B1>
<B2>
<B3>
[]
'so
from
menus
by
example:
you
both
For
the
hold
keys.
corner
corner
used
example:
are
enclosed
two
keys
down
<Shift>,
of a window
of a window
to
implement
in
is
[OK]
1-3
Page 18

Page 19

2
Setting
Up
Telephone
Manager
2-1
Getting
Installing
Software
Identifying
Hardware
Connecting
Setting
Configuring
Getting
Telephone
Audio
The
Monitor
Status
Ready
Telephone
the
Telephone
Telephone
Up
Telephone
the
Modem
Reacquainted
Line
Display
Manager
Lines
Lines
with
2-1
2-1
Manager
2-3
2-4
2-5
2-9
Your
2-10
2-11
2-11
Page 20

Page 21

This
section
Manager
Once
you
telephone
lines.
and
connect
2
shows
software.
install
to
your
This
section
telephone
Setting
you
the
computer
up
Telephone
how
software,
briefly
lines.
to
install
and
describes
you
can
connect
Manager
the
connect
your
how
Telephone
your
telephone
to
set
up
Refer
complete
See
information
Getting
Before
please
Installjng
You
Administration
To
to
the
install
install
the
information
AT&T
Ready
you
do
o
1
2
AT&T
UNIX PC
UNIX PC
about
install
the
following:
Look
for
listed,
installed.
"Installing
below.
Telephone
Telephone
menu
Telephone
Select I Administration
press
Select
Administration
about
Owner's
setting
your
Telephone
Telephone
Manager
in
Manager:
<Enter>.
ISoftware
connecting
up
Telephone
If
it
Telephone
Manager
the
Office
Setup I from
menu
Installation
Manual
the
lines.
Manager
in
your
Manager
is
not
listed,
Manager
Software
software
of
I
from
and
press
Guide
telephone
for
more
Office.
software
Software"
by
any
the
the
<Enter>.
software,
is
refer
using
user.
Office
for
lines.
If
already
the
it
to
is
and
2-1
Page 22

Setting
up
3
4
Telephone
You
see
IIJ·
-
Install
Install
Remove
Show
Select
press
A
message
floppy
Insert
press
Manager
this
Softllare
Software
Installed
Installed
IInstal1
<Enter>.
prompts
disk.
the
Telephone
<Enter>.
Software
hom Flo
sent
by
Software
Software
Software
you
menu:
Electronic Hail
from
to
install
Manager
Floppy I and
the
first
floppy
disk
and
5
6
7
This
completes
installation.
2-2
Several
the
message
The
message
When
the
complete,
remove
that
certain
updated.
A
window
installation
Remove
envelope.
Press
Close
<Enter>.
the
the
messages
first
a
the
floppy.
appears
the
floppy
installation
Telephone
appear
Checking
Install
part
message
files
to
is
complete.
for
in
of
tells
Then
are
tell
disk
Manager
briefly,
Size
progress
the
installation
you
messages
being
you
and
replace
windows.
software
followed
file.
appears.
it
is
tell
installed
that
the
it
safe
you
and
in
by
is
to
its
Page 23

If
you
Manager
must
Emulation
plan
for
install
(ATE)
communications
plan
to
UNIX PC
for
install
Terminal
installation
Setting
Note
to
use
data
communications,
the
Asynchronous
software
package
ATE,
Emulation
instructions.
your
refer
up
Telephone
Telephone
or
some
software.
to
User's
you
Terminal
other
If
the
~
Guide
Manager
you
Identifying
Look
at
UNIX PC
If
the
shown
1,
can
and
use
~-~
~-~~-~
~~-.,~~~
~~-.,~~~
~~~~-~
~~~~-~
~~-.,
below,
the
back
telephone
back
panel
Line
the
~-~
~_~
the
Telephone
panel
hardware
of
with
2,
three
your
Telephone
.-----===
'-==-==::..1
Manager
of
your
your
UNIX
connectors
telephone
Manager
Printer
Hardware
computer
is
enabled:
PC
looks
hardware
communications
labeled
is
to
see
like
Phone,
enabled:
~-~~-~
~-~~-~
~-~~-~
~-,.--.,~~~
~~-.,~~~
~~~~~~
~-~~~~
if
your
the
one
Line
features.
you
2-3
Page 24

Setting
If
shown
UNIX PC
the
Up
back
below,
does
communication
Telephone
panel
the
telephone
not
support
features.
of
Manager
your
UNIX PC
the
harware
Telephone
looks
is
like
not
enabled:
Manager
~-~~-~
~-~~-~
~-~~-~
~--,.-~~~~
~~~~~~
~~~~~~
~-~~----.~
the
one
your
Connecting
Although
the
AT&T
included
making
One
telephone
telephone
computer's
Telephone
connecting
UNIX
briefly
sure
to
back
PC
Installation
in
everything
line
the
connector
panel,
Lines
the
this
should
telephone
guide
is
set
be
labeled
as
shown
lines
Guide,
the
as a checklist
up
correctly.
connected
Phone
below:
is
discussed
procedures
from
your
on
your
~-~~-~
~-~~-~
~-~~-~
~--r--'~~~
~~~~~~
in
are
for
2-4
Page 25

The
line
labeled
telephone.
One
telephone
connector
line.
should
to
the
When
one
for
voice
switches
you
place
between
Phone
The
on
UNIX PC
support
"Identifying
Hardware"
computer's
labeled
If
you
be
connected
wall
telephone
calls
the
the
your
forms a link
Line
the
1,
back
telephone
communications.
line
should
Line 1 to
have
two
outlet
for
line
or
line
data
to
call.
telephone
Line
panel
the
above
back
telephone
from
the
data
Setting
between
Note
2,
and
are
hardware
Telephone
for a picture
panel.
be
connected
the
the
connector
second
is
connected,
calls.
or
voice
Up
and
the
your
Phone
plugged
does
Refer
Manager
wall
outlet
lines,
line.
Telephone
automatically
Telephone
connector
computer
connectors
if
your
not
to
of
your
from
the
for
a
second
labeled
it
can
Manager
Line
be
Manager
and
this
line
2
used
when
When
two
up
as
line
voice
and
Setting
Before
tell
the
and
how
telephone
the
Office
Although
UNIX PC
briefly
everything
To
set
telephone
line
Up
you
system
you
lines
setting
Owner's
in
up
your
1
Log
lines,
2
as a data
Telephone
can
work
how
will
be
from
of
install.
up
Manual,
this
guide
is
set
telephone
in
as
lines
or
line
Lines
with
many
using
the
the
lines
the
as a checklist
up
correctly.
install.
are
connected,
1
can
be
line.
Telephone
telephone
these
lines.
Administration
is
discussed
procedures
lines:
both
set
up
Manager,
lines
You
selection
are
for
can
as a voice
you
are
connected,
set
in
the
included
making
be
need
up
~
sure
set
to
the
in
2-5
Page 26

Setting
,rnjij·,,·4imn
Clipboard
Filecabinet
Floppydisk
Preferences
Printers
Telephone
UtllX
Wastebasket
Up
Te1ephone
2
Select I Administration
press
You
see
3
Select
You
see
4
Select
System
Manager
<Enter>.
the
IHardware
the
ITelephone
Change
Changing Password
Date and
Diagnostics Floppy
Disk
Disk Restore
l:tmzjUb,o»mm
Hail Setup
Software Setup
SysteM
User Logins
Administration
Setup I and
Hardware
root
Tillie
Backup
Information
menu.
Setup
password
I
from
I .
the
menu.
press
Office
<Enter>.
and
---
2-6
--
---
Page 27

5
Press
Information
iii·
Is
a telephone
Is
LIHEl
Is
LIHEl
Does
Is
a telephone
Hill
Is
LIltE2
Is
LIltE2
6
To
line
<Mark>
7
If
line,
line?
press
<Enter>
Ielenhooe
line
a -Touch-tonea -Keyset-
LIHEl
LIHE2
a -Touch-tonea -Keyset-
answer
plugged
line
line?
plugged
for
line?
have a -Message Waiting
be used
the
plugged
until
the
line
point
(most
<Mark>
Setting
to
display
form:
Information
into
the
line?
(IRost
(old
phones
into
VOICE
the
calls,
line?
(most pushbutton phones)
(old
phones
IllIII
first
into
the
YES
appears.
1
telephone
to
the
Is
pushbutton
until
YES
up
Telephone
the
Telephone
LIHE 1 port?
pushbutton phones)
w/lighted
Feature·
LIHE 2 port?
or
w/lighted
for
DATA
buttons)
calls?
buttons)
question:
LINE 1 port?,
line
LINE
1 a
phones)
appears.
Manager
IlliII
YES
ItO
ItO
HO
DATA
YES
ItO
Is a telephone
press
is a touch-tone
"Touch-tone"
field
and
If
line
a
bank
performing
point
phones
<Mark>
8
If
your
and
is
AT&T
system
"Message
<Mark>
If
you
telephone
communications
line,
System
1
is
of
lighted
functions
to
the
w/lighted
until
telephone
connected
System
75/85
(PBX),
Waiting
until
have
any
line
or
is a keyset
Administrator.
an
older
type
buttons
like
Is
LINEl a "Keyset"
buttons)
YES
appears.
has a message
to
an
AT&T
business
point
to
the
Feature"
YES
appears.
questions
is
part
(PBX)
of a business
system,
line,
of
telephone,
at
the
hold
bottom
and
transfer,
line?
field
and
waiting
Dimension
communications
Does
field
about
LINEl
and
whether
is a touch-tone
ask
your
with
for
(Old
press
lamp
or
an
have
press
your
Telephone
a
2-7
Page 28

Setting
Up
Telephone
The
are
telephones
System
systems.
telephone
designed
75/85
Manager
electronics
to
work
and
the
business
Note
with
AT&T
Dimension
communications
on
the
ordinary
UNIX PC
or
Telephone
other
communications
these
your
9
Point
the
If
your
If
<Mark>
step
10
To
line,
VOICE
If
calls
until
second
If
on
calls,
11
Answer
line
Manager
types
of
systems
UNIX
PC.
to
the
LINE 2 port?
you
have
have
two
PC,
only
UNIX
you
until
12.
continue.setting
point
to
calls,
you
plan
other
line
want
2
to
appears.
to
to
and
to
DATA
you
line
press
the
as
remainder
you
2
may
not
telephones
systems.
may
result
Is a telephone
field.
telephone
press
INol
or
the
for
use
<Mark>
one
appears,
up
Will
DATA
line
telephone
your
computer
You
make
outgoing
receive
do
not
<Mark>
incoming
plan
until
of
did
in
step
work
or
Its
in
damage
line
lines
until
and
second
LINE2
calls?
2
primarily
systems,
can
to
VOICE
the
questions
7.
with
use
with
plugged
connected
YES
line,
then
be
used
field.
still
voice
voice
receive
appears.
to
skip
telephone
for
press
use
calls.
into
to
appears.
press
to
for
data
<Mark>
the
calls
data
for
2-8
12
13
When
save
Close
of
the
you
your
the
Office
complete
selections.
the
Administration
of
install.
form,
windows
press
<Enter>
and
log
to
out
Page 29

The
status
display
have
reads
one
as
line
telephone
voice
shown
at
information.
line
below:
DATA
2
the
and
top
one
Fri
Setting
of
the
data
Aug
22, 1:
For
line,
19
Up
screen
example,
pm
Telephone
should
the
status
if
Manager
now
you
line
Configuring
You
can
built-in
The
settings
file.
To
set
up
standards:
1
2
3
the
Modem
use
the
modem
you
the
Log
Modem
to
built-in
in
comply
specify
as
install.
Setup
modem
Select I Administration
press
You
Select
You
<Enter>.
see
see
the
Administration
IHardware
the
Hardware
III
;umM-mm
Pr
inter
RS232
Telephone Setup
feature
with
are
saved
for
Setup I and
Setup
Setup
International
to
in a configuration
International
I
from
menu.
press
menu:
configure
standards.
the
Office
<Enter>.
the
and
4
Select
IModem
Setup I and
press
<Enter>.
2-9
Page 30

Setting
up
Telephone
You
III·
Is
the
Is the
5
First,
International
If
calling
YES
If
within
6
Press
question
tone
see
this
International
International
answer
you
are
outside
appears.
you
are
the
<Return>
Is
in
effect?
Manager
Modem
Modem
Information
.ode.
Answer
.ode.
guard tone
the
modem
outside
the
calling
U.S.,
to
the
International
Information
tone
in
in
question
Answer
the
U.S.,
inside
keep
NO
move
effect?
effect?
United
press
the
selected.
the
Is
the
tone
States,
U.S.,
cursor
modem
menu:
HO
HO
in
<Mark>
to
effect?
or
from
the
guard
are
until
7
8
Getting
Let's
Reacquainted
look
"computerized
2-10
Press
1807-Hz
CCITT
Keep
212
mode.
Press
Reboot
modem
now
telephone."
<Mark>
guard
V.22
NO
selected
<Enter>
the
with
at
some
until
tone
YES
to
specification.
to
to
save
system
the
with
appropriate
Your
of
the
to
appears
be
compatible
set
the
your
initialize
Telephone
features
to
modem
selections.
the
settings.
of
your
set
with
for
built-in
the
the
Bell
Page 31

Setting
Up
Telephone
Manager
Audio
Your
audible
You
will
on
the
allows
signals,
Slide
Monitor
system
feedback
right
you
this
find
and
includes
a
side
to
listen
busy
control
for
sliding
of
signals.
away
an
audio
managing
volume
the
computer
for
ringing,
from
monitor
calls.
control
you
base.
modem
to
increase
to
provide
for
The
connection
the
monitor
volume.
monitor
The
When
lines
line
look
on
Status
your
at
similar
how
are
the
you
Line
Display
UNIX PC
set
up,
top
to
have
DATA
2
power
you
of
the
should
your
status
configured
Thu
is
turned
see a telephone
screen.
line
your
Aug
7 l 9:
23
on
and
The
status
shown
telephone
am
the
below,
telephone
status
line
depending
lines:
should
2-11
Page 32

Setting
Use
of
later
whether
an
incoming
not
being
each
telephone
indicating
line
or a data
The
status
is
turned
telephone
If
your
your
telephone.
Up
the
in
this
the
computer
Telephone
status
guide.
telephone
call,
used
at
line
whether
line.
line
on
so
from
your
Manager
line
is
Briefly,
line
has a message
the
moment.
you
have
the
line
always
you
can
appears
monitor
computer
power
is
discussed
this
is
in
The
connected
is
being
when
screen.
turned
more
display
use,
waiting,
status
your
and
control
off,
is
and
used
you
completely
tells
on
hold,
or
is
idle
line
reflects
set
up,
as a voice
computer
your
can
still
you
has
and
power
use
Performing
off
the
voice
or
a
system
UNIX PC
data
calls.
shutdown
disconnects
or
any
powering
active
2-12
Page 33

3
Getting
Started
3-1
Opening
Manager
Opening
Using
Using
Telephone
the
Placing
Taking
Using
Using
Using
Using
the
the
the
the
Directory
Creating
Creating
Assignments
Moving
and
Directory
Dialing
or
Directory
Dialing
Keeping
Displaying
Displaying
and
Using
Telephone
Telephone
a
Call
Call
Notes
REDIAL
HOLD
HANGUP
Call
Directory
Repertory
Between
from
a
Repertory
Track
the
Call
from
Screen
Screen
the
the
of
History
Telephone
Manager
Manager
the
Screen
Screen
Entries
Dialing
Call
Call
Number
Calls
Notes
Keyboard
Key
Key
Key
and
Screen
Screen
List
3-3
3-3
3-4
3-7
3-7
3-9
3-11
3-11
3-12
3-13
3-13
3-15
3-17
3-17
3-18
3-19
3-19
3-20
Summary
3-21
Page 34

Page 35

This
section
Telephone
chapters
Once
you
to
the
Using
information
directory.
in
o
o
o
o
o
o
are
introduces
Manager.
this
Open
Telephone
Place
Redial
hang
up
Create
directory
Display
Close
familiar
Telephone
on
setting
3
Getting
Exercises
section
a
call
a
number,
from
and
place
notes
Telephone
with
the
basic
show
Manager
from
the
place
the
keyboard
a
and
call
Manager
these
Manager
up
and
Started
are
you
keyboard
voice
section
using
features
provided.
how
a
calIon
call
history
basic
your
of
to:
and
hold,
from
operations,
for
more
telephone
UNIX
The
take
the
PC
notes
and
turn
Before
telephone
connecting
Up
Telephone
the
AT&T
turning
you
begin,
line
UNIX
on
This
PC
you
hardware
"Identifying
chapter
Manager
and
Manager
PC
your
telephone
are
you
might
connections.
setting
section
Owner's
system
section
unsure
is
enabled,
in
the
section
want
You'll
up
your
of
Manual
and
logging
Note
applies
hardware
whether
Telephone
Setting
of
to
telephone
this
if
only
is
your
refer
Manager
Up
this
check
find
guide.
you
in.
if
enabled.
telephone
to
Telephone
guide.
your
information
in
the
need
help
your
UNIX
the
Hardware"
Refer
If
on
Setting
to
3-1
Page 36

Page 37

This
and
then
You
will
other
If
you
using
personal
chapter
describes
find
UNIX PC
o
o
o
o
have
your
telephone
Opening
shows
that
software
Commands
the
mouse
a
window.
The
directory
moved
for
elsewhere
other
Windows
working
telephone
Information
log
and
applications.
not
done
own
user
and
Using
you
how
some
of
Telephone
products:
and
services
or
arrow
windows
windows.
can
be
elsewhere,
calls
from
notes--can
so
already,
name
directory.
Telephone
to
open
the
product's
Manager
keys
on
the
suspended
ready
at
the
Telephone
be
so
you
Manager
Telephone
works
are
selected
to
highlight
can
be
reshaped
screen
while
to
be
touch
of a button.
Manager--the
incorporated
log
into
can
begin
features.
like
to
make
you
used
your
creating
Manager
your
by
using
items
and
room
are
for
into
computer
in
call
other
your
Qpening
To
open
Telephone
Telephone
>
Select I Telephone I from
Manager
Manager:
<Enter>.
the
Office
and
press
3-3
Page 38

Opening
and
Using
You
screen
see
Telephone
the
keys:
-----
Call
Manager
screen
and
Telephone
~m!IDI_'
II[WII~
Manager
Using
Telephone
area.
telephone
Your
Telephone
the
with
detail
3-4
Telephone
directory
screen.
Telephone
Manager
It
uses
lines
Manager
below.
Manager
the
are
appears
They
Manager.
uses
status
set
screen
display
all
in
up
keys
Each
three
line
and
the
the
parts
to
show
what
main
work
appear
functions
part
is
of
you
each
at
you
described
the
line
area.
the
work
how
bottom
can
is
the
The
use
in
doing.
of
more
Page 39

Opening
and
Using
Telephone
Manager
Status
The
top
status:
The
status
the
telephone
to
connect
the
Setting
If
you
indicators
currently
The
word
currently
Call
Screen
The
Call
opened.
typically
Directory
including
Line
line
have
IDLE
screen
It
of
DATA
line
information
and
Up
Telephone
two
is
highlighted
selected.
following
has
no
and
holds
your
holds
those
your
2
is
always
set
up
telephone
telephone
Directory
appears
a
most
an
unlimited
in
the
screen
Fri
Hay
displayed.
in
your
Manager
lines,
to
VOICE
whenever
list
of
frequently
Call
displays
39,
11:16
the
telephone
indicate
1:
activity.
up
to
called
number
screen.
the
am
If
status
lines
section)
one
of
that
indicates
Telephone
15
directory
numbers.
of
entries,
telephone
you
line,
(refer
.
the
line
the
that
Manager
do
you
line
entries,
not
line
The
line
see
need
to
is
1
is
Initially,
name,
telephone
"Arranging
Telephone
information
that
both
generally
You
can
entry
and
the
and
Manager
the
as
dial
then
entries
number,
Printing
on
how
Call
directories
an
entry
pressing
in
and
the
section
to
rearrange
screen
in a directory
the
the
alternate
Directory"
of
and
in
this
Enter
Directory
this
this
Directory
guide.)
guide
key.
are
telephone
in
contains
display.
are
by
selecting
arranged
the
referred
by
number.
Using
(Note
to
the
3-5
Page 40

Opening
and
Using
Telephone
Manager
Screen
The
Keys
Telephone
telephone
DIRCTORY,
activities,
keys
perform
pressing
You
can
the
screen
Subsequent
screen
keys.
described
Manager
functions.
display
the
also
keys,
chapters
more
section
Manager
such
one
HOLD
use
The
completely
a
window
as
Create
specific
key
the
to
dial
show
Telephone
of
this
screen
Some
places
function
telephone
you
in
guide.
keys
screen
from
data
function.
a
calIon
keys,
how
Manager
the
let
keys,
which
entry.
numbers.
to
Using
you
you
For
hold.
which
use
screen
Telephone
perform
such
select
Other
example,
correspond
some
keys
as
screen
of
EDIT
other
to
the
are
3-6
Page 41

You
can
you
use
Telephone
efficiently.
use
any
Manager
the
other
Using
telephone
telephone,
lets
the
you
Telephone
connected
but
use
your
you
to
your
will
telephone
UNIX PC
find
more
as
that
Telephone
manage
disconnect
redial
Additionally,
you
The
date,
This
computer
notes.
and
Arrange
PC
information
anyway.
Placing
One
type
now:
You
your
the
are
call
time,
chapter
HANGUP
user,
way
the
>
see
Manager
calls
a
last
given
is
also
number
using
It
also
screen
to
make
or
read
to
a
Call
to
dial
telephone
If
select
<Enter>.
the
Call
displays
by
call,
when
the
shows
the
place
from
Telephone
letting
select
number.
you
option
logged,
called,
you
keyboard
shows
keys.
some
practice
through
the
a
call
number
I
Telephone I from
screen.
place
how
you
a
call
using
Manager
screen
you
the
a
of
taking
so
you
and
to
place
and
how
this
you
Keyboard
Telephone
at
the
keys
place
other
to
calls
chapter
telephone
call
from
notes
have a record
length
explains
were
is
of
a
call
use
the
with
and
planning
keyboard.
not
already
the
Office
that
help
a
calIon
your
on
the
from
how
REDIAL,
another
use
Manager
line,
computer,
the
of
call.
to
the
to
is
Try
open,
and
you
hold,
and
call.
the
your
take
HOLD,
UNIX
make
to
this
press
>
If
you
(PBX), a line
telephone
are
Type a telephone
on
the
top
row
dialing
number
access
gain
from
number
access
of
an
number
the
office
and
to
using
alphanumeric
telephone
a +
the
the
preceding
outside
number
keyboard.
system
a
line.
keys
3-7
Page 42

Using
For
The
shown
the
Telephone
example:
telephone
below:
Administration
Clipboard
Filecabinet
Floppydisk
Preferences
Printers
I.IIG!1iIlImI
UNIX
System
Wastebasket
9+555-1234
9+555-1234.
number
appears
on
the
command
line,
as
--------
>
If
you
the
right
monitor
Manager
Watch
screen.
A
Dialing
3-8
Press
>
Listen
telephone
do
not
side
volume.
section
the
telephone
It
>
Pick
with a manual
message
hear
of
should
up
the
for
the
(Refer
for
the
appears
<Enter>
the
monitor.
anything,
computer
to
the
location
status
show
ACTIVE.
telephone
call.
key
sound
the
line
on
use
the
to
of
dialing
the
base
Setting
of
at
handset
message
dial
to
this
the
the
volume
adjust
Up
control.)
top
as
number.
from
the
control
the
Telephone
of
the
you
would
line.
on
Page 43

The
Take
notes
IE!!
Take
or
on
call?
Confhm
notes
Touch
CAHCl
on
EHTER
to
stop.
prompt
call?
to
continue
appears
Using
as
the
shown
Telephone
below:
Taking
When
your
The
typed
the
call:
Call
Call
>
on
prompt
Notes
the
>
>
Notes
Press
command
In
the
person
Press
appears,
<Enter>.
form
Name
you
Hallie
HUlilber
<Enter>
you
appears.
line
field,
are
Call
b11i-
9+555-1234
IIiliII
to
can
appears
type
calling,
HoteS
save
The
type
telephone
in
the
Sue,
this
some
notes
number
the
Number
name
of
for
example.
information.
about
you
field.
the
3-9
Page 44

Using
You
see
time,
number:
The
cursor
you
begin
easiest
call.
the
the
name
May
to
>
>
Telephone
Current
of
the
29
6:39
appears
typing
type
At
the
Complete
person
your
the
end
notes
Sue
below
note.
notes
of
your
form,
you
this
as
the
notes
are
You
soon
call,
which
calling,
9+555-1234
line
will
about
to
probably
as
you
replace
the
lists
and
indicate
complete
the
call.
the
telephone
where
find
handset.
date,
it
the
Your
notes
meeting
For
now,
The
Take
moments
however,
completing
3-10
could
date,
just
> When
<Exit>
notes
if
you
still
the
>
From
the
>
Select
to
>
Fill
Call
include
or a report
type
a
simple
you
finish
to
close
on
Call?
don't
take
press
notes
call:
the
Call
Telephone
Take
notes
display the
in
the
notes
Name
form.
any
information:
on
the
note.
typing
the
Call
prompt
the
disappears
Enter
on a telephone
screen,
press
Commands
on
and
call
notes
Number
Call
subject
your
notes
key.
menu.
and
form.
of
note,
form.
call
<Cmd>
press
fields
a
reminder,
the
press
after
You
to
in
call.
a
few
can,
~
display
<Enter>
the
a
Page 45

Next
of
the
you
>
Press
form.
>
Complete
>
Press
will
screen
<Enter>
<Exit>
make
keys.
your
to
another
to
notes
close
display
about
the
telephone
Using
the
the
Call
call
the
Current
call.
notes
and
Telephone
notes
form.
try
some
Using
The
is
REDIAL
feature
previously
To
Using
The
to
At
on
VOICE 1
asterisk
that
Notice
screen
status
the
last
stored
redial
the
HOLD
the
some
hold:
you
REDIAL
telephone
in a special
screen
is
>
>
call.
point
>
in
>
that
key,
line.
key
handy
busy
the
last
Press
Pick
up
HOLD
Screen
screen
during
Press
the
appears
have a calIon
status
Press
the
and
Screen
number
redials
for
retrying
or
unanswered.
number
[REDIAL].
the
handset
Key
key
places
your
[HOLD].
line
in
the
[HOLD]
asterisk
<HOLD
has
Key
you
memory
that
you
a
conversation,
indicates
HOLD
hold.
again
no
longer
changed
dialed
area.
number
a
number
dialed
to
calIon
screen
to
return
from
Pressing
from
connect
hold
<HOLD,
key
appears
to
ACTIVE
for
that
to
the
you.
the
to
and
place
to
your
computer
the
was
computer:
the
returns
the
and
remind
in
the
on
This
call.
call
an
you
call.
the
3-11
Page 46

Using
the
Telephone
Using
The
this
the
HANGUP
key,
computer
handset
Try
hanging
>
The
status
another
its
cradle.
immediately,
cradle
to
indication
indicator
Now
that
Manager's
chapter
directory.
HANGUP
screen
you
without
to
its
up
Press
line
telephone
If
you
reconnect
of
in
the
you
are
functions
where
Screen
key
can
continue
having
cradle.
this
[HANGUPJ.
indicates
call
you
should
an
incoming
telephone
familiar
you'll
Kgy
disconnects
to
way:
or
are
not
return
the
ringer;
and
screen
take
placing
return
IDLE.
you
going
call
status
with
a
closer
a
your
You
can
return
to
the
otherwise,
will
line.
some
keys,
call.
calls
telephone
can
place
handset
be
the
of
Telephone
go
look
from
now
the
on
at
By
using
your
place
handset
a
call
to
its
the
only
<RING
to
the
the
to
status
next
3-12
Page 47

The
Telephone
directories
telephone
need
The
The
for
Directory
Call
entries.
Manager
listing
easily
calls
automatically
number
This
chapter
and
how
Using
you
numbers,
telephone
screen
This
is
opened.
frequently
displayed
with
just
to
place
the
Manager's
have
is a list
lists
screen
than
a
shows
calls
Call
used.
as
well
records.
up
appears
The
called
the
from
few
keystrokes.
you
how
from
Screen
Directory
It
as
of
all
to
15
Call
screen
numbers,
Directory.
both
to
the
and
is
contains
other
your
of
these
whenever
since
lists,
create
directory.
Directory
similar
names
information
directory
directory
Telephone
is
convenient
it
You
can
and
you
directory
to
and
entries.
is
make
can
other
you
for
more
find
entries
a
Creating
You
create
Voice
You
see
Entry
>
Directory
voice
form.
If
Telephone
call
Entries
entries
To
display
Manager
select I Telephone I from
<Enter>.
the
Call
screen.
>
Press
[EDIT
DIRCTORYJ
by
completing
this
is
form:
not
the
already
Office
the
and
Create
open,
press
3-l3
Page 48

Using
You
see
the
>
III
Call
this
Select
press
Entry
Name
Phone
Alternate
EMail
Field
Field
Call
In
Function
Screen
Edit
Directory
III
IMOO···;Wmm
Create
Create fIlultiple voice
Delete
Modify
Modify
Directory
/Create
<Enter>
form:
II
II
Address
8
9
Screen?
Yes
Key
None
and
EdH
data
entry
entry
field
forlilat
to
Directory
Directoru
entry
nalRes
multiple
menu:
entries
voice
display the
I
III
entries/
Create
and
Voice
The
fill
3-14
form
in
contains
only
the
>
Type a name
When
should
that
directory.
for
Functions"
details
you
allows
an
several
first
in
type
establish
easy
Refer
Entry"
chapter
about
fill-in
two,
the
the
a
searching
in
the
searching
Name
Name
name,
consistent
to
"Searching
"Applying
of
this
fields.
and
field.
keep
through
Phone
in
naming
through
Directory
section
For
#.
mind
the
the
for
a
directory.
now,
that
format
Directory
you
Page 49

If
you
your
line
line,
If
you
key
to
entire
A
blank
another
Next
you
dialed
Manager.
>
are
then
make
erase
field
>
Create
directory
will
quickly
Point
telephone
dialing
access
type
any
them,
and
Press
Voice
learn
from
Using
to
the
number.
from
number
the
digits
typing
or
start
<Enter>
entry.
how
any
Phone
a PBX
and
mistakes,
the
over.
to
Entry
to
window,
the
a +
of
Clear
save
form
create
Call
4
field
system,
to
the
Line
your
appears
even
Screen
access
phone
press
an
and
type
remember
number.
the
key
to
entry.
so
entry
outside
and
the
Back
erase
you
that
Telephone
Directory
a
to
type
outside
Space
the
can
type
can
be
Creating
Telephone
that
lets
function
You
can
that
entry
pressing
do
not
type
of
For
instance,
assignment
Repertory
Manager
you
keys
then
by
the
have
call;
to
>
In a blank
the
>
Point
<Cmd>.
assign
F1
dial
pressing
assigned
to
be
you
you
call
Name
and
the
to
Dialing
offers
a
F3
in
Telephone
can
can
your
Create
and
the
Assignments
a
repertory
directory
through
telephone
and
holding
function
dial
from
create
boss:
Phone
Function
Manager
a
repertory
Voice
#
entry
F8.
number
the
key.
any
Entry
fields
Key
dialing
to
associated
Shift
Best
to
window.
form,
for
field
directory
each
key,
of
place
dialing
your
and
of
all,
this
fill
boss.
press
the
with
then
you
in
3-15
Page 50

Using
You
see
the
Call
the
Screen
Repertory
and
Directory
Dialing
menu:
Now
down
You
entries
shown
you
the
see
>
>
can
Shift
>
the
appear
below:
iii·
Name
-Deli
M.
Time
F1
Deli
F3
Hone
F4
Hone
F5
Hone
F6
Hone
F7
M.
FB
M.
Point
Press
entry.
appears.
call
Press
form.
Call
Boss
Repertory
Boss
Boss
to
<Enter>
your
key
<Exit>
screen.
in
IEII
Another
boss
and
the
directory
Phone
9+555-4321
9+555-1234
9+767-1111
DiaHng
and
press
to
save
blank
from
pressing
to
exit
Notice
'*
Assignments
the
Create
any
the
the
that
in
Alternate
<Enter>.
new
Voice
screen
El
function
Create
your
alphabetic
'*
directory
Entry
by
Voice
directory
holding
key.
Entry
order,
form
as
3-16
Page 51

Using
the
Call
Screen
and
Directory
Moving
When
you
appears.
Notice
Directory
To
return
In
later
that
appear
Dialing
Between
open
>
Name
M.
- Tilile 9+767-1111
that
>
chapters
from
To
Press
I -
Deli
Boss
as
to
Press
the
Telephone
display
<Page>.
the
entries
well
as
the
Call
<Shift>-<Page>.
you
only
in
the
Call
Call
the
phone II
9+555-4321
9+555-1234
the
the
Screen
Manager,
Directory:
you
Call
screen:
will
Directory.
Screen
created
screen.
learn
or
and
Directory
the
Alternate
how
Directory
Call
II
appear
to
screen
in
create
the
entries
One
from
of
the
the
>
>
>
>
>
>
quickest
Call
Open
appears
Point
want
Press
Pick
Take
Press
cradle
screen
Telephone
(or
to
the
to
dial.
<Enter>
up
the
notes,
[HANGUPJ
to
ways
or
display
handset
if
end
to
place
Directory:
Manager
entry
to
place
desired.
or
replace
the
call.
a
so
the
Directory)
containing
the
to
connect.
call
the
call.
the
is
to
Call
.
the
number
handset
dial
screen
in
you
the
3-17
Page 52

Using
the
Call
Screen
and
Directory
Dialing
Another
a
quick
repertory
assignments
>
>
>
>
At
some
while
point
working
suspends
automatically.
the
suspended
Repertory
way
number.
to
Press
Pick
Take
Press
cradle
you
in
the
window
window.
Number
to
place
If
call
you
your
<Shift>-<Fl>.
up
the
handset
notes,
if
[HANGUPJ,
to
end
may
want
another
and
Exiting
a
created
boss,
desired.
or
the
call.
to
window.
opens
from
call
is
one
try
to
connect.
replace
try
this
Repertory
Telephone
Telephone
to
of
dialing
the
dial
these
this
handset
type
of
dialing
Manager
Manager
a
dialing
dialing
resumes
way:
in
for
the
you
3-18
Page 53

This
call
of
chapter
history
your
shows
and
telephone
Keeping
you
notes
calls.
Track
how
to
features
of
use
so
Calls
Telephone
you
can
Manager's
keep
track
Displaying
Telephone
you
make.
To
display
time
use
Your
list
the
>
>
the
History
Manager
This
this
mouse:
Point
line
and
Press
List
window.
looks
record
list,
to
[HISTORY]
something
III·
call
and
that
see
Harne
Time
M.C.
made
person
time
the
"Keeping
call.
you
Manager
Number
- 00:02 V
9+767-1111
7096
For
each
name
of
the
subject
the
date
of
indicates
details,
Using
Telephone
keeps
the
press
you
you
when
took
List
a
record
is
called
open
Telephone
VOICE
<Bl>.
to
like
lime
Ivpe
BB:B1
V Out Jun 2 2:BBa
BB:B2
V Out Jun 2 2:B1a
see
the
called,
you
placed
The
asterisk
notes
Call
Notes
section.
1:
display
this:
When
In
Jun 2 1:57a
telephone
the
for
of
each
the
display
length
the
(*)
that
and
telephone
History
Manager.
on
the
Edit
Sub
ject
number,
of
call,
under
call.
History"
the
Notes
and
List
This
status
History
the
the
Notes
For
in
call
file.
the
call,
more
the
3-19
Page 54

Keeping
Track
of
Calls
Di~laYing
To
display
>
>
>
All
notes
shown
below:
III • -
May
30
Needs a ride
May
30
Jun
2 2:04a
M.C.
not
Call
the
notes
Display
Highlight
Notes.
Press
for
that
3:28
tOlilorrow.
3:41
in.
Try
Notes
the
[SHOW
entry
M.C.
M.C.
M.C.
back
you
History
an
entry
NOTES] .
later.
took
appear
Set
meeting time.
on a call:
List.
with
an
on
7096
7096
7096
asterisk
your
screen,
under
as
The
Using
how
that
stored
3-20
>
>
>
"Keeping
Telephone
to
save
can
be
for
Press
bottom
Press
the
top
Press
Telephone
Call
Manager
the
used
future
<Shift>-<up
of
the
screen.
<Shift>-<down
of
the
screen.
<Exit>
until
Manager
Notes
and
section
contents
by
of
other
reference.
arrow>
arrow>
you
windows.
History"
the
History
UNIX PC
to
have
of
this
software
view
to
view
closed
chapter
guide
List
notes
notes
all
in
the
shows
in a file
products
at
the
the
at
you
or
Page 55

Now
that
know
how
to:
You
can
section,
that
in
your
List.
calls
the
o
o
o
o
help
This
and
you
have
basics
Dial
directories.
Use
call.
Take
Display
now
go
which
you
directory,
section
store
worked
of
UNIX PC
a
telephone
the
screen
notes
the
on
to
provides
organize
and
telephone
Summary
through
keys
on a call.
History
the
Using
easy-to-follow
your
edit
also
shows
numbers
Telephone
Getting
number
to
manage
List.
Telephone
entries,
and
maintain
you
Manager.
from
customize
how
in
your
Started,
the
keyboard
your
telephone
Manager
instructions
the
to
History
place
Filecabinet.
You
fields
data
you
know
and
3-21
Page 56

Page 57

4
Using
Telephone
Manager
4-1
Command
Telephone
History
Screen
Keys
Command
Customizing
Modifying
Preferences
Logging
Determining
Determining
Setting
Invocation
Determining
Determining
Opening
Manager
Using
the
Telephone
Using
the
Manager
Picking
Telephone
Opening
the
Office
Telephone
Displaying
and
Directory
Scrolling
Exiting
Summary
Commands
Commands
Keys
Telephone
Telephone
Calls
the
History
Automatic
Notes
History
and
Closing
Call
Manager
Mouse
Up
the
Manager
Telephone
Window
Manager
the
Through
from
Telephone
Charts
Time
Off-Hook
Display
Key
to
to
Open
Handset
Manager
Display
Call
the
Manager
Manager
Threshold
List
Length
Display
Telephone
Open
Telephone
to
Screen
Directory
Manager
Order
Order
Open
from
4-3
4-3
4-5
4-5
4-8
4-9
4-9
4-11
4-11
4-11
4-12
4-12
4-13
4-15
4-15
4-15
4-16
4-16
4-16
4-17
4-19
4-20
Page 58

Contents
Creating
Using
Creating
Creating
Using
Directory
the
a
a
Special
Customizing
Editing
Directory
Modifying
Deleting
Editing
Applying
an
Phone
Directory
Arranging
Sorting
the
Searching
Entry
Saving
Copying
the
(Loading)
Another
Updating
Exporting
Printing
Placing
Setting
Calls
Up
Selecting
Placing
Placing
Calls
a
Reconnecting
Using
the
Answering
Disconnecting
Logging
In
Disconnecting
Answering
Create
Voice
Data
Entry
Entry
Entry
Dialing
the
Create
a
Directory
Entry
Number
the
Directory
Directory
the
Directory
Directory
Computer
Your
Directory
a
Directory
a
Directory
Communication
Telephone
CalIon
a
CalIon
Timer
a
Voice
a
Voice
to a Data
a
Data
Data
Call
a
Entries
Characters
Entries
Entry
Files
Functions
in a File
a
Directory
Lines
Hold
Call
Call
Call
Call
Form
Entry
Display
for
(Merging)
Lines
Hold
Form
an
4-21
4-21
4-24
4-27
4-31
4-33
4-37
4-37
4-38
4-39
4-41
4-41
4-43
4-44
4-46
from
4-47
4-48
4-50
4-51
4-53
4-53
4-53
4-55
4-59
4-61
4-61
4-62
4-62
4-62
4-64
4-64
Page 59

Contents
Keeping
Using
Taking
Taking
Taking
Taking
the
Notes
Notes
Notes
Notes
Looking
Discarding
Displaying
Copying
Displaying
Editing
Maintaining
Copying
a
File
Sending
Setting
Sending
Receiving
Call
Notes
Note
on
on
on
After
at
Previous
Call
Call
Call
Notes
Call
the
History
the
the
History
Messages
Up
to
Electronic
Electronic
Pad
Directory
Outgoing
Incoming
Notes
Notes
History
History
Send
and
Hlstory
a
Call
Notes
into
Files
List
List
List
Messages
Messages
Messages
Calls
Calls
Calls
into
4-67
4-67
4-68
4-69
4-70
4-71
4-72
4-73
4-74
4-77
4-77
4-79
4-80
4-83
4-85
4-85
4-86
4-87
Page 60

Page 61

This
reference
Manager
you
learned
UNIX PC
this
section.
features
in
Telephone
4
Using
section
and
Getting
Manager
Telephone
covers
operations.
Started
features
all
as
Manager
the
UNIX PC
The
basic
well
are
features
as
additional
described
Telephone
in
These
procedures
UNIX PC
The
information
groups
Office
o
o
o
o
of
basics.
Menus
menu
is a list
selection.
type
your
When
the
to
an
to
the
or
the
or
an
you
prefer.
method,
You
can
the
corresponding
to
the
the
B1
To
exit
point
window
related
assume
that
A
and
forms
from
A
form
responses.
instructions
item
on a menu,
item
by
mouse,
using
or
abbreviation
When
that
method
use a screen
screen
mouse
key
button.
from a window,
to
[X]
this
in
press
section
and
in
tasks.
brief
are
you
you
function
with
the
the
you
are
review
referred
which
has
for
you
blank
say
to
you
can
the
cursor
can
type
it -whichever
must
is
given.
key
either
the
press
lower-left
B1
mouse
is
organized
familiar
with
follows:
to
by
name.
make
move
a
where
or
the
fields
select
movement
the
item
method
use a particular
by
or
by
and
Exit
corner
pressing
pointing
pressing
key
of
key
mouse
the
button.
into
the
A
you
point
cursor
keys
name
or
the
4-1
Page 62

Page 63

The
following
to
the
The
commands
under
overview
where
command
The
command
you
perform
cursor
and
then
button.
a
single
Telephone
Command.
of
or
the
find
key.
to
menus
tasks.
keys
or
pressing
The
key.
Command
charts
Manager
and
functions
The
function.
more
display
the
the
command
Summary
provide
commands
Description
complete
You
select
mouse
to
Enter
keys
Charts
a
summary
are
listed
column
The
Page
instructions
commands
a
highlight
key
or
perform
and
key
alphabetically
column
you
command
the
the
tasks
of
and
functions.
provides
indicates
for
select
by
desired
left
mouse
at
the
reference
using
to
using
touch
a
help
brief
the
the
task,
of
Telephone
You
can
Call
screen
key,
or
with
the
Command
Dial
number
Display
screen
Display
Directory
Commands
display the
or
by
mouse
Directory
pointing
and
alternate
Call
Telephone
to
the
pressing
Telephone
Description
Dials
telephone
in
the
Displays
screen.
Displays
is
active
Directory
the
Commands
an
directory.
Commands
by
B2
mouse
alternate
number
the
Call
the
Directory.
menu
pressing
or
Call
button.
listed
when
screen
the
the
Cmd
Page
4-56
4-18
4-18
4-3
Page 64

Command
Summary
Charts
Command
Display
repertory
dialing
Export
Load
directory
Print
Save
directory
Send
electronic
mail
Show
Notes
Telephone
numbers
Directory
directory
file
Commands
Description
Displays
numbers
function
for
speed
Copies
an
ASCII
Copies
another
Prints
list.
Saves
list
Uses
Electronic
to
messages
directory
Displays
collected
directory
the
in a file.
the
deliver
(Continued)
telephone
assigned
keys
dialing.
the
directory
file.
a
directory
UNIX
PC.
the
directory
directory
UNIX PC
Mail
written
to a selected
entry.
call
notes
on a selected
entry.
to
from
program
to
Page
4-58
4-50
4-47
4-51
4-46
4-86
4-74
Sort
Take
call
Update
Directory
4-4
by
field
notes
Telephone
on
Displays
sorted
field.
Provides
"notepad"
call
notes.
Merges
another
telephone
the
an
for
UNIX
directory.
directory
on-screen
recording
from
PC
by a specified
entries
4-43
4-71
4-48
Page 65

Command
Summary
Charts
Errstory
You
can
History
pointing
and
pressing
Command
Clear
list
Save
list
Copy
paste
Print
list
Commands
display
List
to
the
history
history
list
to
buffer
history
the
window
Edit
the
B2
History
by
pressing
History
mouse
History
Description
Erases
History
Saves
History
Standard
Copies
History
paste
from
pasted
application
the
Prints
History
commands
List
button.
Commands
the
List.
the
current
List
file.
the
List
buffer
which
into
Clipboard.
the
List.
the
window
current
in
current
into
location
it
can
an
file
current
from
Cmd
a
or
a
be
key
with
the
or
Edit
by
the
mouse
Page
4-82
4-82
4-82
4-82
Screen
The
the
select
Keys
Telephone
Call
the
corresponding
pointing
the
BI
mouse
screen
screen
to
the
Manager
or
function
screen
button.
screen
Directory
key
functions
key
key
keys
is
(FI
with
are
displayed.
by
pressing
through
the
mouse
displayed
F8),
and
You
the
or
by
pressing
when
can
4-5
Page 66

Command
The
following
screen
Summary
or
Directory
Charts
screen
keys
is
displayed.
are
displayed
when
the
Call
Telephone
Screen
Key
DIRCTORY SEARCH
EDIT
DIRCTORY
HANGUP
HISTORY
HOLD
LINE
SELECT
REDIAL
Manager
Screen
Description
Starts
a
directory
search.
Displays
choices
and
a
for
editing
entries.
Disconnects
Displays
the
Places/connects
on
hold.
Selects
changes
voice
line
or
the
line
line
from
voice.
Redials
telephone
entered
keyboard
the
number
from
or
Keys
list
of
creating
directory
current
History
to a call
other
1
from
to a data
data
last
the
directory.
call.
line;
a
to
List.
Page
4-44
4-37
4-62
4-77
4-59
4-53
4-59
TIMER
4-6
Turns
on
or
the
off.
call
timer
4-61
Page 67

The
following
Current
notes
screen
or
Previous
Call
keys
Notes
are
notes
Screen
Command
displayed
pad
Keys
is
displayed.
Summary
when
Charts
the
Screen
BOTTOM
Key
WINDOW
DISCARD NOTES
TOP
WINDOW
The
following
History
Screen
SHOW
List
Key
NOTES
screen
window
Edit
Displays
Current
Discards
taken
Displays
on a call.
key
is
displayed.
Hlstory
Displays
on
from
Description
notes
notes
the
on a call.
previous
is
displayed
List
Description
notes
an
entry
the
History
window.
last
Screen
selected
in
the
notes
notes
when
Key
collected
List.
the
Page
4-73
4-73
4-72
Edit
Page
4-76
4-7
Page 68

Command
Summary
Charts
Command
The
following
functions
Key
Creat
Dlete
Find
Print
Rplac
Keys
available
chart
Displays
Entry
single
can
Deletes
highlighted
Directory
Displays
Search
Prints
directory.
In
form,
the
displays
form
summarizes
with
Telephone
Command
Description
the
form
voice
be
created.
the
the
form.
the
the
Create
with
Data
Profile
the
for
that
Create
so
entry
entry
in
or
Call
Directory
current
the
Terminal
the
Keys
that
the
Data
cursor
Name
profile.
command
Manager.
Voice
a
screen.
Entry
on
field,
Setup
key
Page
4-21
4-38
4-44
4-51
4-38
4-8
Page 69

This
chapter
selection
Manager's
As
shipped
up
to:
You
can
when
you
o
o
o
o
also
in
call
from
List
Log
History
Begin
placed
Display
notes
pick
Customizing
describes
your
Office
logging
the
factory,
up
to
both
incoming
List.
logging
or
received.
the
first.
customize
up
the
Telephone
how
to
and
14
calls
calls
least
Telephone
telephone
to
use
customize
history
Telephone
in
and
30
recent
handset.
Manager
the
list.
the
History
outgoing
seconds
call
Manager
Preferences
Telephone
Manager
List.
calls
after
history
so
it
is
set
in
the
they
and
opens
are
Modifying
Modifications
Preferences
take
effect
menu.
To
customize
1
Telephone
to
selection
as
Telephone
Telephone
soon
Manager
in
as
you
Manager:
Select I Preferences
<Enter>.
Preferences
Manager
the
Office.
exit
are
made
The
using
the
Office
modifications
Preferences
from
I
in
the
and
the
press
4-9
Page 70

Customizing
2
Telephone
You
see
this
Select
You
5\
Preferences
log incoming
log outgoing
Time
Maximum
Invoke phone manager
Display beginning
Display beginning
IPhone
see
this
phone manager
threshold
number
Manager
Preferences
III I
...
II!IIIm
Phone
Manager
manager I and
Phone
calls?
calls?
before recording
of
entries
on
off-hook
of
previous
of
history
manager
preferences
calls
in
the
history
notes
list
menu:
press
preferences
D
Yes
38
list
14
No
No
No
<Enter>.
form:
4-10
3
4
Make
as
described
When
to
save
your
you
changes
finish
them.
below.
making
to
the
changes,
preference
press
fields,
<Enter>
Page 71

Customizing
Telephone
Manager
Logging
Telephone
incoming
can
change
or
only
calls
at
1
2
Determjnjng
The
time
Manager
starts
logging
Initially,
time
it
dialed.
999
seconds
To
select
logged:
1
Calls
Manager
and
outgoing
the
incoming
all,
Point
outgoing
Press
response,
the
threshold
waits
the
typically
You
can
(16.65
a
different
Point
calls
initial
by
to
<Mark>
Time
when
the
time
to
field.
is
initially
calls,
doing
the
calls?
Yes
Threshold
is
you
call
threshold
takes
shorten
minutes)
the
calls
setup
or
the
Log
to
or
the
make
in
to
this
period
Time
set
in
the
to
you
can
following:
incoming
field.
display
No.
amount
or
receive
the
History
is
find
time
.
of
threshold
log
of
set
that
time
up
History
only
set
calls?
the
time
to
a
or
before
to
log
both
List.
outgoing
it
up
to
or
appropriate
Telephone
a
call
List.
30
seconds,
wrong
number
extend
calls
before
recording
the
before
it
not
up
You
calls
log
Log
it
the
was
to
are
2
Determining
The
History
calls.
shorter
long,
but
storage
and
the
Type
Elstory
List
You
can
or
longer.
you
space
difficulty
the
number
is
change
may
want
available
List
initially
the
The
to
in
working
of
Length
size
list
consider
on
your
seconds
set
of
can
be
computer's
with
to
this
you
contain
up
the
a
long
prefer.
list
to
999
amount
hard
list.
up
to
entries
of
to
make
disk
14
it
4-11
Page 72

Customizing
To
change
1
2
Telephone
the
size
Point
history
Type
to
the
of
the
list
number
Manager
the
History
Maximum
field.
of
number
entries.
List:
of
entries
in
the
Refer
to
section
List.
Setting
This
selection
Telephone
handset
current
Telephone
handy,
as
Manager
To
set
or
1
Determinjng
You
can
previous
least
recent
appears
taken
on
default,
"Keeping
for
procedures
Automatic
Manager
from
its
active
Manager
it
whenever
remove
Point
field.
2
Press
response,
Notes
choose
call
above
calls
most
Call
Qff-Hook
lets
you
to
be
cradle
window
or
you
resume
you
use
allows
this
to
the
<Mark>
Yes
Di~lay
whether
notes
first.
the
in
The
Current
to a particular
recent
notes
Notes
for
decide
opened
(take
is
suspended
instant
your
feature:
Invoke
to
display
or
Qrder
the
order
Previous
notes
and
History"
maintaining
Invocation
whether
when
it
off-hook).
it.
This
access
telephone.
phone
the
No.
Previous
of
the
notes
form,
telephone
appear
you
until
manager
notes
most
first.
in
the
you
this
History
want
remove
The
you
exit
feature
to
Telephone
on
appropriate
menu
recent
menu,
lists
all
number.
your
can
be
off-hook
lists
or
which
notes
from
the
By
To
4-12
change
1
Highlight
notes
2
the
notes
Press
response,
display
the
field.
<Mark>
Yes
Display
to
display
or
No.
order:
beginning
the
of
previous
appropriate
Page 73

Yes
No
displays
displays
Customizing
the
the
most
least
recent
recent
Telephone
notes
notes
first.
Manager
first.
Determining
You
can
least
List.
in
To
recent
the
change
By
list.
1
2
choose
default,
the
Highlight
list
Press
Yes
No
History
whether
or
most
order
field.
<Mark>
display
displays
Di~lay
you
recent
the
most
of
calls
the
Display
to
the
the
Order
want
calls
recent
in
display
least
most
want
first
call
the
History
beginning
Yes
recent
recent
to
or
calls
display
in
appears
of
No.
calls
the
List:
history
first.
the
History
first
first.
4-13
Page 74

Page 75

This
chapter
Manager.
around
information
Telephone
create
Opening
in
the
Manager
and
describes
It
also
to
edit
and
describes
Call
determine
to
directory
Closing
screen
place
how
to
how
and
the
or
entries.
Telephone
open
and
to
move
Directory.
easiest
receive
Manager
close
the
way
a
call
Use
of
Telephone
cursor
this
using
and
to
Using
Open
Shift
You
this:
Using
Open
mouse.
The
the
Telephone
and
o
see
your
Ill·
-Deli
the
Telephone
To
o
Call
screen
Cal]
Call
Press
press
Name
M.
Boss
Time
Mouse
do
Point
line
Key
Manager
keys.
the
Call
Manager
this:
and
to
<Shift>
<Call>
screen,
phone
9+555-4321
9+555-1234
9+767-1111
to
Open
to
the
press
appears.
Open
from
To
do
and
which
II
Telephone
from
VOICE
<Bl>.
Telephone
any
window
this:
hold
key
it
(the
looks
Alternate
any
window
1:
display
Manager
by
down
F2
something
II
Manager
by
using
while
function
using
on
the
the
you
key)
like
the
status
4-15
Page 76

Opening
and
Closing
Telephone
Manager
Picking
You
you
"Customizing
for
Invocation
Opening
Open
of
The
Telephone
When
similar
Status
Line
Display
Up
the
Handset
can
customize
pick
up
the
instructions
Telephone
these
Call
you
--~~Q!g~.,.,-~~.l
feature.
Telephone
methods:
o
Select I Telephone
QL
press
screen
Manager
open
to
the
Telephone
telephone
Telephone
on
Manager
Manager
type
telephone
<Enter>.
appears.
Di~lay
Telephone
screen
to
Manager"
setting
from
below:
Open
Manager
handset.
up
from
the
I
on
Manager,
Telephone
to
Refer
chapter
the
Automatic
the
Office
Office
the
command
you
Manager
open
any
to
the
in
this
Off-Hook
Window
by
using
line
see a screen
Call Screen
time
section
either
and
Screen
Keys
4-16
___
'
••
11m.
IllDlII
rilll!IllW
IBlillWII
IDIDI
I!JlmII!llri
•.
--
Page 77

The
Call
directory
The
status
lines
connected
no
lines
line
also
status
the
following:
screen
entries.
are
set
to
are
changes,
o
line
up.
your
connected,
informs
<RING
Opening
directory
display
If
computer,
you
the
word
notifies
indicates
just
nothing
of
telephone
IDLE
you
and
Closing
contains
one
only
is
of
up
how
telephone
VOICE
appears.
activity.
replaced
an
incoming
Telephone
to
15
of
your
telephone
line
1:
appears.
The
with
call.
Manager
your
is
status
As
the
one
If
of
o ACTIVE
o
o
Refer
to
instructions
telephone
The
message
The
command
The
Telephone
to
frequently
These
Di~laying
The
use
Your
screen
want
create
features
Directory
the
same
Directory
lists
an
entry
the
voice
HOLD
call.
indicates
hold.
indicates
MSG
notifies
line
1
if
to
your
and
Dimension
communications
administrator
waiting
the
Setting
on
connecting
message.
lines.
line
displays
line
is
Manager
used
are
the
Call
and
the
display
lists
up
to
to
appear
entry.
that
you
use
the
telephone
or
AT&T
system.
for
Up
Telephone
used
screen
Telephone
described
Screen
Call
format
all
15
entries
entries.
in
the
line
the
of a message,
message
is
System
the
procedure
and
configuring
Telephone
for
typing
keys
Manager
in
the
and
Djrectory
screen
to
list
you
You
the
Call
is
busy
line
has a calIon
waiting
connected
75/85
Contact
Manager
Manager
telephone
provide
commands.
following
are
similar.
your
create;
specify
screen
with
if
you
feature,
to
business
your
to
pick
section
the
messages.
easy
call
your
if
when
a
set
an
AT&T
up
for
numbers.
access
chapters.
Both
entries.
Call
you
you
up
a
4-17
Page 78

Opening
You
can
Directory.
to
as
directories.
and
place
If
in
your
that
Any
however,
List
"Keeping
section
and
Closing
Throughout
Telephone
calls
from
this
you
use
the
to a different
Office,
user's
calls
you
Call
you
are
and
~
Call
for
more
history.)
both
Other
can
screen
place
logged
notepad.
Notes
information
Manager
your
manual,
Note
Users
user's
display
and
under
and
Call
both
object
Office
and
Directory.
notes
~
(Refer
History"
screen
are
and
you
History
to
about
to
from
use
take,
in
and
referred
log
this
notes
your
Initially,
name,
for
telephone
voice
entry,
the
sample
Refer
to
"Applying
for
procedures
the
and
an
asterisk
Directory
filiI
Hame
-Oeli
*11.
80ss
11.
80ss
Time
"Arranging
Directory
directory
number,
data
to
modify
and
entries.
appears
below:
phone
It
9+555-4321
2558
9+555-1234
9+"popcorn·
the
Directory
Functions"
display
alternate
If
before
the
directory
format
the
the
Alternate
Display"
chapter
shows
telephone
entry
entry
It
of
display
the
number
is a data
name,
in
the
this
section
format.
entry
as
in
4-18
Page 79

Opening
and
Closing
Telephone
Manager
Scrolling
You
can
move
the
The
following
their
Manual
Using
handy
directory
use
the
entry.
in
the
section.
Through
use
cursor
functions.
for
more
these
for
searching
is
Directory
Refer
"Applying
Key
Next
Prev
End
your
table
keys
long,
to
the
Directory
keyboard's
through
lists
Refer
information
to
scroll
a
short
however,
Search
"Searching
Directory
Cursor
Description
Displays
entry.
Displays
directory
Displays
directory
paging
the
Call
these
to
the
on
through
list
you
command
the
Functions"
Movement
screen
keys
AT&T
the
of
might
to
Directory
Keys
the
the
entry.
the
list.
and
arrow
and
UNIX PC
use
of
the
directory
entries.
find
search
chapter
next
directory
previous
end
of
keys
and
Directory.
summarizes
Owner's
these
If
it
easier
for
For
an
of
the
to
keys.
is
your
to
an
Entry"
this
Beg
down
up
arrow
arrow
Displays
directory
Moves
directory
each
entry
Moves
directory
each
entry
the
the
the
list.
cursor
list,
as
cursor
list,
as
beginning
down
highlighting
it
moves
up
highlighting
it
moves
the
of
the
down.
up.
the
4-19
Page 80

Opening
and
Closing
Telephone
Manager
Exiting
Use
one
Manager
You
can
window.
and
reshape
screen.
from
of
from
o
Press
point
suspend
As
Telephone
the
following
the
<Exit>,
to
Telephone
you
can
Telephone
Call
Manager
screen
[X]
with
Manager's
methods
or
and
Manager
other
or
press
to
exit
Directory:
the
by
windows,
Directory
from
<B1>
mouse
selecting
you
and
Telephone
button.
another
can
move
Call
4-20
Page 81

This
chapter
call
entries.
for a telephone
information
All
voice
your
entries
determine
when
Number
files
directory
and
Directory.
to
appear
whether
you
create
file
are
stored
as
Creating
describes
A
call.
for
data
data
the
that
well.
Directory
how
voice
call
A
communication.
call
You
can
in
your
an
entry
entry.
contains
in
your
to
create
entry
data
call
entries
specify
Call
appears
You
a
call
Filecabinet
Entries
sets
you
up
screen
can
entry;
voice
entry
create
to
in
also
and
up
15
as
the
sets
well.
create
Phone
appear
and
data
information
up
appear
directory
You
Call
screen
a
Number
in
in
Phone
your
Using
the
Telephone
help
you
voice
the
or
To
or
call.
Call
Office.
display
Directory:
Create
Manager
set
screen
the
o
For a voice
press
press
Directory
Entry I or
press
o
For a data
to
select
up
the
You
or
Create
<Creat>,
[EDIT
<Enter>.
display
Entry
provides
information
can
display the
Directory,
Entry
call
DIRCTORYJ
menu,
ICreate
call
the
ICreate
Form
or
Edit
Data
the
or
form
entry
and
then
multiple
entry,
Directory
Entry I and
Create
you
Create
from
from
to
press
Entry
need
your
the
display
select
voice
to
Entry
Filecabinet
Call
ICreate
[EDIT
menu,
press
form
make
form
screen
the
Edit
entries
DIRCTORY]
and
<Enter>.
to
a
from
Voice
I
then
and
4-21
Page 82

Creating
When
you
or
Filecabinet,
file.
your
information
customer,
call
entry
specify,
To
display
or
Office:
Directory
display
Creating
for
also
the
the
1
From
<Create>.
You
the
you
a
pertaining
example,
appears
Call
Create
the
see
Entries
Create
create
Phone
Number
in a single
in
screen.
Entry
Office
this
Create
Select
object
lurwmljGD
Modem
Profile
Phone
Number
RS-232
Profile
Standard
file
Entry
the
form from
entry
file
to a particular
the
Directory
form
from
or
your
Filecabinet,
menu:
tg
create
as a Phone
lets
you
file
folder.
and,
your
the
Office
Number
store
client
The
if
you
Filecabinet
press
all
or
4-22
2
Select
A
form
3
Type a name
name
identifies
Filecabinet
IPhone
prompts
can
be
for
up
the
and
Number I and
you
for
Phone
the
Phone
to
12
the
characters
Number
entry
Phone
press
Number
Number
file
in
your
<Enter>.
name.
file.
long
and
in
your
directory.
The
Page 83

4
Press
menu:
5
Select
depending
create,
<Enter>
E!I
IVoice
on
and
Creating
to
display
Phone
object
Create
entru
@··';WYhHij
Data
entry
entry I or
the
type
then
press
(lI
of
<Enter>.
this
IData
entry
Directory
Phone
Entryl,
you
Object
want
Entries
to
Depending
Create
Create
Complete
entry.
saved.
The
fields
below,
Data
Entry."
the
type
Data
Data
the
If
under
of
on
Entry,
Entry
you
in
entry
whether
form
form
and
press
the
Create
"Creating
Refer
you
the
to
you
Create
appears.
press
the
a
the
are
selected
the
Exit
Entry
Voice
appropriate
creating.
Voice
Enter
key,
form
Entry"
Create
Entry
the
are
Voice
form
key
to
entry
described
and
"Creating
description
Entry
or
save
is
or
the
the
not
a
for
4-23
Page 84

Creating
Directory
Entries
Creating
Depending
or a data
the
Create
describe
shown
below:
II
Name
If
you
display
Filecabinet,
file.
the
Names
only,
You
directory
can
last
remember
names:
a
Voice
on
entry,
Data
the
Hame
Phone
**
Alternate
EMail
Address
Field 8
Field 9
In
Call Screen'?
Function
should
be
name
the
Entry
whether
you
Entry
fields
**
Yes
Key
Hone
the
you
have
use
entry
entered
then
following
you
use
form.
in
Create
already
the
matches
any
first
want
the
the
way
when
Create
The
Create
Voice
same
the
you
name,
entering
to
create
following
Voice
Entry
named
name
file
prefer--first
or
a
Voice
Entry
form from
the
Phone
in
this
name.
company
your
voice
Entry
paragraphs
form,
Number
field
name
name.
directory
entry
form
your
so
or
Just
4-24
o
You
name,
your
o
Names
characters
Albert,
James,
can
enter
the
directory.
are
Ryan
for
up
first
to
17
alphabetized
that
appear
would
example.
45
of
which
appear
characters
are
by
the
in
the
before
displayed
first
form,
Benson,
for
so
each
in
that
Page 85

o
o
Names
names
appears
Names
those
beginning
beginning
before
in
uppercase
in
lowercase
Creating
with
with
Adams.
letters
letters.
numbers
letters,
Directory
appear
so
appear
that
before
Entries
before
2nd
Phone
Use
:Jt:
the
number
Telephone
characters
business
characters
and
set
characters
described
Dialing
Alternate
This
optional
telephone
and
home
business
number
following
in
this
field:
o
You
can
phone
displayed
o
You
can
parentheses
making
are
ignored
o
It
is
numbers.
Manager
that
communications
let
up
you
redirection
and
the
later
Characters."
:Jt:
field
number.
number,
number
in
the
Alternate
guidelines
enter
number,
in
use
them
not
necessary
provides
let
you
enter
procedures
in
this
lets
If
for
in
the
up
the
the
spaces,
to
separate
easier
during
place
equipment.
alphabetic
dialing.
chapter,
you
someone
example,
Phone
:Jt:
field.
to
to
first
Call
a
to
dialing.
set
enter
:Jt:
type
45
characters
17
screen
hyphens,
groups
read.
to
separate
of
calls
These
to
set
under
gives
you
might
field,
the
of
which
or
periods,
These
special
through
Other
telephone
special
up
them
"Using
an
alternate
you
both
enter
and
telephone
for
are
Directory.
of
numbers,
characters
groups
dialing
PBX
special
numbers
up
Special
a
the
the
home
the
and
of
or
are
business
The
number
same
rules
characters
screen
or
Directory.
entered
given
entered
in
for
in
the
Alternate
Phone:Jt:.
this
field
Only
appear
:Jt:
the
field
first
in
follows
17
the
the
Call
4-25
Page 86

Creating
Directory
Entries
EMai1
This
Address
field
possible
computer
package.
section
Fie1ds
These
optional
information
characters.
this
field
Each
field
information
include
Name.
Directory
later
Entry
In
This
in
Form."
Ca11
field
displayed
The
default
screen.
response
entries
accepts
to
send
user
The
tells
8
and
9
for
Only
appear
can
it
Address,
You
use
menu
this
Screen?
determines
in
the
Yes
Once
automatically
are
displayed
written
who
has
chapter
you
how
fields
the
the
in
be
relabeled
contains.
Zip
the
to
relabel
chapter,
Call
response
the
Call
Electronic
purchased
"Sending
to
let
entry.
first
the
Code,
Modify
under
whether
screen
screen
changes
only
Mail
messages
send
these
you
store
Each
17
Call
screen
to
Some
Account
field
the
fields,
"Customizing
the
as
places
has
in
the
addresses,
to
another
the
Electronic
Messages"
messages.
additional
field
characters
or
represent
suggested
Number,
names
entry
well
as
the
entry
15
No
entries,
and
to
Directory.
in
holds
entered
Directory.
the
field
item
as
described
the
should
the
in
all
making
UNIX
Mail
this
up
to
names
and
Company
in
the
Create
be
Directory.
the
the
subsequent
it
PC
45
in
Edit
Call
Yes
Function
Telephone
(F1
and
Key
numbers
F3
through
Once a function
dial
that
key
and
function
re.pertory
chapter
about
A
total
function
4-26
number
holding
key.
dialing.
in
this
repertory
of
seven
keys
(Repertory
can
F8)
key
from
it
down
Dialing
Refer
section
dialing.
telephone
F1
and
be
is
any
F3
Dia1ing)
assigned
at
the
assigned
window
while
using
to
for
more
numbers
through
to
top
of
to a number,
by
you
pressing
press
function
the
"Placing
complete
can
F8.
the
the
keys
be
function
keyboard.
you
the
the
assigned
is
Calls"
information
assigned
keys
can
Shift
called
to
Page 87

To
assign
1
2
a
function
Move
Press
you
want
already
entry,
this
the
<Mark>
assigned
you
field.
key
cursor
to
assign
will
to
until
to
a
not
Creating
an
entry:
the
you
to
the
function
see
Directory
Function
see
the
entry.
key
it
as a choice
Key
function
If
to
another
Entries
field.
you
key
have
for
Creating
Depending
a
voice
the
Create
describe
shown
below.
earlier
III . . I
a
Data
on
entry,
Voice
the
in
this
Harne
Phone
II
Alternate
Data
Profile
Connection
Field 8
Field 9
In
Call Screen?
Function
Data
History
entries
Directory.
Entry
whether
you
Entry
fields
(The
chapter.)
II
Harne
Key
calls
you
use
in
Create
1200bps
Modell
Ves
Hone
List,
in
are
the
want
the
form.
the
Note
not
but
Call
Create
Create
Voice
ATE_Modem
recorded
they
to
create
The
Entry
do
screen
Data
Entry
following
Data
Entry
form
in
appear
and
a
data
the
entry
form
paragraphs
form,
is
described
as
or
or
4-27
Page 88

Creating
If
you
display
Filecabinet,
file.
the
You
directory
Directory
you
should
entry
the
Entries
Create
have
use
already
the
matches
Data
same
the
Entry
named
name
file
form
the
in
name.
Phone
this
from
field
your
Number
so
Names
only,
remember
names:
Phone
If
you
enter
type
the
modem
Use
the
number
can
last
the
o
o
o
o
#
are
a
telephone
telephone
on
the
following
in
be
entered
name
following
You
can
name,
your
directory.
Names
characters
Albert,
James,
Names
names
appears
Names
those
using
other
this
field:
any
then
first
enter
the
first
are
alphabetized
that
Ryan
for
example.
beginning
beginning
before
in
uppercase
in
lowercase
an
RS-232
number
number
computer.
guidelines
way
when
up
17
appear
would
with
with
Adams.
in
that
you
name,
entering
to
45
of
appear
letters
letters.
cable
this
to
prefer--first
or
company
characters
which
by
the
in
the
before
numbers
letters,
to
communicate,
field.
gains
type
your
are
first
form,
appear
so
appear
access
the
name
name.
directory
for
displayed
so
Benson,
before
that
before
Otherwise,
to
the
telephone
each
that
2nd
do
Just
in
not
4-28
o
You
phone
displayed
can
number,
enter
in
up
the
the
to
first
Call
45
characters
screen
17
of
which
or
Directory.
for
the
are
Page 89

o
You
parentheses
making
are
o
It
numbers.
can
ignored
is
not
use
them
spaces,
to
separate
easier
during
necessary
Creating
hyphens,
to
read.
dialing.
to
separate
groups
Directory
periods,
of
These
groups
Entries
and
numbers,
characters
of
Telephone
characters
business
also
let
up
redirection
the
procedures
this
chapter,
Alternate
This
optional
telephone
and
home
business
number
The
number
the
same
characters
screen
Data
Profile
This
field
profile,
profile
Manager
that
communications
you
enter
dialing.
to
under
#
field
number.
number,
number
in
the
Alternate
entered
rules
given
entered
or
Directory.
Name
lets
the
name
uses,
and
9600bps
provides
let
alphabetic
set
If
for
in
the
for
in
you
of
the
you
place
equipment.
These
a
up
them
"Using
lets
Special
you
someone
example,
Phone # field,
#
field.
the
this
Alternate
Phone
field
for
specify
the
communications
profile
set
calls
telephone
special
up
enter
gives
you
#.
the
name
type,
of
special
through
Other
are
Dialing
an
you
might
Only
appear
as
dialing
PBX
characters
numbers
characters
described
Characters."
alternate
both a business
#
of
enter
and
field
the
in
the
the
the
the
home
follows
first
data
application
shown
below:
or
and
later
Call
set
and
in
17
the
You
can
folder,
profile:
use
modify
o
If
press
profile
an
you
existing
an
existing
want
<Mark>
you
data
to
until
want
profile,
use
to
profile
an
existing
the
use.
name
from
or
appears
your
create
data
Profiles
a
new
profile,
for
the
4-29
Page 90

Creating
For
complete
the
AT&T
Connection
The
Connection
connection
you
use
Data
Profile
see
the
The
following
types:
Directory
o
If
the
Creating
under
Up
AT&T
o
If
see
Up
AT&T
UNIX PC
you
must
type
Entries
you
want
Create
a
"Creating
the
Software
UNIX PC
you
want
"Modifying
the
Software
UNIX PC
information
Terminal
field
want
match
Name
of
field.
connection
list
the
describes
to
create
command
new
data
Terminal
to
modify
Data
Terminal
about
lets
to
use.
type
from
profile
Data
Profiles"
for
Data
Profiles"
for
Data
data
Emulatjon
you
specify
Note
of
profile
Press
you
want
some
a
new
data
the
Filecabinet.
is
Calls
Emulation
an
existing
Calls
Emulatjon
profiles,
User's
which
that
the
Mark
to
possible
described
in
section
User's
in
section
User's
the
named
key
make.
profile,
the
Setting
of
Guide.
profile,
the
Setting
of
Guide.
refer
Gujde.
type
of
connection
in
the
until
connection
use
the
the
to
you
Fields
These
optional
information
characters.
appear
4-30
o Modem
o
Serial
(n
represents
through
o STARLAN
communications
Network
o SNA
3270
emulation
must
be
8
and
9
fields
for
Only
in
the
Call
for
calls
Port
6)
for
software
and
calls.
installed.)
the
the
screen
n
.
calls
Bisync
let
entry.
first
using
for
calls
the
RS-232
to
network.
must
you
and
the
the
be
3270
(Note
store
Each
17
characters
Directory.
built-in
using
port
STARLAN
(Note
installed.)
for
that
additional
field
an
number
that
IBM
3270
holds
of
modem.
RS-232
0
Network
STARLAN
3270
software
up
the
to
cable
45
field
Page 91

Each
field
information
include
Name.
You
Directory
described
Create
In
This
Entry
Call
field
displayed
The
default
screen.
Yes
response
subsequent
can
it
Address,
use
menu
later
Form."
Screen?
determines
in
the
Yes
Once
automatically
entries
be
relabeled
contains.
Zip
the
to
change
in
Call
response
the
Call
Code,
Modify
this
whether
screen
appear
Some
field
the
chapter,
places
screen
in
Creating
to
represent
suggested
Account
names
names
the
as
well
contains
changes
the
Number,
of
under
entry
the
entry
to
Directory
Directory
the
field
and
item
in
these
"Customizing
should
as
the
in
15
entries,
No,
and
only.
Entries
names
Company
the
Edit
fields,
be
Directory.
the
Call
all
as
the
the
Function
Telephone
(Fl
and
Key
numbers
F3
through
Once a function
dial
that
key
and
function
repertory
A
total
function
To
assign
number
holding
key.
dialinq.
of
keys
a
1
Move
2
Press
seven
you
already
entry,
this
Using
You
numbers
special
Special
can
use
to
take
services,
(Repertory
key
from
it
Dialing
telephone
Fl
and
function
the
<Mark>
want
you
field.
Dialinq
special
advantage
can
be
FS)
is
any
down
F3
key
cursor
to
assign
assigned
will
Characters
dialing
such
Dialing)
assigned
at
the
assigned
window
while
using
numbers
through
to
an
to
until
a
not
of
as
alphabetic
to
top
of
to a number,
by
you
press
function
FS.
entry:
the
Function
you
see
to
the
function
see
it
characters
Telephone
the
function
the
keyboard.
pressing
the
keys
can
be
the
function
entry.
key
as a choice
in
Manager's
dialing.
you
the
assigned
is
called
assigned
Key
field.
If
you
to
another
telephone
keys
can
Shift
to
key
have
for
4-31
Page 92

Creating
The
table
and
their
Directory
below
functions:
lists
Entries
the
special
dialing
characters
Symbol
n
+
-
=
$
&.
,
(comma)
:
%
-
}
Special
Dialing
Outside
to
request
equipment
the
Wait
the
9+767-1234.
Hang
Also
functions.
Flash
comma
Pause 2 seconds
next
Pause
the
Begin
Begin
line
number.
for
dial
number.
up
or
suppresses
switch
for
number.
10
next
number.
touch
pulse
Characters
Description
access.
an
outside
can
be
tone
For
disconnect
notes
hook.
proper
before
Example:
seconds
dialing.
dialing.
A
line
entered
before
example,
the
Follow
timing.
before
digit
before
and
dialing
&.,
dialing
on
PBX
dialing
line.
history
by
5000.
(n)
a
the
4-32
j j
II
II
}
Alphabetic
between
are
translated
numbers
example,
translates
dialing.
slashes
on
the
jpopcornj
to
or
double
to
the
dial
or
7672676.
Letters
quotes
corresponding
pad.
For
"popcorn"
typed
Page 93

Creating
Directory
Entries
Symbol
[ ]
*
Customjzing
You
can
form
for
Field
should
information
Originally
8
relabel
Special
the
use
Field
additional
and
Field
they
the
Dialing
Redirection
entry
direct
program
telephone
Suppresses
functions
of a telephone
example,
<*>
<#>
Create
8
and
information.
9
are
them
with
contain.
Create
Characters
key
key
Entry
Field
not
names
Entry
Description
names
an
automatic
to
the
number
notes
when
9+555-1234-.
on
pushbutton
on
pushbutton
Form
9
especially
representative
form
dialing.
entered
entry
placed
number.
in
the
Since
looks
(Continued)
Directory
in
brackets
dialing
so
can
be
and
history
at
phones.
phones.
Create
the
meaningful,
like
the
dialed.
the
For
Entry
field
of
this:
end
names
you
the
Name
Phone It
Alternate
EMail Address
Field
Field
In
Function
Call
8
9
Screen?
Key
It
Yes
None
4-33
Page 94

Creating
When
you
for
all
the
form
To
relabel
Directory
relabel
entries.
looks
Name
Phone
Alternate
EMail
Address
Field 9
In
Call Screen?
Function
these
1
From
the
like
II
II
Address
Key
the
Edit
Entries
Field
If
you
this:
Yes
None
fields:
Call
Directory
8
or
relabel
screen
9,
menu.
the
Field
or
Directory,
field
8
name
to
changes
Address,
display
4-34
2
Select
Directory
You
IModify
see
this
Field 8
Field 9 Field 9
field
menu
and
Label
I abe] Asgjgnment
~lm'·~I!~'I1:~
names I in
press
Assignment
••••
IIilI1
<Enter>.
form:
the
Edit
Page 95

3
Point
type
characters.
4
Press
from
screen.
to
your
<Enter>
the
the
field
new
window,
label.
to
Creating
you
save
and
want
You
the
return
Directory
to
can
new
to
change
type
labels,
the
up
Call
Entries
and
to
19
exit
4-35
Page 96

Page 97

This
chapter
change a name
profile,
a
directory
for
Editing
describes
or
example.
entry.
telephone
Directory
how
to
number
It
also
Entries
edit
or
describes
a
directory
modify
how
a
data
to
entry
delete
to
Modifying
To
modify
1
2
Press
Directory
3
4
a
Directory
a
directory
In
the
entry
Select
The
Modify
selected
form.
Follow
to
modify
In
general:
To
change
that
Line>
Then
Keep
removes
history
find
name,
are
collected
Call
to
[EDIT
IModify
the
needs
to
type
in
files,
but
Entry
entry:
Screen
be
modified.
DIRCTORYJ
menu.
Entry
appears,
appropriate
the
a
fill-in
modification
erase
the
mind
the
link
for
the
notes,
any
or
entry I and
form
similar
fields
information
new
information.
that
changing
to
previous
old
and
subsequent
under
Directory,
to
for
procedures
in
the
field,
and
entry.
history
the
new
display
press
the
to
the
form:
select
press
in
an
notes
You
history
name.
select
the
<Enter>.
entry
Create
the
entry
can
under
you
from
the
<Clear
fields.
and
and
Edit
~
still
the
notes
the
Entry
below
field
old
To
change
the
field
appears.
the
and
In
press
Call
Screen7 field,
<Mark>
until
Yes
select
or
No
4-37
Page 98

Editing
Directory
To
change
for
Key
appropriate
In
the
To
change
Data
until
appears.
To
modjfy
SetMP
o
Select
press
Setup
o
Select
make
Termina]
complete
fields
modify
Entries
repertory
field
Modify
Profile
the
information)
<Rplac>
form
your
or
delete
dialing,
and
press
key,
or
Data
the
data
Name
appropriate
the
data
the
Data
to
for
the
fields
changes.
Emulation
information
in
the
data
Terminal
profiles.
a
<Mark>
None,
Entry
profile
field
profile
:
Profile
display
the
function
select
and
data
profile
you
See
User's
about
until
appears.
form:
name,
press
profile
(Change
Name
the
want
the
Setup
key
assignment
the
Function
the
select
<Mark>
name
Terminal
field
and
Terminal
shown.
to
change
AT&T UNIX PC
Guide
for
filling
form
to
the
and
in
Deleting
To
delete
4-38
o
To
Connection
appropriate
5
Press
exit
an
an
1
Highlight
Press
data
Entry
change
Entry
entry:
profile
<Enter>
from
<Enter>
form.
the
field
connection
the
the
to
save
and
return
connection,
and
press
to
save
form.
entry
to
device
the
be
the
to
select
<Mark>
new
deleted.
changes
the
Modify
the
until
appears.
information
to
the
Data
the
and
Page 99

The
highlighted
notes,
however.
2
Press
QL
Directory
entry
if
press
recorded
<Dlete>
[EDIT
I .
entry
for
menu,
is
that
Editing
DIRCTORYJ
and
then
deleted.
entry,
Directory
to
display
select
Call
still
IDelete
history
exist,
Entries
the
Edit
and
Editing
Because
file
exists
directory,
mind
if
Remember
files
current:
PhoDe
the
it
you
o
You
Filecabinet,
file.
o
Removing
not
directory
Number
entry,
from
o
You
Edit
file,
Any
Number
entry.
to
o
Make
Telephone
o
When
it
Filecabinet.
Nllmher
directory
in
two
is
important
modify
can
delete
remove
file.
you
the
use
the
Directory
just
modifications
file
do
the
all
you
from
the
Files
information
places,
or
delete
a
just
or
deleting
the
directory
entry
Once
cannot
Filecabinet.
IModify
menu
as
you
as
well
following
changes
Manager.
delete
directory
the
Filecabinet
to
keep
Phone
Number
you
a
Phone
the
Number
delete
a
Phone
as
entry.
for a Phone
does
not
you
dial
remove
delete
the
Phone
Entry I selection
to
modify
modify a directory
are
made
to
keep
Number
as
to
the
your
Number
well
to
a
as
to
Phone
Phone
and
following
file
file
any
Number
Deleting
the
the
directory
Number
a
Phone
the
Phone
directory
Phone
files
file,
as
from
number
the
from
other
file
Phone
in
Number
entry.
Number
remove
the
in
entry:
the
does
the
file
the
from
4-39
Page 100

 Loading...