

Page 1
Page 2
UNIX PC
This
section
Terminal
information
it
with
Guide.
in
this
BEW
FEATURES:
1
2
3
3.51
Asynchronous
contains
Emulation
before
your
Page
AT&T
numbers
guide.
Page
132-column
UNIXPC
VT100-132,
Terminal
Page
available
Sequences
a
break
before
Page
new
session.
the
using
UNIX@ PC
3-11.
emulations.
Type
3-18.
character
transmitting
4-5.
entry
current
important
version
the
below
The
Terminal
displays
513BCT-132
field
Two
for
send
form.
The
Local
for
setting
The
tab
session
Terminal
information
3.51.
Terminal
Terminal
refer
for
To
on
the
new
special
strings
In
an
and
\p
characters
Commands
tabs
settings
only.
Emulation
Please
Emulator,
to
related
Emulator
VT100,
access
or
UNIXPC-132
Terminal
in
SS
field,
pauses
during
remain
about
review
Emulation
informati
now
513BCT a
these,
setup
characters
the
Auto-Log
\b
for 2 secon
to
the
menu
contains
a
in
Softwaz
usi
and
User
suppor
sele
in
for
generat
host.
termin
effect
th
ke
t
a
f
To
a
b
c
d
use
this
Access
and
Press
Commands
Select
ruler
appears
Using
the
remove
feature:
the
press
host
<Enter>.
<Shift>-<Cmd>
menu.
\Set
showing
at
the
the
cursor
left
along
tabs.
computer,·
Tabs \ and
the
current
bottom
and
right
the
to
of
show
press
the
arrow
ruler
type
<Enter>.
tab
stty
the
settin
screen.
keys,
to
set
ta
Loc
mo
a
Page 3
minal
Emulation
To
desired
appears
stop.
To
the T and
disappears.
3.51
Important
set
a
tab,
column
in
the
remove a tab,
press
Information
move
and
press
column
position
<Enter>.
the
cursor
<Enter>.
to
indicate
the
cursor
The T indicator
to
a
over
the
A T
tab
4
e To
You
can
during
make
a
Page
4-3.
can
now
screens.
screens,
o
<Ctrl>-<up
revealing
of
o
<Ctrl>-<down
down,
the
o
<Ctrl>-<Next>
screen.
o
<Ctrl>-<Prev>
screen.
o
<Ctrl>-<Beg>
of
o
<Ctrl>-<End>
of
save
the
change
the
current
ch~nge,
In
VT100
view
To
use
these
the
screen.
revealing
bottom
display
display
tab
these
repeat
up
to
scroll
arrow>
one
of
displays
memory.
displays
memory.
settings,
settings
session.
steps b through
and
513BCT
3
previously
or
page
key
combinations:
rolls
line
at a time
arrow>
one
the
rolls
line
screen.
displays
displays
the
the
the
press
at
any
If
you
emulations,
displayed
through
the
display
from
the
at
a
time
the
next
previous
first
last
<Exit>.
time
want
e
above.
these
the
display
from
full
full
24
lines
24
lines
to
you
up,
top
5
printing
Page
Local
4-21.
Commands
sequence
that
sent
The
menu
by
\stop
is
the
now
turned
host
Printing
allows
on
computer.
\
you
by
entry
to
terminate
an
in
the
escape
Page 4
Terminal
6
Page
513BCT
character
press
the
escape
console:
A-5.
<Enter>.
Enter
Emulation
If
you
terminal,
is
generated
Characters
key
sequence
can
sent
<Esc>[21;nlxxxx
3.51
are
now
Important
using
a
be
by
your
<Ctrl>-<J>
by
default
sent
to
programmed
the
Information
UNIX
PC
linefeed
when
the
host
using
host
to
as
a
you
by
an
the
7
8
TECHNICAL
1
where
sequence
or
characters.
Page
A-5.
<Esc>H
must
first
while
stop
at
a
tab
Page
B-2.
terminal,
The
first
and
PF4;
The
rest
These
can
be
while
TIPS:
Page
that
PC
with
3-16.
an
and
communications,
fail.
data
call
fail,
your
UNIX
n
is
the
(no
more
The
and
<Esc>[g
enter
on
the
the
stop
current
at
If
eight
four
these
are
labeled
correspond
used,
using
the
Automatic
error-free
the
host
After
again.
check
PC
number
than
VT100
stty
host
4)
terminal
are
now
tabs
system.
of
and x is
column
the
current
you
use
screen
keys
match
with
for
vi
your
are
the
same
UP,
the
example,
editor.
keys
labeled
DOWN,
login
path
exists
computer.
auto-login
such a failure,
If
the
and
auto-login
communications
the
host
characters
escape
supported,
and
<Esc>H
and
column.
UNIX
are
keys
VT100
to
sequences
If
there
try
computer.
the
press
<Esc>[q
PC
now
PF1, PF2,
on
LEFT
cursor
move
between
are
sequences
to
continues
path
in
character
sequences
but
<Enter>
sets
a
deletes
as
a VT100
mapped.
the
VT100.
and
RIGHT.
keys
the
cursor
assume
the
problems
place
between
the
you
tab
PF3
and
UNIX
can
the
to
3
Page 5
rermina1
Emulation
2
Page
emulate
identify
vt100-w.
display
3
Page
terminal
at
indicates
local
and
Commands
and
4-2.
4-3.
the
top
commands.
m,
nothing
M:
3.51
If
a
VT100-132
your
If
you
features
When
to
run
of
that
menu,
Important
you
are
terminal
use
will
using
an
emulation
the
screen
you
enter
If
happens.
you
Information
using
terminal
to
the
vt100-132,
not
work
the
UNIX
under
n<ESC>CMn
you
use
must
To
use
your
host
the
correctly.
PC
session,
the
the
access
the
UNIX
you
computer
from a remote
status
lowercase
uppercase
PC
to
should
132-column
a
to
the
as
display
line
access
Local
c
C
The
"<ESC>EX"
use
To
use
See
Remote
4
Page
serial
Information
or
you
your
control
To
PC,
a
b
<Esc>
same
the
exit
the
<Esc>
pages
4-3.
device
should
UNIX
enable
start
Select
<Enter>.
Select
<Enter>.
<Shift>-<C>
display
to
lowercase
uppercase
Access
port
associated
exit
from
the
<Shift>-<E>
4-13
If
to
Systems
that
enable
PC
hardware
by
logging
<Shift>-<M>
line
indicates
from
e
and
Terminal-Emulator,
E
and
<Shift>-<X>
and
User's
your
supports
and
I
I
Hardware
4-14
Guide.
UNIX
a
network
Network
the
Administration
hardware
hardware
disable
with
flow
in
the
x,
X:
in
PC
that
control
as
Setup
that
Emulator.
nothing
the
AT&T
is
connected
such
(ISN) , or a switch
the
install.
flow
flow
software
serial
I
I
as
on
and
and
you
If
happens.
you
UNIX
the
control,
control
port.
the
enter
you
must
by
AT&T
flow
UNIX
press
press
PC
a
on
4
Page 6
Terminal
c
Emulation
Select
Setup I and
configuring
select
d
Highlight
Control?
e
Press
To
disable
with a port,
Filecabinet
used
in
conjunction
Emulation.
a
Highlight
and
select
b
Highlight
and
select
c
Press
IRS232
the
field
<Enter>
the
software
open
and
<Enter>
port
open
the
No.
the
No.
press
an
the
the
Flow
3.51
Important
Setup I or
<Enter>.
RS232
number.
Enable
and
select
to
save
flow
Profiles
each
with
Flow
to
RS232
the
Control
Control
save
IRS232
expansion
Hardware
Yes.
the
change.
control
folder
port
from
the
changes.
Information
Expansion
If
you
associated
in
profile
by
Terminal
to
Host
Host
are
port,
Flow
your
to
field
field
be
For
most
accessed
stop
and
<Ctrl>-<S>
For
this
computer
<S>
as
the
If
your
stty
ixon
Note
that
editor,
not
interpret
same
way.
restart
interactive
with
the
restart
and
to
work,
to
recognize
XONjXOFF
host
computer
and
pressing
some
applications,
use a full
<Ctrl>-<S>
You
the
will
screen
software
Terminal
the
screen
<Ctrl>-<Q>
you
must
<Ctrl>-<Q>
flow
is
<Enter>
8-bit
not
display
Emulator,
display
key
set
control
a UNIX
such
character
and
be
able
in
applications
with
combinations.
up
the
and
characters.
system,
will
as
do
the
set
<Ctrl>-<Q>
to
this
stop
fashion.
you
host
<Ctrl>-
typing
this.
EMACS
and
can
the
do
the
and
5
Page 7
Terminal
Emulation
If
device
enabled
software
limitations,
you
screen
in
key
display
value,
For
"Important
UNIX
5
Page
UMODEM
manager
five
A
windows:
console
windows
3.51
hardware
to
on
flow
should
display
most
cases.
combination
when
such
more
PC
Owner's
4-10.
press
to
windows
file
transfer
requires
be
Important
flow
control
which
the
UNIX PC,
control.
when
be
able
with
Holding
should
the
port
as
9600
information
Information"
Manual.
Before
<Suspd>
make
sure
open.
Transfer
open
at
you
are
using
to
<Ctrl>-<S>
speed
baud.
on
you
that
Close
will
status
that
anyone
Information
is
unavailable
connected
you
should
Subject
the
Terminal
stop
and
down
help
stop
is
flow
control
section
transfer
and
check
you
have
any
create
and
no
more
time.
enable
to
the
restart
and
<Ctrl>-<Q>
the
<Ctrl>-<S>
the
set
to
of
a
the
no
extra
two
additional
Confirm.
than
on
or
above
Emulator
screen
a
high
see
the
AT&T
file
with
window
more
than
windows.
eight
the
not
the
the
the
The
6
Page
ITerminate
Commands
transfer
this
minutes
"time
between
After
back
Local
and
clear
<Shift>-<Exit>
call.
4-16.
menu
with
function,
for
out"
your
waiting,
typed
Commands
press
up
the
Place
You
File
Transfer I entry
when
UMODEM.
you
UMODEM
before
UNIX
if
characters
menu.
<Enter>.
problem.
to
a
new
should
you
have
If
the
can
host
to
you
have
again
the
still
your
you
PC
the
will
on
and
Select I Emulator
In
most
If
not,
terminate
data
call
avoid
initiated
do
to
host
transmit
host
screen,
cases
you
your
to
continue
using
in
the
need
wait
computer
computer.
does
open
this
must
active
Local
a
to
several
not
Reset
press
the
file
use
to
data
echo
the
I
will
data
your
work.
You
should
wi
th
a
placing
6
not
UMODEM
a
data
use
file
call
ITerminate
File
transfer
from a remote
when
terminal.
Transfer
you
I
are
Page 8
Terminal
Emulation
3.51
Important
Information
7 When
terminal,
will
terminal
remote
key
placing
typing
send a "break"
through
on
host.
your
In
remote
a
the
<Esc>
the
this
data
call
sequence
br
character
UNIX
configuration
terminal
PC
may
from
from
console
the
not
a
the
work.
remote
remote
to
the
[BREAK]
7
Page 9

'erminal
Emulation
3.51
Important
Information
(This
page
left
blank
intentionally.)
B
Page 10

@1985, 1986 AT&T
All Rights Reserved
Printed in USA
NOTICE
The information in
assumes no responsibility for any errors
this
document
is subject to change
that
may appear in this
without
notice.
AT&T
document.
Page 11

Preface
Welcome
~.
to
This
Asynchronous
features.
chapters:
o
o
o
o
o
the
AT&T
guide
QNIX® PC
describes
Terminal
This
guide
Introducing
features
and
Setting
up
the
calls.
of
what
you'll
Up
communications
This
connecting
Setting
describes
and
needed
also
how
shows
Up
how
to
for
sequences.
Communicating
the
procedures
system,
logging
receiving
screen
Appendix
the
data.
A
terminal
Asynchronous
Terminal
how
Emulation
is
organized
Termina1
to
(ATE)
Emulation
Asynchronous
need
to
the
Hardware
lines
chapter
an
RS-232C
the
to
set
terminal
you
with
files,
Software
up
how
for
install
the
to
Other
calling
in,
and
also
cable
software
emulation.
set
transmitting
capturing
Presentation
command
sequences
Terminal Emulation.
Emulation
set
up
and
into
the
Terminal
get
started.
shows
you
for
discusses
to
for
Data
the
ATE
up
automatic
Computers
another
Level
UNIX
use
PC
its
following
describes
Emulation
how
your
your
to
data
computer.
Calls
software,
environment
This
chapter
describes
computer
and
and
printing
Protocol
supported
User's
the
set
login
lists
by
o
Appendix
keyboard
emulation.
o
AppendiX
provides
details
o
Appendix
describes
B UNIX
codes
C
RS-232
pin
assignments
of
the
D
UMODEM
the
PC
Keyboard
transmitted
Technica1
UNIX
PC's
File
UMODEM
and
DTE
Transfer
protocol.
Codes
during
Information
technical
RS-232
lists
terminal
port.
Formats
the
i
Page 12
Preface
o
Appendix
provides
be
lists
o
Glossary
terms.
How
to
Proceed
You
should
UNIX
PC.
Getting
I f
Started
guide.
For
more
see
Also
telephone
detailed
the
AT&T
recommended
use
communications,
UNIX®
PC
Communications
o
AT&T
encountered
some
already
you're
Guide
UNIX
and
which
UNIX
E
Problem-Solving
a
list
possible
lists
be
familiar
not,
before
information
® PC
are
Owner's
the
remote
are
® PC
of
possible
when
placing
solutions.
and
defines
with
turn
to
continuing
about
Manual,
following
terminal
included
Management
Telephone
commonly
the
the
AT&T
using
guides
operation
in
binder:
Manager
Checklist
problems
a
data
basics
UNIX
with
the
describing
your
AT£T
User's
that
call
used
of
®
this
UNIX
during
can
and
the
PC
PC,
data
Guide
ii
o
AT&T
UNIX®
PC
Remote
Access
User's
Guide
Page 13
Contents
1
Introducing
What
You
Will
Terminal
Need
Emulation
Conventions
2
Setting
Setting
Connecting
Setting
Setting
3
Setting
Data
Getting
Installing
Creating
Creating
Up
Up
Up
Up
Up
Calls
Ready
Data
an
the
Hardware
Built-in
an
RS-232
Direct
External
the
Software
ATE
Software
Profiles
Automatic
Modem
Cable
Connection
Modem
for
Login
Calls
Calls
Calls
Sequence
Saving
Modifying
Using
4
Communicating
Placing
Transferring
Printing
Data
Data
a
Profiles
Data
Profile
Data
Screen
Profiles
with
Call
Data
Data
Files
Other
Computers
1-1
1-2
1-2
2-1
2-1
2-3
2-4
2-6
3-1
3-1
3-2
3-4
3-15
3-23
3-24
3-25
4-1
4-1
4-6
4-20
A
B
C
D
E
Presentation
UNIX
PC
RS-232
UMODEM
Technical
File
Problem-Solving
Level
Keyboard
Transfer
Protocol
Codes
Information
Formats
Checklist
A-I
B-1
C-l
D-1
E-1
iii
Page 14
Contents
G
I
Glossary
Index
Figures
B-1
UNIX PC
C-1
UNIX PC
Tables
A-1
ASCII
A-2
Control
A-3
Escape
A-4
Control
B-1
VT-100
B-2
Left
B-3
Function
B-4
Right
B-S
Letter
and
Action
Cursor
Keyboard
RS-232
Characters
Characters
Sequences
Sequences
Key
Functions
Codes
Keys
Keys
Action
Keys
and
Number
Port
Keys
Pinout
and
Keys
G-1
1-1
B-1
C-2
A-2
A-3
A-S
A-7
B-2
B-4
B-S
B-S
B-6
iv
Page 15

This
guide
Asynchronous
o
o
o
o
o
1
Introducing
provides
Terminal
Set
up
the
terminal
the
AT&T
working
the
were
work
as
While
using
they
terminal.
Select
gain
Set
access
up
terminal
automatic
automatically
you.
Transfer
You
can
exchange
programs)
online
boards
information
and
information
Print
on-screen
the
information
Emulation
same
way
513
in
UNIX PC
the
screen
to
data
to
with
gain
offered
Terminal
environments
as,
BCT
and
emulation
screen
options
other
login
log
into
and
information
other
systems
access
by
data
Emulation
you
(ATE).
other
DEC-VT100
mode,
and
and
keyboard
that
computers.
sequences
other
from
other
computer
and
to
the
these
or
store
need
ATE
that
emulate,
terminals,
terminals.
you
keyboard
of
allow
that
computers
computers.
(files
users
bulletin
wealth
services.
it
in a file.
to
lets
you
use
you:
such
are
as
another
to
for
and
or
call
of
or
if
The
Terminal
Telephone
you
first
Directory.
specify
information
When
you
you
gain
o
a
place
access
Place
Emulation
Manager
create
When
data
profile:
your
the
data
software.
a
data
you
computer
data
to
Terminal
calls
software
call
create
a
call
from a remote
works
To
use
entry
the
file
needs
in
data
providing
to
place
through
Emulation.
terminal.
with
Terminal
your
call
the
the
Telephone
the
Emulation,
telephone
entry,
data
you
call.
Manager,
1-1
Page 16
Introducing
What
You
To
use
Terminal
Will
UNIX PC
Need
Terminal
Emulation
Emulation,
you
need:
o A UNIX PC
o
Data
calls
port.
For
o An
Note
that
such
as
network
Conventions
This
guide
Information
boldface
connected
calls.
DATA
the
Telephone
features.
Telephone
can
this
RS-232C
connect
an
RS-232C
your
you
can
STARLAN.
you
want
uses
displayed
type.
Please
with
and
A
second
is
recommended
Manager
also
be
type
your
computer
also
Consult
to
use
the
following
For
example:
login:
at
capable
Manager
made
of
call
modified
computer
modified
to
place
for
on
the
least
telephone
to
and
using
you
null
straight
an
external
data
the
owner's
details.
conventions:
screen
one
of
transmitting
take
and
Terminal
ATE
software
your
need:
modem
to
another
calls
is
telephone
line
set
full
advantage
Emulation
installed.
UNIX
PC's
cable
computer,
cable
to
modem.
over a network,
manual
shown
for
in
line
data
up
to
connect
for
of
RS-232
or
the
Information
example:
Names
For
1-2
of
example:
Type
keys
<Exit>
you
type
unixpc
on
the
is
shown
keyboard
in
are
boldface
enclosed
type.
in
For
<>'s.
Page 17
The
mouse
buttons
are
Introducing
represented
Terminal
as
follows:
Emulation
Screen
Items
I
I's.
Key
combinations
separated
To
type
key,
press
The
exit
shown
The
help
is
shown
The
symbol
changes
Left
Middle
Right
keys
[HOLD]
to
select
For
example:
IRS232
by a hyphen.
<Shift>-<Cmd>
this
the
symbol
as:
[X]
symbol
as:
[?]
at
is
shown
mouse
are
key
the
button
mouse
mouse
enclosed
(highlight)
Setup
are
represented
combination,
Cmd
key,
in
the
in
the
bottom
as:
button
button
in
I
For
and
lower-left
upper-right
of a form
<B1>
<B2>
<B3>
[]
IS.
from
menus
by
example:
you
then
release
For
the
hold
corner
corner
used
example:
are
enclosed
two
keys
down
the
both
keys.
of a window
of a window
to
implement
in
Shift
is
[OK]
1-3
Page 18

Page 19
This
section
PC
hardware
The
UNIX
AT&T's
Model
integrated
of
Telephone
data
communication
RS-232
232
connections
connected
The
Setting
this
guide
and
set
you
are
Model
212
ports.
it
calling.
for
PC
houses
(1200
with
modems.
Up
describes
up
2
Setting
briefly
data
103
(300
bps).
the
Manager.
So
you
to
the
to
accommodate
Up
describes
communications.
a
built-in
bps,
or
This
telephone
Telephone
connections
can
how
use
computer
to
another
Software
the
how
modem
bits
built-in
lines
that
Telephone
for
Data
install
the
Hardware
to
set
compatible
per
modem
and
Manager
use
and
Calls
the
computer
up
second)
is
under
also
the
Manager
to
externally
chapter
ATE
or
your
with
and
fully
control
controls
UNIX
with
software
network
UNIX
PC's
RS-
of
Setting
Setting
includes
UNIX
Administration.
and
profile,
for
PC
set
Data
Up
up
connecting
and
up,
as
Calls
Built-in
for
calls
then
you
described
chapter
setting
Once
can
Modem
that
your
the
create
in
of
Calls
use
the
telephone
up
the
telephone
a
data
the
Setting
this
built-in
lines
entry
guide.
line
lines
through
Up
the
modem
or
lines
are
and a modem
to
install's
connected
Software
the
2-1
Page 20
Setting
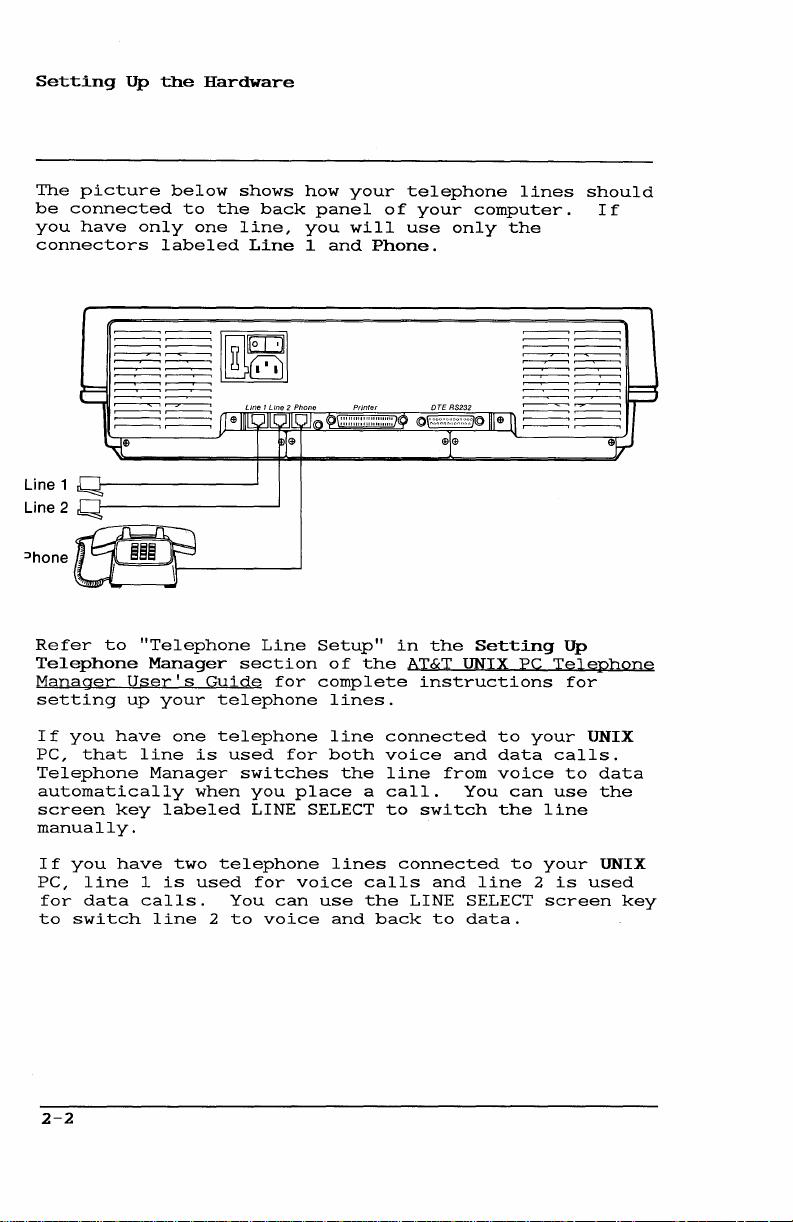
The
picture
be
connected
you
have
connectors
Line 1
2
Line
:Jhone
Up
the
only
labeled
Hardware
below
to
one
the
shows
back
line,
Line
how
panel
you
1
and
your
will
Phone.
telephone
of
your
use
computer.
only
lines
the
~-~~-~
~-~~-~
~-~~-~
~-r-~~"'--~
~-r-~~~~
should
If
Refer
Telephone
Manager
setting
If
PC,
you
that
to
User's
up
have
Telephone
automatically
screen
key
manually.
If
you
PC,
for
to
2-2
have
line
data
switch
"Telephone
Manager
Guide
your
telephone
one
line
telephone
is
Manager
when
labeled
two
1
is
used
calls.
line
2
Line
section
for
used
switches
you
LINE
telephone
for
You
can
to
voice
Setup"
complete
for
place
SELECT
voice
use
of
lines.
line
both
the
lines
and
in
the
AT&T
connected
voice
line
a
call.
to
connected
calls
the
LINE
back
the
Setting
UNIX
instructions
to
and
data
from
voice
You
switch
and
the
line
SELECT
to
data.
PC
can
to
your
your
2
Up
Tel§Phone
for
UNIX
calls.
to
data
use
the
line
UNIX
is
used
screen
key
Page 21
Setting
Up
the
Hardware
Connecting
Data
calls
data
calls
from
the
you
are
between
connecting
232
null
the
UNIX PC
a
description
port.
To
connect
an
using
require
UNIX PC
connecting
the
UNIX
to
modem
end.
an
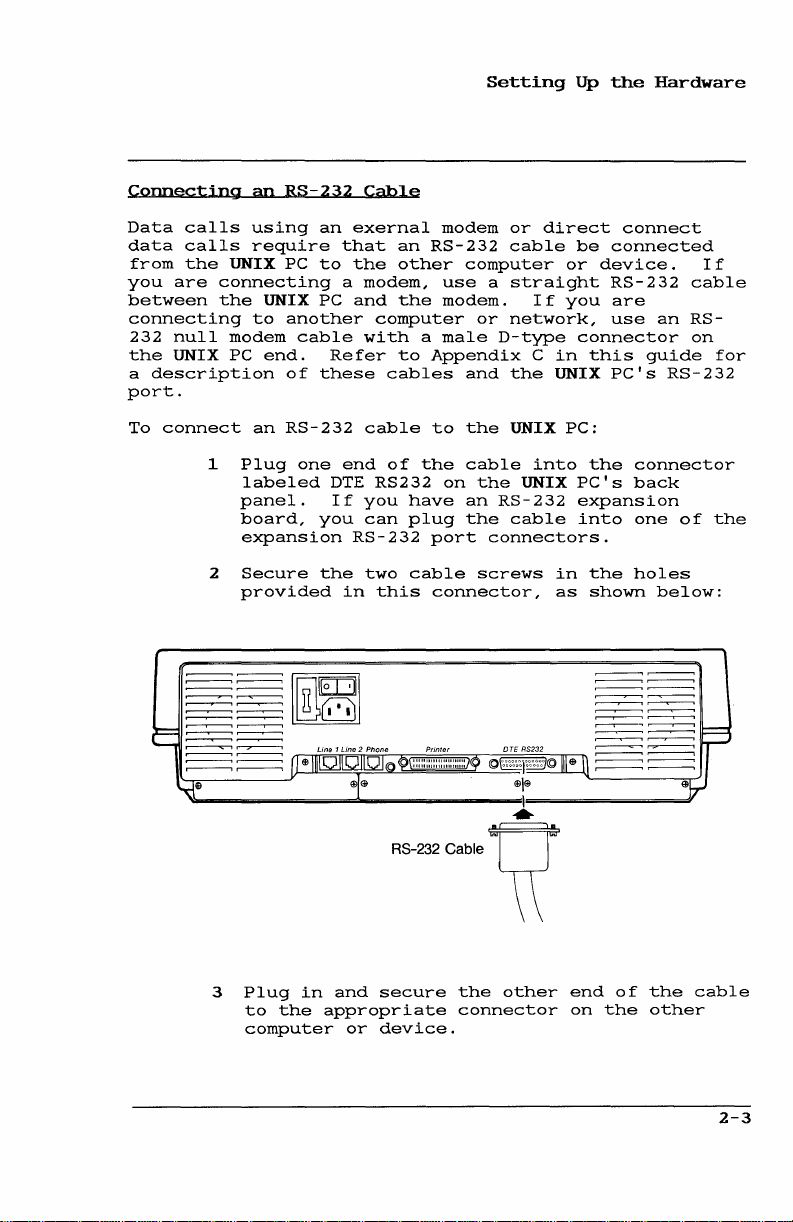
1
Plug
labeled
panel.
board,
expansion
2
Secure
provided
RS-232
an
to
PC
another
cable
Refer
of
these
RS-232
one
you
the
Cable
exernal
that
an
the
other
a
modem,
and
the
computer
with a male
to
cables
cable
end
of
DTE
RS232
If
you
can
RS-232
two
in
this
modem
RS-232
computer
use a straight
modem.
or
Appendix
and
to
the
the
cable
on
have
plug
cable
the
an
the
port
connectors.
screws
connector,
or
direct
cable
If
network,
D-type
C
the
UNIX
into
UNIX
RS-232
cable
be
or
device.
you
connector
in
this
UNIX
PC:
the
PC's
expansion
into
in
the
as
shown
connect
connected
RS-232
are
use
an
gUide
PC's
RS-232
connector
back
one
of
holes
below:
If
cable
RS-
on
for
the
3
Plug
in
to
the
computer
and
secure
appropriate
or
device.
the
other
connector
end
on
of
the
the
other
cable
2-3
Page 22
Setting
Up
the
Hardware
Setting
You
can
to
call
UNIX
PC.
leaving
Before
must
making a data
connect
computers
"Connecting
for
cabling
Once
the
procedures
1
2
3
4
Up
Djrect
use
direct
another
This
your
and
an
procedures.
RS-232
below
Log
from
Press
If
RS-232
skip
if
want
IRS232
step
Press
Expansion
Connection
UNIX
allows
telephone
the
RS-232
set
up
RS-232
cable
to
in
as
the
<Enter>
you
are
port,
to
step
you
have
to
use
Expansion
4.
<Enter>
connnections
PC
or
another
you
to
lines
call
using
null
the
RS-232
Cable"
is
connected,
set
up
the
install
and
Administration
to
display
setting
select
6,
or
an
RS-232
an
RS-232
Setup
to
Ports
display
menu:
Calls
through
share
available
an
modem
connection.
earlier
connection:
select
menu.
up
the
IRS232
expansion
expansion
I ,
an
computer
resources
for
RS-232
cable
in
this
follow
IHardware
the
Hardware
UNIX
Setup
and
then
this
RS-232
RS-232
from
while
other
port,
between
See
chapter
the
PC's
I ,
and
board
port,
go
port
your
calls.
you
Setup
menu.
standard
then
and
select
on
to
I
2-4
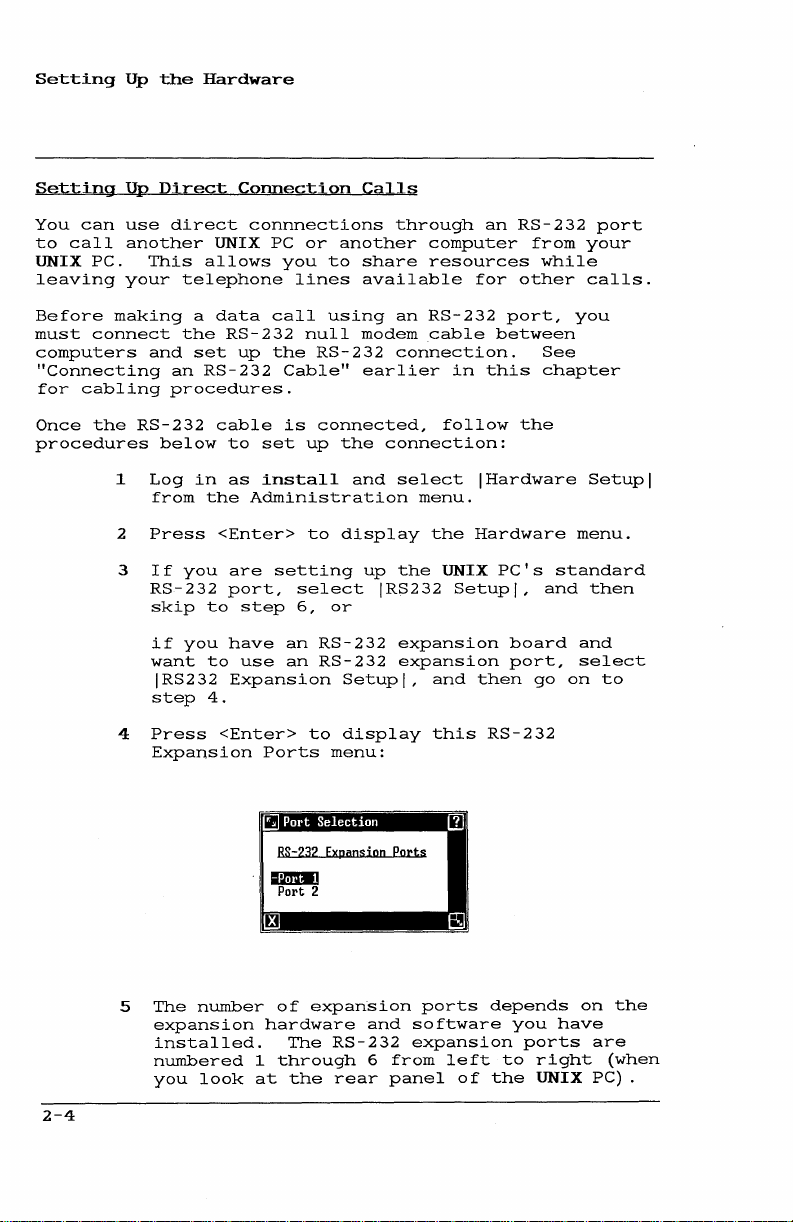
5
The
number
expansion
installed.
numbered
you
look
"
RS-232 Expansj
mmDIl
Port 2
of
expansion
hardware
The
1
through
at
the
on
and
RS-232
6
rear
Ports
ports
software
expansion
from
panel
left
of
depends
you
ports
to
right
the
UNIX PC) .
on
have
the
are
(when
Page 23
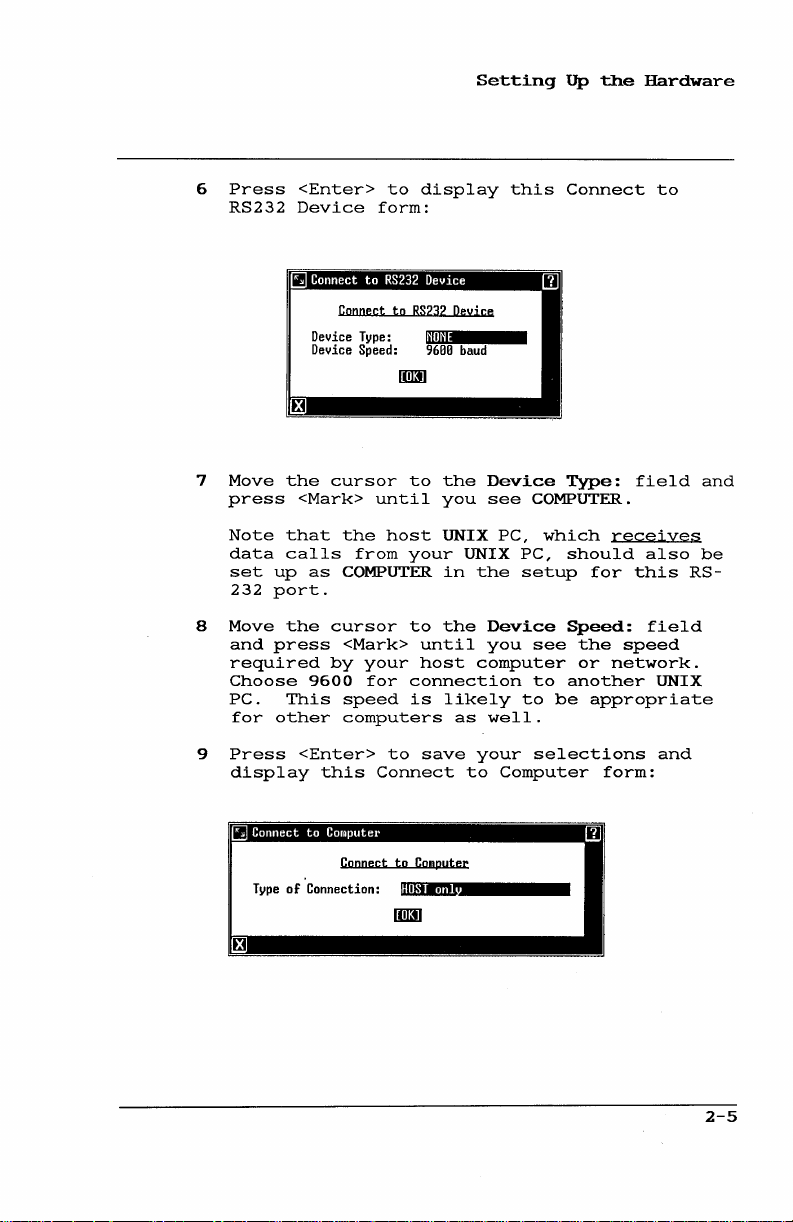
6
Press
RS232
<Enter>
Device
to
form:
display
Setting
this
up
the
Connect
Hardware
to
7
8
9
Move
press
Note
data
set
up
232
port.
Move
and
press
required
Choose
PC.
for
other
Press
display
III·
Type
III·
Device Type:
Device
the
<Mark>
that
calls
as
the
9600
This
<Enter>
this
of
Connection:
Connect
to
Speed:
cursor
until
the
host
from
COMPUTER
cursor
<Mark>
by
your
for
speed
computers
to
Connect
Connect
to
I-
RS232
Deyi
9600
baud
to
the
you
UNIX
your
UNIX
in
to
the
until
host
connection
is
likely
as
save
to
Computer
HOST
onl
ce
Device
see
COMPUTER.
PC,
PC,
the
setup
Device
you
see
computer
to
to
well.
your
selections
Computer
Type:
which
should
Speed:
the
or
another
be
field
recejyes
also
for
this
field
speed
network.
UNIX
appropriate
and
form:
and
be
RS-
2-5
Page 24
Setting
Once
the
a
data
described
chapter
10
11
entry
Up
the
Press
selection
calls
Do
outgoing
The
from
only
Press
For
up
(to
PC),
Access
cable
in
of
this
Hardware
<Mark>
sets
from
use
your
the
not
data
host
UNIX
your
UNIX
in
the
<Enter>
complete
a UNIX PC
receive
refer
to
User's
is
connected
and a serial
the
Setting
guide.
until
up
you
direct
UNIX PC
HOST
calls.
PC,
which
PC,
to
~
for
save
setup
Note
information
as a remote
data
calls
the
AT&T
Guide.
and
(RS-232)
Up
the
see
only
this
your
from
UNIX PC
set
Software
CALLER
connection
to
another
selection
receives
be
set
RS-232
selections.
about
host
your
up,
profile,
only.
computer.
for
data
up
as
port.
setting
computer
UNIX
Remote
you
can
as
for
Data
This
outgoing
calls
HOST
create
Calls
Setting
You
can
use
that
telephone
calls.
Before
must
connect
computer
connection.
in
this
Once
the
procedures
2-6
Up
External
connect
modem
lines
to
a
place
and
making a data
the
the
See
for
cable
in
the
<Enter>
RS-232
modem,
"Connecting
to
as
and
chapter
RS-232
1
2
below
Log
from
Press
Modem
Calls
separate
data
built-in
call
using
straight
and
cabling
is
connected,
set
up
install
Administration
to
modem
to
calls,
modem
an
available
RS-232
cable
then
set
an
RS-232
procedures.
the
connection:
and
select
menu.
display the
an
RS-232
leaving
between
up
Cable"
follow
IHardware
Hardware
the
your
port,
RS-232
the
port
for
your
earlier
and
other
you
Setup
menu.
I
Page 25
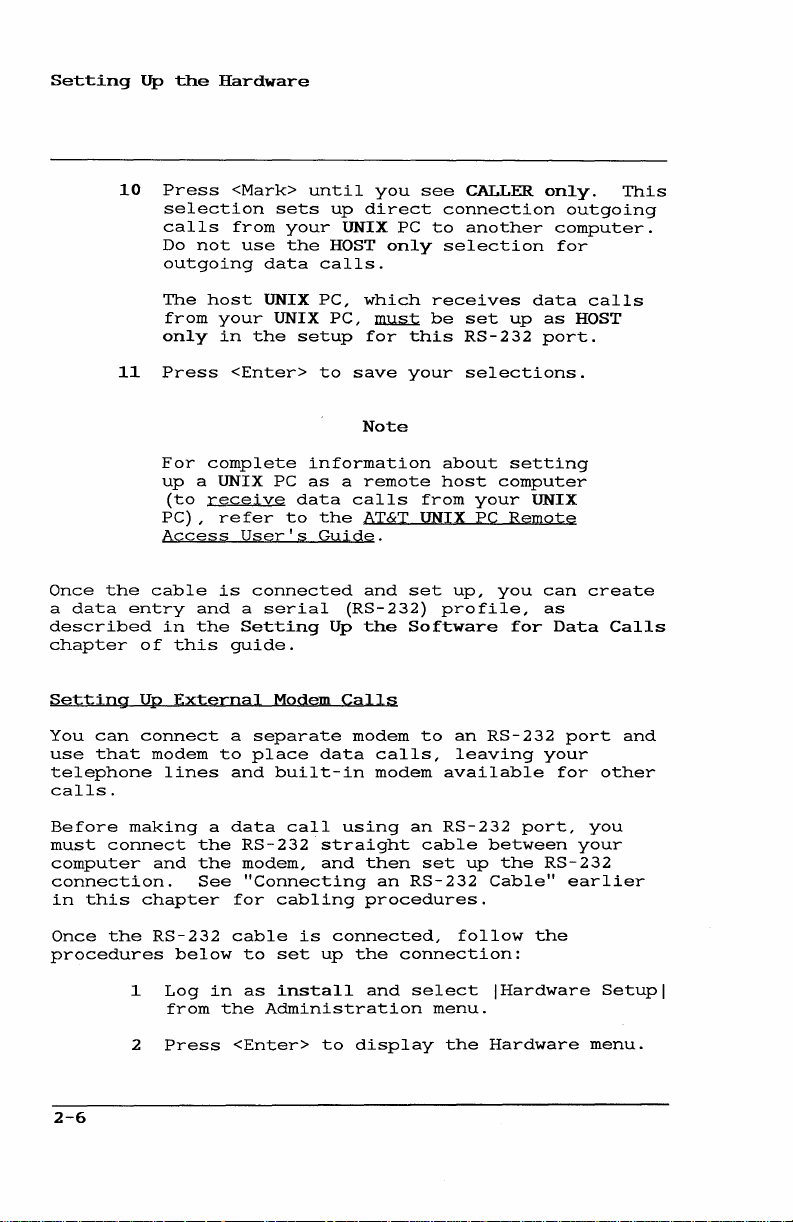
3
If
port,
step
if
want
step
4
Press
Expansion
5
The
expansion
numbered
you
you
6,
you
to
IRS232
4.
number
installed.
look
are
setting
select
or
have
use
Expansion
<Enter>
Ports
51
POl't
RS-232 Expansi
Iimm]
Port
of
hardware
1
through
at
IRS232
an
RS-232
an
RS-232
to
Selection
2
expansion
The
the
up
Setupl,
display
menu:
on
Ports
and
RS-232
6
rear
Setting
the
Setupl,
expansion
expansion
software
expansion
from
panel
standard
and
this
III
ports
left
and
of
up
then
board
port,
then
RS-232
depends
you
to
the
the
RS-232
go
ports
right
UNIX
Hardware
skip
and
select
on
to
on
have
are
(when
PC)
to
the
6
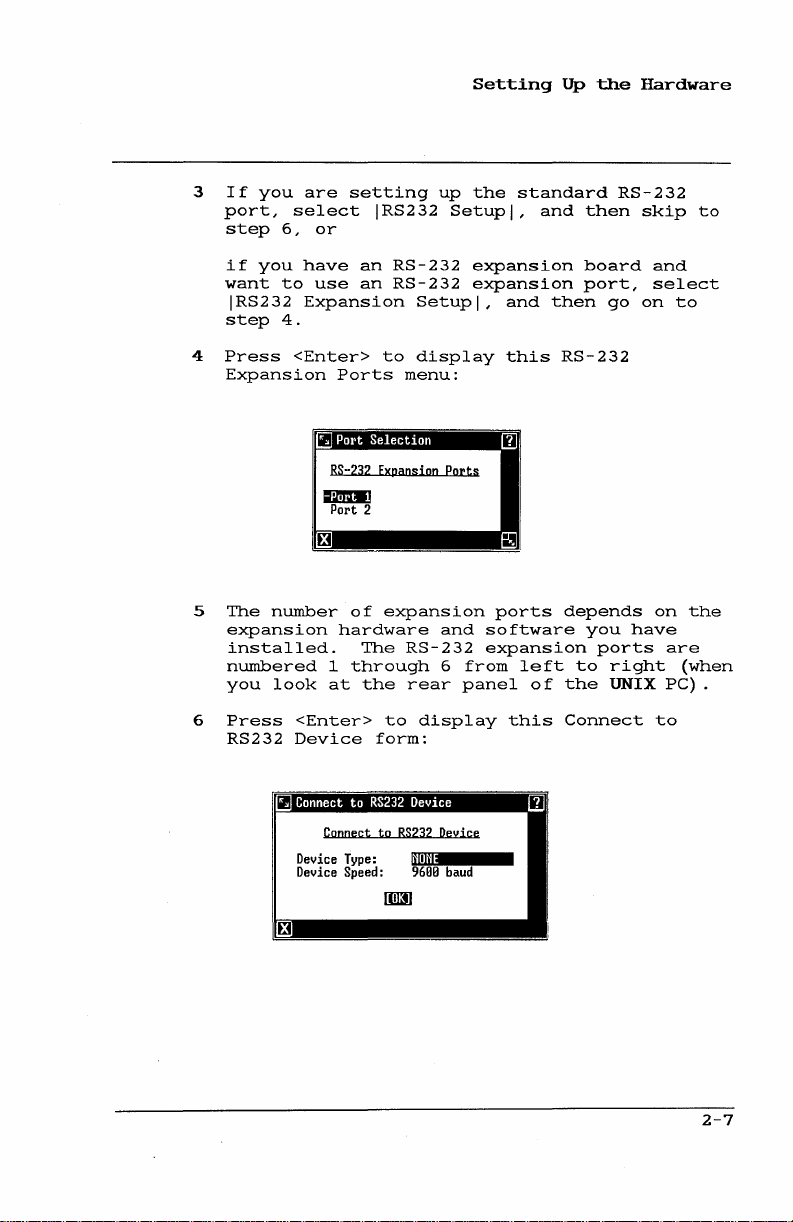
Press
RS232
<Enter>
Device
iii·
Connect
Device Type:
Device Speed:
to
form:
to
RS232
display
I-
Deyice
1$1110
9600
baud
this
Connect
to
2-7
Page 26
Setting
up
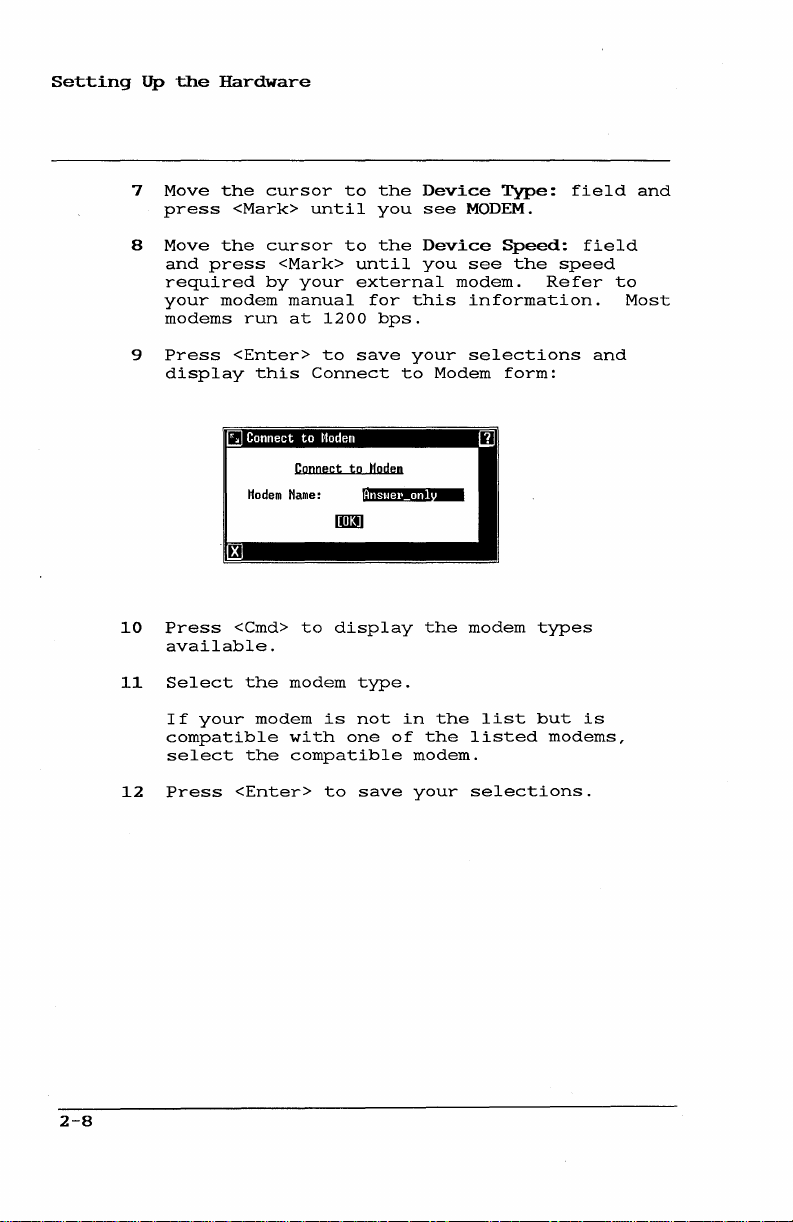
7
8
9
10
the
Hardware
Move
the
press
Move
the
and
press
required
your
modem
modems
Press
display
II·
Press
available.
cursor
<Mark>
cursor
<Mark>
by
run
<Enter>
this
Modem
<Cmd>
until
your
manual
at
1200
to
Connect
Connect
Harne:
to
to
the
you
to
the
until
external
for
bps.
save
to
Modem
display
Device
see
Device
you
this
your
to
modem.
Modem
the
MODEM.
modem
Type:
Speed:
see
the
Refer
information.
selections
form:
types
field
field
speed
and
to
Most
and
2-8
11
12
Select
If
your
compatible
select
Press
<Enter>
the
modem
the
modem
with
is
type.
not
one
compatible
to
save
in
of
the
modem.
your
the
listed
selections.
list
but
is
modems,
Page 27
3
Setting
Up
the
Software
for
Data
Calls
Setting
up
installing
creating
computers
contain
that
options,
accommodate
communicate.
modify,
Because
and
ATE
Telephone
install
Getting
Before
and
Ready
you
following:
1
2
the
the
data
profiles
(called
This
save a data
works
Manager
set
install
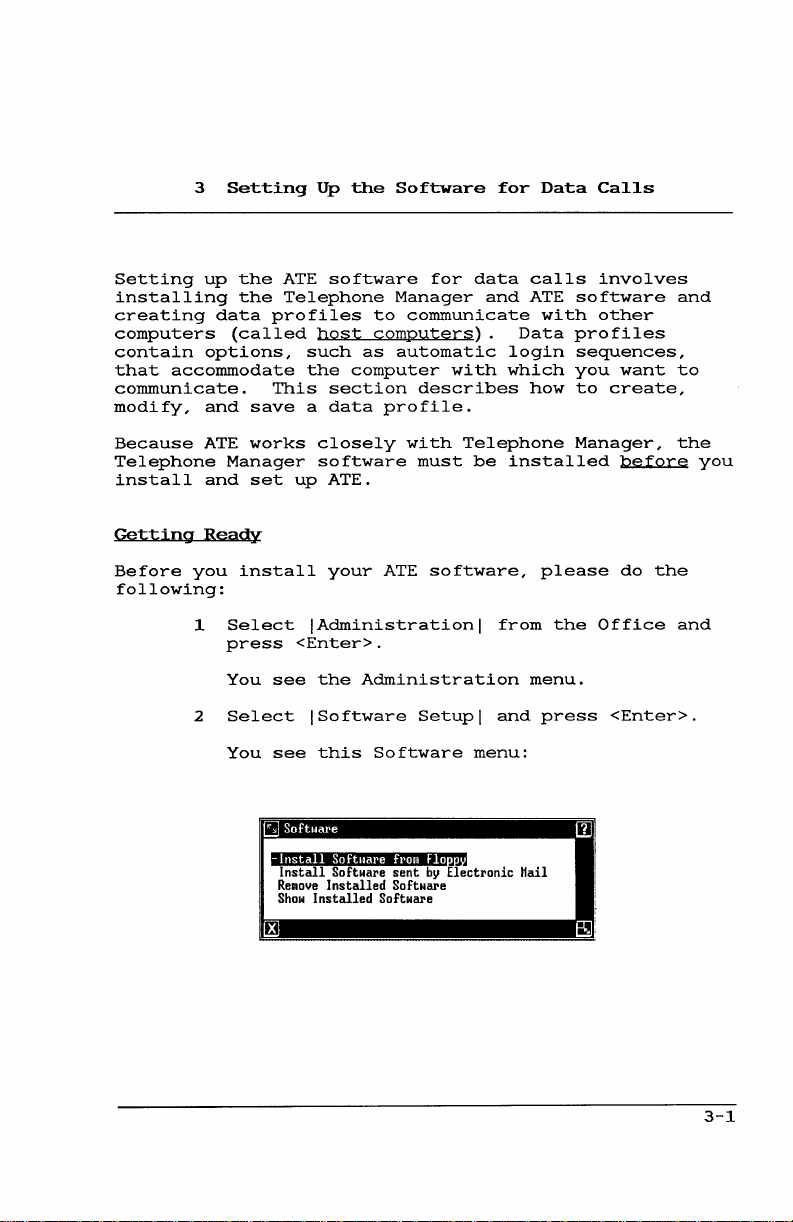
Select
press
You
see
Select
You
see
III·
-
Install
Install
Reliloye
Show
ATE
software
Telephone
to
host
such
the
computers).
as
computer
section
closely
software
up
ATE.
your
!Administration!
<Enter>.
the
Administration
!Software
this
Software
Softuare
Software
Installed
Installed
for
Manager
communicate
automatic
describes
profile.
with
must
ATE
software,
Setup!
hom Flo
sent
by
Software
Software
data
and
with
Telephone
be
from
and
menu:
Electronic
calls
ATE
with
Data
login
which
how
installed
please
the
menu.
press
Mail
involves
software
other
profiles
sequences,
you
want
to
create,
Manager,
before
do
Office
<Enter>.
and
to
the
you
the
and
3-1
Page 28
Setting
Up
the
3
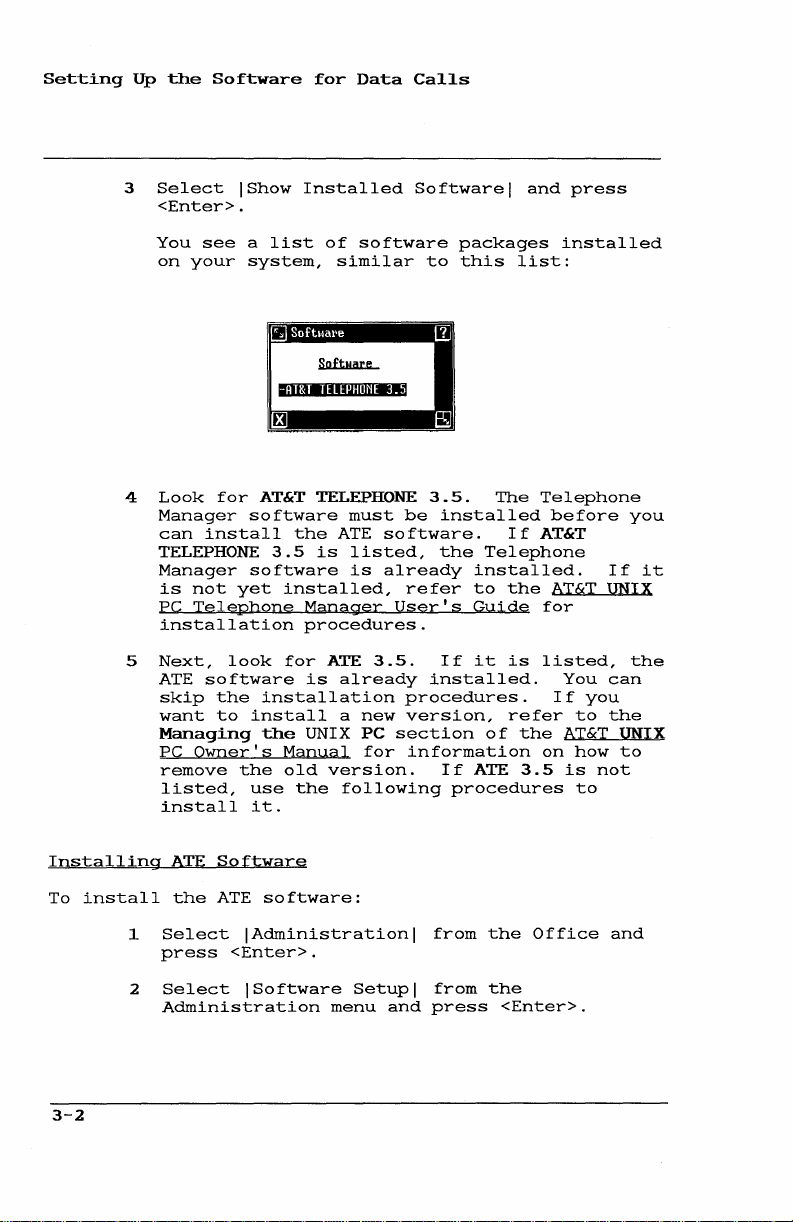
Select
<Enter>.
You
on
4
Look
Manager
can
TELEPHONE
Manager
is
PC
installation
Software
IShow
see a list
your
system,
for
AT&T
software
install
software
not
yet
Telephone
for
Data
Installed
of
software
similar
1;"jlMII'IU:IUU-'"
TELEPHONE
must
the
is
ATE
listed,
3.5
is
installed,
Manager
procedures.
Calls
Software I and
packages
to
this
3.5.
be
installed
software.
the
already
refer
User's
Telephone
installed.
to
Guide
list:
The
If
the
press
installed
Telephone
before
AT&T
If
AT&T
UNIX
for
you
it
Installing
To
install
3-2
5
Next,
ATE
skip
want
Managing
PC
remove
listed,
install
1
Select I Administration
press
2
Select
Owner's
ATE
the
look
software
the
installation
to
install
the
the
use
it.
Software
ATE
<Enter>.
ISoftware
for
Manual
old
software:
Administration
is
UNIX
the
ATE
already
a
version.
following
menu
3.5.
If
installed.
procedures.
new
version,
PC
section
for
information
If
procedures
I
from
Setup I from
and
press
it
of
ATE
the
the
<Enter>.
is
refer
the
3.5
Office
listed,
You
If
to
AT&T
on
how
is
to
the
can
you
the
UNIX
to
not
and
Page 29
3
4
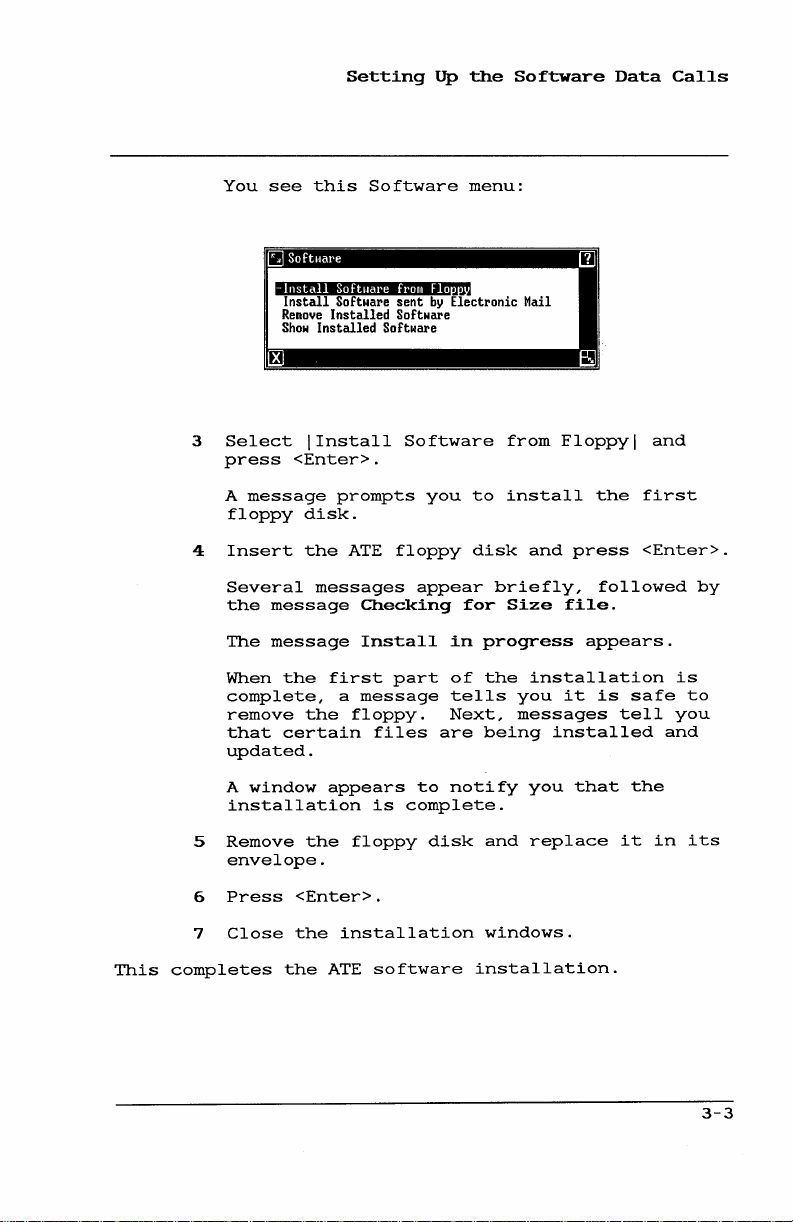
You
Select
press
A
message
floppy
Insert
see
-
Install
Install
Remoye
Show
<Enter>.
Setting
this
Softual'e
Software
Installed
Installed
IInstal1
prompts
disk.
the
ATE
Software
fl'OIll
sent
Software
Software
Software
you
floppy
up
the
menu:
Flo
by
Electronic Mail
to
disk
Software
from
install
and
Data
I
~
Floppy I and
the
first
press
<Enter>.
Calls
This
Several
the
The
When
complete,
remove
that
updated.
A
installation
5
Remove
envelope.
6
Press
7
Close
completes
message
message
the
certain
window
<Enter>.
the
the
messages
first
a
the
floppy.
appears
the
floppy
installation
ATE
appear
Checking
Install
part
message
files
to
is
complete.
software
in
of
tells
Next,
are
notify
disk
briefly,
for
Size
progress
the
installation
you
messages
being
you
and
replace
windows.
installation.
followed
file.
appears.
it
is
installed
that
safe
tell
the
it
in
by
is
to
you
and
its
3-3
Page 30
Setting
Up
the
Software
for
Data
Calls
Creating
Data
profiles
needed
other
files
profiles
Profiles
installed.
ATE
uses
You
can
You
can
Filecabinet,
Entry
The
and
form.
rest
modify
Creating
You
can
modem
To
profiles.
create
Filecabinet:
Data
Profiles
are
to
set
up
that
are
stored
is
set
the
following
o Modem
using
o
RS-232
communications
use
existing
create
or
of
this
a
data
Profiles
use
this
a
data
files
your
you
up
profiles,
the
(or
data
the
chapter
profile.
from
method
profile
that
computer
work
in
the
for
you
types
built-in
serial)
data
profiles
Telephone
the
to
contain
with
Filecabinet.
when
of
which
modem
profiles,
using
profiles
from
Manager's
tells
Office
create
from
the
for a data
the
on
your
the
ATE
data
profiles:
set
up
and
the
RS-232
or
create
the
Office,
you
how
RS-232
Office
information
call.
UNIX
A
software
folder
PC,
Like
data
is
communications
telephone
which
set
lines
up
ports
new
ones.
the
Create
to
Data
create,
(serial)
or
the
named
save,
or
3-4
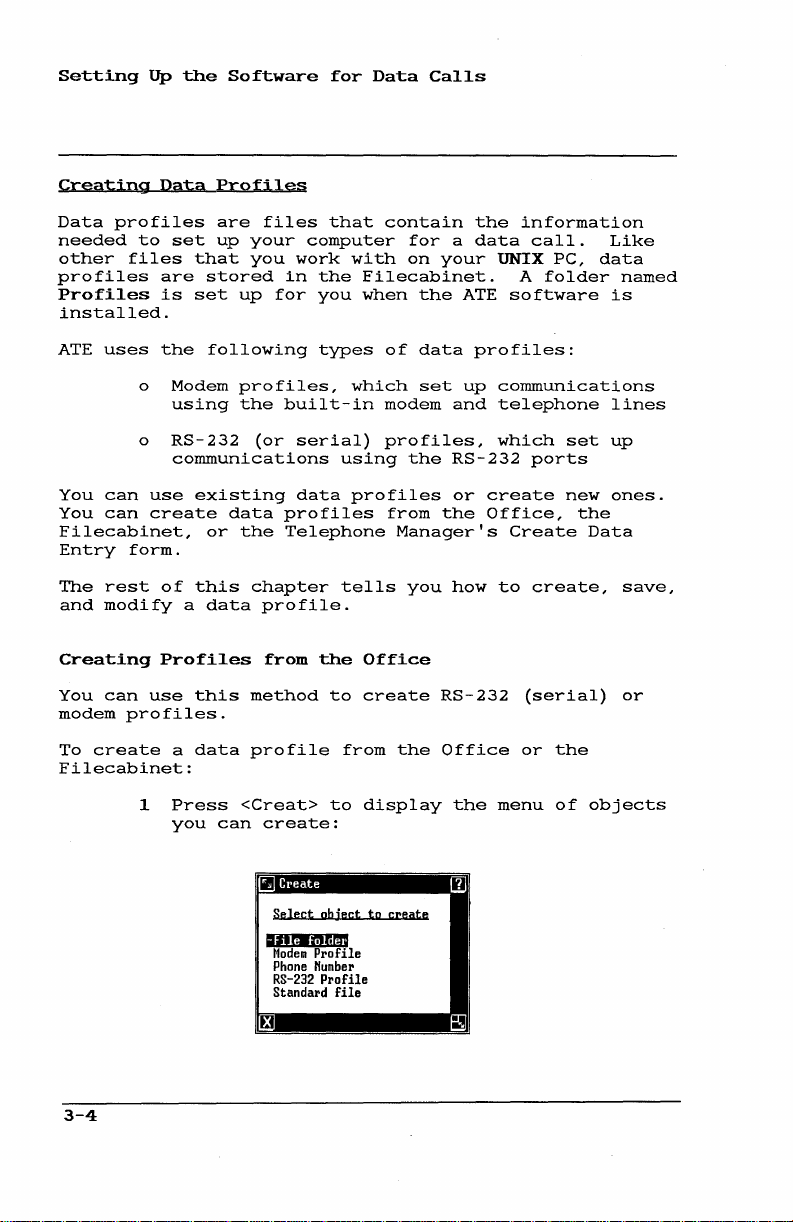
1
Press
you
<Creat>
can
create:
to
Select
object
IUNtII.!!!"
Modem
Profile
Phone
Humber
RS-232
Profile
Standard
file
display
to
create
the
menu
of
objects
Page 31

2
Select
the
Setting
profile
Up
type
the
Software
from
the
Data
following:
Calls
The
folder
3
4
5
6
7
profile
in
o IModem
o
Press
modem
IRS-232
the
and
RS-232
<Enter>
Type a name
be
descriptive
creating.
Press
<Enter>
form.
Complete
the
described
Setup
Press
Form"
<Enter>
options.
you
your
created
Filecabinet.
Profilel
telephone
Profilel
port.
to
for
to
Terminal
under
later
to
now
display
the
of
the
display
"Filling
in
save
exists
to
set
to
profile.
type
Setup
this
your
up a call
lines
set
the
the
In
chapter.
in
up a call
name
The
of
profile
Terminal
form,
the
Terminal
terminal
the
Profiles
using
form.
name
as
setup
using
should
you
Setup
the
are
3-5
Page 32

Setting
up
the
Software
for
Data
Calls
Creating
To
create
Profiles
1
With
press
You
2
Directory
You
a
data
Select
the
see
see
from
profile
Call
[EDIT
the
ICreate
menu
this
Telephone
from
Telephone
Screen
DIRCTORY] .
Edit
Directory
data
entry I from
and
press
Create
Data
Manager
or
Directory
Manager:
menu.
<Enter>.
Entry
displayed,
the
form:
Edit
5l Create Data Entry III
Hame
Phone
1*
Alternate
Data
Connection
Field 8
Field 9
In
Function
3
1*
Profile
Call Screen?
Key
Point
<Creat>
to
Hame
to
1200bps
Modem
Yes
None
the
Data
display the
Profile
Name
Terminal
field.
Profile
Press
form:
3-6
III
Profile
Application
Jj:rmjnaJ
Hame
Hallie
-
Profile
ATE_Modem
Page 33

4
Type a name
should
you're
5
Select
<Cmd>
applications
created.
ATE_Modem
Setting
be
descriptive
creating.
the
Application
to
see a menu
For
or
Up
for
the
for
which
creating
ATE_Serial.
Note
the
profile.
of
Name
of
the
profiles
ATE
Software
the
type
field
different
profiles,
This
can
Data
name
of
and
Calls
profile
press
be
use
Procedures
given
below.
Application
and
ATE_Serial
other
emulator
packages
create
packages,
that
package.
6
Select
want
to
to
create
lATE_Serial I to
7
Press
You
Complete
<Enter>.
see
described
8
Setup
Press
Form"
<Enter>
options.
for
filling
installed
profiles
refer
the
application
use.
a
the
the
under
names
may
or
for
to
Select
modem
create
Terminal
Terminal
"Filling
below.
to
save
in
the
other
appear,
than
representing
communications
on
your
other
the
UNIX
communications
documentation
and
profile
lATE_Modem I
profile;
Setup
an
Setup
your
select
RS-232
form.
form,
In
the
terminal
Terminal
ATE_Modem
pc.
To
for
type
if
you
profile.
as
Terminal
setup
Setup
form
you
want
are
3-7
Page 34

Setting
up
the
Software
for
Data
Calls
Filling
The
your
In
Terminal
computer
communication:
To
fill
required
to
To
in
by
communicate.
display
o
the
Terminal
Setup
for
11-
Flow
this
the
computer
the
selections
Point
repeatedly
appears,
to
form
terminal
Send
Check
Terminal
RS232
Modem
Character Size: 7
Character
Flow
Control
Control
form,
the
until
or
Setup
Form
contains
emulation
Baudrate :1ibili.Ih&
Parity:
Parity:
Control : 0
Stop
to
from
Auto
you
field
No
No
Type : UNIXPC
ff
Bits:
1
Echo : No
Host:
Yes
Host:
Yes
login
No
need
network
for
to
each
or
and
the
selection
options
and
find
with
field:
press
for
data
out
the
which
<Mark>
you
setting
settings
you
want
up
want
The
field
3-8
point
a
choice
following
in
the
to
menu
paragraphs
Terminal
of
and
the
the
field
press
Setup
and
available
<Enter>.
describe
form.
press
choices.
the
<Cmd>
choices
to
Select
for
display
your
each
Page 35

Baud
Rate
The
Baudrate:
which
The
A
create
is
supports
A
create
up
connected
baud
generally
or
Send
The
controller
capability
transmission.
data
choices
rate
of
a
compatible
rate
of
an
an
RS-232
rates
network
Parity
Send
110,
field
is
transmitted
are:
300,
1200
modem
the
Parity:
bps
profile.
with
300
9600
bps
RS-232
or
through
supported
serial
are
most
documentation
and
uses
to
make
1200,
is
AT&T
and
is
or
the
field
sure
Setting
offers
2400,
selected
The
models
1200
selected
serial
profile
RS-232
common.
by
networks.
to
works
the
host
data
Up
selections
in
bits
4800,
UNIX
baud
profile.
port,
The
determine
like
computer's
is
the
Software
for
per
second
9600,
automatically
PC's
and
an
the
Refer
a
data
garbled
built-in
212
If
external
300
the
103
rates.
automatically
for
higher
not
the
and
modems
you
and
rates
to
your
speed
quality
parity
Data
speed
(bps).
19200.
when
when
are
modem
1200
are
checking
during
Calls
at
you
modem
and
you
setting
modem
to
use.
Each
character
string
the
parity
zeroes
makes
an
odd
computer
is
correct
adds
up
of
and
the
or
can
to
seven
bit.
ones.
eighth
even
then
by
an
displayed
data
Think
The
bit
number
verify
checking
even
or
bits,
of
UNIX
even
of
whether
odd
on
the
plus
data
PC's
or
zeroes
that
number.
odd
the
screen
an
bits
Send
as
and
data
each
is
eighth
as a series
needed
ones.
group
sent
bit
Parity:
you
of
option
to
The
send
eight
as
a
called
of
maintain
other
to
bits
it
3-9
Page 36

Setting
Up
the
Software
for
Data
Calls
Select
Find
call,
Check
The
for
Select
one
o No
o
o
out
and
Parity
Check
data
one
o
of
means
without
used
parity.
Even
even
Odd
odd
the
requirements
set
Set
other
Parity:
being
of
No
means
garbled
No
the
when
means
parity.
means
parity.
this
Send
UNIX
received
the
is
the
following:
data
parity.
the
data
data
selection
Parity
PCs.
field
following:
no
parity
characters
default
is
other
is
is
of
to
value
by
sent
This
sent
sent
the
to
Note
No
the
check
received
setting.
from
default
computer
from
from
computer
match.
for
is
the
UNIX
is
the
UNIX PC
setting
does
the
the
accessing
quality
PC.
performed.
are
can
not
check
UNIX PC
UNIX PC
you
plan
controller
displayed.
be
with
with
to
Any
Find
parity,
3-10
out
o
whether
and
Yes
garbled
set
Set
other
performs
characters
the
this
Check
UNIX
a
host
selection
Parity
PCs.
parity
received.
computer
Note
to
to
No
check
sends
match.
for
and
discards
data
accessing
any
with
Page 37

Setting
Up
the
Software
Data
Calls
Terminal
The
Terminal
setting
Select
Type
Type:
up
the
kind
one
of
the
o
VT100
the
DEC
when
that
terminals.
o
513BCT
with
setting
computers,
513
BCT
selection.
o UNIXPC
It
provides
features
o
REMOTE
remote
Remote
for
placing
any
data
uses
do
not
field
of
following:
sets
VT-100
you
communicate
is
set
sets
the
AT&T
when
terminal.
is
used
and
is
terminal.
Access
call
REMOTE
select
offers
terminal
up a terminal
terminal.
up
to
support
up a terminal
513
BCT
you
such
communicate
as
the
513BCT
to
log
support
capabilities.
used
to
place
Refer
User's
a
data
call
placed
as
the
terminal
it
in
four
selections
to
be
emulated.
mode
Use
with a host
DEC
mode
terminal.
with
AT&T
3B2,
is
the
into
all
a
to
other
of
data
the
for
for
Guide
remotely.
from a remote
type,
this
field.
compatible
this
setting
computer
VT-100
compatible
Use
host
that
default
UNIX
the
Office
call
from
AT&T
UNIX PC
the
procedures
Note
terminal
even
for
series
this
use
PCs.
if
with
the
a
that
you
The
terminal
and
513BCT
UNIX
PC
described
Manual
selections
keyboard
in
under
control
codes
the
AT&T
kbd(7)
sequences
are
listed
and
control
UNIX® PC UNIX
and
escape
(7)
supported
in
Appendix
sequences
System V User's
.
by
the
A.
VT-100
The
are
3-11
Page 38

Setting
Up
the
Software
for
Data
Calls
RS232
The
RS232
the
emulator
signal
does
not
Select
Be
sure
profile.
data
call.
Character
The
Character
of
data
and
receipt
Select
Modem
Modem
from
affect
one
o
o
to
bits
one
0 5
Control
should
the
of
On
in
is
connected
Off
a
host
a
DTDM
check
It
can
Size
per
of
of
data
use)
Control:
host
modem
the
following:
most
if
your
computer
in
this
be a source
Size:
character
data.
the
following:
bits
field
exit
when
computer.
profiles.
cases,
to
UNIX PC
an
AT&T
selection
field
per
value
it
such
another
is
or
to
System
of
value
for
both
character
determines
receives
The
value
as
when
UNIX
directly
certain
75/85.
before
errors
determines
the
(not
a
disconnect
of
this
your
PC.
connected
networks,
saving
when
placing
the
transmission
for
normal
whether
UNIX
your
number
field
PC
to
or
a
to
Typically,
3-12
0 6
0
0 8
o
data
use)
data
7
data
a
character
Seven
the
description
above),
eight
bits
bits
bits
data
data
or
per
per
per
bits
bits
character
charactercharacter
is
transmitted
and
of
and
one
the
no
parity
Send
parity
(not
in
Parity:
for
strings
bit
bit.
normal
(refer
field
of:
to
Page 39

The
other
compatibility
character
the
requirements
Stop
Bits
Stop
bits
character.
many
stop
selections
with
size
selection.
To
gain
the
character
are
additional
The
bits
are
of
access
Stop
Setting
are
systems
the
Bits:
sent
included
requiring
Set
other
to
size
bits
field
for
Up
the
this
computer.
Note
another
to
eight
transmitted
each
Software
to
ensure
different
selection
UNIX
bits.
value
character.
Data
PC,
set
after
determines
to
Calls
match
each
how
Select
Set
this
other
Character
The
characters
terminal
character
your
computer.
Character
host
UNIX PC
you
type
displayed
one
of
o 1
o 2
baud
selection
Set
UNIX
Echo
are
emulation.
you
computer
can
is
for
the
stop
stop
Stop
Echo:
type
echo
both
you
following:
bit
bits,
rates
to
Bits
PC.
field
displayed
back
does
characters
sent
to
(the
frequently
(110
match
to 1 for
on
Some
to
not
to
the
see.
default
to
300
the
Note
value
your
host
your
display
to
host
selection)
used
bps)
requirements
accessing
determines
terminal
computers
screen
each
the
screen
computer
with
screen
send
for
character,
so
the
of
another
how
each
display.
that
and
slower
the
during
If
the
what
3-13
Page 40

Setting
up
the
Software
for
Data
Calls
Select
Flow
Flow
data
of
transmission
Control
being
print
flow
Select
one
o No
o
Control
control
from
either
received
data
control.
one
of
characters
operation,
mode,
Yes
to
type
or
Set
another
being
computer
to
Host:
during
of
the
following:
if
the
host
is
the
to
display
the
host
of
operation
half-duplex
Character
UNIX
to
Host
acts
as a data
lost
for
field
from
transmission,
the
following:
becomes
is
to
also
default
computer
PC.
if
some
provides
the
computer
your
called
typed
is
mode.
Note
Echo
traffic
the
holding
full
reason
host
echoes
screen.
remote
setting.
characters
simultaneously.
also
called
to
No
for
manager
area
or
if
interrupted.
this
be
service
sure
computer.
typed
This
or
and
accessing
(input
the
data
If
to
type
of
full-duplex
send
This
local
you
enable
to
for
echo
prevent
queue)
The
data
plan
them
Flow
to
this
For
up
sends
data
3-14
to
flow
stop
it
when
o
Yes
enable
the
o No
control
sending
an
the
Set
accessing
(the
host
to
disable
XOFF
UNIX PC
Flow
default
flow
computer.
to
work,
data
(DC3)
Control
other
control
flow
the
to
signal
sends
UNIX
and
recommended
for
control.
host
the
UNIX PC
and
it
an
Note
to
Host
PCs.
data
computer
to
resume
XON
(DCl)
to
Yes
setting)
received
when
for
from
must
the
UNIX PC
sending
signal.
be
to
set
Page 41

Flow
This
from
is
lost
or
transmission
Control
field
your
if
sets
UNIX
the
from
PC
host
Host
up
flow
to a host
computer's
is
interrupted.
Setting
control
Up
the
for
computer,
input
Software
data
being
so
that
queue
Data
~
no
becomes
Calls
data
full
Select
For
up
to
input
signal
UNIX
Auto
The
login
name,
you
when
save
time
receive
one
o
a
flow
send
queue
when
PC.
Login
Auto
sequence.
password,
log
you
you
you
of
Yes
enable
computer.
No
control.
control
an
is
it
Set
accessing
Login:
into
place
the
place
the
results
the
following:
(the
default
flow
if
the
host
to
work,
XOFF (DC3)
almost
is
ready
Flow
Control
other
field
An
automatic
account
another
a
data
effort
the
of
call.
of
and
control
computer
the
signal
full
and
to
receive
from
UNIX
lets
you
number,
computer's
call.
typing
You
these
recommended
for
host
to
to
Note
Host
PCs.
set
login
and
system
Automatic
this
can
commands.
data
sent
does
not
computer
the
UNIX PC
send
an
more
to
up
an
provides
so
forth,
automatically
login
information
also
set
setting)
to
use
must
XON
data
Yes
for
automatic
up a file
the
host
flow
be
when
(DCl)
from
the
a
login
so
that
sequences
every
to
set
its
to
Creating
To
set
up
1
2
an
Automatic
an
On
Login:
Select
automatic
the
Terminal
field.
Yes.
Login
login
Seqyence
sequence:
Setup
form,
point
to
the
Auto
3-15
Page 42

Setting
ill'
Timer: _
R81:
R82:
R83:
R84:
R85:
R86:
R87:
R8B:
R89:
R81B
R811
R812
R813
up
3
Press
Sequences
4
Fill
described
Sequences
the
Software
<Enter>
File
Hame:
in
the
form:
form
below,
Form."
for
to
Data
display
881:
882:
883:
884:
885:
886:
887:
88B:
889:
881B
8811
8812
8813
I1ilII
with
under
Calls
your
"The
the
Auto-Logon
information
Auto-Logon
as
The
Auto-Logon
Each
of
fields
enter
occurs
host
computer.
characters
sends
field,
field,
3-16
5
When
save
the
RS:
holds
up
information
when
you
you
the
host
then
waits
and
so
you
complete
the
automatic
Sequences
(Receive
to
29
that
receive
When
have
computer
to
on.
characters.
follows
and
your
entered
the
receive
the
Form
String)
answer
UNIX
in
characters
login
the
PC
the
the
form,
sequence.
and
SS:
In
same
the
receives
RS1:
characters
press
these
sequence
prompts
field,
in
<Enter>
(Send
fields,
the
the
in
String)
from
it
SS1:
the
to
you
that
the
then
RS2:
Page 43

For
example,
prompt
you
a
data
in
type
call
receive
user
name,
later
in
Sequences."
You
fill
highlight
fields
This
are
field
seconds,
received
create
a
received
feature
The
Timer:
seconds.
timeout
the
in
the
logging
this
in
the
described
holds
for
from
timeout
or
can
field
If
period
you
RS1:
response
to
the
login
chapter
the
form
fields
your
the
the
line
prevent
you
is
Setting
could
field,
in
host
prompt,
you
by
and
in
the
maximum
UNIX PC
host
period
will
wasted
is
optional
leave
30
seconds.
enter
and
the
computer,
then
in.
under
using
typing
the
to
computer.
within
be
time
this
Up
the
the
host
enter
SSl:
field.
the
automatically
A
detailed
"Sample
the
arrow
your
following
amount
wait
for
This
which
disconnected.
on a call.
and
can
field
blank,
Software
computer's
the
user
When
UNIX PC
example
Automatic
keys
information.
paragraphs:
of
time,
data
field
data
must
contain
the
Data
name
sends
to
in
to
is
This
up
default
login
you
waits
is
Login
be
used
be
to
Calls
that
place
to
your
given
The
to
9999
File
Name
The
File
records
set
up
to
be
used
The
file
file
in
file
to
pathname.
RSl·
through
The
RS:
entering
receive
receive
and
terminal
host
is
last
few
Name:
information
in
your
if
you
name
your
Filecabinet.
any
UNIX
RS13
fields
prompts
from
the
strings
type.
too
long
characters
field
login
you
on
resulting
want
in
directory
the
or
strings
host
are
prompts
If
to
fit
of
holds
sequence.
to
capture
this
field
left
computer.
the
in
the
the
name
from
This
is
Expert
by
side
of
users
entering
of
characters
Some
for a login
string
the
field,
string.
of a file
any
tasks
field
information.
stored
can
a
full
the
menu
examples
name,
received
you
that
that
is
you
optional,
as a standard
direct
the
UNIX
are
that
for
you
of
password,
from
can
the
enter
3-17
the
Page 44

Setting
SSl:
tbrouqh
The
SS:
entering
and
commands.
answers
terminal
up
fields
your
to
type.
the
Software
SS13
on
answers
Some
prompts
for
the
right
to
the
examples
for a login
Data
side
host
of
Calls
of
computer's
send
name,
the
menu
strings
password,
are
for
prompts
are
and
Special
Sometimes
computer,
commands
computer
return
characters
\E
\e
\2
\q
\r
\n
Characters
you
or
you
to
the
might
characters.
in
In
an
special
session
these
In
an
the
(CR)
character
computer
data.
In
an
feed
next
character
computer
To
send
a to
send a Control-D
type
in
Send
receive
host
send a message
your
RS:
characters
SS:
same
on
SS:
(LF),
line
followed
-d
special
may
want
computer.
You
RS:
field,
characters
with
field,
effect
the
in
responds
field,
which
at
in
is
or
receive
in
an
can
and
the
UNIX PC
RS:
the
an
sending
by
SS:
and
Receiye
characters
to
send
followed
use
SS:
fields:
typing
automatically
host
in
SS:
this
as
pressing
keyboard.
fields
with
this
places
same
RS:
field
a
a
control
the
character.
to
field.
special
For
example,
the
following
anyone
computer.
fields.
special
when
more
character
the
position.
when
line
feed.
the
host
Strings
from
characters
by
two
of
character
the
Return
Use
the
than
causes
cursor
the
character,
For
computer,
the
these
ends
Do
this
host
one
Use
host
the
host
carriage
special
the
not
key
line
a
on
the
this
example,
host
or
use
has
of
line
type
3-18
Page 45

Setting
up
the
Software
Data
Calls
Procedures
To
save
data
profile
To
modify
already
To
delete
profile:
your
1
Fill
Logon
2
Press
an
saved:
1
Follow
given
Terminal
2
Point
3
Press
Sequences
4
Make
an
1
Follow
Terminal
for
automatic
you
automatic
<Enter>
automatic
given
Saving,
are
in
all
Sequences
<Enter>.
the
later
Setup
to
the
<Enter>,
form
your
changes
to
the
later
Setup
Modifying,
login
creating:
the
login
steps
in
this
form
Auto
displaying
containing
save
login
steps
in
this
form
sequence
fields
form.
to
the
to
you
sequence
modify a data
chapter,
for
Login:
to
the
sequence
sequence
modify
chapter,
for
Deleting
as a part
want
that
the
profile.
field.
the
your
form,
from a data
a
the
profile.
Sequences
in
the
you
profile,
displaying
Auto-Logon
sequence.
and
again.
data
displaying
press
profile,
of
Auto-
have
the
the
the
Sample
Use
the
auto
2
Point
3
Automatic
following
login
Select
to
save
sequences.
to
the
INol
the
Login
examples
Auto
for
this
profile
Sequences
Login:
again.
to
help
field,
field.
you
and
set
press
up
<Enter>
your
own
3-19
Page 46

Setting
Up
the
Software
for
Data
Calls
Sample
This
into
name
1:
Sequence
sample
another
John
automatic
with a password
1
In
These
the
2
In
These
followed
3
In
These
password.
4
In
These
return
5
In
These
prompt
prompt
portion
feature
UNIX
the
host
the
the
the
the
for
login
PC.
RS1:
field,
characters
UNIX
SSl:
field,
characters
by a return
RS2:
field,
characters
SS2:
field,
characters
(\r).
RS3:
field,
characters
requesting
does
not
is
sufficient
to
make
a UNIX PC
sequence
This
host
secret:
type
are
PC.
type
enter
type
are
type
enter
type
are
terminal
fit
an
accurate
UNIX PC
the
the
(\r).
the
the
the
in
the
for
can
Please
prompt
John\r
login
Password:
prompt
secret\r
password
by
RETURN:
last
type.
field,
the
match.
be
used
has a user
login:
displayed
name
for
a
and
part
of
The
and
automatic
to
a
the
entire
this
login
log
by
3-20
6
In
the
These
a
return
SS3:
field,
characters
(\r).
type
enter
unixpc\r
the
terminal
type
and
Page 47

The
To
save
Auto-Logon
• •
I"
Timer:
RS1:
Please IDgin:
RS2:
PasswDrd:
RS3:
by
RETURH:
RS4:
RS5:
RS6:
RS7:
RS8:
RS9:
RS1B:
RSl1:
RS12:
RS13:
the
o
Press
Sequences
File
Hame:
sequence:
<Enter>.
Setting
IIilIJ
form
SS1:
SS2:
SS3:
SS4:
SS5:
SS6:
SS7:
SS8:
SS9:
SS1B
SSl1
SS12
SS13
Up
looks
JDhn\r
secret
l!lliiMIii
the
Software
like
\r
this:
Data
Calls
When
you
to
place
automatically.
after
Sample
Expert
that
In
perform
this
you
2:
users
example,
computer
BCT
terminal
root
directory,
of
this
that
information
can
1
use
a
call
place
Sequence
as
root
later
In
the
data
to
the
The
the
can
also
tasks
for
the
using
emulation.
and
be
recalled.
the
File
profile
host
host
call,
for
ExPert
set
them.
sequence
a
checks
is
recorded
Name:
UNIX
Office
ready
up
profile
It
then
the
field,
containing
PC,
window
for
Users
automatic
logs
that
lists
active
in a file
Logging
type
you
work.
the
selects
processes.
out
this
are
appears
login
user
the
files
named
is
log.chk
sequence
logged
shortly
sequences
into
a
AT&T
in
All
log.chk
automatic.
in
host
513
the
3-21
Page 48

Setting
up
the
Software
for
Data
Calls
These
session
Filecabinet.
the
pathname,
2
In
These
login
3
In
These
4
In
These
password.
5
In
These
return
6
In
These
terminal
7
In
characters
UNIX
the
characters
prompt.
the
characters
the
characters
the
characters
the
characters
the
in
system
RS1:
SSl:
RS2:
SS2:
(\).
RS3:
type
SS3:
the
such
field,
field,
field,
field,
field,
field,
store
file
To
log.chk
store
you
could
as
/usr/tmp/log.chk.
type
match
type
log
type
are
type
enter
type
match
prompt.
type
the
the
login:
the
root\r
you
Password:
the
secret\r
the
RETURN:
the
b513\r
results
in
file
enter
host
in
as
prompt
password
host
of
your
elsewhere
a
full
computer's
root.
for
a
and
computer's
the
in
a
3-22
8
9
10
These
computer
In
the
This
character
system
In
the
This
executes
list
the
In
the
This
character
the
host
files.
characters
as
an
RS4:
field,
prompt.
SS4:
field,
files.
RS5:
computer
AT&T
matches
the
field,
matches
identify
513
type
type
host
type
sends
you
BeT
terminal.
#
the
host
Is
-l\r
computer's
#
the
system
after
to
the
computer's
command
prompt
listing
host
to
that
the
Page 49

11
In
the
SS5:
Setting
field,
up
type
the
Software
ps
-e\r
Data
Calls
The
this:
To
12
completed
1iII'
I
Timer:
R81:
R82:
R83:
R84:
R85:
R86:
R87:
R88:
R89:
R811l:
R811:
R812:
R813:
save
the
These
command
In
the
These
the
login:
password:
RETURN:
II
rm"
_______
IIA:
sequence:
characters
to
list
RS6:
characters
next
system
Auto-Logon
File
Name:
log.
field,
Sequences
chk
_
IIilII
execute
the
active
type
exit
prompt.
881:
root\r
882:
secret
883:
b513\r
884:
Is
885: ps
886:
887:
888:
889:
881B
8811
8812
8813
the
processes.
#\e
Terminal
form
\r
-l\r
-e\r
host
Emulation
looks
computer's
at
like
As
part
performs
fields,
log.chk
Saving
To
save a data
folder
o
Press
of a data
the
placing
file.
Data
Profiles
in
the
o
When
press
<Enter>.
profile,
tasks
specified
the
profile,
Filecabinet:
you
complete
<Enter>.
this
information
and
in
store
the
login
the
SS3:
it
collects
it
in
Terminal
sequence
and
the
Setup
also
SS4:
in
the
Profiles
form,
3-23
Page 50

Setting
up
the
Software
for
Data
Calls
MOdifying
You
can
already
from
the
To
change a data
1
2
3
4
To
change a data
Manager:
1
2
3
4
Data
make
saved.
Office
Open
Open
Point
press
form
Make
and
Select
to
Directory.
Press
Select
menu
Point
Profiles
changes
You
or
profile
the
the
to
<Enter>
for
your
press
profile
the
be
modified
[EDIT
IModify
and
to
to a data
can
change
from
Telephone
starting
Filecabinet.
Profiles
the
profile
to
the
profile
changes
<Enter>
starting
entry
in
DIRCTORYJ .
press
the
entry I from
<Enter>.
Data
profile
a
data
Manager.
from
folder.
you
you
the
save
Call
want
have
Terminal
the
from
Name:
display the
to
to
containing
the
Profile
that
profile
the
to
Terminal
selected.
changes.
Telephone
the
Screen
the
Edit
you
Office:
change
Setup
data
or
field.
have
starting
and
Setup
form
profile
Directory
3-24
5
6
7
If
the
displayed
the
name
Press
form
for
Make
your
and
press
profile
in
of
<Rplac>
the
changes
<Enter>
you
the
the
to
profile
want
field,
profile
display
to
to
you
the
save
to
change
press
you
the
have
Terminal
the
<Mark>
want
Terminal
selected.
changes.
is
not
until
appears.
Setup
Setup
form
Page 51

Setting
up
the
Software
Data
Calls
Using
To
display
Because
in
your
Manager
Profiles
folder.
profile
telephone
Data
o
data
telephone
expects
folder,
You
file
Profile
a
list
Open
the
or
press
Data
Profile
Manager's
profiles
should
unless
directory
Files
of
Profiles
the
directory,
data
you
all
<Cmd>
Name:
Create
are
profiles
should
also
you
entries
profile
folder
key
Data
associated
not
take
are
certain
use
with
field
and
to
care
files:
in
the
of
Entry
because
be
move
not
the
the
cursor
Telephone
form.
with
stored
them
to
that
profile.
Filecabinet,
on
data
in
to
another
delete
entries
the
of
Telephone
none
the
a
your
3-25
Page 52

Page 53

4
This
section
Emulation
up.
The
data
terminal
The
first
call,
mode,
second
procedures
communicating
include
sending
Two
recording
and
sample
Communicating
gives
once
the
part
logging
and
part
of
for
performing
with a host
data
receiving
data
transfer
procedures
hardware
of
this
into
a
ending
this
section
displayed
files,
sessions
with
Other
for
and
section
host
computer,
a
data
data
transfers
computer.
and
Computers
using
software
covers
call.
gives
on
your
printing
are
Terminal
detailed
These
also
have
placing
working
while
procedures
screen,
screen
included.
been
set
a
in
data.
Placing
Follow
Refer
chapter
Manager
data
a
Data
these
1
Select
Manager
press
2
When
prompt
see a prompt,
should
3
Follow
gain
to
the
in
User's
calls.
general
"Setting
this
Call
the
Call
<Enter>
you
from
appear.
the
access
guide
Guide
procedures
data
screen
are
connected,
the
host
to
Up
and
for
call
to
place
host
press
computer's
the
the
to
more
to
place
entry
or
Directory,
the
you
computer.
<Return>
system.
Software
the
AT&T
information
a
from
call.
should
and
login
for
UNIX PC
data
the
Telephone
and
see
If
you
the
prompt
procedure
Data
Calls"
Telephone
on
setting
call:
then
a
don't
to
up
4-1
Page 54

Communicating
with
Other
Computers
Logging
Before
familiar
on
computer
you
check
out
into
If
with
Setup
your
Into
calling
with
that
system.
services
this
information.
with
what
user
the
system,
the
host
the
emulation
form--VT-100,
terminal
from a remote
identify
computer
To
call
terminal
create
for
another
enter
When
will
displayed
mouse.
UNIX PC
your
User's
UNIX
Owner's
PC
objects
command
Data
your
you
notice
own
PC.
your
so
another
type
the
Calls
UNIX
place
and
You
keys
system.
Guide
You
that
line.
Other
a
the
the
person
names
computer
type
terminal.
terminal
your
in
data
profile
in
PC,
terminal
a
some
used.
can,
in
for
may
Manual
you
Computer
computer
information
Online
supply
have
or
establish
requests
type
AT&T
is,
screen
UNIX
PC,
the
Terminal
this
type
type.
data
differences
For
however,
the
same
See
full
also
for a list
can
gain
Systems
system,
information
instruction
Before
in
charge
been
you
selected
513
you
It
is
correctly
BCT, UNIX
if
type
display
you
should
(see
Setting
guide).
unixpc
call
when
between
in
example,
use
way
the
as
AT&T UNIX PC
information
want
to
access
you
needed
calling
of
the
established
your
own
a
terminal
are
placing
very
is
correct.
Setup
When
you
two
the
you
the
Office
when
on
refer
of
the
to
should
to
and
become
log
in
mainframe
manuals
another
system
for
user
name.
type,
in
the
Terminal
PC,
or
the
important
to
the
host
choose
form
Up
you
way
the
are
UNIX
the
the
when
Software
log
prompted
PCs,
screen
cannot
window
you
are
Remote
ac~essing
to
the
AT&T
commands
by
using
and
that
UNIX
to
find
logging
respond
whatever
data
to
UNIX
you
into
you
use
the
and
working
Access
another
UNIX
and
Office
the
work
give
PC,
call
PC
to
is
the
in
Logging
If
you
your
data
computer
Refer
Setting
guide
login
4-2
In
Automatically
create
profile,
automatically
to
"Creating
Up
the
for
more
sequences.
an
automatic
Software
complete
you
an
Automatic
login
are
logged
when
you
for
Data
information
sequence
into
place
Login
Calls
the
the
Sequence"
chapter
about
as
part
host
data
call.
of
automatic
in
of
the
this
Page 55

Communicating
with
Other
Computers
Working
Once
established,
that
you
as a Terminal
you
dial
fills
dial
into
the
another
ATE
entire
another
displays
computer
a
window
UNIX PC
UNIX
PC,
and a connection
without
screen.
your
screen
this:
DATA
1
Welcome
to
the
AT&T
UNIX
Please
login:
IIDiMIIIM-;.iu:;.Wmnm;.'¥i;i,1.1MlilHmI;.Mi;;;{*m;;,iuiu6j,i.".
Fri
June 6, 2:96
pc
pm
For
is
a
border
example,
looks
if
like
The
the
press
The
ATE
use
host
other
screen.
the
prompt
to
remind
at
any
computer:
o
o
UNIX
PC's
If
at
time
the
you
you
key
bottom
of
while
Return
<Shift>-<Exit>
disconnect
<Shift>-<Cmd>
Emulation
login
don't
and
prompt
immediately
the
of
two
key
you
are
to
from
the
to
commands.
appears
prompt
the
screen
combinations
communicating
end
the
host
display
at
see a prompt,
should
is
displayed
that
session
computer
a
menu
of
the
appear.
you
with
and
Terminal
top
the
of
by
can
4-3
Page 56

Communicating
with
Other
Computers
Note
As
soon
this
prompt
If
the
or
AT&T
if
your
has
the
will
want
determine
functions.
on
escape
VT-lOO
See
"Transferring
sending
session
Suspending
You
can
window
not
disconnect
another
Always
to
leave
Commands
window
menu.
as
you
enter
disappears.
data
profile
513
BCT
UNIX PC
same
to
which
terminal
is a terminal.
keys
check
UNIX PC
Appendix
and
and
and
in
suspend
and
control
513
BCT
receiving
a UNIX
and
Resuming
the
resume a different
you
window:
press
the
the
Terminal
menu.
containing
commands
you
as
the
the
information
A
gives
sequences
emulation.
Data"
files,
PC
file,
full-screen
from
Exit
Do
not
the
are
using
type,
AT&T
keys
to
expert
below
capturing
and
Terminal
the
host
key
Emulation
suspend
Local
for
the
specifies
you
can
The
513
BCT.
in
use
supported
for
information
printing
Emulation
Terminal
window.
computer.
when
you
the
Commands
host
now
UNIX PC
VT-100
Appendix
to
perform
users
the
information.
Emulation
Doing
want
Local
computer,
the
VT-100
operate
keyboard
users
B
VT-100
information
by
both
on
results
so
will
To
work
to
as
of
a
in
Follow
Emulation
menu
as
4-4
1
2
the
Async
Press
and
press
Select
menu
and
same
window,
Emulator.
<Suspd>,
<B1>.
the
window
press
steps
which
to
is
or
point
you
<Enter>.
return
identified
to
want
to
the
[W]
from
Terminal
in
with
the
the
the
mouse
Windows
Windows
Page 57

Communicating
with
Other
Computers
Resetting
If
you
terminal,
the
terminal
Resetting
when
you
example,
to
your
solves
To
reset
Terminal
are
familiar
you
returns
have
sometimes
keyboard
this
Terminal
1
Press
Commands
know
when
been
input;
problem.
<Shift>-<Cmd>
iii·
- Record
Stop Recording
Transmit
Receive
Transmit
*Terminate
Start
Stop
Emulator Reset
Emulation
with
that
you
the
it
are
terminal
working
the
host
resetting
Emulation:
menu:
avail
ahJ e
SCI'een
File -ASCII
File -UMODEM
File -UMODEM
File
Printer
Printer
the
VT-100
is
sometimes
working
to
in a different
computer
to
choj
ces
to
File
to
File
Transfer
or
513
useful
with a host
its
original
does
the
emulator
display
BCT
mode.
not
the
to
reset
computer.
state
For
respond
often
Local
See
"Transferring
rest
of
2
the
Select
commands
IEmulator
Data"
on
Reset I and
below
this
menu.
for
press
descriptions
<Enter>.
of
the
4-5
Page 58

Communicating
with
Other
Computers
Logging
Follow
these
computer:
1
2
Transferring
Terminal
you
to
transfer
Out
steps
When
procedure
do
not
host
process.
you
If
logging
message
return
instructions.
If
logging
press
disconnects
Telephone
to
terminate
computer
have
out.
Data
Emulation
to
end a session
you
finish
for
log
out
computer
You
disconnect.
out
tells
to
Telephone
out
<Shift>-<Exit>.
the
Manager.
and
loggged
offers
data
between
working,
that
before
your
should
disconnects
you
to
does
line
any
connection
should
out
or
several
system.
follow
disconnecting
session
always
press
Manager.
~
disconnect
Doing
and
returns
This
is a fail-safe
be
used
if
you
options
computers.
with a host
the
Note
that
may
still
log
out
the
line,
any
letter
Follow
so
always
you
with a host
only
are
after
unable
that
You
logout
from
before
a
these
the
to
allow
can:
if
be
key
line,
you
to
you
the
in
to
way
log
You
to
This
into
4-6
o
o
o
o
can
display
menu
the
Send
computer
Receive
UNIX PC
Record
displayed
Emulation
Print
using
select
Terminal
is
other
files
files
in
information
your
these
available
system.
from
your
from
a UNIX
on
PC
your
session
UNIX
PC's
options
Emulation's
at
all
UNIX
another
file
screen
displayed
attached
by
pressing
Local
times
PC
to
another
computer
information
during
on
a
your
printer
<Shift>-<Cmd>
Commands
when
you
on
your
Terminal
screen
menu.
are
logged
Page 59

Communicating
Note
with
Other
Computers
Several
display
these
The
paragraphs
kind
of
Recording
The
Record
type
and
feature
electronic
and
text
another
Press
menu.
of
the
forms
guidelines
o
To
type
o
To
Filecabinet,
(I)
StoCks/JunelO
from a folder
o
Expert
UNIX
pathname.
data
Screen
Screen
data
allows
bulletin
files
computer.
<Exit>
Do
options
prompting
when
direct
the
direct
and
then
users
directory
that
transfer.
Data
to
displayed
you
directed
~
a
file
a
follow
File
to
boards
to
leave
suspend
in
the
you
entering
file
name
file
type
the
directs
named
can
by
option
on
copy
to
the
Local
the
menu.
Local
Commands
for a filename.
to
to
the
file
names
or
in
or
in
from
the
form.
from a folder
folder
name.
the
file
Stocks.
direct
typing
give
a
file
the
procedures
directs
the
screen
messages,
and
information
your
UNIX
data
PC
Commands
menu
Follow
these
the
forms:
Filecabinet,
in
name, a slash
An
example:
JunelO
to
or
UNIX
for
from
each
that
full
data
to a file.
from
services,
screen
from
to
your
or
any
you
This
Once
file
option.
in
a UNIX
To
record
you
until
1
2
select
The
you
this
select
file
directory.
screen
When
and
data:
you
ready
<Shift>-<Cmd>
menu.
Select
IRecord
<Enter>,
option,
the
can
be
are
logged
to
begin
displaying
Stop
located
to
display
Screen
data
is
Recording
in
into
recording
to
the
Name
captured
your
the
the
Filel
to
Filecabinet
host
data,
Local
and
of
File
in
the
File
computer
press
Commands
press
form.
or
4-7
Page 60

Communicating
3
Type a file
The
If
exists,
end
4
Press
5
Display
the
You
filename
6
When
you
7
Select I Stop
Local
8
Press
with
file
you
of
file.
see
filename
you
want
Other
name
that
give
the
the
new
this
file.
<Enter>
the
information
the
message
at
the
is
the
finish
in
the
Recording
Commands
<Enter>.
Computers
or
is
created
name
information
to
begin
bottom
name
displaying
file,
menu.
pathname
is a standard
of a file
capturing
you
Recording
of
the
you
gave
press
to
Filel
for
the
that
is
already
added
screen
want
to
put
on
file
screen,
the
file.
the
information
<Shift>-<Cmd>.
from
file.
file.
onto
:
where
the
the
data.
into
Transmitting
The
Transmit
file,
or a file
characters,
control
object
You
file
the
code
will
on
UNIX
capture
this
purpose.
When
transmitting
the
UMODEM
this
section.
To
send
1
4-8
codes
need
the
PC.
or
an
When
and
begin
display
ASCII
File
to
another
and
cannot
to
other
Most
receive
file
ASCII
the
Files
-
ASCII
containing
binary
be
set
up a means
computer
data
file
ASCII
transfer
file
you
are
host
sending
the
option
only
computer.
files
transferred
before
communication
option
files
options
to
another
logged
computer
a
file,
Local
Commands
lets
alphanumeric
Files
such
as
with
of
capturing
sending
that
can
between
described
computer:
into
the
is
ready
press
you
send a data
containing
programs
this
option.
the
the
programs
be
used
two
UNIX
later
host
computer
for
you
<Shift>-<Cmd>
menu.
file
have
PCs,
or
ASCII
from
a
for
use
in
to
to
Page 61

2
3
4
5
Select
<Enter>,
Enter
o
Press
menu
type
pathname
your
Press
The
file
to
the
being
ASCII
screen,
the
file.
this
message
You
can
To
end
complete,
Local
Communicating
ITransmit
displaying
the
name
<Enter>
of
the
the
name
to
UNIX
<Enter>
appears
host
sent,
File
computer.
you
:
where
When
stop
the
file
press
Commands
File
the
of
the
to
display
files
of
the
the
file
system.
to
transmit
on
the
see
the
filename
filename
transmission
disappears.
the
file
transfer
<Shift>-<Cmd>
menu.
with
-
ASCII I and
Name
file:
in
your
file
if
the
screen
While
message
at
the
is
the
transfer
before
Other
of
File
and
select
Filecabinet,
to
send,
it
is
file.
as
the
Transmitting
bottom
name
is
complete,
at
it
to
Computers
press
form.
or
elsewhere
it
is
file
is
of
you
any
time.
is
display
from
the
sent
the
gave
the
a
or
in
Receiving
If
the
you
should
the
host
in
this
You
can
an
ASCII
UMODEM
know
the
of
an
6
host
computer
chapter.
use
file
file
host
ASCII
Select
I*Terminate
<Enter>.
ASCII
Files
computer
use
this
the
Record
from a computer
transfer
computer
file
on
has
program
to
your
protocol.
your
File
the
UMODEM
to
UNIX
Screen
commands
screen.
send
PC,
to
that
Transfer
as
File
does
You
to
display
program
ASCII
described
option
not
will
I
and
available,
files
support
also
the
press
to
need
contents
from
later
receive
the
to
4-9
Page 62

Communicating
To
receive
1
Log
command
you
yet.
2
Press
to
chapter.
with
an
ASCII
into
want
<Shift>-<Cmd>
Filel,
Other
file:
the
to
to
as
Computers
host
display
receive.
described
computer
the
contents
Do
and
earlier
and
Dot
select
type
press
IRecord
in
of
this
the
the
file
<Return>
Screen
3 When
4 When
The
UNIX PC
has
the
prompt
the
and
displayed
file
you
prompt.
Transferring
The
Transmit
options
ensure
that
protocol
programs,
wide
variety
both
binary
files.
Overview
file
begin
computer.
the
IStop
earlier
file
same
is
also
may
want
use
the
files
is
used
enabling
of
QMODEM
you
recording
displaying
the
file,
Recording
that
contents
by
saved
to
Files
File
Christensen
by a number
of
systems.
(object
see
host
press
in
this
you
as
the
edit
with
-
UMODEM
are
transferred
your
and
the
message
has
begun,
the
computer
<Shift>-<Cmd>
to
Filel,
chapter.
specified
the
host
host
the
the
computer
the
file
UMODEM
at
and
file
of
UNIX PC
It
allows
program)
file
is
end
Receive
transfer
data
to
files
telling
press
from
the
finished
and
as
described
for
recording
computer
after
of
your
to
remove
Option
File
correctly.
communications
exchange
you
to
and
you
that
<Return>
host
displaying
select
file.
sending
UNIX PC
this
-
UMODEM
protocol
This
data
transfer
text
to
now
The
you
file,
to
with
(ASCII)
a
The
UMODEM
systems
UMODEM
that
does
4-10
that
to
protocol
are
transfer
not
use
must
transferring
files
this
protocol.
be
to
available
files.
or
from
on
You
another
both
cannot
computer
use
computer
Page 63

Communicating
with
Other
Computers
Files
block
bits
sum
that
are
received
in
is
the
displayed
garbled
appears,
data
up
To
transfer
host
computer
initiate
To
send a file
UMODEM
the
UMODEM
Emulation
To
receive
execute
set
up
Terminal
system.
If
you
responds
elapsed.
UMODEM
transmitted
all
the
compared
block
for
data
reaches
and
the
to
10
a
the
transfer
commands
transmit
Local
a
file
UMODEM
the
UMODEM
Emulation
stop
a
after
Transfer
undergoes
in
characters
to a checksum
of
data
each
block
the
UMODEM
times
file
to
using
send
before
or
to
to
another
to
that
file
Commands
from
commands
receive
Local
transfer
a
timeout
Types
blocks
a
checksum
are
is
correct.
received.
receiving
program
ending
UMODEM,
receive
or
UNIX
UNIX
function
menu
another
to
that
file
Commands
after
period
added
byte.
from
PC,
system;
on
UNIX
function
it
of
128
test,
together,
This
A
message
If
computer,
tries
to
transmission.
you
first
the
file;
your
UNIX
you
then
using
your
local
PC,
UNIX
system;
menu
has
begun,
of
up
to
bytes.
where
test
no
data
retransmit
set
then
PC.
first
you
the
you
using
on
your
the
30
Each
the
and
ensures
is
or
a
message
up
you
execute
set
Terminal
system.
first
then
the
local
program
seconds
the
the
the
up
you
has
The
UMODEM
transfer:
Appendix
UMODEM
general
your
situation,
detailed
program
o
Binary
o
ASCII
o
ASCII
D
contains
processes
guidelines
information:
o
To
use
8-bit
7-bit
each
and
transfer
the
supports
a
technical
to
consult
binary
type
choose
files
type.
three
of
transfer.
the
Appendix
between
types
description
appropriate
D
two
of
Follow
if
UNIX
file
you
of
how
type
need
systems,
these
for
more
4-11
Page 64

Communicating
o
o
most
o
To
send
8-bit
To
or
type
To
or
need
with
receive
only
type.
transfer
CP/M
ASCII
for
transfer
DOS
word
to
Other
a
in
files
system,
text
program
an
processor
use
the
Computers
file
8-bit
use
files,
and
ASCII
ASCII
from
ASCII
between
the
other
file
to
7-bit
a UNIX
mode,
a UNIX PC
ASCII
and
use
non-ASCII
created
a UNIX
system
8-bit
type.
use
the
and a DOS
type
the
binary
by a CP/M
PC,
you
that
~
files.
can
for
may
UMODEM
To
transfer
the
following
umodem
umodem
umodem
umodem
umodem
umodem
In
these
being
You
can
commands
umodem
bit
ASCII
any
file
the
user
These
than
a UNIX
UMODEM
which
Commands
files
UNIX
Command
-rb
-sb
-rt
-st
-rt7
-st7
commands,
transferred.
include
to
overwrite
-mrt7
file
myfile
Jim.
commands
PC.
commands
you
are
between
UNIX
commands
filename
filename
filename
filename
filename
filename
an m after
filename
the
UNIX
for
Receive
Send
Receive
Send
Receive
Send
is
the
existing
u/Jim/Filecabinet/myfile
myfile
already
may
are
You
not
for
on
will
the
stored
work
the
host
for
need
particular
communicating.
PCs
with
the
Function
binary
binary
ASCII
ASCII
ASCII
ASCII
the
pathname
hyphen
computer,
in
the
a UNIX
to
find
host
files
8-bit
7-bit
(-)
file.
receives
Filecabinet
system
out
system
UMODEM,
UNIX
PC:
files
8-bit
files
7-bit
files
of
in
these
For
overwriting
what
you
files
files
the
file
example,
the
7-
of
other
the
with
use
4-12
Page 65

Communicating
with
Other
Computers
Receiving
To
receive
the
host
UNIX PC
computer
filename.
window
UNIX
To
receive
follow
out
before
over)
:
a
a
computer's
using
is
Note
a
the
procedures
you
Log
1
Emulation.
2
Give
the
3
Press
Commands
4
Select
<Enter>
form:
51
File
with
file
with
the
UMODEM
another
that
on
the
file
using
reach
into
the
file
<Shift>-<Cmd>
\Receive
to
Receive
File
Name
of
File:
Transfer
Mode:
Description:
UMODEM
UMODEM,
commands
protocol.
UNIX
PC,
you
host
must
computer.
UMODEM
fairly
step 9 below,
the
host
host
computer
with
UMODEM.
menu.
File
display
-
mlODEI1
Binary
Standard
you
to
send a file
choose
type
(note
quickly:
computer
the
to
display
-
UMODEM\
the
Receive
will
If
umodem
the
that
if
you
using
command
need
to
the
host
-sb
command
you
UMODEM
must
start
Terminal
the
and
File
to
your
in
should
to
Local
press
-
know
a
times
send
UMODEM
5
Select
name
if
you
other
for
than
the
the
want
Name
received
to
the
of
File:
file,
store
the
Filecabinet.
field
or
file
in a directory
and
the
type
the
pathname
4-13
Page 66

Communicating
6
Select
<Slect>
should
in
bit
7
Select
to
The
choose
have a word
UNIX
with
computer,
choose I Standard
a
Select
received
is
displayed.
the
file.
display
for
are
file
file
If
you
with
Other
the
until
match
host
For
ASCII,
the
the
received
types
available
the
you
are
PC,
and
the
same
type
aren't
the
Computers
Transfer
the
Your
the
computer
example,
and t for
Description:
a
list
displayed
on
type
receiving.
processor
you
word
you
would
for
the
sure
type
file
and
Mode:
type
entry
transfer
command
b
a-bit
of
the
file.
are
the
Create
that
is
are
receiving
processor
choose
Description:
what
I .
of
file
press
field
of
transfer
in
this
type
for
binary,
ASCII.
field
UNIX
the
same
menu.
appropriate
For
application
the
type
that
<Enter>.
and
field
that
to
send
t7
and
press
PC
file
ones
example,
on
a
file
on
the
word
field.
is
appropriate,
you
want
press
you
want
you
the
for
types
that
You
should
for
if
your
created
host
processor
for
used
7-
<Cmd>
the
you
the
UMODEM
is
transferred.
message
of
the
Sending
To
send a file
with
UMODEM,
commands
If
the
appropriate
To
send a file
4-14
9
Press
displays
UMODEM
status
a
File
to
host
1
Log
Emulation.
<Enter>
a
When
terminating
messages,
with
from
you
will
receive
computer
command
using
into
series
UMODEM
your
a
is
from
UMODEM:
the
to
the
see
need
file
another
host
begin
of
status
transfer
is
displayed.
the
UNIX PC
to
know
using
the
list
computer
receiving
messages
is
sample
to
another
the
the
UNIX
above.
complete,
For
sessions
host
UMODEM
PC,
choose
using
the
file.
as
the
the
examples
below.
computer
computer's
protocol.
the
Terminal
file
Page 67

2
Give
the
3
Press
Commands
4
Select
<Enter>
form:
Communicating
the
host
file
with
<Shift>-<Cmd>
menu.
ITransmit
to
display
computer
UMODEM.
File
II
to
the
with
the
display
-
UMODEMI
Transmit
Other
command
the
and
File
Computers
to
receive
Local
press
-
UMODEM
UMODEM
is
transferred.
message
of
the
5
Select
<Mark>
displayed.
match
host
For
ASCII,
6
Point
and
o
7
Press
displays
UMODEM
status
Transfer
Name
of
File/Directory:
the
until
the
computer
example,
and t for
to
enter
Press
list
type
send,
elsewhere
<Enter>
a
When
terminating
messages,
Mode:
Transfer
transfer
the
the
<Enter>
of
the
the
if
series
1ilGiil&i!lmIJlJ
••
"'.".
Filecabinet
the
Your
command
b
for
Name
name
files
pathname
it
is
in
your
to
of
the
transfer
see
Mode:
type
of
entry
type
to
binary,
8-bit
of
File/Directory:
of
the
to
display
in
of
in
a UNIX
UNIX
begin
status
is
displayed.
the
sample
field
transfer
in
this
that
receive
ASCII.
file:
your
the
PC
sending
messages
is
and
field
you
t7
for
and
select
Filecabinet,
file
directory
system.
the
complete,
For
sessions
you
used
the
7-bit
you
file.
as
press
want
should
in
the
file.
field
from
want
the
the
examples
below.
is
a
or
to
file
4-15
Page 68

Communicating
with
Other
Computers
Terminating
You
can
When
you
seconds
To
stop
1
2'
Reviewing
Two
sample
receive
help
you
Sample
In
1:
this
Junerpt.WP
to
get a copy
dialed
an
on
the
expert
your
1
a
Transfer
stop
a
UMODEM
terminate
for
the
a
UMODEM
Press
Commands
Select
<Enter>.
Sample
sessions
files
set
with
up
Receiying
e~ample,
is
stored
of
other
user,
UNIX
PC.
In
the
IUNIX
have
access
system.
transfer
a
transfer,
UMODEM
program
transfer:
<Shift>-<Cmd>
menu.
I*Terminate
UMODEM
Sessions
demonstrating
the
system
a
word
on
now
UMODEM
File
processing
another
file
and
you
computer's
your
a
this
UNIX PC
and
other
System I and
to
the
before
it
can
to
respond.
to
display
File
Transfer
how
option
for
these
file
UNIX
for a report.
logged
want
to
into
receive
Office,
press
other
<Enter>.
UNIX
it
is
take
the
to
transmit
are
included
functions.
named
PC,
and
the
PC's
complete.
up
Local
I
and
you
You
Office
this
select
You
UNIX
to
press
have
now
30
and
to
need
as
file
4-16
2
Type
The s option
a
file
binary
for
umodem.
to
transfer
transfers
-sb
your
Junerpt.
sets
UNIX
type,
between
up
WP
the
PC.
which
two
other
system
The b option
is
appropriate
UNIX
PCs.
to
send
selects
Page 69

3
Press
messages
function
4
Press
Commands
5
Select
the
6
In
<Return>.
indicating
is
$
umodelll
-sb Junerpt.HP
UHDDEM
Version
UMDDEM:
UMDDEM:
UMDDEM:
UMDDEM:
File
Estimated
B-Bit Transmission Enabled
Ready
<Shift>-<Cmd>
menu.
IReceive
Enter
the
Name
Name
Communicating
You
see
that
now
set
up:
2.8a
Hame:
Junerpt.HP
File
Size
lK,
to
SEHD
File
to
File
of
File
of
File:
with
the
the
3 Records,
display
-
UMODEMI,
form.
field,
Other
following
send
358
Bytes
the
displaying
type
Computers
file
Local
Junerpt.WP
Notice
Mode:
and
you:
III . - -
Name
Transfer
Description:
If
you
application
select
description.
that
the
Description:,
of
File:
Mode:
were
using
on
the
word
other
II
Binary
Standard
both
processor
the
two
same
UNIX
are
PCs,
fields,
filled
word
file
processor
you
type
Transfer
in
for
would
for
the
4-17
Page 70

Communicating
7
Press
You
When
transmission
appears
the
When
for
number
transmission
each
of
with
<Enter>
see
this
'51
Trans
UMODEH
Version 2.8a
UMODEH:
IJunerpt.NP
UMODEM:
UMODEH:
begins,
block
the
block
is
Other
Computers
to
start
message:
fer
status,
file:
Junel'pt.
File
"aae:
lu/tutor/Filecabinet
8-Bit Transmission Enabled
Ready
to
RECEIVE
File
the
data
data.
message
transferred,
you
of
of
complete,
the
HP
file
Received
see
transfer.
this
sector
where n is
message:
n
The
Standard
Filecabinet,
the
tutor
4-18
III
File
in
login.
UMODEH
terminating.
Touch
EHTER
this
to
continue.
Junerpt.WP
case
the
is
now
Filecabinet
stored
in
your
belonging
to
Page 71

Communicating
with
Other
Computers
Sample
To
demonstrate
the
UMODEM
file
PC.
now
you
2:
named
You
want
1
2
3
have
Transmitting
the
procedure
protocol,
demo
that
called
to
transmit
In
the
other
System I and
access
Type
to
umodem
The r option
receive
option
a
selects
appropriate
PCs.
Press
messages
function
<Return>.
indicating
is
$
UMODEM
UMODEM:
UMODEM:
UMODEM:
assume
you
the
computer's
press
the
-rb
sets
file
for
now
ulllodea
a
File
to
that
want
computer
this
<Enter>.
other
UNIX
demo
up
from
your
binary
transfers
You
set
-rb
deao
Version 2.8a
File
Hame:
8-Bit
Transmission
Ready
to
transmit
you
to
send
file.
the
transfer
see
that
up:
demo
RECEIVE
a
have a program
to
and
Office,
PC's
other
UNIX
another
logged
You
UNIX
system
PC.
select
now
type,
between
the
following
the
receive
Enabled
File
file
in,
system.
The
two
using
have
to
which
UNIX
file
UNIX
and
IUNIX
b
is
4
Press
Commands
5
Select
<Enter>
form.
already
6
Point
and
files
Filecabinet
<Shift>-<Cmd>
menu.
ITransmit
to
display
Note
selected
to
the
press
in
<Enter>
your
that
binary
Name
Filecabinet
of
the
to
display
File
-
the
Transmit
for
you.
of
Ei1e/Directory:
to
display
tutor
UMODEMI
transfer
a
(in
this
login)
the
and
file
list
.
Local
mode
case,
press
is
field
of
UMODEM
the
the
4-19
Page 72

Communicating
7
Select
begin
message:
When
transmission
appears
the
When
message
stored
for
number
transmission
is
in
with
UMODEH
UMODEH:
Idemo
UMODEH:
rds,
UMODEM:
UMODEM:
each
of
the
displayed.
the
Filecabinet
Other
the
file
Uersion
5632
begins,
block
block
is
Computers
file
demo
transmission.
2.8a
File
Nale:
lu/tutor/Filecabinet
Estiaated
Bytes
8-Bit TransMission Enabled
Ready
to
File
SEND
the
of
data
of
complete,
The
on
and
Size
6K,
File
message
transferred,
data.
the
executable
the
other
press
You
45
Reco
Sent
UMODEM
file
UNIX
<Enter>
see
this
sector
where n is
terminating
demo
PC.
is
to
n
now
Printing
The
Local
printing
These
copy
of
bulletin
can
be
A
printer
computer
The
information
saved
use
the
in
this
4-20
Screen
Data
Commands
data
options
that
are
information--stock
board
listings--any
displayed
must
before
be'attached
you
is
in a file.
Record
Screen
chapter.
menu
appears
especially
on
your
can
recorded
To
save
to
also
screen
use
the
File
contains
on
your
handy
reports,
type
and
installed
this
on
paper
information
command
terminal
for
of
from
feature.
options
obtaining
news
releases,
information
another
on
only
and
in a file,
described
for
screen.
computer.
your
is
earlier
a
that
not
hard
Page 73

To
print
The
information
You
can
screen
session.
that
information
1
Press
2
3
Display
print.
4
When
5
also
at
To
supports
Commands
<Shift>-<Cmd>
Select
The
message
right
corner
information
by
you
you
information
<Cmd>
to
Select
is
print
any
time
do
so
screen
Communicating
from
menu.
IStart
or
type
*PRINTING*
of
displayed
is
now
finish
you
display
IStop
Printer
sent
a
copy
during
you
must
prints
the
Printer
the
the
collected
displaying
want
the
to
your
of
the
your
have a dot
attached
with
screen:
to
display
I
and
press
information
appears
screen,
on
the
for
or
to
print,
Local
I
and
Commands
press
printer.
information
Terminal
to
Other
the
you
in
and
any
screen
printing.
typing
press
<Enter>.
Emulation
matrix
your
Computers
Local
<Enter>.
want
the
lower-
or
the
<Shift>-
menu.
on
your
printer
UNIX
to
typed
PC.
To
print
A
message
is
being
disappears,
o
the
Press
appears
sent
you
screen:
<Shift>-<Print>.
telling
to
your
can
continue
you
printer.
to
with
wait
When
your
while
the
work.
the
message
screen
4-21
Page 74

Page 75

This
appendix
escape
emulation.
processed
are
received
they
need
provided
and
control
by
not
in
A
Presentation-Level
lists
the
sequences
In
normal
the
Terminal
in
the
datastream
concern
support
of
terminal
operation
Emulation
the
end
software
Protocol
control
recognized
these
from
user.
development
during
codes
software
the
host
This
codes
list
and
terminal
are
when
computer;
is
activities.
the
they
Asynchronous
modes:
that
UNIX
the
100
the
the
one
emulates
PC
mode.
escape
and
513
sequences
following
o
o
o
Terminal
that
emulates
the
DEC
The
control
modes.
used
tables
in
and
BCT
programming
For
VT-100
User's
part
For
Guide,
no.
EK-VT100-UG-002.
513
BCT
Technical
999-700-49318,
For
UNIX
and
UNIX
PC
keyboard(7)
8ystem
999-801-31218,
Emulation
the
VT-100
in
sequences
For a complete
each
of
reference
mode
sequences,
Digital
mode
sequences,
Reference
Issue
mode
sequences,
sections
V
User's
Issue
has
AT&T
terminal,
this
supported
the
Equipment
Manual,
1,
Manual,
2,
three
513
BCT
and
appendix
description
three
manuals:
see
see
AT&T
November
see
of
the
AT&T
October
operating
terminal,
the
native
summarize
during
modes,
the
refer
~
Corporation
the
513
catalog
1984.
the
escape(7)
AT&T UNIX PC
catalog
1985.
one
VT-
of
to
BCT
no.
no.
A-1
Page 76

Presentation-Level
Protocol
ASCII
Table
decimal
Dec.
0
1
2
3
4
5
6
7
8
9
10
11
12
13
14
15
16
17
18
19
Characters
A-I
below
number.
Char.
-@
NULL
-A
SOH
-B
STX
-C
ETX
-D
EOT
-E
ENQ
-F
ACK
-G
BEL
-H
BS
-I
HT
-J
LF
-K
VT
-L
FF
-M
CR
-N
SO
-0
SI
-p
DLE
-Q
DC1
-R
DC2
-S
DC3
lists
Table
Dec.
32
33
34
35
36
37
38
39
40
41
42
43
44
45
46
47
48
49
50
51
A-1
the
Char.
space
!
"
#
:;;
%
&
I
(
)
*
+
,
-
/
0
1
2
3
standard
ASCII
Dec.
ASCII
Characters
Char.
64
65
66
67
68
69
70
71
72
73
74
75
76
77
78
79
80
81
82
83
@
A
B
C
D
E
F
G
H
K
L
M
N
P
R
I
J
0
Q
S
characters
Dec.
96
97
98
99
100
101
102
103
104
105
106
107
108
109
110
111
112
113
114
115
Char.
,
a
b
c
d
e
f
9
h
i
j
k
1
m
n
0
P
q
r
s
by
A-2
20
21
22
23
24
25
26
27
28
29
30
31
-T
-U
-y
-W
-X
-y
-Z
-[
-\
-]
--
-
-
DC4
NAK
SYN
ETB
CAN
EM
SUB
ESC
FS
GS
RS
US
52
53
54
55
56
57
58
59
60
61
62
63
4
5
6
7
8
9
:
;
<
=
>
?
84
85
86
87
88
89
90
91
92
93
94
95
T
U
Y
W
X
Y
\
-
Z
]
-
116
117
118
119
120
121
122
[
123
124
125
126
127
t
u
v
w
x
Y
z
{
I
}
-
DEL
Page 77

Presentation-Level
Protocol
Control
Table
A-2
recognized
equivalents.
the
character
Where
no
column,
VT-100
emulation
characters
recognized.
ignored
513
Name
BEL
BS
!IT
LF
Cbaracters
below
by
Terminal
The
is
name
that
appears
character
not
Characters
when
received
Table
DEC
Name
BEL
BS
!IT
LF
is a summary
Emulation
key
or
included
in
is
respectively.
included
in
that
by
A-2
Control
Character
Ox07
(-G)
Ox08
(-H)
of
key
combination
in
parentheses.
the
513
not
this
are
Terminal
Control
the
control
with
Name
recognized
The
ASCII
list
not
Emulation.
Characters
Description
Bell.
Backspace.
cursor
Horizontal
the
cursor
the
next
Line
Feed.
cursor
column
their
that
or
DEC
in
control
are
not
recognized
Sounds
Moves
left
one
Tab.
forward
tab
stop
Moves
down
in
codes
hexadecimal
invokes
Name
513
BCT
are
the
bell
space
Moves
to
the
the
same
or
CR
SO
SI
VT
FF
CR
SO
SI
OxOD
(-M)
Vertical
same
Form
same
Return.
cursor
margin
Shift
the
G1
Shift
the
GO.
effect
Feed.
effect
to
out.
character
in.
character
Tab.
as
Has
as
Moves
the
Switches
Switches
Has
LF
LF
the
left
the
the
to
set
to
set
A-3
Page 78

Presentation-Level
Protocol
513
Name
DCl
DC2
DC3
DC4
CAN
SUB
Table
A-2
DEC
Name
XON
XOE'E'
CAN
SUB
Control
Control
Character
(-Q)
Oxll
(-R)
Oxl2
Oxl3
(-S)
(-T)
Oxl4
(-X)
Oxl8
(-Z)
OxlA
Characters
Resumes
Recognized
Control
enabled
profile
Turns
All
printing
received
Stops
Recognized
Control
enabled
profile
Turns
and
the
Cancels
parsing
Cancels
parsing
(Continued)
Description
transmission.
from
in
on
print
data
is
until
transmission.
from
in
off
sends
print
print
the
queue
escape
escape
if
Host
the
saved
if
Host
the
Flow
is
data
logging.
for
DC4
Flow
is
data
logging
data
sequence
sequence
is
to
A-4
ESC
ESC
OxlB
(ESC)
Begins
parsing
escape
sequence
Page 79

Presentation-Leve1
Protocol
Esc~e
Table
A-3
recognized
referenced
detailed
charts
Where
no
column,
BCT
or
sequences
received
513
Name
IND
NEL
RI
RIS
SCS
Sequences
below
by
at
usage
of
the
name
that
escape
VT-100
that
by
the
Table
DEC
Name
IND
NEL
RI
RIS
SCS
is a summary
Terminal
the
beginning
considerations
character
appears
sequence
emulation
are
not
Terminal
A-3
Emulation.
of
sets.
in
the
respectively.
recognized
Emulation
Escape
Escape
Sequence
ESC D
ESC E
ESC M
ESC c
ESC ( A
of
the
this
for
513
Name
is
not
Sequences
Index
Next
Reverse
Reset
GO = U.K.
set
escape
See
the
appendix
these
or
recognized
Escape
are
ignored
software.
Description
line
to
sequences
manuals
for
sequences
DEC
Name
when
index
initial
character
in
and
513
state
SCS
SCS
SCS
SCS
SCS
SCS
ESC ( B
ESC ( 0
ESC
( 0
( 1
ESC
ESC ( 1
GO = ASCII
character
set
GO = Basic
Drawing
Line
Graphics
GO = Special
Characters
Drawing
and
set
GO = Extended
Drawing
Graphics
GO = Alternative
Character
ROM
Line
Line
Standard
A-5
Page 80

Presentation-Level
Protocol
Table
513
Name
SCS
SCS SCS
SCS SCS
SCS
SCS ESC
SCS ESC
A-3
DEC
Name
SCS
SCS
SCS
Escape
Escape
Sequence
ESC
ESC
ESC
ESC
ESC ) 0
ESC)
ESC ) 1
Sequences
( }
2
(
A
)
B
)
0
1
)
}
)
(Continued)
Description
GO
=
Videotex
Mosaics
GO = Alternative
Character
G1
=
set
Gl
=
set
Gl
=
Drawing
Gl = Special
Characters
Drawing
Gl = Extended
Drawing
Gl = Alternative
Character
Gl = Videotex
Mosaics
U.K.
ASCII
Basic
Graphics
set
Graphics
ROM
character
character
Line
and
ROM
Block
Graphics
Line
Line
Standard
Block
5lXAT
5lXBSL
5lXCHD
5lXDSPFL
A-6
SCS
DECALN
DECKPAM
ESC)
ESC
ESC <
ESC
ESC
ESC
:JI:
:JI:
?
=
Gl = Alternative
2
Character
Alignment
8
Blank
Cursor
2
Display
Labels
Keypad
Mode
ROM
Test
Screen
Home Down
Application
Labels
System
Graphics
PF
Page 81

Presentation-Level
Protocol
Table
513
Name
51XRCP
A-3
DEC
Name
DECKPNM
DECRC
Escape
Escape
Sequence
ESC
ESC
51XSCP DECSC ESC 7
Control
Table
recognized
referenced
detailed
Where
column,
BCT
sequences
received
A-4
no
or
Sequences
below
by
at
usage
name
that
VT-100
that
by
the
is a table
Terminal
the
beginning
considerations
appears
control
emulation
are
not
Terminal
Table
A-4
Emulation.
in
sequence
recognized
Sequences
>
8
Keypad
Restore
Position
Store
of
the
of
this
for
the
513
is
respectively.
Emulation
Control
(Continued)
Description
Numeric
Cursor
control
See
the
appendix
these
Name
or
not
recognized
Control
are
ignored
software.
Sequences
Cursor
Position
sequences
manuals
for
sequences.
DEC
Name
when
Mode
in
513
513
Name
CBT
CRA
CNL
CPL
CUB
DEC
Name
CUB
Escape
Sequence
ESC
[PnZ
ESC [
column
ESC [ Pn
ESC
ESC [
Pn
[
Pn
D
Description
Cursor
Backward
Tabulation
G
Cursor
Horizontal
Absolute
E
F
Cursor
Cursor
Next
Line
Preceding
Line
Cursor
Backward
A-7
Page 82

Presentation-Level
Protocol
Table
513
Name
CUD
CUF
CUP
A-4
DEC
Name
CUD
CUF
CUP
Control
Escape
Sequence
ESC
ESC
ESC
Sequences
PnB
[
Pn
[
[
row
column
CUU CUU
DA
DA
DCH DCH
DL
DL
ESC
Pn
[
ESC [ Pn
ESC [ Pn
ESC
Pn
[
DSR DSR ESC [ Ps
ED ED
EL
EL
HPA ESC
ESC [ Ps
ESC [ Ps
column
[
H
C
A
P
c
M
n
J
(Continued)
Description
Cursor
Cursor
;
Cursor
Cursor
Report
Down
Forward
Position
Up
Device
Attributes
Delete
Delete
Device
Character
Line
Status
Report
in
in
Display
Line
Erase
K
'
Erase
Horizontal
Position
Absolute
HPR
HVP HVP
ICH
IL
IRM
A-a
IL
ESC [
ESC [
Pn
row
column
ESC [ Pn
ESC
ESC
Pn
[
4h
[
a
Horizontal
Position
Relative
;
f
Horizontal/
Vertical
Position
@
L
Insert
Insert
Set
Character
Line
Insertion/
Replacement
Mode
Page 83

Presentation-Level
Protocol
Table
513
Name
IRM
LNM
LNM
MC
MC
A-4
DEC
Name
LNM
LNM
MC*
MC*
Control
Escape
Sequence
ESC
ESC
ESC
ESC
ESC
ESC
ESC
Sequences
[ 4 1
[
20
[
20
? 4
[
?
[
[ ?
?
[
REP ESC [ Pn
SD
SGR
SGR
ESC
ESC
Pn
[
m
[
h
1
4 i
5 i
8
b
T
(Continued)
Description
Reset
Replacement
Set
Newline
Reset
Newline
i
Media
Insertion/
Linefeed/
Mode
Linefeed/
Mode
Copy
Mode
(log
text)
Media
off
Media
on
i
Media
auto
auto
Copy
Copy
pr
Copy
(turn
print)
(turn
int)
(stop
print)
Repeat
Scroll
Select
Rendition
off
Down
Graphic
(turn
character
attributes)
SGR
*VT-102
SGR
control
ESC [ 0 m
sequence.
Select
Rendition
off
character
attributes)
Graphic
(turn
A-9
Page 84

Presentation-Level
Protocol
Table
513
Name
SGR ESC
SGR
SGR SGR ESC
A-4
DEC
Name
SGR
SGR
Control
Escape
Sequence
ESC [ 1 m
ESC
Sequences
[
.2
[ 4 m
[ 7 m
SGR ESC [ 8 m
m
(Continued)
Description
Select
Rendition
on
bold
attribute)
Select
Rendition
on
half
intensity
attribute)
Select
Rendition
on
underline
attribute)
Select
Rendition
on
reverse
attribute)
Select
Rendition
on
concealed
mode)
Graphic
(turn
Graphic
(turn
Graphic
(turn
Graphic
(turn
video
Graphic
(turn
SU
VPA
VPR
51XAWM
A-IO
DECAWM
ESC [ Pn
ESC [ row
ESC [
ESC
Pn
?
[
S
e
7 h
Scroll
d
Vertical
Up
Position
Absolute
Vertical
Position
Relative
Set
Auto-Wrap
Mode
Page 85

Presentation-Level
Protocol
Table
513
Name
51XAWM
51XOM
51XOM
51XDSW
51XDPEK
A-4
DEC
Name
DECAWM
DECOM
DECOM
DECSTBM
Control
Escape
Sequence
ESC
ESC
ESC
ESC [
bottom
ESC
1 ;
Sequences
? 7 1
[
6 h
?
[
? 6 1
[
top
row
Ps ; Pn
[
0
P L + S
row
r
51XSTO ESC [ 10 ; Ps
DECCKM
DECCKM
ESC
ESC
VT52 ESC
1 h
?
[
1 1
?
[
2 1
?
[
(Continued)
Description
Reset
Mode
Set
Reset
Mode
;
Define
Scrollable
Window
Define
;
Key
Set/Reset
I
Wrap
Set
Mode
Reset
Mode
Set
Auto-Wrap
Origin
Origin
System
Mode
Cursor
Cursor
VT52
Mode
PE
Auto-
Key
Key
Mode
VT52 ESC A
VT52 ESC
VT52
B
ESC C
VT52 ESC D
VT52
ESC
VT52 ESC G
H
VT52
ESC
Cursor
Cursor
Cursor
Cursor
F
Enter
Up
Down
Left
right
Graphics
Mode
Graphics
Exit
Mode
Cursor
Home
A-II
Page 86

Presentation-Level
Protocol
513
Name
Table
A-4
DEC
Name
VT52 ESC I
VT52
VT52 ESC K
VT52
ANSI ESC <
Control
Escape
Sequence
ESC J
ESC Y
column
Sequences
line
(Continued)
Description
Reverse
Feed
Erase
Screen
Erase
Line
Direct
Address
and
the
037
Exit
and
Mode
to
to
column
numbers
octal)
VT52
enter
Line
End
End
Cursor
(line
Mode
ANSI
of
of
are
plus
A-12
Page 87

This
Appendix
by
the
the
codes
keyboard
See
Appendix
UNIX PC
transmitted
in
each
A
B UNIX
describes
keys
during
Terminal
for a chart
PC
by
Keyboard
the
special
terminal
each
Emulation
of
key
the
Codes
functions
emulation
on
the
mode.
ASCII
UNIX PC
codes.
performed
and
lists
Keyboard
Figure
layout,
Layout
B-1
below
showing
Action
Keys Function Keys
~,r--------------------~~--------------------~r--~--~
illustrates
the
major
the
groups
UNIX
of
PC
keys:
keyboard
Action
Keys
l8lBl
R'ft'
Letter and Number Keys
Numeric
Pad
and
Cursor Movement Keys
Figure
B-1
UNIX
PC
Keyboard
B-1
Page 88

UNIX
PC
Keyboard
Codes
VT-100
The
the
Mode
VT-100
UNIX PC
present
Table
during
by
for
The
host
mode
keys
and
B-1
Terminal
VT-100
the
table
computer
is
on
the
transmit
similarly
are
located
Table
VT100
SET
ESC
BACKSPACE
BREAK
SHIFT/BREAK
CTRL/BREAK
TAB
RETURN
Key
terminal's
layout
on
the
below
keys.
special
also
selected.
the
left
Exit,
nothing.
on
both
differently.
Key
UP
Functions
UNIX
to
Emulation
VT-100
includes
by
Suspd,
B-1
keyboard
and
PC.
determine
The
table
the
UNIX PC
Note
side
of
Cmd,
The
keyboards
VT-100
and
Transmitted
layout
contains
VT-100
which
for
the
gives
keys
and
the
codes
keys
that
in
the
keyboard
Msg,
Rsume,
alphanumeric
although
Key
Functions
UNIX PC
Key
None
Esc
Back
Space
None
Shift-Exit
None
Tab
Return
several
users
UNIX PC
functions
UNIX PC
functions.
transmitted
when
this
mode
keys
some
Codes
is
different
keys
can
not
refer
keys
performed
equivalents
VT-100
the
transmit
and
Help
function
symbol
and
Codes
Transmitted
ESC
(disconnect)
(
answerback)
to
to
use
to
the
emulation
14
action
nothing,
keys
keys
Code
BS
lIT
CR
from
Reset
B-2
DELETE
CTRL
CAPS
NO
SCROLL
SHIFT
LINE
LOCK
FEED
function
Shift-Esc
Caps-Lock
Ctrl-S
Shift-Break
Ctrl
and
Shift
Opts
Ctrl-Q
DC3
DEL
and
LF
ESC c
DC1
Page 89

Table
B-1
VT-100
Key
Functions
(Continued)
UNIX
PC
and
Keyboard
Codes
Codes
VT-10
0
Cursor
Keys
UP
ARROW
DOWN
ARROW
ARROW
LEFT
ARROW
RIGHT
VT-100
Numeric
Pad
Keys Keys
PFl
PF2
PF3
PF4
7
a
9
-
4
UNIX
Keys
UNIX
PC
Fl
F2
F3
F4
Print
Clear-Rfrsh
Page
Left
Arrow
Beg
F5
F6
F7
Fa
5 Home 5
6
End
Cancl
1
2
3
Up
Prey
Arrow
Next
ENTER
Transmitted
PC
ANSI ANSI VT52
CKM
Set
ESC 0 A ESC
ESC
o B ESC
ESC o D ESC [ D
ESC o C ESC [ C
Transmitted
ANSI
KPNM
ESC o P
ESC o Q
ESC o R
ESC o S
7
a
9
-
4
6
1
2
3
CR
Codes
CKM
Reset
A
[
B
[
Codes
ANSI VT52
KPAM KPNM
ESC o P ESC
0
ESC
ESC
Q
ESC 0 R ESC R
ESC 0 S ESC S
o w 7
ESC
ESC o x a
0
ESC
ESC 0 m
9
Y
-
ESC o t 4
ESC o u 5
ESC o v 6
ESC 0 1
ESC 0 q 1
ESC o r 2
ESC o s 3
ESC 0 M
RETURN
Cursor
ESC A
ESC
ESC D
ESC C
P
Q
Key
B
VT52
KPAM
ESC
P
ESC
Q
ESC R
S
ESC
? w
ESC
? x
ESC
ESC ?
ESC ? m
ESC ? t
ESC ? u
ESC ? v
ESC ? q
ESC ? r
ESC ? s
ESC ? M
Y
0
*CKM
**KPNM
***KPAM
is
is
is
Down
Right
Cursor
Keypad
Keypad
Arrow
Arrow
Key
Mode
Numeric
Application
0
Mode
Mode
ESC
o P
ESC o n
0
ESC ?
ESC ? n
P
B-3
Page 90

UNIX
UNIX
PC
PC
Keyboard
and
513
Codes
BCT
Mode
Key
Function
LocatiQDs
Users
notice
the
UNIX
Tables
familiar
that
same
PC
B-2, B-3, B-4,
transmitted
emulation
are
processed
received
not
concern
in
support
The
tables
groups.
keyboard
tables
show
pressed
the
Ctrl
sequences
transmitted.
nothing
Key
Clear
Rstrt-Ref
Creat
Save
Undo
the
locations.
and
513
by
is
selected.
in
the
the
of
cover
The
is
shown
the
alone,
key
held
are
is
transmitted
Line
with
the
AT&T
513
BCT
UNIX PC
BCT
each
by
the
datastream
end
software
each
location
codes
with
included
Where
Table
Mode
and
UNIX PC
host
user.
of
of
in
Figure
transmitted
the
down.
no
B-2
Alone
keyboard
Transmitted
B-5
give
key
In
normal
computer
from
This
development
the
four
these
groups
B-1.
Shift
for
key
The
spaces
readability;
sequence
for
that
Left
Action
With
keyboard
has
the
Key
the
when
codes
UNIX PC
operation
when
the
UNIX
information
activities.
major
on
For
each
when
the
held
down,
in
the
appears
key
or
combination.
Keys
Shift
ESC 0 a ESC 0 A ESC 0 A
ESC 0 b ESC 0 B ESC
ESC 0 n ESC 0
ESC
0
0
ESC 0 0
N
ESC 0 s ESC 0 S
will
same
keys
Codes
or
513
these
they
are
PC;
they
is
provided
UNIX PC
the
key,
key
key
UNIX
the
is
and
with
code
no
spaces
in a column,
With
Ctrl
0
ESC 0 N
ESC
0
ESC
0
in
BCT
codes
need
PC
are
B
0
S
Redo
Find
Rplac
Move
Copy.
Dlete
Dlete
Sleet-Mark
Input
B-4
Char
Mode
ESC 0 t ESC 0 T
ESC
ESC
ESC N c ESC
x
0
0
Y
ESC N d ESC
ESC
ESC
ESC
ESC
N
N
N
N j
e
f
i
ESC 0 X
o y
ESC
N C
ND
N E
ESC
ESC N F
N I
ESC
N J
ESC
0
o y
N C
T
ESC
ESC 0 X
ESC
ESC
ESC N D
ESC
ESC
ESC N
ESC N
N
N F
E
I
J
Page 91

UNIX
PC
Keyboard
Codes
Key
Fl
F2
F3
F4
FS
F6
F7
F8
Table
Key
Exit
Msg
Help
Suspd
Rsume
Opts
Cmd
Close-Open
Cancl
Print
B-4
Table
Alone
ESC
ESC
ESC
ESC
ESC
ESC
ESC
ESC
Right
B-3
Function
With
0 c
0 d
e
0
0 f
0 g
h
0
0 i
0
j
Action
Alone
ESC 0 k
ESC
o r
ESC 0 u
ESC
v ESC
0
ESC 0 w ESC
ESC
o z
Shift
Keys
With
ESC
Keys
With
and
Cursor
Shift
R ESC 0 R
0
V ESC 0
0
W ESC 0 W
0
With
Ctrl
Keys
Ctrl
V
Clear-Rfrsh
Page
Beg
Home
End
Prey
Roll-Up
Next
Left
Arrow
Roll-Down
Right
Arrow
Arrow
Arrow
ESC N a ESC
ESC [ U ESC
ESC
9
ESC N B ESC
ESC [ H ESC
ESC
ESC N
ESC
ESC
ESC
ESC
ESC
0
[ A
NH
[ D
[ B
[ C
ESC
ESC
g
ESC
ESC
ESC N K ESC
ESC
ESC
J ESC
[
V ESC
[
NM
NN
NG
[ T
NH
[ S
ESC N M
ESC
ESC
ESC
ESC
ESC
N L ESC
J
[
V
[
N B
N N
N G
[ T
NH
N K
[ S
N L
B-5
Page 92

UNIX
PC
Keyboard
Codes
Table
Key
Del-Esc
I
2
3
4
5
6
7
8
9
0
-
=
Back
Space
Reset-Break
Tab
Q
W w
E e
R r R
T t T DC4
Y
U u U
I i I
B-S
Letter
Alone
ESC
1
2
3
4
5
6
7
8
9
0
-
=
BS
HT
q
Y
and
Number
With
Shift
Keys
With
DEL
! ESC
@
#
$ ESC P
%
-
&.
*
(
)
-
+ ESC P 1
BS
ESC c ESC
ESC
Q
W ETB
E
y
Z ESC
0
ESC
ESC
ESC
ESC P f
ESC
ESC P
ESC P
ESC
ESC
BS
DCI
ENQ
DC2
CAN
NAK
HT
Ctrl
P
P
P c
P e
P
P
P k
c
0
a
b
d
9
h
i
j
z
0
P
[ [
]
\
,
Lock
Caps
A
S
D
F
G
B-6
0 0
P
]
\
,
a
s S
d
f
9
P
A
{
}
D
F
G
SI
DLE
ESC
GS
I
FS
NUL
SOH
DC3
EOT
ACK
BEL
Page 93

UNIX
PC
Keyboard
Codes
Table
H h
J
K k
L
I I
Return
Enter
Left
Z z
X x
C c
V v
Key
Shift
B-5
Letter
and
Number
Alone
j J LF
1 L FF
CR
LF
Keys
With
Shift
H
K
:
"
CR CR
LF LF
Z
X
C
V
(Continued)
With
BS
VT
SUB
CAN
ETX
SYN
B b B STX
N
M m
, ,
/ /
Right
Left
Space
Right
Num
Shift
Ctrl
Bar
Ctrl
Lock
n
N
M
<
>
?
SO
CR
SPACE SPACE SPACE
Ctrl
B-7
Page 94

Page 95

This
Appendix
UNIX
PC's
considerations.
DTE
C
RS-232
provides
RS-232
Technical
technical
port,
Information
including
information
cabling
for
the
Signals
The
UNIX PC
its
back
Electronics
signals
serial
stands
Equipment
Typically
port
can
such
as a modem.
referred
An
RS-232-C
RS-232
to
the
to
the
addressed
that
are
UNIX
PC's
female
Supported
has
panel.
Industry
used
device
for
Data
includes
a
printer
also
to
as
cable
port.
pins
on
connector
on
supported
RS-232
DB25
connector.
on
an
RS-232
RS-232
in
communications
such
as a terminal
Terminal
output
be
This
the
is
used
These
Data
Communications
is
cable
the
RS-232
determines
port.
on
port,
the
RS-232
port
is a standard
Association
Equipment.
devices
connected
to
connect
intermediate
used
to
has a connector
port.
which
Figure
the
UNIX
located
Port
labeled
(EIA)
between
or a printer.
at
an
connect
How
C-l
PC's
on
DTE
developed
to
a
Data
such
as
this
intermediate
devices
Equipment
a
device
the
signals
illustrates
RS-232
the
rear
RS-232
define
computer
Terminal
printers.
port,
are
(DCE).
to
that
attaches
cable
will
port.
panel,
by
DTE
but
is
be
the
on
the
the
and
the
device
the
wired
pins
The
is
a
a
C-l
Page 96

RS-232
Technical
Information
Request
Figure
There
~
are
and
two
null
Connecting
communications
shown
below,
Ground
Transmit Data " 3 0 0
Receive Data
To
Send --"';1':"15":"0 0
To Send 0
Clear
Data Set Ready
Ground
Carrier Detect
C-l
types
modem
a
modem
link.
supports
20
~10
112
--"';'':'''4';'0
::
II
UNIX PC
of
cables:
(crossed)
to
the
The
this
A B
11
I
2
1
3
41
51
61
71
81
I
14
0
15
0
16
17
18
~ 0 ~19
0
20
8
0
0
2111
1~~
~~
110
~ClockOut
120
025
Transmit Clock"
/1
Receive Clock"
11
Data Terminal Ready
" Synchronous Only
RS-232
standard
cable.
DTE
port
straight
sets
RS-232
link:
11
12
13
14
15
16
17
18
I
20
Port
Pinout
straight
up a DTE-to-DCE
cable
RS-232
pinout,
C-2
Page 97

When
a DTE
at
the
RS-232
problem
which
PC
is
directly
transmit
signals
null
modem
3,
which
The
following
for
null
pinout
(uucp)
works,
shown
connections.
since
interface;
disconnected
device
occurs.
what
and
be
crossed.
cable.
must
modem
because
port
A
the
to
another
receive
be
reversed
illustrations
cables.
below
no
control
when
such
as
using
the
DTE-to-DTE
user
must
computer,
signals
This
The
pins
A
works
for
This
leads
of
this,
you
turn
RS-232
another
straight
communications
set
up
and
type
of
of
concern
on
~
show
null
modem
terminal
null
modem
are
however,
off
the
TeChnical
computer
RS-232
to
attach
requires
some
of
connection
of
the
two
different
cable
and
cable
passed
the
terminal:
Information
is
connected
cable,
link,
the
that
the
control
requires
are
pins
connectors.
using
UNIX-to-UNIX
always
across
line
is
UNIX
the
2
and
pinouts
the
the
not
a
a
A
1
7
1-1
----------11
1-1
----------11
B
1
7
c:
C-3
Page 98

RS-232
The
more
Technical
null
control,
equipment;
connections.
is
disconnected
Both
null
most
large
Some
of
particular
modem
it
modem
computer
these
applications.
Information
cable
but
is
When
pinout
it
is
used
in
you
when
and
use
you
A B
1
~------------~
2~2
3
~
4~4
5
~
7
....
1
---------------11
6~6
8 8
20 20
straight
dealers
businesses
not
shown
compatible
below
terminal-to-UNIX
this
off
type
the
1
3
5
7
turn
cables
and
make
electronics
custom
with
of
terminal:
can
cables
offers
PC
cable,
be
a
all
the
found
retailers.
for
bit
line
at
C-4
Page 99

This
three
program
specific
Appendix
file
and
applications.
D
UMODEM
provides
transfer
gives
formats
some
File
a
usage
Transfer
detailed
provided
considerations
Formats
explanation
by
the
of
the
UMODEM
for
UMODEM
ASCII
protocol
7-bit
UNIX PC UNIX
below
UNIX
Sending
Binary
ASCII
ASCII
discuss
PC.
Files
8-bit
7-bit
provides
transfers.
System V User's
transfers
from
a UNIX
The
file
disk
the
newline
of
the
This
transfer
above,
of
each
that
on
is
except
out
NULL
returns
of
always
to
allows
the
the
is
padded
using
Carriage
each
end
multiple
character.
character
file.
be
sent
This
8-bit
bit
treatment
files
viewed
for
binary,
UMODEM
Manual.
of
each
PC
sent
exactly
that
to a multiple
character.
are
character
file
is
128
bytes
At
least
appears
treatment
MS-DOS
is
the
except
character
set
certain
high-order
receiving
is
type
padded
and
that
ASCII
described
The
both
as
the
end
added
in
the
out
using
one
control-Z
at
allows
CP/M
same
as
the
is
set
word
bits
system.
8-bit,
in
paragraphs
to
it
exists
of
the
of
128
in
front
file.
to
the
control-Z
the
end
text
systems.
sending
high-order
to
processing
to
and
a
o.
the
bytes,
of
of
files
This
be
and
~
from
on
file
The
the
ASCII
a
to
D-l
Page 100

UMODEM
File
Transfer
Formats
Receiying
Binary
ASCII
ASCII
Sending
Sending
Sending
an
Files
8-bit
7-bit
Files
to
type
system.
correctly
to
ASCII
carriage
the
requires.
mode.
The
Padding
are
Carriage
characters
characters
discarded.
files
systems.
This
ASCII
high-order
o
when
treatment
files
viewed
to
another
on
both
an
MS-DOS
file,
end
of
on
the
file
not
to
transfer
8-bit
from
Other
UNIX
Doing
with
use
returns
the
If
UNIX
is
stored
characters
removed.
returns
are
at
This
be
received
files
bit
the
character
allows
MS-DOS
on
the
Systems
system--Use
the
UNIX PC
so
transfers
no
need
or a CP/M
ASCII
between
file
the
file
PC
exactly
at
followed
discarded.
the
end
treatment
is
the
above,
of
each
certain
or
UNIX
PC.
for
system--If
8-bit
that
is
the
of
from
same
character
is
received.
CP/M
binary
and
the
all
translation.
transfer
lines
MS-DOS
binary,
as
end
by
newline
Control-Z
the
allows
MS-DOS
as
receiving
except
word
systems
other
types
and
or
use
received.
of
the
file
are
ASCII
and
that
is
processing
to
transfer
UNIX
of
the
file
to
add
control-Z
CP/M
binary
file
CP/M
the
set
This
be
files
also
to
is
the
at
Receiving
Receiving
D-2
Files
from
type
PC.
ASCII
receive
on
If
8-bit
from
another
both
the
other
mode,
the
Other
the
file.
UNIX
other
UNIX
then
Systems
system--Use
UNIX
system
use
system
can
ASCII
binary
and
only
8-bit
transfer
the
send
to
UNIX
in
 Loading...