

Page 1
AT&T MetroCell Quick Start
Thank you for purchasing AT&T MetroCell !
Before you begin
Note: Allow 1-2 hours for a simple installation. Once system
activation is initiated, it may take up to another 2 hours
for your MetroCell to be ready for use. For more complex
installations, please refer to the Installation Guide included
in your MetroCell kit or online at att.com/metrocell.
To install AT&T MetroCell, you will need:
A central point where you can attach the access point to
an interior wall or column. This location should be:
• Within 25 feet of an exterior window, glass wall or door
(to receive GPS signals), and preferably no closer than
15 feet. A 70-foot extension is available - ask your AT&T
representative to order one for you.
• At least 2 feet away from metal obstructions,
microwave ovens, cordless phones, fans, motors, and
fluorescent lighting in order to avoid interference with
the radio signal.
• At least 1 foot away from any work station or place where
people may gather in order to avoid excessive exposure
to radio frequency emissions.
• 50 to 100 feet away from any other small cell (MetroCell,
MicroCell, or repeater) to avoid radio wave interference.
An available Ethernet port on a router or switch with
sufficient available bandwidth to support the traffic that
will be carried over the AT&T MetroCell (see Installation
Guide or User Guide for bandwidth guidelines)
An AT&T Premier user ID and password with
administrative permissions
• If you do not already have a Premier username and
password, please go to the following website for
information on how to obtain these credentials: https://
www.wireless.att.com/businesscenter/premier/getstarted-premier.jsp.
Basic tools and hardware (drill, hammer, screw driver,
screws, wall anchors, cable fasteners)
If you’re connecting the MetroCell to a router that has a
simple configuration and hasn’t been customized, you likely
won’t have to make changes to your router settings.
If the router configuration has been customized or is
acting as a firewall, please consult the LAN configuration
requirements in the AT&T MetroCell Installation Guide or
User Guide, as well as documentation from your router
manufacturer and/or Internet Service Provider.
1
Page 2
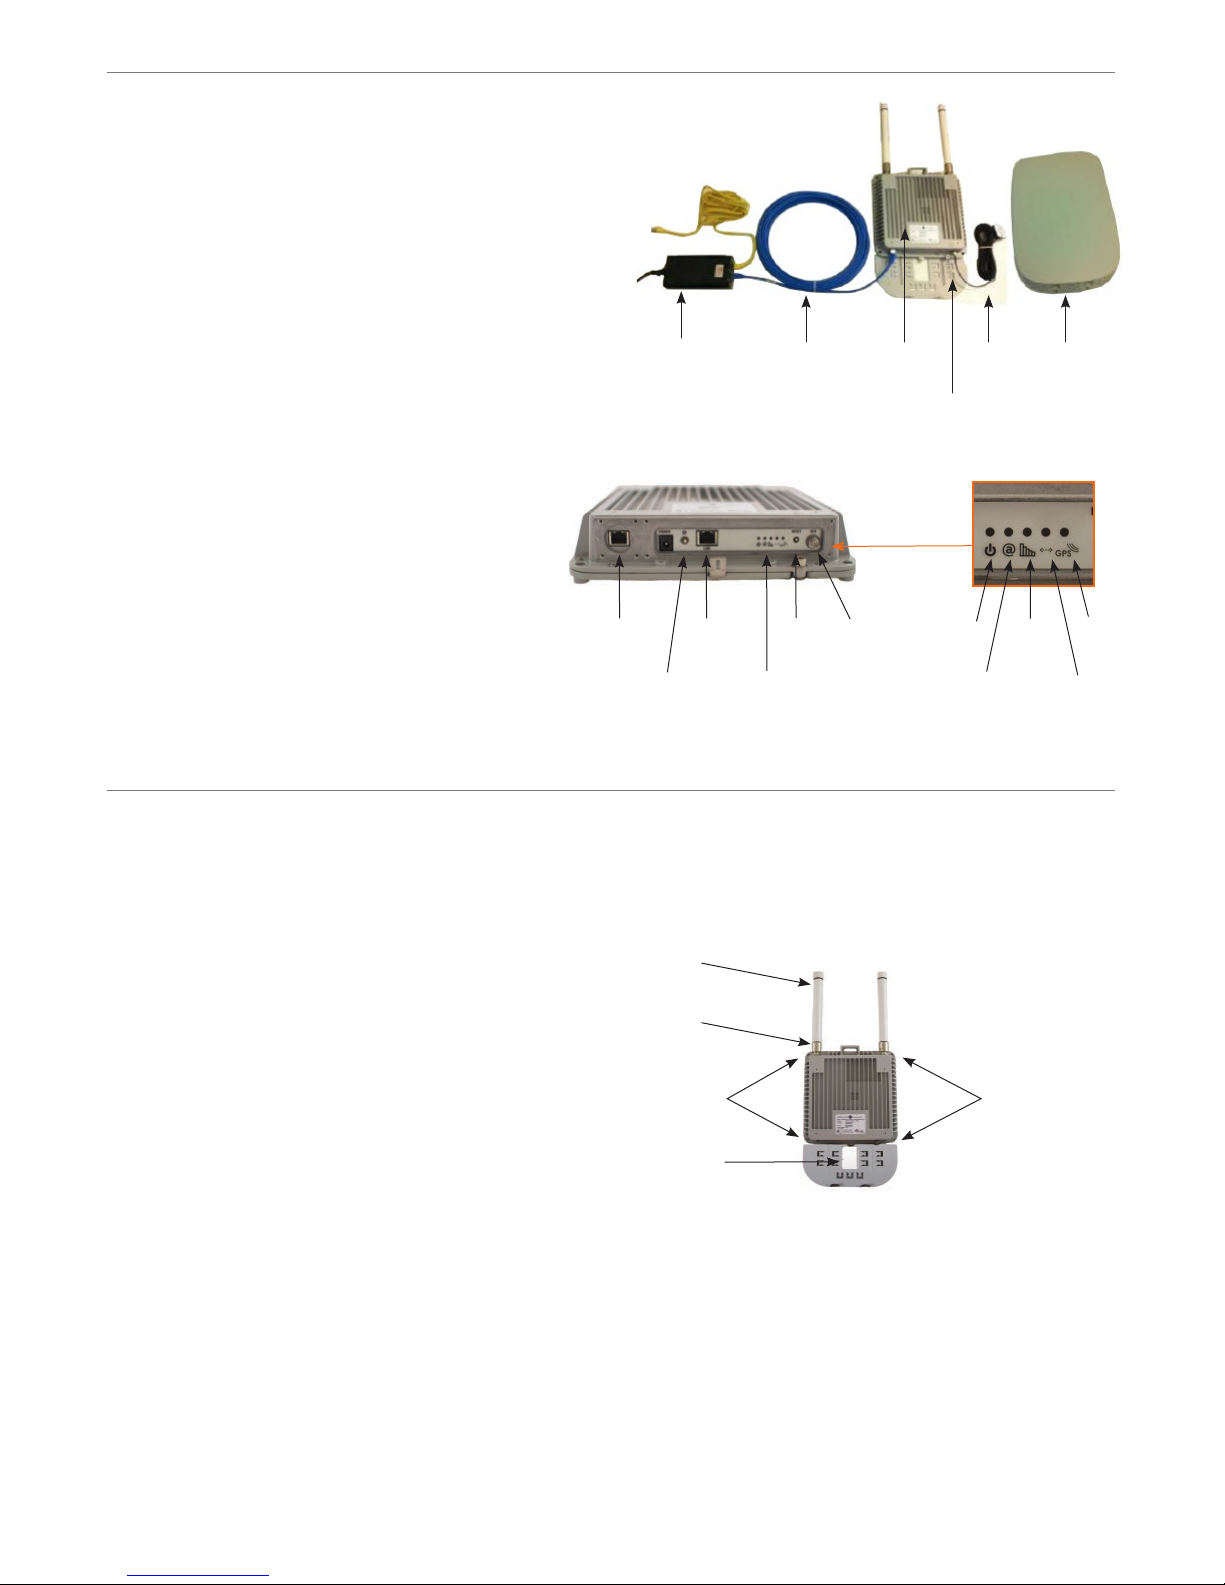
What’s in the kit
• Box 1: AT&T MetroCell access point, 10’ Ethernet cable,
external GPS antenna with 25 feet of cable.*
• Box 2: Two omni-directional (“stick”) antennas.
• Box 3: Power over Ethernet (PoE) injector kit,
including power cord and user guide.
• Box 4: 150’ Ethernet cable (shielded Cat5E).
• Box 5: Cosmetic cover with bracket.
* Note that the typical installation does not require several
of the components in Box 1, including the power adaptor,
power cord, mounting bracket, cable cover, and cable
cover bracket. Packaging may not be exactly as described.
Also note that a 70-foot extension for the GPS cable can be
obtained from your AT&T representative.
Ethernet
cable (10’)
PoE
injector
Antennas
Ethernet
cable (150’)
MetroCell Cosmetic
Cosmetic
cover bracket
GPS
antenna
cover
Getting to know AT&T MetroCell
The AT&T MetroCell is an Alcatel-Lucent 9363
Metro Cell – Indoor. The following diagram identifies
key parts and features you may need to know:
Assembly
Find the 2 “stick” antennas and screw them into the
connection points shown.
Locate the metal bracket packed with the cosmetic
cover and attach it to the back of the MetroCell,
using the 4 provided screws.
Ethernet
port #1
On/off button
“Stick” antennas
Antenna
connection
points
Ethernet
port #2
LEDs
Reset
button
GPS
antenna
connector
LEDs
Power
Phone
(device)
System Ethernet
port #2
GPS
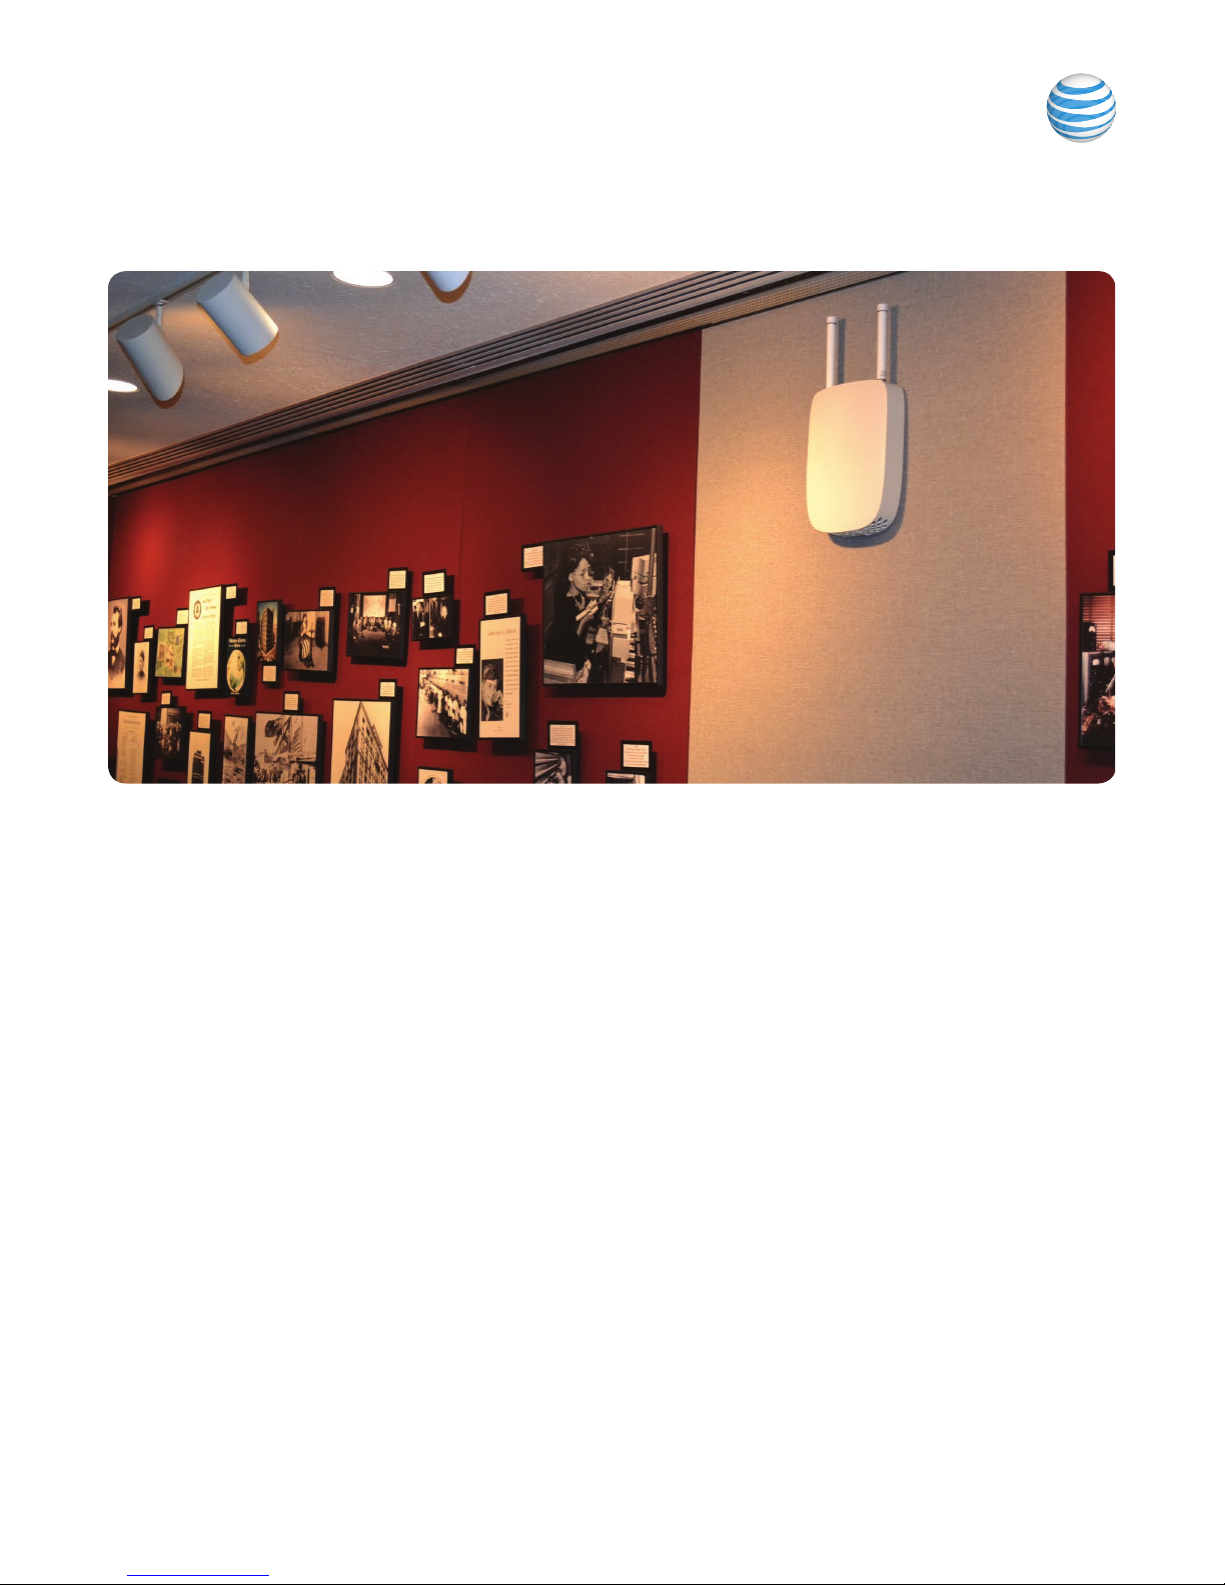
Step 1: Mount AT&T MetroCell
To mount AT&T MetroCell to a wall:
There are four bolt holes at the corners of the body
of the MetroCell. Use the MetroCell to mark positions
for holes in the wall.
Drill holes for wall anchors (not provided but are
recommended to be used, depending on wall material;
device weighs 4.5 pounds).
Align the bolt holes on the corners of the MetroCell with
the drilled holes, then drive the screws into the anchors.
2
Bolt holes
Cosmetic
cover bracket
Bolt holes
Page 3

Ethernet
To internet
Customer
router or switch
PoE+ Injector MetroCell
Ethernet
To 110V
AC power
To ground
(optional)
Cat5e shielded
Ethernet with
metallic “boots”
(150 feet)
Step 2: Connect AT&T MetroCell
The following instructions explain how to set up an AT&T
MetroCell using the Power over Ethernet Plus (PoE+) Injector.
Note: When PoE+ is used, the Ethernet cable which connects
the MetroCell to the PoE+ Injector must be as provided:
shielded Cat5e, with metallic “boots” at each end.
See Installation Guide to connect via other options.
The MetroCell MUST be powered by one of the
provided options: either the Power over Ethernet Plus
(PoE+) injector or the AC/DC power adaptor. Do NOT
use both at the same time, and do NOT use Power over
Ethernet from a router or switch.
• Secure the PoE+ Injector to an equipment rack
(if available , customer-provided) or other fixture.
• If a ground connection is available near the PoE+ Injector,
ground the Injector using the attached 6-inch ground wire
or a longer wire (not included) if needed. If not available,
the ground in the Injector power cord is adequate.
• Connect the PoE+ Injector to an available port on your
router or Ethernet switch with the 10-foot Ethernet cable.
• Connect the MetroCell to the PoE+ Injector using the 150foot Ethernet cable.
• Connect the GPS antenna cable to the MetroCell. A
70-foot extension is available if needed - ask your AT&T
representative. Do not use your own cable or more than
one extension.
• Route the GPS antenna towards the nearest window and
secure the end to a horizontal surface to hold it in place.
• Secure all cables .
• Connect the PoE+ power supply cord to the PoE+ Injector
and plug the cord into a 110V power outlet.
Ethernet cable
connection point
GPS antenna
connector
3
Page 4

Step 3: Activate AT&T MetroCell
Activation is initiated on the AT&T MetroCell website:
• Go to the AT&T MetroCell website at att.com/metrocell.
• Select Manage My Metrocell.
• Log in with your AT&T Premier user ID and password.
• Acknowledge the AT&T MetroCell terms and conditions.
• Select the Inactive MetroCell to be activated.
• Enter the requested information (Serial Number,
a “nickname” you want to give the device, street address,
a technical contact, etc.) and confirm it.
Note: The Serial Number is 10 or 11 digits long and
can be found on the device label or the shipping label.
• Click Submit.
The device will initialize, establish IP connectivity, update
its software, reboot, and auto-configure itself. This process
may take up to 2 hours to complete.
Check that the device is ready to use
When the device is ready for use, an email will be sent to the
technical contact named during the activation process, and
the 3 leftmost LED indicators (see Getting to Know AT&T
MetroCell above) will all be on and steady.
Make a test call
When activation is complete:
• Check that handsets within range of the MetroCell
display more “bars” of signal strength than they did
before activation.
• Make at least one test call and test at least one
data application.
Note: Premium edition subscribers will be able to operate in
“Closed” mode, which restricts use of the MetroCell to only
authorized cellular phone numbers. When testing signal
strength and placing test calls, please be sure that the
MetroCell is in “Open” mode or that the test phone is on the
authorized user list.
See User Guide for additional information.
Complete the installation
Attach the cosmetic cover (optional)
• Clip the cover into the attachment point on the top of
the MetroCell.
• Secure in place using the two retention screws at the
bottom of the cover.
Top attach point
Cosmetic cover and
retention screws
Troubleshooting
If your MetroCell has not successfully activated, please
confirm that you have:
• Waited at least 2 hours after initiating Activation on the
MetroCell website.
• Checked for an email confirming activation or providing
additional instructions.
• Checked all connections.
• Checked that the Power, System, Phone (Device), and
GPS LED indicator lights are on and steady (see Figure
under Getting to Know AT&T MetroCell, above).
• Verified that you have configured your router as required
– see Installation Guide.
• If your MetroCell has been activated in Closed mode,
verified that the device you are using to make test calls
has been added to the approved user list.
For additional assistance
• Refer to the Troubleshooting appendix of the
Installation Guide.
• Refer to the Help and Troubleshooting material on the
AT&T MetroCell website: att.com/MetroCell.
• call the AT&T Product Management Center at
877-996-7017 and enter the PIN ‘METRO’ (63876).
Please note:
the MetroCell User Guide is
available at the MetroCell website:
att.com/metrocell
©2015 AT&T Intellectual Property. All rights reserved. AT&T and Globe logo are registered trademarks of AT&T Intellectual Property.
4
All other marks are the property of their respective owners.
Maintain Required Records
The records contained in Appendices D and E of the
Installation Guide are provided to satisfy FCC requirements
and must be maintained with the MetroCell and made
available when requested. Please post or file them in a
suitable location.
 Loading...