

Page 1

AT&T System 25
Multiline Telephone
User Guide
Page 2

©1989 AT&T
All Rights Reserved
Printed in USA
TO ORDER COPIES OF THIS DOCUMENT REFER TO DOCUMENT
NUMBER 555-540-703.
Contact: Your AT&T sales representative, or
Call:
800-432-6600,
Monday to Friday between 7:30 am
and 6:00 pm EST.
In Canada call: 800-255-1242, or
Write: AT&T Customer Information Center
2855 North Franklin Road
P.O. Box 19901
Indianapolis, Indiana 46219
Every effort was made to ensure that the information in this document
was complete and accurate at the time of printing. However, this
information is subject to change. This document will be reissued
periodically to incorporate changes.
Multiline Telephone User Guide
Prepared by the
Technical Publications Group
Page 3

Contents
1
Introduction
9
Multiline Features
Account Code Entry
Automatic Intercom
Bridged Access
Call Accountability
Call Waiting
Callback
Conference Calls
Coverage
Data Calls
Placed from Your Telephone
Direct Group Calling (DGC)
Direct Station Selection (DSS)
Directory
Display
Display Functions
Exclusion
Following
Forwarding
Hands-Free Answering
Hold
Inspect
Last Number Dialed
Leave Word Calling
Message Waiting
Night Service
Paging
Park
Personal Message Waiting
Pickup
Placing Calls
Programming Numbers
9
11
12
13
14
15
16
17
18
19
20
21
24
32
33
34
35
36
38
40
42
43
44
45
46
47
48
49
50
52
Page 4

Recall
55
Repertory Dialing (REP DIAL)
Send All Calls
Signaling
Speaker
Speakerphone
Speed Dialing
Testing Your Telephone
Transfer
56
57
58
59
60
62
63
64
65
Glossary
Page 5
Introduction
This guide describes the features available to you from AT&T
System 25 through a multiline telephone and provides
instructions for using the features. For your convenience, the
features are arranged in alphabetical order.
Your telephone is ready to use as soon as it is connected to the
System 25. Therefore, as you learn to use the features, you can
make and receive calls with your telephone just as you would
with any ordinary phone.
Features
Your AT&T System 25 has two types of features: fixed and
assignable.
A fixed feature is one that is provided on all
multiline telephones. (In this guide, fixed features are indicated
at the beginning of the feature description by a box with a
check. )
An assignable feature is not provided automatically on all
phones. It must be “assigned” by your System Administrator.
(In this guide, assigned features are indicated at the beginning of
a feature description by an empty box. )
fixed feature
assignable feature
Check with your System Administrator as to which features have
been assigned to you. (As a reminder, you can place a check in
the box of each assignable feature as you receive it.)
Page 6
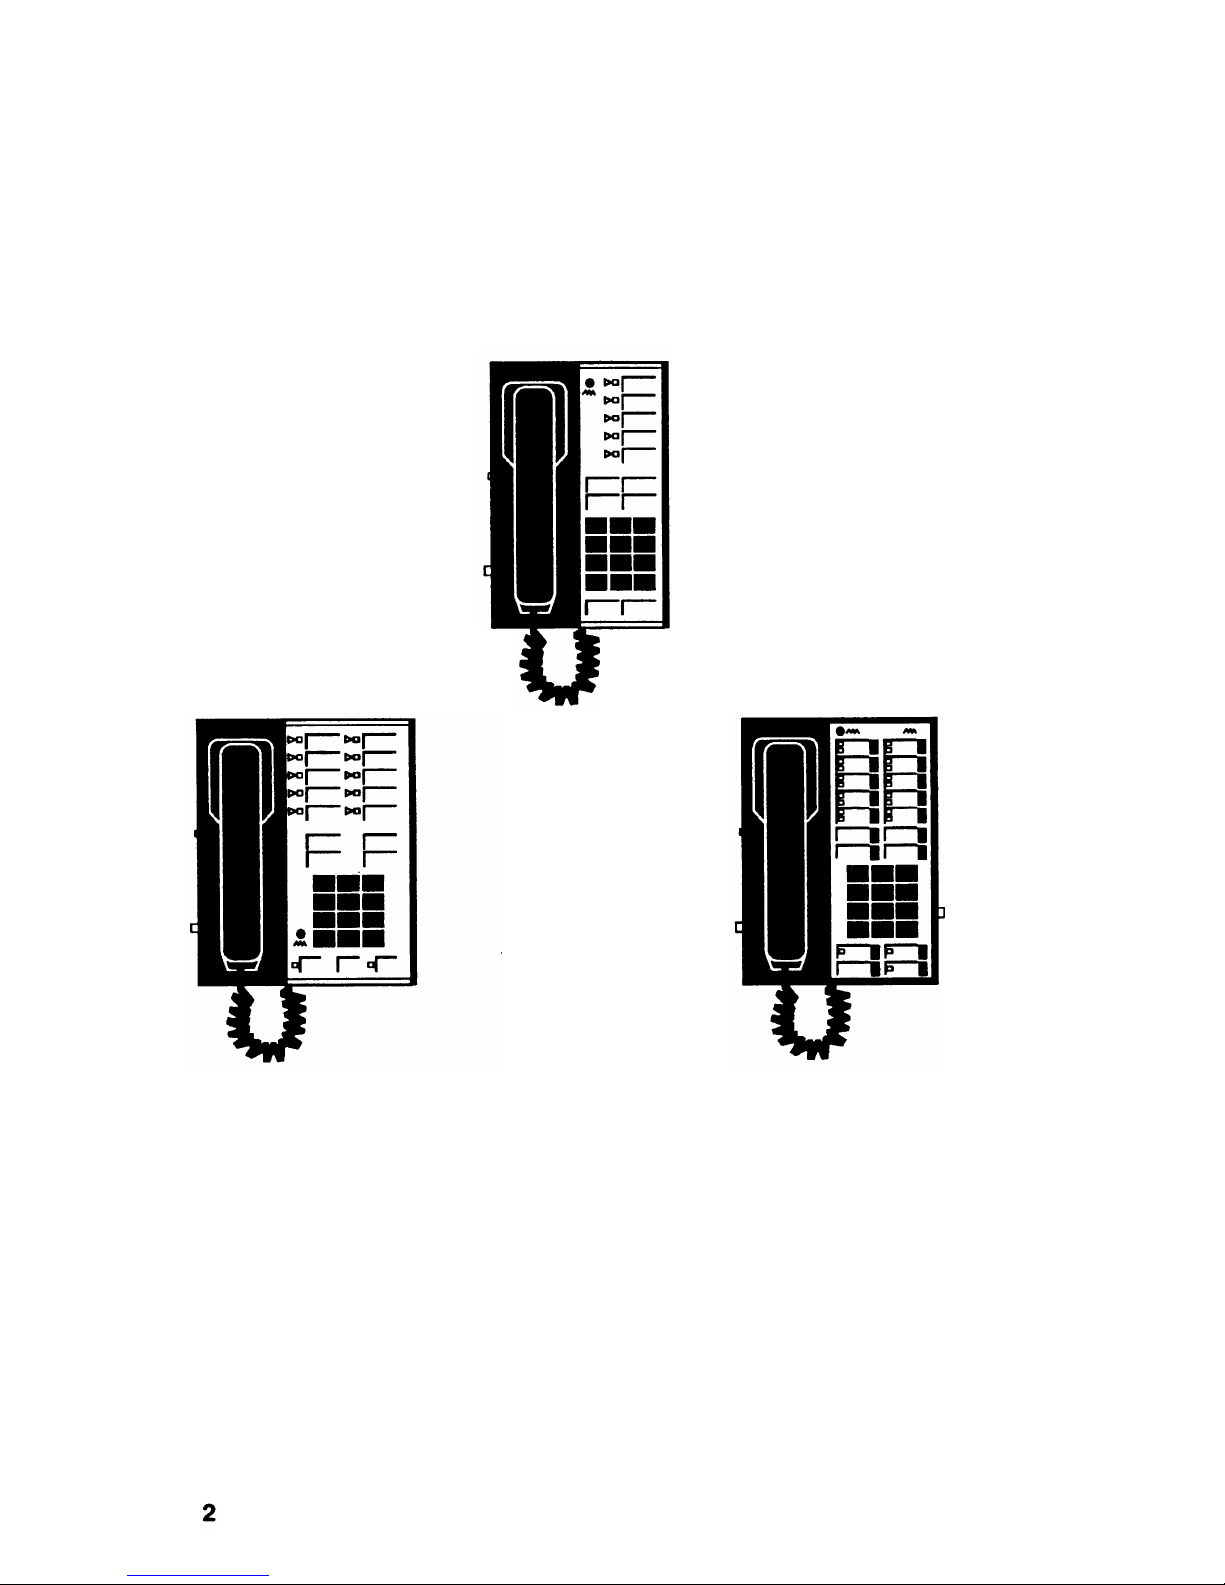
Multiline Telephone Models
The telephones shown below and on the following page are
some of the phones that are used with System 25. You can use
this guide with any of these telephones.
5-Button
10-Button
10-Button BIS
Page 7
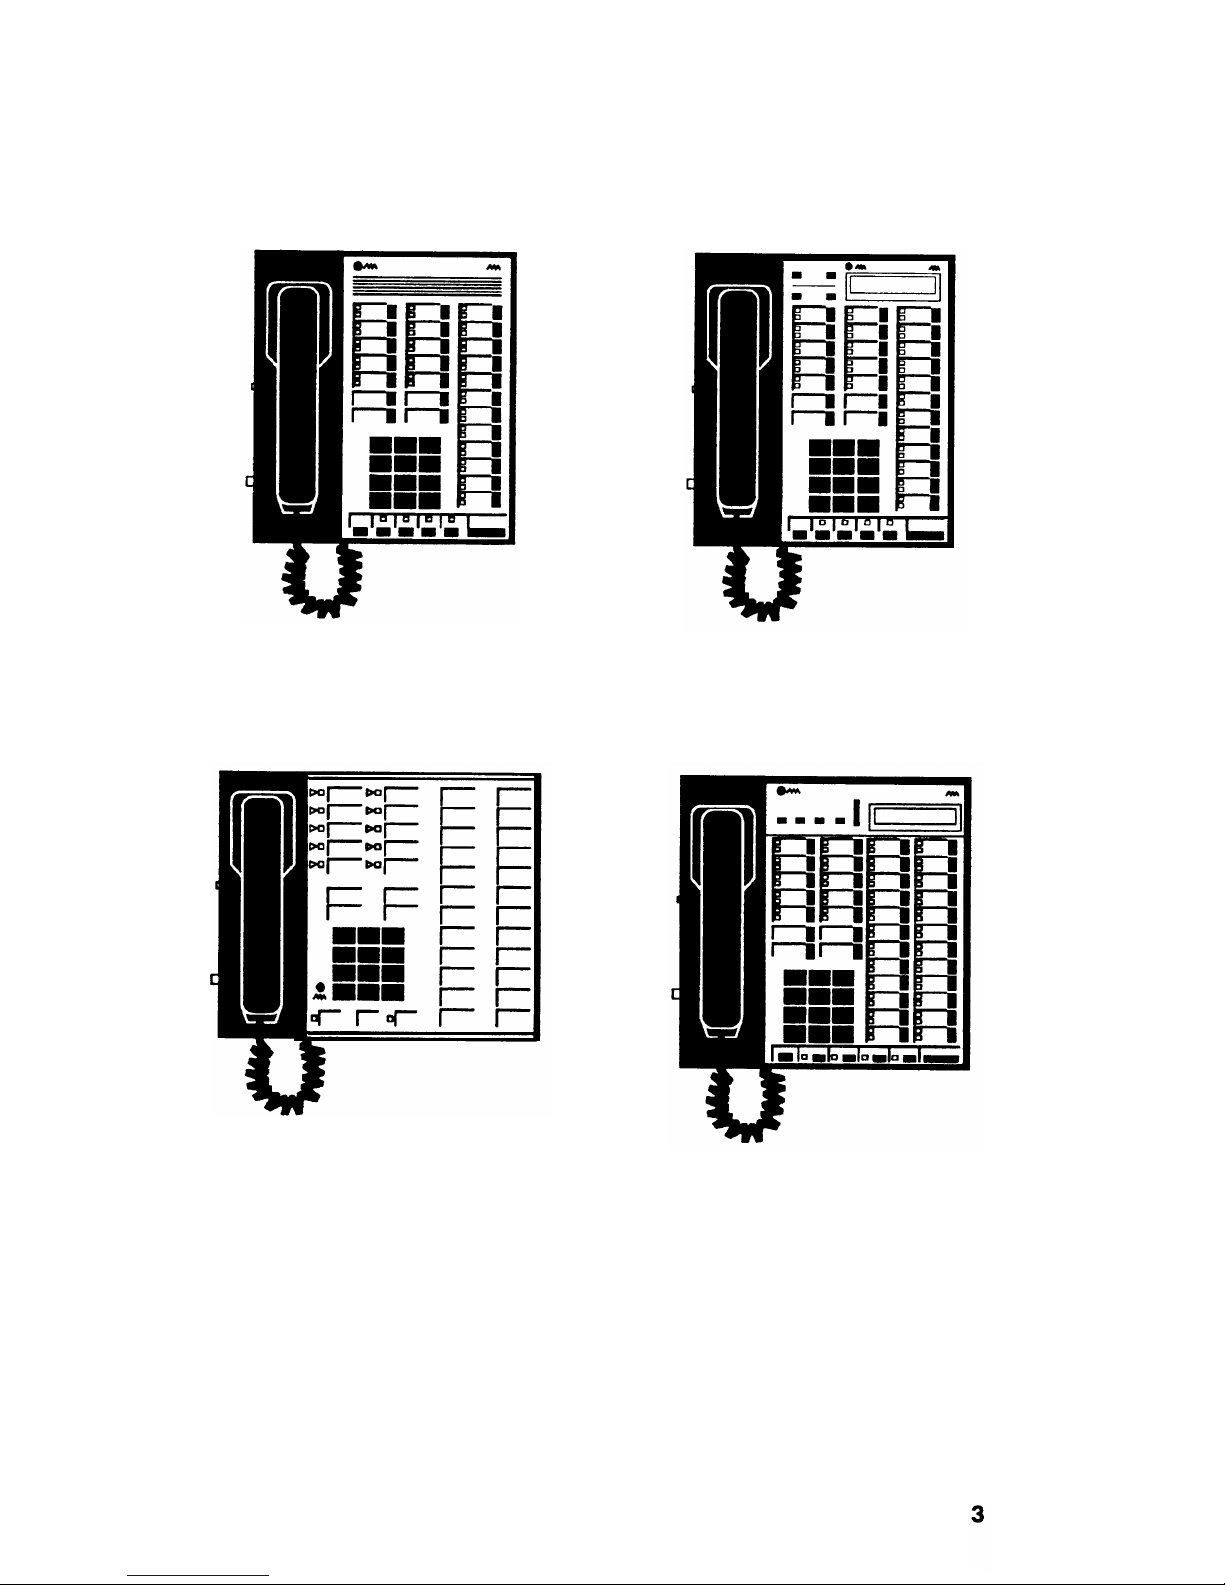
22-Button BIS with Display
22-Button BIS
34-Button
34-Button BIS with Display
Page 8
Buttons
Most multiline telephones have
Each is represented in a special
TYPE
dial pad buttons
three standard types of buttons.
way in this guide:
SHOWN AS:
button next to permanent
label with dark background
button next to changeable
label with light background
NOTE: A fourth type of button can be found on the display unit,
and is represented in this way:
Each multiline telephone has System Access buttons that are
used to place and receive calls and to access special system
features. On most phones, these buttons are located on the
upper left portion of the faceplate, and are labeled with your
extension number.
Line Selection
Your telephone should automatically select a line when you lift
the handset to place a call, and automatically select a ringing
line when you lift the handset to answer a call. These options
are set by the System Administrator, and the procedures in this
guide assume that you have both of them. (If you do not have
these options, you must press the appropriate line button at the
beginning of most precedures.)
Page 9

Handset Tones
System 25 signals you with tones that are heard through the
handset. The tones and their descriptions are listed below.
DIAL TONE
(a continuous steady tone)
You can dial.
CONFIRMATION TONE
(three short tones)
Your action has been accepted.
RINGBACK TONE
(repeating on/off tone)
The number you dialed is ringing.
SPECIAL RINGBACK TONE
(one long tone and
one short, dull tone)
The person you dialed
Waiting.
is busy, and has been notified of Call
BUSY TONE
(repeating on/off tone)
The number you dialed is busy.
FAST BUSY TONE
(fast repeating on/off tone)
The number you dialed was busy, misdialed, or restricted.
CALL WAITING TONE (short tone(s) heard during a call)
(the waiting call is an inside call)
(the waiting call is an outside call)
You have a call waiting to be answered.
QUEUEING TONE
(five short tones)
Your request for a callback has been confirmed.
DEQUEUEING TONE
(three short tones)
The extension or outside line that you requested for callback is
now available.
5
Page 10
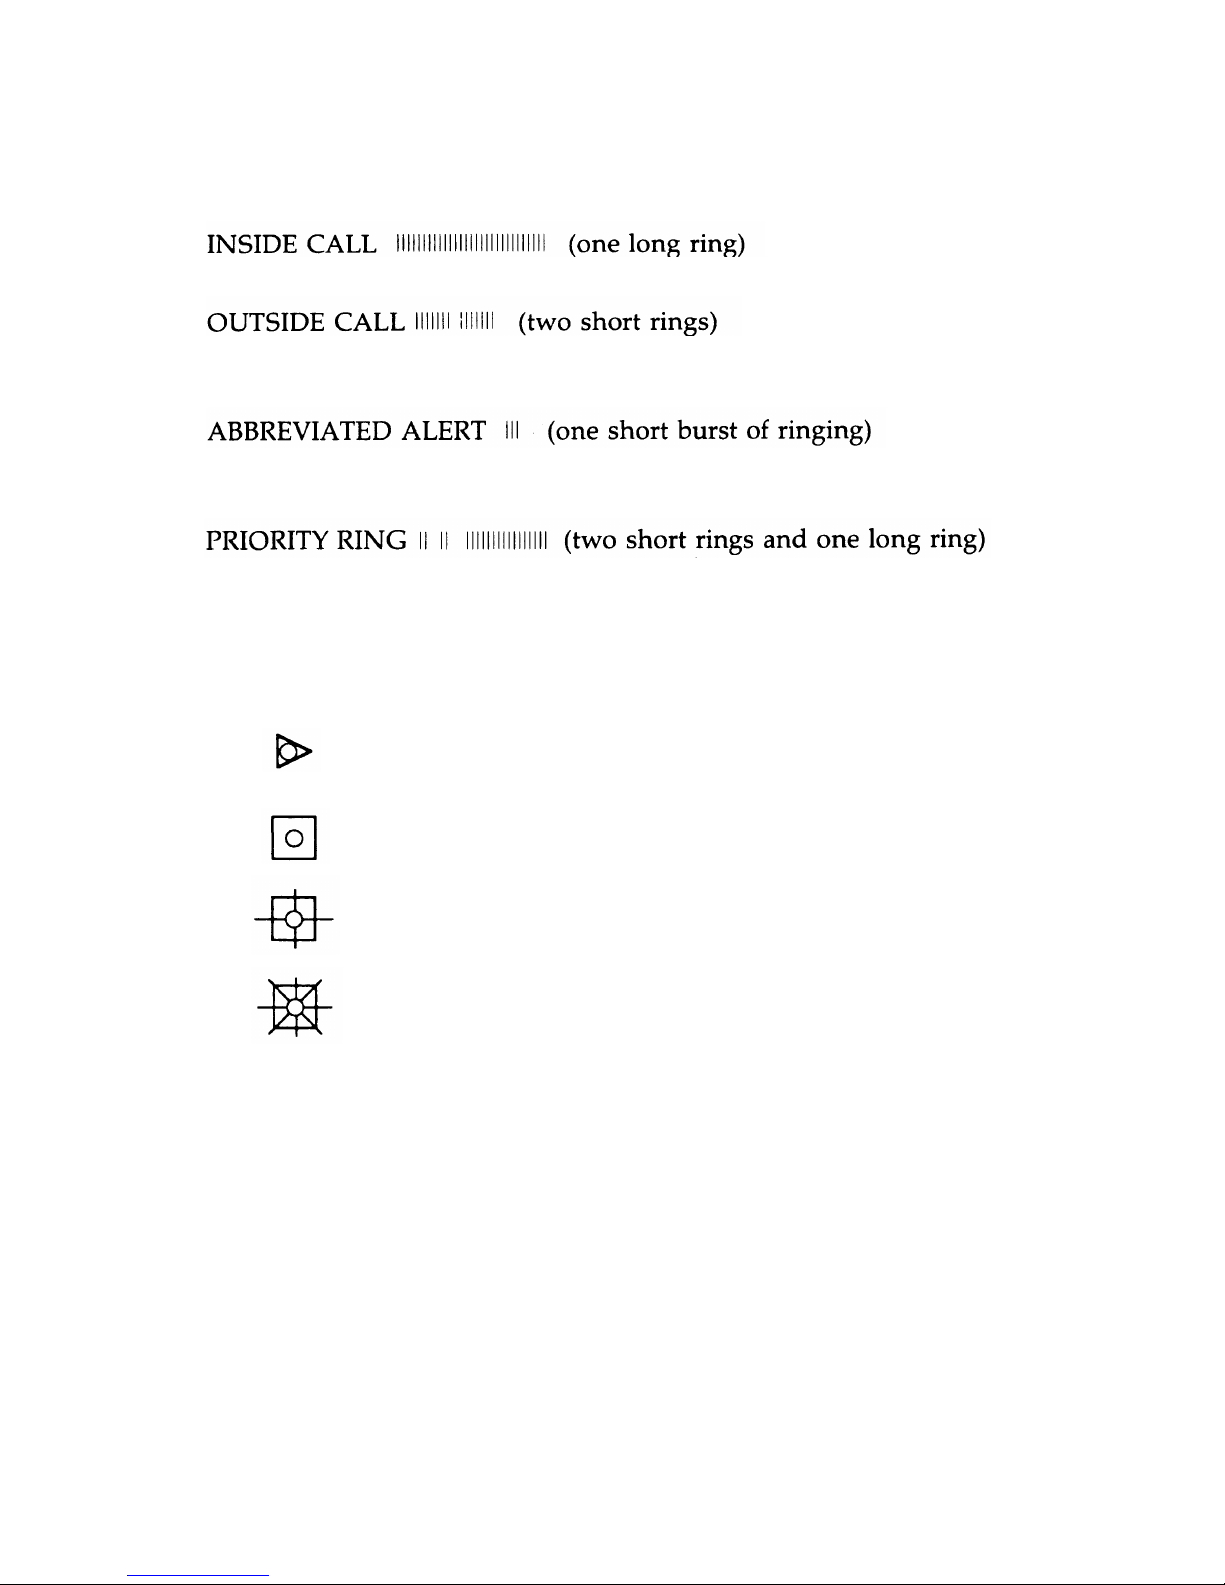
Ringing Tones
System 25 signals you with four distinctive rings. The rings and
their descriptions are listed below.
Your call is from a person inside your company.
Your call is from the attendant or someone outside your
company.
This can indicate a call on another line; a busy-to-idle reminder;
a manual signal; or that your telephone is in program mode.
You are being alerted that your request for Callback can now be
completed; or a call is being set up remotely for your phone via
a data feature known as Third-Party Call Setup.
Lights
A steady red light indicates the line you should
use when you lift the handset.
A steady green light indicates the line or feature
in use.
A slow blinking green light indicates an
incoming call.
A fast blinking green light indicates a call on
hold or a queued call. (An intermittent blinking
green light indicates a call held temporarily while
being transferred or conference.)
6
Page 11

Data Dial Code (DDC)
When your System 25 was installed, Data Dial Codes (DDCs)
were assigned to data terminals. If you have a data terminal
associated with your System 25, you will receive separate
information regarding its use.
Personal Dial Code (PDC)
Personal Dial Codes (PDCs) were assigned to telephones. In
most cases, your PDC is your extension number. If a telephone
is shared by two or more people, each person may have been
assigned their own
“floating” extension number (FPDC).
Display Unit
If your telephone has an attached display, use the procedures
and sample screens under the following sections: “Directory”,
“Display”, and “Display Functions”. If your telephone does not
have a display unit, you can skip these parts of the guide.
Additional Information
See your System Administrator if you have any questions or
would like additional information about your System 25 features.
7
Page 12
Multiline Features
Account Code Entry
For bookkeeping purposes, your System Administrator may
assign account codes to use with certain calls. If you are
required to use account codes for outgoing calls, the account
code must be entered before you can place an outgoing call. If
this feature is not mandantory, you may still optionally use the
Account Code Entry feature.
See your System Administrator to verify the types of calls, if
any, for which you must enter an account code.
Account Code Entry - Outgoing Calls
1
2
3
4
5
Listen for dial tone, then press
Dial the account code.
NOTE: If you make a mistake while entering the account
code, press
, then the correct account code.
Listen for dial tone.
Dial the outside line access code and listen for dial tone.
Dial the telephone number.
NOTE: Do not use AC use the
button for this
procedure.
9
Page 13
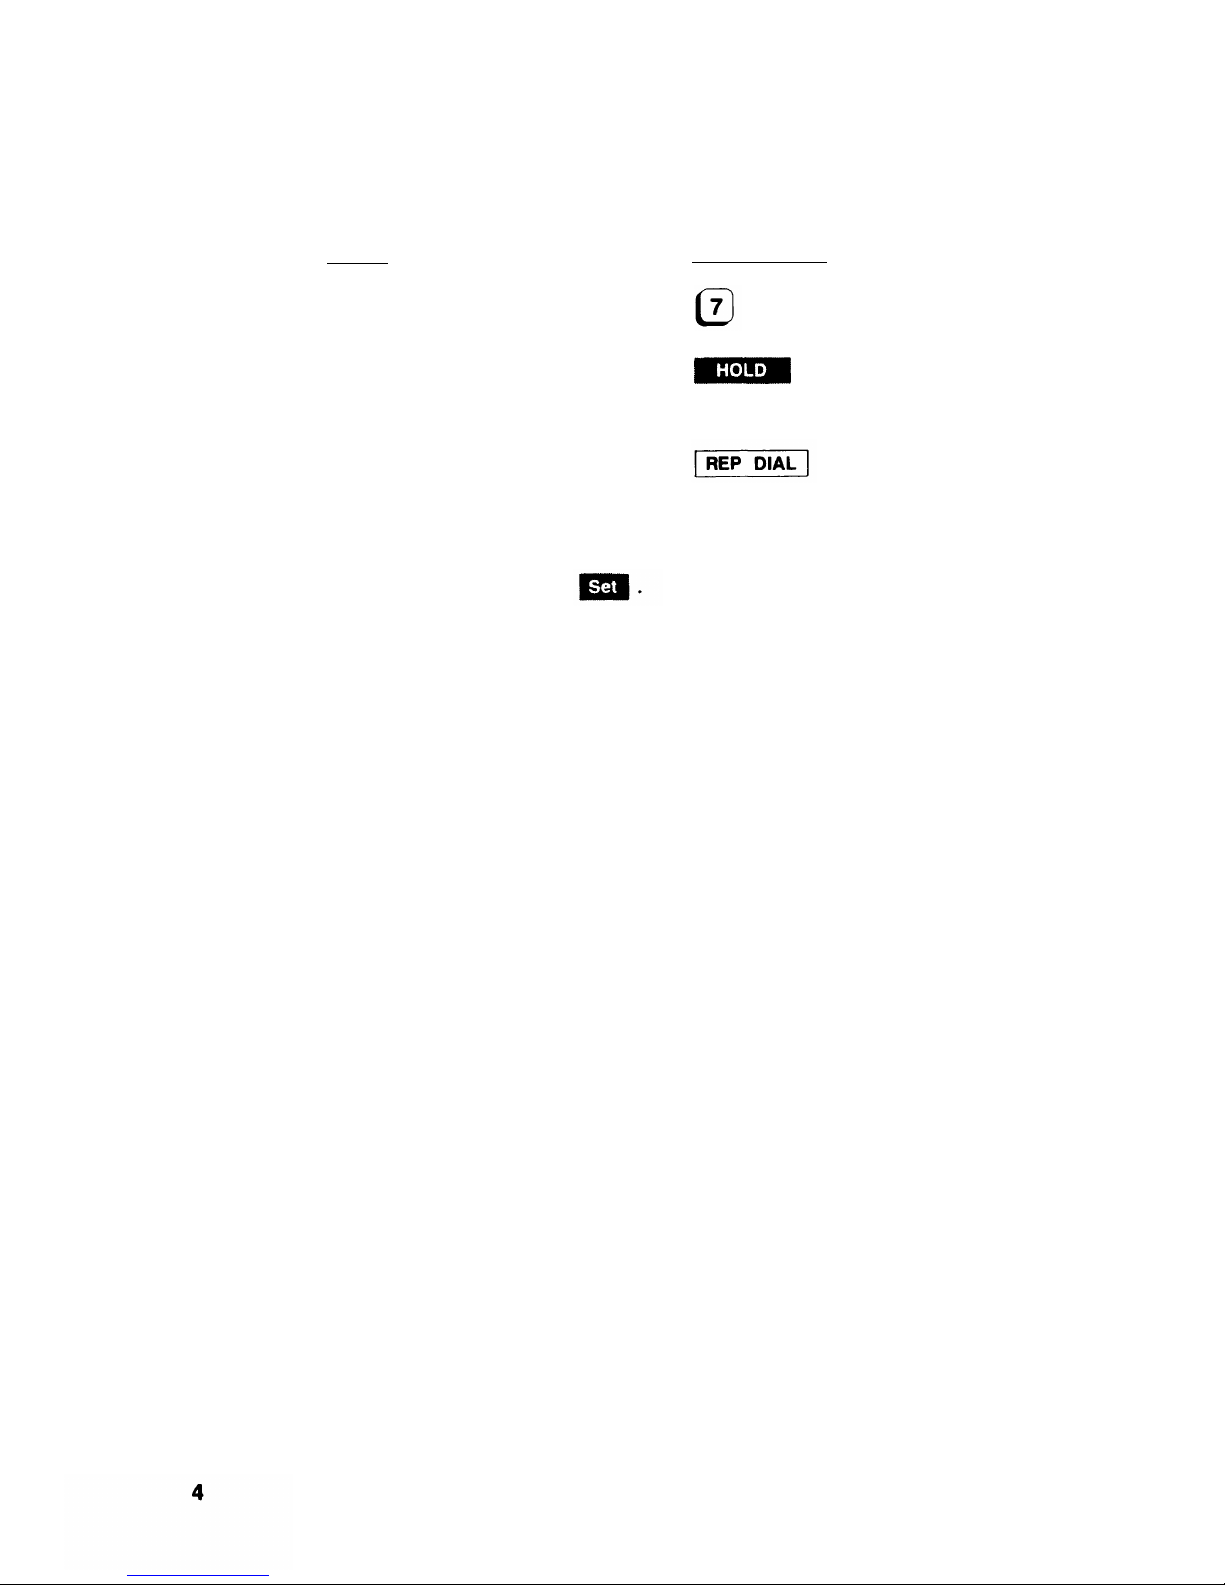
Account Code Entry (Continued)
Account Code Entry - Incoming Calls
1
2
3
10
Page 14
Automatic Intercom
You and another person may each have a button labeled
that you can use to call each other.
Using AUTO ICOM
1
Press
2 Listen for ringback.
11
Page 15
Bridged Access
This feature allows for a common connection between a specific
button, on your telephone and a specific line
button,
on someone else's telephone. You can
join in a call or cover the other line by using your bridged access
button. Up to 15 people can use their bridged access buttons for
the same system access button.
Your System Administrator can set your
to ring in any of the following ways:
button
■ Ring immediately when a call rings
line.
■ Ring after a predetermined number
at the other person’s
of rings (delayed ring).
Not ring at all.
If you are on a call and another call comes in on a previously
idle
button, you will hear abbreviated ringing.
When someone picks up the call, the light next to your
button becomes steadily lit.
Bridging Onto a Call in Progress
1 Press the
button next to the steadily lit
green light.
You are connected to the call in progress.
2 To drop out, simply hang up at any time.
NOTE: You cannot bridge onto a call if any one of the
extensions on that call has their Exclusion feature turned on
or if the conference limit has already been reached for that
call.
12
Page 16

Call Accountability
You can use your own extension number at any other extension
to place toll calls that should be billed to you.
Billing Calls to Your Extension
1 Listen for dial tone, then press
2 Dial your extension number.
3 Listen for dial tone, then dial the telephone number.
NOTE: If you make a mistake, hang up and restart the
sequence.
13
Page 17
Call Waiting
If all of your System Access buttons are busy, you may be
notified (through your handset) that a call is waiting. If you
hear one short tone, it is an inside call waiting; two short tones
indicate you have an outside call waiting.
If you have a System Access-Outgoing
button on
your telephone, you can put your calls on hold and answer the
call waiting.
If you do not have this button, you must end one
of the existing calls in order to answer the call waiting.
Answering - Using SYS ACC-O
1 Press
2 Press .
I
3
Press
Answering - Ending a Current Call
1 End your conversation and hang up.
2 When the telephone rings, lift the handset.
14
Page 18

Callback
If a System 25 extension or outside line is busy when you place a
call, you can request a callback. Your call will wait in a line
(called a queue) for the extension or line to become available.
The system will then alert you with a priority ring and complete
the call.
For inside calls, use Callback when you hear a busy tone or a
special ringback tone.
For outside calls, use Callback only when
you hear fast busy tone.
NOTE: You may hear the callback request queueing tone
automatically when you place certain calls.
Requesting Callback
1 Before you hang up, press
2 Listen for queueing tone, then hang up.
NOTE: If you do not hear
not been accepted for this
Completing Callback
queueing tone, your request has
call.
1 When you hear priority ring, lift the handset.
NOTE: If you remained off-hook after requesting Callback,
you will not receive priority ring.
2 Listen for dequeueing tone.
Your call will be completed as dialed.
Canceling Callback
1 Press
2 Press the button associated with the call.
3 Hang up.
15
Page 19
Conference Calls
You can set up a conference that includes a combination of
System 25 extensions as well as outside calls. You may have up
to five conferees; however, no more than two may be on outside
lines.
Setting Up Conference Calls
1 Dial the first person and announce the conference call.
2 Press
and listen for dial tone.
The light next to the held call blinks intermittently.
3 Dial the next person you want added to the conference.
NOTE: If for any reason this call should not be added (busy,
no answer, or misdial): press the switchhook, then the
button associated with the first person; go back to Step 2 and
continue.
4 Announce the conference call to the added person.
5 Press the button next to the blinking light to join the calls
together.
6 For each person you, want to add, go back to Step 3 and
continue the same procedures.
Dropping a Conferee
When you drop someone from the conference, anyone that was
added by that person is also dropped unless they are on a
Bridged Access or Personal Line button. If you drop the person
who added you to the conference, you will also drop anyone
added to the conference by that person.
1 Press
2 Press the button of the person you want to drop.
The light associated with the dropped call goes off.
16
Page 20
Coverage
If your System Administrator has administered this feature, calls
to you can be answered (covered) at specified telephones when
you do not answer the call yourself. Calls unanswered at your
telephone will start ringing at the covering telephone after a
preset number of rings.
However, if you are busy on another
line, calls will go to coverage after a preset number of rings
(usually one).
Buttons used for Coverage answering are:
Coverage calls for one specific person are sent
to an Individual Coverage button assigned to the extension.
Coverage calls for a group of two or more
extensions come in on a Group Coverage button associated
with the group the extensions are assigned to.
17
Page 21
Data Calls
Placed from Your Telephone
If your System Administrator has assigned a
button to
your telephone, you can use it to place data calls for your
associated data terminal.
Placing a Data Call
1
2
3
4
5
6
7
Turn on your data terminal.
Lift the handset on the associated telephone and listen for
dial tone.
If your data call is an inside call, dial the DDC and go to
Step 4.
or
If your data call is an outside call, press
Dial the data number.
.
Listen for a high pitched answer tone and complete any
additional necessary dialing.
Press
within 15 seconds of hearing answer tone.
Hang up and go to the data terminal.
18
Page 22
Direct Group Calling
(DGC)
Your System Administrator will advise you if you have been
assigned as a member of a Direct Group Calling (DGC) group.
Calls that go to these groups are distributed among its members
for the purpose of answering incoming group associated calls.
Leaving the Group
1 Listen for dial tone, then press
2 Listen for confirmation tone and hang up.
Returning to the Group
1 Listen for dial tone, the press
2 Listen for confirmation tone and hang up.
19
Page 23
Direct Station Selection (DSS)
The DSS buttons allow you to make a call without dialing the
digits. The number is stored in the memory system. There are
two kinds of DSS buttons: Fixed and Flexible. The fixed DSS
buttons,
consist of extension numbers or access codes
programmed the System Administrator. Flexible DSS
buttons,
allow you to program your own frequently
called extensions and most other System 25 access codes. (You
cannot program Pooled Facility Access codes on a DSS button.)
For instructions on how to program information in
buttons, see the section titled “Programming Numbers”.
Placing Calls
When DSS Buttons Are Not Lit
1 Listen for dial tone.
2 Press
When DSS Buttons Are Lit
1 Do not lift the handset.
2 Press
or
NOTE: Your telephone will ring once when the other person
hangs up and your call will be placed automatically when
you lift the handset.
20
Page 24

Directory
If your telephone has an attached display and your System
Administrator has set up a system directory, you can use the
display to obtain extension numbers, data numbers, or DGC
access codes for people connected to your System 25.
With this display feature, you can access the name and number
of a specific person.
Start the directory search by dialing the
first letter(s) of the person’s last name. Use the following
buttons for dialing those letters and characters that do not
appear on the dial pad:
For the letter, "Q," press
For the letter, "Z," press
For a space, dot, or comma, press
The first name in the system directory
that matches the letters
you dialed will be displayed. You can press
to
display more names that match the search combination, or you
can modify the search by adding additional letters to the end of
your combination. The directory will “circle back” to the first
name in the group after displaying all available names.
For more information about other ways of using the display, see
the “Display” section.
Using the Directory
1 Press
The following display appears:
2 Start the search combination by dialing the first letters of the
person’s name, using the letters on your dial pad.
For example, for "Stiller, R" you might press
since these buttons include the letters S, T, and I.
(Continued)
21
Page 25

Directory (Continued)
3 Press # .
The system will provide you with the first name in the directory that
matches the search combination that you specified.
At the beginning of each entry, you will will see the letter “ D“ to remind
you that you are using the Directory feature.
4 To see the next matched entry, press
You may
need to press
several times before the correct
name appears.
NOTE: If you appear to be far away from your goal, you may
enter additional letters to the person's name. (Be sure that
you press
after you complete entries from the dial pad.)
If you press
the next name in alphabetical order
appears:
When you press
you see the name you have been
searching for:
22
Page 26

Directory (Continued)
Placing Directory Calls
When the display shows the name and number of the person
you want to call, press
The system will automatically dial the number presently appearing on your
display. If you handset is on-hook, your speakerphone will turn on.
Exiting from the Directory
When you do one of the following, you automatically deactivate
the Directory feature:
Press
again.
Allow the display to be idle for 15 seconds.
Hang up the handset after being off-hook, or lift the handset
after being on-hook.
Place a call using the dial pad or a call appearance button,
such as
or pressing
23
Page 27

Display
Some telephones come with a 16-character display. If your
telephone has an attached display, use the following directions
and sample screens to help you
use the display more efficiently.
Your display can be used in the following ways:
■
■
■
■
Handling calls more easily
Checking the time and date
Setting the alarm, time, day, date, and timer
Programming buttons or speed dialing codes from your
telephone
Using the system directory to check a specific person’s
number
Checking the feature or numbers that are stored on a button,
the identity of an incoming call, and the identity of a call on
hold.
Viewing Display Screens
The display can show two screens of information, each
containing up to 16 characters.
(You can view only one screen at
a time. ) Screen 1 appears automatically and indicates
information such as names and extension numbers (inside calls),
and identification of outside calls.
1 To view the information that appears on Screen 2 of the
display, press
2 To return to Screen 1 of the display, press again.
If Screen 2 of a display is a continuation of Screen 1, such as a
telephone number that is more than 14 digits, you will see a
dash at the beginning of Screen 2.
24
Page 28

Display (Continued)
The following is an example of a double-screen display, in which
the telephone number is continued on Screen 2.
Using the Display
Usually, you use the display to check the name/extension of the
caller (internal calls) or the type of outside line on which the call
is coming in (outside calls).
Inside Calls
When you place or receive calls within the system, the display
shows you the extension number and the name (if the System
Administrator has administered this option) of the person you’
are calling or who is calling you. The following example is a
typical display for an inside call:
If you try to bridge onto a call in progress using a
button, and the person has
turned on the Exclusion feature, you will see this display:
Outside Calls
When you place
dialed, as in the
an outside call, you will see the numbers you
following:
912015551212
The following example is a typical display for an incoming
outside call:
25
Page 29

Display (Continued)
Conferencing
The display for a conference call is slightly different from the
display for an inside or outside call. In the last two positions on
the display are the display symbol associated with conference
calls, “A”,
and the number of conferees currently in the
conference. The following example shows a conference call
being arranged:
You receive a call from R. Cameron, announcing you will be
added to a call he is on with another person.
Cameron includes you in the conference. The following message
is displayed:
Transferred Calls
When you are receiving a transferred call, you will see the letter
“T”, followed by the number and name, if available, of the
person transferring the call.
The following example shows you
that S. Jones is in the process of transferring a call to you.
When S. Jones completes the call transfer by hanging up, you
will see the identity of the transferred person, as in the following
example:
26
Page 30

Display (Continued)
DGC Group
If you are a member of a Direct Group Calling (DGC) group, you
can view the number of calls waiting to be handled by the
group. In the last position of Screen 1, you will see a number
from O through 9, indicating the number of calls waiting for the
DGC group. If there are more than 9 calls in the queue, you will
see a "!".
In the following example, there are three calls waiting
for the group.
Signaling
If a person is signaling you with the Signaling feature, you will
see the letters SIG in front of the name of the person signaling
you, as in the following example.
If the name is not available, you will see SIG followed by the
extension of the person signaling you.
Account Codes
If you are dialing an account code, you will
"ACCT?" before the numbers that you dial,
example.
Redirected
Calls
see the prompt
as in the following
If a call is redirected to your telephone (that is, sent to your
telephone because the original telephone was busy, the
-
call was
unanswered, or one of the features listed in the table below was
in effect), the display will have a redirection symbol, “ > “, at the
beginning of the display. You will then see the original
telephone’s extension and name, if available.
NOTE: If the call has been redirected using Park, or a data
terminal feature the beginning redirection symbol is “}”.
If the call
phone, a
has been redirected from
“c” will appear in the last
your telephone to a coverage
position of Screen 1.
27
Page 31

Display (Continued)
Screens of a Redirected Call
A display for a redirected call has two screens. Each screen
includes the following information:
■ Screen 1. This screen includes a “ >” or “}”,
followed by the
original telephone extension number and name, if available.
Screen 2. This screen includes the extension number and
name of the person who placed the call, followed by a calltype symbol.
The following double-screen display shows a redirected coverage
call:
Leave Word Calling
If you use the Leave Word Calling feature to notify someone that
you have called, your display will show the extension number of
the person you are calling and confirm or deny that the message
has been sent, as in the following displays.
Page 32

Display (Continued)
Display Symbol Summary
Display Symbols for Screen 1
The display symbols that apply to the first character position of
Screen 1 and their meanings are provided in the table below.
Display symbol
Meaning of the symbol
> A redirected or coverage call has been
sent to the console.
}
A call is returning to the console from
a station that is busy or does not
answer; or a call has been redirected
using Park or a data terminal feature.
&
The button has been pressed
while handling a call.
I
This is a call that was busy and is now
available (Busy-to-Idle Reminder).
Q
The call has been queued using
Callback.
F
The call has been forwarded to an
outside location.
T
The call being received is a transferred
call.
The system can signal you when a busy telephone is available by
using the Busy-to-Idle Reminder. Your display shows an “I”,
the extension number (or data terminal DDC), and name of the
now-idle person.
1354 Asay, J
When a call is queued with the Callback feature, the display is
the same as the above, but there is a “Q” in place of the “I”.
Page 33

Display (Continued)
Display Symbols for Screen 2
When you receive a redirected call, the last letter on Screen 2
will give you valuable information concerning the call. The
display symbols and their meanings are provided in the table
below.
Display symbol Meaning of the symbol
a This is a data terminal call.
b
The covered station was busy.
d
The covered station did not answer the
call.
f
The call sent used Following or
Forwarding.
This is a DGC call.
n This is a Night Service call.
p
If the first redirection symbol is “ >”,
the call was picked up using Pickup; if
the first redirection symbol is “]”, this
is a returning
parked call.
s
Send All Calls was turned on by the
covered station.
u
The call was to a non-signed-in FPDC.
30
Page 34

Display (Continued)
Programming Your Telephone
When you start to
will show:
program the buttons and/or codes, the display
PROGRAM
While you are dialing the numbers and/or special characters that
you want stored on a button or programmed into a dialing code,
the display will show the numbers and/or
have dialed, as in the following example:
For more information about programming
special characters you
numbers on your
telephone, see the section for “Programming Numbers”.
.
Inspect Button
button allows you to check the number and name,
if available, of a person calling you, or of a call that you have on
hold. In addition, you can determine the numbers stored on
various buttons (such as
buttons) and
what features is assigned to each button. For more information
about the Inspect feature, see the section titled "Inspect".
31
Page 35

Display Functions
The button provides access to special features built into
your display unit. The buttons at the top of the telephone (next
to the display screen) control a clock, calendar, 60-minute timer,
and an alarm.
When you press
the screen displays whatever function
you select next. Your display will remain in the “Local” mode
until you either place a call, receive a call, or press
again.
Setting the Clock, Date, or Alarm
1
2
3
4
5
Press
The Clock/Calendar Screen appears on the display.
Using the Timer
1
2
3
4
5
6
32
Page 36

Exclusion
This feature prevents others from listening in on a shared line.
If you are on a call and activate this feature, it will automatically
disconnect all other inside lines. To include selected inside people
on your call, press
before adding them to the call.
Activating Exclusion
1 Answer or place a call.
2 Press
The light next to this button turns on,
NOTE: The Exclusion feature goes off automatically at the
end of your call.
Page 37

Following
You can have your personal calls sent to another telephone by
using either the Following or the Forwarding feature. To use the
Following feature, at a telephone other than your own, you sign
in your extension number.
To cancel the request, you may
either sign out your extension number from that other telephone,
or sign in at your own telephone.
Although Following and Forwarding send your calls to another
telephone, the two features differ slightly. Read the information
and procedures for both features and then. use the one that best
fits your need.
Signing In - At Another Phone
1 Listen for
2 Dial your
3 Dial your
4 Listen for
dial tone, then press
own extension number.
extension number again.
confirmation tone, then hang up.
Signing Out - At Another Phone
1
Listen for dial tone, then press
2 Dial your extension number.
3 Dial .
4 Listen for confirmation tone, then hang up.
Signing Out All Extensions
This procedure signs out all extension numbers that have been
signed in at this telephone except for the one normally assigned
to it.
1 Listen for dial tone, then press
2 Listen for confirmation tone and hang up.
Page 38

Forwarding
You can have your personal calls sent to another telephone or to
an outside number. Unlike the Following feature, you do not
need to sign in your extension number at the other telephone.
Instead, simply forward your calls to another location while you
are still at your own telephone.
Read the information and procedures for both the Forwarding
and Following features.
Then use the feature that best fits your
needs.
NOTE: Your System Administrator may or may not allow your
telephone to forward calls to outside telephone numbers. Check
with your System Administrator for any restrictions you may
have concerning this feature.
Forwarding Calls
1
2
3
At your own telephone, dial
Dial the extension number of the other telephone.
or
Dial the outside line access code and the telephone number
of the other phone.
Listen for confirmation tone, then hang up.
Canceling Forwarding
1 At your own telephone, press
2 Dial your own extension number.
3 Dial your extension number again.
4 Listen for confirmation tone, then hang up.
35
Page 39

Hands-Free Answering
When you use the Hands-Free Answering feature on any of the
telephones listed below, you can answer inside calls without
lifting your handset.
■ All Built-in-Speakerphone (BIS) telephones
■ All telephones with a Hands-Free Answer on Intercom
button
■ All telephones with a Hands-Free Unit (HFU)
■ 5-, 10-, 22-, and 34-Button telephones without an HFU
If your telephone has an attached display, you cannot use the
Hands-Free feature when you are using the Directory or Inspect
feature.
Turning On Hands-Free Answering
1 If your telephone has a
button, press
this button.
The light next to this button turns on.
2 Press
The light next to this button turns on.
Answering Calls
1 Listen for the beep that announces a call.
2 If you have a
or a
button, begin speaking.
or
If you have only a button, lift the handset and
begin speaking.
(Continued)
36
Page 40

Hands-Free Answering (Continued)
NOTE:
If you have only a Speaker button, you can hear the
caller, but the caller cannot hear you until you pick up the
handset.
If you have a Speakerphone and Microphone, or
button, you can hear the caller and the caller can
without lifting your handset.
To temporarily keep the caller from hearing you,
a HFAI/MIC
hear you
press
Press this button again to speak.
Ending Calls
1
2
3
If you had to use the handset to talk, hang up.
or
If you were able to talk Hands-Free, press
Press
or
Press your
NOTE: Be sure to turn this feature off before leaving your phone
unattended, or incoming calls cannot be covered by other
System 25 features, such as Forwarding, Coverage, or Send All
Calls, etc.
37
Page 41

Hold
You can hold calls while you attend to other matters and then
pick them up again.
After you put a call on hold, you may hang
up the handset without losing the call. To pick up a call you
have placed on hold you must use the same telephone (or one
that shares the same line).
Using Hold
1
Press
The light next to the button
of
the held call blinks.
2 You can handle other matters without disconnecting the line.
3 To return to the
blinking light.
4 If necessary, lift
held call, press the button next to the
the handset.
5 Continue your conversation.
Hold - Placing Another Call
1 Press
2 Press an idle line button and listen for dial tone.
3 Place and complete the second call.
4 To return to the held call, press the button next to the
blinking light.
Page 42

Hold (Continued)
Hold - Answering Another Call
1
Press
The light next to the button of the held call blinks.
2 Press the button next to the blinking light.
3 Speak with the caller.
4 To return to the held call, press the button next to the
blinking light.
Page 43

Inspect
If your telephone has an attached display, you can use the
button to do the following:
Identifying Calls on Hold
The display is the same as the one shown when the call first
came in, as in these examples:
329 Tango, S
or
OUTSIDE
Identify Programmed Numbers
You can identify the number that is stored on Flexible DSS and
Repertory Dialing buttons, and Last Number Dialed. For
example:
If no number is currently stored, you will see the feature name
instead of numbers on your display:
Determine Status of Outside Lines
The display tells you the number of busy lines out of the total
number of lines in a pool.
In the following example, five of the
12 trunks in the pool of trunks are busy.
005 OF 012 BUSY
40
Page 44
Inspect (Continued)
Check Features Assigned to Buttons
If you inspect a button other than those shown above, you will
simply see the name of the feature assigned to that button. For
example:
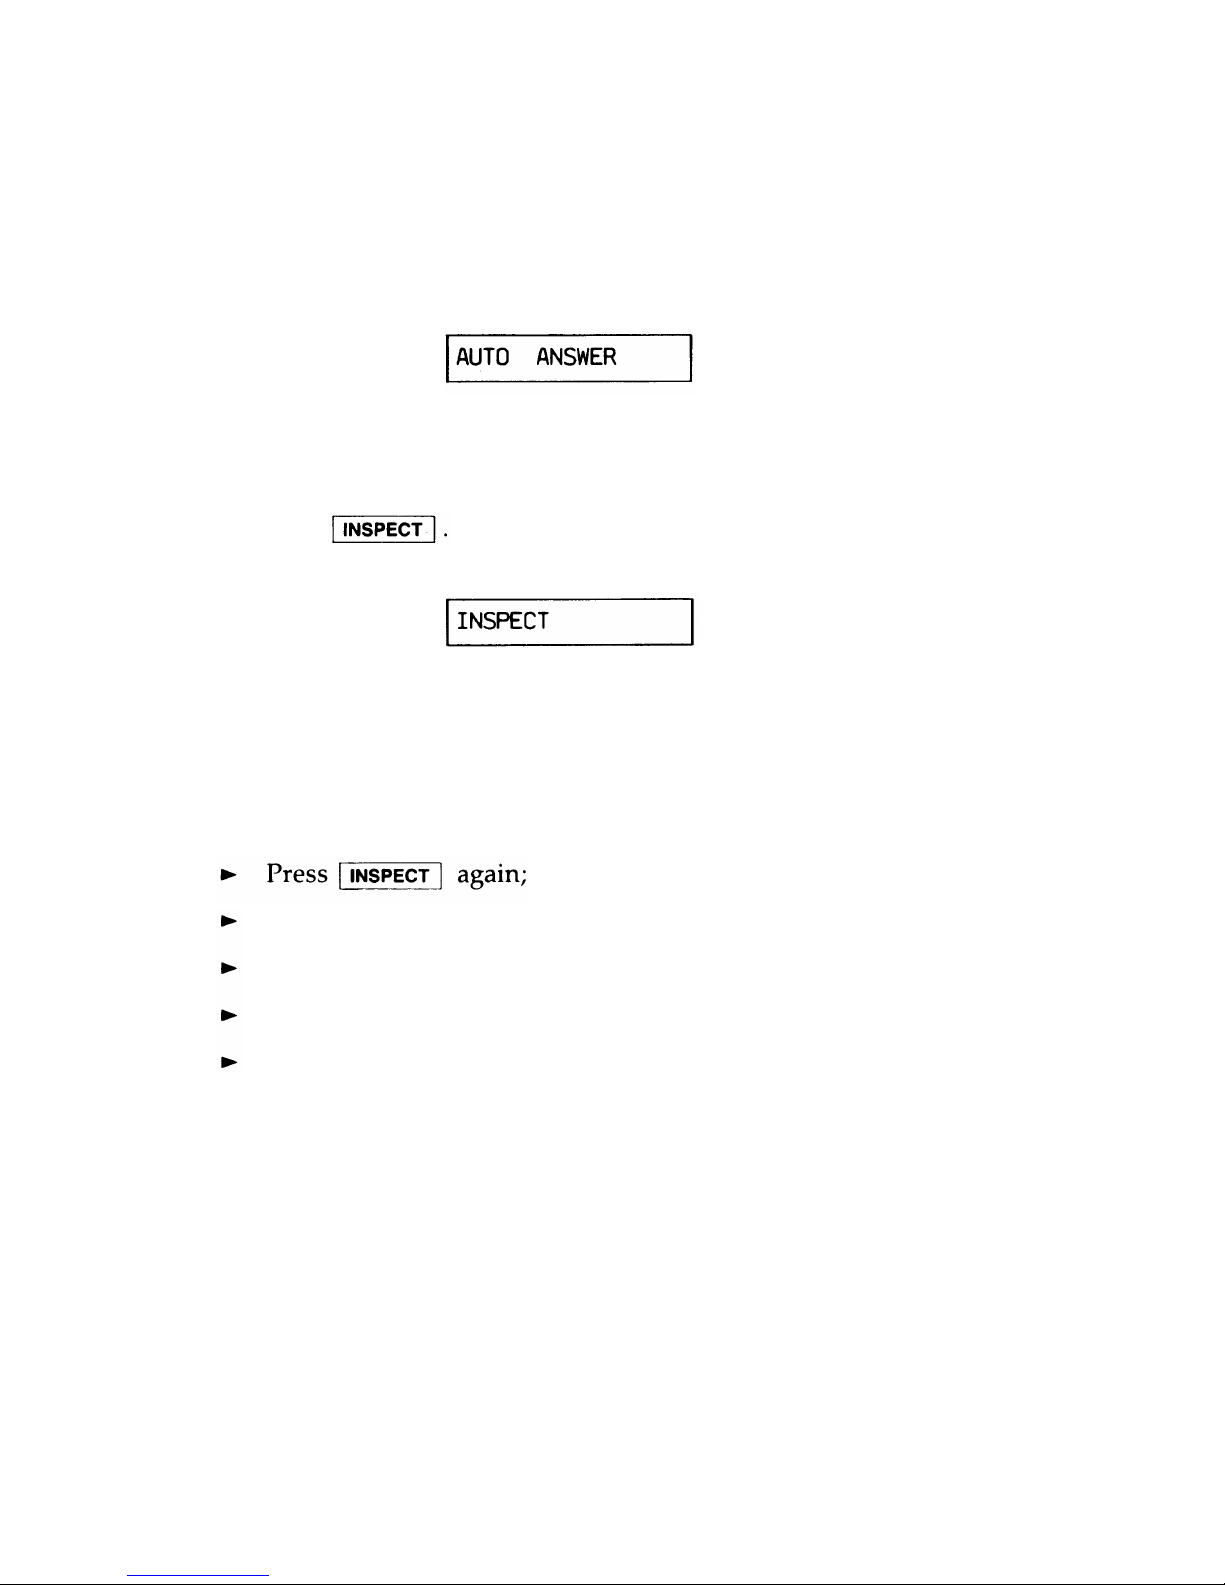
Using the Inspect Feature
While using the Inspect feature, you are able to answer calls.
1
Press
The display will initially read:
2 Press the button you want to inspect.
Turning Off the Inspect Feature
When you do any of the following, you automatically turn the
Inspect feature off:
Hang up the handset after being off-hook;
Lift the handset after being on-hook;
Allow the display to be idle for 15 seconds.
Answer an incoming call.
41
Page 45

Last Number Dialed
You can redial the last number you dialed (up to 16 digits) by
using the
button.
Numbers are stored in
when you use the Speed
Dialing feature or the following buttons:
Numbers are not stored in
when you use the
Account Code Entry or Call Accountability features or the
following buttons:
Using Last Number
1 Listen for dial tone.
2 Press
NOTE: If you dialed the last telephone number with any of
the following buttons, you must use the same type of button
to obtain dial tone before you redial:
Page 46

Leave Word Calling
You can use the Leave Word Calling feature only if the VOICE
POWER Voice Message System is connected to your System 25.
You may want to use the Leave Word Calling feature for any of
the
■
■
■
following reasons:
The
The
You
You
person you called is busy
call is unanswered
have requested callback for that extension
have been connected to Coverage for that extension
instructions on obtaining messages left at your telephone,
your System Administrator.
d
Leaving Messages While on a Call
1 Press
2 Listen for confirmation tone, then hang up.
NOTE: If you hear fast busy tone instead of confirmation
tone, either the other
to it, or the extension
Leaving Messages
1
2
3
telephone does not have VMS assigned
you dialed is invalid.
When Not on a Call
Listen for dial tone, then press
Dial the extension of the other person.
Listen for confirmation tone, then hang up.
NOTE: If you hear fast busy tone instead of confirmation
tone, either the other telephone does not have VMS assigned
to it, or the extension you dialed is invalid.
43
Page 47

Message Waiting
Message Waiting is available on most multiline telephones, and
is a feature that can be used by anyone in the system. Most
telephones have a light that indicates a waiting message.
You may also have a
button, which you can press to
turn the light off after you receive messages. If yor telephone
does not have a
button, you must use a feature access
code to turn it off.
If you have a button, you can also control the
message waiting lights on telephones that you provide
Individual Coverage for, or for which you have a
button, (if you want to check on the feature)
associated with the
button, go to the section titled
"Personal Message Waiting".)
Turning On Message Lights
1 Listen for dial tone, then press
2 Dial the extension number of the other telephone.
3 Listen for confirmation tone, then hang up.
NOTE: If you hear fast busy tone instead of confirmation
tone, either the other telephone has no message waiting light
or the extension you dialed is invalid.
Turning Off Message Lights
1 Listen for dial tone, then press
NOTE: To turn off your own light, press your
button.
2 Dial the extension number of the telephone.
3 Listen for confirmation tone, then hang up.
44
Page 48

Night Service
When the attendant leaves for the night, the system can be set
so that incoming calls either ring a night bell or are directed to
preassigned telephones. See your System Administrator for the
night service access code.
Answering Calls
1 Listen for dial tone.
2 Dial the night service access code.
45
Page 49

Paging
If your company has a paging system, you may access the
system by using either a button or a code. See your System
Administrator for the paging access code, and for additional
information if you have zoned paging.
Using the Paging System
1 Listen for dial tone.
2 Press
or dial the paging access code.
NOTE: If you dialed a code, listen for
3 Make your announcement, then hang
confirmation tone.
up.
46
Page 50

Park
Parked calls are similar to held calls except that they can be
picked up from any telephone.
If a parked call is not picked up
within a preset interval (the usual time is two minutes), it will
ring at the telephone that parked the call. You can only park one
call at a time from your telephone.
Parking a Call
1 Press
The light next to the button of the call on hold blinks.
2 Press
and listen for dial tone.
3 Press
4 Listen for confirmation tone and dial tone.
5 If the call is for someone else, dial or page that person,
notifying them of the extension number where the call is
parked.
NOTE: If the person does not answer, press the button next
to the blinking light and complete your conversation
with the
caller.
6 Hang up.
Picking Up Parked Calls
1 Listen for dial tone, then press
2 Dial the extension number where the call is parked.
47
Page 51

Personal Message Waiting
You and another person may have been assigned a button that is
used to signal each other. If so, a waiting message is indicated
by the light next to
being lit. This light can be
turned off at either telephone.
Sending a Personal Signal
1 Do not lift the handset.
2 If the
light next to the button is off, press it.
Canceling a Personal Signal
1 Do not lift the handset.
2 If the
light next to the button is on, press it.
48
Page 52
Pickup
Pickup allows you to answer a call that is ringing at another
telephone.
All multiline telephones have this fixed feature.
Picking Up Calls
1
Listen for dial tone, then press
2 Dial the extension number of the ringing telephone.
Picking Up Calls in Your Pickup Group
1 Listen for dial tone.
2 Press
NOTE: Your System Administrator will notify you if you
have been designated to be in a pickup group. (This is an
assignable feature. )
49
Page 53

Placing Calls
You can place calls to people inside your company with
buttons, and you can place
calls to people outside your company with the following buttons:
lines in this group are busy.
If the light is on, you can activate a
“busy-to-idle” reminder. This reminder lets you know when the
line is no longer busy.
Placing Inside Calls
1 Listen for dial tone.
2 Dial the extension number or press a
button.
Placing Outside Calls
Using System or Bridged Access Buttons
1 Press
and listen for dial
tone.
2 Dial the outside line access code and lsiten for dial tone
again.
3 Dial the telephone number or press a
button.
50
Page 54

Placing Calls (Continued)
Using Facility or Pers Line Buttons
1 Press
and listen for dial tone.
2 Dial the telephone number or press a
button.
Requesting Busy-to-idle Reminder
If all outside lines are busy when you try to place a call, you can
request a Busy-to-Idle reminder and be notified when a line is
available.
1 Do not lift the handset.
2 Press
Your telephone will ring once when a line is available.
51
Page 55

Programming Numbers
You can program numbers into
buttons, and Personal Speed Dialing codes. While only extension
buttons (maximum of 28 characters) and Personal Speed Dialing
codes (maximum of 25 characters).
Special Characters
You may need to use the “*” and the “ #” when you program
numbers. The “*” is used as either a 1.5 second pause or as an
actual “*” character. The “ # “ may be used as an actual “ # “
character, at the beginning of end-to-end signaling, or at the
beginning of a Speed Dialing code.
NOTE: These special characters cannot be programmed into
buttons.
access code and the telephone.
You program: 9*5557023
This means: 9 (1.5 second pause) 555-7023
Using *
as a Character
If you want to use the “*”
as a character, you must place a “ # “
before the “*”.
For example, you may want to program the feature access code
"*70" into a
button.
You program: # *70
This means: *70
52
Page 56

Programming Numbers (Continued)
Using # as a Character
If you want to use a
“ # “ as an actual character, you must place
two “ # “s in the programmed number.
For example, you may want to program a Call Accountability
feature access code (# # extension), into a
button.
You program: # # # #275
This means: # #275
Using # with Speed Dialing Codes
When you want to have a Speed Dialing code as part of your
programmed number, you should use a single “ # “ for the code.
For example, you may want to program the System Speed
Dialing code "#100" into a
button.
53
Page 57

Programming Numbers (Continued)
Programming or
Using the Switch
1 Slide the switch on
listen for dial tone.
Removing Numbers
the left side of the telephone to P and
2 If you want to remove a number, go to Step 3.
or
Dial the number you want to program.
3 To indicate on which button this number should be
programmed or removed:
Press
or
Press “ # “ and a
Personal Speed Dialing number (20 - 39).
4 After confirmation tone and dial tone, hang up.
5 Slide the switch back to the midpoint between “ T“ and “P”.
NOTE: If the switch is not moved, your phone will ring
every minute to remind you that you are in program mode.
Using a Code
1
2
3
4
Listen for dial tone, then press
If you want to remove a number, go to Step 3.
or
Dial the number you want to program.
To indicate on which button this
programmed or removed:
number should
be
Press
or
Press "#" and a Personal Speed Dialing number (20-39).
After confirmation tone and dial tone, hang up.
54
Page 58

Recall
If a System 25 telephone or outgoing line is busy when you
attempt to place a call, you can press
and hang up.
When the telephone or outgoing line becomes available, the
system will ring your telephone. For more information about
this feature, see the “Callback” section.
In addition, if your company uses certain Central Office features,
Check with your System Administrator for a description of
available features, access codes, and procedures.
Page 59

Repertory Dialing (REP DIAL)
You can program telephone numbers, account codes, or feature
access codes into
buttons (a maximum of 28
characters). You can then dial the programmed number by
pressing
For instructions on how to program
numbers, see the
section for “Programming Numbers”.
Placing Calls
1 Listen for dial tone.
2
Press
56
Page 60

Send All Calls
You can use the
button to send your calls
immediately to coverage.
If you do not have coverage, the Send
All Calls feature simply turns off the ringer at your telephone for
most incoming calls.
In either case, the light next to the ringing
button blinks until the call is answered, or until the caller hangs
up.
Your System Administrator determines whether or not your
telephone will ring once when a call comes in, to remind you
that this feature is turned on.
Turning On Send All Calls
1 Do not lift the handset.
2
Press
The light
Turning
next to this button turns on.
Off Send All Calls
1 Do not lift the handset.
2 Press
The light next to this button goes off.
57
Page 61

Signaling
You can use a button to send an alert to another telephone
without actually calling that telephone.
Signaling Another Telephone
1 Do not lift the handset.
2
Press
The other telephone receives a short burst of ringing tone.
58
Page 62

Speaker
Some telephones have a
place calls without lifting the handset, and allows others to listen
during calls.
You cannot speak to the caller unless you lift the
handset.
Placing Calls
Page 63

Speakerphone
If you have a Built-In-Speakerphone (BIS) telephone or multiline
telephone with a Hands-Free Unit (HFU), you can use the
Placing Calls
The light next to Speakerphone turns on to indicate that you can listen,
and the light next to Microphone turns on, indicating that you can be
heard on the other end.
2 When the other person answers, begin talking.
NOTE: If you want to temporarily keep the other person .
The light next to this button turns on again.
Answering Calls
1
2
The light next to Speakerphone turns on to
and the light next to Microphone turns on,
heard by the caller.
Begin talking.
NOTE: If you want to temporarily
hearing you, press
The light next to this button goes off.
indicate that you can listen,
indicating
that you can be
keep the caller from
When you want to resume your conversation with the caller,
60
Page 64

Speakerphone (Continued)
Ending Calls
1 Wait until you have completed your conversation.
The lights next to the Speakerphone and Microphone
buttons go off.
61
Page 65

Speed Dialing
Speed dialing allows you to dial telephone numbers (or enter
account codes) by simply dialing “ # “ and a 2- or 3-digit code.
There are two kinds of speed dialing— Personal and System.
Personal Speed Dialing codes are 2-digit numbers that allow you
to program up to twenty personal numbers. These Personal
Speed Dialing codes use the numbers 20 through 39.
System Speed Dialing codes are 3-digit numbers programmed by
your System Administrator, and are used for numbers that are
frequently called by people in your company. System Speed
Dialing codes use the numbers 100 through 189.
For instructions on how to program Personal Speed Dialing
numbers, see the section for “Programming Numbers”.
Placing Calls
1 Listen for dial tone.
2 Dial the #, followed by the selected
number (either 20 through 39 or 100
speed dialing
through 189),
code
62
Page 66

Testing Your Telephone
You can test the lights and ringer on your telephone if you have
a Test/Program Switch. On some telephones, the Test/Program
switch has a spring.
If so, you must hold the switch in the “T”
position to test the lights and ringer; the switch will
automatically return to the midpoint when released.
Testing
1
2
Slide the switch on the left side of your telephone to “T”.
The red and green lights alternately flash, and the ringer sounds.
NOTE:
If your switch has a spring, hold the switch in the
“T” position.
If your switch has a spring, release the switch. If there is no
spring, slide the switch back to the midpoint between “T”
and “P”.
63
Page 67

Transfer
You can easily transfer calls to another System 25 telephone.
You can also transfer some calls to outside lines. However, you
should see your System Administrator for more information
about this type of transfer.
When you transfer a call, the original person is temporarily
placed on hold and is not connected to the other person until
you hang up. At that time, the call disappears from your
telephone.
Transferring Calls
The light next to the button of the call on hold blinks.
2 Dial the other person's extension or press a line button, such
as
NOTE: If you misdial the number, return to the person on
hold by pressing the button next to the blinking light. Then
return to Step 1 and continue.
3 Hang up if you do not want to announce the call.
Otherwise, announce the call and then hang up to complete
the transfer.
NOTE: If the person you attempt to call does not answer,
press the button next to the blinking light to return to the call
on hold.
Page 68

Glossary
account code
entry
alarm
assigned button
assigned feature
automatic
intercom
BIS
busy-to-idle
reminder
call
accountability
call waiting
callback
conferencing
feature that allows you to assign account
codes to calls to charge them to specific
customers, clients, or business cases.
feature that warns you of system problems.
button that may be given to you as an
optional feature.
optional feature that can be distributed by
the System Administrator.
feature that allows two people to each have
a dedicated button for calling each other.
(Built-in-Speakerphone) name of a multiline
telephone that allows you to listen and
speak on any call without lifting the
handset.
feature that automatically notifies you
when a person or line is available.
feature that allows you to make calls at
another telephone and charge them to your
extension number.
a telephone feature that notifies you of an
incoming call while on another call.
feature that allows you to request the use of
a busy extension or line. The system will
signal your telephone when the telephone
or line is available.
feature that allows you to have up to five
parties on a call.
65
Page 69

confirmation
three short tones indicating that an
tone
action was accepted.
coverage
DDC
DGC
DSS
data call (from
telephone)
dequeueing tone
exclusion
extending calls
FPDC
fast busy tone
feature that allows individuals to have their
calls answered by someone else.
(Data Dial Code) extension number
assigned to a data terminal.
(Direct Group Calling) a group of
telephones where incoming calls are
distributed among the group members.
(Direct Station Selection) button containing
an extension number or an access code, and
programmed by the System Administrator.
(For buttons that you can program, see
FLEX DSS.)
feature that allows you to place a data
call from your telephone, then transfer the
call to your data terminal.
three short tones indicating the
feature can now be completed.
feature that allows you to keep
listening in on a conversation.
Callback
others from
procedure followed by the attendant when
sending a call to the desired party.
(Floating Personal Dial Code) a number
associated with a person, but not a
particular telephone. FPDCS provide the
convenience of receiving calls at various
telephones.
repeating on/off tone indicating that the
dialed number or access code is busy,
misdialed, or restricted, or that an outgoing
line is busy. (Sometimes called reorder
tone.)
Page 70

feature access
code
fixed feature
following/
forwarding
hands-free
answering
hold
idle line
preference
inside call
leave word
calling
message waiting
message waiting
signal
system access
button
system access
originate only
button
night service
series of numbers and characters that allow
you to access System 25 features.
standard feature that is available to every
telephone.
feature that allows you to redirect
calls to another telephone.
feature that provides answering of
calls without lifting the handset.
feature that temporarily suspends a call.
feature that allows a telephone to
automatically select a button when you lift
the handset to place a call.
call between two or more System 25
telephones. It is signalled by one long ring.
feature that allows you to notify a person at
a busy or unanswered telephone that you
have called. To use this feature, you must
have a VOICE POWER Voice Message
System (VMS) connected to your
System 25.
feature that allows you to turn message
lights on and off at ‘telephones in the
system. (See also personal message
waiting. )
feature that allows two people in the system
to turn a light on or off at each other’s
telephone, notifying them of a message.
button that gives you direct access to
System 25 to dial or to access features. It is
labeled with your extension number.
an extra system access button on
which you can place calls, but cannot
receive calls.
feature that allows you to send incoming
calls either to a bell or to preassigned
telephones when you leave for the night.
67
Page 71

off-hook
on-hook
outside call
outside line
PDC
paging feature
park
personal message
waiting
pickup
prime line
preference
queue
queueing tone
either the handset has been removed from
its cradle or the speaker/speakerphone is
turned on.
the handset is in its cradle and the
speaker/speakerphone is turned off.
call between a System 25 telephone and a
telephone not connected to the System 25.
Outside calls are made over Central Office
or other lines and are signalled by two short
rings.
a line to the Central Office or other system.
Outside lines may be accessed by pressing
special buttons or by dialing an access code.
(Personal Dial Code) extension number that
is assigned to an individual and is usually
associated with the telephone at the
individual’s desk. (See also FPDC.)
allows you to access paging equipment from
System 25 telephones.
a feature similar to hold, except that it
allows you to answer the call from any
telephone in the system.
feature that allows you to turn on and off
a light at another person’s telephone to
notify them of a message.
feature that allows you to answer a call that
is ringing at another telephone.
feature that allows the telephone to select
a button automatically when you lift the
handset to place a call.
a place where calls are held until they can
be acted upon (such as a request for
Callback).
five short tones indicating that your request
for a Callback is confirmed.
68
Page 72

repertory dialing
ringback tone
ringing line
preference
send all caIls
signaling
special ringback
tone
speed dialing
switchhook
system
administrator
test
transfer
trunk
feature that allows you to program a
telephone number or account code into a
REP DIAL button and then dial by pressing
that button.
repeating on/off tone indicating that the
number you dialed is ringing.
feature that allows the telephone to select
the ringing line automatically when you lift
the handset to answer a call.
feature that can be selected at a telephone
to send calls to a “covering” telephone.
feature that sends an audible alert to
another telephone without calling that
telephone.
one long tone followed by one short, dull
tone indicating that the person you dialed is
busy on a call and has Call Waiting.
feature that allows you to place a call or
enter an account code by pressing the “ #”
and a 2- or 3-digit code.
button depressed by the handset when the
telephone is not in use.
person responsible for assigning features
and overseeing System 25 operation.
feature that allows you to test the lights and
ringer on your telephone.
feature that allows you to connect the
person you are talking with to another
person, and then drop out of the
conversation.
a telecommunications line between two
switching systems. (See also outside line. )
69
Page 73

Page 74

AT&T System 25
QUICK REFERENCE CARD
Multiline Telephone
FEATURE ACCESS CODES
FEATURE
DESCRIPTION CODE
Account Code
to enter an Account Code
* 0 Code
Call Accountability
to charge call to correct extension
## Ext.
to request callback for a busy ext./line
RECALL
Callback
to cancel callback, while on that call
DROP
Call Waiting
I
to answer call waiting
I
*9
to leave your DGC group
*4
Direct Group Calling
to return to your DGC group
*6
to sign in extension
** Ext. Ext.
Following
,
to sign out extension
** Ext. 0
(at another extension)
to sign out all extensions
** 0
to send your calls to another extension
#70 Ext.
Forwarding
to send your calls to a remote number
(from your extension)
~
#70 number
to cancel forwarding
** Ext. Ext.
to leave a message when calling extension LEAVE WORD
Leave Word Calling
to leave message when not on that call
LEAVE WORD Ext.
Message Waiting
to turn on message light
#90 Ext.
#91 Ext. or MESSAGE
to turn off message light
(for yourself)
to signal ext. while on coverage call
COVER MSG
Message Waiting,
Coverage
to signal ext. when not on coverage call
to cancel message waiting signal
COVER MSG Ext.
COVER MSG Ext.
COVER MSG
to parka call
*5
Park
to answer a parked call
* 8 Ext. that parked call
to pickup call ringing in your group
* 70
Pickup
to pick up call ringing outside group
* 7 Ext.
Programming
to program a button or code
#4
to send calls to coverage or turn off ringer
SEND ALL CALLS
Send All Calls
to turn off Send All Calls feature
SEND ALL CALLS
Speed Dialing
I
to dial a programmed number
(20-39, 100-189)
(See Dial Code list on other side.)
Page 75

 Loading...