

Page 1
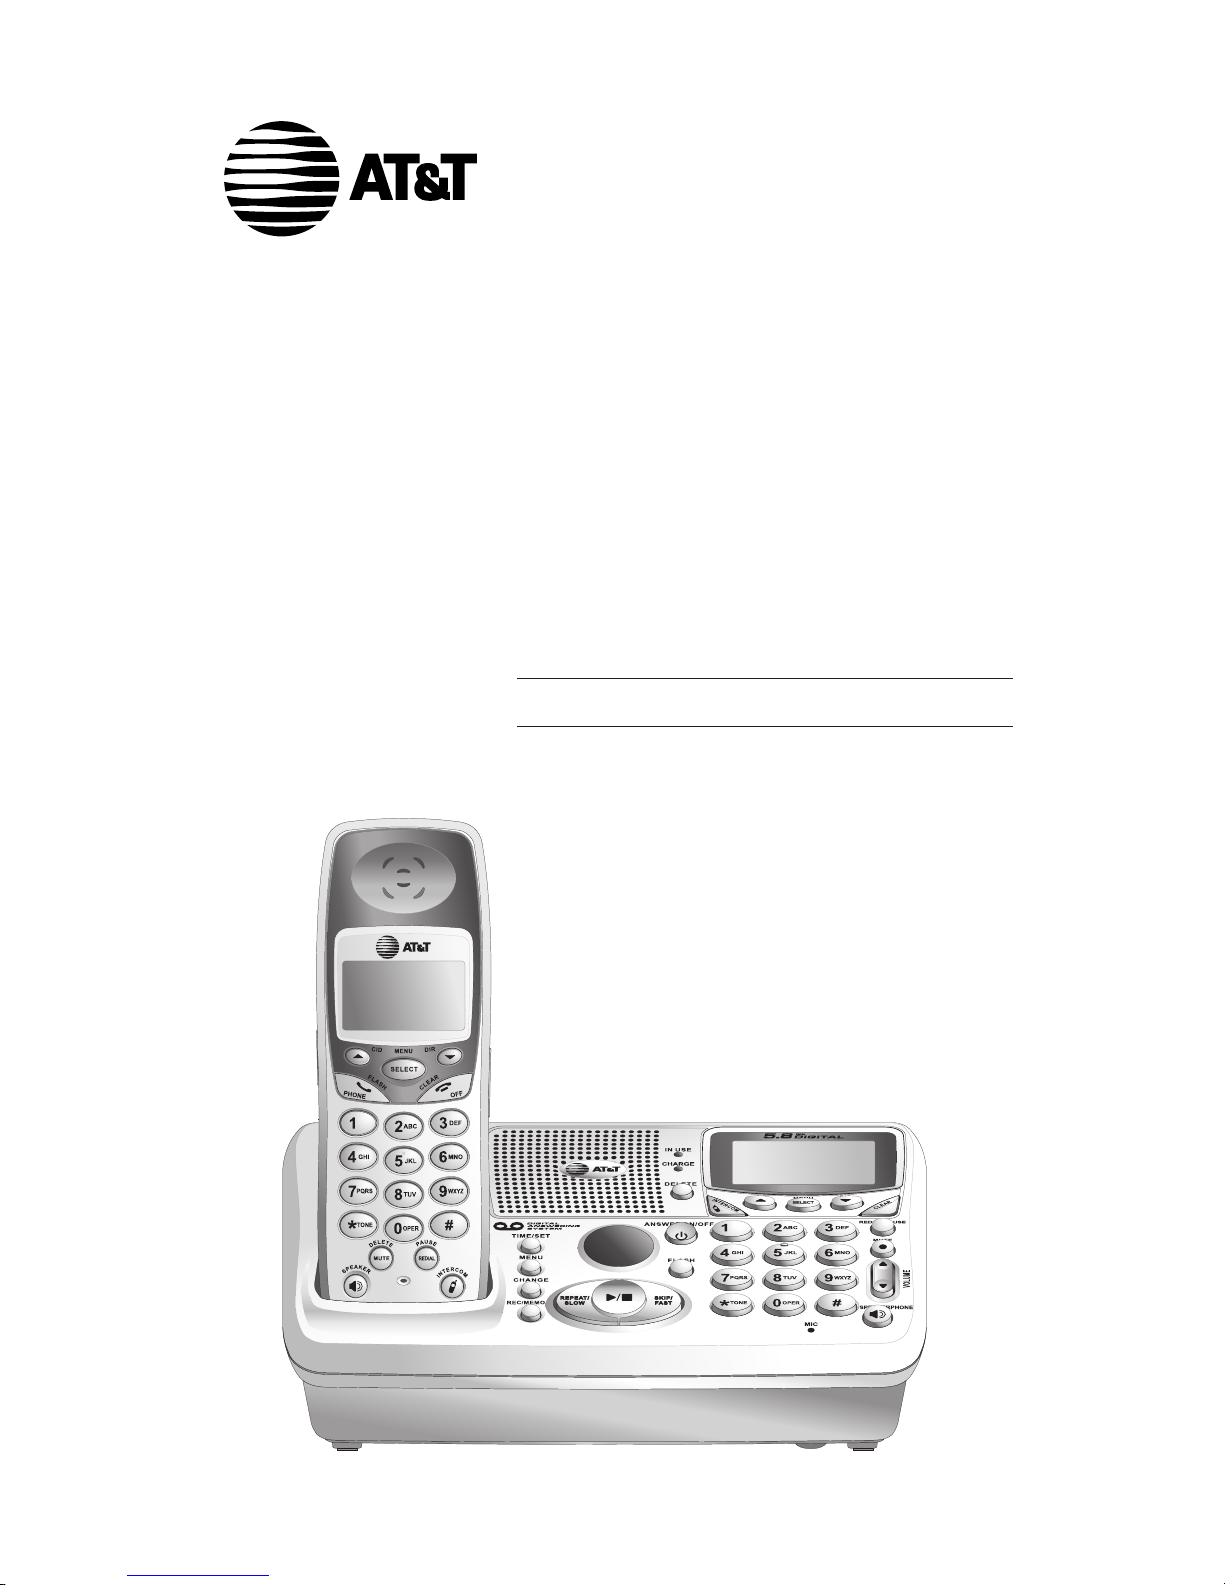
User's Manual (Part 2)
5.8 GHz Cordless
Telephone/Answering
System E5654B
with Caller ID & Call Waiting
Page 2
Copyright © 2006 Advanced American Telephones. All Rights Reserved.
AT&T and the Globe Design are trademarks of AT&T Corp.,
licensed to Advanced American Telephones.
STOP!
See page 7
for easy instructions.
You must install and
charge battery before
using the telephone.
Please also read
Important Product Safety
Information
Enclosed in product package.
For customer service or product
information, visit our web site at
www.telephones.att.com
or call 1-800-222-3111.
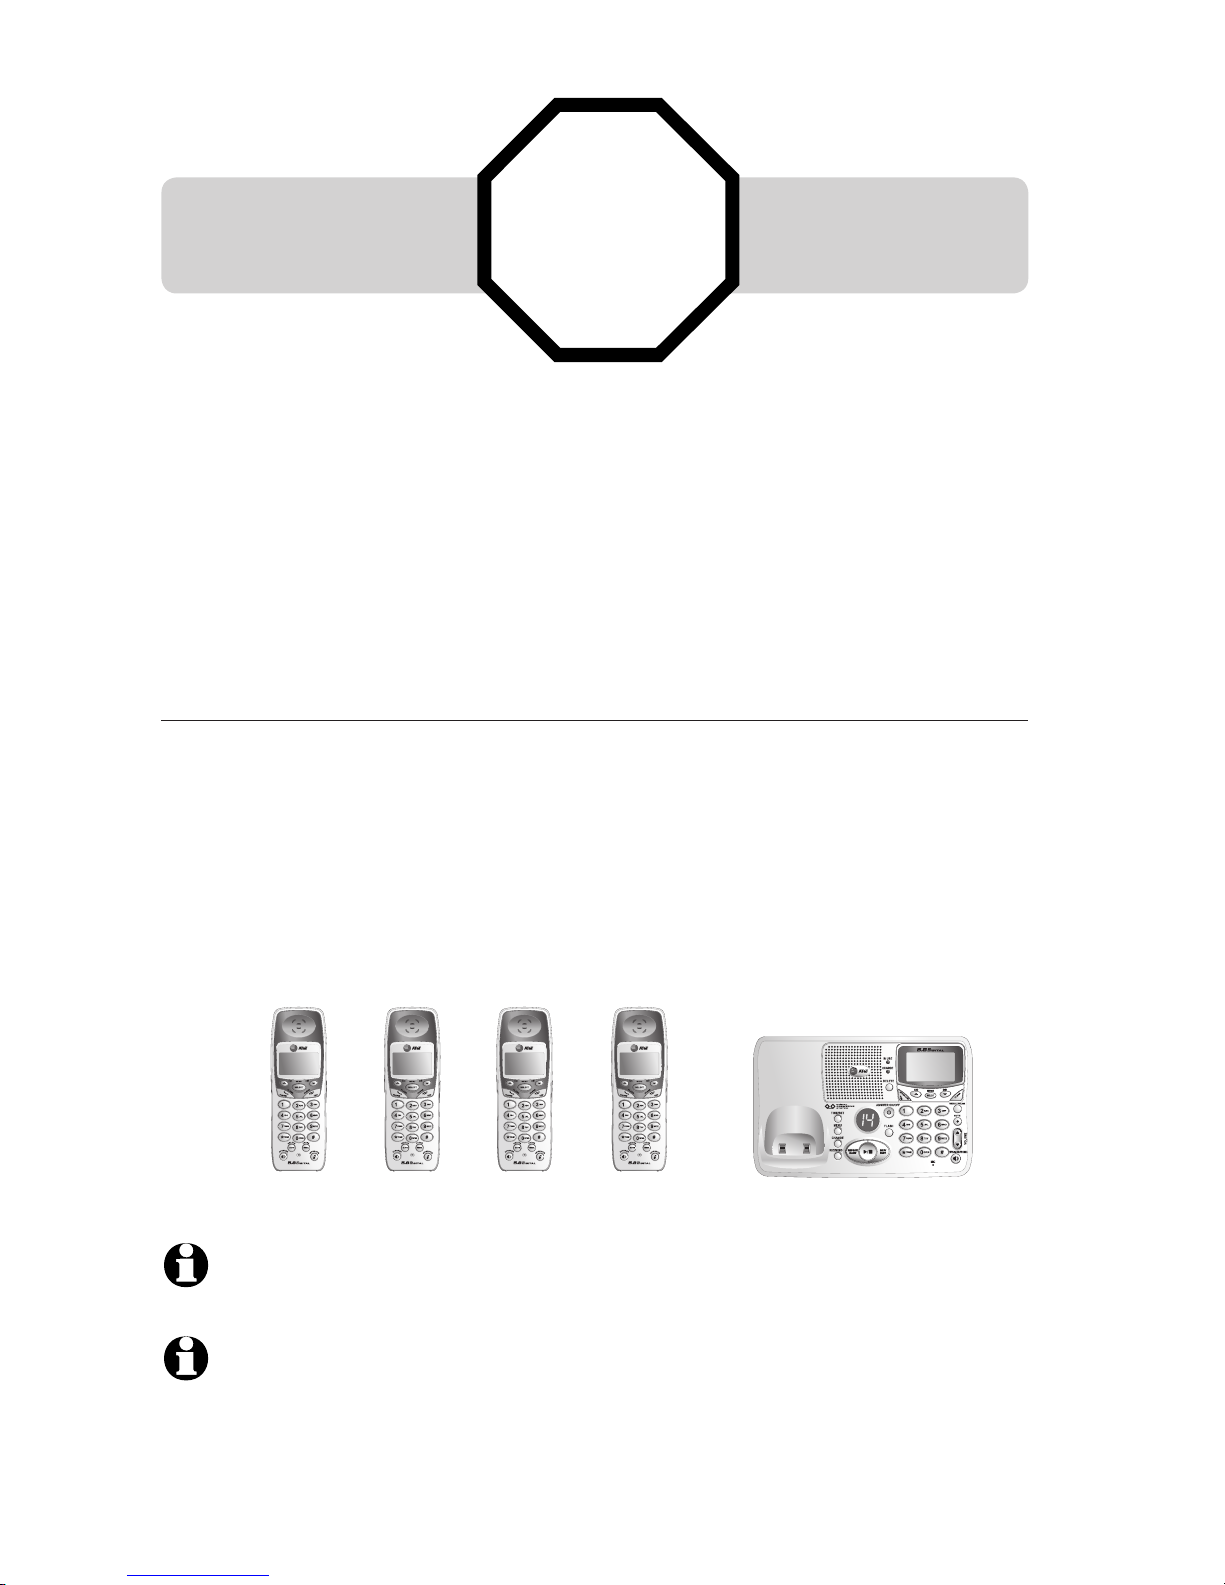
Add new handsets to make your phone more versatile (see page 46)
Your telephone can accommodate up to four cordless handsets. You can add new
handsets (Model E560-2, purchased separately) at any time, but each must be registered with the base before use.
The handset provided with your telephone is automatically registered as Handset 1.
Additional handsets will be assigned numbers in the order they are registered (2, 3 or
4). You can register a maximum of four handsets.
Handset 1 Handset 2 Handset 3 Handset 4
NOTE: Only two handsets or one handset and the base can be connected to an outside call at the same
time.
NOTE: The E5654B has four pre-registered handsets. You cannot register any additional handsets to the
E5654B.
Page 3
1
Table of contents
Getting Started
Quick reference guide ........................ 2
Parts checklist ...................................... 4
Before you begin .................................. 5
Telephone base installation ................ 6
Battery installation & charging .......... 7
Wall mounting ...................................... 8
Belt clip & optional headset .............. 9
Telephone Operation
Basic handset operation ...................10
Basic base operation ......................... 11
Options while on calls-handset
and base ...............................................12
Intercom calls .....................................14
Call forward ........................................15
Call transfer ........................................16
Handset settings.................................17
Base settings .......................................19
Directory
About the directory ..........................22
New directory entries ......................23
Directory search ................................25
To dial, delete, or change entries ....26
Caller ID Log
How Caller ID works .......................27
To review the call log ........................29
Answering System Operation
Answering system operation ..........31
Day and time announcements ........32
Outgoing announcements ................33
Announce Only mode ......................34
Changing feature options ................. 35
Message playback ...............................36
Recording and playing memos ........37
Message counter displays .................38
Remote access ...................................39
Appendix
Screen icons ....................................................41
Alert tones & indicator lights ...................42
Handset display screen messages ...........43
Base display screen messages ...................45
Adding new handsets ..................................46
Replacing a handset ......................................47
Re-Registering a handset ...........................48
Troubleshooting .................................49
Technical specifications .....................56
Index .....................................................57
Remote access wallet card ..............58
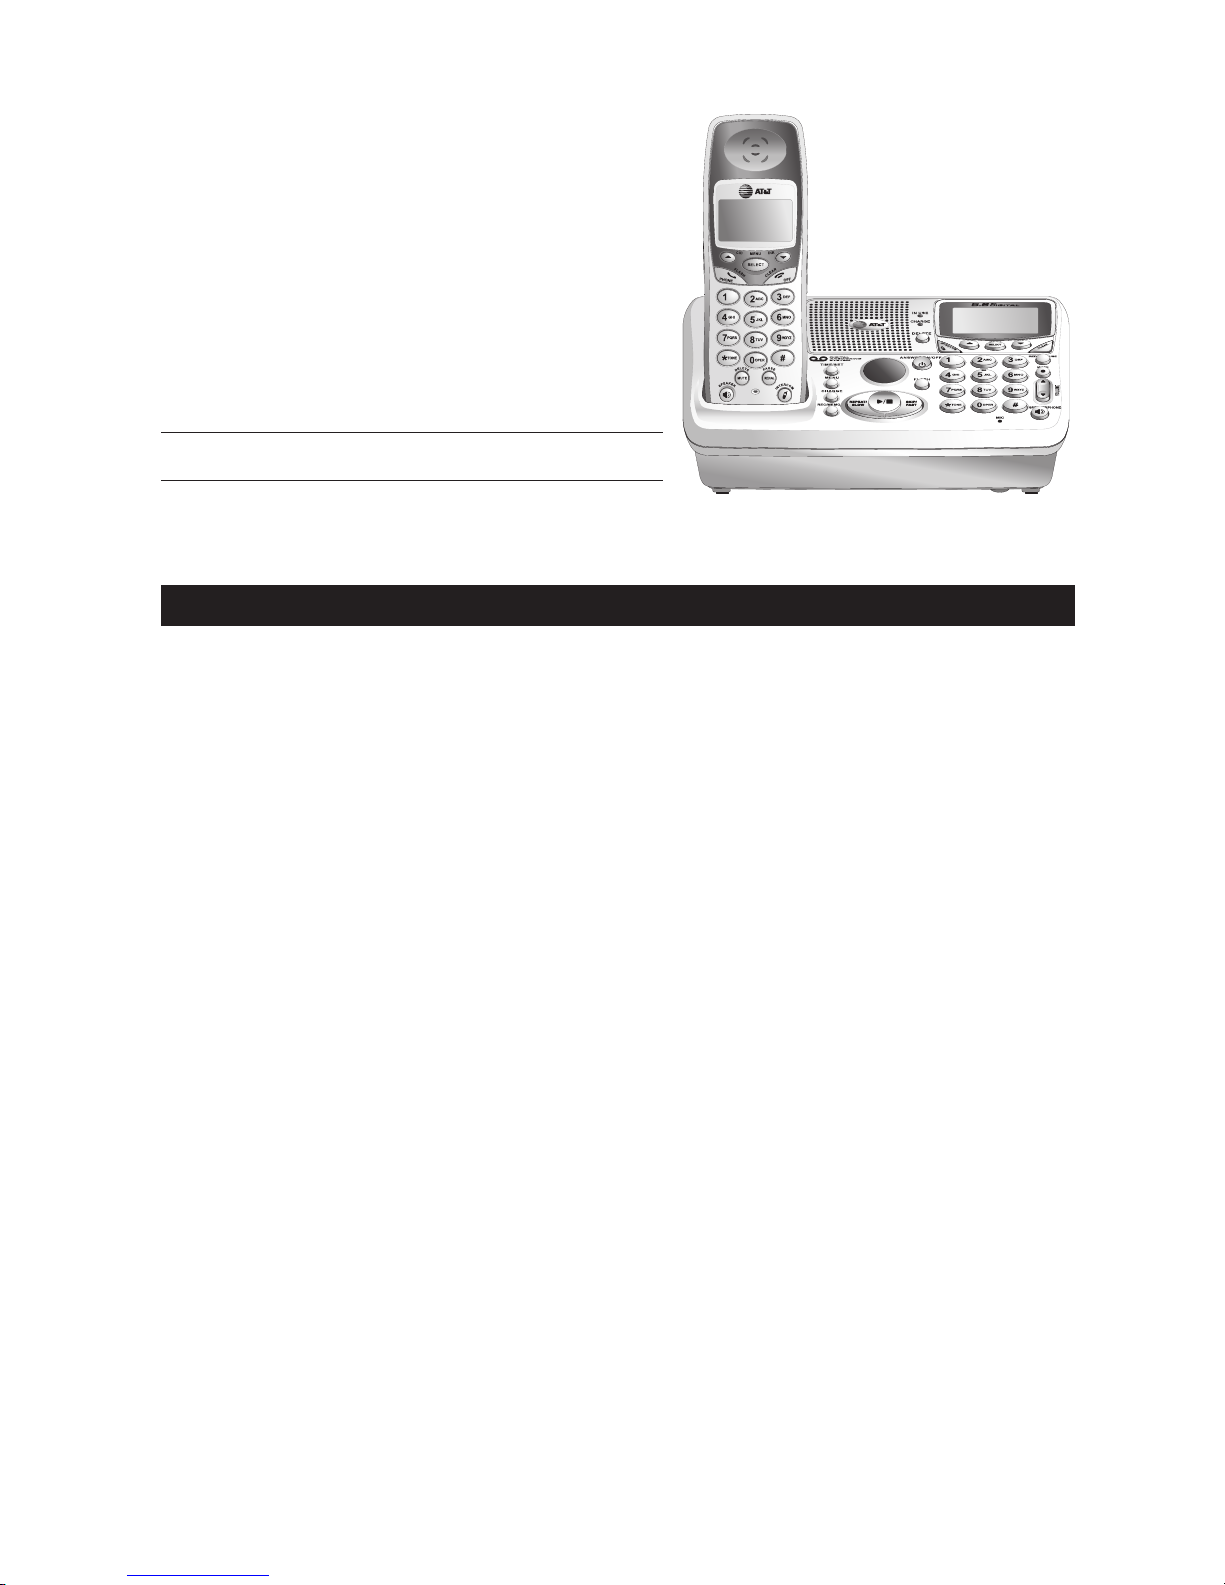
User's Manual (Part 2)
5.8 GHz Cordless
Telephone/Answering
System E5654B
with Caller ID & Call Waiting
Page 4
2
Getting Started
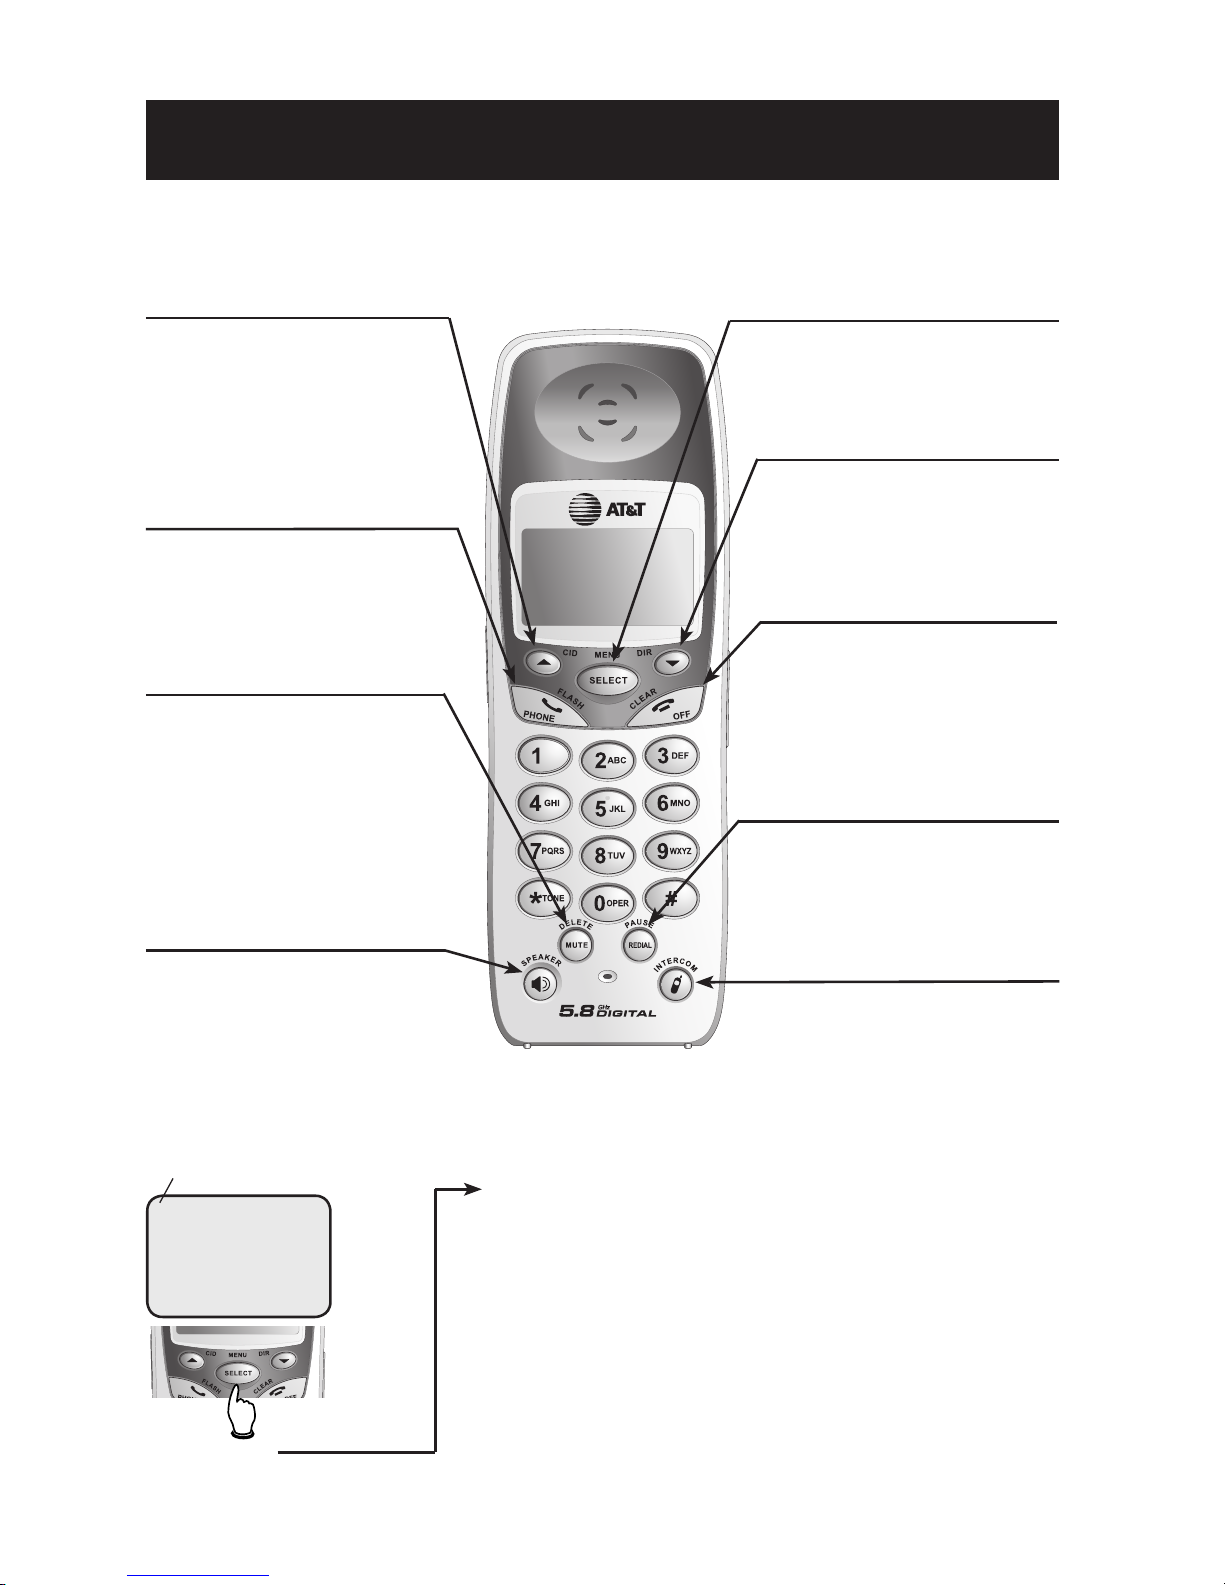
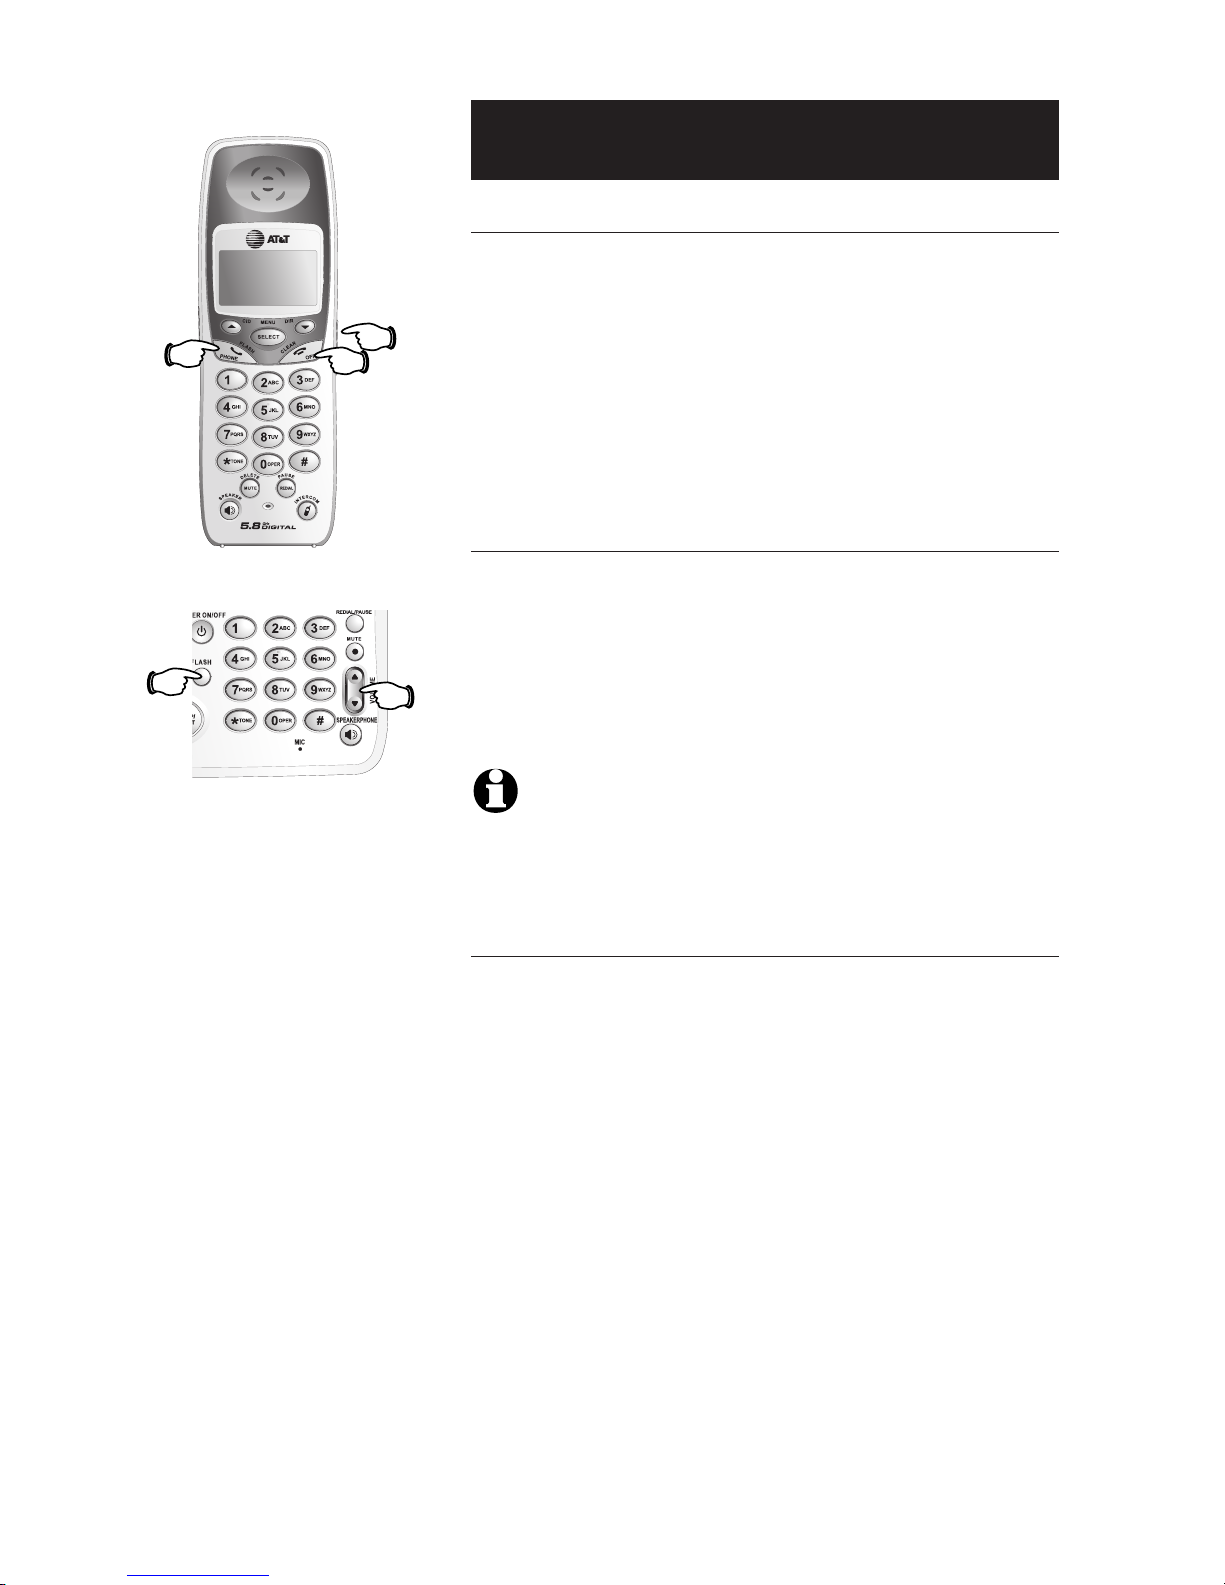
OFF/ CLEAR
During a call, press to hang up.
While using menus, press to cancel
an operation, back up to the previous
menu, or exit the menu display.
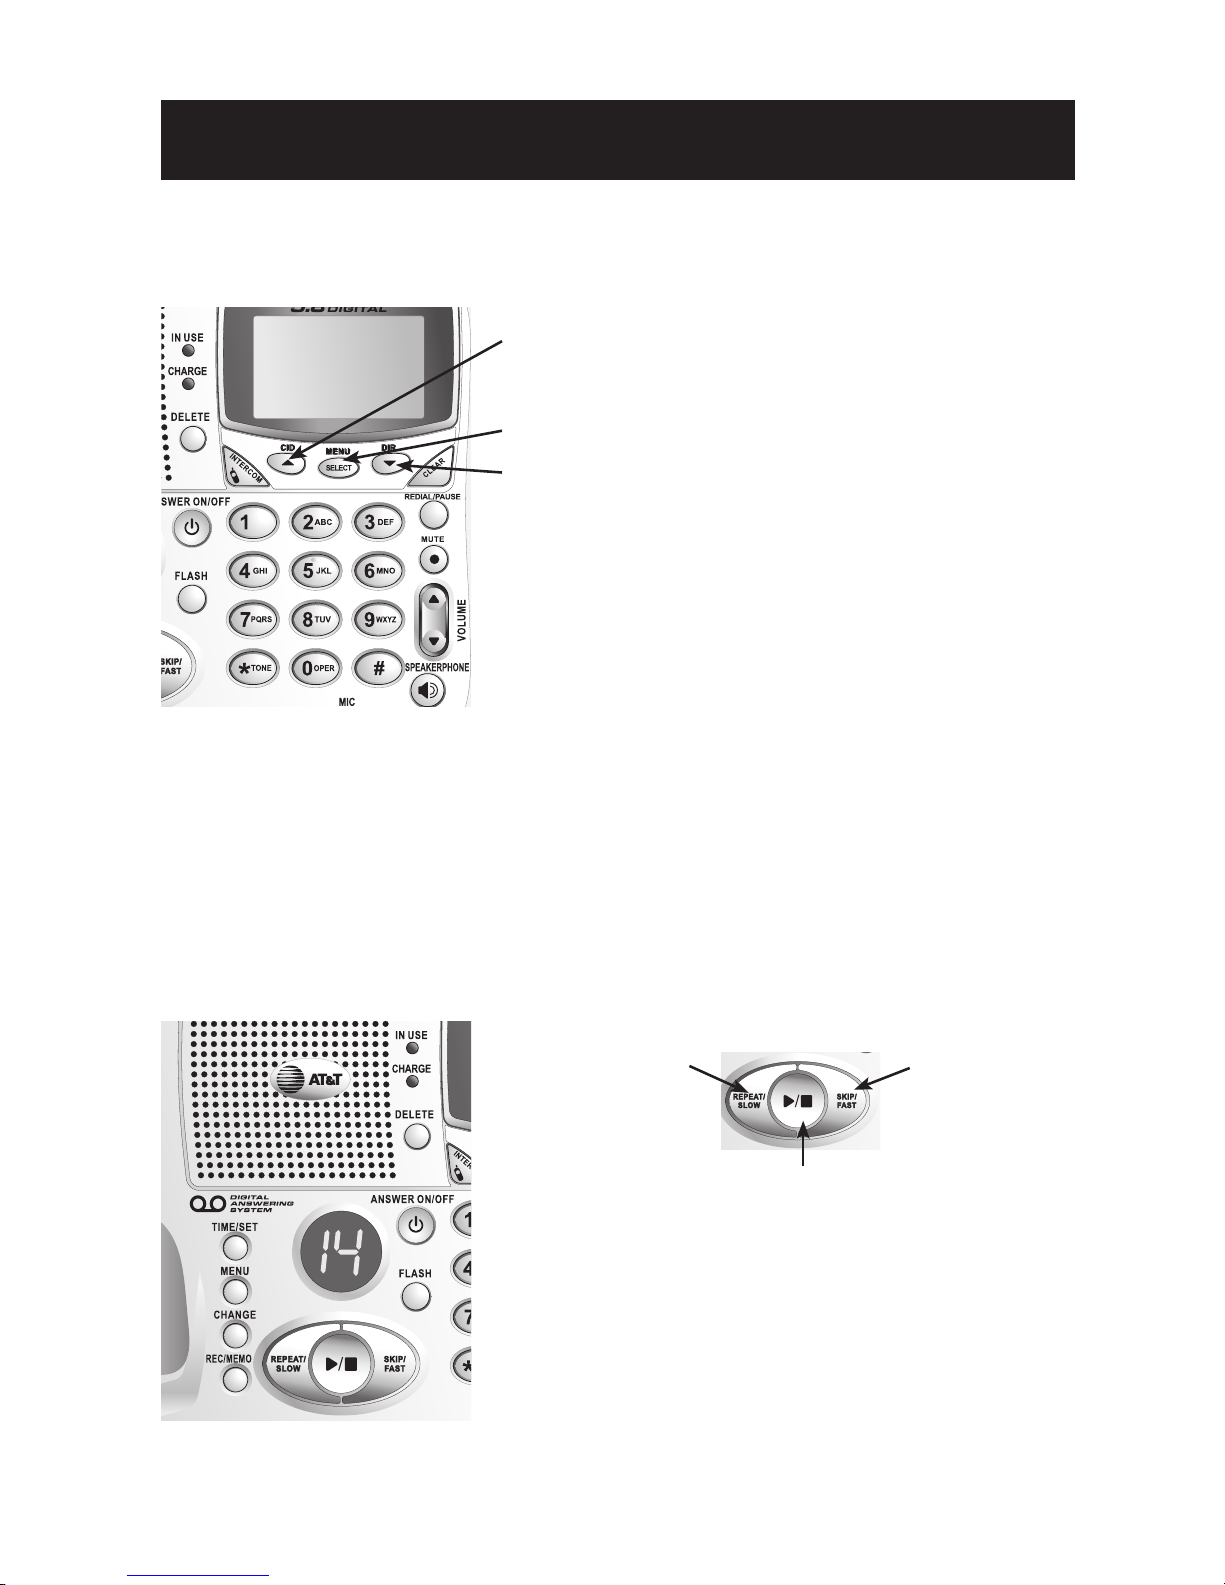
Quick reference guide
MUTE/DELECT
While on a call, press to mute microphone
(see page 13).
While reviewing the call log, press to delete
an individual entry or press and hold to
clear the Caller ID log (see page 30).
While pre-dialing, press to delete digits
from a string (see page 10).
^ CID
Press to scroll up while in menus.
Press to display Caller ID information
(see page 29). While entering names
or numbers, press to move the cursor
to the left.
SPEAKER
Press to activate handset speakerphone.
Press again to resume normal handset use
(see page 10).
V DIR
Press to scroll down while in menus.
Press to display directory entries (see
page 25). While entering names, press
to advance cursor.
PHONE/FLASH
Press to make or answer a call.
During a call, press to receive an incoming
call if Call Waiting is activated (see page 12).
INTERCOM
Press to initiate an intercom conversation or transfer a call (see pages 14,
16). Press and hold to forward a call
(see pages 15).
Handset
Feature menu
>DIRECTORY
CALL LOG
Menu
Feature Menu
Directory .................See page 22
Call Log ..................See page 27
Ringer Volume ........See page 17
Ringer Tone ............See page 17
Key Tone ................See page 17
Language................See page 18
CLR Voice Mail ......See page 18
Dial Type ................See page 18
Press ^ or V to scroll
through menu items.
Press SELECT to select or
modify a highlighted item.
Press OFF/CLEAR to cancel
an operation, back up to the
previous menu, or exit the menu
display.
MENU/ SELECT
Press to display menu, or to select
highlighted item from menu.
> shows highlighted item
REDIAL/PAUSE
Press to view redial memory (see page
10). While entering numbers, press
and hold to insert a dialing pause (see
page 23).
Page 5
Answering system controls (see pages 31-40)
ANSWER ON/OFF . Press to turn answering system on or off.
DELETE ................. Press to delete a message during playback. Press
and hold to delete all old messages when set is idle.
TIME/SET ............... Press to review or set the answering system clock.
MENU ..................... Press to review or change answering system options.
CHANGE ................ Press to change a menu option.
REC/MEMO ............ Press to record a memo or press after pressing
MENU to record an outgoing announcement.
3
Getting Started
Quick reference guide
Base/Speakerphone
Press to play or stop playing messages.
Press to repeat message.
Hold to slow playback.
Press twice to hear previous message.
Press to skip to next
message. Hold to
speed up playback.
Telephone function keys
CID ^ .................. Press to scroll up while in menus. Press to display
Caller ID information (see page 29). While entering
names or numbers, press to move the cursor to the
left.
SELECT/MENU ...... Press to display menu, or to select highlighted item
from menu.
DIR V .................. Press to scroll down while in menus. Press to dis-
play directory entries (see page 25). While entering
names, press to advance cursor.
REDIAL/PAUSE ..... Press to view redial memory (see page 11). While
entering numbers, press and hold to insert a dialing
pause (see page 23).
CLEAR ................... Press to cancel an operation, back up to the previous
menu, or exit the menu display.
INTERCOM ............ Press to initiate an intercom conversation or transfer
a call (see pages 14, 16). Press and hold to forward a
call (see pages 15).
FLASH .................... During a call, press to receive an incoming call if Call
Waiting is activated (see page 12).
VOLUME ................ Press to adjust speakerphone listening volume (see
page 12).
MUTE ..................... Press to silence microphone; press again to resume
(see page 13).
SPEAKERPHONE ... Press to turn speakerphone on or off (begin or end a
call, see page 11 ).
Page 6
4
Getting Started
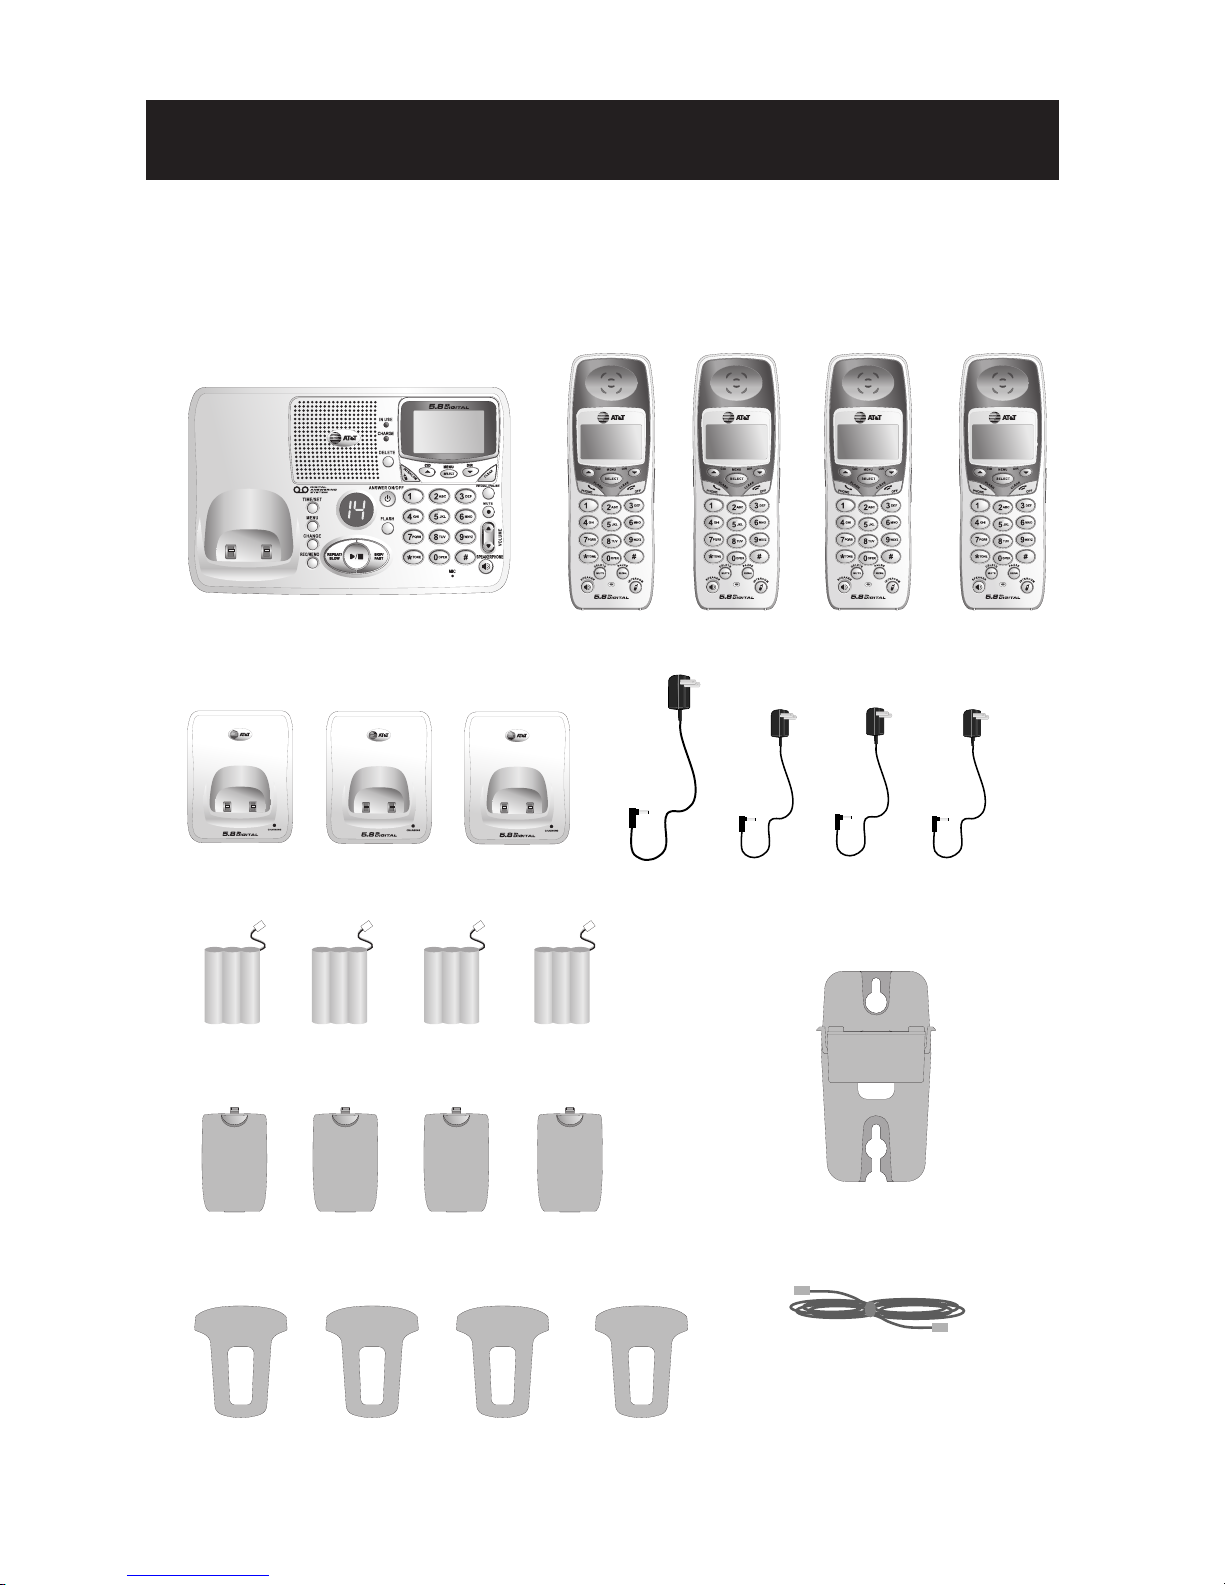
Parts checklist for E5654B
Remember to save your sales receipt and original packaging in case you ever need to
ship your telephone for warranty service. Check to make sure the telephone package
includes the following:
Batteries
Handset chargers
Power adapters
Telephone base
Telephone handsets
Telephone line cord
Wall mount bracket
Battery compartment covers
Belt clips
Page 7

5
Getting Started
Before you begin
About Caller Identification
Caller ID with Call Waiting features in
this telephone lets you see who’s calling before you answer the phone, even
when you’re on another call. These
features require services provided by
your local telephone company.
Contact your telephone service provider if:
• You have both Caller ID and Call
Waiting, but as separate services
(you may need combined service).
• You have only Caller ID service, or
only Call Waiting service.
• You don’t subscribe to any Caller
ID or Call Waiting services.
You can use this phone with regular
Caller ID service, and you can use its
other features without subscribing to
either Caller ID or combined Caller ID
with Call Waiting service. There may be
fees for these services, and they may
not be available in all areas.
Caller ID features will work only if
both you and the caller are in areas
offering Caller ID service, and if both
telephone companies use compatible
equipment.
See Caller ID Operation, beginning on
page 27, for more details about how
these features work.
Telephone operating range
This cordless telephone operates with
the maximum power allowed by the
Federal Communications Commission
(FCC). Even so, the handset and base
can communicate over only a certain
distance — which can vary with the
locations of the base and handset, the
weather, and the construction of your
home or office.
If you receive a call while you are
out of range, the handset might not
ring — or if it does ring, the call might
not connect when you press PHONE.
Move closer to the base, then press
PHONE to answer the call.
If you move out of range during
a phone conversation, you might
hear noise or interference. To improve
reception, move closer to the base.
If you move out of range without
pressing OFF, your phone will be left
off the hook. To hang up properly, walk
back towards the telephone base, periodically pressing OFF until the call is
disconnected.
Page 8
6
Getting Started
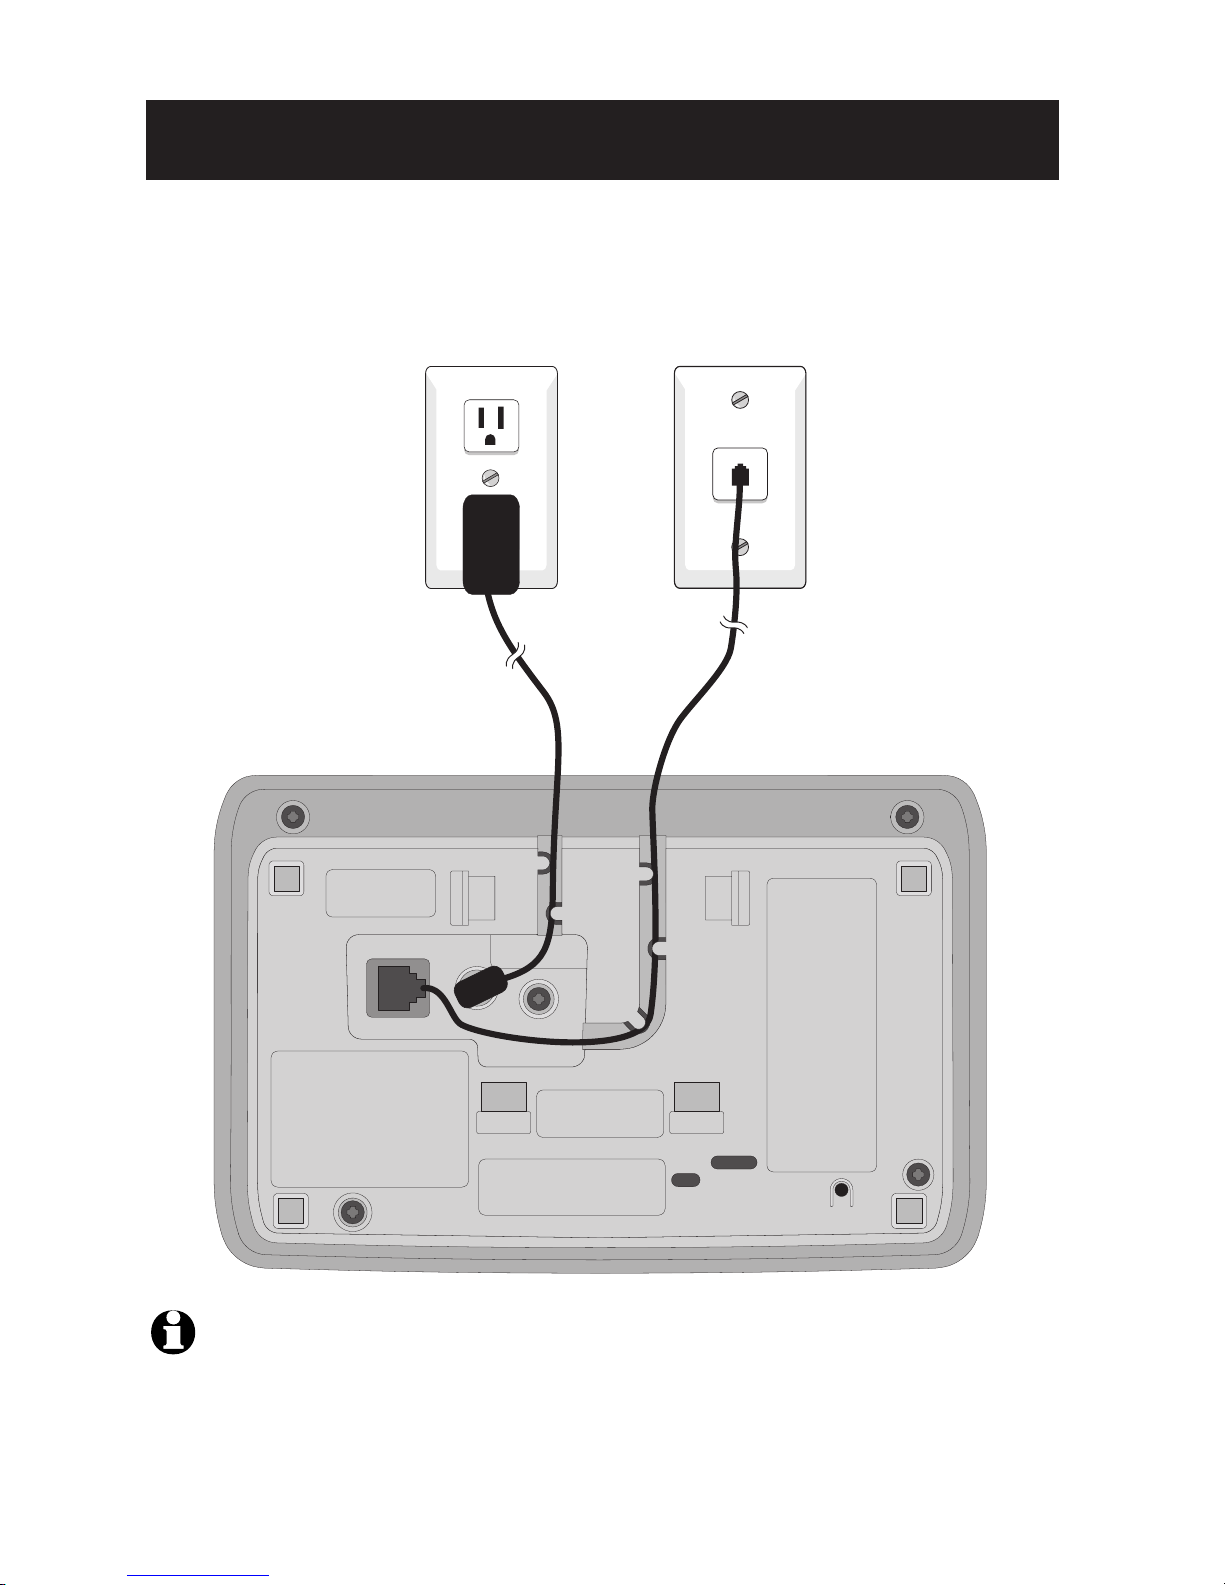
NOTE: Use only the power cord supplied with this product. If you need a replacement, call 1-800-222-3111. In
Canada, call 1-866-288-4268. Be sure to use an electrical outlet not controlled by a wall switch.
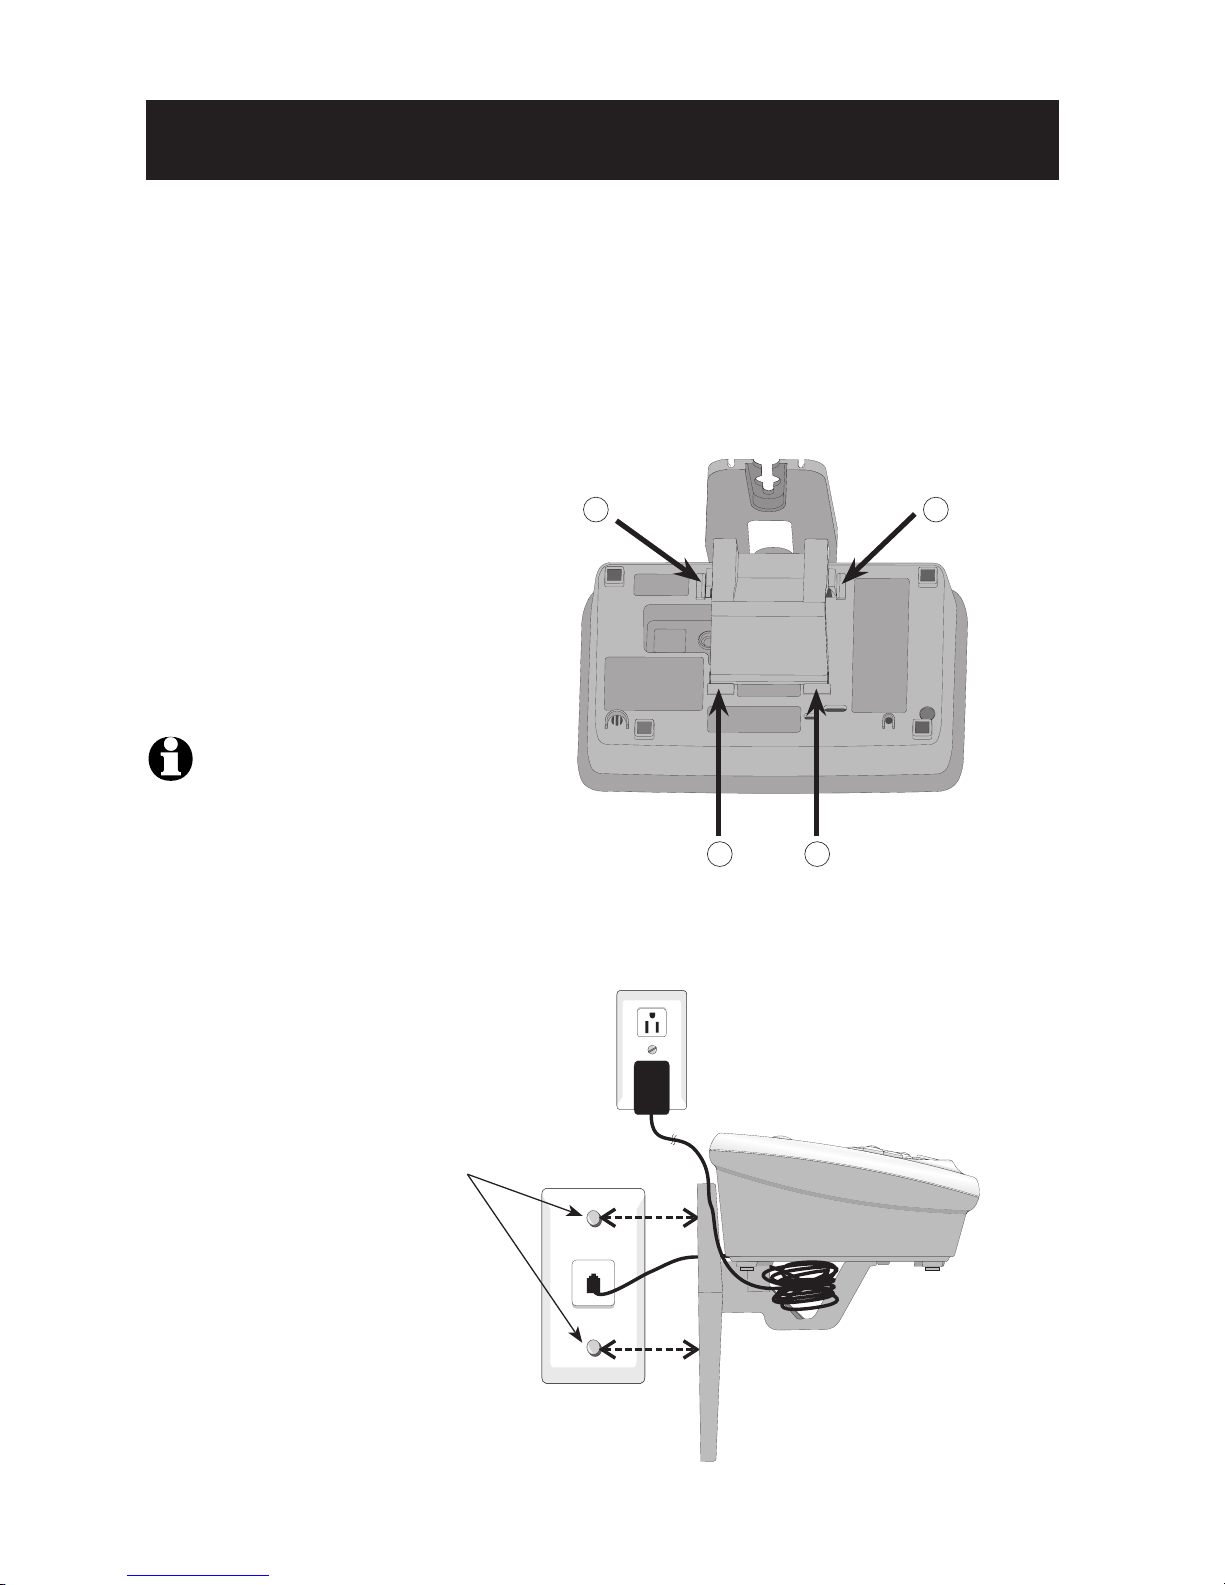
Telephone base installation
Install the telephone base as shown below. Choose a base location away from
electronic equipment such as personal computers, computer routers, television sets or
microwave ovens. Avoid excessive heat, cold, dust or moisture.
Plug the power adapter
into an electrical outlet not
controlled by a wall switch.
Plug telephone
line cord into
telephone jack.
Page 9
7
Getting Started
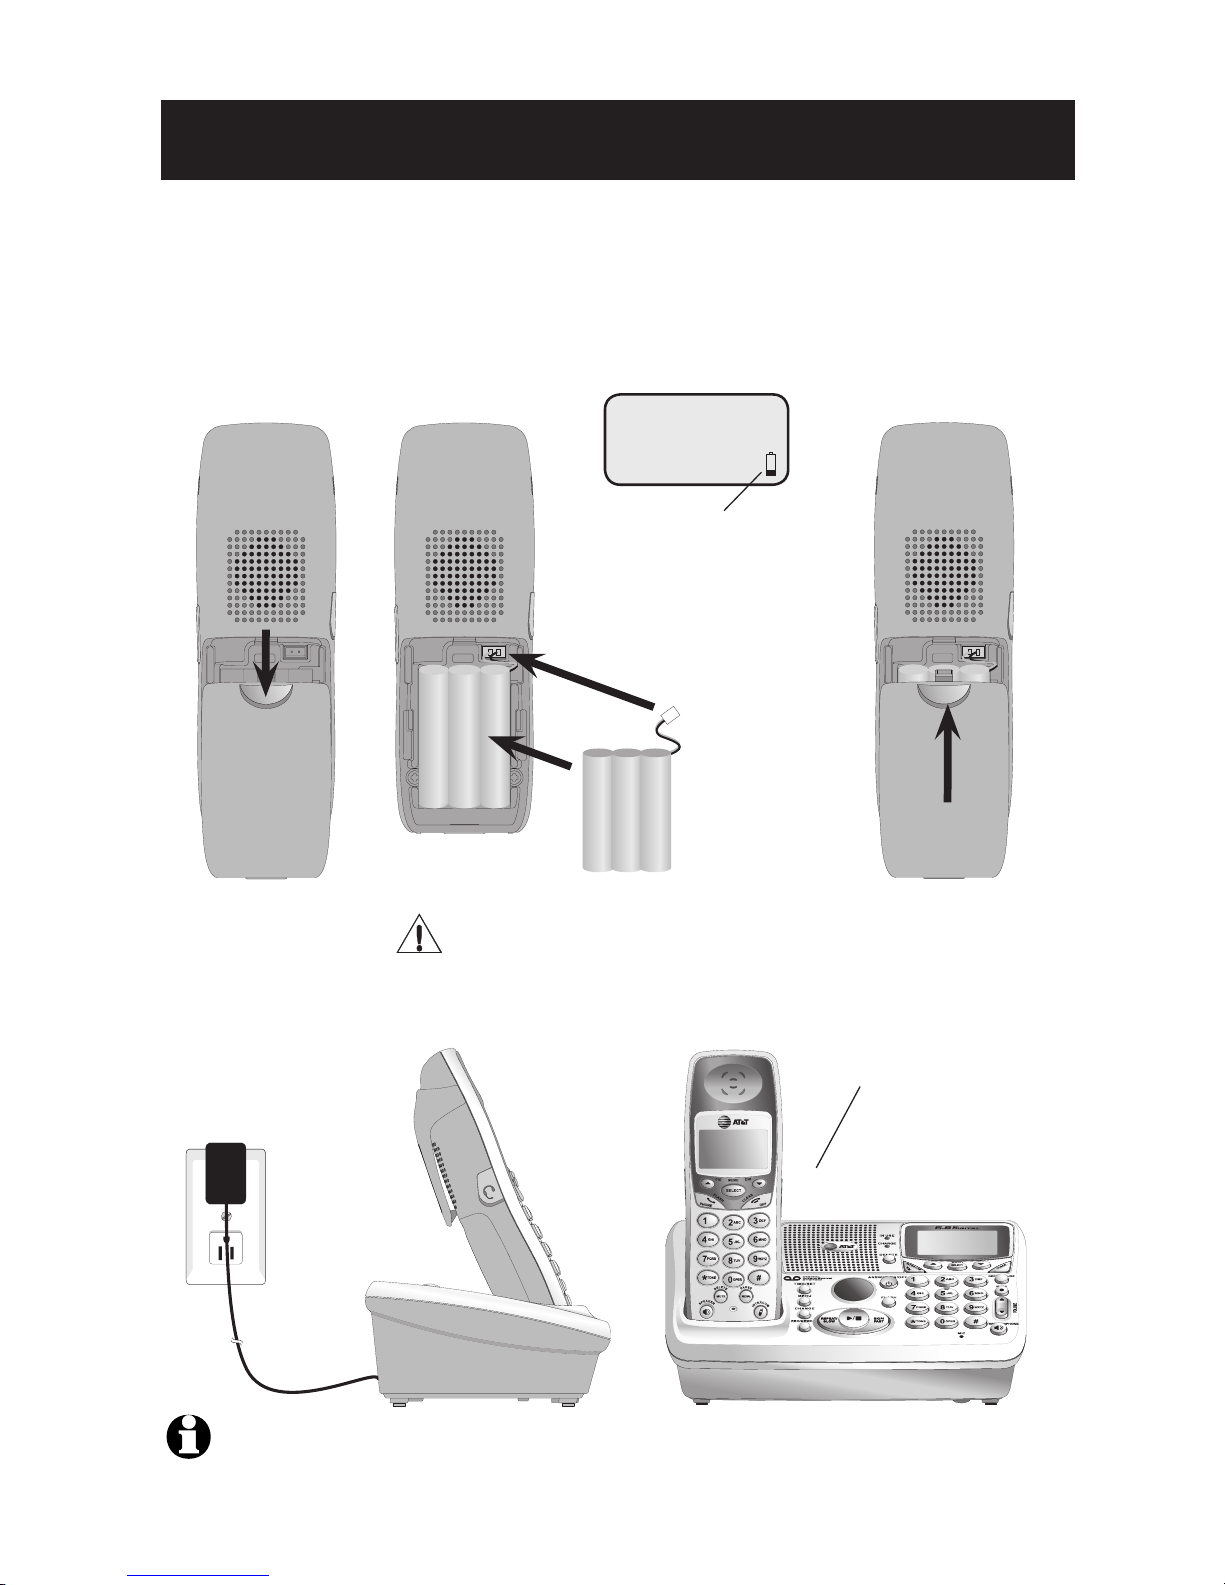
Battery installation & charging
After battery installation, place each handset in the base or charger and allow to charge
for at least 16 hours before use. You can keep the battery charged by returning the handsets to the base or charger after each use. When the battery is fully depleted, a recharge
takes about 12 hours. The average talk time on a fully charged battery is about eight
hours depending on environmental conditions and the standby time is approximately
fours days.
Plug the battery
pack connector
into handset.
Place the battery
pack and wires in
the compartment.
Place handset in base or charger
to charge for at least 16 hours
before first use.
Plug power adapter
into an electrical outlet
not controlled by a wall
switch.
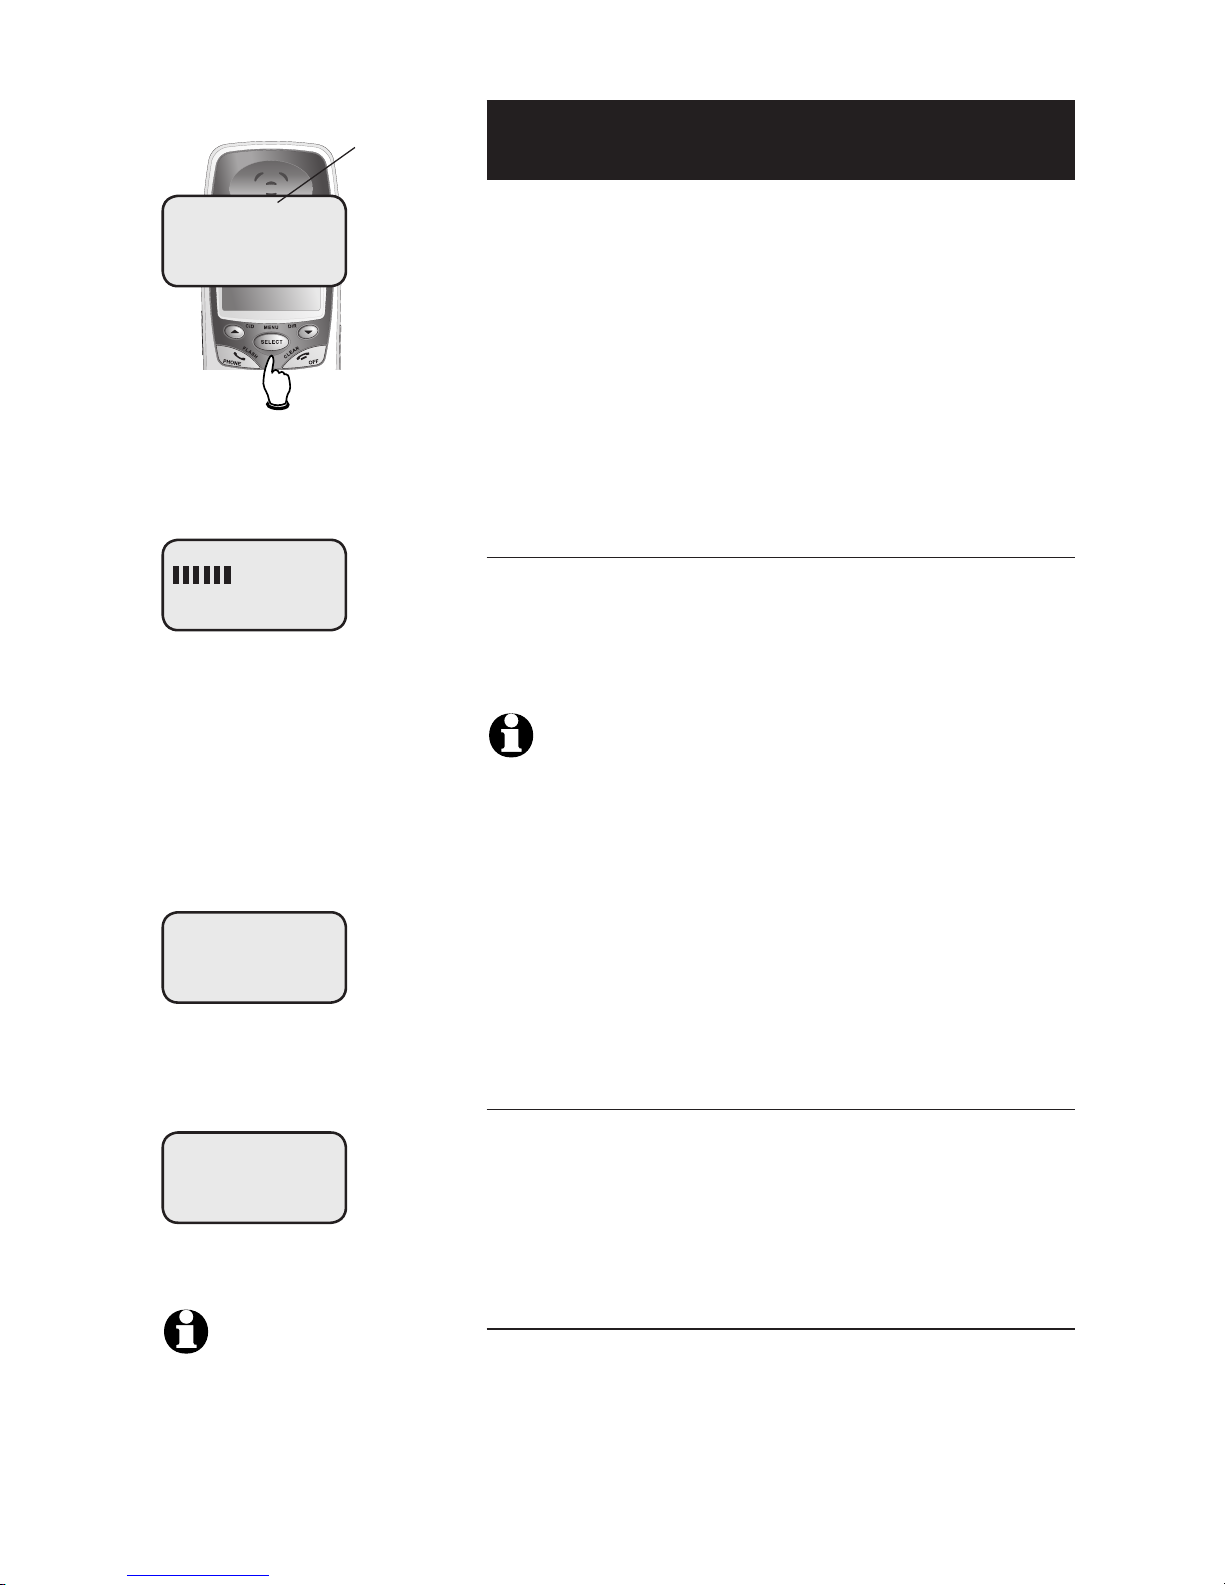
Low battery indicator
Return handset to base
or charger to recharge
when this symbol flashes.
(Handset will beep when
battery is low.)
Caution: Use only supplied rechargeable battery or AT&T replacement
battery model 27910 (SKU 00102. Part
number 89-0099-00-00).
LOW BATTERY
Press tab to open
battery compartment.
Replace compartment cover.
NOTE: Use only the power cord supplied with this product. If you need a replacement, call 1-800-222-3111. Be
sure to use an electrical outlet not controlled by a wall switch.
Page 10
8
Getting Started
Wall mounting
The base can be installed on any standard wall phone outlet as shown below. Choose a
location away from electronic equipment, such as personal computers, computer routers, television sets or microwave ovens. Avoid excessive heat, cold, dust or moisture.
Plug power adapter
into electrical outlet.
Plug telephone line
cord into telephone
cord wall jack.
1) Connect telephone line cord and power
adapter to telephone jacks and wall
jacks, as shown on page 6.
2) Install wall mount bracket onto the set.
(a) First put the two front wall mount
bracket tabs into the front notches on
the bottom of the telephone base.
(b) Squeeze the rear tabs of the wall
mount bracket as you insert them into
the rear notches on the bottom of the
telephone base.
NOTE: To disassemble the wall
mount bracket, squeeze the rear tabs while
lifting up the wall mount bracket back and
away from the telephone base.
3) Position the wall-mount bracket
over the wall-outlet mounting pegs,
and press and slide the wall-mount
bracket down firmly so it is held
securely on the outlet mounting
pegs.
b
aa
b
Page 11
9
Getting Started
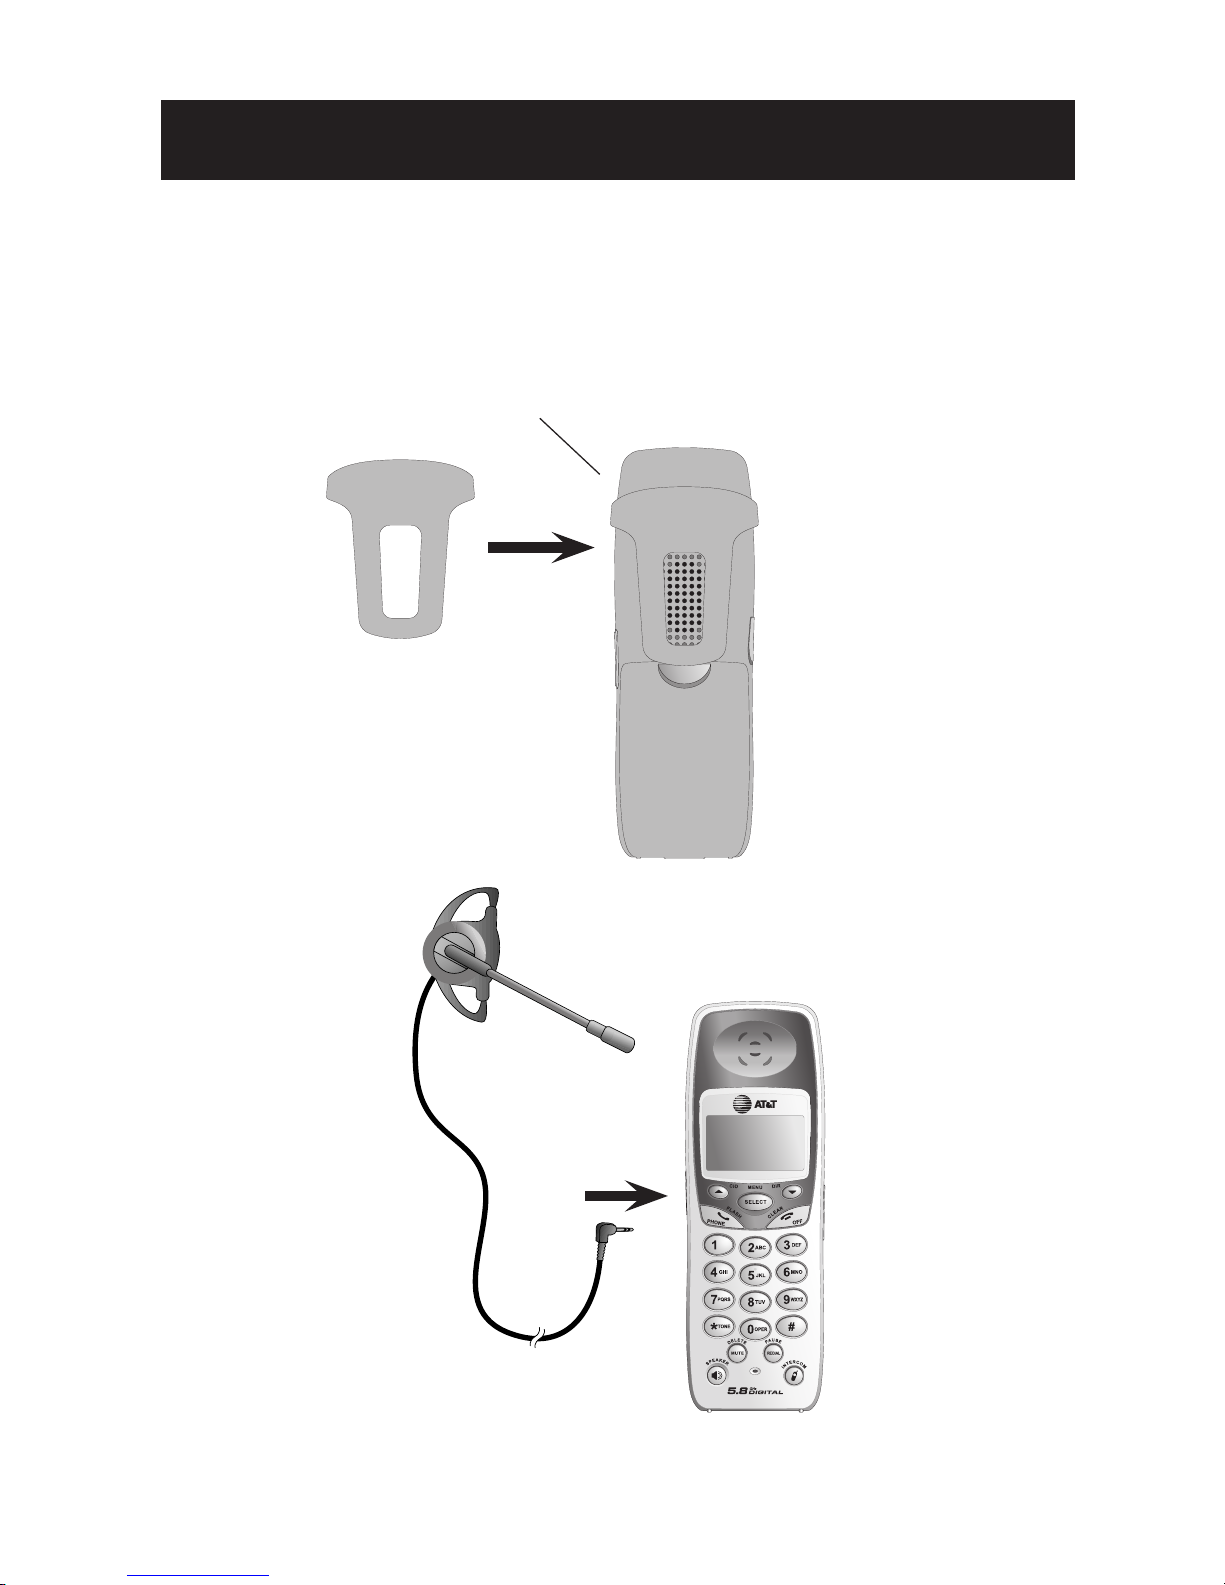
Belt clip & optional headset
Install belt clip as shown below if desired.
For hands-free telephone conversations, you can use any industry standard 2.5 mm
headset (purchased separately). For best results use an AT&T 2.5 mm headset.
Snap belt clip into notches on
side of handset. Rotate and pull
to remove.
Plug 2.5 mm headset
into jack on side of
handset (beneath
small rubber cap).
Page 12
10
Telephone Operation
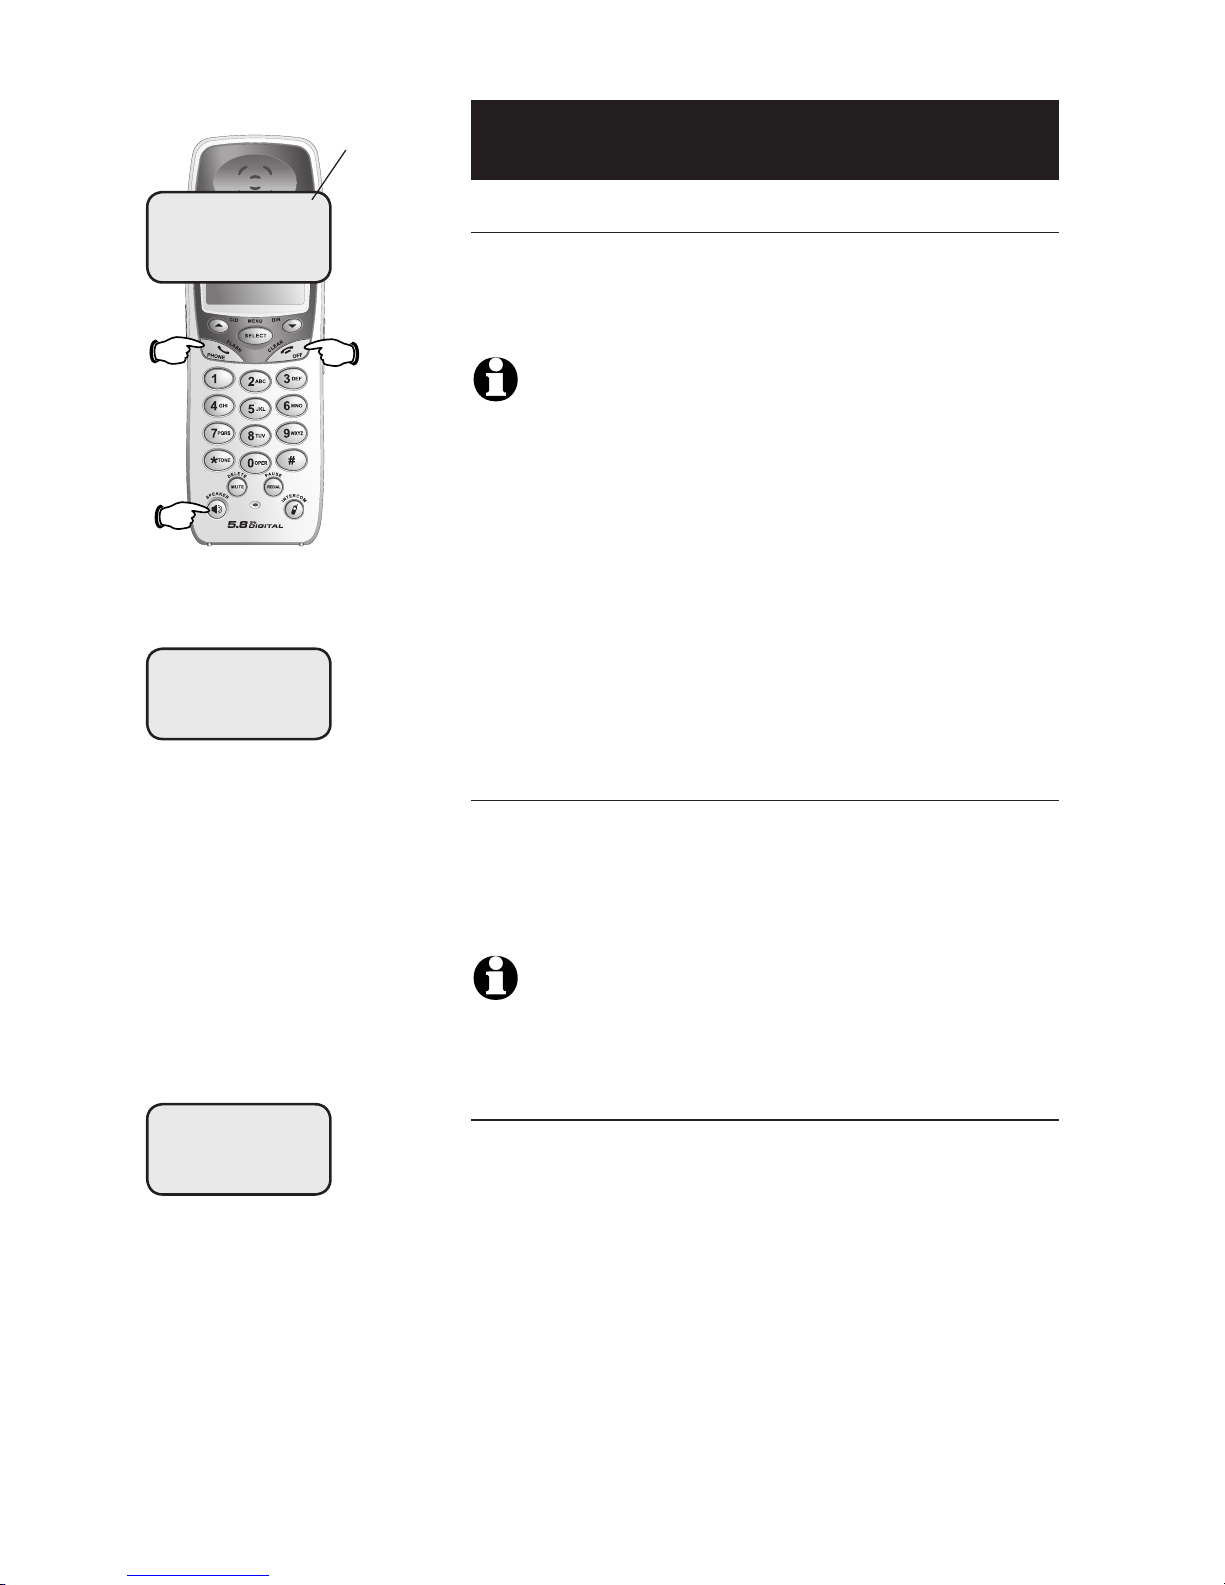
Basic handset operation
Making and answering calls
To answer an incoming call, press PHONE (or SPEAKER,
or any dial pad key). To make a call, press PHONE or
SPEAKER, then dial a number. Press OFF to hang up.
NOTE: If you have accessed the directory or call log, you will need to
press OFF/CLEAR more than once to hang up.
To preview numbers before dialing, enter numbers first,
then press PHONE or SPEAKER to dial. Press DELETE
or CLEAR at any time to make corrections as you are
entering numbers. Press and hold PAUSE to enter a 3second dialing pause.
The screen displays the elapsed time as you talk (in
hours, minutes and seconds).
Hands-free speakerphone calls
To answer a call, press SPEAKER. To make a call, press
SPEAKER, then dial a number. During a call you can press
SPEAKER to toggle between hands-free speakerphone
and normal handset use. Press OFF to hang up.
NOTE: If you have accessed the directory or Call log, you will need to
press OFF/CLEAR more than once to hang up.
Last number redial
Before pressing PHONE, press REDIAL to display the
most recently called numbers (up to 32 digits). Use the
^V buttons to view up to five recently called num-
bers. The handset will beep twice at the beginning or end
of the list.
Press PHONE or SPEAKER to redial any displayed number. Press DELETE to delete the number from the redial
memory.
After pressing PHONE, press REDIAL to call the most
recently called number (up to 32 digits).
Elapsed time
PHONE 00:00:12
SPEAKER 00:00:12
REDIAL
555-1234
Page 13
11
Telephone Operation
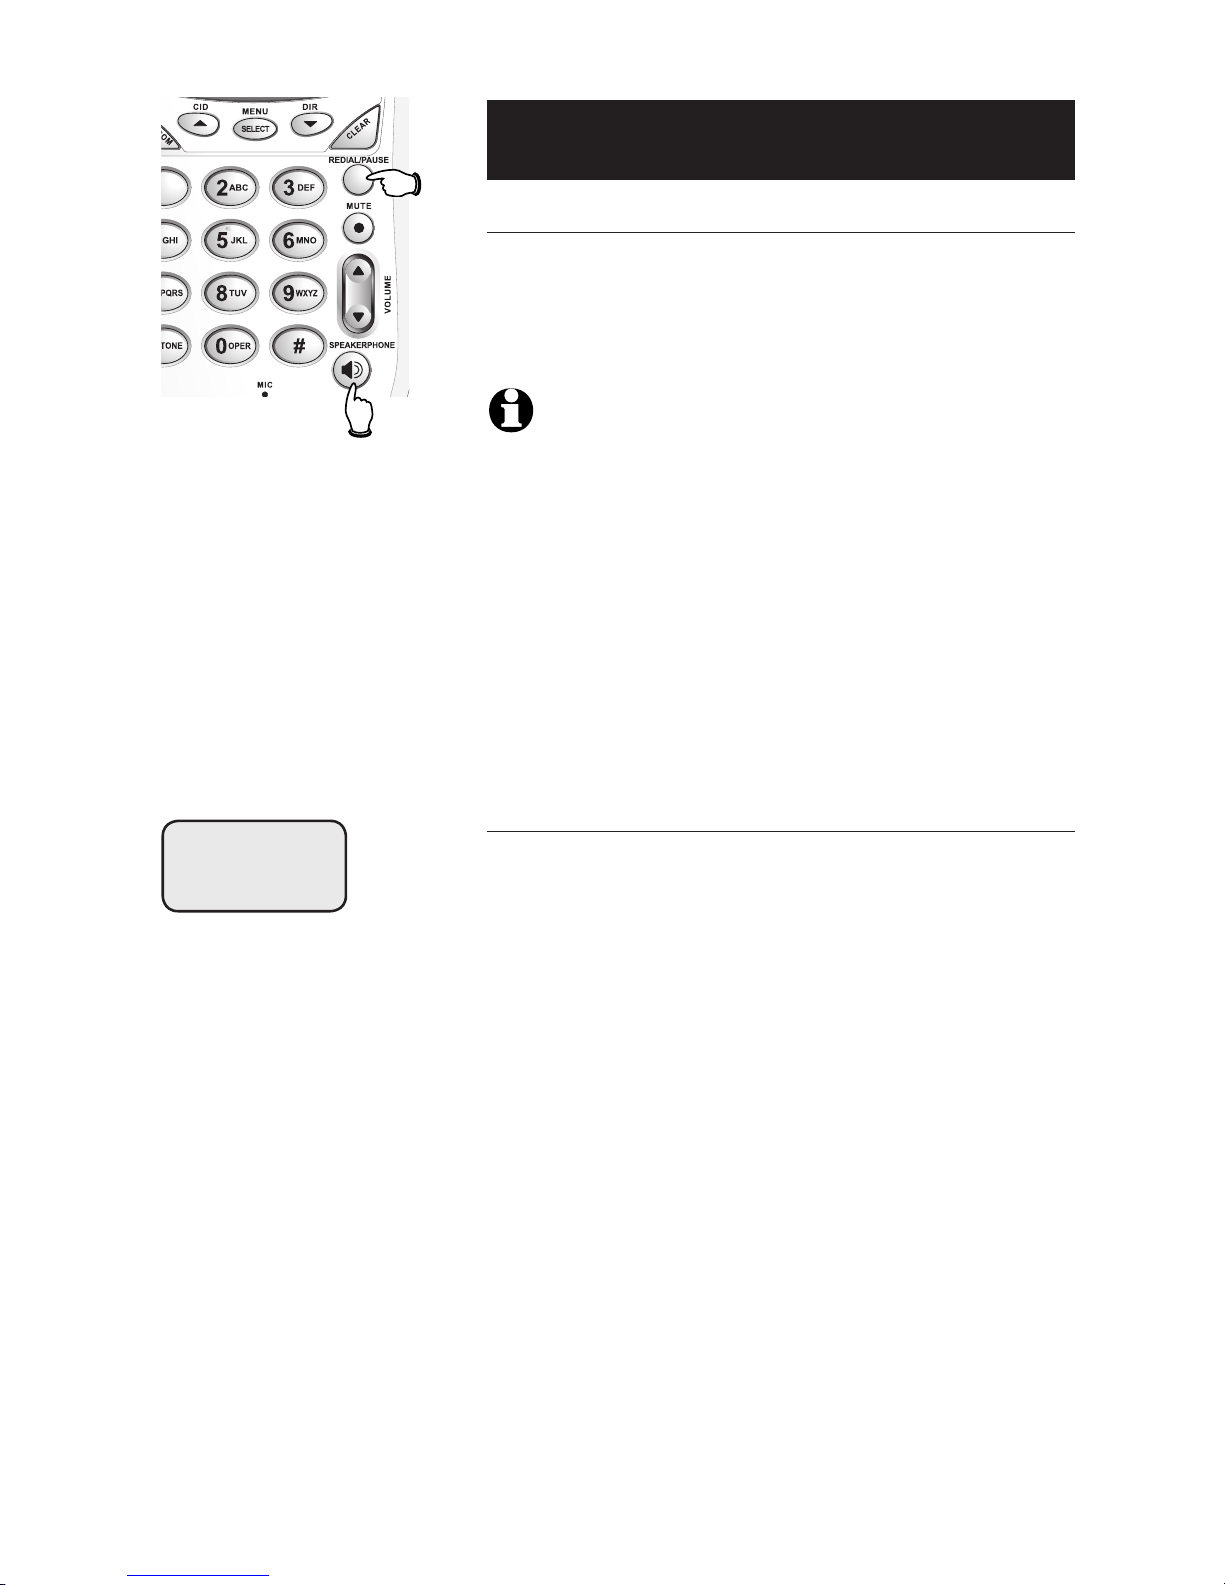
Basic base operation
Making and answering calls
To answer an incoming call, press SPEAKERPHONE (or
any dial pad key). To make a call, press SPEAKERPHONE,
then dial a number. Press SPEAKERPHONE again to hang
up.
NOTE: If you have accessed the directory or Caller log, you will need to
press CLEAR then SPEAKERPHONE to hang up.
To preview numbers before dialing, enter numbers first,
then press SPEAKERPHONE to dial. Press CLEAR or
DELETE at any time to make corrections as you are
entering numbers. Press and hold REDIAL/PAUSE to
enter a 3-second dialing pause.
The screen displays the elapsed time as you talk (in
hours, minutes and seconds).
Last number redial
Before pressing SPEAKERPHONE, press REDIAL/PAUSE
to display the most recently called numbers (up to 32
digits). Use the ^V buttons to view up to five recently
called numbers. The base will beep twice at the beginning
or end of the list.
Press SPEAKERPHONE to redial any displayed number.
Press DELETE to delete the number from the redial
memory.
After pressing SPEAKERPHONE, press REDIAL/PAUSE to
call the most recently called number (up to 32 digits).
Speakerphone
Redial
REDIAL
555-1234
Page 14
12
Telephone Operation
Volume control
Press the top ( + ) or the bottom ( - ) of the VOLUME
button on the handset or press ^ or V of the
VOLUME button on the base to adjust listening volume.
Each button press raises or lowers volume by one level.
When you change the volume level, the new setting is
saved. The new volume level will be applied each time
you use the handset, speakerphone or headset.
Call waiting
If you subscribe to a call waiting service with your local
telephone service provider, you will hear a beep if someone calls while you are already on a call. Press FLASH to
put your current call on hold and take the new call. You
can press FLASH at any time to switch back and forth
between calls.
NOTE: On the handset, if you have accessed the directory while on a
call, you will need to press CLEAR then FLASH to put the call on hold and
take the new call.
3-way conference calls
While a call is in progress, a person at one other handset can press PHONE or SPEAKER to join the call. A
person at the base can press SPEAKERPHONE to join
the call.
A person at either handset can press OFF, or place the
handset in the base to drop out of the conference call. A
person at the base can press SPEAKERPHONE to drop
out of the conference call. A conference call will not be
terminated until all the handsets and the base hang up.
Only two handsets or one handset and the base can be
connected to an outside call at the same time.
Volume
Flash
Volume
Flash
Options while on calls - Handset
and Base
Off
Page 15

13
Telephone Operation
Mute
Press MUTE to silence the microphone. You will see
MICROPHONE MUTED in the display for four seconds. A MUTE indicator will stay in the display while the
call is muted. If you are using the base speakerphone,
the MUTE button indicator will also be on. You will be
able to hear, but the person on the other end will not
be able to hear you until you press MUTE again and
resume speaking.
Ring silencing
Press CLEAR or MUTE while the phone is ringing to
silence the ringer temporarily.
The next phone call will ring normally.
Temporary tone dialing
If you have dial pulse (rotary) service, you can switch
to touch tone dialing during a call by pressing *. This
can be useful if you need to send tone signals for access
to answering systems or long-distance services.
After you hang up or press FLASH to access services
with your local telephone service provider, the phone
automatically returns to dial pulse (rotary) service.
Options while on calls - Handset
and Base
MUTE
MICROPHONE MUTED
PHONE 00:00:12
MUTE
MICROPHONE MUTED
SPEAKER 00:00:12
Tone
Mute
Mute
Tone
Page 16
14
Telephone Operation
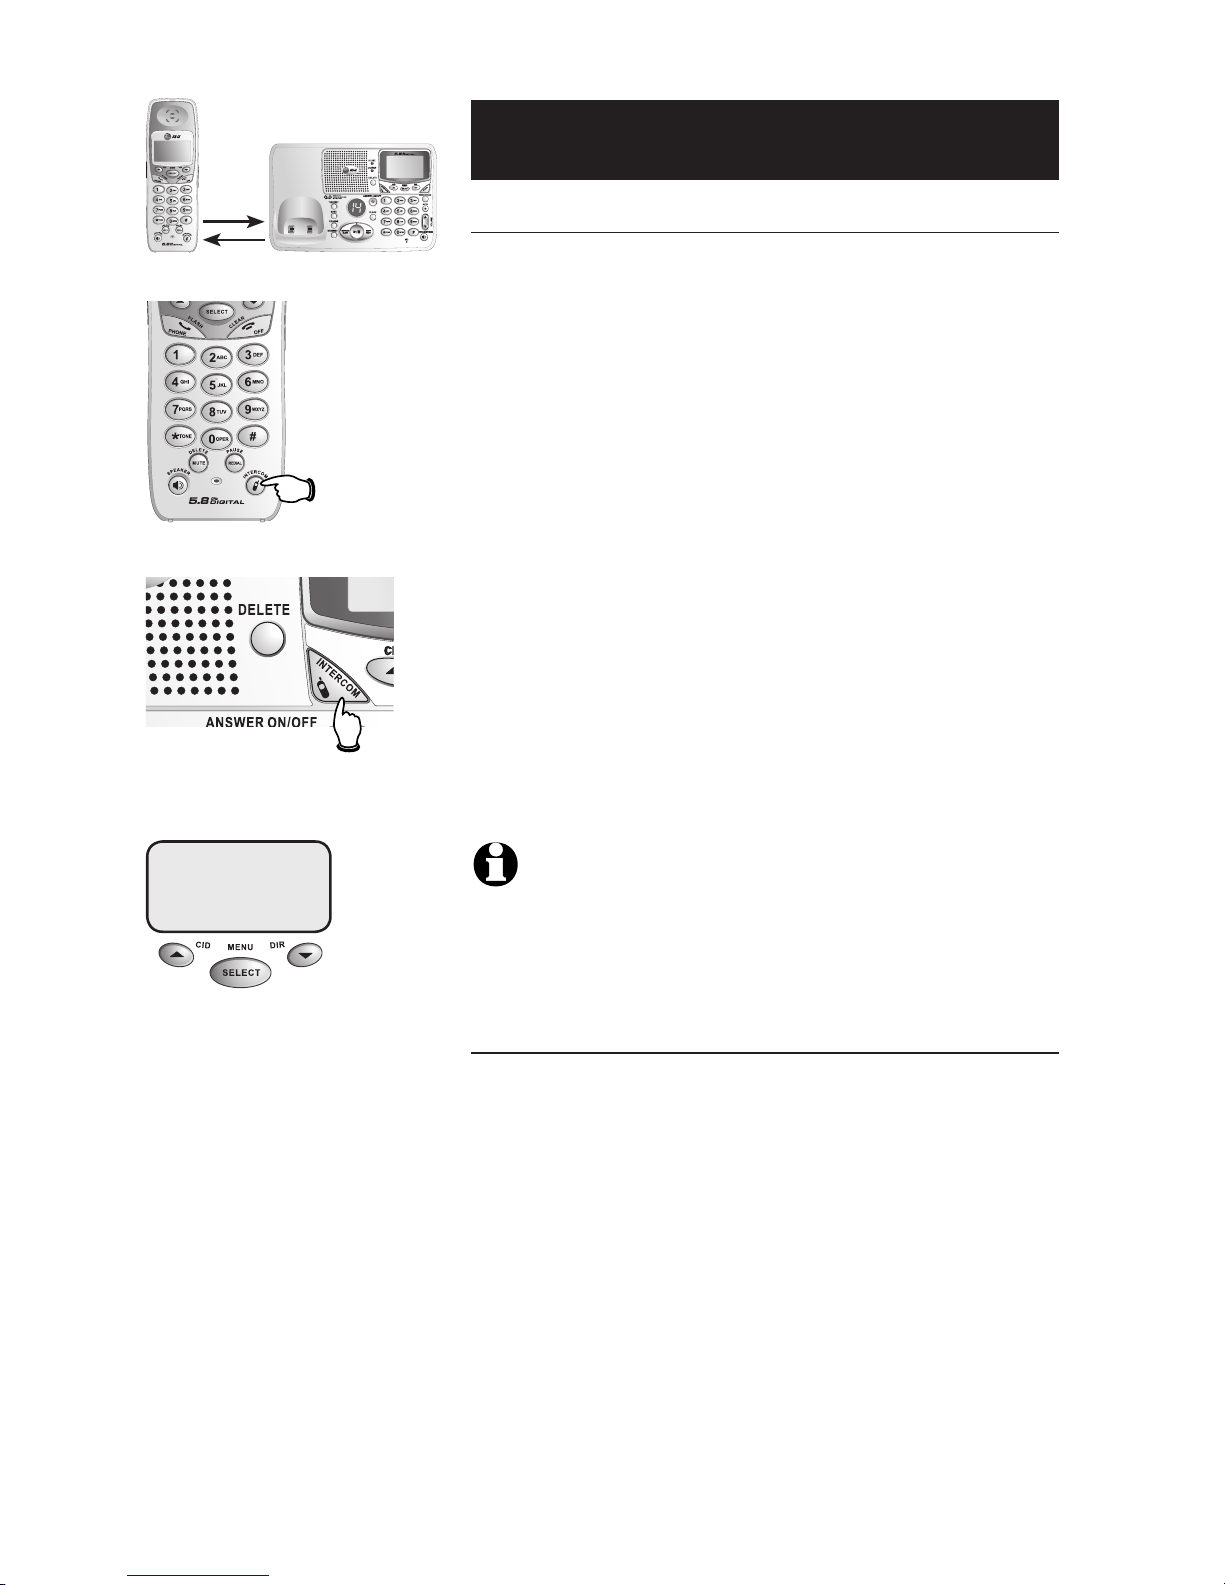
Intercom calls
Intercom calls
If you have more than one handset, use the intercom
feature to have conversations between the handsets and
base.
• Press the INTERCOM button on a handset or on the
base to initiate an intercom call.
• After entering the number of the handset (or 0 for
base) you wish to intercom with, your handset (or
base) will call the other handset or base.
At a handset, press PHONE, INTERCOM, SPEAKER or
any dial pad key to answer an intercom page. At the
base, press INTERCOM, SPEAKERPHONE or any dial pad
key to answer an intercom call.
At a handset, press OFF or INTERCOM, or place the
handset in a charger or base to end the intercom call.
At the base, press CLEAR or INTERCOM to end the
intercom call. The display will show INTERCOM
ENDED.
NOTE: The intercom feature cannot be utilized while a handset is in the
directory or call log. Pressing INTERCOM while on an outside call will initiate call transfer (see page 16). Pressing and holding INTERCOM while on
an outside call will initiate call forward (see page 15).
Handling incoming calls
The phone will beep if you receive an outside call during
an intercom conversation. You can either:
• Press PHONE or SPEAKERPHONE to end the inter-
com call and answer the incoming call.
OR
• Press INTERCOM or CLEAR to disconnect the inter-
com connection without answering the incoming call.
The incoming call will continue to ring.
Press INTERCOM.
Select station to page.
ENTER HANDSET #
Page 17
15
Telephone Operation
Call forward
An external call can be forwarded between the following parties:
• From one handset to another handset.
• From a handset to the base.
• From the base to a handset.
Call forward
You can forward an external call from one handset to
another handset or to the base.
• Press and hold INTERCOM. You will see ENTER
HANDSET #.
• Enter the handset number (or 0 for the base) to
which you want to forward the call. The display will
show CALL FORWARDED.
• The destination set will ring and the display will show
INCOMING CALL.
• Press PHONE, SPEAKER or any dial pad key on
the destination handset to answer the call. Press
SPEAKERPHONE or any dial pad key on the tele-
phone base to answer the call.
NOTE: If the forwarded call is not answered within 60 seconds, the
external call will be returned to the base or handset that originated the forward, and its display will show CALL BACK. If the returned call is not
answered within an additional 60 seconds, the external call will end automatically.
Page 18
16
Telephone Operation
Call transfer
An external call can be transferred between the following parties:
• From one handset to another handset.
• From a handset to the base.
• From the base to a handset.
Call transfer
During a conversation you can transfer the call to
another handset or to the base.
• Press INTERCOM (the external call is put on hold).
You will see ENTER HANDSET #.
• Enter the handset number (or 0 for the base) to
which you want to transfer the call. The display will
show CALLING HANDSET X or CALLING
BASE.
• The destination set will ring, showing an intercom call. The display will show HANDSET X IS
CALLING or BASE IS CALLING.
• Press PHONE, INTERCOM, SPEAKER or any dial pad
key on the destination handset to answer the intercom call. Press INTERCOM, SPEAKERPHONE or any
dial pad key on the telephone base to answer the
intercom call.
• When the recipient answers the intercom call, you
can talk privately without the outside caller hearing
the conversation.
• On a handset press OFF to transfer the call. On
the base press SPEAKERPHONE to complete the
transfer to a handset. The display will show CALL
TRANSFERRED.
NOTE: If the intercom call is not answered within approximate 100 sec-
onds, the external call will be released from hold at the originating set.
Page 19
17
Telephone Operation
Handset settings
At the feature menu you can change settings to
program how the telephone works.
Press MENU, then use the ^V buttons to scroll to
the feature you want to change. As you scroll through
the menu, the top menu item is always highlighted with
a > symbol. Press SELECT to select the highlighted item.
Press OFF at any time to cancel an operation, back up
to the previous menu, or exit the menu display.
Ringer volume
At this menu, you can set a ringer volume level
(1-6), or turn the ringer off (0). Use the ^V buttons
to hear an example of each volume level, then press
SELECT to select the one you prefer.
NOTE: The ringer volume level also determines the levels of ringing for
intercom calls (see page 14) and the paging tone when initiating the handset
locator feature (see page 21). If the handset ringer volume level is set to off
(0), that handset is silenced for all calls and paging.
Ringer volume can also be temporarily adjusted by
pressing VOLUME on the side of the handset during
incoming ringing.
The next call will ring normally.
Ringer tone
This feature allows you to choose one of 10 ringer
tones. Use the ^V buttons to hear an example of
each ringer tone, then press SELECT to select the one
you prefer.
Key tone
The handset is factory programmed to beep at each key
press. Use the ^V buttons to select ON or OFF, then
press SELECT to save your preference.
Highlighted
menu item
> DIRECTORY
CALL LOG
RINGER VOLUME
RINGER TONE
1
KEY TONE
ON
NOTE: If you select OFF,
you will not hear a beep when you
press keys.
Page 20

18
Telephone Operation
Handset settings
Language
At this menu you can select the language used in all
menus and screen displays. Use the ^V buttons to
select English, Spanish, or French, then press SELECT to
save your preference.
CLR Voice Mail
If you subscribe to a voice mail service provided by
your local telephone company, you will receive a text
message on the handset when you have new voice mail.
To manually remove the voice mail message on the display:
• Press MENU.
• Press the ^ or V button to highlight CLR
VOICE MAIL.
• Press SELECT.
• Press SELECT again to remove the displayed message, or press OFF to exit.
NOTE: This only turns off the displayed message; it does not delete
your voice mail message(s). This feature allows you to correct a voice mail
indication that is out of synch with your local telephone company. If there actually is a new voice mail message, your local telephone company will continue
to send the message which turns the display message back on.
Dial Type
At this menu you can choose Tone or Pulse dialing. The
factory default setting is TONE. Change this to PULSE
only if you do not have touch-tone dialing service.
Use the ^V buttons to select TONE or PULSE, then
press SELECT to save your preference.
NOTE: This sets the dial type for both the handset(s) and the base.
LANGUAGE
ENGLISH
DIAL TYPE
TONE
>DIRECTORY
CALL LOG
>CLR VOICE MAIL
DIAL TYPE
TURN INDICATOR
OFF?
>CLR VOICE MAIL
DIAL TYPE
Page 21

19
Telephone Operation
Base settings
At the feature menu you can change settings to
program how the telephone works.
Press SELECT/MENU, then use the ^V buttons to
scroll to the feature you want to change. As you scroll
through the menu, the top menu item is always highlighted with a > symbol. Press SELECT/MENU to select
the highlighted item.
Press CLEAR at any time to cancel an operation, back
up to the previous menu, or exit the menu display.
Ringer volume
At this menu, you can set a ringer volume level
(1-6), or turn the ringer off (0). Use the ^V buttons
to hear an example of each volume level, then press
SELECT/MENU to select the one you prefer.
NOTE: The ringer volume level also determines the level of ringing for
intercom calls (see page 14). If the base ringer volume level is set to off (0),
the base will be silenced for all calls.
Ringer volume can also be temporarily adjusted by
pressing VOLUME during incoming ringing.
The next call will ring normally.
Ringer tone
This feature allows you to choose one of 10 ringer
tones. Use the ^V buttons to hear an example of
each ringer tone, then press SELECT/MENU to select
the one you prefer.
Key tone
The base is factory programmed to beep at each key
press. Use the ^V buttons to select ON or OFF, then
press SELECT/MENU to save your preference.
NOTE: If you select OFF, you will not hear a beep when you press
keys.
Highlighted
menu item
> DIRECTORY
CALL LOG
RINGER VOLUME
RINGER TONE
1
KEY TONE
ON
Page 22

20
Telephone Operation
Base settings
Language
At this menu you can select the language used in all
menus and screen displays. Use the ^V buttons to
select English, Spanish, or French, then press SELECT/
MENU to save your preference.
CLR Voice Mail
If you subscribe to voice mail services provided by your
local telephone company, you will receive a text message on the base and all handsets (if you have additional
handsets) when you have new voice mail. To manually
remove the voice mail message on the display:
• Press SELECT/MENU.
• Press the ^ or V button to highlight CLR
VOICE MAIL.
• Press SELECT/MENU.
• Press SELECT/MENU again to remove the displayed
message, or press CLEAR to exit.
NOTE: This only turns off the displayed message; it does not delete
your voice mail message(s). This feature allows you to correct a voice mail
indication that is out of synch with your local telephone company. If there actually is a new voice mail message, your local telephone company will continue
to send the message which turns the display message back on.
LANGUAGE
ENGLISH
>DIRECTORY
CALL LOG
>CLR VOICE MAIL
HANDSET LOCATOR
TURN INDICATOR
OFF?
>CLR VOICE MAIL
HANDSET LOCATOR
Page 23

21
Telephone Operation
Base settings
Handset Locator
This feature is used as an aid to locate the handset(s).
It can only be activated from the base. Press SELECT/
MENU and then press the ^ or V key until the
HANDSET LOCATOR option is shown. Press
SELECT/MENU. The screen on the base will show
PAGING ALL HANDSETS and start the paging tone
at the handset(s) for 60 seconds.
To stop the paging tone, press PHONE, SPEAKER or
press any dial pad key on the handset or press CLEAR
on the base.
NOTE: The handset ringer volume also determines the level of the pag-
ing tone. If the handset ringer volume level is set to off (0), that handset will
be silenced for all calls and paging (see page 17).
Display Base ID
Press SELECT/MENU and then press the ^ or V key
until the DISPLAY BASE ID option is shown. Press
SELECT/MENU to show the base ID number. This num-
ber can be used when adding, replacing, or re-registering
handsets (see page 46-48).
Dial Type
At this menu you can choose Tone or Pulse dialing. The
factory default setting is TONE. Change this to PULSE
only if you do not have touch-tone dialing service.
Use the ^V buttons to select TONE or PULSE, then
press SELECT/MENU to save your preference.
NOTE: This sets the dial type for both the handset(s) and the base.
DIAL TYPE
TONE
>HANDSET LOCATOR
DISPLAY BASE ID
>DISPLAY BASE ID
DIAL TYPE
Page 24

22
Directory
Shared directory
The directory is stored in the base, and is shared by all
handsets and base. Changes made at any one handset or
base will be reflected in all.
Memory capacity
The directory can store up to 50 entries. Each entry can
contain a number up to 32 digits, and a name up to 16
letters long. A convenient search feature can help you
find and dial numbers quickly (see page 25).
Timeouts and error messages
If you pause for more than 30 seconds while making an
entry, the procedure will time out and you will have to
begin again.
If all memory locations are in use, the screen will
display LIST FULL. You will not be able to store a new
number until you delete an existing one.
Handset: 50 entries
Base: 50 entries
PAT JOHNSON
908-555-0100
Page 25

23
Directory
New Directory entries
To create a new directory entry
Press SELECT/MENU, then press SELECT/MENU to
choose DIRECTORY. Press V to highlight STORE. Press
SELECT/MENU, then enter the telephone number when
prompted.
Use the dial pad to enter up to 32 digits, then press
SELECT/MENU. You will be notified if the number is
already in your directory.
To insert a number from your redial list, press REDIAL,
then ^V to find the number, then press SELECT/
MENU.
Press SELECT/MENU again to complete number entry.
• Press DELETE to erase numbers if you make a mistake.
• Press and hold PAUSE to enter a 3-second dialing pause.
To enter a name
Use the dial pad and the chart below to enter a name
(up to 16 characters). Each press of a particular key will
cause characters to be displayed in the following order:
The cursor moves to the right when you press another
dial pad button or the V button. Press ^ to move
the cursor to the left. Press DELETE to erase letters if
you make a mistake.
HANDSET 1
> DIRECTORY
CALL LOG
> STORE
REVIEW
ENTER NUMBER
555-1234_
ENTER NAME
Pat Williams_
Pat Williams
555-1234
Characters by number of key presses
Dial
Key
1
2
3
4
5
6
7
8
9
0
#
1
A
D
G
J
M
P
T
W
0
space
#
B
E
H
K
N
Q
U
X
?
’
C
F
I
L
O
R
V
Y
!
,
2
3
4
5
6
S
8
Z
/
-
a
d
g
j
m
7
t
9
(
.
b
e
h
k
n
p
u
w
)
&
c
f
i
l
o
q
v
x
@
r
y
s
z
1 2 3 4 5 6 7 8 9
Page 26

24
Directory
New Directory entries
Storing the entry
Press SELECT/MENU to store your new directory entry.
To change it later, see page 26.
Page 27

25
Directory
Directory search
Press DIR to display the first listing in the directory.
You can then use the ^ or V to browse through the
directory, or search to find a specific entry. Press CLEAR
at any time to exit the directory.
NOTE: You can also display the first listing in the directory by pressing
SELECT/ MENU twice to choose DIRECTORY, and then SELECT/
MENU again to choose REVIEW.
To browse through the directory
To browse, press ^ or V to scroll through all entries
one by one. Entries will be displayed alphabetically by
the first letter in the name.
To search by name
When any entry is displayed, you can press a dial pad
button to display the first name beginning with a letter
associated with that key.
Press dial pad buttons once for the first letter, twice for
the second, three times for the third, as shown on the
previous page.
For example, press 5 (JKL) once to find Jennifer, twice to
find Kevin, or three times to find Linda.
Viewing long numbers
The screen can display only 16 digits at a time. To view
numbers longer than this, press * or # to display
the remaining digits.
5
7
Andrew
555-6789
Barbara
555-9876
Jennifer
555-4321
Pat
555-1234
Page 28

26
Directory
To dial, delete, or change entries
To dial a number
When any directory entry is displayed:
• If the phone is not in use, press PHONE (or
SPEAKER) on the handset or SPEAKERPHONE on
the base to dial the displayed number.
OR
• If you have dial tone or are already on a call, press
SELECT to dial the displayed number.
To delete an entry
When any directory entry is displayed, press DELETE
to delete the displayed entry from the directory. Once
deleted, an entry cannot be recovered.
To change an entry
When any directory entry is displayed (and the phone is
not in use), press SELECT to modify the entry:
• You are prompted to EDIT NUMBER. Press
DELETE to erase digits then you can enter the cor-
rect telephone number. You can use the ^ button
to move the cursor to the left and the V button to
move the cursor to the right. Press and hold PAUSE
to add a 3-second pause if necessary. You can also
press REDIAL, then ^V to scroll to the previously
dialed number from the redial list you want to store
in the directory, then press SELECT.
• Press SELECT.
• You are now prompted to EDIT NAME. Press
DELETE to erase characters, then use the dialing keys
to enter the correct name (see page 23). You can also
use the ^ button to move the cursor to the left
and the V button to move the cursor to the right.
• Press SELECT.
Andrew
555-6789
EDIT NUMBER
555-6789_
EDIT NAME
Andy_
Andy
555-6789
Page 29

27
Caller ID Log
How Caller ID works
If you subscribe to Caller ID service provided by your
local phone company, information about each caller will
be displayed after the first ring.
Information about the last 50 incoming calls is stored
in the call log. You can review the call log to find out
who has called, easily return the call, or copy the caller’s
name and number into your directory.
When the call log is full, the oldest entry is deleted to
make room for new incoming call information.
If you answer a call before the information appears on
the screen, it will not be saved in the call log.
NOTE: Caller ID features will work only if both you and the caller are in
areas offering Caller ID service, and if both telephone companies use compatible equipment.
Shared Caller ID Log
The Caller ID Log is stored in the base, and is shared by
the base and all handsets. Changes made at the base or
at any handset will be reflected in all.
Caller’s name Caller’s number
Appears when
new call is
received
Time of call
Date of call
CHARLIE JOHNSON
1-888-883-2445
NEW
11/23 10:01
AM
Handset: 50 entries
Base: 50 entries
CHARLIE JOHNSON
1-888-883-2445
NEW
11/23 10:01
AM
Page 30

28
Caller ID Log
About names
Names of callers will be displayed only if this information is
provided by your local telephone company.
If the telephone number of the person calling exactly matches
a number in your directory, the name that appears on the
screen will match the name that you entered into your directory.
(Example: If Christine Smith calls, her name will appear as
Chris if this is how you entered it into your directory.)
NOTE: The phone company usually delivers ten-digit phone numbers,
so if you have to dial a 1 first, or if you only dial seven digits, the name will
appear as delivered by the phone company.
Page 31

29
Caller ID Log
To review the call log
To review the call log
Press CID to review the call log. The most recent call is
displayed first. Use the arrow buttons to scroll through
the list as shown at left.
To return a call
When any Caller ID entry is displayed:
• If the phone is not in use, press PHONE (or
SPEAKER) on the handset or SPEAKERPHONE on the
base to dial the displayed number.
OR
• If you have dial tone or are already on a call, press
SELECT to dial the displayed number.
Caller ID numbers may appear with an area code that
may not be required for local calls, or without a 1 that
may be needed for long distance calls. If the number displayed is not in the correct format, you can change how
it is dialed.
To change the number before calling, press #repeat-
edly to see different dialing options (you can choose to
dial with or without the area code and with or without
the 1).
Example:
CID..............................Number displayed as 908-555-0100.
# (three times) ......Number changes to 555-0100 (drops “1” + area code).
PHONE/
SPEAKER .................. Dials 555-0100.
HANDSET 1
6 NEW CALLS
NEW
Pat Williams
555-1234
NEW
11/23 10:31
AM
Chris Thompson
908-555-0100
NEW
11/23 10:21
AM
Jeffrey Adams
555-9876
NEW
11/23 10:11
AM
Page 32

30
Caller ID Log
To review the call log
Other options
• Press DELETE to delete this entry from your call log.
• Press and hold DELETE to delete all entries from
your call log. When asked to confirm, press SELECT
to clear your call log of all entries, or OFF or CLEAR
to exit and leave all call log entries intact.
• Press SELECT (when the phone is not in use) to
copy this entry into your directory. If the name or
number is not provided, you will be prompted to
enter them (see page 23).
NOTE: If both the name and number are not provided, UNABLE TO
SAVE will be displayed.
Page 33

31
Answering System
Operation
Message capacity
The answering system can record up to 99 messages,
depending on the length of each message. Individual
messages can be up to four minutes long, and total
maximum recording time is 15 minutes. Messages will
remain available for replay until you delete them.
Message counter
Number of messages (or
during playback, message
number currently playing).
Press repeatedly to hear
menu options (see page 35).
Press to select or change a
menu option (see page 35).
Press to review or set clock
(see page 32).
Press to record a memo (see page
37) or, after pressing MENU, to
record an outgoing announcement
(see page 33).
Press to delete message currently playing; hold
to delete all old messages (see page 36).
Press to repeat message;
hold to slow playback,
press twice to play previous
message (see page 36).
Press to skip message;
hold to speed up playback
(see page 36).
Press to start or stop message
playback (see page 36).
Press to turn answering
system on or off.
Page 34

32
Answering System Operation
Day and time announcements
To set day and time
Before playing each message, the answering system
announces the day and time the message was received.
Before using the answering system, you should follow
the steps at left to set the day and time, so messages
are dated correctly.
The system uses voice prompts to guide you. Each
time you press CHANGE, the day, hour, minute or year
advances by one. When you hear the correct setting,
press TIME/SET to move to the next setting.
To check day and time
You can press TIME/SET at any time to hear the
current day and time without changing it.
NOTE: Press and hold CHANGE to advance the minute or year by
increments of 10 (the year can be set from 2000 to 2039).
NOTE: Caller ID provides the time and date. Set the year so that the
day of the week can be calculated from the Caller ID information. After you
set the time once, it will thereafter be set automatically with incoming Caller
ID information. The time will be set automatically only if you subscribe to
Caller ID service provided by your local telephone company (see page 5).
1.
Press TIME/SET
The system will announce the current clock setting, then announces
“To begin setting the clock,
press TIME/SET, then press
CHANGE to change the setting
or press TIME/SET to continue.¨
2.
Press TIME/SET
4.
Press CHANGE
until the system announces the correct hour, then press TIME/SET.
3.
Press CHANGE
until the system announces the correct day, then press TIME/SET.
NOTE: You can press and
hold CHANGE to advance
the minutes in increments of ten.
Press CHANGE
until the system announces the correct minutes, then press TIME/
SET.
5.
6.
Press CHANGE
until the system announces the correct
year, then press TIME/SET. The
system announces the current
clock setting.
Page 35

33
Answering System Operation
Outgoing announcements
Outgoing announcements are the messages callers hear
when calls are answered by the answering system.
The phone is pre-programmed with announcements for
normal (Answer and Record) mode and for announcement only mode (see page 34). If the phone is set up to
record messages, the phone answers calls with “Hello.
Please leave a message after the tone.” You can use
this announcement, or replace it with a recording of
your own voice.
To record your outgoing announcement
Press MENU until you hear "Announcement. Press
PLAY or press RECORD. To continue setup, press
MENU." Then press REC/MEMO and begin speaking
after you hear "Record after the tone. Press STOP
when you are done." Speak facing the telephone base
from about nine inches away. Press PLAY/STOP when
you are done.
Elapsed time (in seconds) will be shown in the message
window as you record. You can record an announcement up to 90 seconds long. Announcements less than
three seconds long will not be recorded.
To play your outgoing announcement
Press MENU until you hear "Announcement. Press
PLAY or press RECORD. To continue setup, press
MENU." Then press PLAY/STOP. You will hear the out-
going announcement.
To delete your outgoing announcement
Press MENU until you hear “Announcement. Press
PLAY or press RECORD. To continue setup, press
MENU.” Then press PLAY/STOP to begin playback. Press
DELETE during playback to delete your announcement.
When your announcement is deleted, calls will be
answered with the pre-programmed announcement
described above.
1.
MENU
“Announcement. Press
PLAY or press RECORD.
To continue setup, press
MENU.”
2.
(Plays announcement
previously recorded).
2.
REC/MEMO
“Record after the tone.
Press STOP when you
are done.”
3.
4.
(Announcement is
played back).
Speak into microphone.
Microphone
OR
Elapsed
recording time
(seconds).
Press to stop
recording.
(Play/Stop)
(Play/Stop)
Page 36

34
Answering System Operation
Announcement Only mode
In announce only mode, callers hear an announcement
but cannot leave messages. This option can be used, for
example, to notify callers that you will be away for an
extended period and request that they call back after a
certain date.
Announcement Only on or off
Press MENU repeatedly until you hear “Announcement
only, record no messages. To change the setting press
CHANGE.” Then press CHANGE until you hear the
option you want (on or off). Press PLAY/STOP to store
your selection and exit, or press MENU again to modify
other features (see page 35).
To record your outgoing announcement
When announce only is turned on, calls are answered
with a pre-recorded announcement that says “We’re
sorry, messages to this number cannot be accepted.”
You can use this announcement, or replace it with a
recording of your own voice.
After turning on the announce only feature, follow the
steps on page 33 to record your announcement. Callers
will hear this announcement only when the announce
only feature is turned on. Otherwise they will hear the
standard announcement asking them to leave a message.
1.
MENU
“Announcement only,
record no messages.
To change the setting
press CHANGE.”
2.
CHANGE
“Off”
3.
CHANGE
“On”
4.
Beep
(Option selected).
A
A is displayed when Announce
Only is activated.
(Play/Stop)
Page 37

35
Answering System Operation
Changing feature options
Menu features can be changed to program how the
answering system operates. Press MENU repeatedly to
hear each feature. Press CHANGE when you hear the feature you want to modify.
Feature options (Default settings underlined).
System announces: Feature description:
1.
MENU
3.
MENU
-OR-
Press until desired feature
is heard (see list at right).
Press until desired selection
is heard.
Press to set selection and
move to next menu option.
Press to set selection and
exit menu.
2.
CHANGE
“Announcement. Press PLAY
or press RECORD. To continue setup, press MENU.”
Options: [record announcement]
“Remote access code. To
change the setting press
CHANGE.”
Options: [enter 2-digit code] 19
“Message alert. To change the
setting press CHANGE.”
Options: On / Off
“Announcement only, record
no messages. To change the
setting press CHANGE.”
Options: On / Off
“Call screening. To change
the setting press CHANGE.”
Options: On / Off
“Number of rings. To change
the setting press CHANGE.”
Options: 2 / 4 / 6 /Toll Saver
Press REC/MEMO to record your
outgoing announcement (see page 33).
Press PLAY/STOP to stop recording.
Enter a two-digit number (10-99) for remote
access from another phone (see page 39).
When the Answering System is turned on
(and the ANSWER ON light is on) and the
Message Alert function is activated, any
new incoming message will increase the
flashing number in the message window
by one, and a beep tone will sound every
ten seconds as a reminder that there are
unreviewed messages on the answering
system.
When on, callers hear an announcement
but cannot leave messages (see page 34).
When on, you can hear callers leave
messages, or answer the call.
Choose number of rings before the system
answers a call. When Toll Saver is activated, the system answers after 2 rings if
you have new messages, and after 4 rings
if you have no new messages.
NOTE: Press and hold CHANGE to advance the remote access
code number by 10.
(Play/Stop)
NOTE: To temporarily dis-
able the message alert tone, press
any key on the answering system
except ANSWER ON/OFF. This
turns off the audio message alert
tone but the number in the message window will continue to flash
as a reminder that there are unreviewed messages on the answering system. The message alert
tone will be re-activated with the
next incoming message.
NOTE: To switch off the
message alert tone for all incoming messages, read the section
on disabling the message alert
function in this user's manual.
Page 38

36
Answering System Operation
Message playback
Press PLAY/STOP to hear messages. The system
announces the number of messages, then begins playback.
If you have new messages waiting, you will hear only the
new messages (oldest first). If there are no new messages,
the system will play back all messages (oldest first).
Announcements
• When playback begins, you will hear the total
number of messages.
• Before each message, you will hear the day and time
it was received.
• After the last message, you will hear “End of messag-
es.” If the system has less than 5 minutes of recording time left, you will hear time remaining.
Options during playback
• Press VOLUME button to adjust speaker volume.
• Press SKIP to skip to next message (or hold down to
speed up message playback).
• Press REPEAT to repeat message currently playing.
Press twice to hear previous message. (Hold down
to slow message playback).
• Press DELETE to delete message being played back.
• Press PLAY/STOP to stop playback.
To delete all messages
To delete all messages, press and hold DELETE while the
phone is idle (not during a call, or during message playback).
1.
“You have [xx] new
messages and [xx] old
messages”
Number of messages waiting
(or, during playback, message
number currently playing).
Message playback begins. See
options at right.
2.
Message playback ends.
NOTE: If F is flashing in the
message window, memory is full.
You will have to delete some messages before new ones can be
received.
NOTE: New (unheard)
messages cannot be deleted.
Press PLAY/STOP to begin or
end message playback.
(Play/Stop)
(Play/Stop)
Page 39

37
Answering System Operation
Recording and playing memos
Memos are messages you record yourself. They are
saved, played back and deleted exactly like incoming messages. You can record a memo as a reminder to yourself,
or leave a message for someone else if other members
of your household use the answering system.
To record a memo
Press REC/MEMO. Elapsed time (in seconds) is shown
in the message window as you record. You can record a
memo up to four minutes long. Memos less than 1 second long will not be recorded.
Press PLAY/STOP to stop recording.
To play back a memo
Press PLAY/STOP to hear messages and memos (see
page 36 for other options).
1.
REC/MEMO
“Record after the tone.
Press STOP when you
are done.”
3.
Beep
(Memo has been
recorded).
Elapsed
recording time
(seconds).
Press to stop
recording.
2.
Speak into microphone.
(Play/Stop)
Microphone
Page 40

38
Answering System Operation
Message counter displays
The message counter usually displays the total number of
memos and incoming messages. See the list below for
explanations of other displays in this counter.
Message counter displays
0 No messages.
1-98 Number of messages/memos, or message number
currently playing (flashes if you have new messages).
10-99 Current remote access code while setting
(see page 35 and 39).
1-8 Current volume level while adjusting.
1-99 (counting) Elapsed time while recording a memo (see page 37)
or announcement up to 90 seconds (page 33).
99 (flashing) Memo recording exceeded maximum time of 99
seconds.
F (flashing) Memory is full. Messages must be deleted before
new messages can be received.
CL (flashing) Clock needs to be set (see page 32).
A Announcement only mode is on (see page 34).
-- System is answering a call, or being accessed
remotely.
-- (flashing) System is being programmed or initialized.
On (or) OF Displayed for one second when any answering
system setting is turned on or off.
02, 04, 06, tS Current number of rings while setting (see page
35).
Message counter
Page 41

39
Answering System Operation
1.
Remote access
A two digit security code is required to access your
answering system from any touch-tone phone. This code
is 19 by default; see page 35 to change it.
Dial your telephone number from
any touch-tone phone.
2.
When system answers, enter
two digit remote access code (19
unless you have changed it).
3.
Enter remote commands
(see list at right).
4.
Hang up to end call and save all
undeleted messages.
Play all messages
1
Play new messages
2
Delete the message
3
33
Repeat or go back
4
Stop
5
Skip to next message
6
Review announcement
#7
Record announcement
*7to begin recording
5to stop recording
Record memo
8to begin recording
5to stop recording
Review remote access code
#9
Change remote access code
*9
Press to hear all messages.
Press to hear new messages.
Press during playback to delete current
message. Press 3 twice to delete all old
message.
Press during the caller’s message to
repeat the message. Press during the
beginning of the day and time announcement to go back to the previous caller’s
message.
Press to stop any operation (stop playback, stop recording).
Press to skip current message and
advance to next message.
Press to review current outgoing
announcement.
Press * 7, wait for beep, then begin
speaking. Press 5 to stop recording and
hear playback of new announcement.
Press 8, wait for beep, then begin speaking. Press 5 to stop recording.
Press # 9 to review remote access code.
Press * 9 to change remote access code,
then enter desired remote access code
from 10-99.
NOTE: If you pause for
more than 10 seconds during
remote access, you will hear a
help menu listing all features &
commands. If you issue no
command for another 20 seconds,
the call will end automatically.
Page 42

40
Answering System Operation
Help menu
*5
Turn system off
0
Turn system on
0
Press to hear list of features and commands.
Press to turn off answering system.
Incoming calls will no longer be
answered.
If off, system will answer after 10 rings.
Enter your access code, then press 0 to
turn on.
Remote access
Page 43

41
Appendix
Base screen icons
Screen icons
Ringer off.
Battery charging (animated display).
Low battery (flashing); place handset in base or charger to
recharge.
MUTE
Microphone is muted.
NEW
New calls (press CID to review call log).
Handset screen icons
Handset 1
NEW
MUTE
11/23 10:01
AM
Ringer off.
BASE
NEW
MUTE
11/23 10:01
AM
MUTE
Microphone is muted.
NEW
New calls (press CID to review call log).
Page 44

42
Appendix
Alert tones & indicator lights
Two short beeps
Press VOLUME keys while the volume levels are
already at limits.
Indicator lights
IN USE
On when handset or base is in use.
Flashes when another phone is in
use on the same line, when ringing,
or answering system is answering an
incoming call.
CHARGING
On when handset is positioned so its
battery can charge.
ANSWER ON/OFF
On when answering system is activated and
ready to receive calls.
SPEAKER
On when speakerphone is in use.
Handset alert tones
Two beeps
Out of range during off-hook.
Four short beeps
Low battery warning.
Confirmation tone
Programming command completed successfully.
MUTE
On when base microphone is muted.
One beep every 10
seconds
Message Alert.
A series of beeps
Press VOLUME keys while the volume levels are
already at limits.
Base alert tones
Confirmation tone
Programming command completed successfully.
Page 45

43
Appendix
Handset display screen messages
PHONE
The handset is in use.
LIST FULL
You are saving to a full directory.
MICROPHONE
MUTED
The call is on mute.
LOW BATTERY
The battery needs to be recharged.
INCOMING CALL
There is a call coming in.
ENDED
The handset is on hook.
NO ENTRIES
You are accessing an empty directory or call
log.
SPEAKER
The handset speakerphone is in use.
Screen display messages
NEW VOICE MAIL
There are new voice mail messages.
X NEW CALLS
There are new calls in the CID log.
SEARCHING ...
The handset has lost communication with the
base.
BASE IS PAGING
The base is paging handset(s).
Other handset is calling.
EXT. IN USE
An extension phone is in use.
NO LINE
There is no telephone line connected.
ALREADY SAVED
The telephone number you have entered is
already stored in the directory.
SAVED
Your operation is successful.
HANDSET X IS
CALLING
The base is calling.
Calling another handset.
CALLING BASE
Calling the base.
CALLING
HANDSET X
BASE IS
CALLING
Page 46

44
Appendix
WARNING CHECK
BATTERY!
• The battery is not installed or not installed
properly in the handset.
OR
• The battery needs to be replaced.
OR
• An incorrect battery has been installed by
mistake. Use only supplied battery or AT&T
replacement battery model 27910.
The battery is very low. The handset should be
placed in the base unit or charger.
CHARGING
A handset with a low battery has been placed in
the base unit or charger.
PLACE IN
CHARGER
Handset display screen messages
Screen display messages
Page 47

45
Appendix
SPEAKER
The speakerphone is in use.
LIST FULL
You are saving to a full directory.
The call is on mute.
INCOMING CALL
There is a call coming in.
Base display screen messages
ENDED
The speakerphone is on hook.
NO ENTRIES
You are accessing an empty directory or call
log.
Screen display messages
The base is paging handset(s).
EXT. IN USE
An extension phone is in use.
NO LINE
There is no telephone line connected.
ALREADY SAVED
The telephone number you have entered is
already stored in the directory.
MICROPHONE
MUTED
PAGING ALL
HANDSETS
There are new voice mail messages.
NEW VOICE MAIL
There are new calls in the CID log.
X NEW CALLS
One of the cordless handsets is calling.
HANDSET X IS
CALLING
Your operation is successful.
SAVED
Calling a handset.
CALLING
HANDSET X
Page 48

46
Appendix
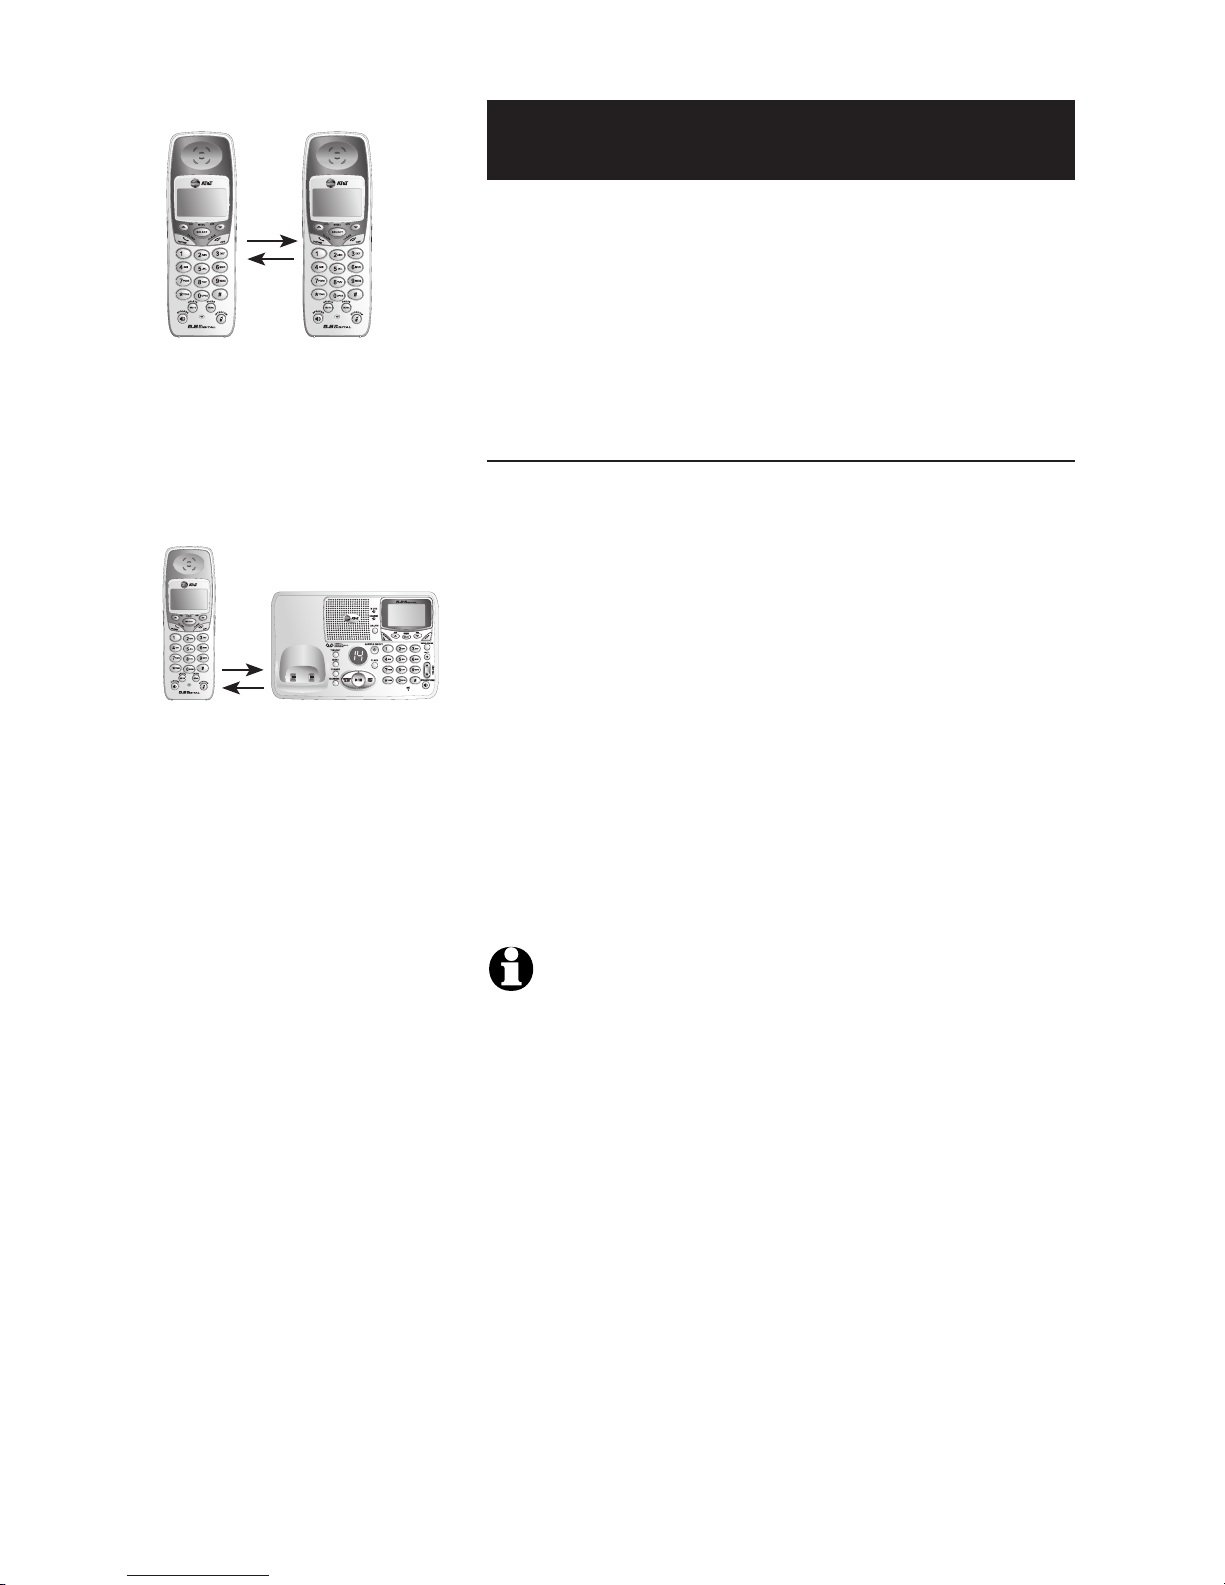
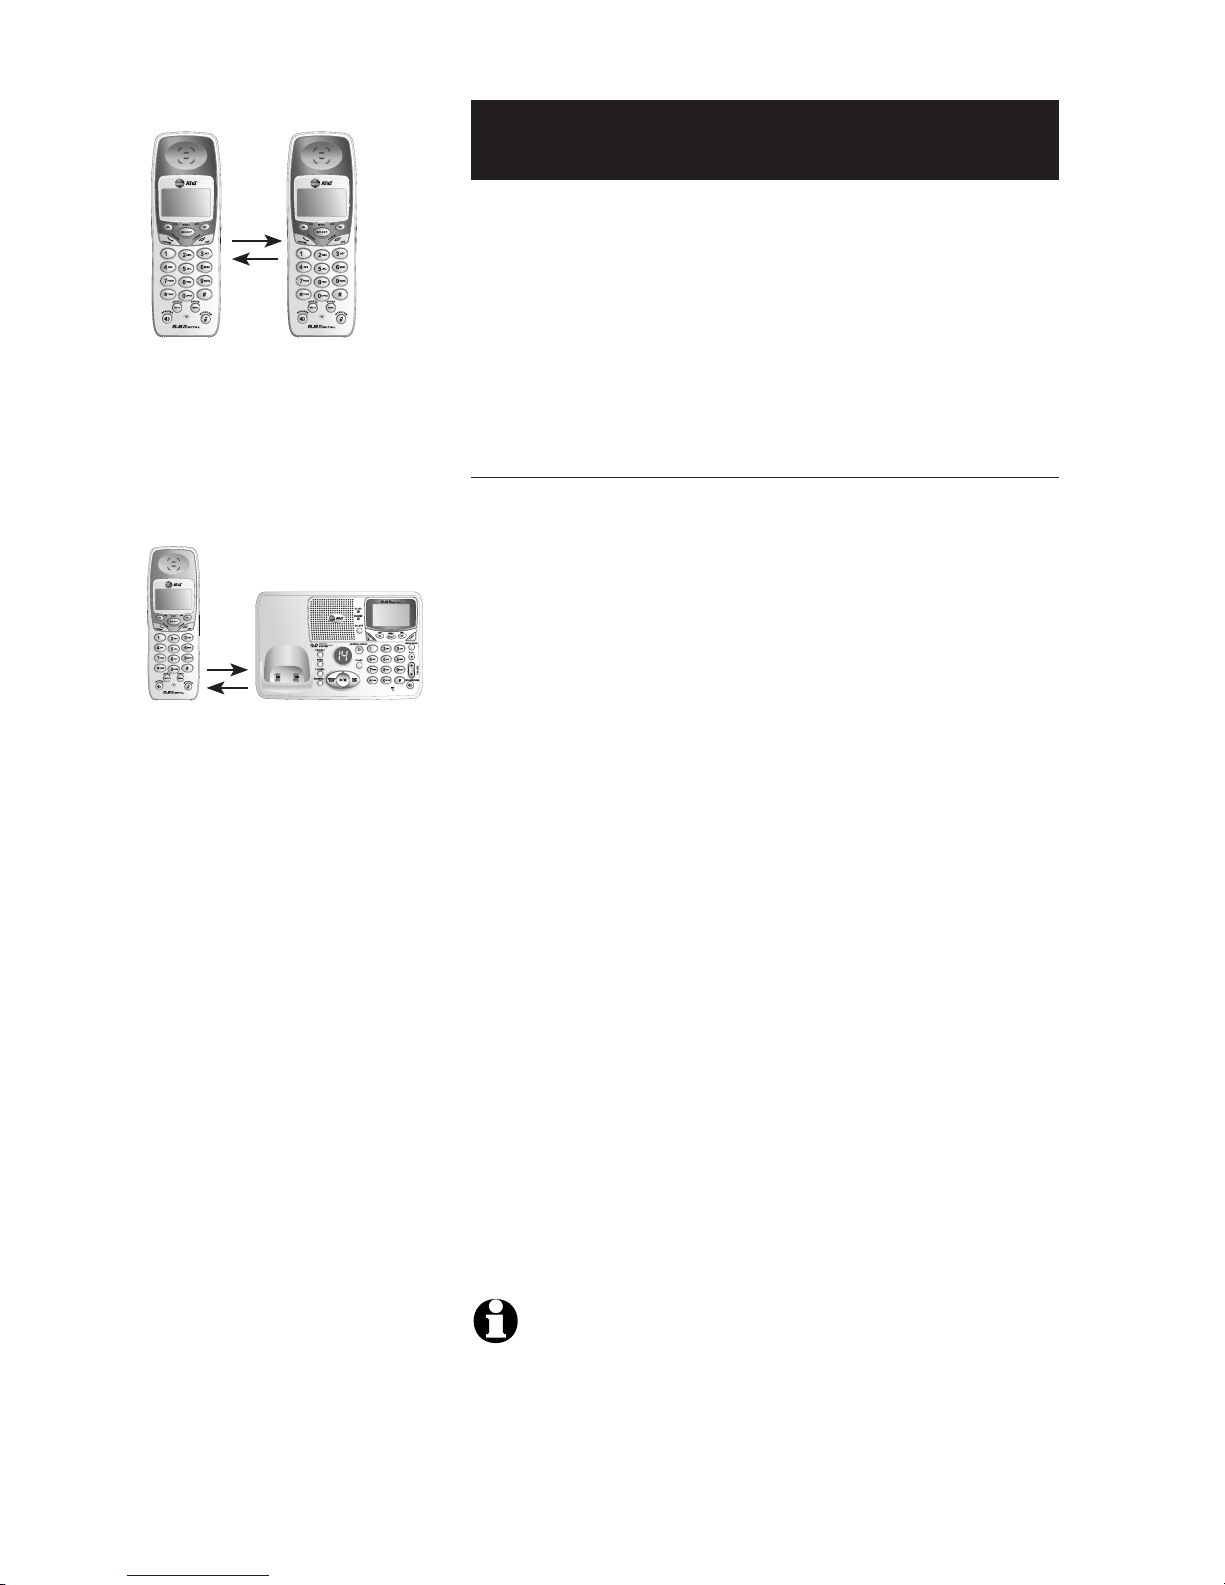
Adding new handsets
Your telephone can accommodate up to four cordless handsets. You can add new
handsets (E560-2, purchased separately) to the E5655 at any time, but each handset
must be registered with the base before use.
The handset provided with your E5655 is automatically registered as Handset 1.
Additional handsets will be assigned numbers in the order they are registered (Handset
2, Handset 3, or Handset 4). You can register a maximum of 4 handsets.
The E5654B has four handsets automatically registered as Handsets 1, 2, 3 and 4. You
cannot register any additional handsets to the E5654B.
Handset 1 Handset 2 Handset 3
Handset 4
Before using a new E560-2 handset, you must register it
with the base. During registration, you must enter the
15-digit ID number of the telephone base.
To locate the Base ID number, press SELECT/MENU on
the base, scroll down to highlight DISPLAY BASE ID,
then press SELECT/MENU. The screen will display the
unique ID code for the system. This number can be used
when adding or replacing handsets.
To add a new handset:
• Make sure your handset battery is properly installed
and charged.
• Your handset will display ENTER BASE ID.
• On your handset enter the 15-digit base ID number
from the base menu.
• Press SELECT/MENU on the handset to accept the
code and complete registration.
NOTE: If an invalid base ID code is entered, you will hear an error tone
and the handset will continue to display ENTER BASE ID. To make corrections while entering the code, you can erase digits by pressing the DELETE
key.
Once a valid base ID code is entered and accepted , the
new handset will be assigned the next available handset
number (Handset 2, Handset 3, or Handset 4). You can
register a maximum of four handsets per base unit.
HANDSET 2
ENTER BASE ID
Enter Base ID, then press SELECT.
>DISPLAY BASE ID
DIAL TYPE
Page 49

47
Appendix
If you are replacing a handset on a system that has the maximum number of registered
handsets (four) or wish to change the assigned handset number of your registered
handsets, you must first de-register the handsets, then re-register all handsets.
To de-register all handsets
• Press the *883244# on the base dial pad.
• Press SELECT/MENU on the base.
All handsets will lose registration with the base and the handsets will
display (can take up to 30 seconds):
The handsets have been de-registered from the base, and can now be re-registered
(see page 48).
Replacing a handset
ENTER BASE ID
Page 50

48
Appendix
Re-Registering a handset
You can re-register handsets after de-registering from the base. Or you can re-register
handsets to a new base unit, if you have replaced your base unit for any reason.
To re-register a handset:
• Make sure your handset batteries are properly installed and charged.
• Your handset will display ENTER BASE ID.
• On your handset enter the 15-digit Base ID number from the base menu (see page
46).
• Press SELECT/MENU on the handset to accept the new code and complete re-registration.
To re-register a handset to a new base unit:
• Make sure your handset batteries are properly installed and charged.
• Unplug the old base unit. Your handset will display SEARCHING....
• Install the new base unit by plugging it into the electrical outlet and phone jack.
• Press and hold the SELECT/MENU key on the handset until you see ENTER BASE
ID.
• On your handset enter the 15-digit Base ID number from the base menu (see page
47).
• Press SELECT/MENU on the handset to accept the new code and complete re-registration.
NOTE: If an invalid Base ID code is entered, you will hear an error tone and the handset will continue to display
ENTER BASE ID. To make corrections while entering the code, you can erase digits by pressing the DELETE key.
Once a valid Base ID code is entered and accepted by the base unit, the new handset
will be assigned the next available handset number. You can register a maximum of four
handsets per base unit.
Page 51

49
Appendix
Troubleshooting
If you have difficulty with your phone, please try the suggestions below. For Customer
Service, visit our web site at www.telephones.att.com, or call 1-800-222-3111.
My telephone does
not work at
all
• Make sure the battery pack is installed and charged correctly (see
page 7). For optimum daily performance, return the cordless handset to the telephone base after use.
• Make sure the power adapter is securely plugged into an outlet
not controlled by a wall switch.
• Make sure the telephone line cord is plugged firmly into the telephone base and the modular wall jack.
• Unplug the unit's electrical power. Wait for approximately 15 seconds, then plug it back in. Allow up to one minute for the cordless
handset and base to synchronize.
• Remove and re-insert the battery. If that still does not work, it may
be necessary to purchase a new battery pack.
• Disconnect the telephone base from the modular jack and plug in
a working telephone. If this telephone does not work, the problem
is probably in the wiring or the local service. Call the local telephone company.
Low Battery
is displayed
on screen
• Place the handset in the base or charger for recharging.
• Remove and re-install the battery and use it normally until fully
discharged, then recharge the handset on the telephone base or
charger for 16 hours.
• If the above measures do not correct the problem, the battery may
need to be replaced.
The battery
does not
charge in the
handset or
the handset
battery does
not accept
charge
• Make sure the handset is placed in the charger correctly. The
CHARGING light on the telephone base or charger should be on.
• If the cordless handset is in the charger or in the telephone base
but the CHARGING light is not on, refer to "The CHARGING light is
off" in this section.
• It may be necessary to purchase a new battery. Please refer to the
batteries section of this user's manual.
• The telephone might be malfunctioning. Please refer to the Limited
Warranty section of this user's manual for further instruction.
Problem Suggestion
Page 52

50
Appendix
The CHARGING
light is off
• Clean the charging contacts on the cordless handset(s) and telephone
base each month using a pencil eraser or a dry non-abrasive fabric.
• Make sure the power adapter and telephone line cords are plugged in
correctly and securely.
• Unplug the power adapter. Wait for 15 seconds before plugging it back
in. Allow up to one minute for the cordless handset and telephone base
to synchronize.
• The telephone might be malfunctioning. Please refer to the Limited
Warranty section of this user's manual for further instruction.
The CHARGING
light on the
telephone base
is flashing
• This is a signal that the battery is very low, completely depleted, or
when there is no electrical contact between the battery and the telephone base.
• Ensure the connector of the battery is securely plugged into the handset and place the handset in the telephone base for charging.
Troubleshooting
Problem Suggestion
There is no dial
tone
• First, try all the above suggestions.
• Move the cordless handset closer to the telephone base. It might be
out of range.
• The telephone line cord might be malfunctioning. Try installing a new
telephone line cord.
• Disconnect the telephone base from the telephone jack and connect
a different telephone. If there is no dial tone on this telephone either,
the problem is in the wiring or the local service. Contact the local telephone company.
Page 53

51
Appendix
I cannot dial out
• Make sure there is a dial tone before dialing. It is normal if the cordless handset takes a second or two to synchronize with the telephone
base before producing a dial tone. Wait an extra second before dialing.
• Make sure the telephone is set to the correct dial mode (pulse dial
or tone dial) for the service in your area. Refer to the Telephone
Operation section of this user's manual (page 18 for the handset and
page 21 for the telephone base) to set the dial mode.
• If the other telephones in your home are having the same problem,
the problem is in the telephone jack, wiring or local service. Contact
the local telephone company (charges may apply).
• Eliminate any background noise. Noise from a television, radio, or
other appliances may cause the telephone to not dial out properly.
If you cannot eliminate the background noise, first try muting the
cordless handset before dialing, or dialing from another room in your
home with less background noise.
Troubleshooting
Problem Suggestion
The telephone
does not ring
when there is
an incoming call
• Make sure the ringer is on. (See page 17 for handset and page 19 for
telephone base).
• Make sure the telephone line cord and power adapter are plugged in
properly (see page 6).
• The cordless handset may be too far from the telephone base. Move
it closer to the telephone base.
• There may be too many extension phones on the telephone line to
allow all of them to ring simultaneously. Try unplugging some of them.
• Other electronic products can cause interference to your cordless
telephone. Try installing your telephone as far away as possible from
the following electronic devices: wireless routers, radios, radio towers, pager towers, cellular telephones, digital telephones, intercoms,
room monitors, televisions, VCRs, personal computers, kitchen appliances, and other cordless telephones.
• Test a working telephone at the telephone jack. If another telephone
has the same problem, the problem is in the telephone jack, the
wiring, or the local service. Contact your local telephone company
(charges may apply).
• The telephone line cord might be malfunctioning. Try installing a new
telephone line cord.
• Re-install the battery and place the cordless handset in the telephone
base.
• Wait for the cordless handset to synchronize with the telephone base.
To be safe, allow up to one minute for this to take place.
Page 54

52
Appendix
I hear other
calls when
using the telephone.
• Disconnect the telephone base from the telephone jack. Plug in a different telephone. If you still hear other calls, the problem is probably
in the wiring or local service. Call your local telephone company.
My caller ID
features are not
working properly
Troubleshooting
Problem Suggestion
There is noise or
interference during a telephone
conversation
• The handset may be out of range. Move it closer to the telephone
base.
• Appliances or other cordless telephones plugged into the same circuit as the telephone base can cause interference. Try moving the
appliance or telephone base to another outlet.
• Other electronic products can cause interference to your cordless
telephone. Try installing your telephone as far away as possible from
the following electronic devices: wireless routers, radios, radio towers, pager towers, cellular telephones, digital telephones, intercoms,
room monitors, televisions, VCRs, personal computers, kitchen appliances, wireless routers, and other cordless telephones.
• Microwave ovens operate on the same frequency as your telephone.
It is normal to experience static on your telephone while the microwave oven is operating. Do not install this telephone in the same
outlet or near a microwave oven.
• If your telephone is plugged in with a modem or a surge protector,
plug the telephone (or modem/surge protector) into a different location. If this solves the problem, re-locate your telephone or modem
farther apart from each other, or use a different surge protector.
• The layout of your home or office might be limiting the operating
range. Trying moving the base to another location, preferably a higher
location for better reception.
• Disconnect the telephone base from the modular jack and plug in a
corded telephone. If calls are still not clear, the problem is probably
in the wiring or local service. Contact the local telephone company
(charges may apply).
• Select channels 4 through 10 for your router (refer to the user's manual of your router for more information).
• If the other telephones in your home are having the same problem,
the problem is in the wiring or local service. Contact the local telephone company (charges may apply).
• Do you have DSL service? If yes, you need to have a DSL filter
installed at every telephone jack that has a telephone connected to it.
Contact your DSL service provider for filter information.
Page 55

53
Appendix
I hear noise in
the cordless
handset, and
none of the
keys or buttons
work
• Make sure the telephone line cord is plugged in securely.
My caller ID
features are not
working properly
• Caller ID is a subscription service. You must subscribe to this service
from your local telephone company for this feature to work on your
telephone.
• The caller may not be calling from an area which supports caller ID.
• Both you and the caller's telephone companies must use equipment
which are compatible with caller ID service.
• If you subscribe to DSL service, install a noise filter to the telephone
line between the base unit and the telephone line jack. Contact your
DSL service provider for filter information.
The announcement message
is not clear
• When recording the announcement, make sure you speak in a normal
tone of voice about nine inches from the telephone base.
• Make sure there is no background noise (television, music, traffic,
etc.) when recording.
Troubleshooting
Problem Suggestion
The system
does not receive
caller ID or the
system does not
display caller ID
during call waiting
• Make sure you subscribe to Caller ID with Call Waiting features services provided by the local telephone company.
• The caller may not be calling from an area which supports caller ID.
• Both you and the caller's telephone companies must use equipment
which are compatible with caller ID service.
• If you subscribe to DSL service, install a noise filter to the telephone
line between the base unit and the telephone line jack. Contact your
DSL service provider for filter information.
The answering
system does not
answer after the
correct number
of rings
• Make sure the answering system is on (see page 31).
• If Toll Saver is activated, the number of rings changes to two when
there are new messages waiting (see page 35).
• If the memory is full or if the answering system is off, the system will
answer after ten rings.
• In some cases, the answering system may be affected by the ringing
system used by the local telephone company.
Page 56

54
Appendix
The answering
system does not
record message
• Make sure the answering system is turned on. When the answering
system is on, the red light on the ANSWER ON/OFF key is lit.
• Make sure the Announcement Only feature is off (see page 34).
• The memory is full. Delete some of the existing messages from the
system (see page 36).
The messages
on the answering system are
incomplete
• If a caller leaves a very long message, part of it may be lost when the
system disconnects the call after four minutes.
• If the caller pauses for more than seven consecutive seconds, the
system stops recording and disconnects the call.
• If the memory on the system becomes full during a message, the
system stops recording and disconnects the call.
• If the caller's voice is very soft, the system may stop recording and
disconnect the call.
Troubleshooting
Problem Suggestion
The messages
on the system
are very difficult to hear
• Press ^ VOLUME on the side of the handset or ^V VOLUME
on the telephone base to increase the speaker volume.
The answering
system does
not respond to
remote commands
• Make sure your Remote Access Code is correct (see page 35 and
39).
• Make sure you are calling from a touch-tone telephone. When dialing
a number, you should hear tones. If you hear clicks, then it is not a
touch-tone telephone and cannot activate the answering system.
• The answering system may not detect the Remote Access Code
when your announcement is playing. Wait until the announcement is
over before entering the code.
• There may be interference on the telephone line you are using. Press
the dial pad keys firmly when dialing.
Day of the
week is incorrect on the
answering system after the
clock is reset
by the Caller ID
function
• Reset the year when setting the clock in the answering system (see
page 32).
Page 57

55
Appendix
CL flashes in
message window
• Reset the clock in the answering system (see page 32).
Common cure
for electronic
equipment
• If the unit is not responding normally, try putting the cordless handset
in the telephone base or the charger. If it does not seem to respond,
try the following (in the order listed):
• Disconnect the power to the telephone base.
• Disconnect the battery on the cordless handset and the spare battery in the telephone base.
• Wait a few minutes before connecting power to the telephone base.
• Re-install the battery pack and place the cordless handset into the
telephone base or charger.
• Wait for the cordless handset to synchronize its connection with the
telephone base. To be safe, allow up to one minute for this to take
place.
Troubleshooting
Problem Suggestion
Page 58

56
Appendix
Technical specifications
RF Frequency Band
(Handset to base)
2400 MHz — 2483.5 MHz
Output Power Handset: 17~21 dBm
Base: 26~30 dBm
Sensitivity -96 dBm
Modulation GFSK
RF Frequency Band
(Base to handset)
5725 MHz — 5850 MHz
Channels 95
Channel Spacing 864 KHz
Operating Temperature 32°F — 122°F
0°C — 50°C
Base Unit Voltage
(AC Voltage, 60Hz)
96 — 130 Vrms
Base Unit Voltage
(AC Adapter Output)
9VDC @800mA
Handset Voltage 3.2 — 4.7 VDC 700mAH
Replacement Battery Model 27910
3.6V 600mAh
Page 59

57
Appendix
A
AC adapter, 6, 8
Adding new handsets, 46
Alert tones, 42
Answering calls, 10, 11
Answering system, 31-40
B
Battery charging, 7
Battery installation, 7
Belt clip, 9
C
Call forward, 15
Call transfer, 16
Call waiting, 12
Caller ID, 27
add entries to phone directory, 30
delete entries, 30
dial entries, 29
CLR Voice Mail, 18, 20
Conference Calls, 12
D
Delete Call Log entries, 30
Delete redial entries, 10, 11
Dialing,
from a CID record, 29
directory dialing, 26
Directory, 22
change entries, 26
dial a number, 26
name search, 25
new entries, 23, 24
E
Elapsed time, 10, 11
F
Flash (switchhook flash), 12
H
Hands-free use, 10
Headset, 9
I
Incoming call log, 27
Incoming calls, answering, 10, 11
Indicator lights, 42
Intercom, 14
L
Last number redial, 10, 11
Low battery, 7
M
Making calls, 10, 11
Menus, 2
Messages, 31-40
Mute, 13
N
Names,
enter a name, 23
search for, 25
O
Operating range, 5
P
Problems, 49-55
Q
Quick reference guide, 2-3
R
Recharging, 7
Redial, 10, 11
Replacing a handset, 47
Re-registering a handset, 48
Ring silencing, 13
Ring tone options, 17, 19
S
Search for name, 25
Speakerphone, 11, 12
Switchhook flash, 12
T
Technical specifications, 56
Troubleshooting, 49-55
V
Volume controls, 12
Index
Page 60

Appendix
Use the wallet card below to help you remember commands to control your answering
system from any touch tone telephone.
Remote access wallet card
Fold here.
Cut along dotted line.
Action Remote Command
Play all messages ....................... 1
Play new messages ................... 2
Delete the message ................. 3
Delete all old messages .......... 33
Repeat a message ..................... 4
Stop ............................................. 5
Help menu ................................. *5
Skip the message ...................... 6
Review announcement ............ #7
Record announcement............ *7
Record memo ........................... 8
Review remote access code .. #9
Change remote access code .. *9
Answer machine ON/OFF ... 0
Call your phone number, then enter
your two-digit access code (preset to
19).
5.8 GHz Cordless Telephone/Answering System E5654B
Copyright © 2006 Advanced American Telephones. All Rights Reserved.
AT&T and the Globe Design are trademarks of AT&T Corp.,
licensed to Advanced American Telephones. Printed in China.
Page 61

Copyright © 2006 Advanced American Telephones. All Rights Reserved.
AT&T and the Globe Design are trademarks of AT&T Corp.,
licensed to Advanced American Telephones. Printed in China. Issue 1 AT&T 03/06.
91-000811-010-000
www.telephones.att.com
 Loading...