


230

AT&T 230 Quark pdf 7/22/98 12:13 PM Page 1
T R I M L I N E
M e m o ry
Telephone 230
U s e r’s Manu a l
Pa rt 2
© 1998 Philips Consumer Communications, L.P. All rights reserved.
Printed in Mexico. 848234530 Issue 1AT&T
AT&T 230 Quark pdf 7/22/98 12:13 PM Page 2
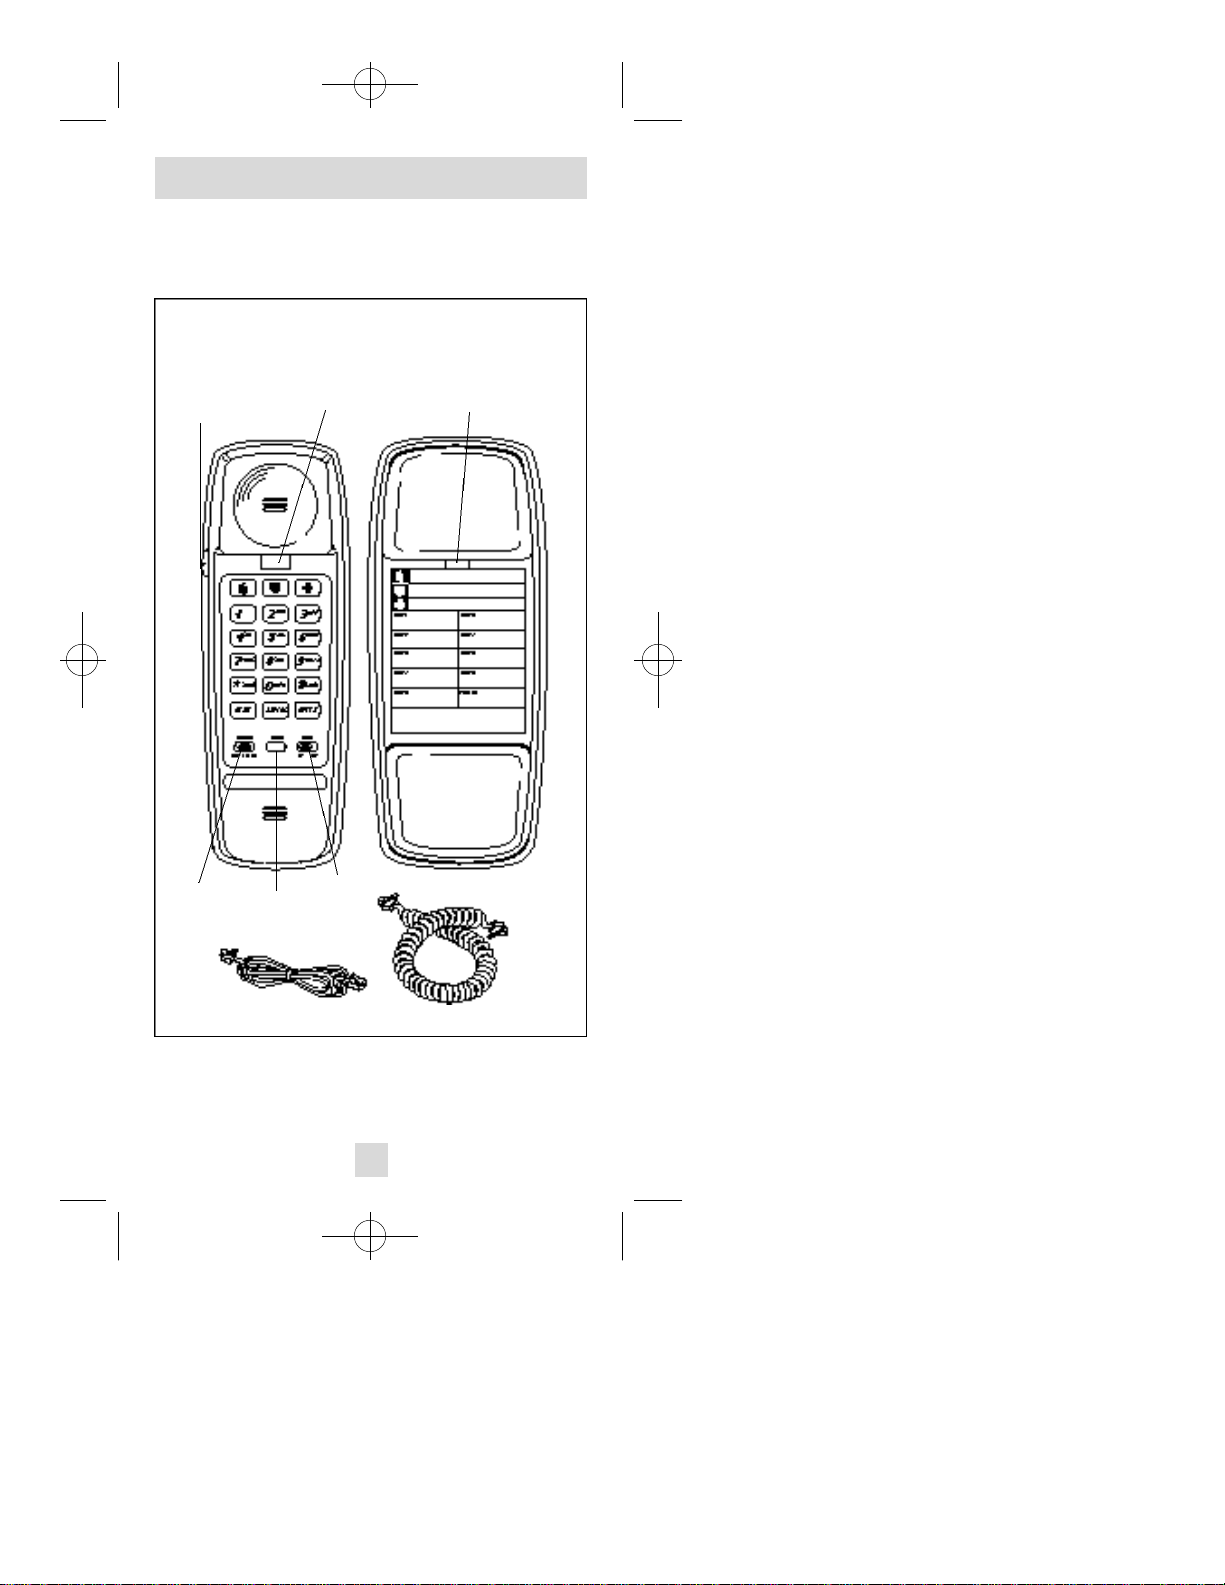
PA RT S C H E C K L I S T
Remember to save your sales receipt in case you ever
need warranty service, and make sure this telephone
package includes the items shown below:
T E L E P H O N E
H A N D S E T
R e c e i v e r
V o l u m e
R i n g e r
V o l u m e
P r o g r a m
S w i t c h h o o k
B u t t o n
T E L E P H O N EB A S E
Handset Tab
D i a l
M o d e
S w i t c h
Coiled handset cord7-foot line cord
1
AT&T 230 Quark pdf 7/22/98 12:13 PM Page 3
TA B L E / D E S K I N S TA L L AT I O N
This telephone includes a 7-foot line cord with a
modular plug on each end. Use this cord to connect
the telephone to a modular jack.
1 . Fill in directory card
Remove the directory card and
write in your own telephone
number. Also write the telephone numbers (or names)
that you want to store in each
memory location.
Reinstall the card and clear
plastic cover.
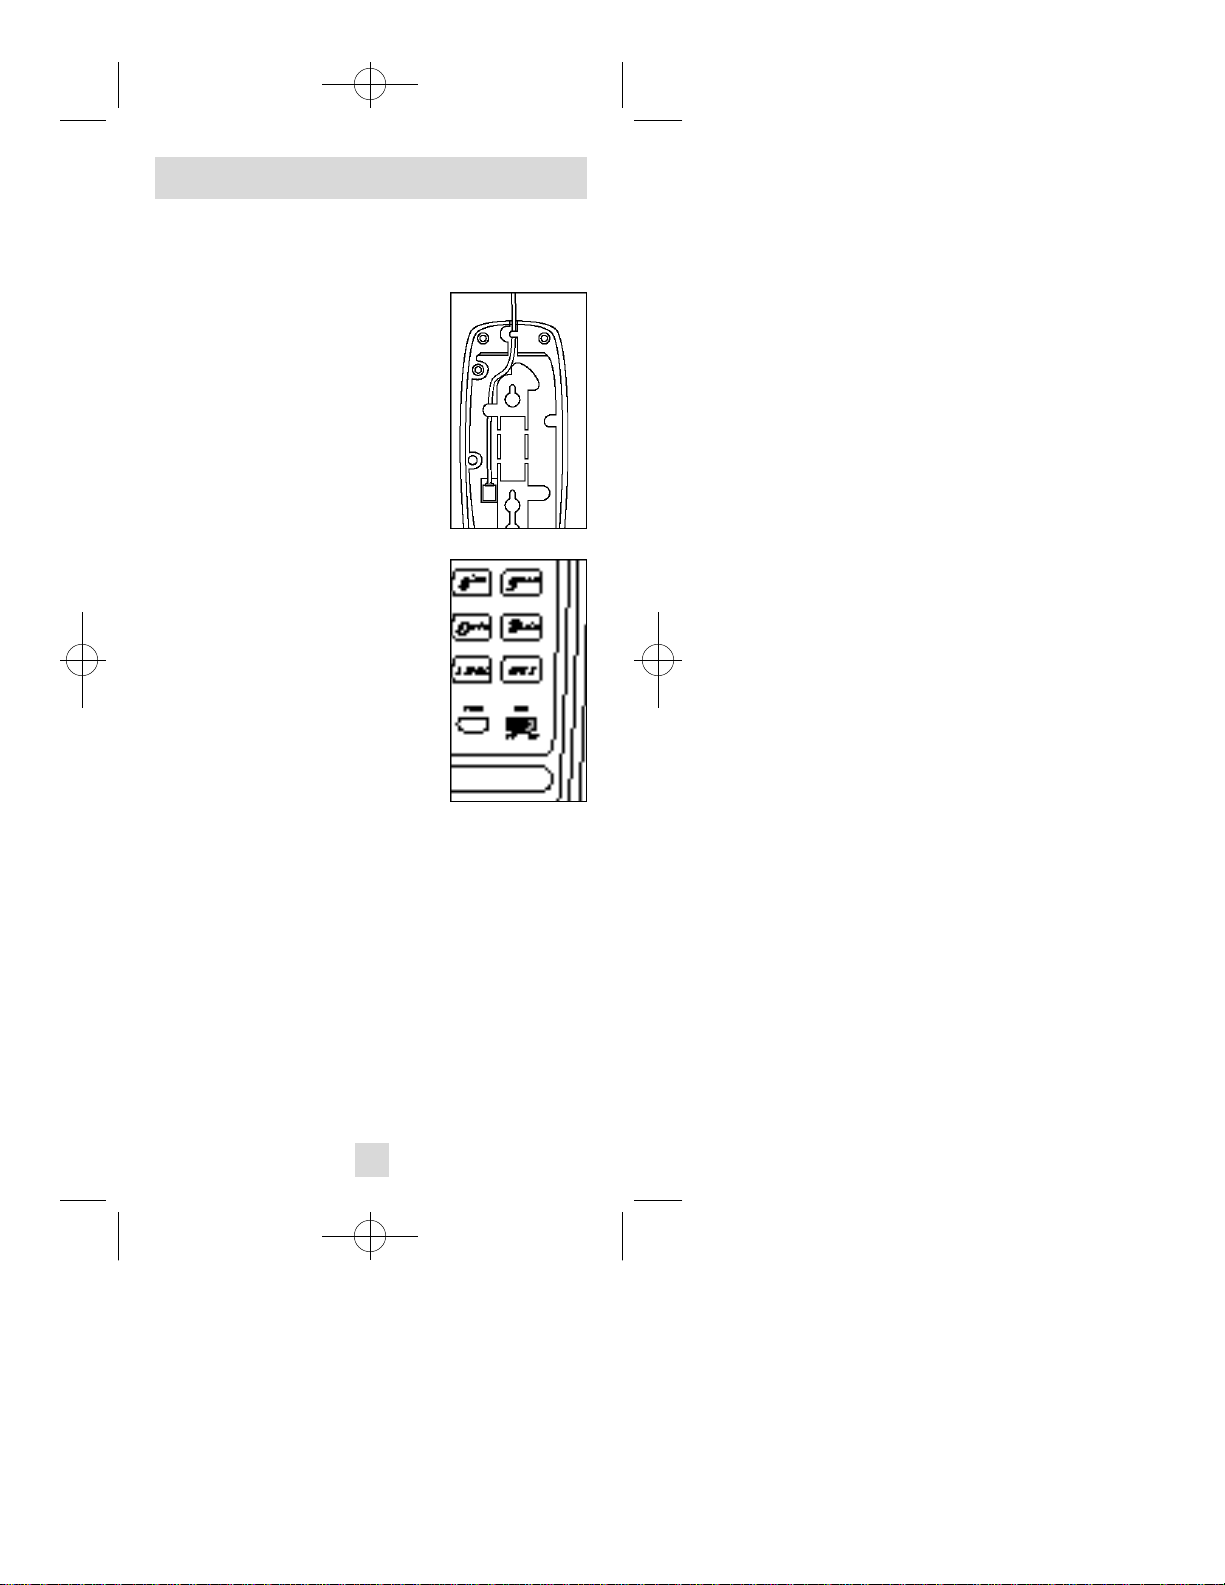
2 . Connect line cord to telephone
Plug the long line cord into the
jack on the underside of the telephone base. Then feed the line
cord through the channel provided so the telephone sits flat
on your table or desk during use
(Figure 1).
3 . Connect line cord to wall jack
Plug free end of
the line cord into a modular
jack. Make sure it snaps firmly
into place.
4 . Set DIAL Mode switch
This product comes set in the
tone (TT) mode. Make sure you choose the
correct dialing method (TT/DP); touch tone dialing will not work if you have dial pulse service.
5 . Connect handset to base
Plug one end of the coiled handset cord into the
handset, and the other end into the base. Then
hang up.
6 . Check for dial tone
Lift the handset and listen for dial tone. If you cannot hear a dial tone, refer to “In Case of Difficulty”
and try to correct the problem.
TO DISCONNECT the telephone, squeeze the
clip on the modular plug and pull it out of the jack.
Figure 1
Figure 2
2
AT&T 230 Quark pdf 7/22/98 12:13 PM Page 4
WA L L I N S TA L L AT I O N
1 . Fill in directory card
Remove the directory card and write in your own
telephone number. Also write the telephone numbers (or names) that you want to store in each
memory location.
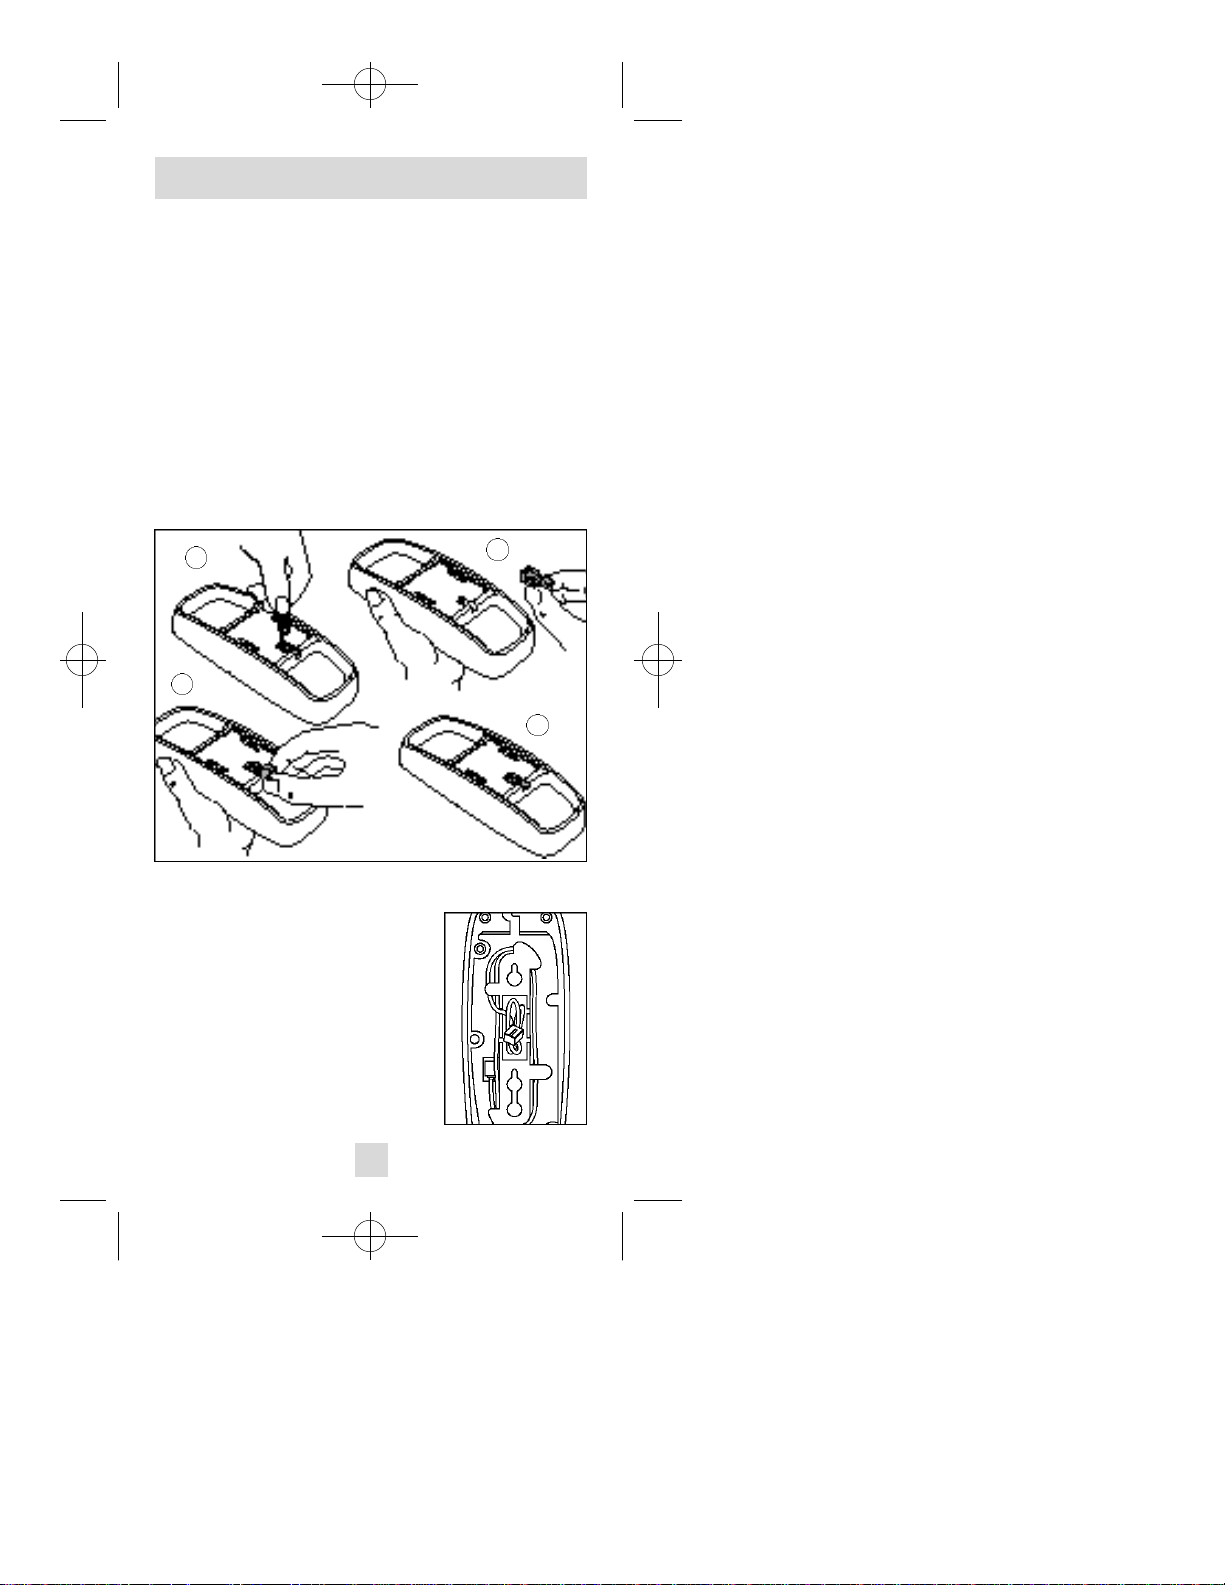
2 . Reverse handset tab
To install the telephone on a wall jack, you must
reverse a small tab beneath the directory card. This
tab holds the handset in place when you hang up.
Remove the directory card and plastic cover. Use
a paper clip to lift and remove the handset tab.
Reverse the tab and reinstall it as shown (Figure
1). Then replace the directory card and cover.
A
C
Figure 1
3 . Plug the line cord into the
jack on the underside of the
base. Feed the line cord into the
channel and wind it around the
mounting area. Feed the last
portion (as short as possible),
through one of the slots in the
mounting area (Figure 2).
( C o n t i n u e d )
B
D
Figure 2
3
 Loading...