

Atomos Connect S2H, Connect H2S User Manual

Atomos Connect
Connect S2H & H2S User Guide
Congratulations on purchasing your Connect
converter and Test Pattern Generator. You
are now the proud owner of an extremely
compact and versatile converter that can
run standalone for up to 10 hours from the
battery supplied – no AC cables required!
Of course, as is our custom at Atomos, we
have included a comprehensive selection
of accessories, including a 9V AC power
adaptor, AC battery charger and a 12V DC
travel adaptor too.
The built-in Test Pattern Generator has
multiple patterns, in both SD and HD, the
latter including 1080p50 and 60 – true 3G
modes. The modes are indicated by coloured
LEDs, which are explained in this QuickStart
Guide. Learn the colour sequences, learn
the modes for fast and easy operation.
www.atomos.com | Sales: sales@atomos.com | Support: support@atomos.com
Atomos Connect. User Manual V1.0 2
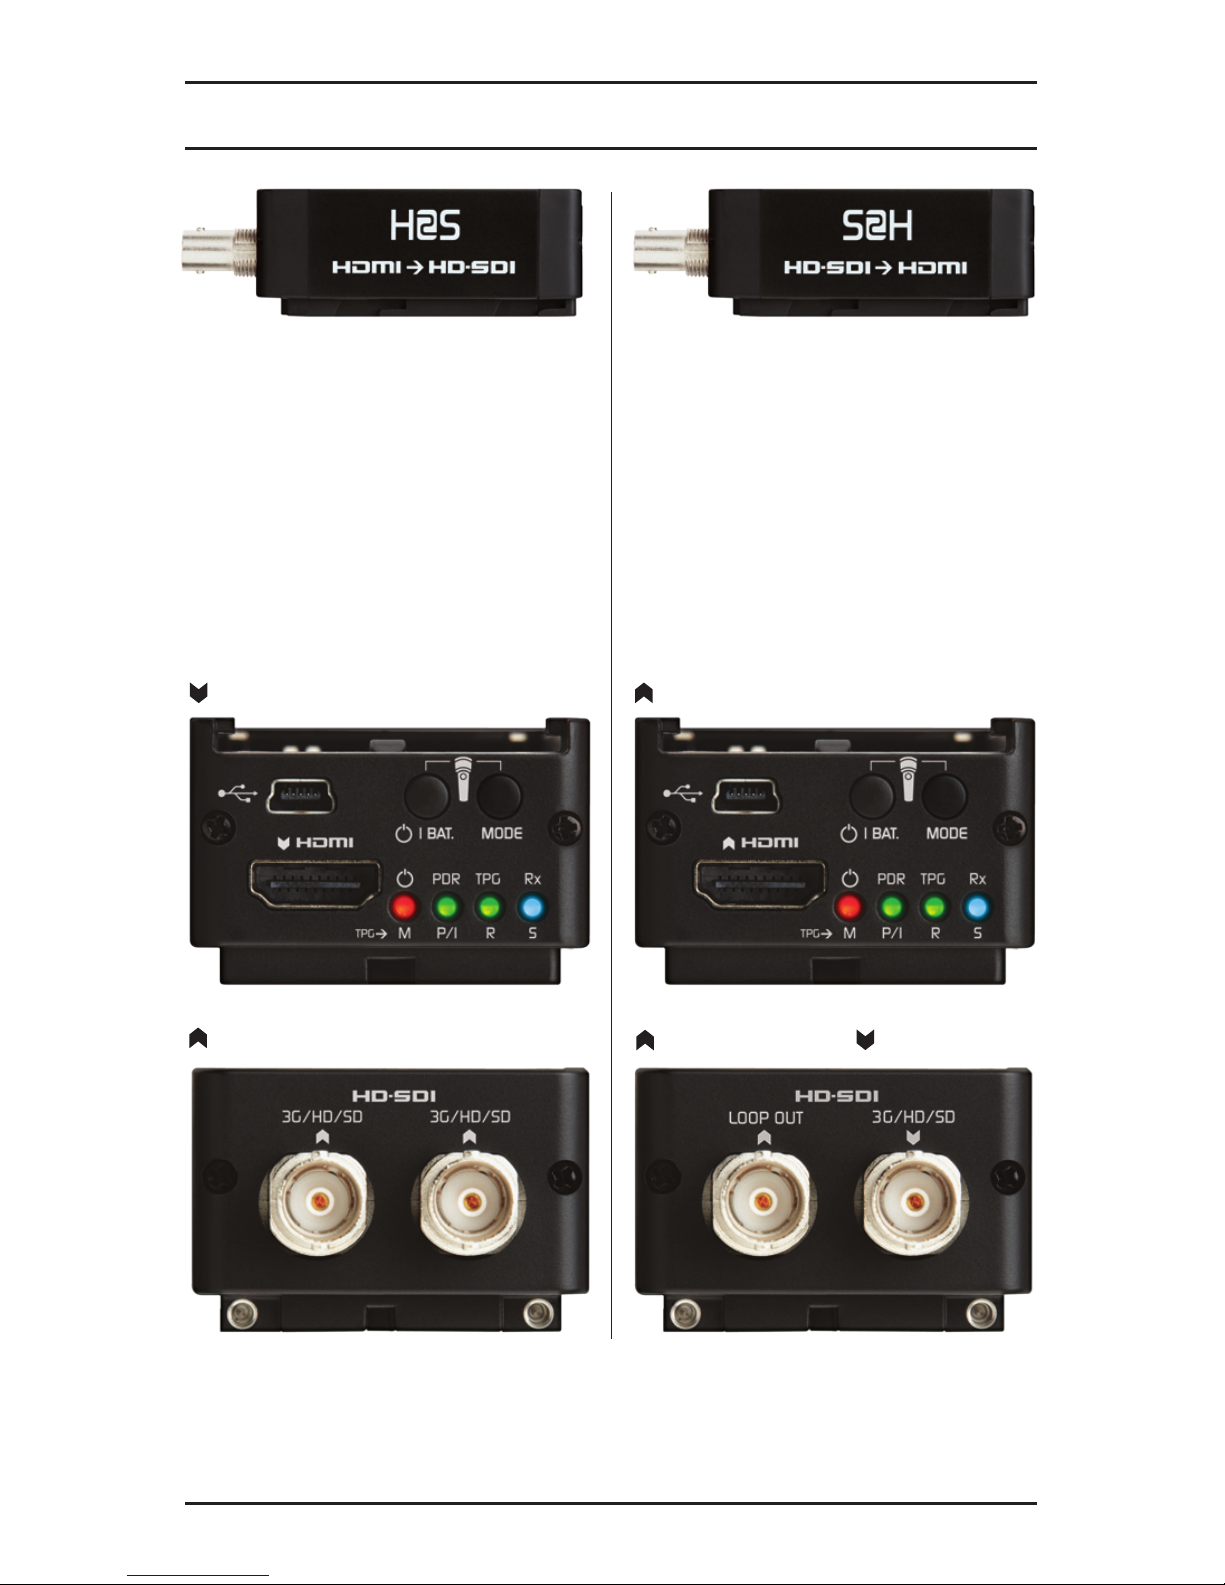
CONNECT H2S
HDMI>HD-SDI
(Part No. ATOMH2S001)
Connect H2S
9V AC Adaptor
12V DC Travel Adaptor
NP Series Battery
AC Battery Charger
CONNECT S2H
HD-SDI>HDMI
(Part No. ATOMS2H001)
Connect S2H
9V AC Adaptor
12V DC Travel Adaptor
NP Series Battery
AC Battery Charger
NOTE:
This User Guide pertains to both Connect units. Each Connect box contains 1 converter only.
What’s in the box
HDMI IN
2 x HD-SDI OUT/TPG OUT
LOOP OUT/TPG OUT HD-SDI IN
HDMI OUT/TPG OUT
Atomos Connect. User Manual V1.0 3
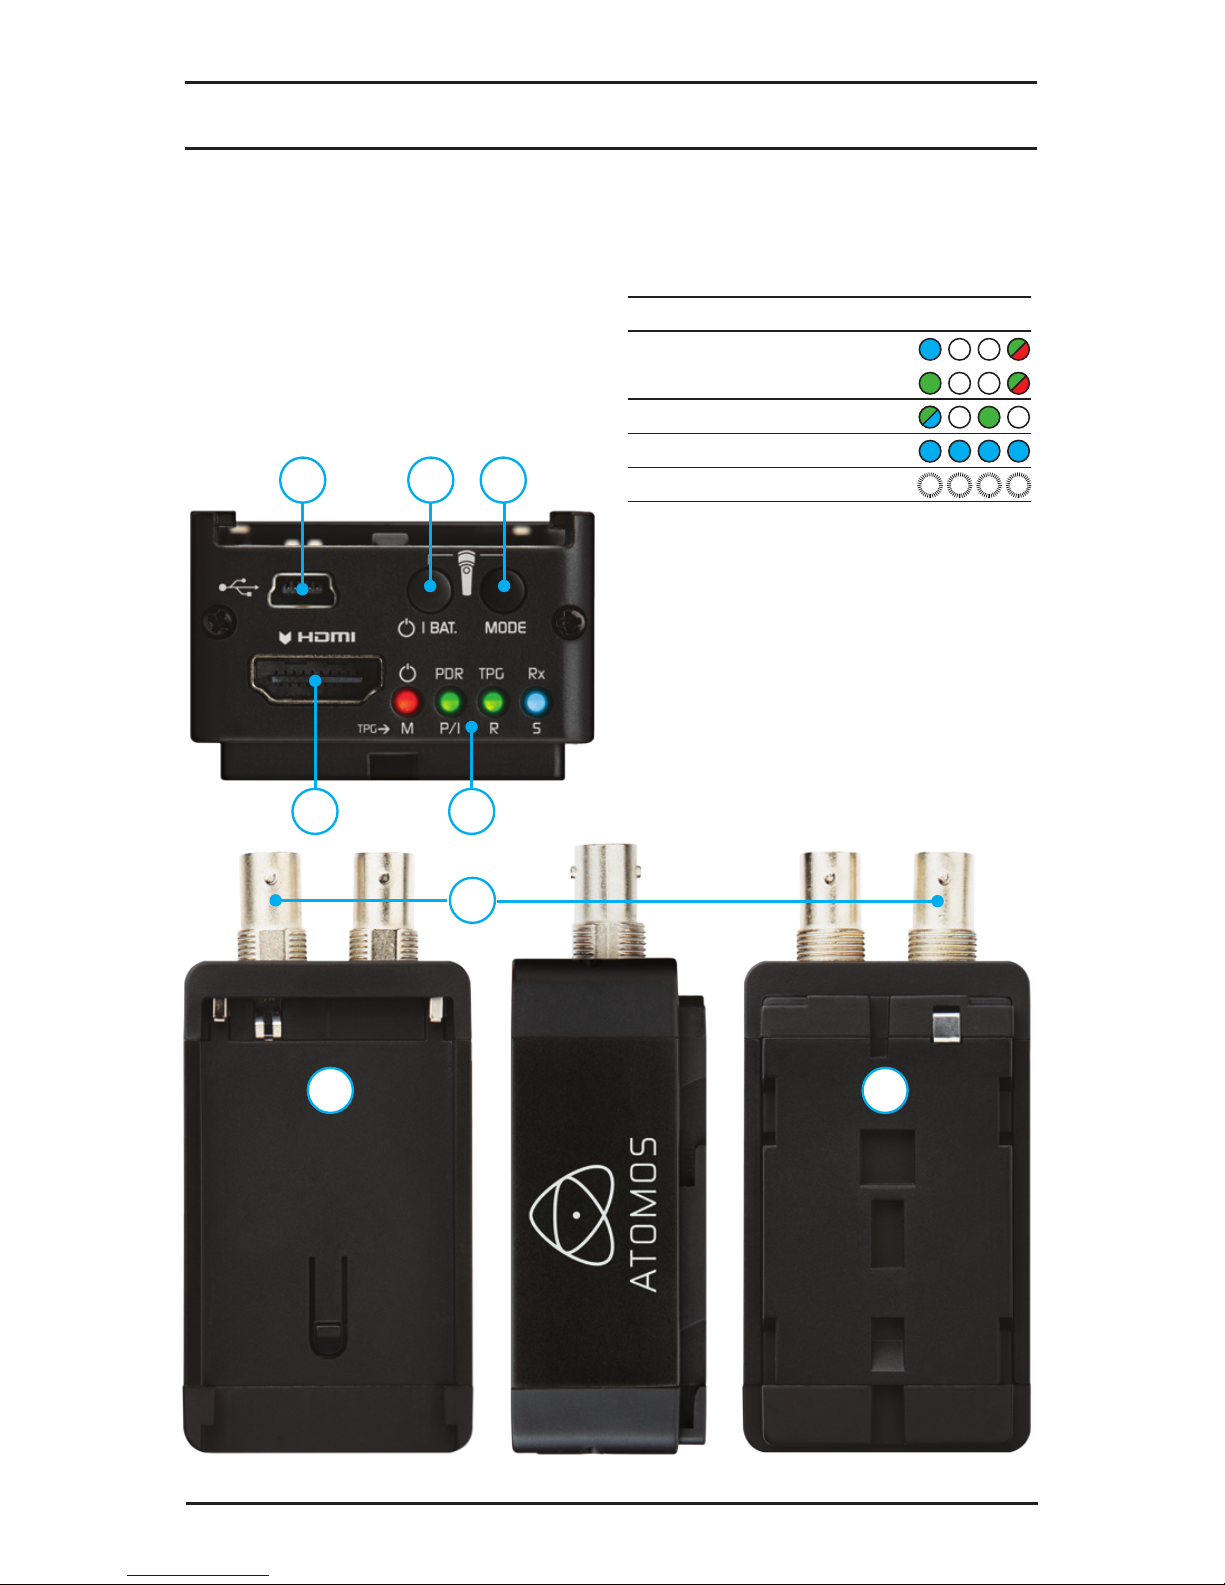
1. POWER/BATTERY
2. MODE
3. USB port (Firmware updates only)
4. HDMI port (H2S in / S2H out)
5. LED DISPLAY
6. SDI CONNECTOR
7. BATTERY TOP
8. BATTERY SHOE
LED INDICATOR OVERVIEW
There are 4 modes of operation indicated
by LEDs.
MODE LED COLOUR
CONVERTER MODE (ext. bat.)
(int. bat)
TPG MODE
PRECISE BATTERY LEVEL
FLASHLIGHT MODE
LED LABELS
PDR Pulldown Removal
TPG Test Pattern Generator
Rx Conversion Input Status
TPG> (TEST PATTERN MODE)
M Mode
P/I Progressive/Interlaced
R Rate
S Scan
Unit description
1 23
4 5
6
7 8
Atomos Connect. User Manual V1.0 4
Getting started
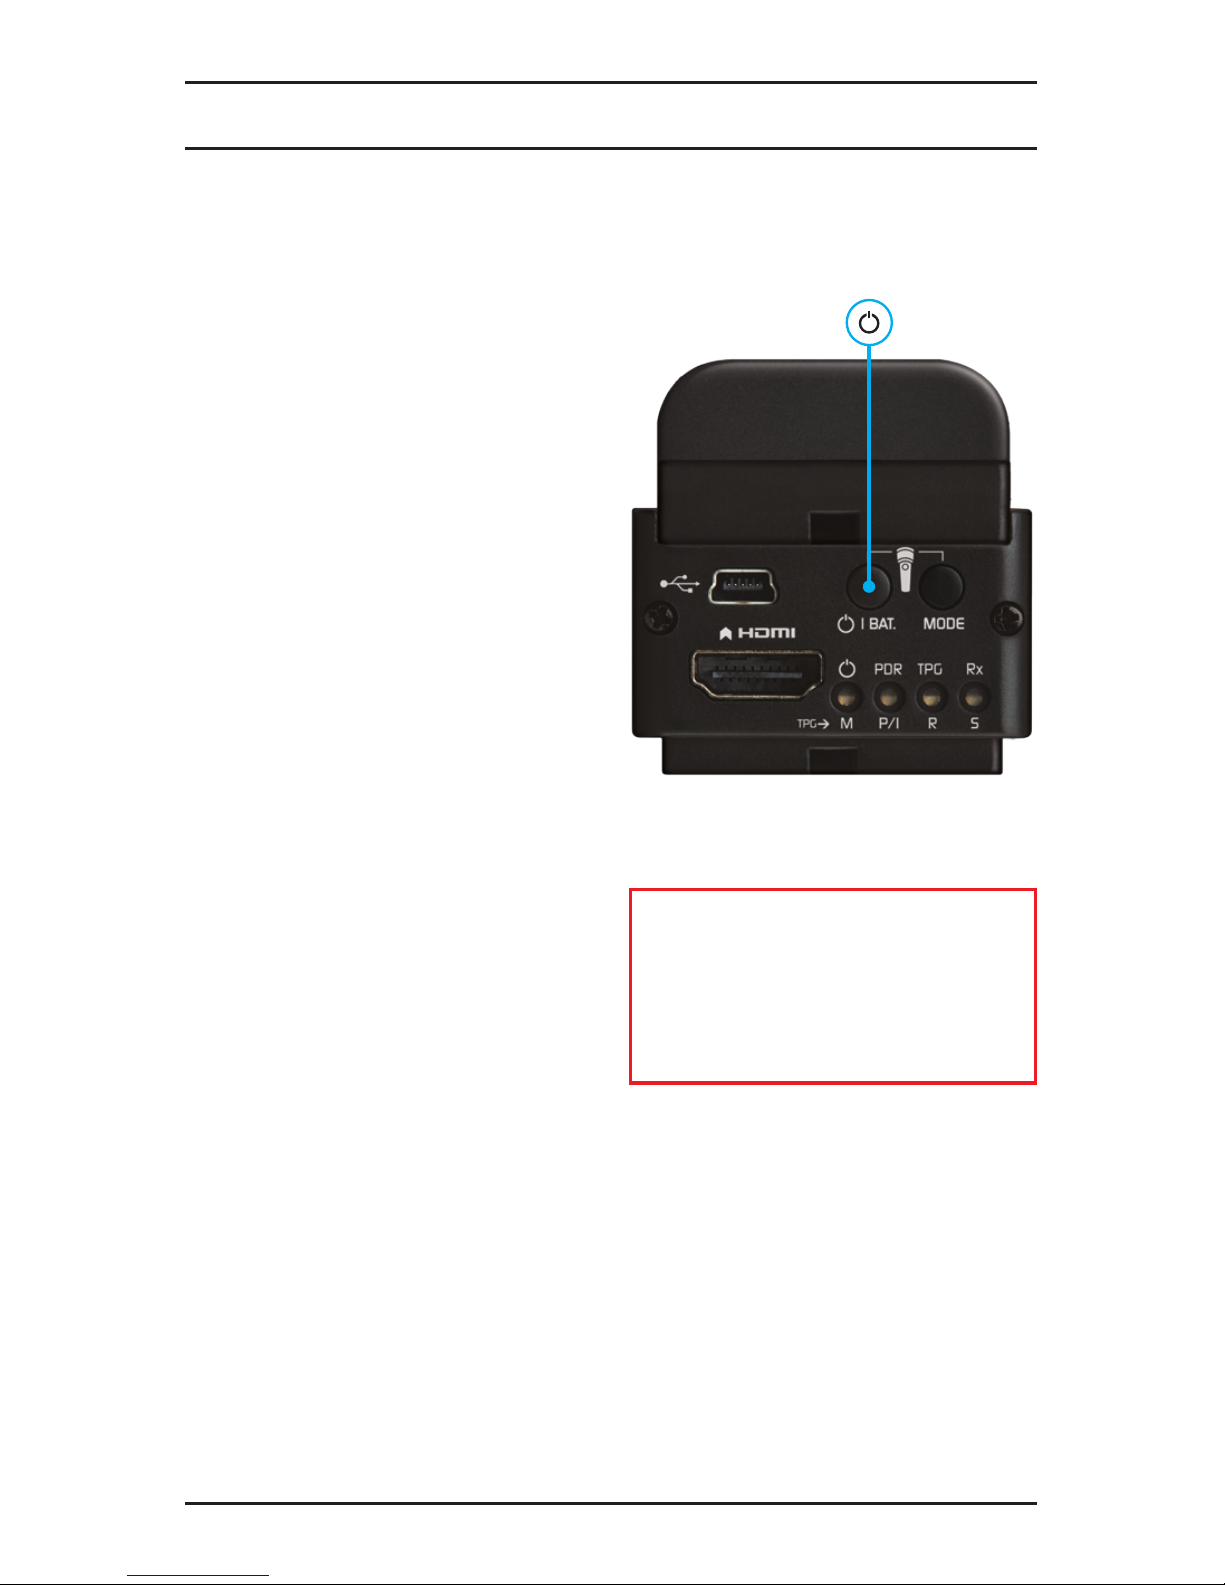
CHARGING BATTERIES
We recommend that you charge new
batteries before using them.
To charge the external battery supplied,
place onto the supplied charger and charge
until the light turns from RED to GREEN.
To charge the internal battery, place the
supplied AC mains adaptor OR an external
battery on to the Connect. Full internal
battery charge is indicated by 4 BLUE LEDs
after pressing the PWR/BAT button.
NOTE: The battery level indicated by
pressing the PWR/BAT button will always
be the current active battery. If an external
battery or AC mains power supply is
attached, the external battery/AC mains
level will be indicated when PWR/BAT is
pressed. If no external battery is present,
the internal battery level will be indicated
when PWR/BAT is pressed.
POWER UP
Turn on by pressing the PWR/BAT button and
the unit will power up ready for operation.
Turn off by pressing & holding PWR/BAT
button for more than 3 seconds.
NOTE: Connect Converters utilise the
aluminium side panels to dissipate heat.
Do not be alarmed if the sides of the
product are warm or hot to touch, this is
deliberate and normal heat dissipation
operation.
 Loading...