

Atlantic Furniture AR288841, AR288854, AR288821, AR288822, AR288824 Assembly Guide
...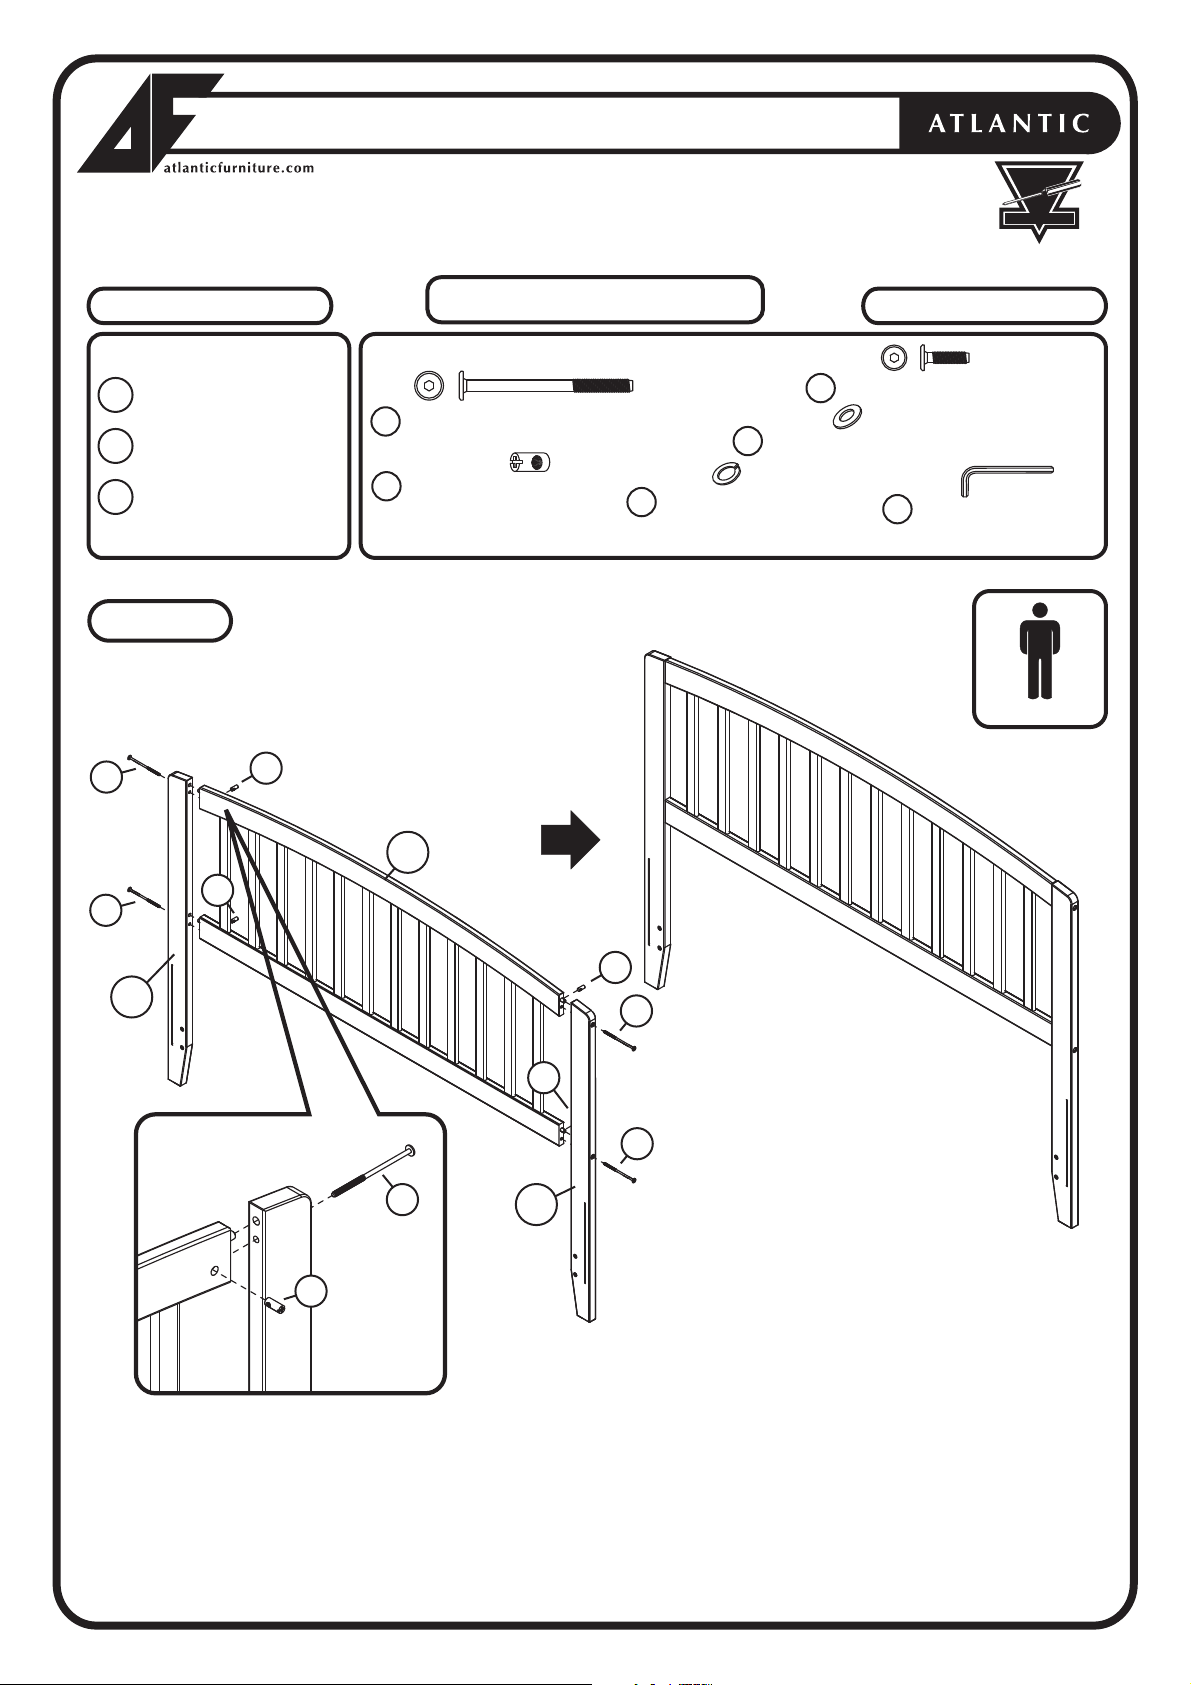
RICHMOND HEADBOARD
ASSEMBLY INSTRUCTIONS
Before assembling your Headboard, please read through these
instructions carefully and familiarize yourself with the different parts.
ATTENTION! If you receive a damaged or defective item,
please contact Atlantic Furniture at service@atlanticfurniture.com 1-800-955-3726 / M-F 9:00-5:00 EST
PARTS LIST HARDWARE
HEADBOARD PANEL
1
LEFT LEG
2
3
RIGHT LEG
NOTE: WE INCLUDE SPARE HARDWARE IN CASE THE ALLEN WRENCH, JCB, BARREL NUT, SPLIT, OR FLAT WASHER ARE DAMAGED DURING ASSEMBLY.
Step 1
Attach the legs (2) and (3) to headboard panel (1),
using JCB (A) and barrel nut (B).
Tighten with the Allen wrench (F).
1 PC
1 PC
1 PC
A
B
Instructions apply for all bed sizes
TWIN > FULL > QUEEN > KING
JCB M6 X 120mm (4 3/4”) - 4 pcs
Spare - 1 pc
Barrel Nut - 4 pcs
Spare - 1 pc
Split Washer - 4 pcs
E
C
Flat Washer - 4 pcs
D
Spare - 1 pc
Spare - 1 pc
JCB M6 X 25mm (1”) - 4 pcs
Allen Wrench - 1pc
F
READY
TO
ASSEMBLE
Spare - 1 pc
Spare - 1pc
Adult Assembly
A
A
2
B
BACK VIEW
B
B
A
1
B
A
B
A
3
Richmond Headboard & Bed
Congratulations!
Your Richmond Headboard is now ready to assembe.
To ensure lasting safety, we recommend that you periodically check
that all screws are tight and all parts are secure.
Page 1 of 5
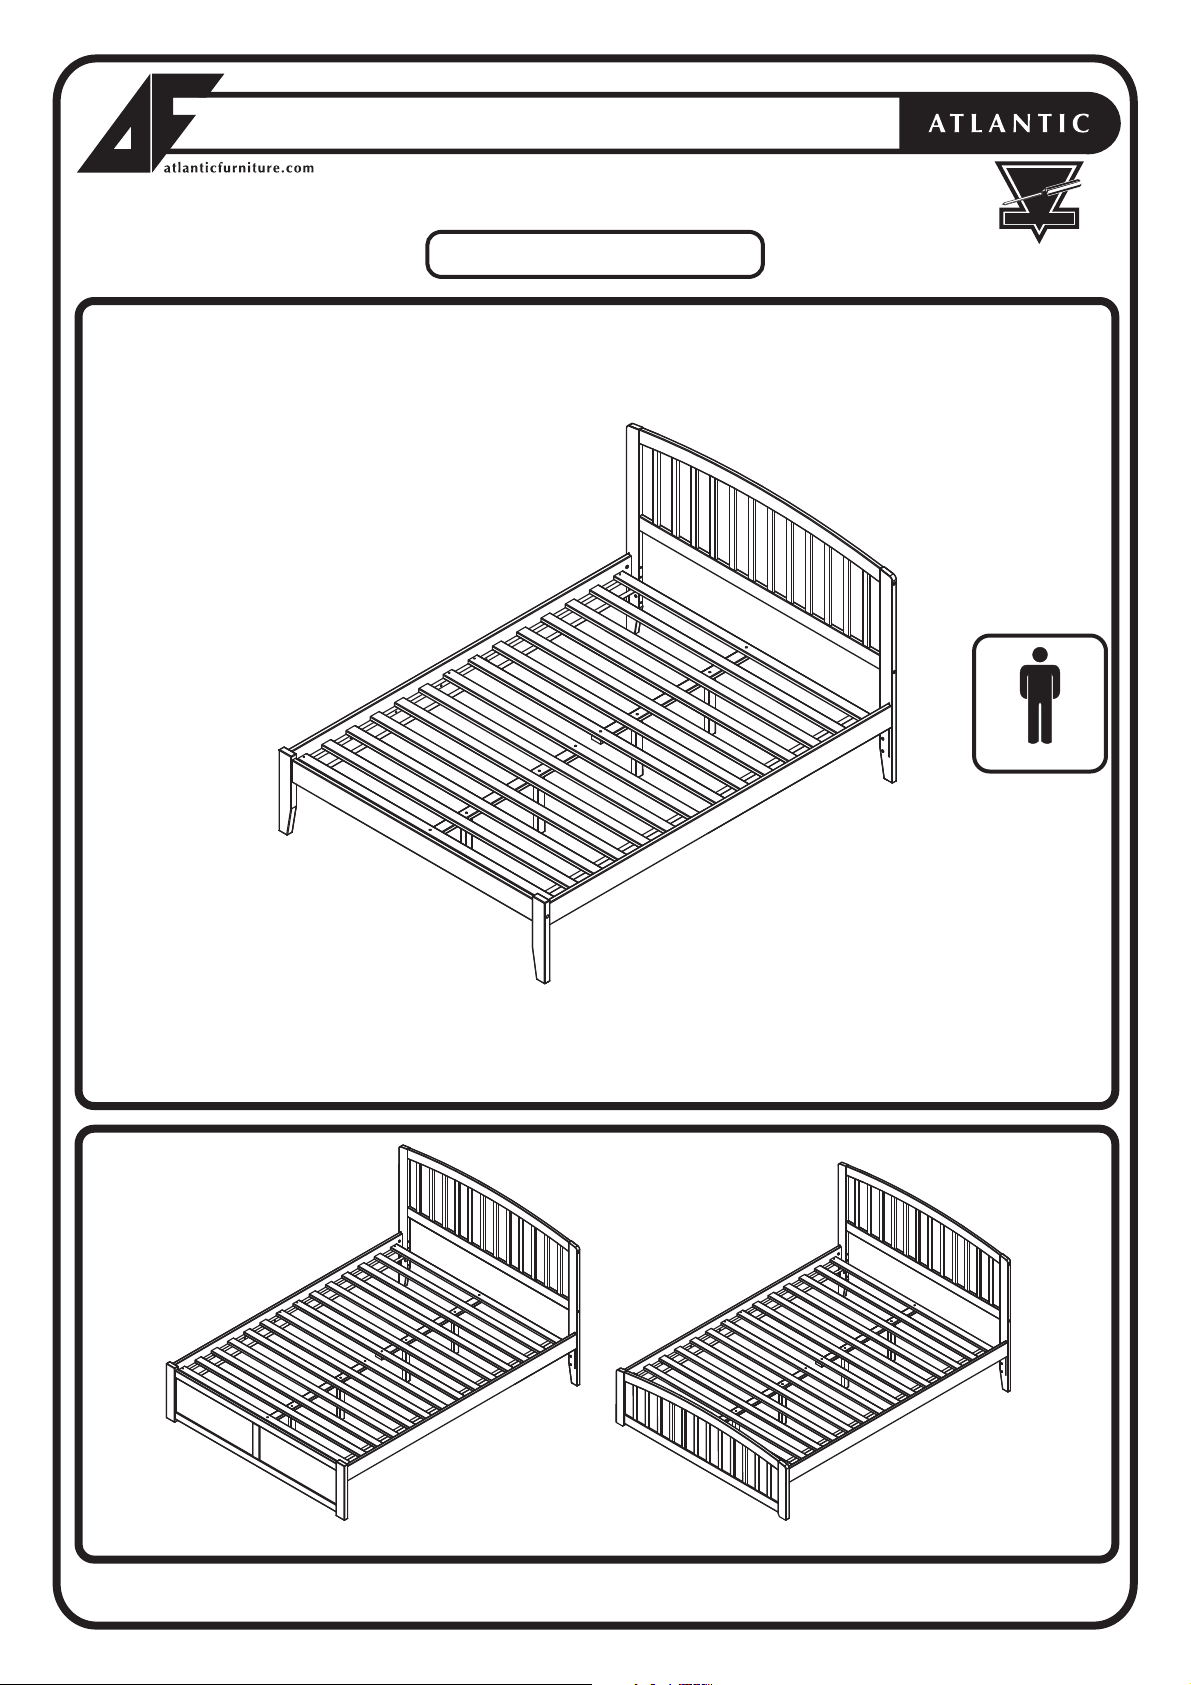
RICHMOND BED
ASSEMBLY INSTRUCTIONS
Before assembling your Headboard, please read through these
instructions carefully and familiarize yourself with the different parts.
Instructions apply for all bed sizes
TWIN > FULL > QUEEN > KING
BED SHOWN WITH OPEN FOOTRAIL
READY
TO
ASSEMBLE
Adult Assembly
BED SHOWN WITH FLAT PANEL FOOTBOARD BED SHOWN WITH MATCHING FOOTBOARD
Richmond Headboard & Bed
Page 2 of 5
 Loading...