

Atkins AquaTuff351, AquaTuff352, AquaTuff353 User Manual
Digital Thermocouple Thermometer
Warranty and User Guide
Cooper-Atkins Corporation
33 Reeds Gap Road
Middlefield, CT 06455-0450 U.S.A
Telephone: 800-835-5011
Fax: 860-347-5135
info@cooper-atkins.com • www.cooper-atkins.com
AquaTuff™
351
AquaTuff™
352
AquaTuff™
353
®
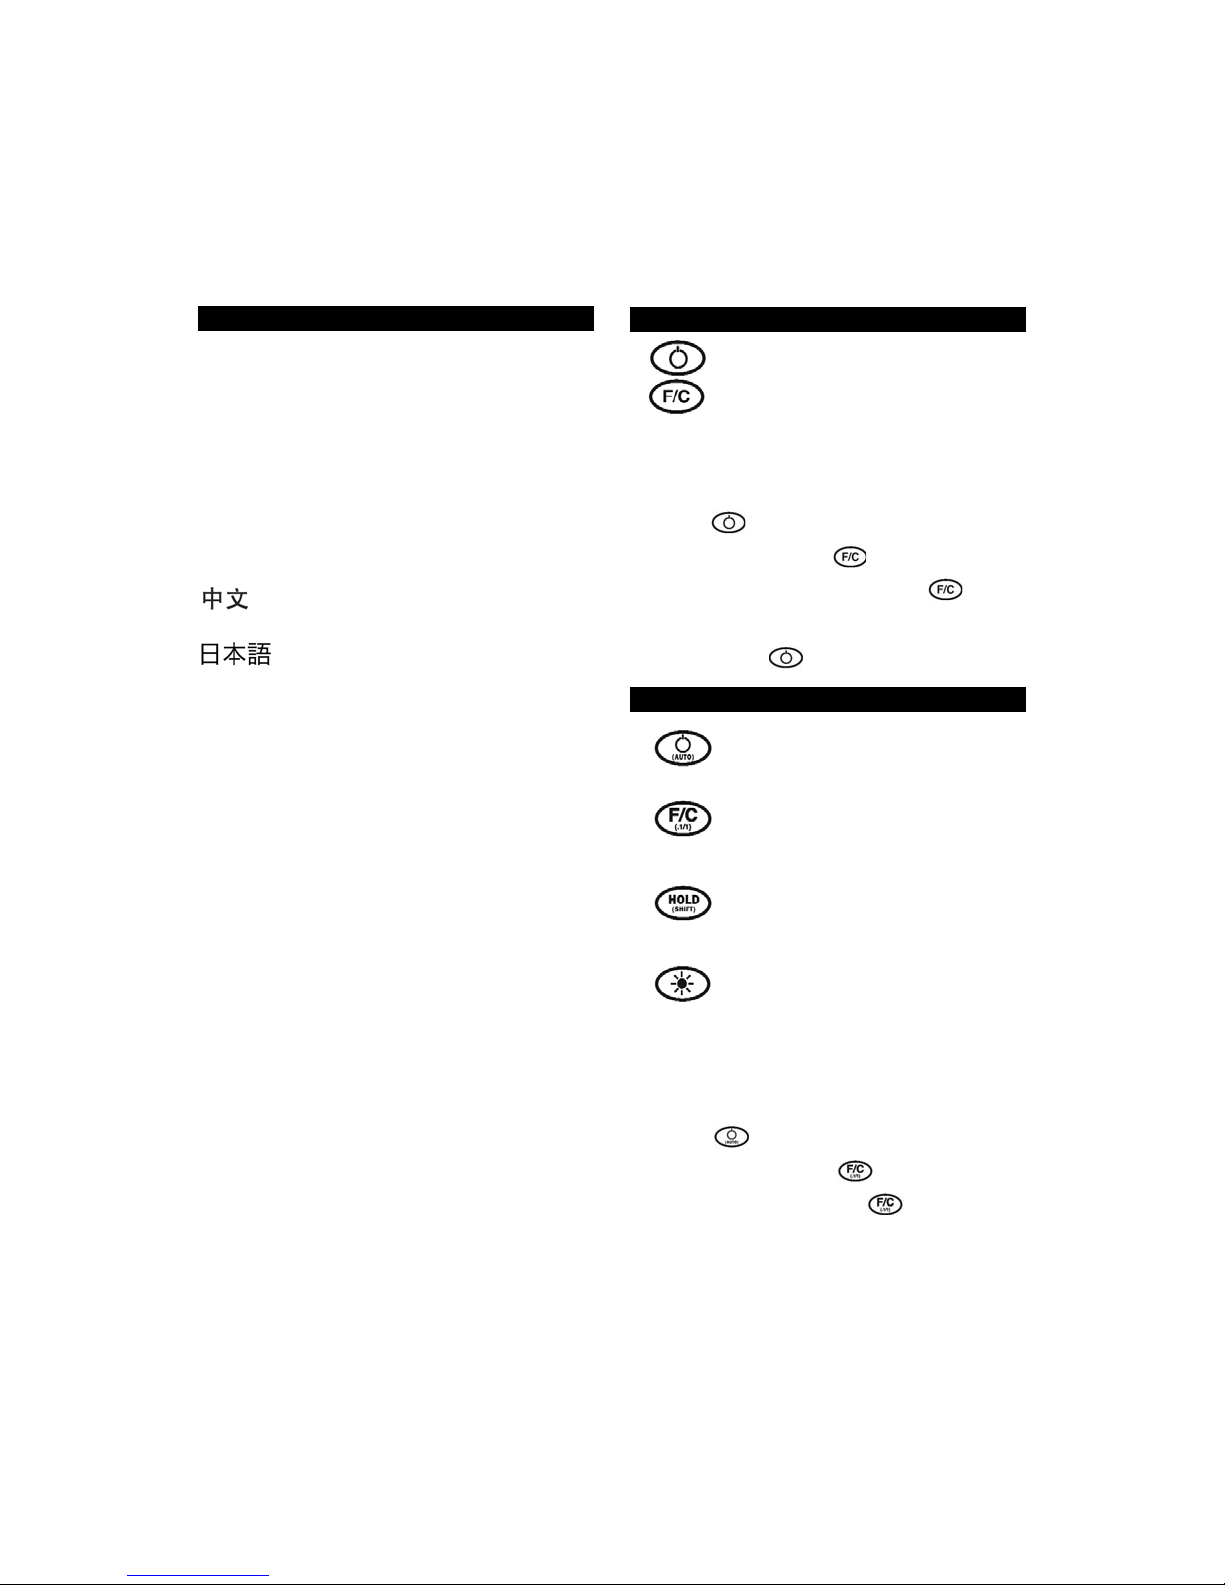
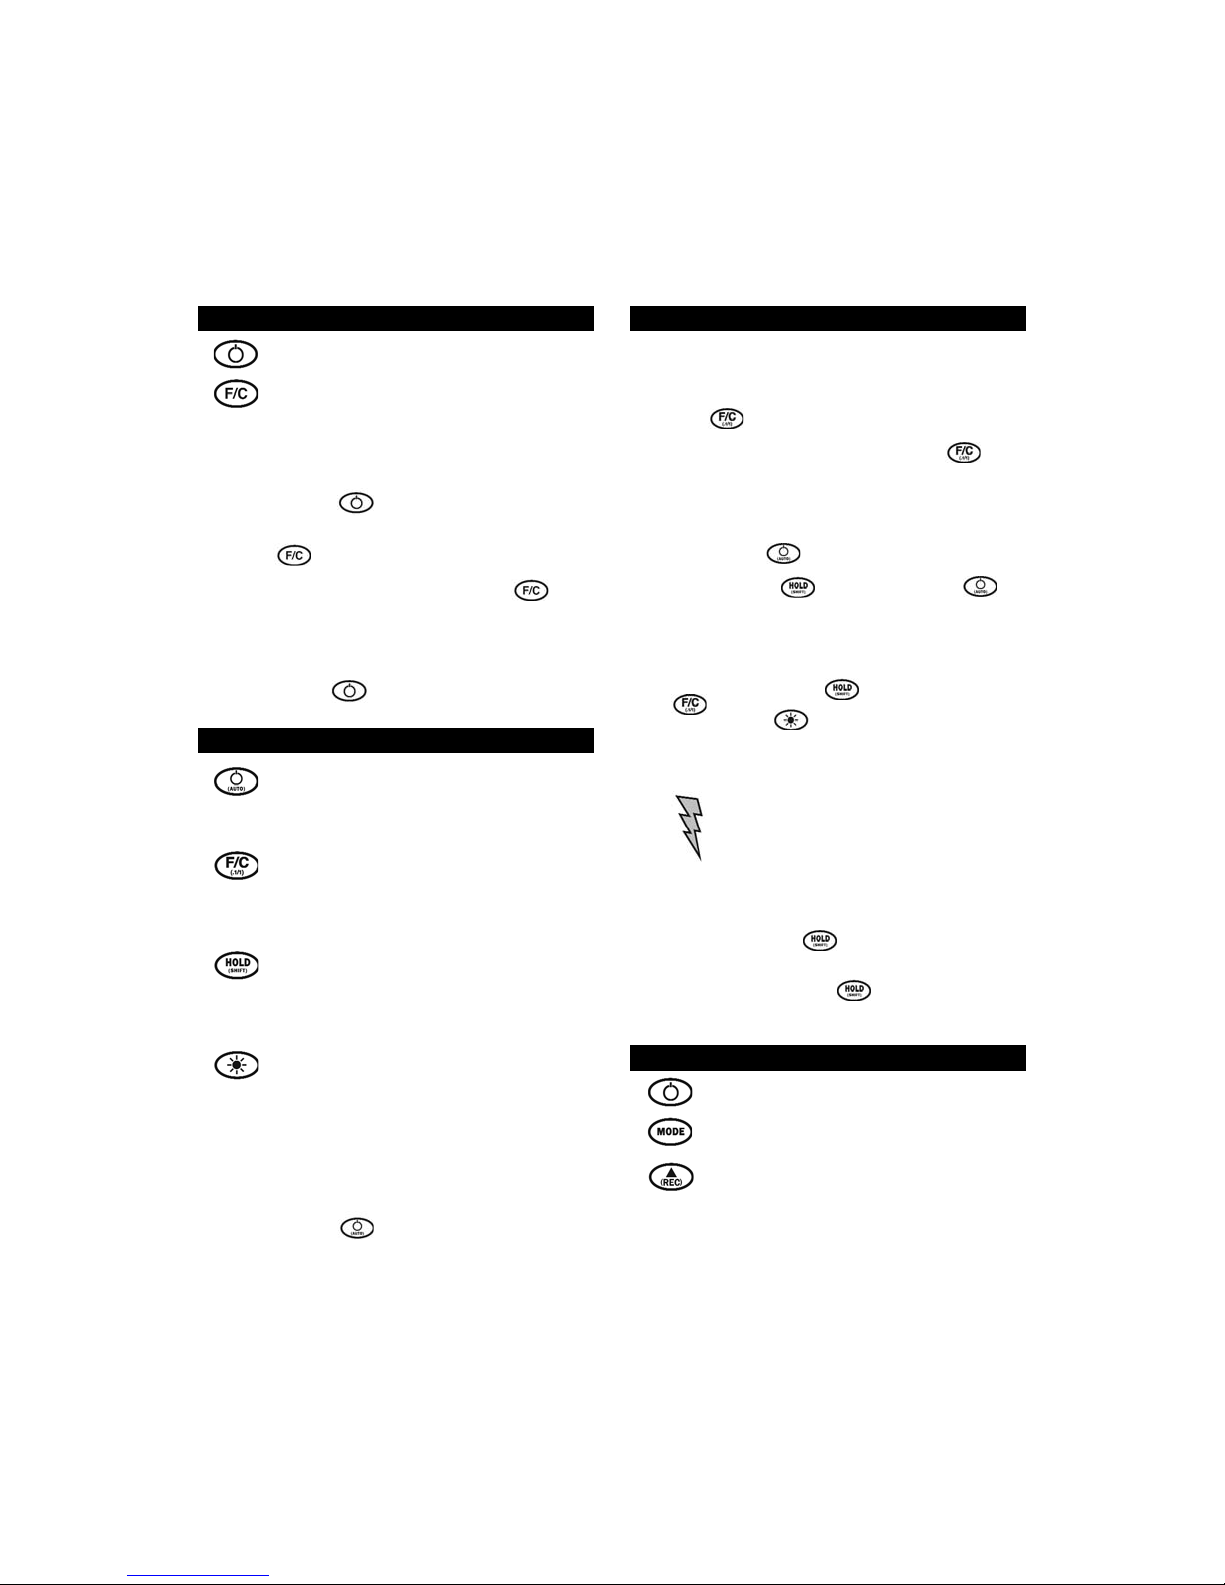
Press to turn instrument ON or OFF.
Press to select Fahrenheit or Celsius
temperature scale.
OPERATION:
1) Observing correct polarity, insert Type K
thermocouple probe into connector on top of
instrument.
2) Press key to turn instrument on.
3) Default temperature scale is Fahrenheit. To change
temperature scale, press key.
(NOTE: Display
will toggle between “F” and “C” icons on right
side of display with each press of the key).
4) The instrument has an auto-off feature that will turn
off unit after 10 minutes of non-keypad activity to
conserve battery life. To manually turn instrument off,
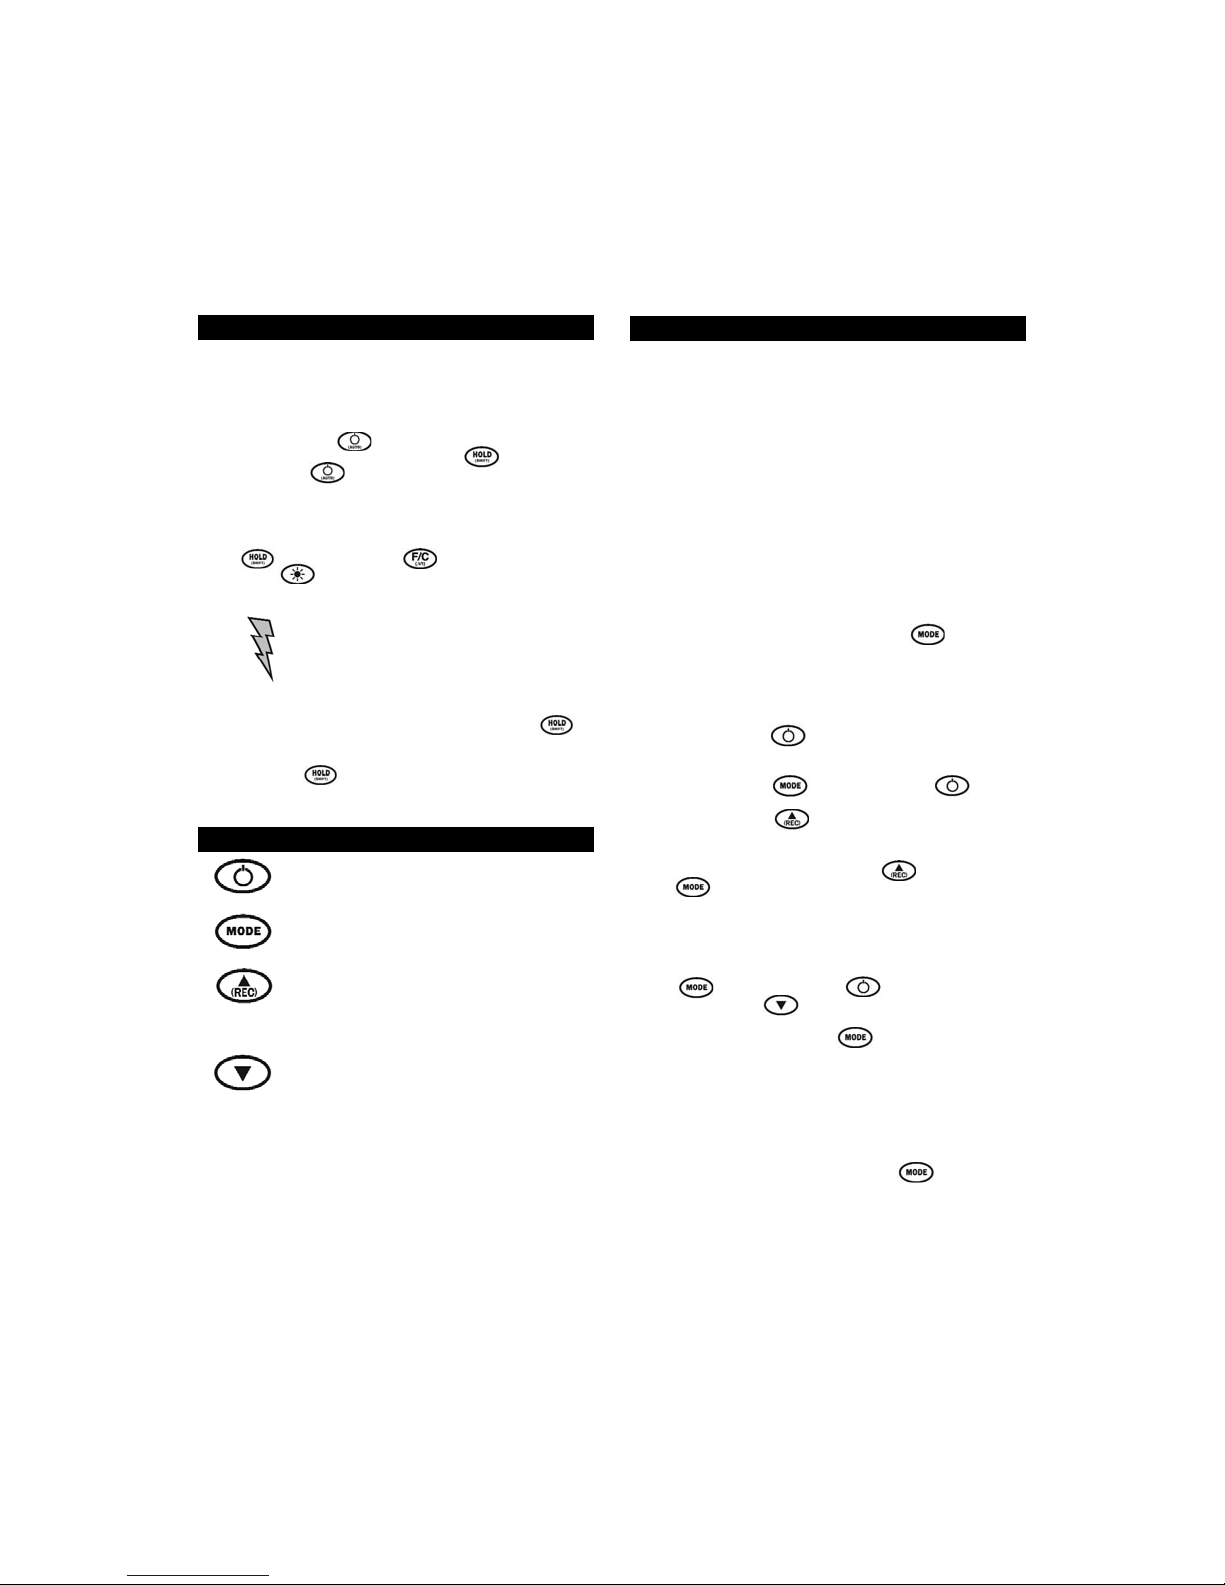
press and hold key momentarily.
23
AquaTuff™ 352 THERMOMETER
Press to turn instrument ON or OFF. When
used in combination with SHIFT key, enables
or disables AUTO-OFF feature.
Press to select FAHRENHEIT or CELSIUS
temperature scale. When used in
combination with SHIFT key, selects tenth
degree or whole degree resolution.
Press to “FREEZE” current temperature
reading on display. SHIFT function provides
secondary user settings with other keys as
noted.
Press to turn on BACKLIGHT for viewing
temperatures in low lighting conditions.
When pressed, BACKLIGHT will remain on
for 5 seconds.
OPERATION:
1) Observing correct polarity, insert Type K
thermocouple probe into connector on top of
instrument.
2) Press key to turn instrument on.
3) Default temperature scale is Fahrenheit. To change
temperature scale, press key.
(NOTE: Display
will toggle between “F” and “C” icons on right side of
display with each press of the key).
TABLE OF CONTENTS
English..........................................3-9
Español.....................................10-17
Français....................................18-25
Deutsch.................................... 26-33
..................................................34-40
..................................................41-47
Manufactured in the U.S.A. by Cooper-Atkins Corporation
An ISO 9001 Registered Facility
33 Reeds Gap Road
Middlefield, CT 06455-0450 U.S.A
CUSTOMER SERVICE: 800-835-5011 FAX: 860-347-5135
Email: info@cooper-atkins.com • Website: www.cooper-atkins.com
27-958550B
AquaTuff™ 351 THERMOMETER
OVERVIEW - Continued
In STANDARD TEMPERATURE MODE, the instrument
functions like a normal thermometer. In ITS™ Mode, the
instrument operates with the Intelligent Temperature
Stabilization™ feature. The 353 series instrument has a
unique feature to display temperature of item being
measured when the temperature has reached its final
stabilized temperature. The purpose of this feature is to
assist the user in determining when the final stabilized
temperature has been reached.The ITS feature is
dynamic, in that it operates continuously in real time. It
can be used in ITS Mode with the option of recording
stabilized temperature readings or simply as a
thermometer with ITS functionality. The MEMORY MODE
is for viewing ITS temperature data stored in memory
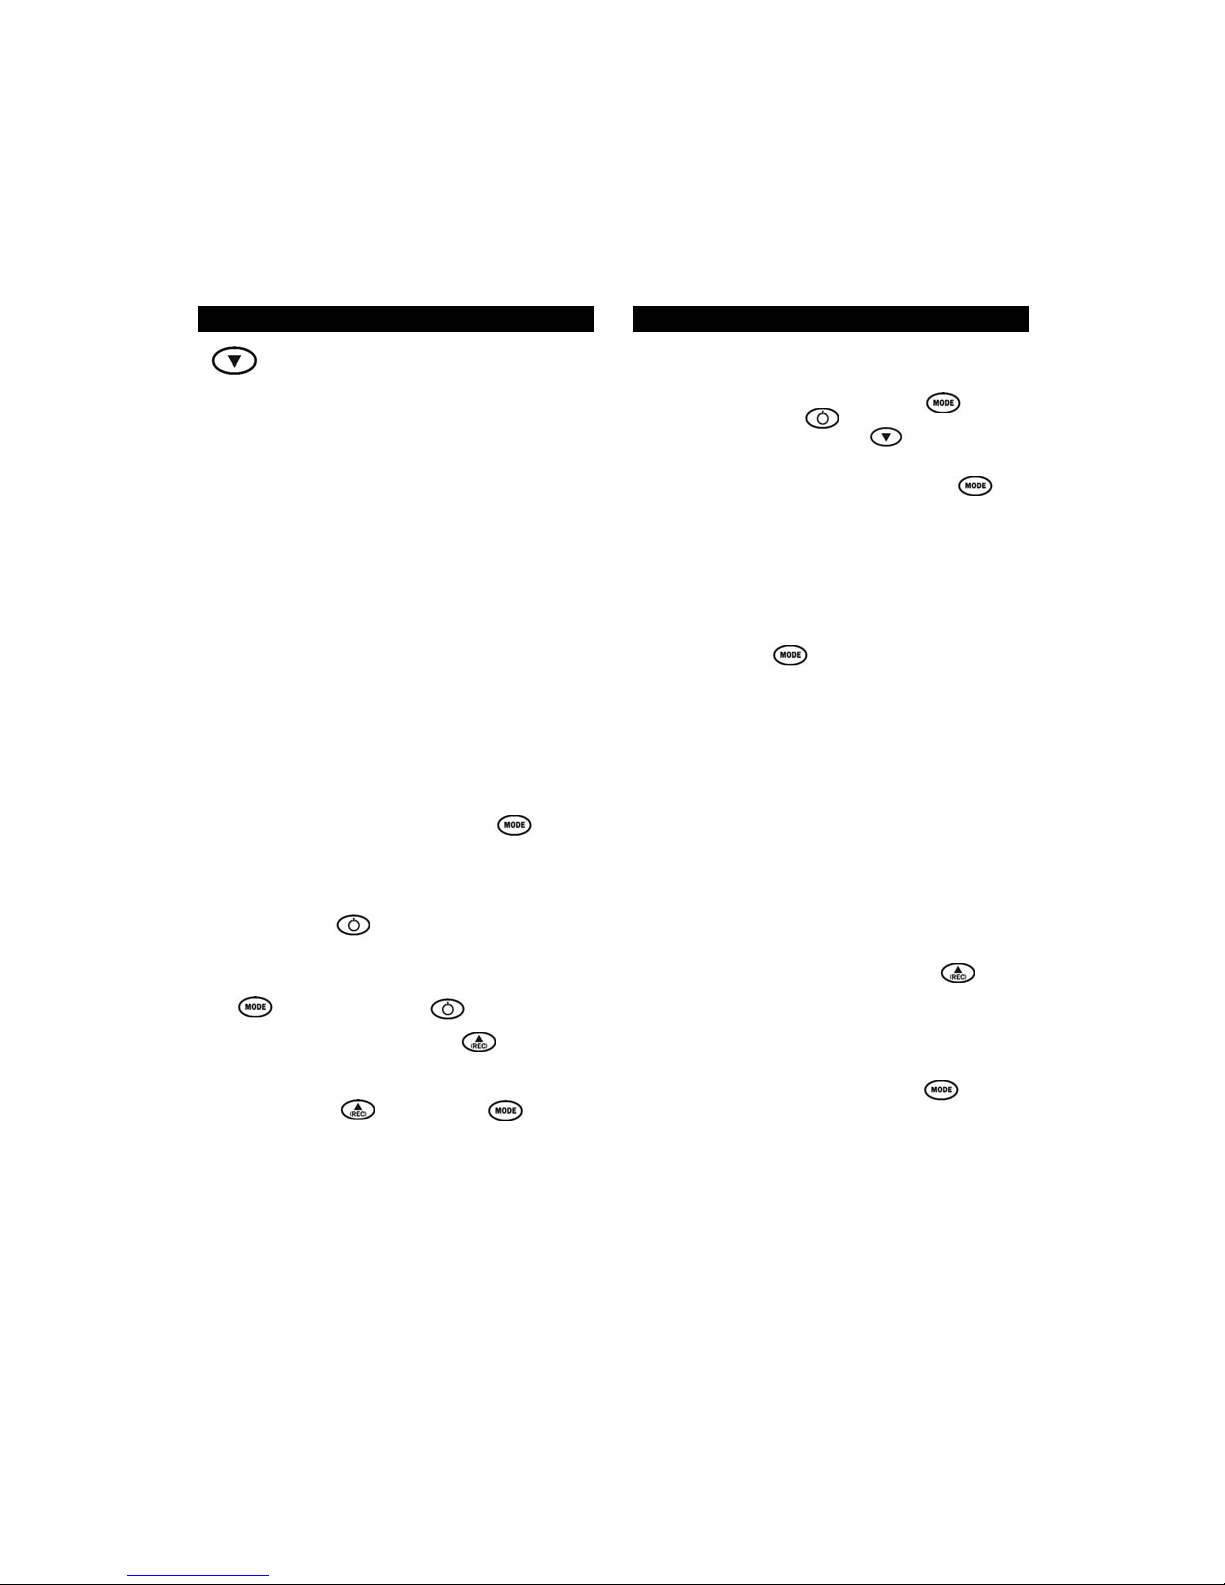
and you can scroll in both directions. The key
easily allows the user to select desired mode of
operation.
STANDARD TEMPERATURE MODE:
1) Press ON/OFF key to turn instrument ON/OFF.
2) Default temperature scale is Fahrenheit. To change
temperature scale, with instrument turned OFF,
press and hold key and then press key
to enter USER MODE
(NOTE: Display will show
“USEr”)
. Press key to switch between
Fahrenheit and Celsius
(NOTE: Display will toggle
between “F” and “C” icons on right side of
display with each press of the key).
Press
key to exit USER MODE to use instrument in
STANDARD TEMPERATURE MODE.
3) The instrument has an auto-off feature that will turn
off unit after 10 minutes of non-keypad activity to
conserve battery life. To disable auto-off feature, with
instrument turned OFF, press and hold the MODE
key and then press key to enter USER
MODE. Press key to enable or disable auto-off
feature. When active, the AUTO icon appears at the
top of LCD display. Press key to exit USER
MODE to use instrument in STANDARD
TEMPERATURE MODE.
ITS MODE (Intelligent Temperature Stabilization™):
1) To use ITS MODE, press to turn instrument ON. On
power up, the instrument is placed in STANDARD
TEMPERATURE MODE. Press the key to
select and activate the ITS function. The ITS icon will
appear at the top of the LCD when ITS MODE is
selected.
4) The instrument has an auto-off feature that will turn
off unit after 10 minutes of non-keypad activity to
conserve battery life. To manually turn instrument off,
press and hold key momentarily. To disable
AUTO-OFF feature, press and hold key and
then press key.
(NOTE: “AUTO” icon at top
of display will appear when AUTO-OFF feature is
active).
5) The resolution default setting is tenth degree. To
change resolution to whole degree, press and hold
key and then press key.
6) Press key to turn on backlight. When pressed,
the backlight will remain on for 5 seconds and
automatically turn off.
NOTE: USE OF BACKLIGHT WILL
SIGNIFICANTLY DECREASE BATTERY
LIFE DUE TO INCREASED POWER
REQUIRED FOR BACKLIGHT OPERATION
7) The instrument has a “HOLD” feature to capture the
current temperature reading on the display. To
activate the hold feature, press and release the
key. The current temperature reading will flash on the
display and the hold icon will appear at top of display.
Press the key again to return to STANDARD
TEMPERATURE MODE.
45
AquaTuff™ 353 THERMOMETER
Press to turn instrument ON or OFF.
Press to select Standard, ITS™, or Memory
mode of operation.
In ITS Mode, press to store ITS
temperature readings. In Memory Mode,
press to scroll forward. In User Mode, press
to select temperature scale.
In Memory Mode, press to scroll backward.
In User mode, press to enable/disable
Auto-Off feature.
OPERATION OVERVIEW:
There are 3 Main Modes of operation:
1) Standard Temperature Mode
2) Intelligent Temperature Stabilization™ (ITS™) Mode
3) Memory Mode
AquaTuff™ 352 THERMOMETER
OPERATION - Continued:
AquaTuff™ 353 THERMOMETER
67
2) When ITS MODE is active, the display will show “- -”
while the temperature is changing (stabilization
seek mode). The final stabilized temperature reading
will flash on the display when reached. The ITS
temperature reading will remain flashing on the
display until the probe is removed or temperature
changes by approximately 5°F(3°C). When the
temperature changes, the instrument will return to
ITS stabilization seek mode and “- -” will be
displayed until the next stabilized temperature is
reached and that temperature reading will flash on
the display.
3) The user has the option of storing the ITS
temperature reading in memory. To store ITS
temperature reading, press key to store
reading. The display will show reading number
“r001-r250” and store reading in memory. Up to 250
readings can be stored in memory.
4) To return to STANDARD TEMPERATURE MODE,
turn unit OFF and back ON or repeatedly press
key until both ITS and MEM icons are
turned off at top of display.
MEMORY MODE:
1) To view temperature readings stored in memory, turn
instrument ON and press key to select
MEMORY MODE. When active, MEM icon will
appear at top of LCD.
(NOTE: WITH NO
TEMPERATURE DATA IN MEMORY, INSTRUMENT
WILL NOT ENTER MEMORY MODE.)
2) To view temperature data, press key to scroll
forward or key to scroll backward through
temperature data. The display will show reading
number “r001-r250” followed by the temperature
recorded.
(NOTE: TO ACCESS FAST SCROLL
MODE, PRESS AND HOLD KEY OR
KEY AND DISPLAY WILL QUICKLY SEQUENCE
THROUGH TEMPERATURE READINGS.)
3) The temperature data is a cyclical data system.
When scrolling through data, the temperature
readings will cycle through all readings either forward
or backward and then repeat readings when either
the first or last reading in memory is reached.
4) To clear temperature readings in memory, press and
hold both the and keys at the same
time until “CLr” is shown on display.
5) To return to STANDARD TEMPERATURE MODE,
turn unit OFF and back ON or repeatedly press
key until both ITS and MEM icons are turned
off at top of LCD display.
USER TIP
When temperature readings are cleared
from memory, there is no facility to
restore deleted temperature data.
Ensure that temperature data is not needed
before clearing memory contents.
AquaTuff™ 353 THERMOMETER
ITS MODE - Continued:
AquaTuff™ 353 THERMOMETER
351 / 352 / 353 BATTERY REPLACEMENT
MEMORY MODE - Continued:
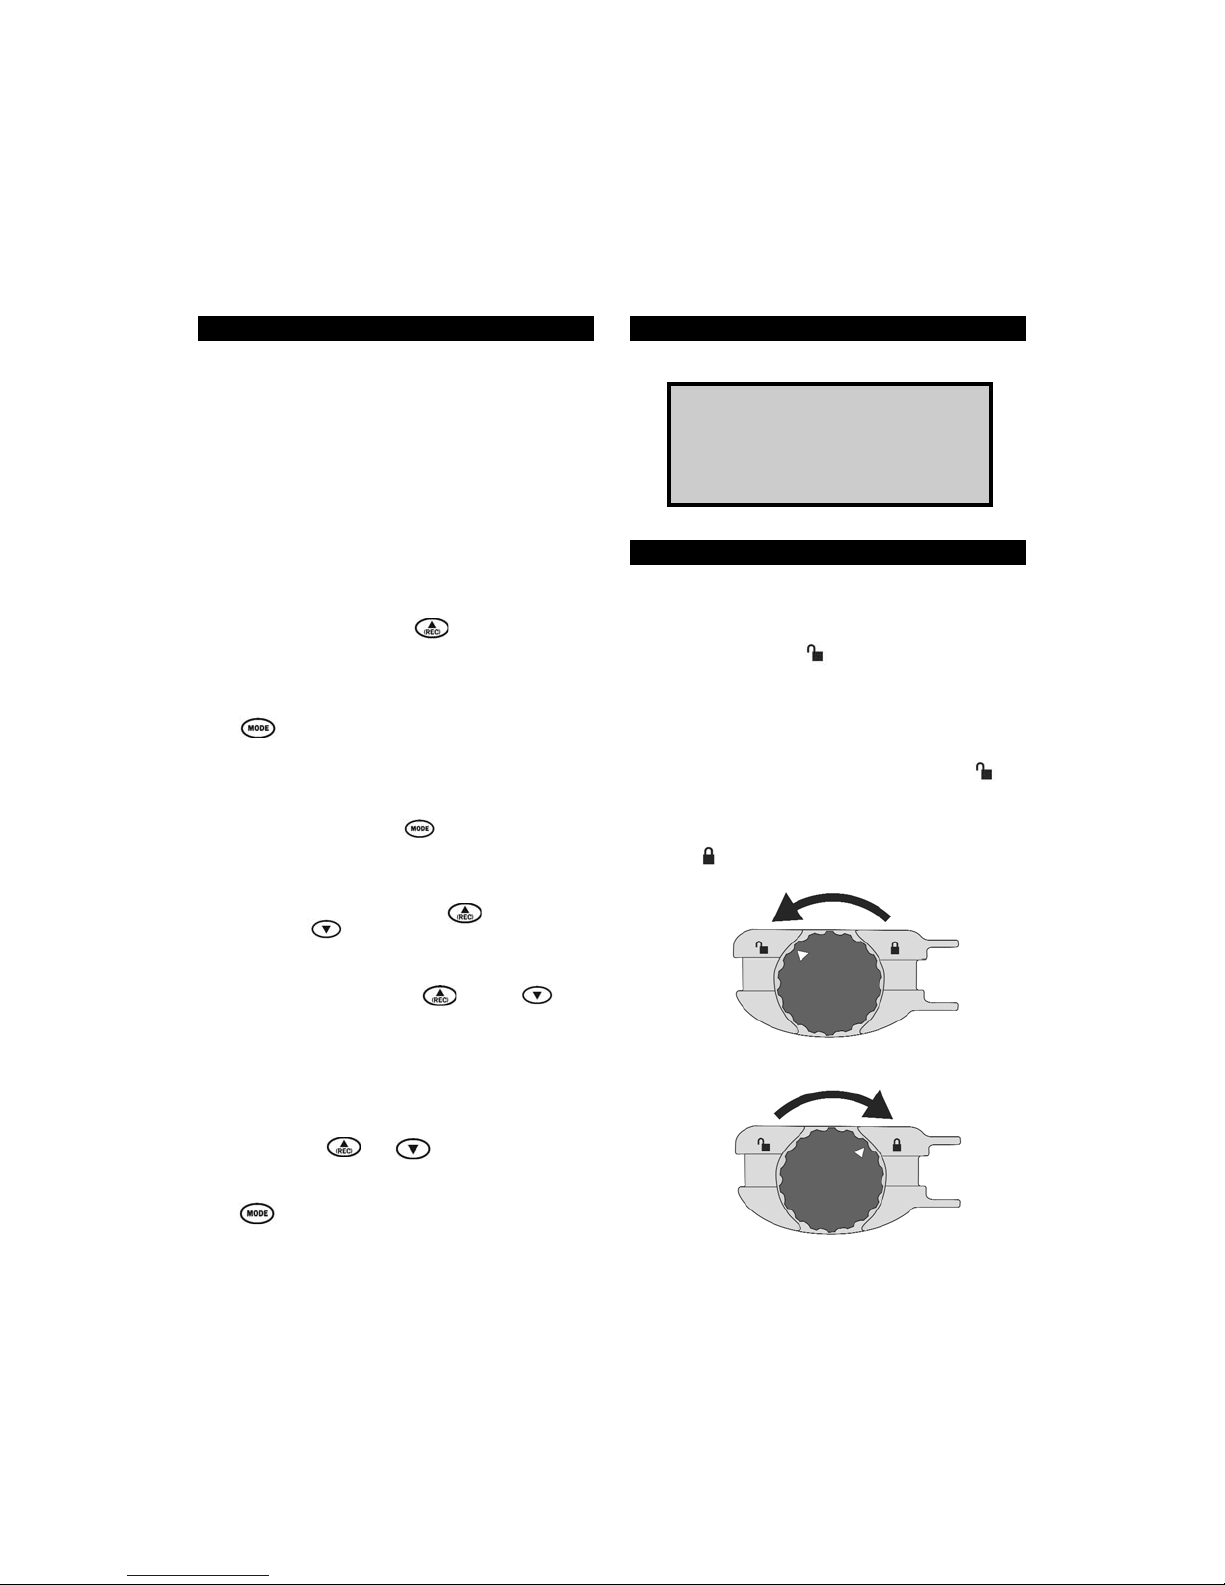
BATTERY REPLACEMENT:
1) Turn battery door knob counter-clockwise until
rotation stops. The arrow on battery door knob will
point towards unlock icon.
2) Pull battery door knob to remove battery door
assembly. Remove batteries.
3) Referring to battery polarity drawing on rear label,
install (2) AAA alkaline batteries as shown.
4) To install battery door assembly, ensure that battery
door knob is turned fully counter-clockwise and
arrow on battery door is pointed towards unlock
icon. Push upward on battery door assembly until
battery door knob is seated against housing. Rotate
battery door knob clockwise until rotation stops.
The arrow on battery door knob will point towards
lock icon.
TURN COUNTER-CLOCKWISE TO UNLOCK
TURN CLOCKWISE TO LOCK

89
351 / 352 / 353 SPECIFICATIONS 351 / 352 / 353 TROUBLESHOOTING
TEMPERATURE RANGES:
35100-K / 35200-K / 35300-K:
-100° to 999°F (-73° to 537°C)
35132 / 35135 / 35140 / 35141:
35232 / 35235 / 35240 / 35241:
35332 / 35335 / 35340 / 35341:
-100° to 500°F (-73° to 260°C)
ACCURACY:
35100-K / 35200-K / 35300-K:
With factory calibration, ±0.5F° (±0.3C°) over entire
measurement range at ambient temperatures
between 68° to 86°F (20° to 30°C)
35132 / 35140 / 35141:
35232 / 35240 / 35241:
35332 / 35340 / 35341:
With factory calibration, ±0.9F° (±0.5C°) Total
System Accuracy over entire measurement range
at ambient temperatures between 68° to 86°F
(20° to 30°C)
35135 / 35235 / 35335:
Surface probe temperature errors for draft-free, flat,
clean oiled surfaces with 2.2 lbs.(1 Kg) of pressure
are typically within +2.7°F and –6.3°F (+1.5°C and
–3.5°C) without thermostat recycling.
RESOLUTION:
35100-K / 35300-K:
35132 / 35135 / 35140 / 35141:
35332 / 35335 / 35340 / 35341:
Tenth degree (.1)
35200-K / 35232 / 35235 / 35240 / 35241:
Tenth degree / whole degree (.1/1), user selectable
BATTERY LIFE:
1800 Hours (2) AAAAlkaline batteries
AMBIENT TEMPERATURE LIMITS:
32° TO 122°F (0° TO 50°C)
TRACEABILITY:
We certify that this instrument has been calibrated
to temperature and/or electrical standards traceable
to the U.S. Department of Commerce National
Institute of Standards and Technology.
CALIBRATION:
Under normal operating conditions, the unit should
not require re-calibration.
TROUBLESHOOTING
Our Customer Service Department is available
Monday through Friday 8:00 AM to 5:00 PM EST
at 800-835-5011.
1) Unit Does Not Turn On:
Batteries are installed incorrectly or dead.
Check batteries are installed according to picture on
rear label. Replace batteries.
2) Display Shows “Prob”: Probe is broken (Open
thermocouple see “Test for Broken Probe” below).
3) Test for Broken Probe: Pull the probe connector out
partially to expose the blade contacts. Place a metal
paper clip across connector blades to short contacts. If
instrument displays temperature, the probe is broken.
Replace Probe.
4) Battery Icon Appears on Display: Low battery.
Replace batteries.
5) Display Shows “bAtt” and Instrument Shuts Off:
Replace batteries.
6) Display Shows “LO” or “HI”: Temperature measured
is outside measurement range of instrument.
351 / 352 / 353 WARRANTY
WARRANTY: Cooper-Atkins thermometers are backed
by a 5-year Instrument Warranty and 1-year Probe
Warranty on defects in workmanship and materials.
10 11
TERMÓMETRO AquaTuff™ 351
[ON] Oprima para Prender o Apagar el instrumento.
[F/C] Oprima para seleccionar escala de temperatura
Fahrenheit o Celsius.
OPERACIÓN:
1) Observando la polaridad correcta, inserta la sonda
del termopar tipo K en la parte superior del instrumento.
2) Oprima la tecla [ON] para prender el instrumento.
3) La escala de temperatura por defecto es Fahrenheit.
Para cambiar la escala de temperatura, oprima la
tecla [F/C] .
(NOTA: Se intercambiará la pantalla
entre los iconos “F” y “C” al lado derecho de la
pantalla cada vez que se oprime la tecla ).
4) El instrumento tiene una función de apagado
automático que apagará la unidad después de 10
minutos sin actividad del teclado para conservar la
vida de la pilas. Para apagar manualmente el instrumento, oprima y mantenga oprimida momentánemente la tecla .
TERMÓMETRO AquaTuff™ 352
Oprima para Prender o Apagar el instrumento.
Cuando se utiliza en combinación con la tecla de
MAYÚSCULAS, le permite activar o desactivar la
función de APAGADO AUTOMÁTICO
Oprima para seleccionar la escala de temperatura
FAHRENHEIT o CELSIUS. Cuando se utiliza en
combinación con la tecla de MAYÚSCULAS, se
selecciona una resolución de décimas o de grado
entero.
Oprima para “CONGELAR” la lectura de
temperatura actual en la pantalla. La función
MAYÚSCULAS proporciona ajustes secundarios
para el usuario en combinación con otras teclas,
como se indica a continuación.
Oprima para prender LA ILUMINACIÓN DE
FONDO para ver las temperaturas cuando no hay
mucha luz. Al oprimirla, ILUMINACIÓN DE
FONDO se mantendrá prendida durante 5
segundos.
OPERACIÓN:
1) Observando la polaridad correcta, inserte la sonda
del termopar tipo K en la parte superior del instrumento.
2) Oprima la tecla para prender el instrumento.
TERMÓMETRO AquaTuff™ 352
OPERACIÓN - Continuación:
3) La escala de temperatura por defecto es Fahrenheit.
Para cambiar la escala de temperatura oprima la
tecla .
(NOTA: Se intercambiará la pantalla
entre los iconos “F” y “C” al lado derecho de la
pantalla cada vez que se oprime la tecla ).
4) El instrumento tiene una función de apagado
automático que apagará la unidad después de 10
minutos sin actividad del teclado para conservar la
vida de la pilas. Para apagar manualmente el instru
mento, oprima y mantenga oprimida momentánea
mente la tecla . Para desactivar la función de
APAGADO AUTOMÁTICO, oprima y mantenga
oprimida la tecla y luego oprima la tecla .
(NOTA: El icono “AUTO” aparecerá en la parte
superior de la pantalla cuando está activada la
función de APAGADO AUTOMÁTICO).
5) La resolución por defecto es décimas de grado. Para
cambiar la resolución a grado entero, oprima y man
tenga oprimida la tecla y luego oprima la tecla
.
6) Oprima la tecla para prender la ilumi
nación de fondo. Al oprimirla, la iluminación de
fondo se mantendrá prendida durante 5 segundos y
luego se apagará automáticamente.
NOTA: USO DE LA ILUMINACIÓN DE NACION
FONDO PARA REDUCIRÁ REDUCIR LA
SENSIBILIDAD DE VIDA DE LA PILA POR
LA ENERGÍA ADICIONAL QUE SE
REQUIERE PARA LA OPERACIÓN DE
ILUMINACIÓN DE FONDO.
7) El instrumento tiene la función de “HOLD” (MANTENER) para capturar la lectura de temperatura
actual en la pantalla. Para activar esta función, opri
ma y suelte la tecla . La lectura de temperatura actual parpadeará en la pantalla y el icono de
“Hold” aparecerá en la parte superior de la pantalla.
Oprima de nuevo la tecla [Hold para regresar al
MODO DE TEMPERATURA ESTÁNDAR.
TERMÓMETRO AquaTuff™ 353
[ON] Oprima para Prender o Apagar el instrumento.
[Mode Oprima para seleccionar el modo de operación
Estándar, ITSMR o de Memoria.
[Rec] En el modo ITS, oprima para almacenar lecturas
de temperatura ITS. En el Modo de Memoria,
oprima para desplazarse línea por línea hacia
delante. En el Modo de Usuario, oprima para
seleccionar la escala de temperatura.
TERMÓMETRO AquaTuff™ 353
En Modo de Memoria, oprima para desplazarse
línea por línea hacia atrás. En el Modo de
Usuario, oprima para activar/desactivar la función
de Apagado Automático.
VISTAZO GENERAL DE LA OPERACIÓN:
Tiene 3 Modos Principales de operación:
1) Modo de Temperatura Estándar
2) Modo de Estabilización Inteligente de Temperatura
(ITS™- Intelligent Temperature Stabilization™)
3) Modo de Memoria
En el MODO DE TEMPERATURA ESTÁNDAR, el instru-
mento funciona como un termómetro normal. En el Modo
ITS, el instrumento funciona con la función de
Estabilización Inteligente de Temperatura
TM
. El instrumento de la serie 353 tiene una función exclusiva para
mostrar la temperatura de la cosa que se está midiendo
cuando la temperatura haya llegado a la temperatura
estabilizada final. El propósito de esta función es para
ayudar al usuario en determinar cuándo se ha alcanzado
la temperatura estabilizada final. La función ITS es
dinámica, o sea, opera continuamente en el tiempo real.
Se puede utilizar el instrumento en el Modo ITS con la
opción de grabar lecturas de temperatura estabilizadas o
simplemente como termómetro con funcionalidad ITS. El
MODO DE MEMORIA es para ver los datos de temperatura ITS almacenados en la memoria, y usted podrá
desplazarse en ambas direcciones. La tecla permite que el usuario seleccione fácilmente el modo de
operación deseado.
MODO DE TEMPERATURA ESTÁNDAR
1) Oprima la tecla [ON] para Prender o Apagar el instru
mento.
2) La escala de temperatura por defecto es Fahrenheit.
Para cambiar la escala de temperatura, con el instru
mento Apagado, oprima y mantenga oprimida la tecla
[Mode y luego oprima la tecla para entrar en
el MODO DE USUARIO. (NOTA: La pantalla
mostrará “USEr”). Oprima la tecla para inter
cambiar entre Fahrenheit y Celsius.
(NOTA: Se inter
cambiará la pantalla entre los iconos “F” y “C” al
lado derecho de la pantalla cada vez que se
oprime la tecla [Re
). Oprima la tecla [Mode
para salir del MODO DE USUARIO para usar el
instrumento en MODO DE TEMPERATURA
ESTÁNDAR.
3) El instrumento tiene una función de apagado
automático que apagará la unidad después de 10
minutos sin actividad del teclado para conservar la
vida de la pilas. Para desactivar la función de apaga
MODO DE TEMPERATURA ESTÁNDAR - Continuación
do automático, con el instrumento APAGADO, oprima
y mantenga oprimida la tecla de MODO y
luego oprima la tecla [ON] para entrar en el MODO
DE USUARIO. Oprima la tecla [down]para activar
o desactivar la función de apagado automático.
Cuando está activada, el icono AUTO aparece en la
parte superior de la pantalla. Oprima la tecla [Mo
para salir del MODO DE USUARIO para usar el
instrumento en el MODO DE TEMPERATURA
ESTÁNDAR.
MODO ITS
TM
Estabilización Inteligente de Temperatura.
1) Para usar el MODO ITS, oprima la tecla para Prender
el instrumento. Al encenderse, se coloca el instrumen
to en el MODO DE TEMPERATURA ESTÁNDAR.
Oprima la tecla para seleccionar y activar la
función ITS. El icono ITS aparecerá en la parte supe
rior de la pantalla cuando el MODO ITS está selec
cionado.
2) Cuando está activo el MODO ITS, la pantalla
mostrará “- -“ mientras la temperatura esté cambian
do (modo de búsqueda de estabilización). La lectura
de temperatura estabilizada final parpadeará en la
pan talla al alcanzarse. La lectura de temperatura ITS
seguirá parpadeando en la pantalla hasta que se
quite la sonda o la temperatura cambie aproximada
mente 5°F (3°C). Al cambiarse la temperatura, el
instrumento volverá al modo de búsqueda de estabilización ITS y se desplegará “- -“ en la pantalla hasta
que se haya alcanzado la siguiente temperatura
estabilizada, en cuyo caso la lectura parpadeará en
la pantalla.
3) El usuario tiene la opción de almacenar la lectura de
temperatura ITS en la memoria. Para almacenar la
lectura de temperatura ITS, oprima la tecla [Rec] para
guardar la lectura. La pantalla mostrará el número de
lectura “r001- r250” y almacenará la lectura en la
memoria. Se pueden guardar hasta 250 lecturas en la
memoria.
4) Para regresar al MODO DE TEMPERATURA
ESTÁNDAR, Apague la unidad y luego Préndala de
nuevo, u oprima repetidamente la tecla [Mod
hasta que se apaguen tanto el icono de ITS como el
de MEM en la parte superior de la pantalla.
12 13
TERMÓMETRO AquaTuff™ 353

TERMÓMETRO AquaTuff™ 353
MODO DE MEMORIA:
1) Para ver las lecturas de temperatura almacenadas en
la memoria, Prenda el instrumento y oprima la tecla
[Mod para seleccionar el MODO DE MEMORIA.
Cuando está activo, el icono MEM aparece en la parte
superior de la pantalla.
(NOTA: SI NO HAY DATOS
DE TEMPERATURA EN LA MEMORIA, EL INSTRU
MENTO NO ENTRARÁ EN EL MODO DE MEMO
RIA).
2) Para ver los datos de temperatura, oprima la tecla
[Rec] para desplazarse adelante o la tecla
para desplazarse hacia atrás a través de los datos de
temperatura. La pantalla mostrará el número de lec
tura “r001- r250” y a continuación la temperatura
grabada.
(NOTA: PARA ACCEDER AL MODO DE
DESPLAZAMIENTO RÁPIDO, OPRIMA Y MANTEN
GA OPRIMIDA LA TECLA [R O LA TECLA
[Do Y LA PANTALA REPASARÁ RÁPIDAMENTE
LAS LECTURAS DE TEMPERATURA.)
3) Los datos de temperatura son un sistema de datos
cíclico. Al desplazarse a través de las lecturas, o bien
hacia delante o hacia atrás, se pasará a través de
todas las lecturas y luego se repetirán al llegar a la
primera o la última lectura.
4) Para borrar las lecturas de temperatura de la memo
ria, oprima y mantenga oprimidas al mismo tiempo las
teclas [Rec] y [dow hasta que aparezca “CLr” en
la pantalla.
5) Para regresar al MODO DE TEMPERATURA
ESTÁNDAR, Apague la unidad y luego Préndala de
nuevo, u oprima repetidamente la tecla [Mode hasta
que se apaguen tanto el icono de ITS como el de
MEM en la parte superior de la pantalla.
AVISO AL USUARIO
Al borrar las lecturas de temperatura
de la memoria, no existe manera de
restaurar los datos de temperatura
borrados. Asegúrese de que no se
necesitan los datos de temperatura
antes de borrar el contenido
de la memoria.
REEMPLAZO DE PILAS EN EL 351 / 352 / 353
REEMPLAZO DE PILAS:
1) Gire en sentido contrario al reloj la manija de la puerta
de pilas hasta que deje de girar. La flechita en la
puerta de pilas apuntará al cono de abierto [U .
2) Jale la manija de la puerta de pilas para sacar el
ensamble de la puerta de pilas. Saque las pilas.
3) Refiriéndose al dibujo de polaridad de pilas en la eti
queta de atrás, instale (2) pilas alcalinas AAA de la
manera indicada.
4) Para instalar el ensamble de la puerta de pilas,
asegúrese que la manija de la puerta de pilas se haya
girado completamente en sentido contrario al reloj y la
flechita en la puerta de pilas apunte hacia el icono de
abierto [U . Empuje hacia arriba el ensamble de
la puerta de pilas hasta que la manija de la puerta de
pilas esté asentada en la cubierta. Gire la manija de la
puerta de pilas en el sentido del reloj hasta que deje
de girar. La flechita en la manija de la puerta de pilas
apuntará al icono de cerrado .
14 15
GIRE EN SENTIDO CONTRARIO
AL RELOJ PARAABRIR
GIRE EN SENTIDO
DEL RELOJ PAR CERRAR
 Loading...