

Page 1
gebruiksaanwijzing
inductiekookplaat
instructions for use
induction hob
mode d’emploi
plaque de cuisson à induction
HI3271W
Het toestel-identifi catieplaatje bevindt zich aan de onderkant van het toestel.
The appliance identifi cation card is located on the bottom of the appliance.
La plaque d’identifi cation de l’appareil se trouve sur le dessus de l’appareil.
Plak hier het toestel-identifi catieplaatje.
Stick the appliance identifi cation card here.
Placez ici la plaque d’identifi cation de l’appareil.
Houd, wanneer u contact opneemt met de serviceafdeling, het complete typenummer bij de hand.
When contacting the service department, have the complete type number to hand.
En cas de contact avec le service après-vente, ayez auprès de vous le numéro de type complet.
Adressen en telefoonnummers van de serviceorganisatie vindt u op de garantiekaart.
You will fi nd the addresses and phone numbers of the service organisation on the guarantee card.
Les adresses et les numéros de téléphone du service après-vente se trouvent sur la carte de garantie.
700003436100
Page 2

NL
Handleiding NL 3 - NL 30
EN
Manual EN 3 - EN 30
FR
Notice d’utilisation FR 3 - FR 30
Gebruikte pictogrammen - Pictograms used - Pictogrammes utilisés
Belangrijk om te weten - Important information - Important à savoir
Tip - Conseil
Page 3

INHOUD
Uw inductiekookplaat
Inleiding 4
Bedieningspaneel 5
Veiligheid
Temperatuurbeveiliging 6
Kookduurbegrenzing 6
Gebruik
Werking van de aanraaktoetsen 7
Inductiekoken 7
Werking inductie 8
Pannen voor inductiekoken 9
Inductiegeluiden 10
Bediening
Inschakelen en vermogen instellen 11
Restwarmte-indicatie 11
Boost 12
Uitschakelen 12
Stand-by modus 13
Eco stand-by modus 13
Kinderslot 14
Pauze 14
Herkennen van een modus 15
Timer / Kookwekker 15
Geluidssignaal in- en uitschakelen 17
Automatische pandetectie 18
De ideale wokstand 19
Gezond koken 19
Onderhoud
Reinigen 20
Storingen
Algemeen 21
Storingstabel 21
Installatievoorschriften
Veiligheidsvoorschriften installatie 23
Benodigde vrije ruimte rondom 23
Bevestigingspunten montagebeugels 24
Inbouwmaten 25
Beluchting 25
Inbouwen boven een lade of vaste blende 26
Inbouwsituatie met tussenruimte 27
Inbouwsituaties met koppelprofiel 27
Inbouwen 28
Technische gegevens
Vermogens- en inbouwtabel 29
Milieuaspecten
Afvoeren toestel en verpakking 30
NL 3
Page 4

UW INDUCTIEKOOKPLAAT
Inleiding
Deze inductiekookplaat is ontworpen voor de echte wokliefhebber.
De kookzone heeft een hoog vermogen en reageert snel en effectief.
De speciaal op de wok afgestemde kookzone verwarmt niet alleen
de bodem maar een groot deel van de pan waardoor u een maximaal
kookcomfort ervaart.
Koken op een inductiekookplaat verschilt met koken op een traditioneel
toestel. Inductiekoken maakt gebruik van een magnetisch veld om
warmte op te wekken. Dit betekent dat u niet zomaar een willekeurige
pan kunt gebruiken. Het hoofdstuk ‘Pannen’ geeft u hierover meer
informatie.
Voor optimale veiligheid is de inductiekookplaat uitgerust met meerdere
temperatuurbeveiligingen en een restwarmtesignalering
die aangeeft dat de kookzone nog heet is.
In deze handleiding staat beschreven op welke manier u de inductiekookplaat zo optimaal mogelijk kunt benutten. Naast informatie over de
bediening treft u ook achtergrondinformatie en onderhoudstips aan die
van dienst kunnen zijn bij het gebruik van dit product.
Lees eerst de gebruiksaanwijzing geheel en aandachtig door
voordat u het apparaat gaat gebruiken en bewaar deze zorgvuldig
voor latere raadpleging.
De handleiding dient bovendien als referentie voor de servicedienst.
Plak daarom het los bijgeleverde gegevensplaatje in het daarvoor
bestemde kader, achter in de handleiding. Het gegevensplaatje bevat
alle informatie die de servicedienst nodig heeft om adequaat op uw
vragen te reageren.
Veel kookplezier!
NL 4
Page 5

UW INDUCTIEKOOKPLAAT
Bedieningspaneel
1
2
3
4
1920
WOK WOK
6 5 7 8 9 10 11
1. Pauzetoets
2. Pauze-indicatie
3. Kinderslot-/Eco stand-by toets
4. Kinderslot-indicatie/Eco stand-by indicatie
5. Standen-indicatie in blokjes
6. Aan-/uittoets
7. Vermogen versneld verlagen
8. Vermogen verlagen
9. Vermogen ophogen
10. Vermogen versneld ophogen
11. Boostindicatie
12. Timer-/kookwekkertoets
13. Kookwekkerindicatie
14. Timerindicatie
15. Tijd verlagen toets
16. Tijd ophogen toets
17. ‘Minuten achter de punt’ indicatie
18. Timer/kookwekker indicatie
19. Woktoets
20. Standen-indicatie
12
Kookzone Ø300 3,0 kW
15 14 13 16
WOK
18
17
NL 5
Page 6
VEILIGHEID
Lees voor gebruik eerst de separate
veiligheidsinstructies!
Temperatuurbeveiliging
• De kookzone is voorzien van een sensor. Deze sensor controleert
ononderbroken de temperatuur van de bodem van de kookpan en
van de onderdelen van de kookplaat om elk risico op oververhitting,
bij bijvoorbeeld een drooggekookte pan, te vermijden. Bij een te hoge
temperatuur wordt het vermogen van de kookzone/kookplaat automatisch verlaagd of schakelt de kookzone/kookplaat helemaal uit.
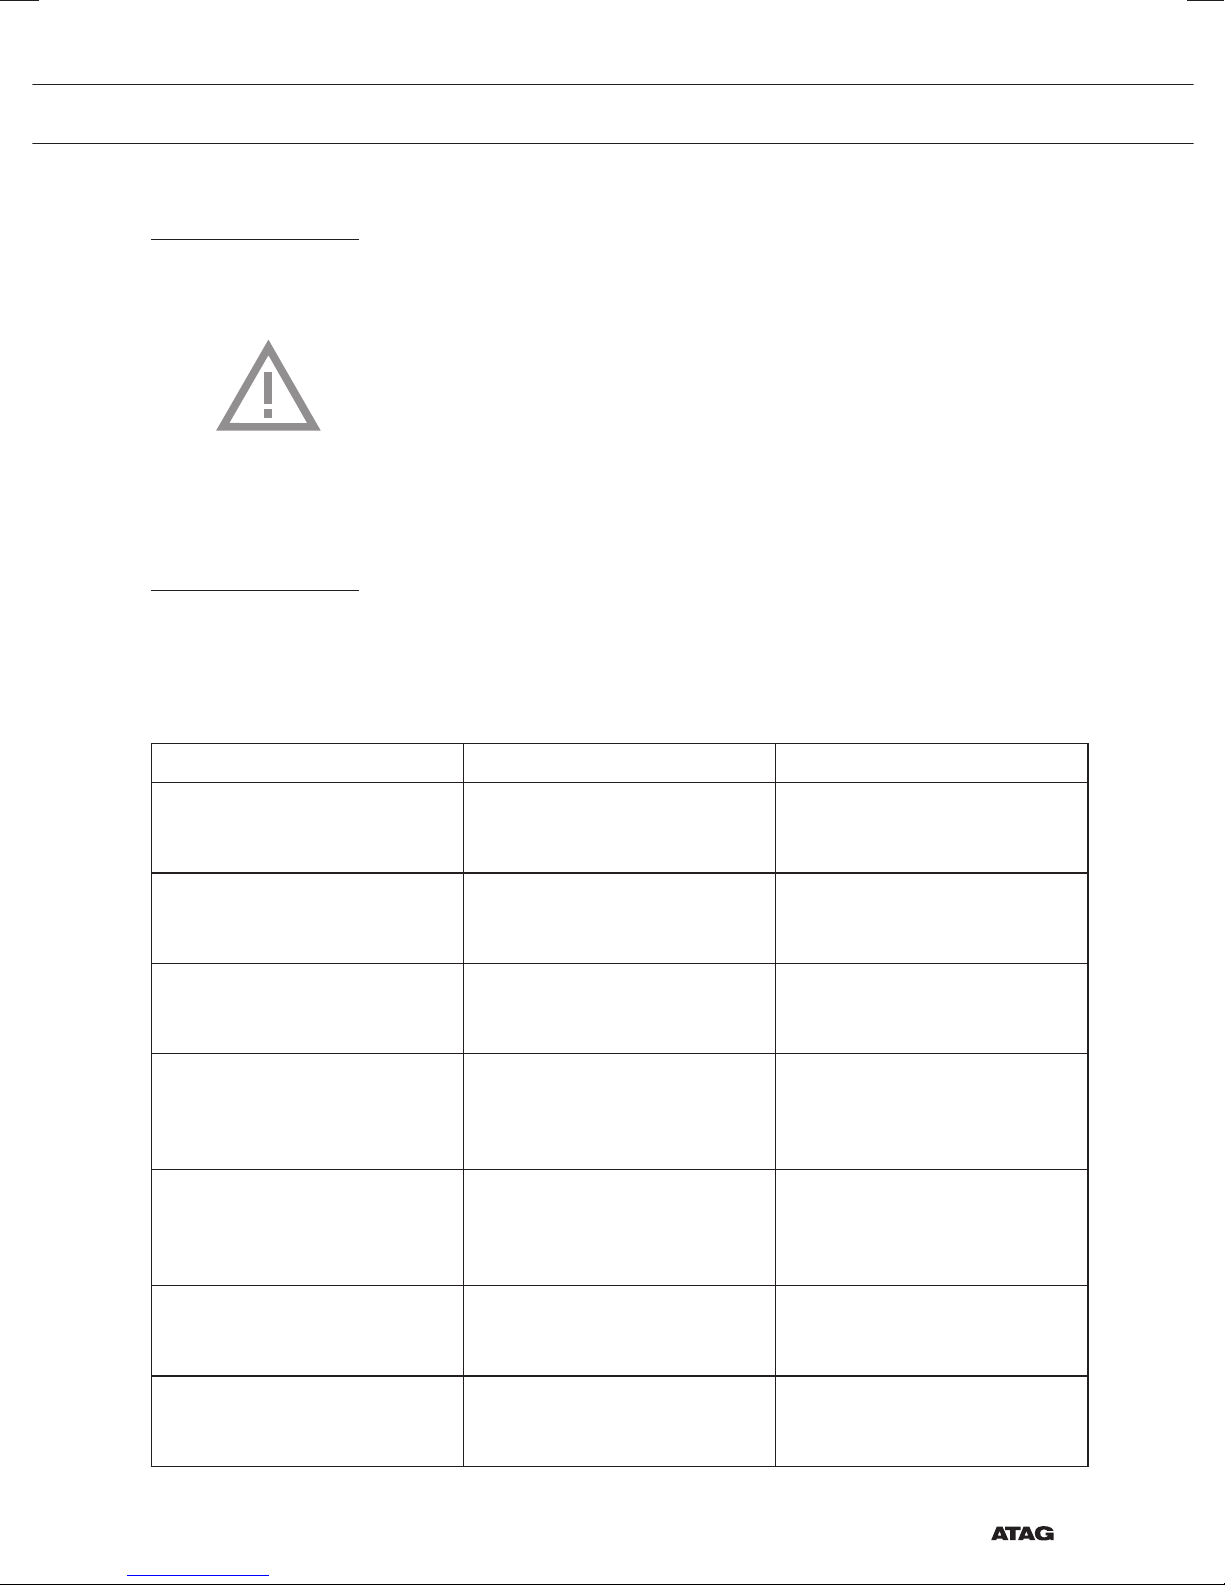
Kookduurbegrenzing
• Als de kookzone gedurende een ongebruikelijk lange tijd aan is,
wordt deze automatisch uitgeschakeld.
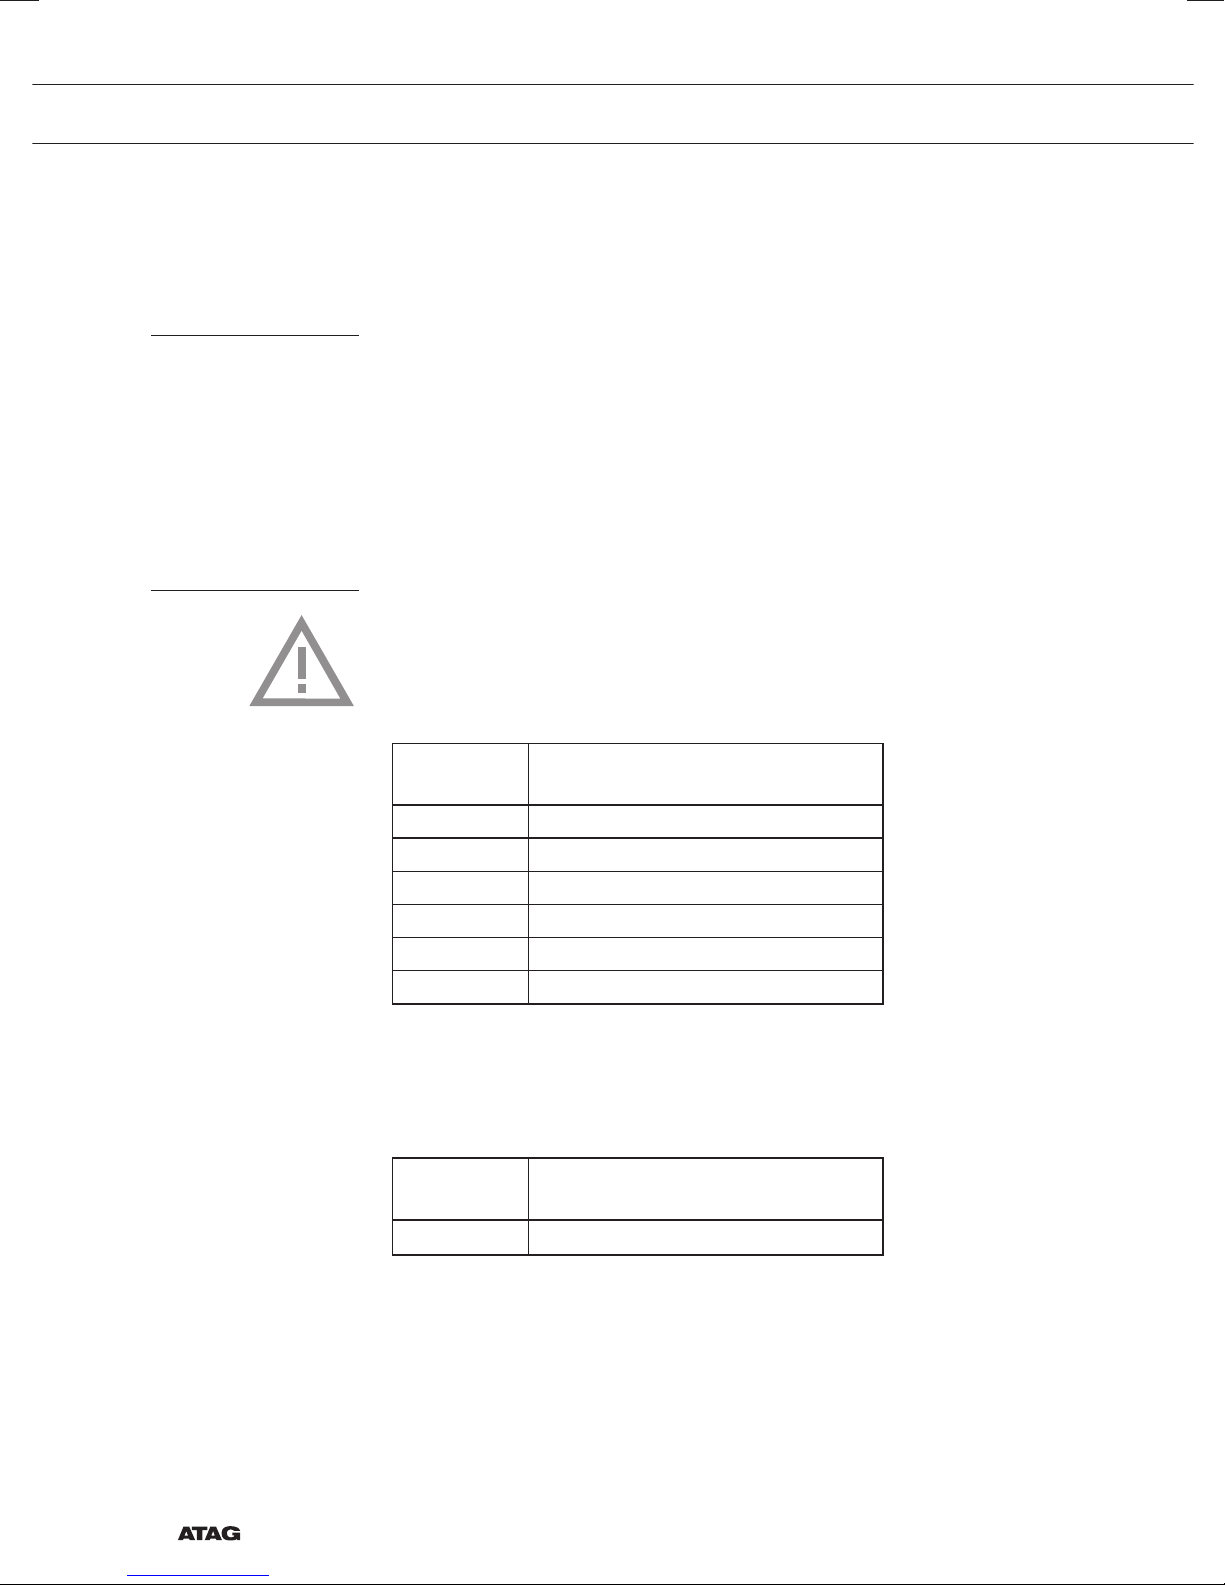
• Afhankelijk van het gekozen kookvermogen wordt de kookduur als
volgt begrensd:
Kookstand De kookzone wordt automatisch
uitgeschakeld na:
1 en 2 9 uur
3, 4 en 5 5 uur
6, 7 en 8 4 uur
9 3 uur
10 2 uur
en 12 1 uur
11
• Als bovengenoemde tijd verstreken is schakelt de kookzone
automatisch uit.
Kookstand De kookzone wordt automatisch
naar stand 12 geschakeld na:
boost
10 minuten
NL 6
Page 7

GEBRUIK
Werking van de aanraaktoetsen
Het bedienen van de kookplaat door middel van de aanraaktoetsen
is even wennen als u andere bediening gewend bent. Leg uw vingertoppen plat op de toetsen voor het beste effect. U hoeft niet hard te
drukken.
De aanraaksensoren zijn zodanig ingesteld dat deze alleen reageren
op de druk en het formaat van vingertoppen. De kookplaat is niet te
bedienen met andere voorwerpen en zal bijvoorbeeld niet inschakelen
als uw huisdier over de kookplaat loopt.
Inductiekoken
Inductiekoken is snel
• In het begin zult u verrast zijn door de snelheid van het toestel.
Vooral het wokken op een hoge stand gaat zeer snel. U kunt er
daarom het beste altijd bij blijven.
Het vermogen past zich aan
Bij inductiekoken wordt alleen dat deel van de zone benut dat in
contact is met de wok. Het is daarom belangrijk om de wok te
gebruiken die u heeft gekregen bij deze inductiekookplaat, omdat deze
wok volledig in contact is met de kookzone.
Geschikte pannen kunt u bestellen op ‘www.atagservice.nl’.
Let op
• Zandkorreltjes kunnen krasjes veroorzaken die niet meer te verwijderen
zijn. Zet daarom alleen pannen met een schone bodem op het
kookvlak en til pannen altijd op als u ze verplaatst.
• Plaats de pan voorzichtig in de kookzone. Als u onvoorzichtig met
de pan omgaat, kan het handvat tegen de glasplaat slaan en deze
beschadigen.
• Schud de pan niet terwijl hij in de kookzone ligt. Daardoor kunnen
krassen in de glasplaat ontstaan of de glasplaat kan door het
handvat beschadigd raken.
• Gebruik de kookplaat niet als werkvlak.
NL 7
Page 8
GEBRUIK
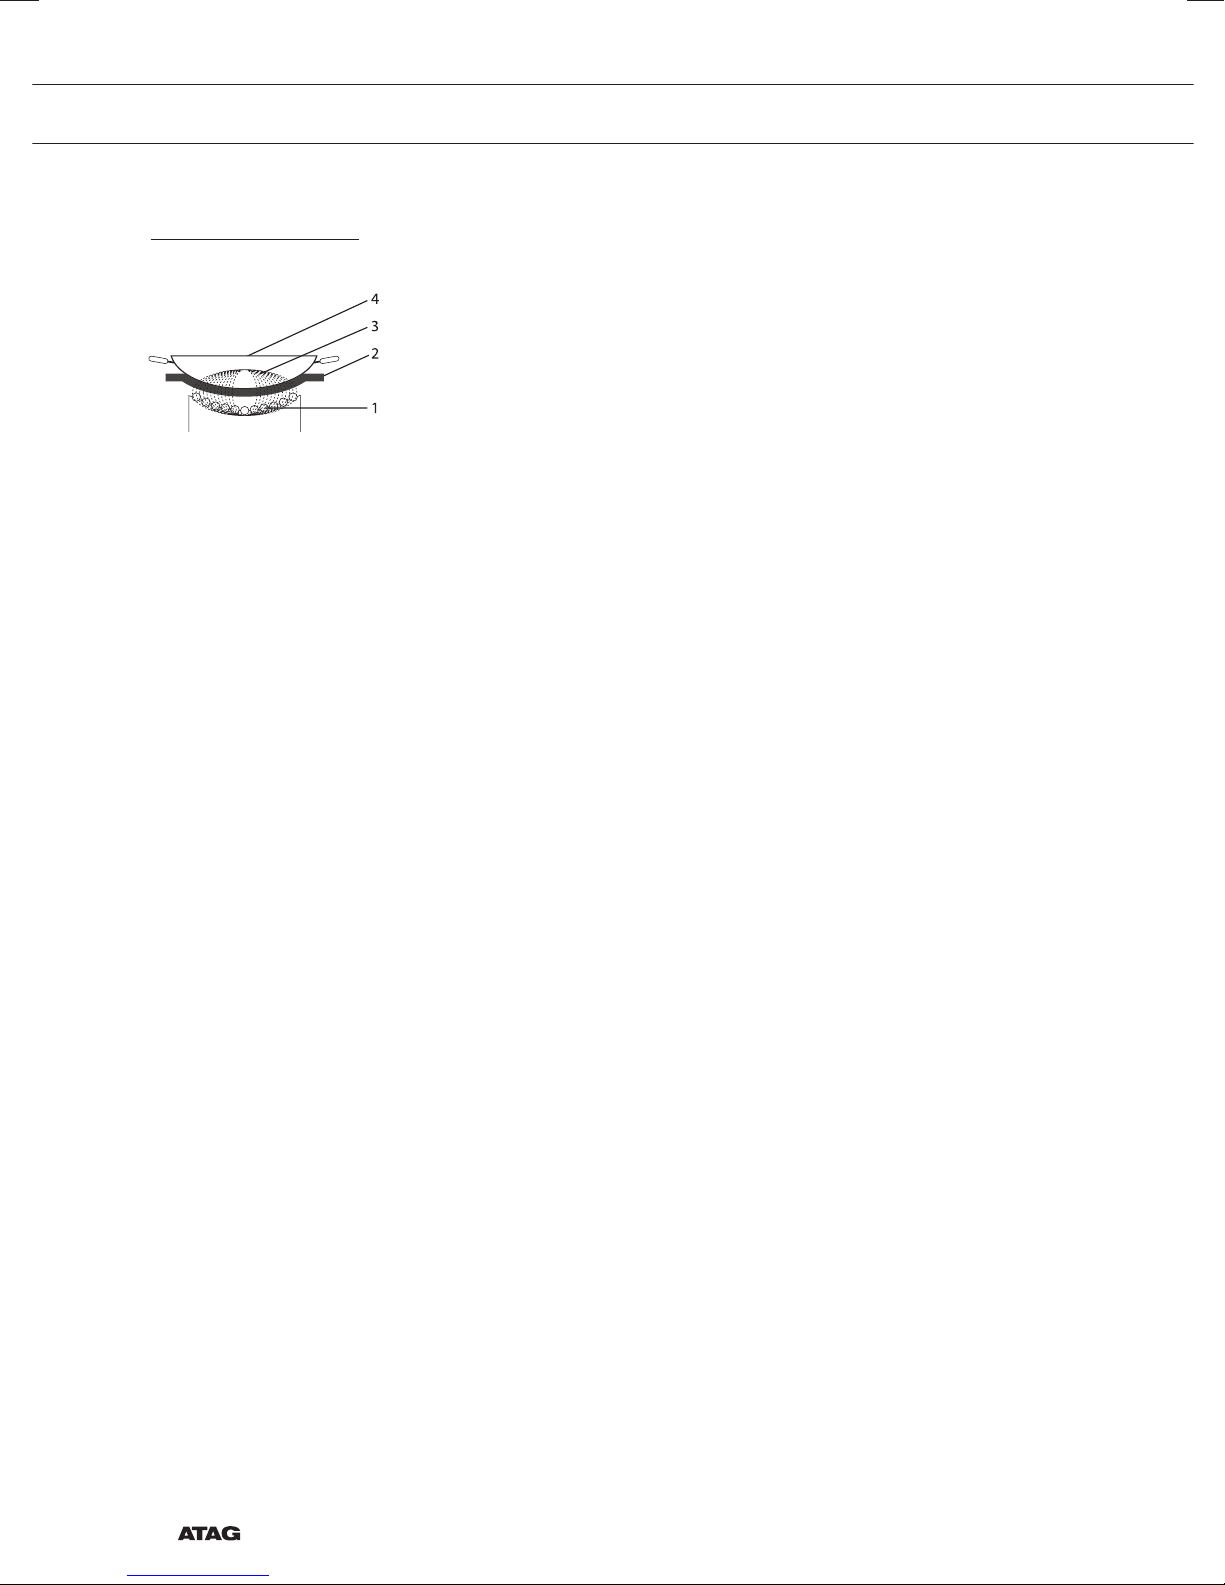
Werking inductie
De spoel (1) in de
kookplaat (2) wekt een
magnetisch veld (3) op. Door
een pan met een ijzeren bodem
(4) op de spoel te plaatsen
ontstaat in de panbodem een
inductiestroom.
In het toestel wordt een magnetisch veld opgewekt. Door een pan
met een ijzeren bodem op een kookzone te plaatsen ontstaat in de
panbodem een inductiestroom. Deze inductiestroom wekt warmte
op in de panbodem.
Comfortabel
De elektronische regeling is nauwkeurig en eenvoudig in te stellen.
Op de laagste stand kunt u bijvoorbeeld chocolade direct in de pan
smelten of ingrediënten bereiden die u gewoonlijk au bain marie
verwarmt.
Snel
Door het hoge vermogen van de inductiekookplaat gaat het wokken erg
snel.
Schoon
De kookplaat is eenvoudig te reinigen. Doordat de kookzone niet heter
wordt dan de pan zelf, kunnen voedselresten niet inbranden.
Veilig
De warmte wordt opgewekt in de pan zelf. De glasplaat wordt niet
warmer dan de pan. Hierdoor blijft de kookzone een stuk koeler dan die
van bijvoorbeeld een keramische kookplaat of een gasbrander.
Na het wegnemen van een pan is de kookzone snel afgekoeld.
NL 8
Page 9
GEBRUIK
Pannen voor inductiekoken
Inductiekoken stelt eisen aan de kwaliteit van de pannen.
Let op
• Pannen waarmee al eerder op een gaskookplaat is gekookt, zijn
niet meer geschikt voor inductiekoken.
• Gebruik alleen pannen die geschikt zijn voor elektrisch- en
inductiekoken met:
▷ een dikke bodem van minimaal 2,25 mm;
▷ een bolle bodem die volledig in contact is met de kookzone.
• Het beste zijn pannen met het “Class Induction” keurmerk.
Geschikte pannen kunt u bestellen op ‘www.atagservice.nl’.
Tip
Niet elke pan is geschikt voor inductiekoken. Het is daarom belangrijk
om te weten of de pan is gemaakt van het juiste materiaal.
Met een magneet kunt u zelf controleren of uw pan geschikt is.
Als de magneet wordt aangetrokken, kunt de pan gebruiken.
Let op
• In verband met het verhitten van olie is slechts één pan geschikt
voor het wokken op deze inductiekookplaat. Dit is een Curiepan,
deze wordt niet warmer dan 250 ˚C. U kunt deze pan bestellen bij
Atag (typenummer AA3611W).
NL 9
Page 10

GEBRUIK
Inductiegeluiden
Omgang met de wok
• Plaats de pan voorzichtig in de kookzone. Als u onvoorzichtig met
de pan omgaat, kan het handvat tegen de glasplaat slaan en deze
beschadigen.
• Schud de pan niet terwijl hij in de kookzone ligt. Daardoor kunnen
krassen in de glasplaat ontstaan of de glasplaat kan door het
handvat beschadigd raken.
Tikkend geluid
Ook bij lage kookstanden kan een zacht tikkend geluid optreden.
Pan maakt geluid
De pannen kunnen geluid maken tijdens het koken. Dit wordt
veroorzaakt door de doorstroming van de energie van de kookplaat
naar de pan. Met name bij een hoge kookstand is dit normaal bij
bepaalde pannen. Het is niet schadelijk voor de pan of de kookplaat.
Ventilator maakt geluid
Om de levensduur van de elektronica te vergroten, is het apparaat
voorzien van een ventilator. Als u het apparaat intensief gebruikt, wordt
de ventilator ingeschakeld en hoort u een zoemend geluid. Ook nadat u
het apparaat heeft uitgeschakeld, kan de ventilator nog geluid maken.
Automatische inschakelfunctie
Wanneer de automatisch inschakel functie (APD) actief is, is een tikkend
geluid waarneembaar ook als de zone niet in gebruik is.
NL 10
Page 11
BEDIENING
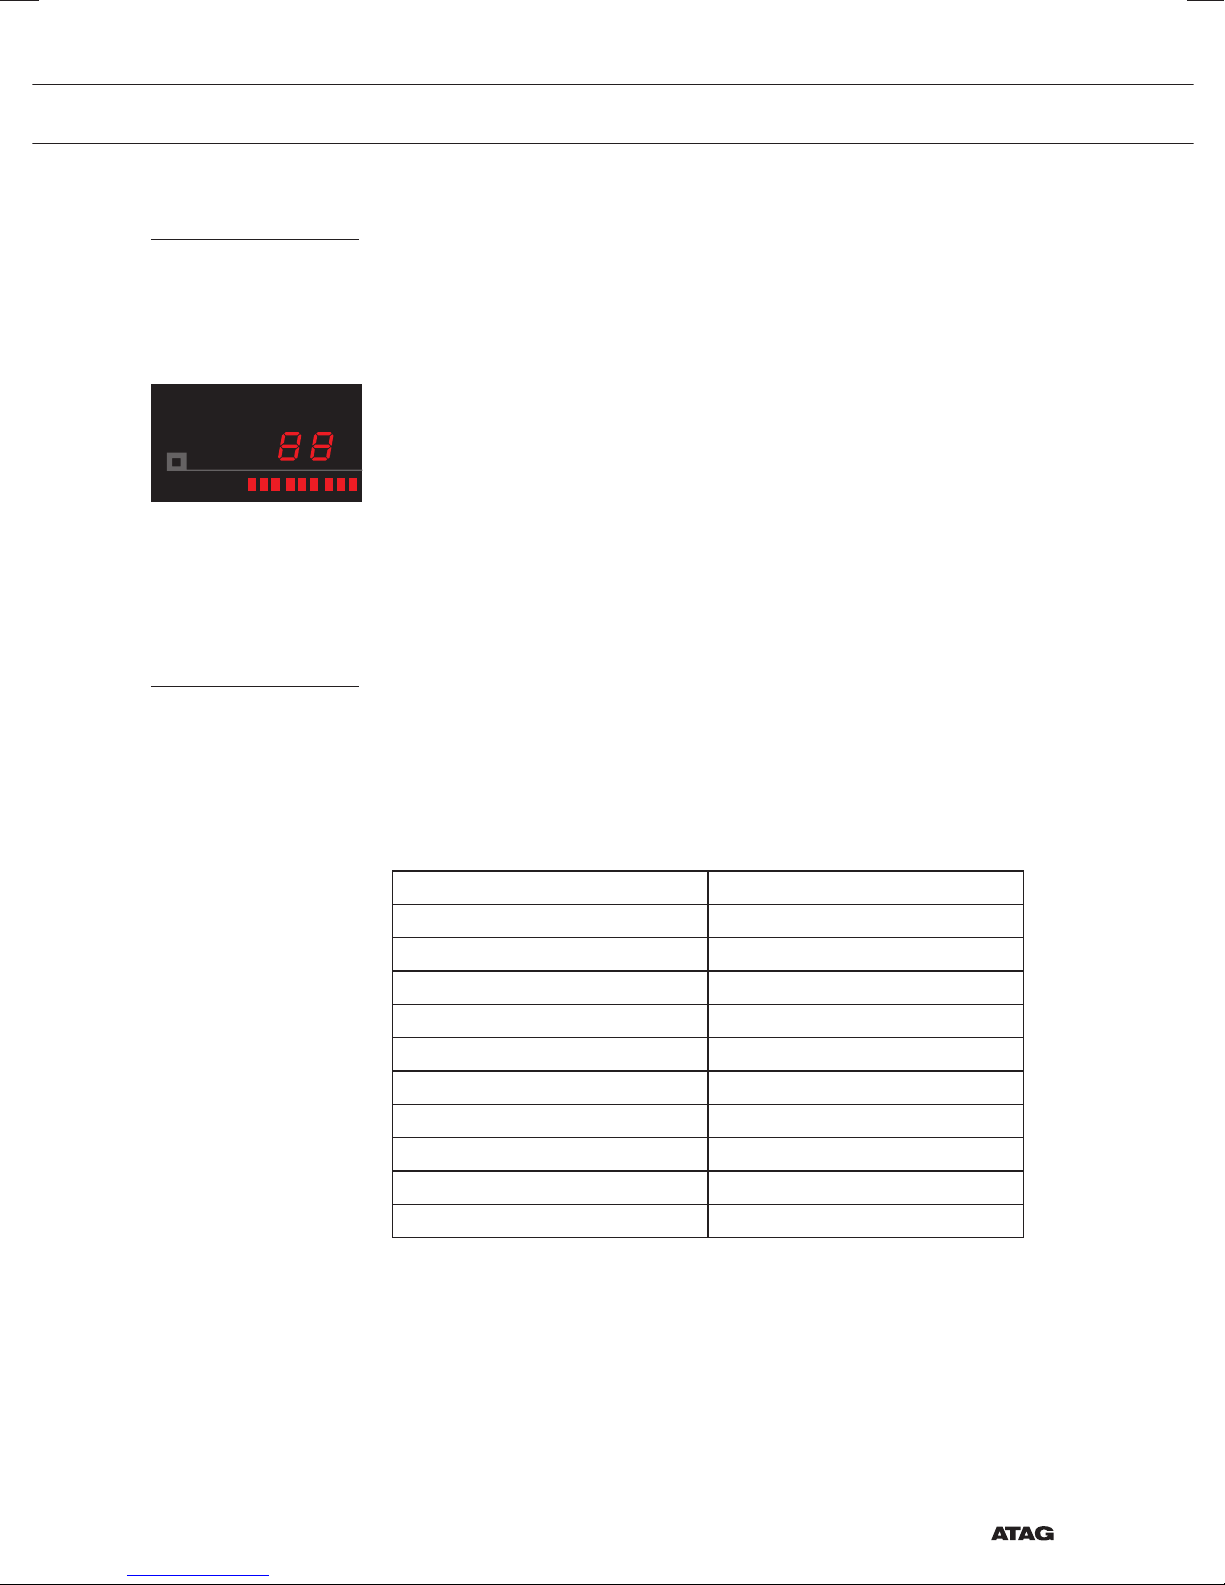
Inschakelen en vermogen instellen
Het vermogen is in te stellen op 12 standen. Daarnaast is er nog een
‘boost’ stand.
1. Plaats een pan in de kookzone.
2. Druk op de kinderslottoets.
Er klinkt een enkel geluidssignaal.
3. Druk op de aan-/uittoets van de kookzone.
In de display verschijnt een knipperende ‘-’ en er klinkt een enkel
geluidssignaal. Wanneer u geen verdere actie onderneemt, schakelt
de kookzone na 10 seconden vanzelf uit.
4. Stel met de + of - toets, of de << of >> toets de gewenste stand in.
De kookplaat start automatisch in de ingestelde stand (als er een
pan gedetecteerd wordt).
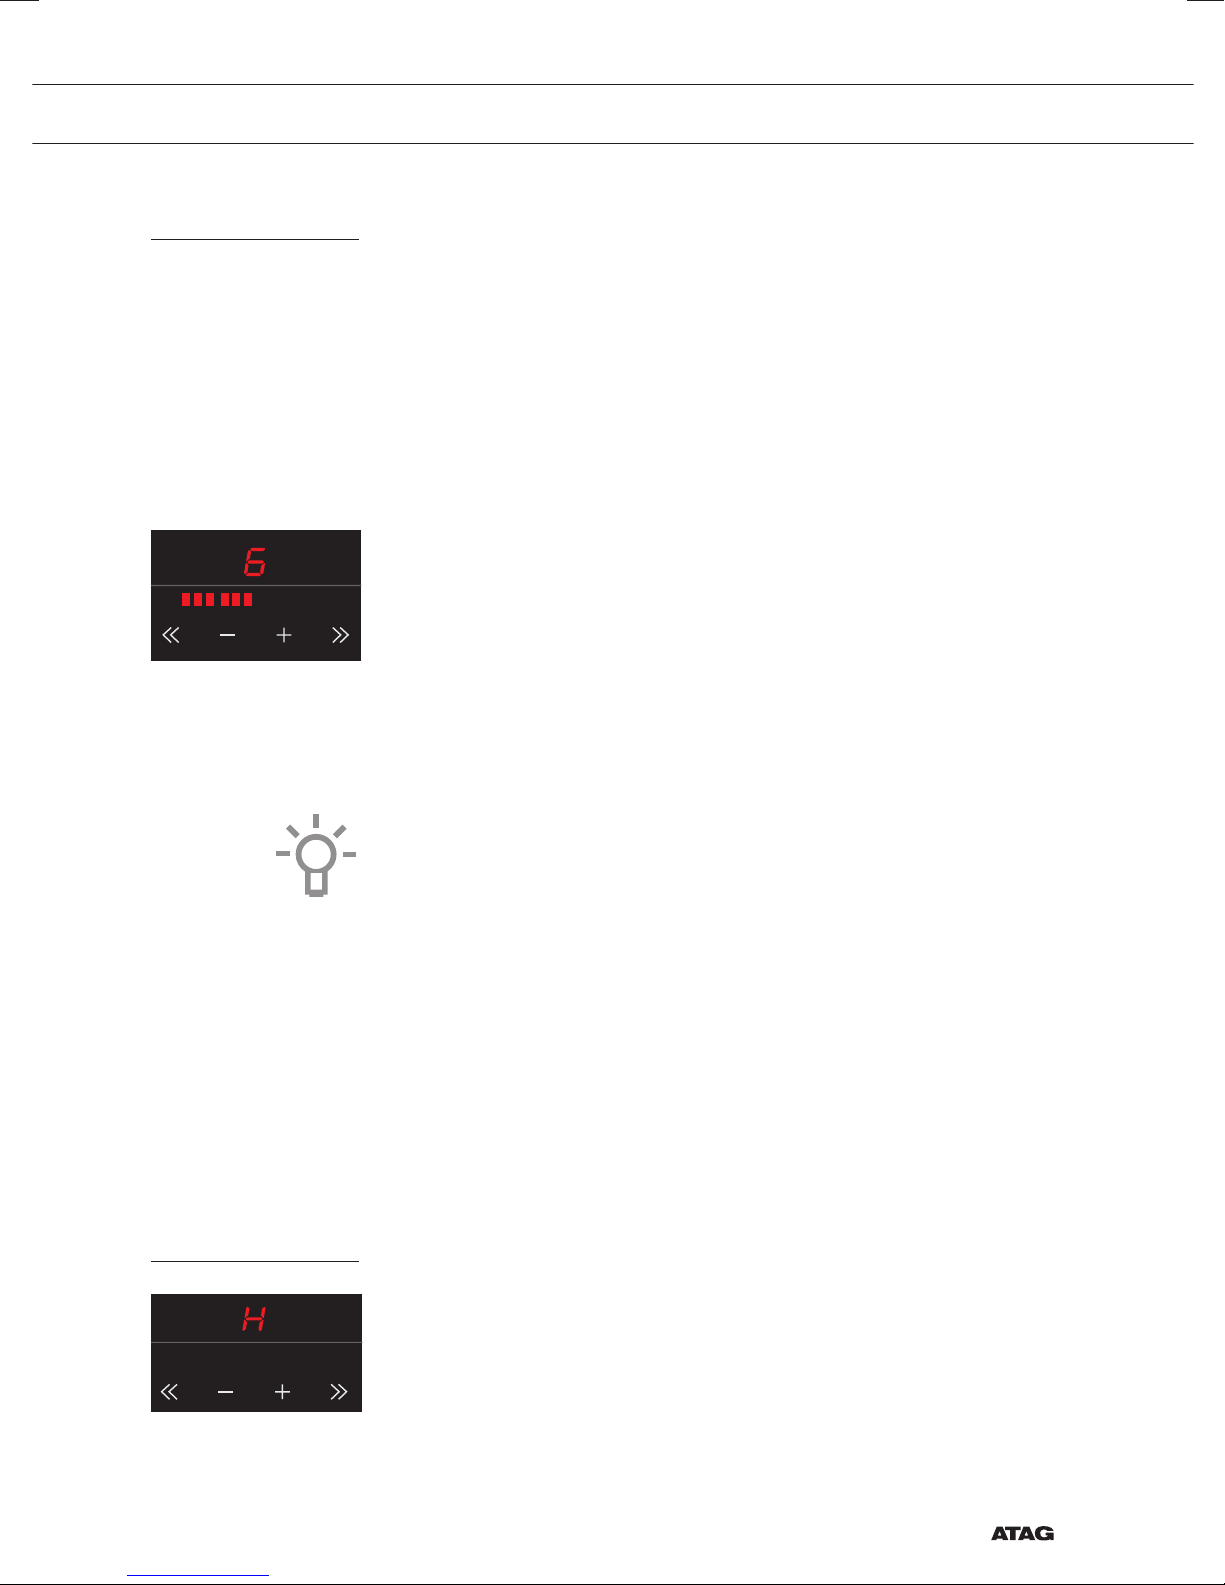
▷ Drukt u de eerste keer op de + of - toets, dan verschijnt stand 6.
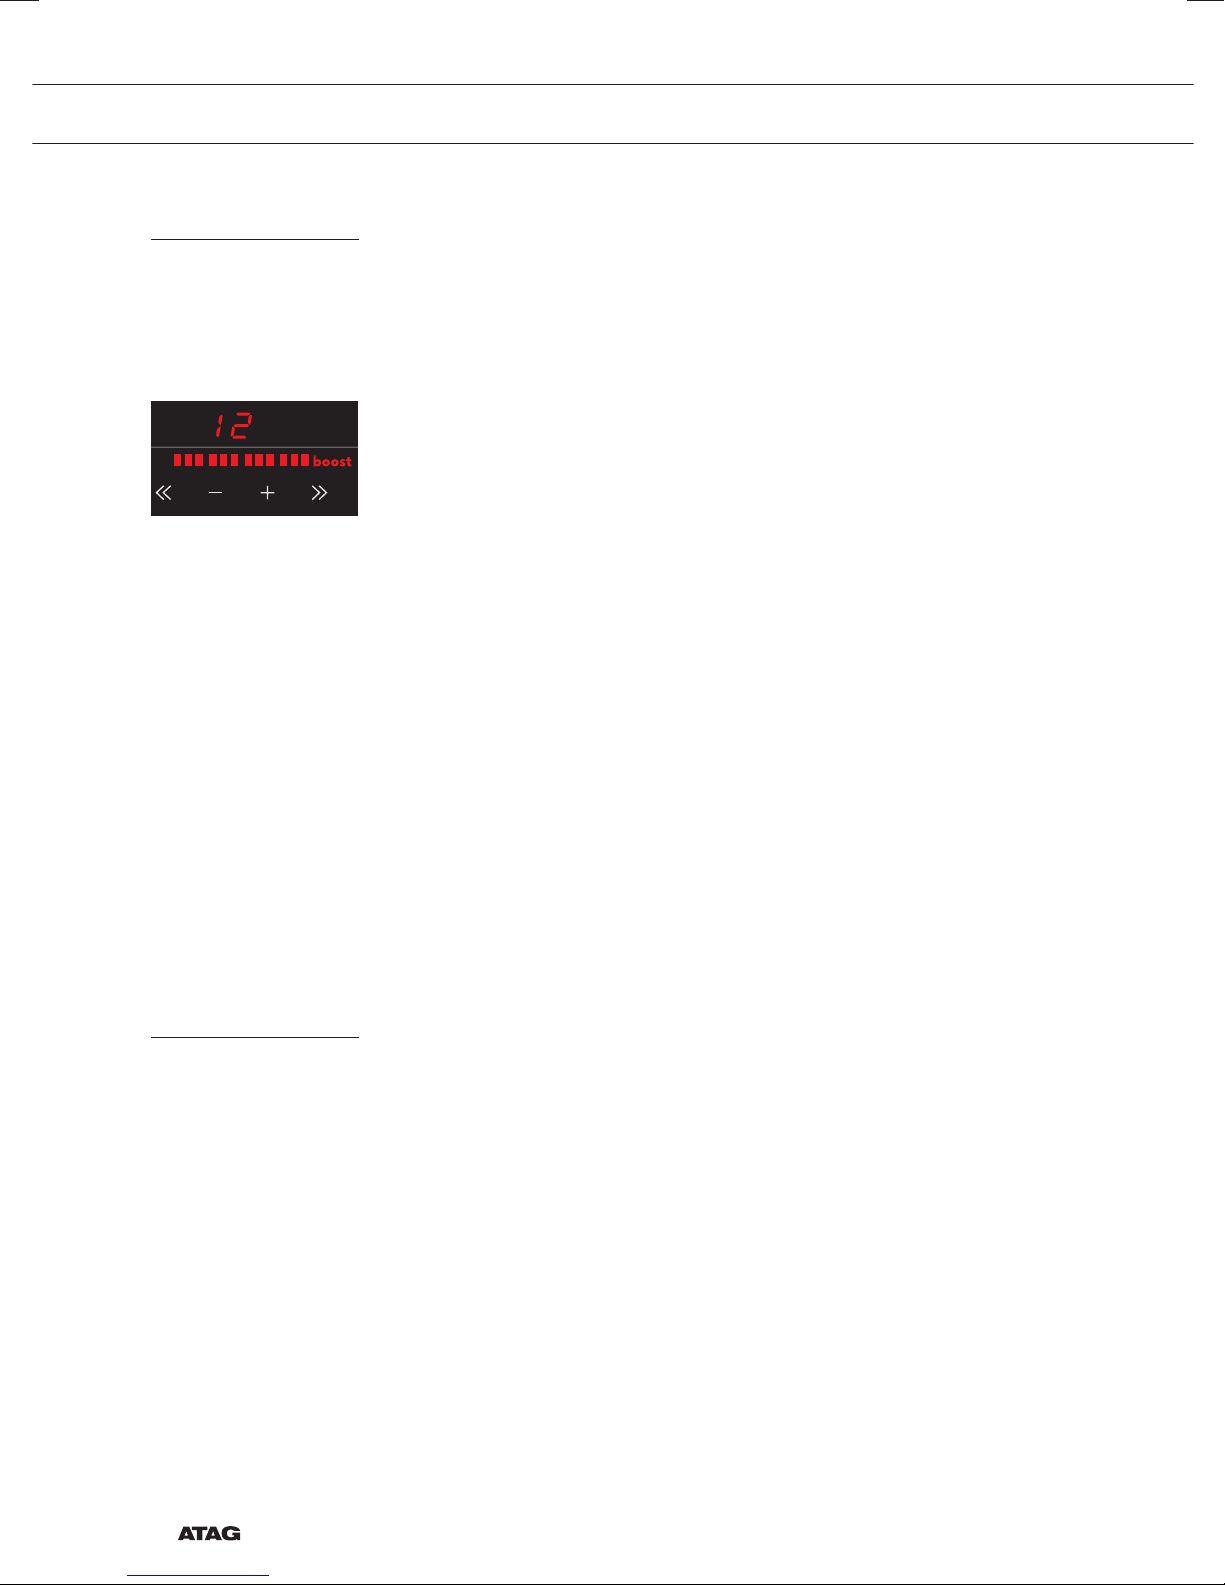
▷ Drukt u de eerste keer op de >> toets dan verschijnt stand 12 +
‘boost’. Dit is de ‘boost’ stand en deze kunt u gebruiken om een
korte tijd op heel hoog vermogen te koken (zie pagina 12).
▷ Drukt u de eerste keer op de << toets dan verschijnt stand 1.
Tips
• Met de + of - toets kunt u de stand stapsgewijs ophogen of
verlagen. Drukt u op de << of de >> toets, dan kunt u de stand
versneld ophogen of verlagen.
• U kunt de << , - , + of >> toets ingedrukt houden om sneller het
gewenste vermogen in te stellen.
Pandetectie
Indien de kookplaat na het instellen van een kookvermogen geen
(geschikte) pan detecteert, zal de display blijven knipperen en de
kookzone blijft koud. Indien er binnen 1 minuut geen (geschikte) pan
geplaatst wordt, schakelt de kookzone automatisch uit.
Restwarmte-indicatie
Na intensief gebruik van de kookzone kan de gebruikte zone nog
enkele minuten warm blijven. Zolang de kookzone heet is, blijft er een
“H” in de display staan.
NL 11
Page 12
BEDIENING
Boost
De ‘boost’ functie kunt u gebruiken om gedurende een korte tijd
(maximaal 10 minuten) op het hoogste vermogen te koken. Na het
verstrijken van de maximale boosttijd wordt het vermogen verlaagd
naar stand 12.
De boostfunctie inschakelen
1. Plaats een pan in de kookzone en schakel de kookzone in.
2. Druk direct na inschakeling een keer op de >> toets.
In de display verschijnt stand 12 en ‘boost’.
• Staat de zone al ingesteld op een bepaalde stand en wilt u deze op
de ‘boost’ stand zetten, dan kunt u dit doen door meerdere keren
op de >> toets of de + toets te drukken.
De boostfunctie uitschakelen
De boostfunctie is ingeschakeld, in de display is stand 12 en ‘boost’
zichtbaar.
1. Druk op de << of - toets.
In de display verschijnt een lagere stand.
Of:
2. Druk op de aan-/uittoets.
Er klinkt een enkel geluidssignaal en de display dooft. De
kookzone is nu helemaal uit.
Uitschakelen
De kookzone uitschakelen
Druk op de aan-/uittoets.
Er klinkt een enkel geluidssignaal en de display dooft.
• De kookplaat staat nu automatisch in stand-by modus (zie ook
Of
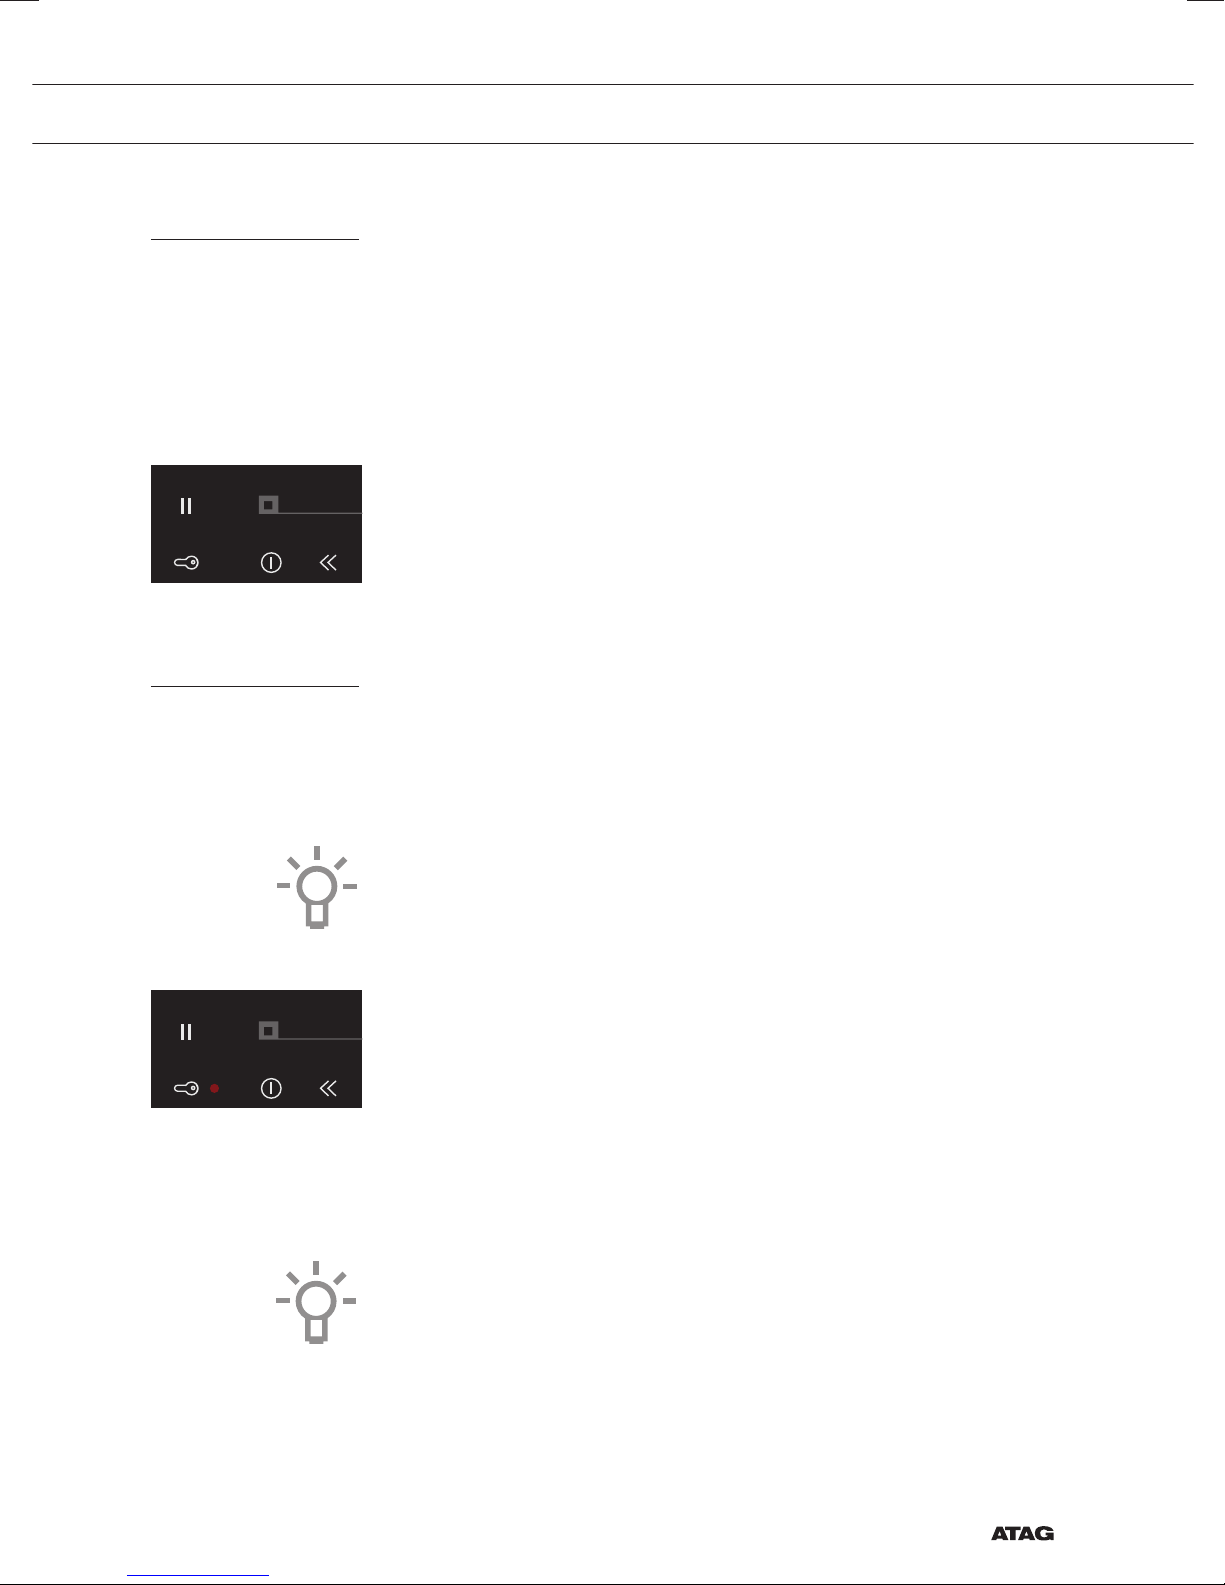
Druk kort op de kinderslottoets om de kookzone uit te schakelen.
Er klinkt een enkel geluidssignaal. Naast de kinderslottoets blijft een
rood lampje langzaam aan en uit gaan.
• De kookplaat staat nu in de eco stand-by modus (zie ook ‘eco
NL 12
‘stand-by modus’).
stand-by modus’).
Page 13
BEDIENING
Stand-by modus
Eco stand-by modus
In stand-by modus is de kookplaat uitgeschakeld. U kunt naar de
stand-by modus schakelen vanuit de eco stand-by modus, of door de
kookzone uit te schakelen.
Vanuit de stand-by modus kunt u direct beginnen met koken door op
de aan-/uittoets te drukken.
De kookplaat vanuit eco stand-by modus naar stand-by modus
schakelen
Het rode lampje naast de ‘kinderslottoets’ knippert langzaam.
Druk kort op de kinderslottoets om naar stand-by modus te schakelen.
Er klinkt een enkel geluidssignaal. Alle lampjes op de kookplaat zijn uit.
In eco stand-by modus is de kookplaat uitgeschakeld en verbruikt de
kookplaat het minste energie. De kookplaat kan naar eco stand-by
modus geschakeld worden vanuit de stand-by modus en wanneer de
kookzone actief is.
Wist u dat
De kookplaat in eco stand-by modus minder dan 0,5W verbruikt.
Dit is nog minder dan in de stand-by modus van de kookplaat.
De kookplaat naar eco stand-by modus schakelen
Druk kort op de kinderslottoets.
Er klinkt een enkel geluidssignaal. De eco stand-by modus is actief, het
rode lampje naast de kinderslottoets knippert langzaam.
Vanuit de eco stand-by modus kunt u niet meteen starten met koken.
Hiervoor moet de kookplaat eerst naar stand-by modus geschakeld
worden.
Wist u dat
Na 30 minuten in de stand-by modus schakelt de kookplaat
automatisch naar eco stand-by modus om onnodig energieverbruik
te voorkomen.
NL 13
Page 14
BEDIENING
Kinderslot
U kunt de kookplaat met het kinderslot vergrendelen. Onbedoeld
inschakelen van de kookzone wordt hiermee voorkomen.
De kookplaat naar kinderslot schakelen
1. Druk gedurende 2 seconden op de kinderslottoets.
Er klinkt een dubbel geluidssignaal. Alle toesten zijn nu inactief
behalve de kinderslottoets. De kookplaat schakelt eerst naar eco
stand-by modus en dan door naar de kinderslot modus. Het rode
lampje brandt constant.
2. Druk nogmaals minimaal 2 seconden op de kinderslottoets om het
kinderslot uit te schakelen.
Er klinkt een enkel geluidssignaal. De kookplaat is nu in stand-by
modus. Het rode lampje naast de kinderslottoets is uit.
Tip
Zet de kookplaat in de kinderslot modus voordat u de kookplaat gaat
reinigen om te voorkomen dat deze per ongeluk inschakelt.
Pauze
Wist u dat
Wanneer de kookplaat op het kinderslot staat, deze net zo weinig
energie verbruikt als in de eco stand-by modus.
Met de pauze functie kunt u de gehele kookplaat tijdens het koken
gedurende 5 minuten ‘op pauze’ zetten. U kunt de kookplaat zo
gedurende een korte tijd, op een veilige manier onbeheerd laten of
schoonmaken, zonder instellingen te verliezen.
De kookplaat naar pauze modus schakelen
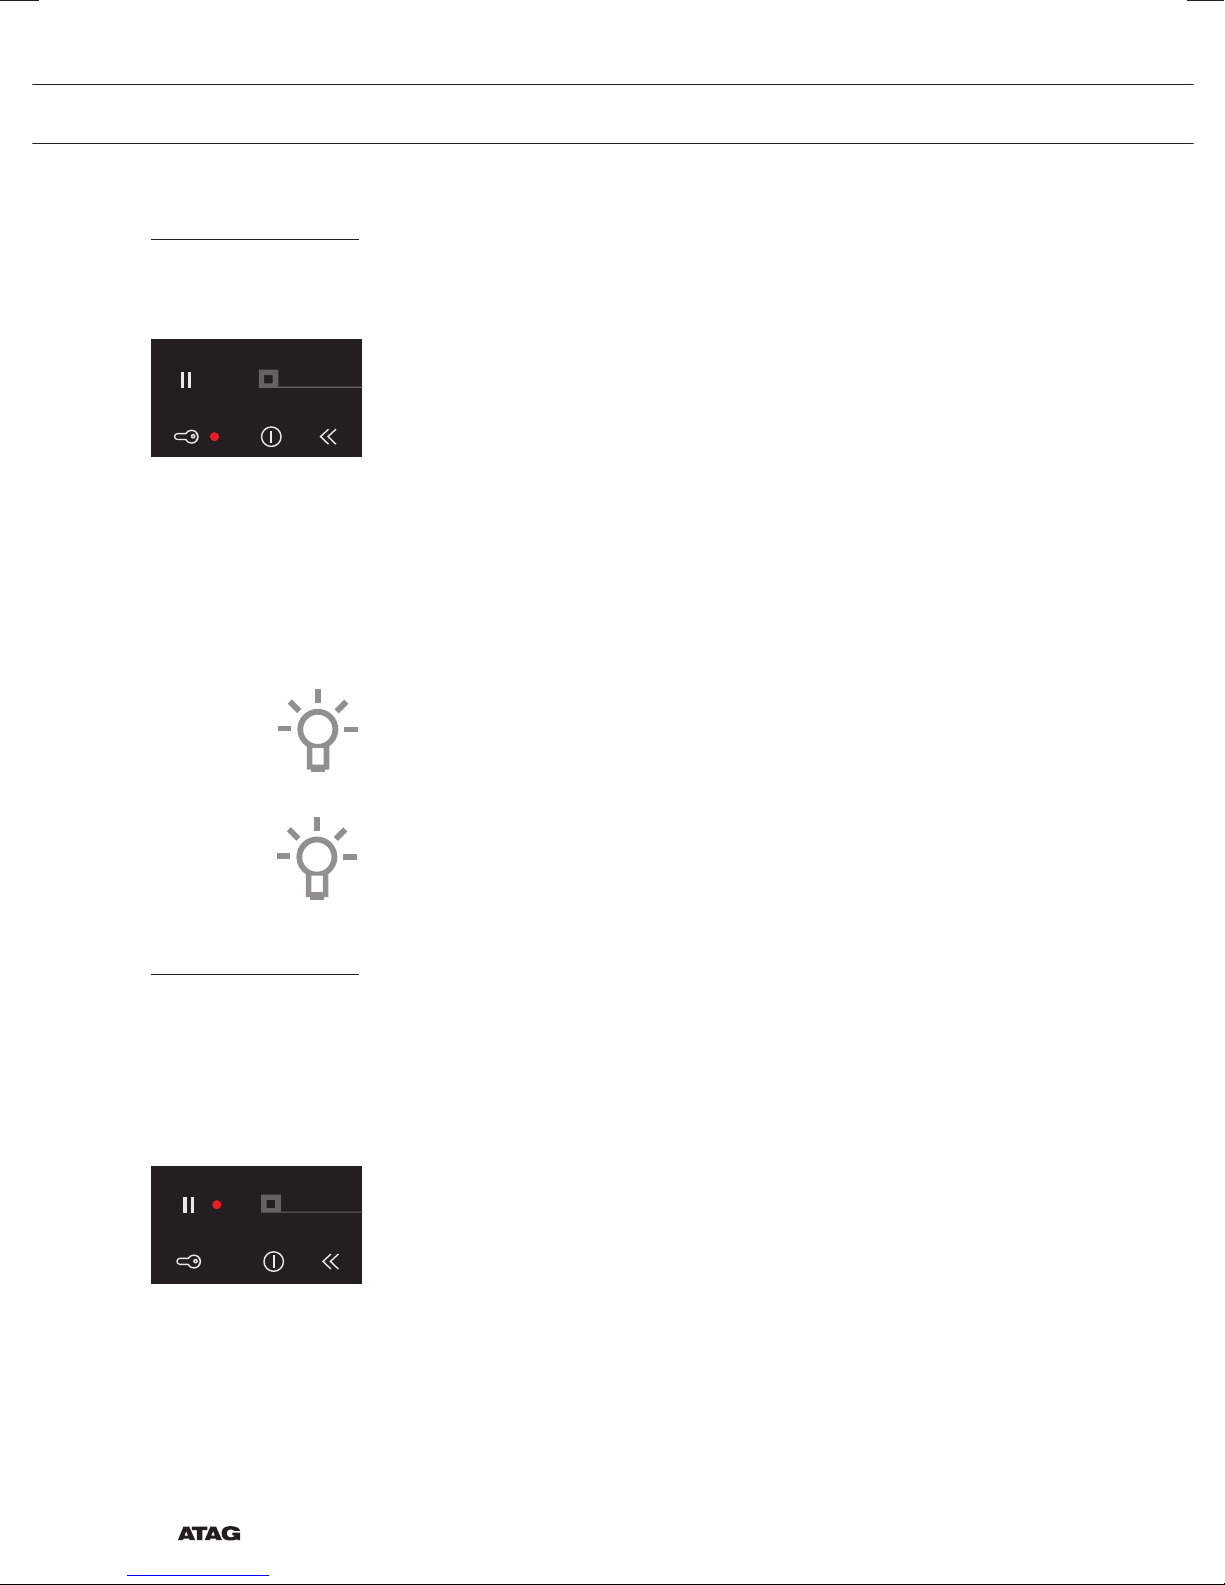
Druk éénmaal op de pauzetoets.
Er klinkt een dubbel geluidssignaal, de standen verspringen naar een
lagere stand en het rode lampje naast de pauzetoets knippert.
• De eventueel ingestelde timer/kookwekker staat stil.
• De kookzone wordt automatisch op een lage stand gezet.
• Alle toetsen zijn inactief behalve de kinderslottoets en de
pauzetoets. Ook de aan-/uittoets blijft actief, echter deze reageert
met een vertraging van twee seconden.
NL 14
Page 15
BEDIENING
Indien u binnen 5 minuten nogmaals op de pauzetoets drukt, zal het
gepauzeerde kookproces hervat worden.
Er klinkt een dubbel geluidssignaal, de kookplaat hervat de instellingen
zoals deze voor de pauze ingesteld zijn.
Indien u binnen 5 minuten geen verdere actie onderneemt:
Wordt de actieve kookzone automatisch uitgeschakeld. Daarna blijft
de pauzetoets nog 25 minuten knipperen om aan te geven dat het
kookproces door de pauze modus is beëindigd. Na 25 minuten schakelt
de kookplaat automatisch van pauze modus naar eco stand-by modus.
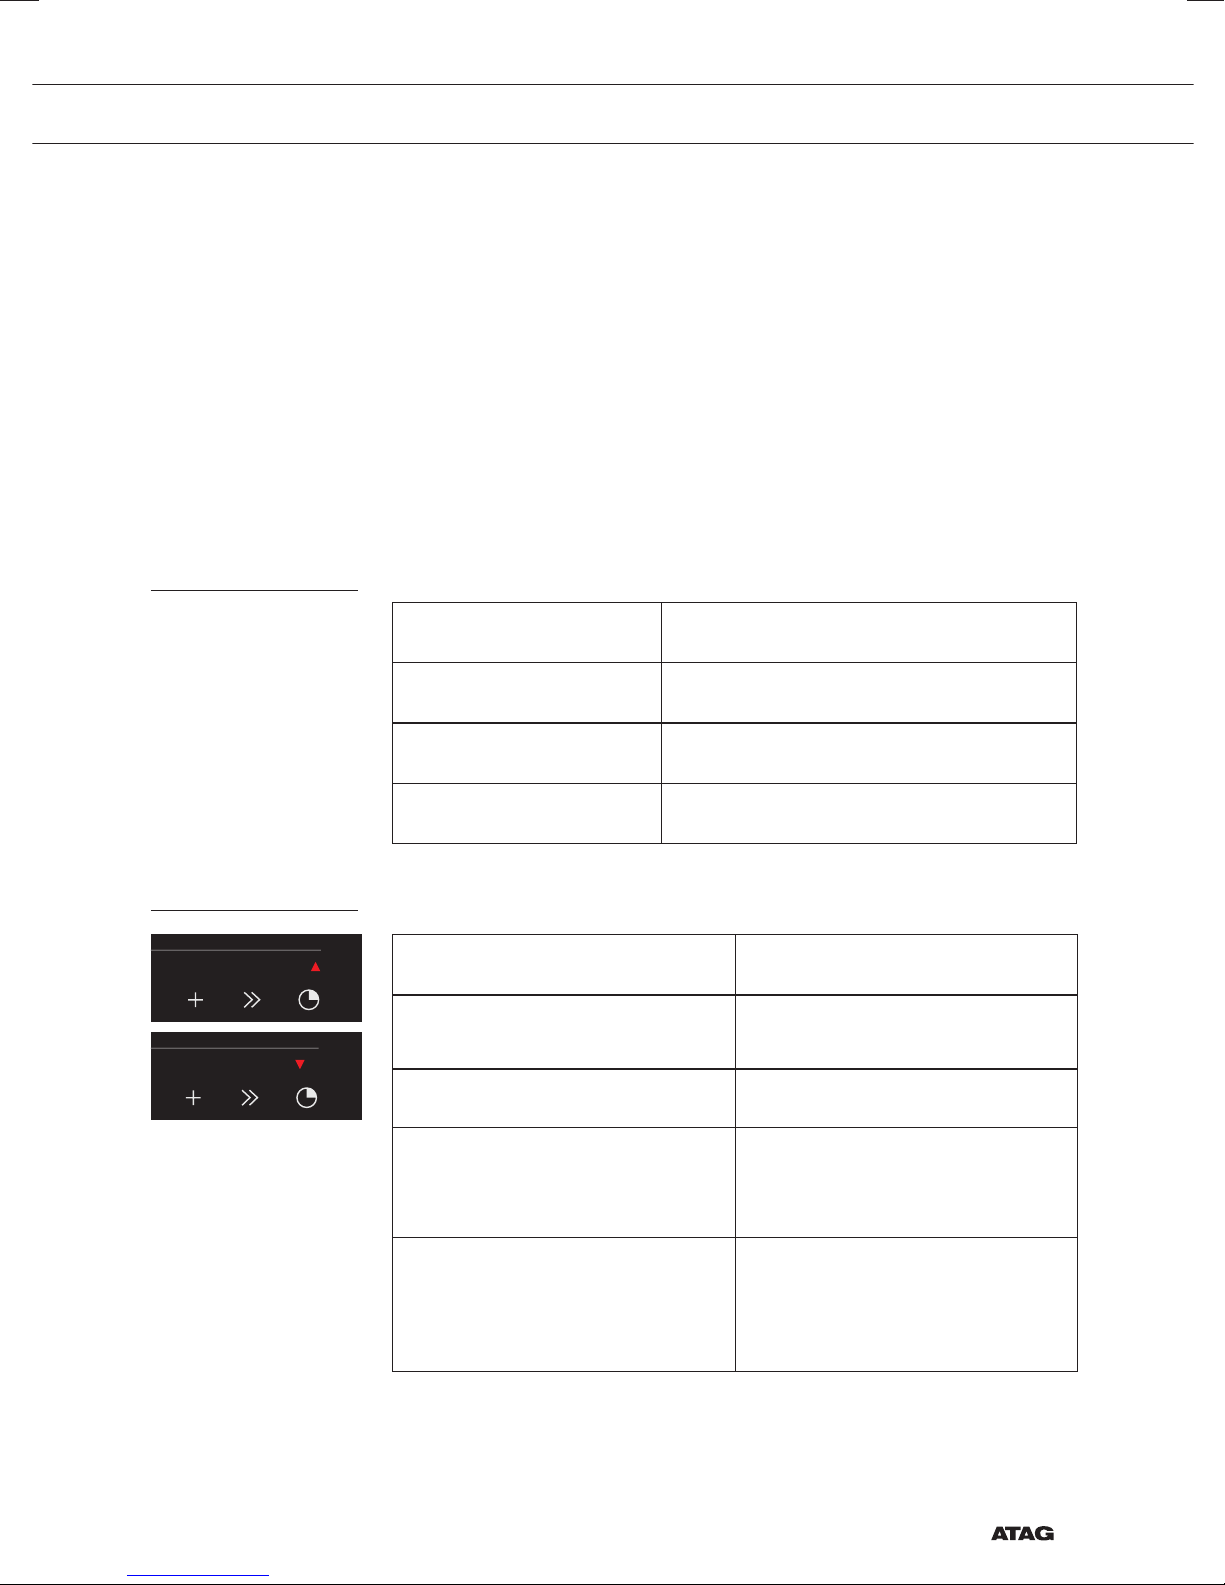
Herkennen van een modus
De stand-by modus Er brandt geen enkel lampje
Timer / Kookwekker
De eco stand-by modus
De kinderslot modus
De pauze modus
De timer-/kookwekkertoets van de kookzone heeft twee functies:
De timerfunctie De kookwekkerfunctie
Herkenbaar aan het naar boven
wijzend rood pijltje.
In de timerfunctie loopt de tijd op.
De timer is niet te koppelen aan
de kookzone.
Druk minimaal 3 seconden op
de ‘timertoets’. De timerfunctie
schakelt in.
Het rode lampje naast de kinderslottoets
knippert langzaam.
Het rode lampje naast de kinderslottoets
brandt constant.
Het rode lampje naast de pauzetoets
knippert.
Herkenbaar aan het naar beneden
wijzend rood pijltje.
In de kookwekkerfunctie telt de
tijd af.
De kookwekker is gekoppeld aan
de kookzone. Dit houdt in dat
de kookzone uitschakelt als de
ingestelde tijd verstreken is.
De kookwekkerfunctie is te
bereiken vanuit de timerfunctie
door op de + of - toets te
drukken.
NL 15
Page 16
BEDIENING
Let op
• De timer-/kookwekkerfunctie kan ook gebruikt worden zonder de
kookzone te activeren.
De timer inschakelen
1. Druk éénmaal op de timer-/kookwekkertoets van de kookzone.
Drie knipperende nullen en ‘+’ en ‘-’ verschijnen in de display.
Als u geen tijd instelt met de + of - toets gaat na 3 seconden
automatisch de timer lopen. De timer loopt tot maximaal 9 uur en
59 minuten.
Rood pijltje (naar boven gericht) licht op en de tijd loopt op.
2. Druk nogmaals op de timer-/kookwekkertoets van de kookzone om
deze uit te schakelen.
De kookwekker inschakelen
1. Druk éénmaal op de timer-/kookwekkertoets van de kookzone.
2. Druk op de + of - toets om van de timerfunctie naar de
kookwekkerfunctie te schakelen. Daarna kunt met de + toets de
gewenste kookduur instellen. Vervolgens kunt u met de - toets de
ingestelde tijd aanpassen.
Rood pijltje (naar boven gericht) licht op en de tijd loopt af.
3. Druk nogmaals op de timer-/kookwekkertoets van de kookzone om
deze weer uit te schakelen.
Let op
• De kookwekker is gekoppeld aan de kookzone indien de kookzone
• Indien de kookwekker gekoppeld is aan de kookzone zal de
NL 16
ingeschakeld is.
kookzone uitschakelen nadat de ingestelde tijd verstreken is.
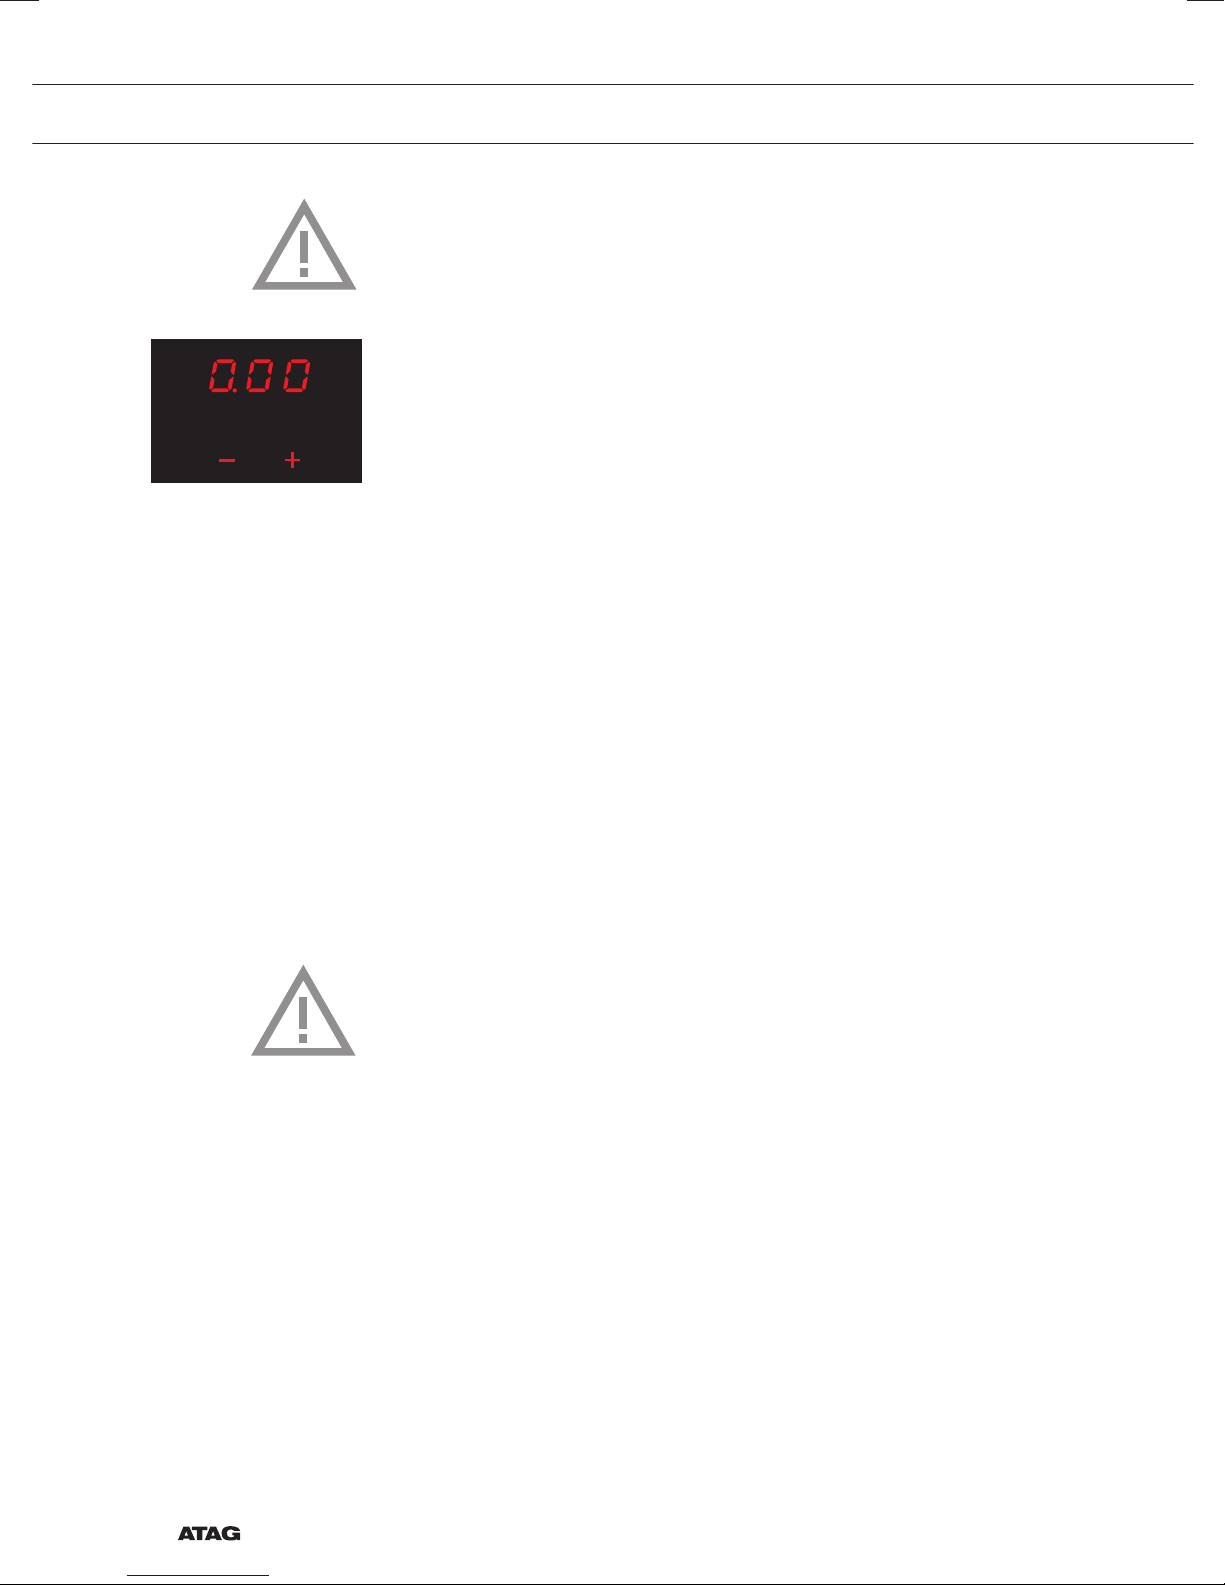
Het kookwekker alarm gaat af en geeft gedurende een kwartier
in afnemende mate een geluidssignaal, terwijl ‘0.00’ en het rode
pijltje naar beneden blijven knipperen. Druk nogmaals op de timer-/
kookwekkertoets van de kookzone om het kookwekker alarm uit te
schakelen.
Page 17

BEDIENING
De kookduur instellen
Schakel de kookwekker in.
Toets Stappen van x per
+ x = 1 minuut 0.00 tot ...
- x = 10 seconden 5.00 - 0.00
- x = 30 seconden 9.00 - 5.00
- x = 1 minuut ... tot 9.00
Na 9 minuten en 0 seconden (“9.00”) verschijnt in de display het woord
“.min” en tellen de minuten verder op achter de punt.
Tip
U kunt de + of - toets ingedrukt houden om sneller de gewenste
kookduur in te stellen.
Geluidssignaal in- en uitschakelen
1. Druk tweemaal op de aan-/uittoets.
2. Houd daarna tegelijkertijd de << toets en de + toets ingedrukt
totdat u een geluidssignaal hoort.
Het geluidssignaal is nu uitgeschakeld voor alle toetsbedieningen,
behalve bij de pauzetoets en de kinderslottoets. Let wel: het
kookwekker alarm en het geluidssignaal bij foutmeldingen zijn niet
uit te schakelen.
3. Gebruik dezelfde toetscombinatie om het geluid weer in te
schakelen.
Tijdsduur
toetsaanraking
NL 17
Page 18

BEDIENING
Automatische pandetectie in- en uitschakelen
Als er, na het inschakelen van de kookplaat, een pan op een inactieve
kookzone geplaatst wordt licht de bediening op en kan deze direct
bedient worden (zonder de aan-/uittoets te bedienen). Als de kookzone
niet binnen 10 seconden ingeschakeld wordt gaat deze weer uit en kan
vervolgens weer geactiveerd worden door de pan te verwijderen en
opnieuw te plaatsen of door gebruik te maken van de aan-/uittoets.
Deze functie is standaard actief, maar kan ook uitgeschakeld worden.
Dit gebeurd door de kookplaat uit te schakelen en ‘Wok’ toets (19) en
‘aan-/uittoets’ (6) van de linker bediening 5 sec. te bedienen. Op de
displays verschijnt dan ‘APd OFF’. Door de handeling te herhalen wordt
de functie weer geactiveerd en verschijnt ‘APd On’ in de display.
NL 18
Page 19
O
BEDIENING
De ideale wokstand
WOK W
Gezond koken
Als de kookplaat is ingeschakeld, kunt u met één druk op een toets
automatisch de ideale wokstand instellen.
De ideale wokstand instellen
Er staat een pan in de kookzone en de kookplaat is ingeschakeld.
1. Druk op de woktoets.
Er licht een icoon op en er verschijnt een ‘A’ in de display. De
kookzone schakelt na 3 seconden automatisch in op de ideale
wokstand.
U kunt met de volgende toetsen een ander vermogen kiezen:
<< , + , - , >> .
Rookpunt van verschillende oliesoorten
Om gezond te bakken, adviseert ATAG om de oliesoort af te stemmen
op de baktemperatuur. Elke oliesoort heeft een ander rookpunt waarbij
giftige gassen vrijkomen. In onderstaande tabel ziet u de rookpunten
van verschillende oliesoorten.
Olie Rookpunt °C
Extra vierge olijfolie
Boter
Kokosolie
Raapzaadolie
Vierge olijfolie
Zonnebloemolie
Maisolie
Arachideolie
Rijstolie
Olijfolie
160 °C
177 °C
177 °C
204 °C
216 °C
227 °C
232 °C
232 °C
255 °C
242 °C
NL 19
Page 20
ONDERHOUD
Reinigen
Tip
Schakel, voordat u met schoonmaken begint, eerst het kinderslot in.
Dagelijkse reiniging
• Hoewel overgekookt voedsel niet kan inbranden verdient het
aanbeveling de kookplaat direct na gebruik schoon te maken.
Voor de dagelijkse reiniging kunt u het beste een mild
reinigingsmiddel en een vochtige doek gebruiken.
• Nadrogen met keukenpapier of een droge doek.
Hardnekkige vlekken
• Ook hardnekkige vlekken zijn met een mild reinigingsmiddel,
bijvoorbeeld afwasmiddel, te verwijderen.
• Verwijder waterkringen en kalkresten met schoonmaakazijn.
• Metaalsporen (ontstaan door schuiven van pannen) zijn vaak lastig
te verwijderen. Hiervoor zijn speciale middelen verkrijgbaar.
• Verwijder overgekookte voedselresten met een glasschraper.
Ook gesmolten kunststof en suiker kunt u verwijderen met een
glasschraper.
.
Nooit gebruiken
• Gebruik nooit schuurmiddelen. Deze veroorzaken krasjes waarin
zich kalk en vuil ophopen.
• Gebruik ook nooit scherpe voorwerpen, zoals staalwol en
schuursponsjes.
NL 20
Page 21
STORING
Algemeen
Storingstabel
Voor het telefoonnummer van de servicedienst kunt u de bijgeleverde
garantiekaart raadplegen of kijken op ‘www.atagservice.nl’.
Indien u een barstje of scheurtje (hoe klein ook) op de glasplaat ziet,
schakel dan de kookplaat onmiddellijk uit, neem direct de stekker
van de kookplaat uit het stopcontact, verbreek de (automatische)
zekering(en) in de meterkast of zet de schakelaar in de meterkast op
nul bij een vaste aansluiting. Neem vervolgens contact op met de
servicedienst.
Wanneer u twijfelt over de goede werking van uw inductiekookplaat
betekent dit niet automatisch dat er een defect is. Controleer in elk
geval de volgende punten in onderstaande tabel of kijk voor meer
informatie op de website ‘www.atagservice.nl’.
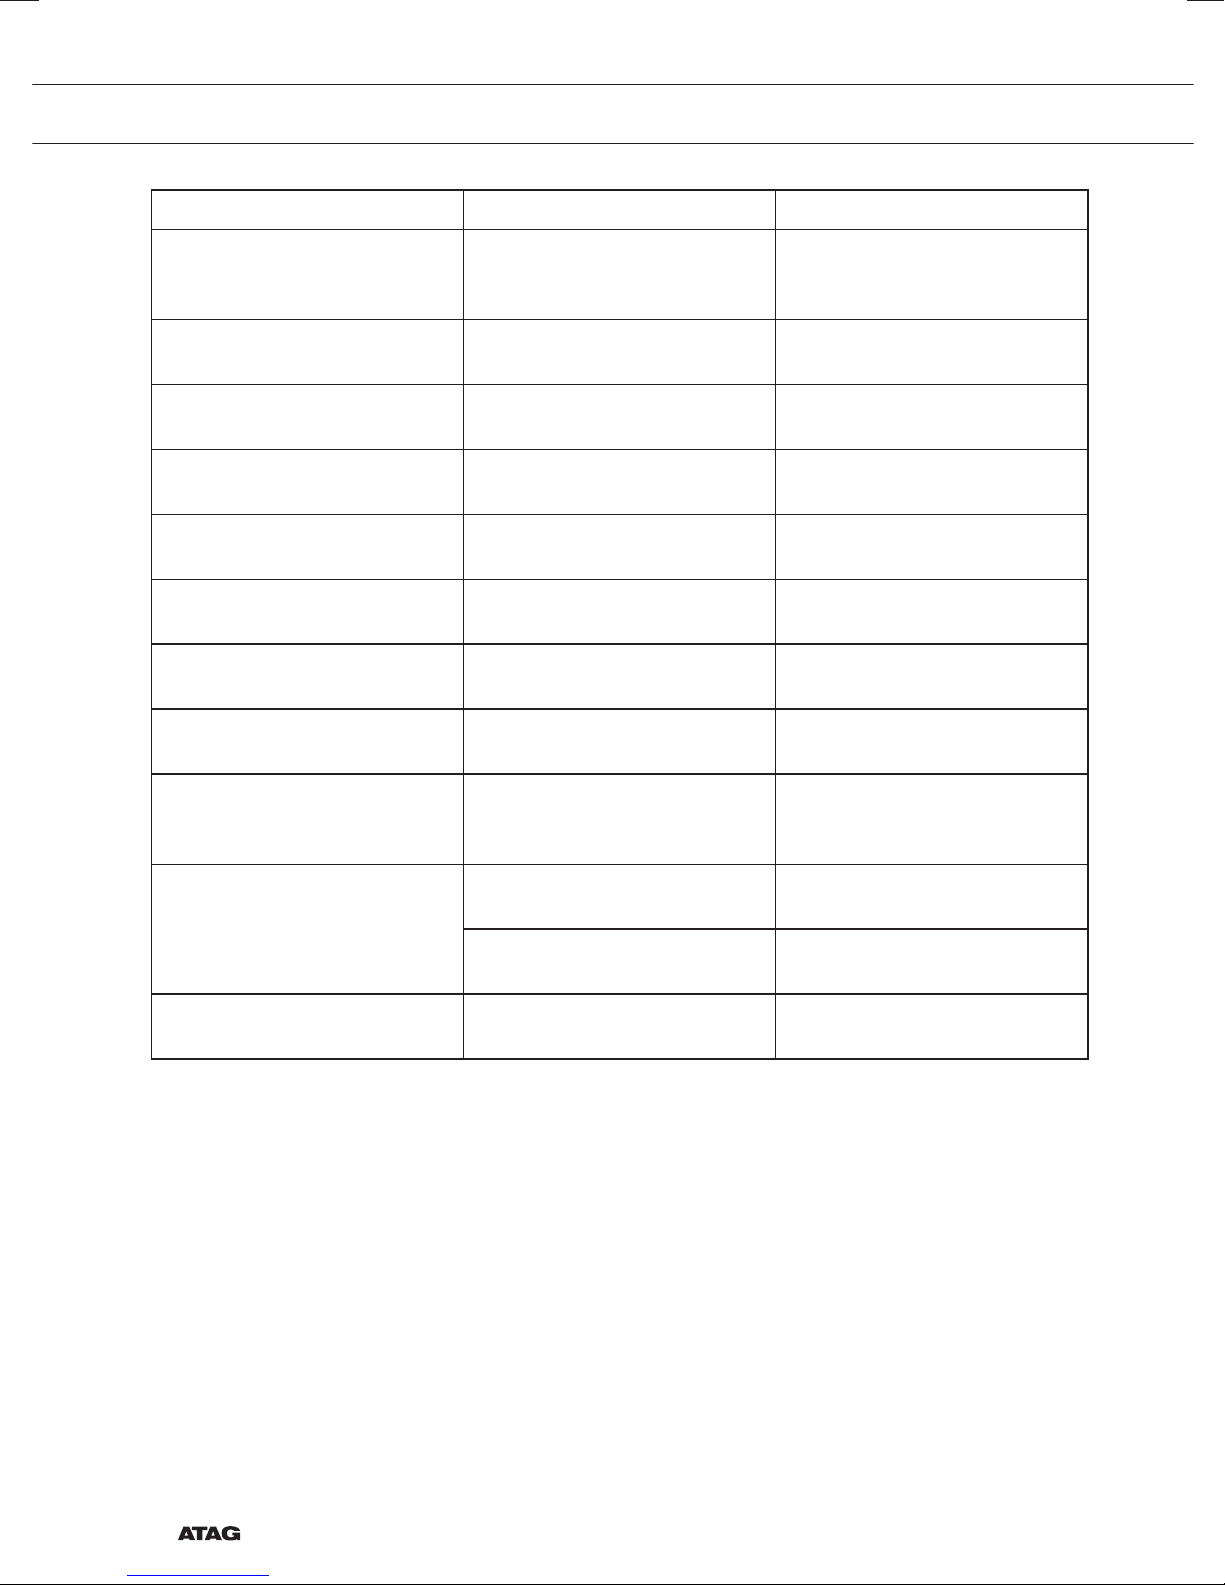
Symptoom Mogelijke oorzaak Oplossing
Bij het in werking stellen
verschijnt er tekst in de
display.
De ventilatie blijft nog enkele
minuten doorwerken nadat de
kookplaat is uitgeschakeld.
De kookplaat geeft bij de
eerste kookbeurten een lichte
geur af.
De kookpannen maken lawaai
tijdens het koken.
Nadat u de kookzone heeft
ingeschakeld blijft de display
knipperen.
De kookzone stopt plotseling
met de werking en er klinkt een
signaal.
Dit is de standaard
opstartroutine.
Afkoeling van de kookplaat. Normale werking.
Opwarmen nieuw toestel. Dit is normaal en verdwijnt na
Dit wordt veroorzaakt door de
doorstroming van de energie
van de kookplaat naar de
kookpan.
De gebruikte kookpan is
niet geschikt voor koken op
inductie of heeft niet de juiste
bolling.
De ingestelde timertijd is
voorbij.
Normale werking.
enkele keren koken.Ventileer
de keuken.
Bij een hoge kookstand is dit
normaal bij bepaalde pannen.
Dit is niet schadelijk voor de
pannen of de kookplaat.
Gebruik een goede pan.
Schakel het signaal uit met de
+ of - toets van de timer.
De kookplaat werkt niet en er
verschijnt niets in de display.
Geen stroomtoevoer door
defecte voeding of foutieve
aansluiting.
Controleer de zekering of de
elektrische schakelaar (bij een
toestel zonder stekker).
NL 21
Page 22
STORING
Symptoom Mogelijke oorzaak Oplossing
Bij het inschakelen van de
kookplaat slaat de zekering
van de installatie door.
Foutcode F00. Het bedieningspaneel is
Foutcode F0 t/m F6 en FC. De generator is defect. Neem contact op met de
Foutcode F7. De omgevingstemperatuur is
Foutcode F8 en F08. Toestel oververhit. Het toestel laten afkoelen en
Foutcode F9 en/of continu
geluidssignaal.
Foutcode F99. U hebt 2 of meerdere toetsen
Foutcode FA. Spanning te laag. Neem contact op met uw
Foutcode FAN. Luchtcirculatie niet goed. Zorg dat de beluchtingsgaten
Verkeerde aansluiting van de
kookplaat.
vervuild of er ligt water op.
niet goed.
Spanning te hoog en/of niet
goed aangesloten.
tegelijk bediend.
Controleer de elektrische
aansluiting.
Bedieningspaneel schoonmaken.
servicedienst.
Zet alle warmtebronnen in de
omgeving van de kookplaat uit.
opnieuw beginnen met koken.
Laat uw aansluiting wijzigen.
Bedien maar 1 toets tegelijk.
energiebedrijf.
onderin de kookplaat open
zijn.
Foutcode E6 Geen goede pan. Kijk op www.atagservice.nl
voor de juiste wokpan.
Hardware- / softwarefout. Neem contact op met de
servicedienst.
Overige foutcodes Generator defect. Neem contact op met de
servicedienst.
NL 22
Page 23
INSTALLATIEVOORSCHRIFTEN
Veiligheidsvoorschriften installatie
• De aansluiting moet voldoen aan de nationale en lokale
voorschriften.
• Het toestel moet altijd geaard zijn.
• Alleen een erkend elektrotechnisch installateur mag dit toestel
aansluiten.
• Sluit dit toestel altijd aan op een geaarde contactdoos.
• De aansluitkabel moet vrij hangen en mag niet door een lade
worden aangestoten.
• Wilt u een vaste aansluiting maken, zorg er dan voor dat er een
omnipolaire schakelaar met een contactafstand van minimaal
3 mm in de toevoerleiding wordt aangebracht.
• Het werkblad waarin de kookplaat wordt ingebouwd moet vlak zijn.
• De wanden en het werkblad rondom het toestel moeten minimaal
tot 85 °C hittebestendig zijn. Ook al wordt het toestel zelf niet
warm, door de warmte van een hete pan kan de wand verkleuren of
vervormen.
• Schade ontstaan door verkeerd aansluiten, verkeerd inbouwen of
verkeerd gebruik valt niet onder de garantie.
.
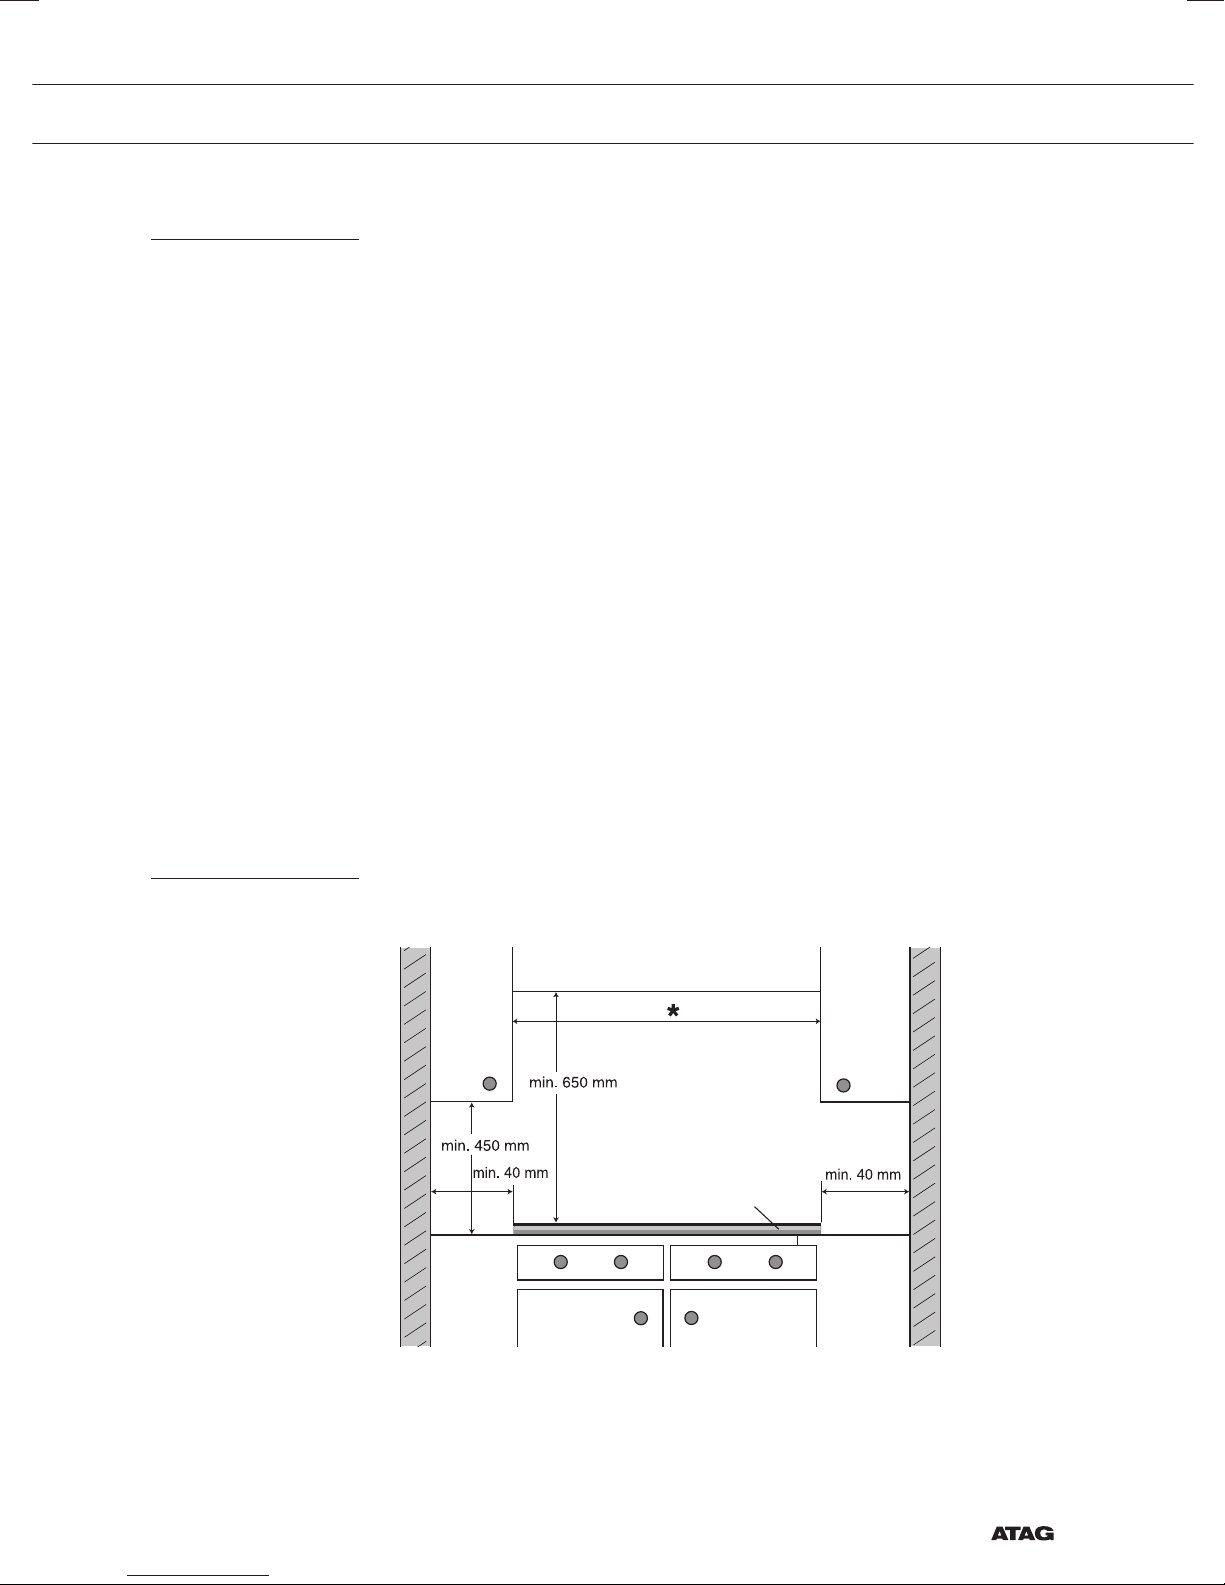
Benodigde vrije ruimte rondom
Voor een veilig gebruik is voldoende ruimte rondom de kookplaat
noodzakelijk. Controleer of deze ruimte aanwezig is.
HI3271W: min. 40 cm
*
kast
cabinet
afzuigkap
cooker hood
kookplaat
hob
zijwand
side wall
NL 23
Page 24
INSTALLATIEVOORSCHRIFTEN
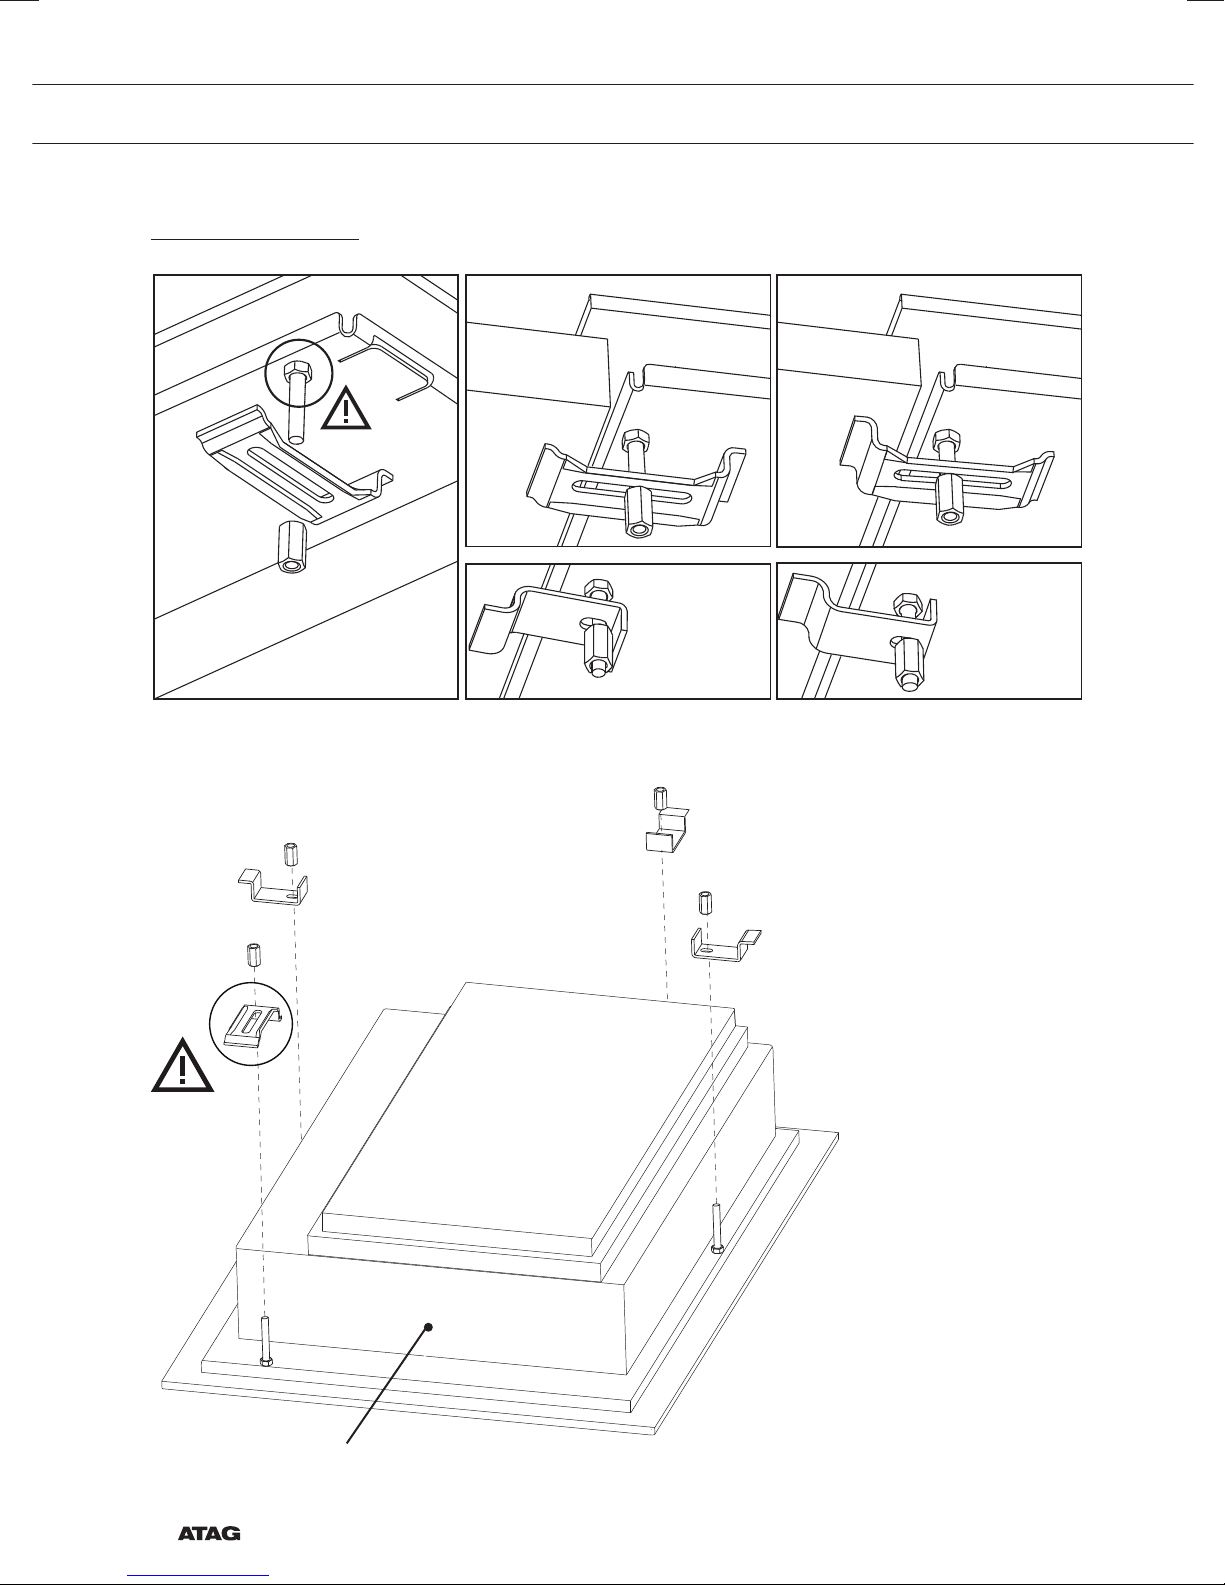
Bevestigingspunten montagebeugels
verdraaien!
2
1
Dikke werkbladen Dunne werkbladenMoer niet verwijderen of
2
2
voorzijde
NL 24
Page 25
INSTALLATIEVOORSCHRIFT
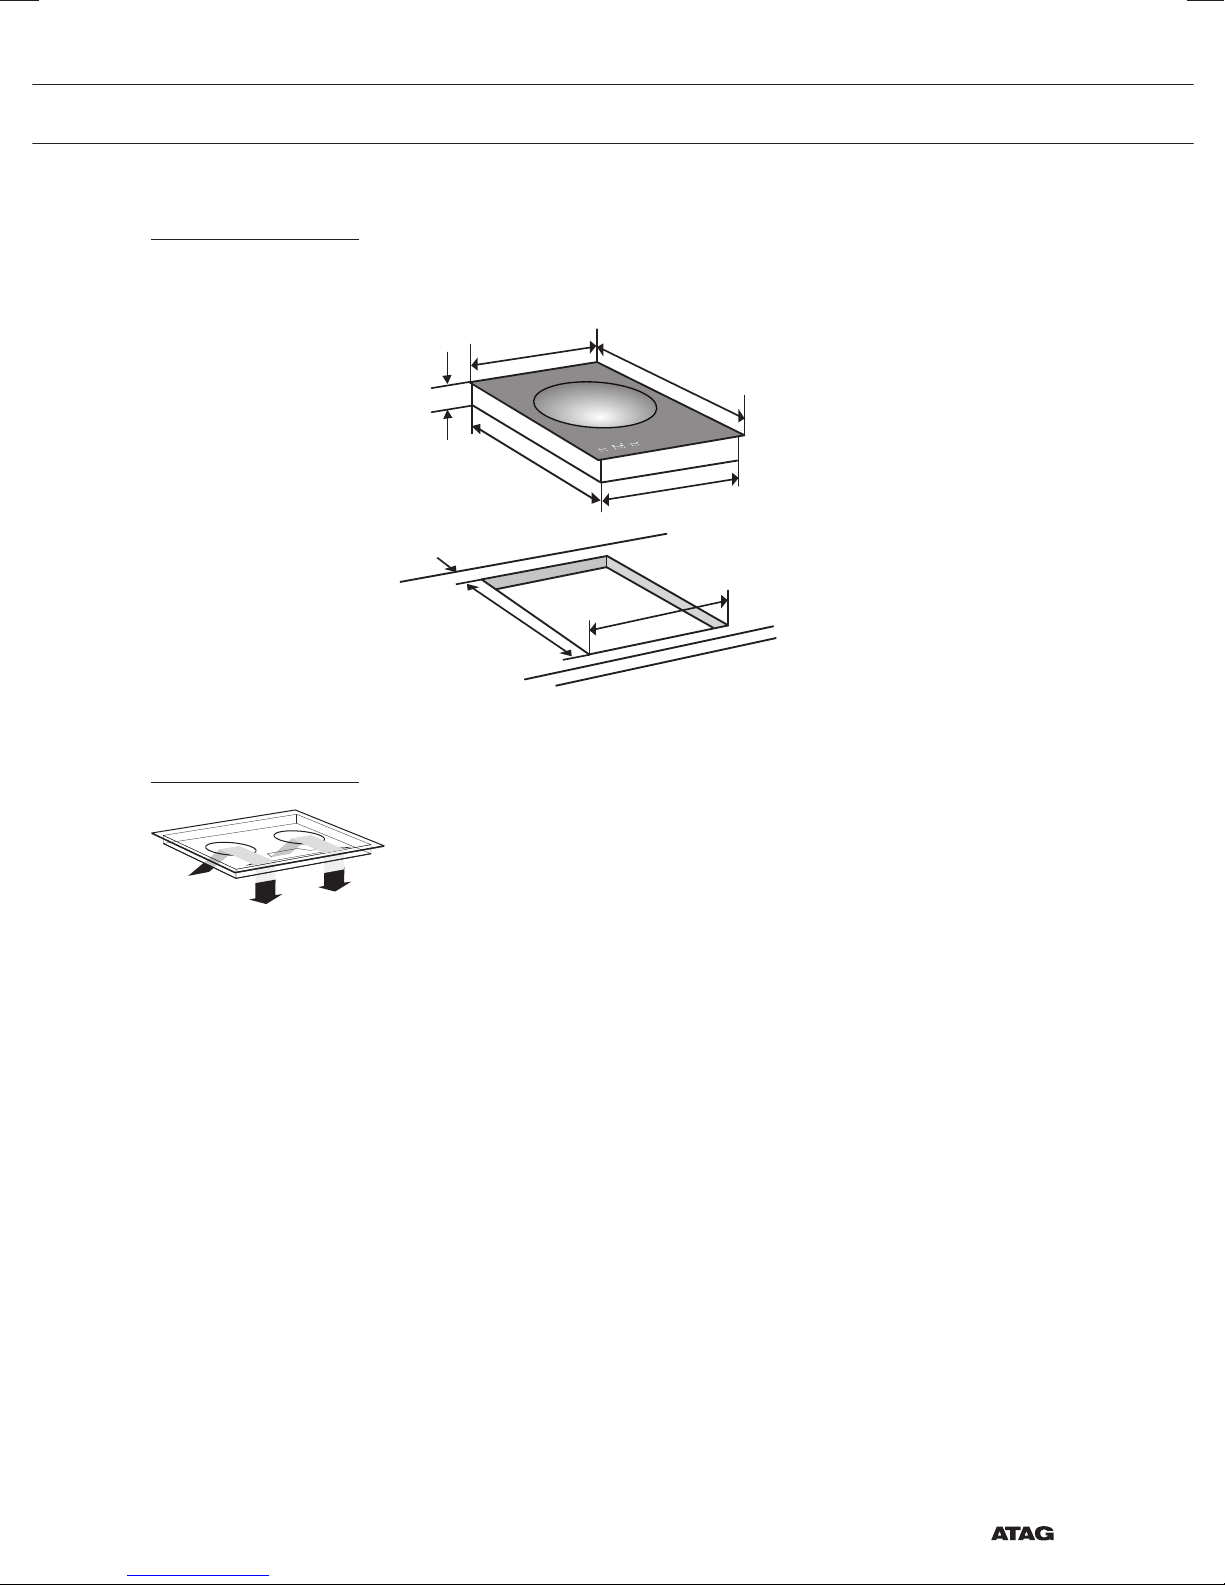
Inbouwmaten
In de volgende illustratie zijn de afmetingen van de uitsparing
aangegeven.
384
125
484
min.40
490
522
338
345
Beluchting
De elektronica in het toestel heeft koeling nodig. Het toestel schakelt na
korte tijd uit wanneer er onvoldoende lucht circuleert. Aan de onderzijde van het toestel bevinden zich de ventilatieopeningen. Door deze
openingen moet koele lucht aangezogen kunnen worden. Aan de
voorzijde en onderzijde is het toestel voorzien van uitblaasopeningen.
NL 25
Page 26

INSTALLATIEVOORSCHRIFT
Inbouwen boven een lade of vaste blende
Beluchting vindt plaats via plint (A) en achterzijde kast (B). Zaag de
B
beluchtingsopeningen (min. 100 cm2) uit. Luchttoevoer A is overbodig
wanneer er, samen met opening B, ergens anders een opening is waar
C
lucht aangezogen kan worden.
A
Zorg ervoor dat de traverselat de luchtdoorvoer niet hindert.
Schaaf of zaag de traverselat C zonodig schuin af.
Heeft u een werkblad dat dikker is dan de inbouwdiepte (=120 mm) van
het toestel, dan is er niets aan de hand. Maar als uw werkblad dunner is
dan de inbouwdiepte van het toestel, past er wellicht geen lade of oven
onder het toestel.
Onder de kookplaat dient een minimale ruimte te zijn ten behoeve van
koeling en optimaal fuctioneren van de kookplaat. Aangeraden word
om minimaal 10 mm ruimte tussen de onderkant van de kookplaat en
de bovenkant van een lade vrij te houden.
Een lade mag de ventilatieopeningen aan de onderzijde van het toestel
niet afsluiten. Bij een lade moet er aan de voorzijde een spleet gemaakt
worden van minimaal de toestelbreedte.
NL 26
Page 27

384
384
345
345
INSTALLATIEVOORSCHRIFT
Inbouwsituatie met tussenruimte
X mm
min. 10 mm
min.50
490
50 mm
345
Inbouwsituaties met koppelprofiel
X mm +50 mm
Koppelprofiel
dient ervoor om
de toestellen
strak tegen
elkaar te
monteren
NL 27
Page 28

INSTALLATIEVOORSCHRIFT
Inbouwen
Controleer of het keukenmeubel en de uitsparing voldoen aan de
gestelde eisen ten aanzien van afmetingen en venti latie.
Behandel van kunststof of houten werkbladen de kopse kanten met
eventueel afdichtvernis, om uitzetten van het werkblad door vocht te
voorkomen.
Leg het toestel omgekeerd op het aanrechtblad.
Verwijder de beschermfolie van het afdichtband en plak het band in
de groef van de aluminium profielen of op de rand van de glasplaat.
Plak het afdichtband niet door de hoek, maar knip 4 stukken die goed
aansluiten in de hoek.
Keer het toestel om en leg het in de uitsparing.
Sluit het toestel aan op het elektriciteitsnet. Het toestel is nu
gebruiksklaar.
Controleer de werking. Indien het toestel fout is aangesloten, zal het
een geluidssignaal geven of een foutcode in de dis plays laten zien.
Indien de aansluitkabel beschadigd is mag deze alleen worden
vervangen door de fabrikant, zijn service-organisatie of gelijkwaardig
gekwalificeerde personen, teneinde gevaarlijke situaties te voorkomen.
NL 28
Page 29

TECHNISCHE GEGEVENS
Vermogens- en inbouwtabel
Deze toestellen voldoen aan alle relevante CE richtlijnen.
Kookplaattype HI3271W
Inductie x
Aansluiting 230V - 50Hz (eurostekker)
Aantal fasen 1
Max. vermogen kookzone 3 kW
Aansluitwaarde 3 kW
(Inbouw)maten
Toestel breedte x diepte 384 x 522 mm
Inbouwhoogte vanaf bovenkant
werkblad
Zaagmaat breedte x diepte 345 x 490 mm
Minimale afstand zaagmaat tot
achterwand
Minimale afstand zaagmaat tot
zijwand
125 mm
40 mm
40 mm
NL 29
Page 30

MILIEUASPECTEN
Afvoeren toestel en verpakking
Bij de vervaardiging van dit toestel is gebruik gemaakt van duurzame
materialen. Dit toestel moet aan het eind van zijn levenscyclus op
verantwoorde wijze worden afgevoerd. De overheid kan u hierover
informatie verschaffen.
De verpakking van het toestel is recyclebaar. Gebruikt kunnen zijn:
• karton;
• polyethyleenfolie (PE);
• CFK- vrij polystyreen (PS- hardschuim).
Deze materialen dient u op verantwoorde wijze en conform de
overheidsbepalingen af te voeren.
Om op de verplichting tot gescheiden verwerking van elektrische
huishoudelijke apparatuur te wijzen, is op het product het symbool
van een doorgekruiste vuilnisbak aangebracht. Dit betekent dat het
apparaat aan het einde van zijn levensduur niet bij het gewone huisvuil
mag worden gevoegd. Het toestel moet naar een speciaal centrum voor
gescheiden afvalinzameling van de gemeente worden gebracht of naar
een verkooppunt dat deze service verschaft.
Het apart verwerken van huishoudelijke apparaten voorkomt mogelijk
negatieve gevolgen voor het milieu en de gezondheid die door een
ongeschikte verwerking ontstaat. Het zorgt ervoor dat de materialen
waaruit het apparaat bestaat, teruggewonnen kunnen worden om een
aanmerkelijke besparing van energie en grondstoffen te verkrijgen.
Conformiteitsverklaring
Wij verklaren dat onze producten voldoen aan de van toepassing zijnde
Europese Richtlijnen, Besluiten en Verordeningen en de eisen die zijn
vermeld in de normen waar naar wordt verwezen.
NL 30
Page 31

CONTENTS
Your induction hob
Safety instructions
Use
Operation
Introduction 4
Control panel 5
Temperature safety 6
Cooking-time limiter 6
Operation of the touch-sensitive buttons 7
Induction cooking 7
How induction works 8
Pans for induction cooking 9
Induction noises 10
Switching on and setting the power 11
Residual heat indicator 11
Boost 12
Switching off 12
Stand-by modus 13
Eco stand-by modus 13
Childproof lock 14
Pause 14
Recognizing a mode 15
Timer / Kitchen timer 15
Switching on and off the beep 17
Automatic pan detection 18
The ideal wok setting 19
Healthy cooking 19
Maintenance
Cleaning 20
Faults
General 21
Troubleshooting table 21
Installation instructions
Safety instructions for the installation 23
Clearance 23
Attachment points for mounting brackets 24
Installation dimensions 25
Ventilation 25
Constructing above an oven or fixed pannel 26
Fitted-unit situation with space 27
Coupling examples with a coupling profile 27
Building in 28
Technical details
Capacity and dimensions table 29
Environmental aspects
Disposal of packaging and appliance 30
EN 3
Page 32

YOUR INDUCTION HOB
Introduction
This induction hob is designed for the true lover of cooking. The
cooking zone has a high capacity and responds fast and effectively. The
cooking zone is designed especially for the wok and does not only heat
the base of the pan, but also a large part of the pan itself, making you
experience maximum cooking comfort.
Cooking on an induction hob is different from cooking on a traditional
appliance. Induction cooking makes use of a magnetic field to generate
heat. This means that you cannot use just any pan on it. The pans
section gives more information about this.
For optimum safety the induction hob is equipped with several
temperature protections and a residual heat indicator, which shows that
the cooking zone is still hot.
This manual describes how you can make the best possible use of the
induction hob. In addition to information about operation, you will also
find background information and maintenance tips that can assist you
in using this product.
Read the manual thoroughly before using the appliance, and store
these instructions in a safe place for future reference.
The manual also serves as reference material for service technicians.
Please, therefore, stick the appliance identification card in
the space provided, at the back of the manual. The appliance
identification card contains all the information that the service
technician will need in order to respond appropriately to your needs and
questions.
Enjoy your cooking!
EN 4
Page 33

YOUR INDUCTION HOB
Control panel
181920
1
2
3
4
WOK WOK
6 5 7 8 9 10 11
12
1. Pauze button
2. Pauze indicator
3. Childproof lock/Eco stand-by button
4. Childproof lock indicator/Eco stand-by indicator
5. Level indicator in cubes
6. On/off button
7. Reduce the power quickly
8. Reduce the power
9. Raise the power
10. Raise the power quickly
11. Boost indicator
12. Timer/alarmclock button
13. Alarmclock indicator
14. Cooking time indicator
15. ‘Reduce the time’ button
16. ‘Raise the time’ button
17. ‘Minutes after dot’ indicator
18. Timer/alarmclock indicator
19. Wok button
20. Level indicator
15 14 13 16
WOK
Cooking zone Ø300 3,0 kW
17
EN 5
Page 34

SAFETY INSTRUCTIONS
Before use, read the separate safety
instructions first!
Temperature safety
• The cooking zone is equipped with a sensor that measures
the temperature of the bottom of the pan to avoid any risk of
overheating when a pan boils dry. In case of temperatures rising too
high, the power is reduced or shut off automatically.
Cooking-time limiter
• The cooking-time limiter is a safety function of your cooking
appliance. It will operate if you forget to switch off your hob.
• Depending on the setting you have chosen, the cooking time will be
limited as follows:
Setting
1 and 2 9 hours
3, 4 and 5 5 hours
6, 7 and 8 4 hours
9 3 hours
10 2 hours
and 12 1 hour
11
• The cooking-time limiter switches the cooking zones off if the time
in the table has elapsed.
Setting The cooking zone switches
boost
The cooking zone switches
automatically off after:
automatically to setting 9 after:
10 minutes
EN 6
Page 35

USE
Operation of the touch-sensitive buttons
The operation of the hob by means of the touch-sensitive buttons takes
a while getting used to when you’re used to a different operation. For
the best effect, place your finger tips flat on the buttons. You don’t have
to push hard.
The touch sensors have been set in such a way that they only react
to the pressure and size of finger tips. The hob can’t be operated with
other objects and won’t, for instance, be turned on if your pet walks
over the hob.
Induction cooking
Induction cooking is fast
• To start with you will be surprised by the speed of induction
cooking. Wokking on a high setting is especially fast. It is best not
to leave the pan unattended.
The power will be adjusted
With induction cooking, only that part of the cooking zone which is
in contact with the wok, is used. It is important to use the wok that is
included, as this wok is fully in contact with the cooking zone.
Suitable pans are available via the website ‘www.atag.nl’.
Attention
• Grains of sand may cause scratches which cannot be removed.
Only put pans with a clean base on the cooking surface and always
pick pans up to move them.
• Carefully place the pan on the cooking zone. When handling the
pan carelessly, the handle may hit and damage the glass.
• Do not shake the pan while on the cooking zone. This may cause
scratches on the glass, or the glass can get damaged by the
handle.
• Do not use the hob as a worktop.
EN 7
Page 36

USE
How induction works
A magnetic field is generated in the appliance. By placing a pan with an
iron base on a cooking zone, a current is induced in the pan base. This
induced current generates heat in the base of the pan.
Easy
The electronic controls are accurate and easy to set. On the lowest
The coil (1) in the hob (2)
generates a magnetic field (3).
By placing a pan with an iron
base (4) on the coil, a current is
induced in the base of the pan.
setting, you can melt chocolate directly in the pan, for example, or cook
ingredients that you would normally heat in au bain-marie.
Fast
Thanks to the induction hob’s high power levels, the wokking goes very
fast.
Clean
The hob is easy to clean. Because the cooking zone does not get any
hotter than the pan itself, food spills cannot burn on.
Safe
The heat is generated in the pan itself. The glass top does not get any
warmer than the pan. This means that the cooking zone is considerable
cooler compared to that from a ceramic hob or a gasburner. Once a
pan has been taken away, the cooking zone cools down quickly.
EN 8
Page 37

USE
Pans for induction cooking
Induction cooking requires a particular quality of a pan.
Attention
• Pans that have already been used for cooking on a gas hob are no
longer suitable for use on an induction hob.
• Only use pans that are suitable for electric and induction cooking
with:
▷ a thick base (minimum 2.25 mm)
▷ a spherical pan base that is fully in contact with the cooking
zone.
• The best are pans with the ‘Class Induction’ quality mark.
Suitable pans are available via the website ‘www.atag.nl’.
Tip
Not all pans are suitable for induction cooking. Therefore it is important
to know whether the pan is of the appropriate material. With a magnet,
you can check if the pan is suitable. When the magnet is attracted to
the pan, the pan is suitable.
Attention
• Because of the high cooking oil temperature there is only one wok
pan suitable for stir-frying on this induction cooking ring. This is
the so-called Curie pan, which cannot be heated to a temperature
higher than 250 ˚C. You can order this pan from Atag (type number
AA3611W).
EN 9
Page 38

USE
Induction noises
How to use the wok
• Carefully place the pan on the cooking zone. When handling the
pan carelessly, the handle may hit and damage the glass.
• Do not shake the pan while on the cooking zone. This may cause
scratches on the glass, or the glass can get damaged by the
handle.
A ticking sound
Ticking can also occur at lower settings.
Pans are making noise
Pans can make some noise during cooking. This is caused by the
energy flowing from the hob to the saucepan. At high settings this is
perfectly normal for some pans. It will not damage either the pans or
the hob.
The fan is making noise
To enlarge the lifespan of the electronics, the appliance is equiped with
a fan. If you use the appliance intense, the fan is activated to cool down
the appliance and you will hear a buzzing sound. The fan runs on for
several minutes after the hob has been switched off.
Automatic power-on function
When the automatic power-on function (APD) is active, you will hear a
ticking noise, even if the zone is not being used.
EN 10
Page 39

OPERATION
Switching on and setting the power
The cooking zones have 12 levels. Beside it there is a level ‘boost’.
1. Put a pan into the cooking zone.
2. Press the childproof lock button.
You will hear a signal.
3. Press the on/off button of the cooking zone concerned.
In the display ‘-’ will blink and you will hear a signal. If no cooking
setting is selected after a zone is switched on, the cooking zone
switches off automatically after 10 seconds.
4. Press the + or - button, or the << or >> button to select the desired
setting. The cooking zone starts automatically in the level that has
been set (when a pan is detected).
▷ If you press button + or - first, level 6 appears.
▷ If you press button >> first, level 12 + ‘boost’ appearin the
display. This is power level ‘boost’ and you can use this setting
if you want to bring dishes to the boil quickly (see page 12).
▷ If you press button << first, level 1 will appear.
Tips
• With the + or - button you can raise or reduce the power setting
step by step. By pressing the << or >> button, you can raise or
reduce the power setting quick.
• Press and hold the << , - , + or >> button to set the desired power
level more quickly.
Pan detection
If the hob doesn’t detect a (suitable) pan after a cooking power has
been set, the display will continue to flash and the cooking area remains
cold. When no (suitable) pan is placed within one minute, the cooking
zone will switch off automatically.
Residual heat indicator
If the cooking zone has been used intensively it will retain heat for
several minutes afterwards. As long as the cooking zone is still hot an
“H” will be visible in the display.
EN 11
Page 40

OPERATION
Boost
You can use the ‘boost’ function to cook at the highest power level
during a short period of time (max.10 minutes). After the maximum
boost time the power will be reduced to setting 12.
Switching on ‘boost’
1. Put a pan into the cooking zone.
2. Press button >> immediately after you have switched on the zone.
Level 12 and ‘boost’ appear in the display.
• If the cooking zone has already been set to a power level and you
want to use ‘boost’, press several times button >> or button +.
Switching off ‘boost’
‘Boost’ has been switched on, the display shows level 12 and ‘boost’.
1. Press button << or - .
In the display you will see a lower level.
Or:
2. Press the on/off button of the cooking zone you want to switch off.
You will hear a signal and the level in the display disappears.
The cooking zone has been switched off completely.
Switching off
Switching off the cooking zone
Press the on/off button.
You will hear a signal and the level in the display disappears.
• The hob will automatically be in the stand-by mode (also refer to
‘stand-by mode’).
Or
Press the childproof lock button to switch off the cooking zone.
You will hear a signal. The red childproof lock indicator next to the
childproof lock button will blink very slowly.
• The induction hob is now in eco stand-by modus
(see also ‘eco stand-by modus’).
EN 12
Page 41

OPERATION
Stand-by modus
In stand-by modus the induction hob is switched off. You can switch to
the stand-by mode from the eco stand-by mode, or by switching off the
cooking zone.
From the stand-by mode you can directly start cooking by pressing the
on/off button.
Switching the hob from the eco stand-by mode to the standy-by
mode
The red light next to the childproof lock button keeps slowly going on
and off.
Press the childproof lock button for a short while to switch to the standby mode.
A single beep will be heard. All lights on the hob are out.
Eco stand-by mode
In the eco stand-by mode the hob is switched off and it uses as little
energy as possible. The hob can also be switched to the eco stand-by
mode from the stand-by mode and whenthe cooking zone is still active.
Did you know that
The hob uses less than 0.5 Watt in the eco- stand-by mode. That is
even less than in the stand-by mode of the hob.
Switching the hob to the eco stand-by mode
Press the childproof lock button.
A single beep will be heard. The eco stand-by mode is active, the red
light next to the childproof lock button keeps slowly going on and off.
From the eco stand-by mode you can’t immediately start cooking. To
be able to, the hob first needs to be switched to the stand-by mode.
Did you know that
After 30 minutes in the stand-by mode the hob will automatically switch
to the eco stand-by mode to prevent unnecessary energy consumption.
EN 13
Page 42

OPERATION
Childproof lock
Your induction hob is equipped with a childproof lock that lets you lock
the appliance. It prevents unintended switching on.
Switching on the childproof lock
1. Press the childproof lock button.
A double beep will be heard. All buttons are active now, except for
the childproof lock button. The hob first switches to the eco standby mode and then to the childproof lock mode. The red light is
constantly on.
2. Press the childproof lock button again for 2 seconds to get the hob
of the childproof lock.
A single beep will be heard. The hob is now in the stand-by mode.
The red light next to the childproof lock button is out.
Tip
Set the hob to the childproof lock mode before cleaning the hob to
prevent it from accidentally switching on.
Pause
Did you know that
When the hob is set to the childproof lock, is uses just as little energy
as when it is in the eco stand-by mode.
With this pause function, you can set the entire hob to ‘pause’ for
5 minutes during cooking. In this way you can leave or clean the hob in
a safe way during a short period of time, without losing settings.
Switching the hob to the pause mode
Press the pause button.
A double beep will be heard, the settings change into a lower setting
and the red light next to the pause button flashes.
• The set timer/kitchen timer stops.
• The cooking zone is automatically changed to a lower setting.
• All buttons are inactive except for the childproof lock and the pause
button. The on/off button of the cooking zone also remains active, it
does however react with a delay of two seconds.
EN 14
Page 43

OPERATION
Recognizing a mode
If you press the pause button again within 5 minutes, the paused
cooking process will be resumed.
A double beep will be heard, the hob resumes the settings as they were
set before the pause.
If you do not undertake any further action within 5 minutes:
The active cooking zone will be switched off automatically. After that the
pause button will keep flashing for 25 minutes to indicate the cooking
process has been ended by the pause mode. The hob automatically
switches from the pause mode to the eco stand-by mode after
25 minutes.
The stand-by mode Not a single light is lit.
Timer / Kitchen timer
The timer/alarm clock button for the cooking zone has two functions:
The red light next to the childproof lock
The eco stand-by mode
The childproof lock
mode
The pause mode
The timer function The kitchen timer function
This function can be recognized
by a small red arrow pointing up.
The time increases in the timer
function.
The timer cannot be linked to the
cooking zone.
The timer function is activated by
pressing the timer button for
3 seconds.
button button keeps slowly going on and
off.
The red light next to the childproof lock
button is constantly on.
The red light next to the pause button
flashes.
This function can be recognized
by a small red arrow pointing
down.
The time decreases in the kitchen
timer function.
The kitchen timer can be linked to
the cooking zone. This means the
cooking zone switches off when
the set time has passed.
The kitchen timer function can be
activated as follows: first activate
the timer function and then
activate the kitchen timer function
by pressing the + or - button.
EN 15
Page 44

OPERATION
Attention
• The timer-/kitchen timer function can also be used without
activating the cooking zone.
Switching on the timer
1. Press the timer/alarmclock button of the cooking zone once.
Three flashing zeroes and + and - appear in the display.
If you do not set a time with the + or - button, the timer will start
running automatically after 3 seconds. The timer can go as far as 9
hours and 59 minutes.
The red arrow pointing up lights up and the time increases.
2. Again press the timer/alarmclock button of the cooking zone to
switch it off.
Switching on the kitchen timer
1. Press the timer/alarmclock button of the cooking zone once.
2. Press the + or - button to switch from the timer function to the
kitchen timer function. After that you can set the desired cooking
time with the + button. Then you can change the set time with the
- button.
The red arrow pointing down lights up. Time is counting down.
3. Again press the timer/alarmclock button of the cooking zone to
switch it off again.
Attention
• The kitchen timer is linked to the cooking zone if the accompanying
• If the kitchen timer is linked to the cooking zone, the cooking zone
EN 16
cooking zone is switched on.
will switch off after the set time has passed.
The kitchen timer alarm goes off and beeps for a quarter of an hour
while decreasing as the time passes, while ‘0.00’ and the arrow
pointing down keep flashing. Again press the timer/alarm clock
button to switch off the kitchen timer alarm again.
Page 45

OPERATION
Setting the cooking time
Switch the kitchen timer on.
Button Steps of x per button
+ x = 1 minute 0.00 to...
– x = 10 seconds 5.00 - 0.00
– x = 30 seconds 9.00 - 5.00
– x = 1 minute ... to 9.00
After 9 minutes and 0 seconds (“9.00”) the word “.min” appears in the
display and the minutes will be added behind the dot.
Tip
You can press and hold the + or - button to set the desired cooking
time quicker.
Switching on and off the beep
1. Press the on/off button twice.
2. Press and hold the << button and the + button at the same time
until you hear a beep.
The beep is now switched off for all button operations, except for
the pause button and the childproof lock button. Note: the kitchen
timer alarm and the beep for error messages cannot be switched
off.
3. Use the same button combination to switch the sound back on.
Time
contact
EN 17
Page 46

OPERATION
Switching on/off the automatic pan detection
If, after the hob has been turned on, a pan is placed in an inactive
cooking zone, the operating controls light up and this can be used
immediately (without operating the on/off switch).
If the cooking zone is not activated within 10 seconds, the light will go
out. It can be re-activated by removing the pan and then replacing it or
by using the on/off switch.
This function is active by default, but can also be switched off. This is
done by switching the hob off and operating the ‘wok’ button (19) and
‘on/off button’ (6) on the left-hand control panel for 5 seconds. ‘APd
OFF’ will appear on the display. By repeating this process, the function
can be reactivated and the ‘APd On’ will appear on the display.
EN 18
Page 47

O
OPERATION
The ideal wok setting
When the hob is switched on, you can automatically set the ideal wok
setting with a push of the button.
To set the ideal wok setting
There is a pan on the cooking zone and the hob is switched on.
WOK W
Healthy cooking
1. Press the wok button.
You can use the following buttons to choose another level:
<< , + , - , >> .
Burning point of different types of oil
Burning point of separate kinds of oil ATAG advises to choose an oil
based on the baking temperature to bake in a healthy way. Every kind
of oil has a different burning point at which toxic gases are released.
You can see the burning points of different kinds of oil in the table
below.
An icon will light up and an ‘A’ will appear in the display. The
cooking zone automatically switches to the ideal wok setting after
3 seconds.
Oil Burning point °C
Extra virgin olive oil 160 °C
Butter 177 °C
Coconut oil 177 °C
Rapeseed oil 204 °C
Virgin olive oil 216 °C
Sunflower oil 227 °C
Corn oil 232 °C
Peanut oil 232 °C
Rice oil 255 °C
Olive oil 242 °C
EN 19
Page 48

MAINTENANCE
Cleaning
Tip
Activate the childproof lock before you start cleaning the hob.
Daily cleaning
• Although food spills cannot burn into the glass, we nevertheless
recommend you clean the hob immediately after use. Best for daily
cleaning is a damp cloth with a mild cleaning agent.
• Dry with kitchen paper or a dry kitchen towel.
Stubborn stains
• Stubborn stains can also be removed with a mild cleaning agent
such as washing-up liquid. Special products are available for this
purpose.
• Remove water marks and lime scale with vinegar.
• Metal marks (caused by sliding pans) can be difficult to remove.
• Use a glass scraper to remove food spills. Melted plastic and sugar
is also best removed with a glass scraper.
Never use
• Never use abrasives. They leave scratches in which dirt and lime
scale can accumulate.
• Never use anything sharp such as steel wool or scourers.
EN 20
Page 49

FAULTS
General
The service department telephone number can be found on the
guarantee card provided or on ‘www.atag.nl’.
If you notice a crack in the glass top (however small), switch the hob
off immediately, unplug the hob, turn off the (automatic) fuse switch(es)
in the meter cupboard or, in the event of a permanent connection,
set the switch in the power supply lead to zero.) Contact the service
department.
Troubleshooting table
If the appliance does not work properly, this does not always mean that
it is defective. Try to deal with the problem yourself first by checking
the points mentioned below or check for more information the website
‘www.atag.nl’.
Symptom
Text appears in the display
when the appliance is
connected for the first time.
The fan runs on for several
minutes after the hob has been
switched off.
A slight smell is noticeable the
first few times the hob is used.
The pans make a noise while
cooking.
You have switched on the
cooking zone, but the display
keeps flashing.
The cooking zone suddenly
stops working and you hear a
signal.
Possible cause Solution
This is the standard set-up
routine.
The hob is cooling down. Normal operation.
The new appliance is heating
up.
This is caused by the energy
flowing from the hob to the
saucepan.
The pan you are using is not
suitable for induction cooking
or does not have the right
spherical shape.
The preset time has ended. Switch the bleep off using the
Normal operation.
This is normal and will
disappear once it has been
used a few times. Ventilate
the kitchen.
This is caused by the energy
flowing from the hob to the
saucepan. This is not harmful
for the pans or hob.
Use a suitable pan.
+ or - button on the timer.
The hob is not working and
nothing appears in the display.
There is no power supply due
to a defective cable or a faulty
connection.
Check the fuses or the electric
switch (if there is no plug).
EN 21
Page 50

FAULTS
Symptom
A fuse blows as soon as the
hob is switched on.
Fault code F00. The control panel is dirty or
Fault code F0 ... F6 and FC. Defective generator. Contact the service
Fault code F7. The ambient temperature is
Fault code F8 and F08. Appliance over heated. The appliance has been
Fault code F9 and/or
continuous beep.
Possible cause Solution
The hob has been wrongly
connected.
has water lying on it.
not good.
The appliance has been
connected incorrectly and/or
the mains voltage is too high.
Check the electrical
connections.
Clean the control panel.
department.
Switch off all heat sources
in the vicinity of the cooking
plate.
switched off because of over
heating. Let the appliance cool
down and start again on a
lower setting.
Let your connection be
changed.
Fault code F99. You have pressed two or more
buttons at the same time.
Fault code FA. Mains voltage is too low. Contact your energy supplier.
Fault code FAN. Air circulation not good. Make sure the venting holes
Fault code E6 Wrong pan. Suitable pans are available via
Hardware / software error. Contact the service
Other fault codes. Defective generator. Contact the service
Do not operate more than one
button at the same time.
under the cooking plate are
open.
the website ‘www.atag.nl’.
department.
department.
EN 22
Page 51

INSTALLATION INSTRUCTIONS
Safety instructions for the installation
• The connection must comply with national and local regulations.
• The appliance must always be earthed.
• This appliance may only be connected by a competent electrical
installer.
• Always connect the appliance to an earthed socket.
• The connection cable must hang freely and is not to be fed through
a drawer.
• If you want to make a fixed connection, make sure that a multipolar switch with a contact separation of at least 3 mm is fitted in
the supply line.
• The worktop the hob is built into must be flat.
• The walls and the worktop surrounding the appliance must be heat
resistant up to at least 85 °C. Even though the appliance itself does
not get hot, the heat of the hot pan could discolour or deform the
wall.
• Damage caused by incorrect connection, installation or use, will not
be covered by the guarantee.
Clearance
HI3271W: min. 40 cm
*
Sufficient all-round clearance is essential to the safe use of the hob.
Check that there is enough clearance.
cooker hood
cooker hood
cabinet
cabinet
side wall
hob
hob
side wall
EN 23
Page 52

INSTALLATION INSTRUCTIONS
Attachment points for mounting brackets
the nut!
2
1
Thick worktops Thin worktopsDo not remove or twist
2
2
Front
EN 24
Page 53

INSTALLATION INSTRUCTIONS
Installation dimensions
The dimensions and recesses are shown in the illustration beneath.
384
125
484
min.40
490
522
338
345
Ventilation
The electronics in the appliance need cooling. The appliance will
automatically switch off if there is insufficient air circulation. There are
ventilation openings at the bottom of the appliance. It must be possible
for cool air to be drawn in through these openings. There are outlet
openings at the bottom and at the front of the appliance.
EN 25
Page 54

INSTALLATION INSTRUCTIONS
Constructing above an oven or fixed pannel
Ventilation occurs through the plinth (A) and the back of the cupboard
B
(B). Saw out the ventilation openings (min. 100 cm2). Air supply A
is superfluous when, together with opening B, there’s an opening
C
somewhere else where air can be drawn in.
A
Make sure the crossbar does not impede the airflow. Plane or saw the
crossbar C diagonally if necessary.
When the work top is thicker than the built in depth (=120 mm) of the
appliance, this is fine. On the other hand, when the work top is thinner
than the built in depth of the appliance, a drawer or oven possibly will
not fit beneath the appliance.
Beneath the hob a minimal space is required for cooling and optimal
functioning of the hob. A minimum space of 10 mm between the base
of the hob and the top of the drawer is advised.
Do not allow a drawer to block the ventilation openings on the bottom
of the appliance. If there is a drawer under the hob, a gap of at least the
width of the hob should be made at the front.
EN 26
Page 55

384
384
345
345
INSTALLATION INSTRUCTIONS
Fitted-unit situation with space
X mm
min. 10 mm
min.50
490
X mm +50 mm
345
Coupling examples with a coupling profile
50 mm
Coupling profile for
making certain that
appliances are mounted
tightly next to each other
EN 27
Page 56

INSTALLATION INSTRUCTIONS
Building in
Check that the cabinet and the cut-out meet the dimension and
ventilation requirements
Treat the sawn ends of wooden or synthetic worktops with sealing
varnish if necessary, to prevent moisture causing the worktop to swell.
Lay the hob upside down on the worktop.
Remove the protective layer from the sealing tape and apply the tape in
the groove of the aluminium profile or on the edge of the glass plate. Do
not stick tape round the corners, but cut 4 separate pieces to seal the
corners well.
Turn the hob over and lay it in the recess.
Connect the appliance to the mains. A short bleep will be heard and all
the displays will light up briefly. The appliance is ready for use.
Check that it works properly. If the appliance has been wrongly
connected either a bleep will sound or nothing will appear in the
displays, depending on the error.
If the connecting cable is damaged, it may only be replaced by the
manufacturer, the manufacturer’s service organisation or equivalently
qualified persons, in order to avoid dangerous situations.
EN 28
Page 57

TECHNICAL DETAILS
Capacity and dimensions table
This appliance complies with all relevant CE directives.
Hob type HI3271W
Induction x
Connection 230V - 50Hz (euro plug)
Phases 1
Maximum capacity cooking zone 3 kW (Ø180)
Connected load 3,0 kW
Total connected load 3000 W
(Building in) dimensions
Appliance width x depth 384 x 522 mm
Build-in height from top of worktop 125 mm
Cut-out width x depth 345 x 490 mm
Minimal distance cut-out to back wall 40 mm
Minimal distance cut-out to side wall 40 mm
EN 29
Page 58

ENVIRONMENTAL ASPECTS
Disposal of packaging and appliance
In the manufacturing of this appliance durable materials were used.
Make sure to dispose of this equipment responsibly at the end of its
lifecycle. Ask the authorities for more information regarding this.
The appliance packaging is recyclable. The following may have been
used:
• cardboard;
• polythene film (PE);
• CFC-free polystyrene (PS hard foam).
Dispose of these materials in a responsible manner and in accordance
with government regulations.
As a reminder of the need to dispose of household appliances
separately, the product is marked with the symbol of a crossed-out
wheeled dustbin. This means that at the end of its working life, the
product must not be disposed of as urban waste. It must be taken to
a special local authority differentiated waste collection centre or to a
dealer providing this service.
Disposing of a household appliance separately avoids possible
negative consequences for the environment and health deriving from
inappropriate disposal and enables the constituent materials to be
recovered to obtain significant savings in energy and resources.
Declaration of conformity
We declare that our products meet the applicable European Directives,
Decisions and Regulations and the requirements listed in the standards
referenced.
EN 30
Page 59

TABLE DES MATIÈRES
Votre plaque de cuisson
Introduction 4
Tableau de commandes 5
Consignes de sécurité
Sécurité anti-surchauffe 6
Limiteur de durée de cuisson 6
Utilisation
Fonctionnement des touches sensitives 7
La cuisson par induction 7
Opération induction 8
Casseroles par induction 9
Les bruits de l’induction 10
Fonctionnement
Mise en marche et réglage de la puissance 11
Voyant de chaleur résiduelle 11
Boost 12
Eteindre 12
Mode veille 13
Mode écoveille 13
Sécurité enfant 14
Pause 14
Identifier les différents modes 15
Horloge/minuteur de cuisson 15
Activer et désactiver le signal sonore 17
Détection automatique de casserole 18
Réglage optimal du wok 19
Cuisson saine 19
Entretien
Nettoyage 20
Pannes
General 21
Tableau des pannes 21
Consignes d’installation
Mésures de sécurité 23
Périmètre de sécurité 23
Points de fixation des étriers de montage 24
Dimensions d’encastrement 25
Ventilation 25
Encastrer au-dessus d’un tiroir 26
Situation d’encastrement avec espace intermédiaire 27
Exemples de raccordement avec la pièce de raccordement 27
Encastrement 28
Fiche technique
Mesures de puissance et d’encastrement 29
Aspects environnementaux
Mise au rebut de l’appareil et de l’emballage 30
FR 3
Page 60

VOTRE PLAQUE DE CUISSON
Introduction
Cette plaque de cuisson à induction est conçue pour les vrais
gastronomes. La zone de cuisson dispose d’une capacité élevée
et réagit de manière rapide et efficace. La zone de cuisson est
spécialement conçue pour le wok et chauffe la base de la casserole,
mais également une grande partie de la casserole, ce qui vous permet
de bénéficier d’un confort maximal pour la cuisson.
Cuire sur une plaque de cuisson à induction est autre chose que
cuire sur un appareil traditionnel. La cuisson à l’induction utilise un
champ magnétique pour générer de la chaleur. Ceci veut dire que
vous ne pouvez pas utiliser n’importe quelle casserole. Le chapitre
« casseroles » vous fournira de plus amples informations sur ce sujet.
En vue d’assurer une sécurité optimale, la plaque de cuisson en
induction est équipée avec un dispositif de sécurité pour la surchauffe
et un voyant de chaleur résiduelle. Il signale que la zone de cuisson est
encore chaude.
Ce manuel décrit la manière d’utiliser au mieux la plaque de cuisson en
céramique. En plus d’une information sur la commande et des conseils
d’entretien, vous trouverez également une information de base qui vous
sera utile pour utiliser ce produit.
Lisez attentivement le mode d’emploi en entier avant d’utiliser
l’appareil. Gardez-le soigneusement pour le consulter
ultérieurement.
Le manuel sert de référence au service après-vente. Il vous faut donc
coller la plaquette signalétique située sur la plaque en verre au dos
de ce manuel dans le cadre prévu à cet effet. Les données qui se
trouvent sur cette plaquette vous seront demandées par les employés
du service après-vente dès que vous les contactez. Si vous ne détenez
pas ces données, il sera plus difficile de fournir un service correct.
Nous vous souhaitons bien du plaisir à cuisiner !
FR 4
Page 61

VOTRE PLAQUE DE CUISSON
Tableau de commande
181920
1
2
3
4
WOK WOK
6 5 7 8 9 10 11
1. Touche pause
2. Voyant pause
3. Touche sécurité enfant/Ecoveille
4. Voyant sécurité enfant/Ecoveille
5. Indicateur de réglages sous forme de blocs
6. Touche marche/arrêt
7. Réduction accélérée de la puissance
8. Réduction de la puissance
9. Augmentation de la puissance
10. Augmentation accélérée de la puissance
11. Indicateur de boost
12. Touche horloge/minuteur de cuisson
13. Voyant minuteur de cuisson
14. Voyant horloge
15. Touche de réduction du temps
16. Touche d’augmentation du temps
17. Indicateur de ‘minutes après le point’
18. Indicateur d’horloge/minuteur de cuisson
19. Touche du wok
20. Indicateur de réglages
12
Zone de cuisson Ø300 3,0 kW
15 14 13 16
WOK
17
FR 5
Page 62

CONSIGNES DE SÉCURITÉ
Avant toute utilisation, veuillez lire les
consignes de sécurité !
Sécurité anti-surchauffe
• La zone de cuisson est dotée d’un capteur thermique. Ce capteur
contrôle en permanence la température du fond de la casserole et
des éléments de la plaque de cuisson, prévenant tout risque de
surchauffe, par exemple par une casserole chauffée à sec. En cas
de température trop élevée, la puissance de la plaque ou zone de
cuisson est automatiquement diminuée ou éteinte.
Limiteur de durée de cuisson
•
Le limiteur de temps de cuisson est une fonction de sécurité de votre
appareil. Il fonctionne si vous oubliez d’arrêter votre plaque de cuisson.
• Selon le réglage choisi, le temps de cuisson est limité comme suit :
Allure de
chauffe
1 et 2
3, 4 et 5
6, 7 et 8
9 3 heures
10 2 heures
11 et 12 1 heur
• La zone de cuisson s’éteint automatiquement lorsque les durées
mentionnées ci-dessus sont écoulées.
Allure de
chauffe
boost 10 minutes
La zone de cuisson est automatiquement désactivée après :
9 heures
5 heures
4 heures
La zone de cuisson revient
automatiquement à la position de
réglage 12 après :
FR 6
Page 63

UTILISATION
Fonctionnement des touches sensitives
Si vous êtes habitué à un appareil traditionnel, la commande de la
plaque de cuisson avec les touches sensitives demande une certaine
adaptation. Vous obtiendrez la réaction la plus rapide en plaçant le bout
du doigt à plat sur les touches. Il n’est pas nécessaire d’appuyer fort.
Les capteurs tactiles sont conçus de manière à réagir uniquement à la
pression et au format du bout des doigts. La plaque de cuisson ne peut
pas être commandée autrement. Elle ne se mettra pas en marche par
exemple, si un animal domestique marche dessus.
La cuisson par induction
La cuisson par induction est rapide
• La rapidité de l’appareil est surprenante au début. La cuisson au
wok sur un réglage élevé est particulièrement rapide. Nous vous
recommandons de toujours surveiller la casserole.
La puissance est automatiquement ajustée
Lors de la cuisson à induction, seule la partie de la zone de cuisson en
contact avec le wok est utilisée. Il est important d’utiliser le wok inclus.
Ce wok est en effet pleinement en contact avec la zone de cuisson.
Les casseroles adaptées sont répertoriées sur le site Web
‘www.atag.nl’.
Attention
• Les grains de sable peuvent provoquer des rayures qui ne partiront
plus. Veillez à ce que le fond des casserole utilisées sur la plaque
cuisson soit parfaitement propre et soulevez toujours les casseroles
pour les déplacer.
• Placez délicatement la casserole sur la zone de cuisson. Si vous
manipulez la casserole sans faire attention, la poignée risque de
heurter et d’endommager la vitre.
• Ne secouez pas la casserole lorsqu’elle se trouve sur la zone de
cuisson. Vous risquez de rayer la vitre ou de l’endommager avec la
poignée.
• N’utilisez pas la plaque de cuisson comme zone de travail.
FR 7
Page 64

UTILISATION
Opération induction
La bobine (1) située dans la
plaque de cuisson (2) active
un champ magnétique (3). En
plaçant une casserole avec un
fond en fer (4) sur la bobine,
un courant à induction va se
présenter dans le fond de la
casserole.
IUn champ magnétique est activé dans l’appareil. En plaçant sur
une zone de cuisson une casserole avec un fond en fer, un courant à
induction va se présenter dans le fond de la casserole. Ce courant à
induction génère de la chaleur dans le fond de la casserole.
Confortable
Le réglage électronique se fait avec précision et simplicité. Sur la
position la plus basse, vous pouvez, par exemple, faire fondre du
chocolat directement dans la casserole ou préparer des ingrédients que
vous réchauffez d’habitude au bain-marie.
Rapide
Grâce à la grande puissance de la plaque de cuisson à induction, la
cuisson au wok est très rapide.
Propre
La plaque de cuisson est facile à nettoyer. Comme la zone de
cuisson ne chauffe pas plus que la casserole en question, les dépôts
alimentaires ne peuvent pas brûler.
Sûr
La chaleur est activée dans la casserole en question. La plaque en verre
ne chauffe pas plus que la casserole. En raison de cela, le risque que
vous vous brûliez à l’appareil est vraiment minime. Après avoir enlevé la
casserole, la zone de cuisson se refroidit très vite.
FR 8
Page 65

UTILISATION
Casseroles par induction
La cuisson par induction impose certaines caractéristiques aux
casseroles.
Attention
• Des casseroles qui ont été utilisées pour la cuisson au gaz ne sont
plus adaptées à la cuisson par induction.
• Utilisez seulement une casserole appropriée pour la cuisson à
l’induction :
▷ un fond epais de 2,5 mm ;
▷ un fond sphérique pleinement en contact avec la zone de
• Les casseroles les mieux appropriées sont celles ayant la marque
« Class induction ».
Les casseroles adaptées sont répertoriées sur le site Web
‘www.atag.nl’.
cuisson.
Attention
Vous pouvez contrôler vous-même avec un aimant si vos casseroles
conviennent à la cuisson par induction. Si l’aimant est attiré par le fond
de la casserole, la casserole convient à la cuisson par induction.
Attention
• Quand il s’agit de réchauffer de l’huile, seule une casserole est
conçue pour cette plaque de cuisson à induction. Il s’agit du
modèle Curiepan, cette casserole ne chauffe pas au-delà de 250°C.
Vous pouvez la commander auprès de Atag (référence AA3611W).
FR 9
Page 66

UTILISATION
Mode d’emploi du wok
• Placez délicatement la casserole sur la zone de cuisson. Si vous
manipulez la casserole sans faire attention, la poignée risque de
heurter et d’endommager la vitre.
• Ne secouez pas la casserole lorsqu’elle se trouve sur la zone de
cuisson. Vous risquez de rayer la vitre ou de l’endommager avec la
poignée.
Les bruits de l’induction
Un cliquetis
Le cliquetis se produit également sur des réglages moins puissants.
Les casseroles font du bruit
Les casseroles peuvent faire du bruit pendant la cuisson. Ceci est dû
à la transmission d’énergie de la plaque de cuisson à la casserole. En
puissance de chauffe élevée, ceci est normal pour certaines casseroles.
La casserole ou la plaque de cuisson ne courent aucun risque
d’endommagement.
Le ventilateur est bruyant
Pour améliorer la durabilité des composants électroniques, l’appareil
est équipé d’un ventilateur. En cas d’utilisation intensive de la plaque de
cuisson, le ventilateur est activé afin de refroidir l’appareil. Ceci produit
un bourdonnement audible. La ventilation continue de fonctionner
quelques minutes après avoir éteint la plaque de cuisson.
Fonction d’activation automatique
Lorsque la fonction d’activation automatique (APD) est activée, on
entend un cliquetis, même si la zone n’est pas utilisée.
FR 10
Page 67

FONCTIONNEMENT
Mise en marche et réglage de la puissance
Il y a 12 positions de réglage de la puissance. Une fonction boost est
également disponible.
1. Mettez une casserole sur la zone de cuisson
2. Appuyez sur la touche sécurité enfant.
Un signal sonore est émis.
3. Appuyez sur la touche marche/arrêt de la zone de cuisson voulue.
Un ‘-’ s’affiche en clignotant et un signal sonore est émis. Si aucune
autre commande n’est effectuée, la zone de cuisson s’éteint après
secondes.
4. Réglez avec la touche + ou - , ou la touche << ou >> la position
souhaitée. La plaque de cuisson démarre automatiquement à la
position réglée (lorsqu’une casserole est détectée).
▷ Lorsque vous appuyez la première fois sur la touche + ou -,
le réglage 6 s’affiche.
▷ Lorsque vous appuyez la première fois sur la touche >>, le
réglage ‘12 + boost’ s’affiche. Le réglage ‘boost’ permet une
cuisson à haute température pendant une courte durée (voir
page 12).
▷ Lorsque vous appuyez la première fois sur la touche <<,
le réglage ‘1.’ s’affiche.
10
Conseils
• La touche + ou - permet de réduire ou d’augmenter graduellement
le réglage de la puissance. Appuyez sur la touche << ou >> pour
augmenter rapidement la puissance ou la baisser.
• Maintenez la touche <<, -, + ou >> enfoncée pour arriver plus
rapidement au réglage de la puissance voulu.
Détection de récipient
Si la plaque de cuisson ne détecte aucun récipient (métallique)
après le réglage de la puissance, l’affichage continuera de clignoter
et la zone de cuisson restera froide. La zone de cuisson s’éteindra
automatiquement si aucun récipient (métallique) n’est placé dessus
dans un délai d’1 minute.
Voyant de chaleur résiduelle
Le voyant indique que la zone de cuisson est encore chaude. Il va
s’éteindre dès que la plaque de verre aura atteint une température sûre.
La chaleur résiduelle sera signalée sur l’écran par le symbole H.
FR 11
Page 68

FONCTIONNEMENT
Boost
La fonction ‘boost’ permet une cuisson à un très haut niveau de
puissance pendant une courte durée (10 minutes au maximum). La
puissance revient automatiquement au niveau 12 une fois la durée
maximum de la fonction boost écoulée.
Activer la fonction boost
1. Placez un récipient sur une zone de cuisson, puis activez cette
zone de cuisson.
2. Appuyez immédiatement après sur la touche >>.
Le réglage 12 et la mention boost apparaissent sur l’affichage.
• Si vous souhaitez activer la fonction boost pour une zone de
cuisson dont la puissance est déjà réglée, appuyez plusieurs fois
sur la touche >> ou la touche +.
Eteindre
Désactiver la fonction boost
La fonction boost est activée, la position de réglage 12 et la mention
boost sont affichées.
1. Appuyez sur la touche << ou -.
Une position de réglage plus basse apparait sur l’affichage.
Ou :
2. Appuyez sur la touche marche/arrêt.
Un signal sonore est émis et l’affichage s’éteint. La zone de cuisson
est alors éteinte.
Eteindre une zone de cuisson particulière
Appuyez sur la touche marche/arrêt.
Un signal sonore est émis et l’affichage s’éteint.
• La plaque de cuisson passe automatiquement en mode de veille
(reportez-vous également à la section relative au mode de veille).
Ou :
Appuyez sur la touche sécurité enfant pour éteindre la zone de cuisson.
Un signal sonore est émis. Le voyant de sécurité enfant rouge situé à
côté de la touche sécurité enfant clignote très lentement.
• Le mode écoveille de la plaque de cuisson à induction est alors
activé (reportez-vous également à la section relative au mode
écoveille).
FR 12
Page 69

FONCTIONNEMENT
Mode veille
En mode veille, la plaque de cuisson n’est pas en fonctionnement. Vous
pouvez passer au mode veille depuis le mode écoveille, ou en éteignant
la zone de cuisson.
La cuisson peut être démarrée directement depuis le mode veille en
appuyant sur la touche marche/arrêt de la zone de cuisson.
Mettre la plaque de cuisson en mode veille depuis le mode
écoveille
Le voyant rouge à côté de la touche sécurité enfant clignote lentement.
Appuyez brièvement sur la touche sécurité enfant pour passer au mode
veille.
Un signal sonore est émis. Tous les voyants de la plaque de cuisson
s’éteignent.
Mode écoveille
En mode écoveille, la plaque de cuisson n’est pas en fonctionnement et
consomme le moins d’énergie.
Le mode écoveille peut être activé depuis le mode veille ou lorsque la
zone de cuisson est encore en fonctionnement.
Bon à savoir
La plaque de cuisson consomme en mode écoveille moins de 0,5 W.
Ce qui est encore inférieur à la consommation en mode veille.
Mettre la plaque de cuisson en mode écoveille
Appuyez brièvement sur la touche sécurité enfant.
Un signal sonore est émis. Le mode écoveille est activé, le voyant rouge
à côté de la touche sécurité enfant clignote lentement.
Vous ne pouvez pas démarrer la cuisson directement depuis le mode
écoveille. Vous devrez d’abord mettre la plaque de cuisson en mode
veille.
Bon à savoir
30 minutes après avoir été mise en mode veille, la plaque de cuisson
passe automatiquement en mode éco veille , évitant une consommation
d’énergie inutile.
FR 13
Page 70

FONCTIONNEMENT
Sécurité enfant
La plaque de cuisson peut être verrouillée à l’aide du dispositif de
sécurité enfant. Cela permet d’éviter tout allumage accidentel.
Activer la sécurité enfant de la plaque de cuisso
1. Appuyez 2 secondes sur la touche sécurité enfant.
Un double signal sonore est émis. Toutes les touches sont
bloquées, excepté la touche sécurité enfant. La plaque de cuisson
passe d’abord en mode écoveille, puis en mode sécurité enfant. Le
voyant rouge est allumé en continu.
2. Appuyez à nouveau 2 secondes sur la touche sécurité enfant pour
désactiver la sécurité enfant.
Un signal sonore est émis. La plaque de cuisson est maintenant en
mode veille. Le voyant rouge à côté de la touche sécurité enfant
s’éteint.
Conseil
Mettez la plaque de cuisson en mode sécurité enfant avant de la
nettoyer, vous éviterez ainsi une mise en marche accidentelle.
Bon à savoir
La plaque de cuisson est aussi économe en énergie en mode sécurité
enfant qu’en mode écoveille.
Pause
La fonction pause vous permet d’interrompre totalement la cuisson
pendant 5 minutes. Vous pourrez ainsi dans ce mode laisser brièvement
la plaque de cuisson sans surveillance ou la nettoyer en toute sécurité,
sans perdre les réglages.
Mettre la plaque de cuisson en mode pause
Appuyez une fois sur la touche pause.
Un double signal sonore est émis, les réglages de la puissance passent
à une position plus basse et le voyant rouge à côté de la touche pause
clignote.
• L’horloge/le minuteur de cuisson est désactivé.
• La zone de cuisson est automatiquement réglée sur une puissance
• Toutes les touches sont inactives, à l’exception de la touche
FR 14
inférieure.
sécurité enfant et de la touche pause. La touche marche/arrêt de la
zone de cuisson est également activée, elle réagit cependant avec
un retard de deux secondes.
Page 71

FONCTIONNEMENT
Pour redémarrer la cuisson, appuyez à nouveau dans un délai de 5
minutes sur la touche pause.
Un double signal sonore est émis, la plaque de cuisson se remet en
marche en reprenant les réglages effectués avant de la mettre en pause.
Si vous n’effectuez pas d’autres commandes durant 5 minutes :
La zone de cuisson active s’éteint automatiquement. La touche pause
continue de clignoter pendant 25 minutes, indiquant que la cuisson a
été interrompue par le mode pause. Une fois ces 25 minutes écoulées,
la plaque de cuisson passe automatiquement du mode pause au mode
écoveille.
Identifier les différents modes
Mode veille Aucun voyant n’est allumé
Mode écoveille
Sécurité enfant
Mode pause Le voyant rouge à côté de la touche pause clignote.
Horloge / Minuteur de cuisson
La touche horloge/minuteur de cuisson du zone de cuisson a deux
fonctions :
Fonction horloge Fonction minuteur de cuisson
Cette fonction se reconnaît à la
flèche rouge orientée vers le haut.
En fonction horloge, le temps
augmente.
L’horloge ne peut pas être
associée à une zone de cuisson.
La fonction horloge est activée
automatiquement 3 secondes
après avoir appuyé sur la touche
horloge/minuteur de cuisson
si aucune commande n’est
effectuée.
Le voyant rouge à côté de la touche sécurité enfant
clignote lentement.
Le voyant rouge à côté de la touche sécurité enfant
est allumé en continu.
Cette fonction se reconnaît à la
flèche rouge orientée vers le bas.
En fonction minuteur de cuisson,
le temps diminue.
Le minuteur de cuisson peut être
associé à une zone de cuisson.
Si c’est le cas, la zone de cuisson
s’éteindra une fois écoulé le
temps de cuisson réglé.
La fonction minuteur de cuisson
est accessible depuis la fonction
horloge en appuyant sur la touche
+ ou -.
FR 15
Page 72

FONCTIONNEMENT
Attention
• Il est également possible d’utiliser la fonction horloge/minuteur de
cuisson sans activer la zone de cuisson.
Activer l’horloge
1. Appuyez une fois sur la touche horloge/minuteur de cuisson de la
zone de cuisson.
L’affichage de l’horloge s’allume, indiquant trois zéros qui clignotent.
Sous l’affichage apparaissent un + et un -.
Si aucun temps n’est réglé avec la touche + ou - , l’horloge démarre
automatiquement après 3 secondes. L’horloge marche au maximum
9 heures et 59 minutes.
La flêche rouge pointée vers le haut s’allume et le temps écoulé
s’affiche.
2. Appuyez à nouveau sur la touche horloge/minuteur de cuisson de la
zone de cuisson pour l’arrêter.
Activer le minuteur de cuisson
1. Appuyez une fois sur la touche horloge/minuteur de cuissonde la
zone de cuisson.
2. Appuyez sur la touche + ou - pour passer de la fonction horloge à
la fonction minuteur de cuisson. Réglez ensuite avec la touche + le
temps de cuisson souhaité. Vous pourrez ensuite modifier avec la
touche - le temps de cuisson réglé.
La flèche rouge pointée vers le bas s’allume. Le décompte du
temps de cuisson démarre.
3. Appuyez à nouveau sur la touche horloge/minuteur de cuisson de la
zone de cuisson pour l’arrêter.
Attention
• Le minuteur de cuisson est associé à une zone de cuisson si la
zone de cuisson correspondante est en fonctionnement.
• La zone de cuisson à laquelle le minuteur de cuisson est associé
s’éteindra automatiquement une fois le temps de cuisson réglé
écoulé.
La sonnerie du minuteur de cuisson se déclenche et sonne pendant
un quart d’heure en volume décroissant ; l’indication ‘0.00’ et la
flêche pointée vers le bas clignotent. Appuyez à nouveau sur la
touche horloge/minuteur de cuisson de la zone de cuisson dont la
flèche rouge pointée vers le bas clignote pour arrêter la sonnerie du
minuteur de cuisson.
FR 16
Page 73

FONCTIONNEMENT
Régler le temps de cuisson
Activez le minuteur de cuisson.
Touche Progression x par
+ x = 1 minute 0.00 à ...
- x = 10 secondes 5.00 - 0.00
- x = 30 secondes 9.00 - 5.00
- x = 1 minute ... à 9.00
Lorsque vous avez atteint 9 minutes et 0 secondes (« 9.00 »), la mention
« .min » apparaît sur l’affichage. Les minutes s’ajoutent ensuite après le
point.
Conseil
Maintenez la touche + ou - enfoncée pour régler plus rapidement le
temps de cuisson voulu.
Activer et désactiver le signal sonore
1. Appuyez deux fois sur la touche marche/arrêt la plus à gauche.
2. Maintenez ensuite enfoncées la touche << et la touche +
simultanément jusqu’à ce que vous entendiez un signal sonore.
Le signal sonore est alors désactivé pour toutes les commandes,
excepté pour les touches pause et sécurité enfant . Notez que la
sonnerie du minuteur de cuisson et le signal sonore des messages
d’erreur ne peuvent pas être désactivés.
3. Pour réactiver le signal sonore, procéder de la même façon.
Durée
pression de touche
FR 17
Page 74

FONCTIONNEMENT
Activer et désactiver la détection automatique de casserole
Si, après l’activation de la plaque de cuisson, vous posez une casserole
sur une zone de cuisson inactive, la touche de commande s’allume et
peut directement être contrôlée (sans utiliser la touche marche/arrêt).
Si la zone de cuisson n’est pas activée dans les 10 secondes, elle
s’éteint automatiquement. Elle peut ensuite être réactivée en enlevant la
casserole et en la remettant en place ou en utilisant la touche marche/
arrêt.
Cette fonction est activée par défaut, mais elle peut être désactivée.
Pour la désactiver, il vous suffit d’éteindre la plaque de cuisson et
d’appuyer pendant 5 sec. sur les touches «wok» (19) et «marche/arrêt»
(6) de la partie gauche du panneau de commandes. L’écran affiche
alors «APd OFF». En répétant cette procédure, la fonction est réactivée
et «APd On» s’affiche à l’écran.
FR 18
Page 75

O
FONCTIONNEMENT
Réglage optimal du wok
Lorsque la plaque de cuisson est allumée, vous pouvez régler
automatiquement le wok de manière optimale d’une pression sur une
touche.
Pour régler le wok de manière optimale
Une casserole est placée sur la zone de cuisson et la plaque de cuisson
WOK W
est allumée.
1. Appuyez sur la touche wok.
Une icône s’allume et la lettre A s’affiche à l’écran. Le réglage
optimal du wok est automatiquement activé pour la zone de cuisson
au bout de trois secondes.
Vous pouvez sélectionner un autre niveau à l’aide des touches
suivantes:
<< , + , - , >> .
Cuisson saine
Point de fumée des différentes sortes d’huiles
Pour un cuisine saine, ATAG conseille d’utiliser une sorte d’huile
convenant à la température de cuisson. Le point de fumée auquel
des gaz toxiques se dégagent diffère selon la sorte d’huile. Le tableau
ci-dessous indique le point de fumée des différentes sortes d’huiles.
Huile Point de fumée °C
Huile d’olive extra vierge 160 °C
Beurre 177 °C
Huile de noix de coco 177 °C
Huile de colza 204 °C
Huile d’olive vierge 216 °C
Huile de tournesol 227 °C
Huile de maïs 232 °C
Huile d’arachide 232 °C
Huile de riz 255 °C
Huile d’olive 242 °C
FR 19
Page 76

ENTRETIEN
Nettoyage
Attention
Avant de commencer le nettoyage, enclenchez la sécurité à enfants.
Nettoyage quotidien
• Bien que les aliments qui sont tombés sur la plaque de cuisson
ne peuvent pas brûler, il est recommandé de nettoyer la plaque de
cuisson tout de suite après utilisation. Pour le nettoyage quotidien,
il est bien d’utiliser un produit d’entretien doux et un chiffon doux.
• Séchez ensuite avec un essuie-tout ou un chiffon sec.
En cas de taches tenaces
• Les taches tenaces peuvent aussi s’enlever avec un produit
d’entretien doux, par exemple, avec un produit pour la vaisselle.
• Enlever les taches d’eau et les traces de calcaire avec du vinaigre
blanc.
• Enlevez les taches d’eau et les traces de métal avec du vinaigre
d’entretien. Les traces de métal (provenant du glissement des
casseroles) sont souvent difficiles à enlever. A cette fin, il est
possible de trouver des outils spéciaux dans le commerce.
• Eliminez les aliments qui se trouvent sur la plaque de cuisson en
utilisant un grattoir en verre. Agissez de même en cas de plastique
et de sucre fondus.
N’utilisez jamais
• N’utilisez jamais d’abrasifs. Ils provoquent des griffures permettant
• N’utilisez jamais d’objets pointus, comme la paille de fer et les
FR 20
au calcaire et à la saleté de s’y déposer.
éponges métalliques.
Page 77

PANNES
General
Tableau des pannes
Les numéros de téléphone du service après-vente se trouvent sur la
carte de garantie. Ou consultez le site Internet ‘www.atag.nl’.
N’utilisez pas d’appareil présentant une surface cassée ou fissurée.
Arrêtez immédiatement le fonctionnement de l’appareil. Débranchez
l’appareil ou mettez l’interrupteur de la conduite d’alimentation (en cas
de connexion fixe) sur 0 ou déconnectez le/les fusible(s) de l’armoire
électrique. Contactez le service après-vente.
Un doute quant au bon fonctionnement de votre plaque de cuisson
à induction ne signifie pas nécessairement qu’elle soit défectueuse.
Vérifiez dans tous les cas les points suivants, ou consultez pour plus
d’informations le site ‘www.atag.nl’.
Symptôme Cause possible Solution
À la mise en route, du texte
apparaît sur l’écran.
La ventilation continue de
fonctionner quelques minutes
après avoir éteint la plaque de
cuisson.
Lors des premières cuissons,
la plaque dégage une légère
odeur.
Les casseroles font beaucoup
de bruit pendant la cuisson.
L’écran continue de clignoter
après avoir sélectionné la zone
de cuisson.
Une zone de cuisson s’arrête
soudainement et vous
entendez un signal.
Il s’agit de la procédure de
démarrage standard.
Refroidissement de la plaque
de cuisson.
Réchauffement d’une nouvelle
plaque.
Ceci est causé par la
transmission d’énergie de
la plaque de cuisson à la
casserole.
La casserole utilisée n’est pas
conçue pour la cuisson par
induction ou ne dispose pas
de la forme sphérique adaptée.
Le délai programmé est
écoulé.
Fonctionnement normal.
Fonctionnement normal.
C’est normal et disparaît après
quelques cuissons. Aérez la
cuisine.
Ceci est normal en allure de
chauffe élevée chez certaines
casseroles. La casserole ou
la plaque de cuisson ne court
aucun danger.
Utilisez une casserole adaptée.
Éteignez le signal avec les
touches + ou - du minuteur.
La plaque de cuisson ne
fonctionne pas et rien
n’apparaît à l’écran.
Aucune alimentation électrique
à cause d’un branchement
erroné ou d’une alimentation
défectueuse.
Vérifiez le fusible ou
l’interrupteur électrique (pour
un appareil sans prise).
FR 21
Page 78

PANNES
Symptôme Cause possible Solution
Le fusible de l’installation
s’enclenche lorsque j’allume la
plaque de cuisson.
Code de panne F00. Le panneau de commande est
Code de panne F0 à F6 et FC. Générateur défectueux. Contactez le service après-
Code de panne F7. La température environnante
Code de panne F8 et F08. Surchauffe de la plaque de
Code de panne F9 et/ou signal
sonore continu.
Code de panne F99. Vous avez appuyé
Code de panne FA. La plaque de cuisson est mal
Branchement erroné la plaque
de cuisson.
sale ou mouillé.
n’est pas adéquate.
cuisson.
La plaque de cuisson est mal
branchée ou le voltage est trop
élevé.
simultanément sur au moins 2
touches.
branchée ou le voltage est trop
faible.
Vérifiez le branchement
électrique.
Nettoyez le panneau de
commande.
vente.
Eteignez toutes les sources
de chaleur à proximité de la
plaque de cuisson.
Laissez refroidir la plaque de
cuisson, reprenez ensuite la
cuisson.
Faites modifier les
branchements.
Appuyez sur une seule touche
à la fois.
Contactez le service aprèsvente.
Code de panne FAN. Mauvaise ventilation. Assurez-vous que les trous de
ventilation sous la plaque de
cuisson ne sont pas bouchés.
Code de panne E6 Casserole incorrecte. Les casseroles adaptées sont
répertoriées sur le site Web
www.atag.nl.
Erreur matérielle/logicielle. Contactez le service après-
vente.
Autres codes d’erreur. Générateur défectueux. Contactez le service après-
vente.
FR 22
Page 79

CONSIGNES D’INSTALLATION
Mésures de sécurité
• Le branchement doit répondre aux prescriptions locales et
nationales.
• L’appareil doit toujours être relié à la terre.
• Seul un installateur électrotechnicien agréé est habilité à
brancher cet appareil.
• Raccordez toujours l’appareil à une prise mise à la terre.
• Le câble de raccordement doit être libre et ne pas être susceptible
d’être heurté par un tiroir.
• Si un raccordement fixe est souhaité, un dispositif de séparation
omnipolaire ayant une distance d’ouverture des contacts d’au
moins 3 mm devra être prévu dans les canalisations électriques
fixes.
• Le plan de travail dans lequel la plaque de cuisson est intégrée
doit être plat.
• Les parois et le plan de travail autour de l’appareil doivent
résister au moins à une température de 85 °C. Même si l’appareil ne
chauffe pas, la chaleur d’une casserole peut décolorer ou déformer
les parois.
• Les dégâts consécutifs à un branchement, un encastrement ou
une utilisation impropres ne sont pas couverts par la garantie.
.
Périmètre de sécurité
Pour garantir une utilisation sans danger, il est nécessaire de laisser
suffisamment d’espace libre autour de la plaque de cuisson. Assurezvous que cet espace libre est respecté.
HI3271W: min. 40 cm
*
le boîtier
hotte d’aspiration
Plaque de cuisson
parois du placard
FR 23
Page 80

CONSIGNES D’INSTALLATION
Points de fixation des étriers de montage
tordre l’écrou !
2
1
Plans de travail épais Plans de travail mincesNe pas enlever ou
2
2
Avant
FR 24
Page 81

CONSIGNES D’INSTALLATION
Dimensions d’encastrement
L’illustration ci-dessus indique les côtes de l´évidement d´encastrement.
384
125
484
min.40
490
522
338
345
Ventilation
L’électronique qui se trouve dans l’appareil a besoin d’être refroidie.
L’air frais se aspirer en arrière du meuble de cuisine et se souffler par
les évents sur la face inférieure de l’appareil.
La plaque de cuisson s’arrête en cas d’aération insuffisant.
FR 25
Page 82

CONSIGNES D’INSTALLATION
Encastrer au-dessus d’un tiroir
La ventilation s’effectue par la plinthe (A) et le panneau arrière (B) du
B
meuble de cuisine. Pratiquez les ouvertures de ventilation à l’aide d’une
scie (min. 100 cm2). L’arrivée d’air A est superflue s’il existe une autre
C
ouverture permettant en combinaison avec l’ouverture B, d’aspirer de
l’air frais.
A
Assurez-vous que la latte transversale n’empêche pas la bonne
circulation de l’air. Si nécessaire, découpez ou rabotez en biseau la latte
transversale C.
Le fait que la partie supérieure du wok soit plus épaisse que la
profondeur d’intégration de l’appareil (= 120 mm) ne pose pas de
problèmes. Cependant, si la partie supérieure du wok est moins
épaisse que la profondeur d’intégration de l’appareil, il est possible que
vous ne puissiez pas placer de tiroir ou de four sous l’appareil.
Un espace minimal est requis sous la plaque de cuisson pour permettre
le refroidissement et le fonctionnement optimal de la plaque. Nous
vous recommandons un espace minimal de 10 mm entre la base de la
plaque de cuisson et la partie supérieure du tiroir.
Les tiroirs ne doivent pas obstruer les ouvertures d’aération au bas
de l’appareil. Si un tiroir est placé sous la plaque de cuisson, un écart
équivalent à au moins la largeur de la plaque de cuisson doit être
conservé à l’avant.
FR 26
Page 83

384
384
345
345
CONSIGNES D’INSTALLATION
Situation d’encastrement avec espace intermédiaire
X mm
min. 10 mm
min.50
490
X mm +50 mm
345
Exemples de raccordement avec la pièce de raccordement
50 mm
La pièce de
raccordement
sert à monter
les appareils les
uns contre les
autres
FR 27
Page 84

CONSIGNES D’INSTALLATION
Encastrement
Vérifiez que le meuble de cuisine et l’évidement correspondent aux
exigences relatives aux dimensions et à la ventilation.
Traitez la tranche des plans de travail en bois ou en matière
plastique, éventuellement avec un vernis d’étanchété, afin d’éviter tout
gonflement du plan de travail sous l’effet de
l’humidité.
Déposez l’appareil sans dessus dessous sur le plan de travail.
Retirez le film de protection de la bande d’obturation et collez cette
dernière dans la rainure des profils en aluminium et sur le bord de la
plaque de verre. Pour une bonne finition des coins, coupez la bande
d’obturation en 4 et ajustez-les bien dans les coins.
Retournez l’appareil et déposez-le dans l’évidement.
Branchez l’appareil sur le secteur. Il émet un bref signal, puis
tous les affichages s’allument brièvement. Vous pouvez
maintenant utiliser l’appareil.
Contrôlez le fonctionnement de l’appareil. Si l’appareil n’a
pas été bien connecté, un signal sonore sera émis ou les
voyants ne s’enclenchent pas.
En cas de détérioration du câble de connexion, seul le fabricant, son
service après-vente ou des homologues qualifiés sont autorisés à en
faire le remplacement. Ceci pour éviter des situations dangereuses.
FR 28
Page 85

FICHE TECHNIQUE
Mesures de puissance et d’encastrement
Cet appareil satisfait à toutes les directives CE en la matière.
Type de plaque de cuisson HI3271W
Induction
Branchement
Phases
Puissance maximale zone de cuisson
Aansluitwaarde
Dimensions (d’encastrement)
Appareil largeur x profondeur 384 x 522 mm
Hauteur d’encastrement à partir de la
face supérieure du plan de travail
Dimensions de l’évidement largeur x
profondeur
Espace entre évidement et paroi arrière 40 mm
Espace entre évidement et paroi
latérale
x
230V - 50Hz (fiche
européenne)
1
3 kW
3 kW
125 mm
345 x 490 mm
40 mm
FR 29
Page 86

ASPECTS ENVIRONNEMENTAUX
Mise au rebut de l’appareil et de l’emballage
Des matériaux durables ont été employés dans la fabrication de cet
appareil. Veillez à éliminer cet équipement de façon responsable à
l’issue de son cycle de service. Renseignez-vous auprès des autorités
à ce sujet.
L’emballage de l’appareil est recyclable. Les matériaux suivants
peuvent le composer :
• carton ;
• film polyéthylène (PE) ;
• polystyrène exempt de CFC (mousse rigide PS).
Éliminez les matériaux de façon responsable et conformément aux
réglementations gouvernementales.
À titre de rappel de la nécessité d’éliminer les appareils ménagers
séparément, le produit est marqué du symbole représentant une
poubelle roulante barrée. Cela signifie qu’à l’issue de son cycle de
service, l’appareil ne peut être mis au rebut avec les déchets ménagers.
Il doit être déposé dans un centre municipal spécial de collecte et de tri
des déchets, ou chez un revendeur assurant ce service.
L’élimination séparée des appareils ménagers évite d’éventuelles
conséquences environnementales et sanitaires négatives découlant
d’une mise au rebut inappropriée et permet de recycler les matériaux
constitutifs pour réaliser des économies substantielles d’énergie et de
ressources.
Déclaration de conformité
Nous déclarons que nos produits sont conformes à toutes les
directives, décisions et régulations européennes et aux exigences
énumérées dans les normes référencées.
FR 30
 Loading...