

Asus W3000 Service Manual

A
upgrade & replacement
Chapter
Upgrade & Replacement
Follow the individual procedures in this chapter to perform the
notebook’s upgrade and replacement of various major components.
sus W3000A Series Notebook is a 2 spindles product, which means there are less
options for you to upgrade to. The key upgradeable and replaceable items include
the CPU module, 1st memory module, 2
Wireless LAN module.
In order to avoid redundancy, please refer to chapters 3 and 4 of this manual for repeated
and reused disassembly and assembly procedures, such as keyboard & heat sink replacement,
which is used by several different procedures in this chapter.
instructions described in Chapter 2 to safeguard the notebook against any potential
damages.
chapter, please refer to Chapters 3 and 4 for detailed disassembly and assembly and perform
necessary procedures accordingly.
This chapter includes the following items:
• CPU Upgrade
• Memory Upgrade
• HDD Upgrade
• ODD Replacement
• WLAN Replacement
For any other components which you need to replace not covered in this
nd
memory module, HDD, ODD, and
Be sure to follow the safety
5 – 1 W3N
upgrade & replacement
CPU
CPU Upgrade
The W3000A Series Notebook comes standard with a Intel® Micro-FCPGA Socket on the
motherboard, which means it can support all Intel Micro-FCPGA CPUs up to 2.1 GMHz.
Upgrading CPU
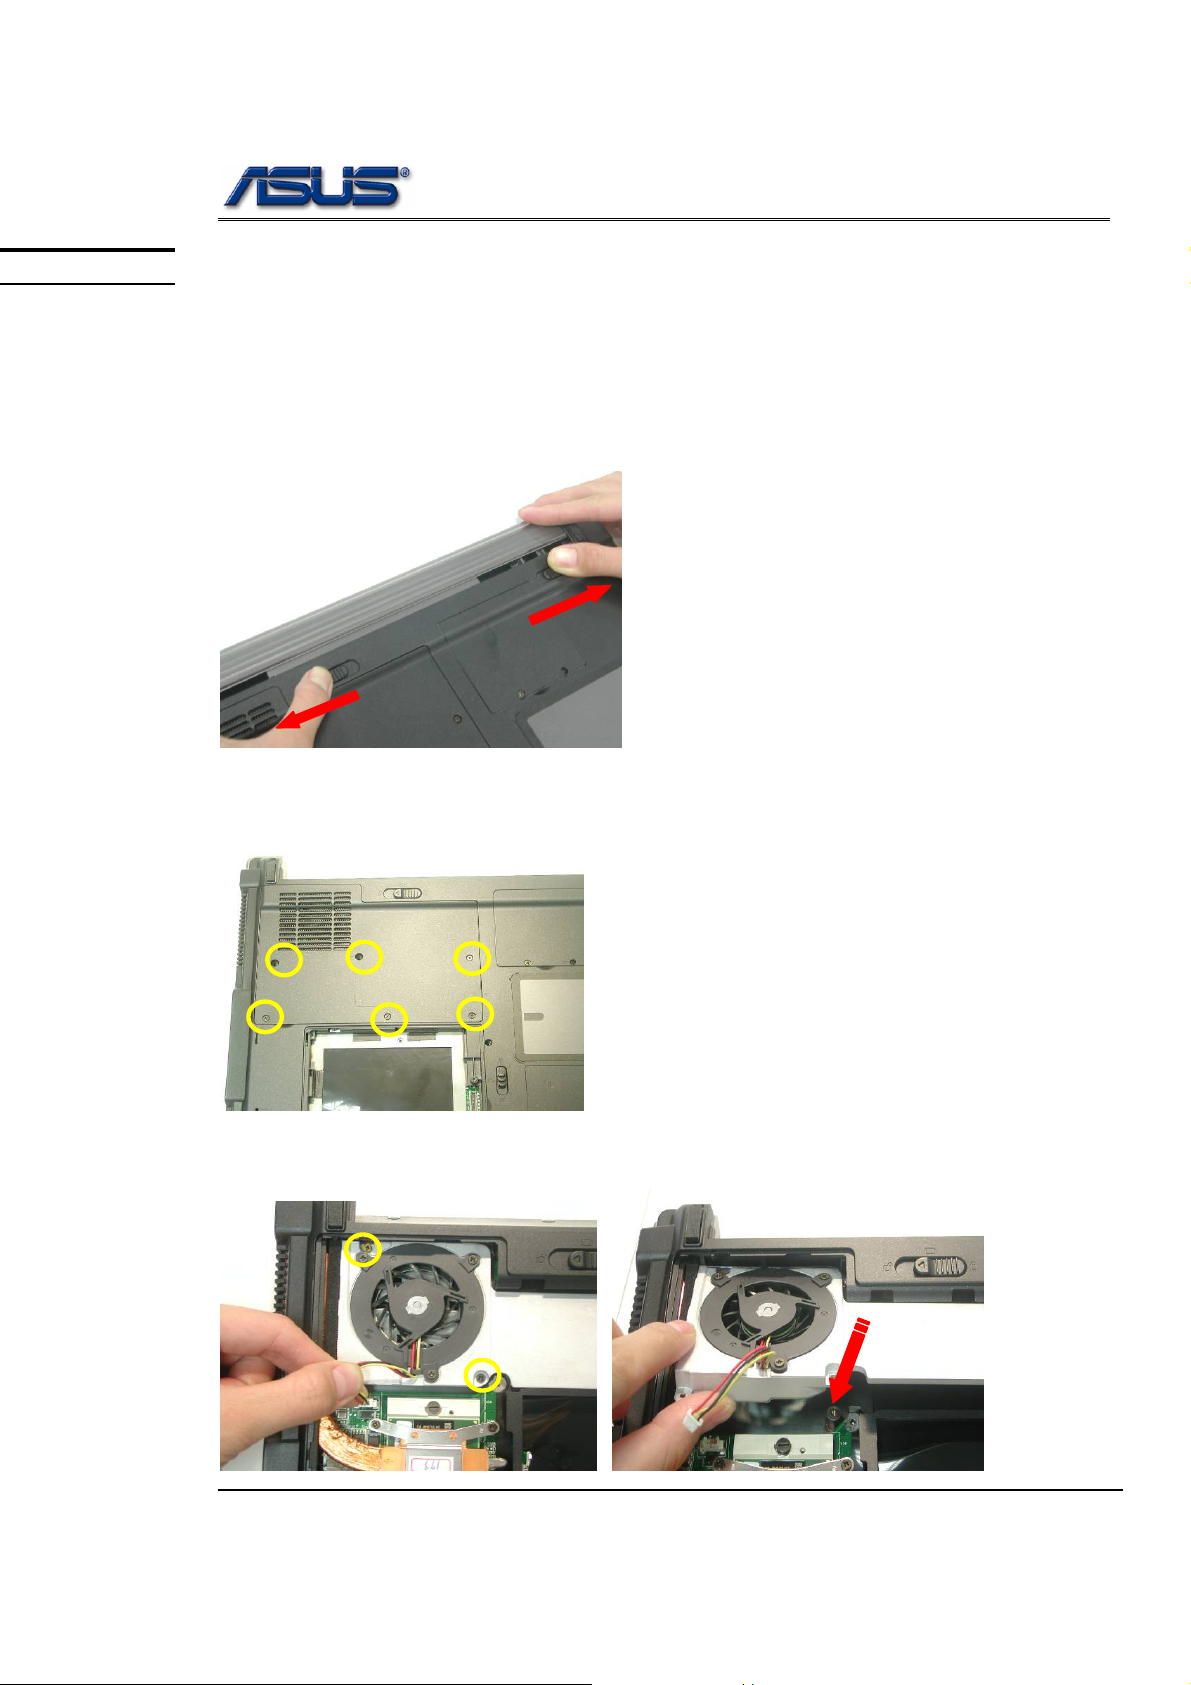
Remove battery module
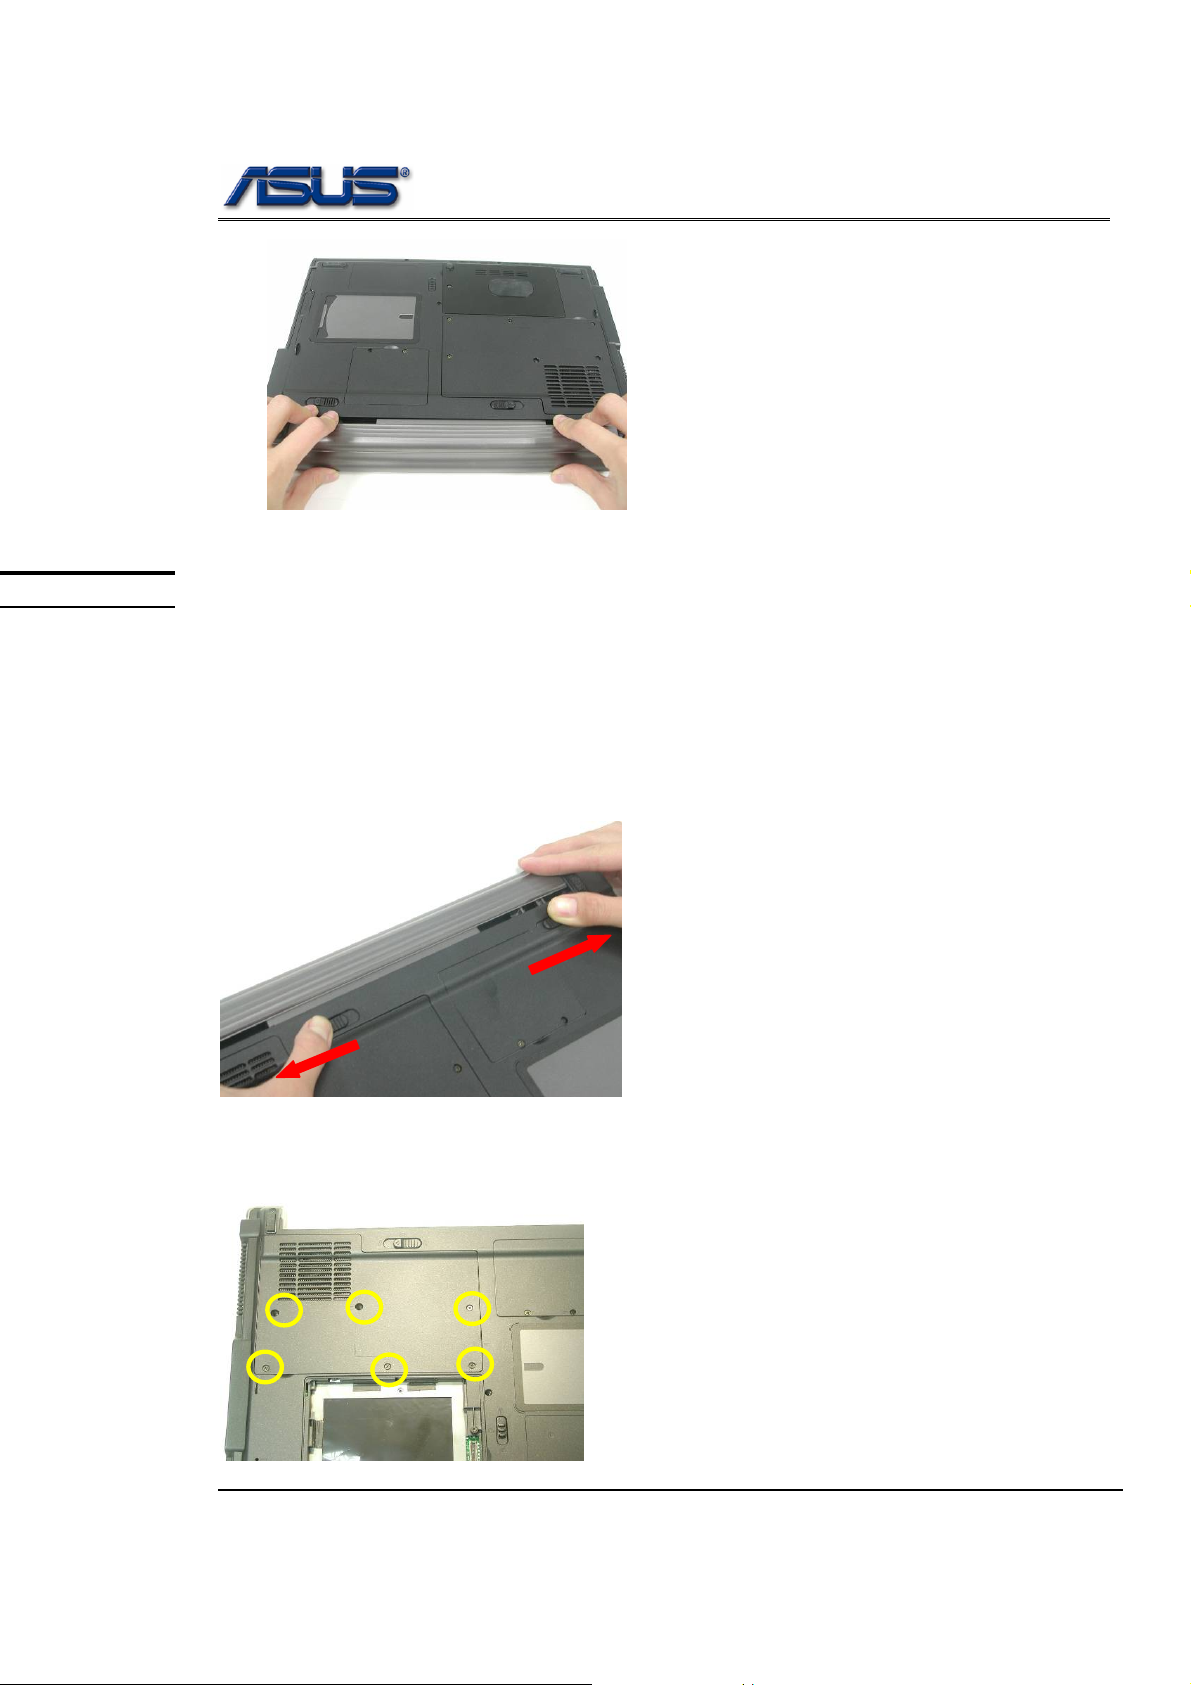
1. Turn the notebook over. Unlock and hold the latch, and remove the battery .
Replacement CPU
.
1. Remove 6 screws(M2*4L(K)) and take the Fan bracket away.
2. Disconnect the FAN connector and remove 2 screws(M2*4L(K)) then take away the
Fan Module.
W3A
5 - 2
upgrade & replacement
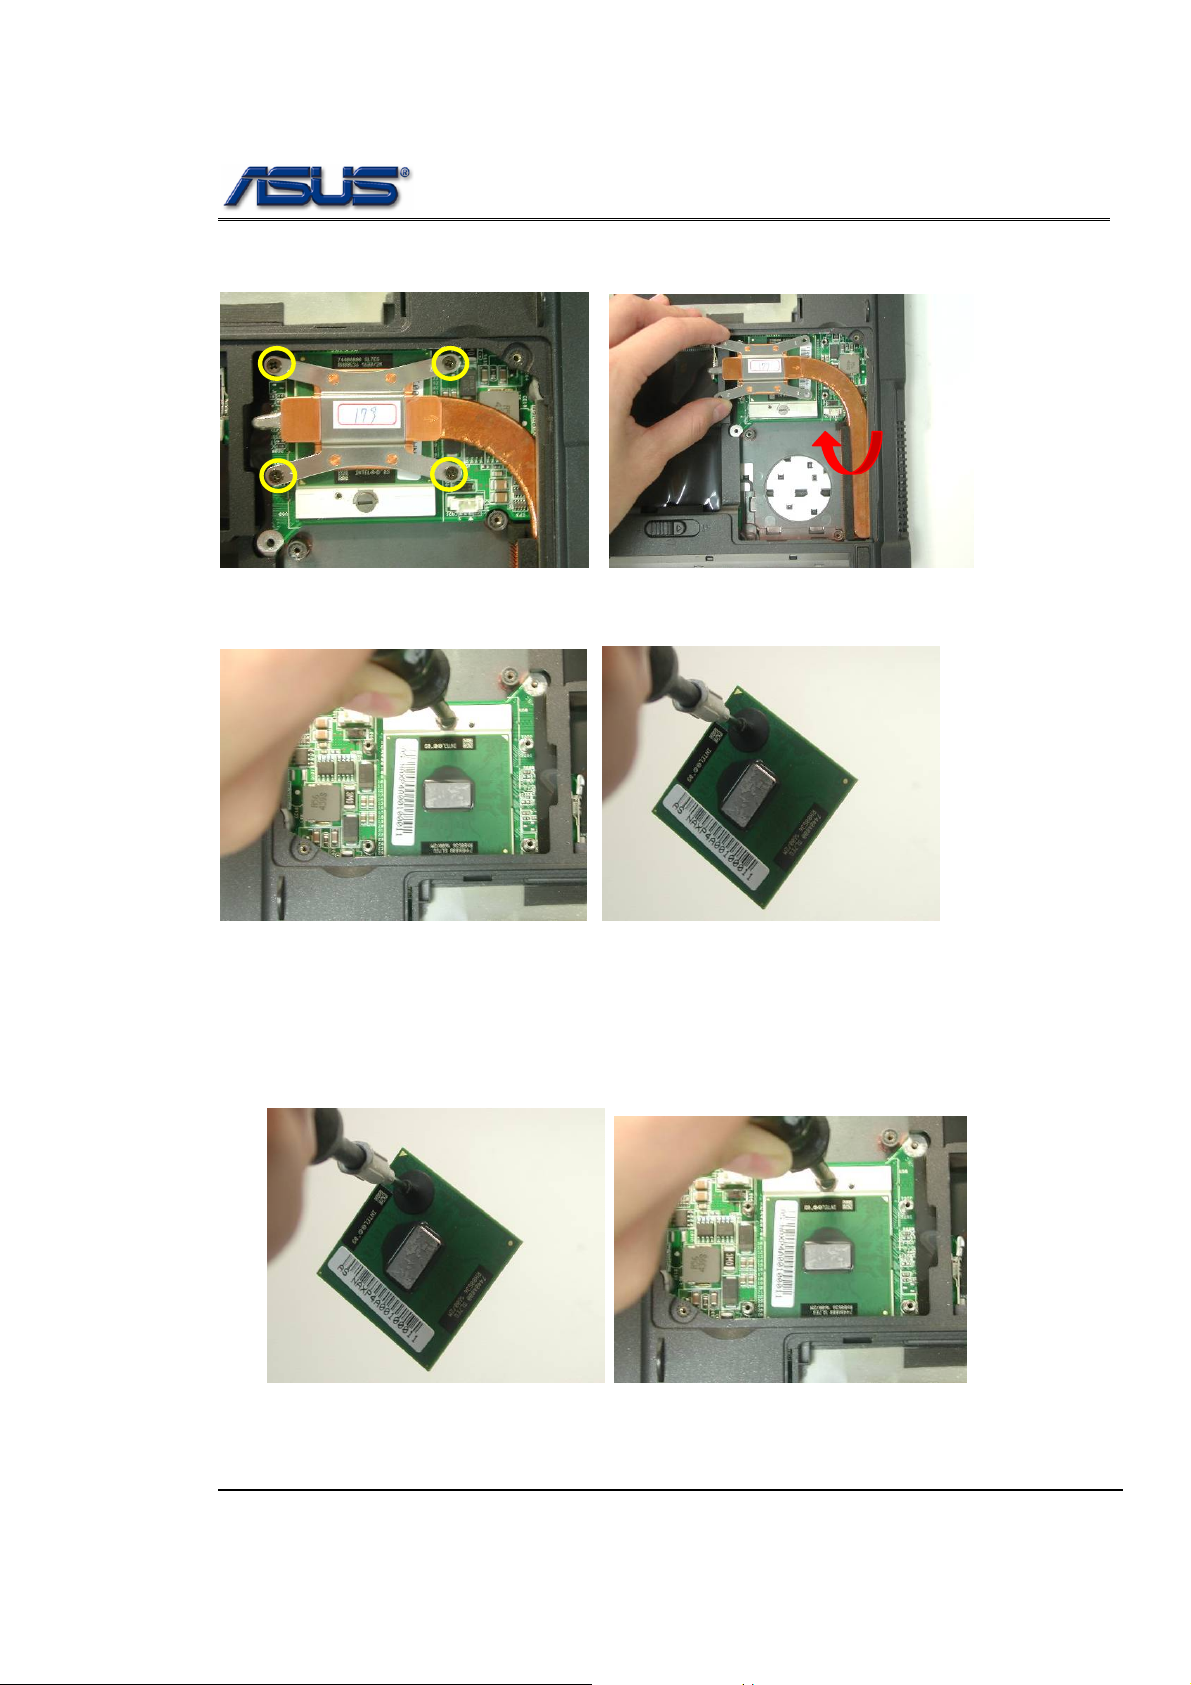
3. Remove the 4 screws (M2*4L(K)) upon the thermal module and take away the CPU heat
sink module gently
4. Turn the non-removable screw here 180 degrees counter-clockwise to loosen the CPU
and take the CPU away
Note: If thermal module has no thermal pad on it, please plus a thermal pad on the
CPU die before assembling.
Installing CPU
1. Use the CPU vacuum to “suck up” the CPU then then Install the CPU and turn
the non-removable screw here 180 degrees clockwise to lock the CPU.
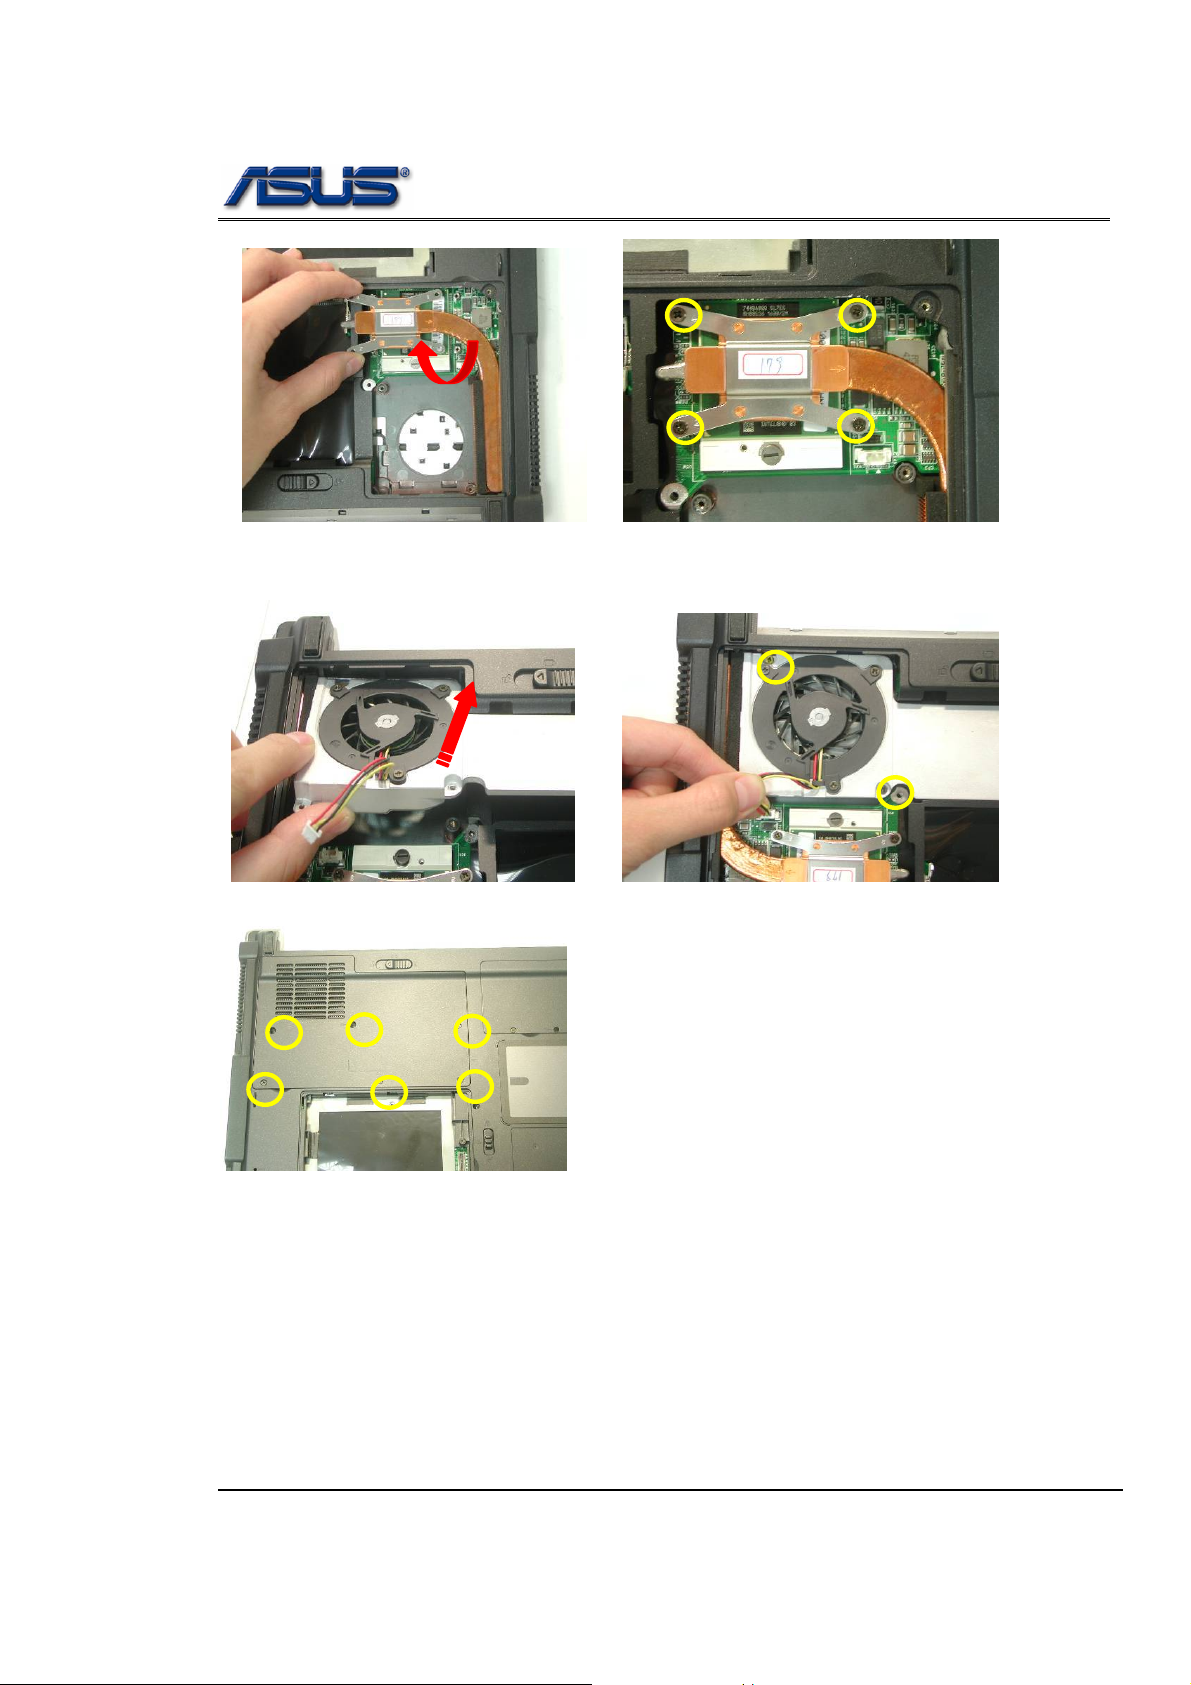
2. Install the CPU heat sink module gently and secure 4 screws (M2*4L(K))upon
the CPU module .+
W3A
5 - 3
upgrade & replacement
M2*4L
3. Finally, put on the fan bracket and secure 2 screws (M2*4L(K)).
M2*4L
4. Put the CPU Module cover on then secure 6 screw (M2*4L(K)) to fix it.
Install battery module .
1. Put the battery module into its compartment.
W3A
5 - 4
upgrade & replacement
MEMORY
Memory Upgrade
The W3000A Series Notebook does not have onboard RAM. There are two SODIMM sockets for installing SO-DIMM RAM. It can upgrade the total memory
size up to 2GB with a 1GB module on each socket.
nd
Upgrading 2
Remove battery module
1. Turn the notebook over. Unlock and hold the latch, and remove the battery .
Replacement Memory Module
1. Remove 6 screws(M2*4L(K)) and take the Fan bra cket away.
Memory Module
W3A
5 - 5
 Loading...