

Asus V301LP User Manual

E8276
First Edition
June 2013
Notebook PC
E-Manual

2
Notebook PC E-Manual
COPYRIGHT INFORMATION
No part of this manual, including the products and software described in it, may be reproduced,
transmitted, transcribed, stored in a retrieval system, or translated into any language in any form or by
any means, except documentation kept by the purchaser for backup purposes, without the express
written permission of ASUSTeK COMPUTER INC. (“ASUS”).
ASUS PROVIDES THIS MANUAL “AS IS” WITHOUT WARRANTY OF ANY KIND, EITHER EXPRESS OR IMPLIED,
INCLUDING BUT NOT LIMITED TO THE IMPLIED WARRANTIES OR CONDITIONS OF MERCHANTABILITY OR
FITNESS FOR A PARTICULAR PURPOSE. IN NO EVENT SHALL ASUS, ITS DIRECTORS, OFFICERS, EMPLOYEES
OR AGENTS BE LIABLE FOR ANY INDIRECT, SPECIAL, INCIDENTAL, OR CONSEQUENTIAL DAMAGES
(INCLUDING DAMAGES FOR LOSS OF PROFITS, LOSS OF BUSINESS, LOSS OF USE OR DATA, INTERRUPTION
OF BUSINESS AND THE LIKE), EVEN IF ASUS HAS BEEN ADVISED OF THE POSSIBILITY OF SUCH DAMAGES
ARISING FROM ANY DEFECT OR ERROR IN THIS MANUAL OR PRODUCT.
Products and corporate names appearing in this manual may or may not be registered trademarks or
copyrights of their respective companies, and are used only for identication or explanation and to the
owners’ benet, without intent to infringe.
SPECIFICATIONS AND INFORMATION CONTAINED IN THIS MANUAL ARE FURNISHED FOR INFORMATIONAL
USE ONLY, AND ARE SUBJECT TO CHANGE AT ANY TIME WITHOUT NOTICE, AND SHOULD NOT BE
CONSTRUED AS A COMMITMENT BY ASUS. ASUS ASSUMES NO RESPONSIBILITY OR LIABILITY FOR ANY
ERRORS OR INACCURACIES THAT MAY APPEAR IN THIS MANUAL, INCLUDING THE PRODUCTS AND
SOFTWARE DESCRIBED IN IT.
Copyright © 2013 ASUSTeK COMPUTER INC. All Rights Reserved.
LIMITATION OF LIABILITY
Circumstances may arise where because of a default on ASUS’ part or other liability, you are entitled to
recover damages from ASUS. In each such instance, regardless of the basis on which you are entitled to
claim damages from ASUS, ASUS is liable for no more than damages for bodily injury (including death)
and damage to real property and tangible personal property; or any other actual and direct damages
resulted from omission or failure of performing legal duties under this Warranty Statement, up to the
listed contract price of each product.
ASUS will only be responsible for or indemnify you for loss, damages or claims based in contract, tort or
infringement under this Warranty Statement.
This limit also applies to ASUS’ suppliers and its reseller. It is the maximum for which ASUS, its suppliers,
and your reseller are collectively responsible.
UNDER NO CIRCUMSTANCES IS ASUS LIABLE FOR ANY OF THE FOLLOWING: (1) THIRD-PARTY CLAIMS
AGAINST YOU FOR DAMAGES; (2) LOSS OF, OR DAMAGE TO, YOUR RECORDS OR DATA; OR (3) SPECIAL,
INCIDENTAL, OR INDIRECT DAMAGES OR FOR ANY ECONOMIC CONSEQUENTIAL DAMAGES (INCLUDING
LOST PROFITS OR SAVINGS), EVEN IF ASUS, ITS SUPPLIERS OR YOUR RESELLER IS INFORMED OF THEIR
POSSIBILITY.
SERVICE AND SUPPORT
Visit our multi-language web site at http://support.asus.com

Table of Contents
About this manual .....................................................................................................6
Conventions used in this manual .............................................................................7
Icons ....................................................................................................................................7
Typography ....................................................................................................................... 7
Safety precautions.....................................................................................................8
Using your Notebook PC .............................................................................................. 8
Caring for your Notebook PC .....................................................................................9
Proper disposal ................................................................................................................ 10
Chapter 1: Hardware Setup
Getting to know your Notebook PC ...................................................................12
Top View ............................................................................................................................. 12
Bottom ................................................................................................................................ 17
Right Side ..........................................................................................................................19
Left Side .............................................................................................................................20
Chapter 2: Using your Notebook PC
Getting started ...........................................................................................................24
Charge your Notebook PC. ..........................................................................................24
Lift to open the display panel. ....................................................................................26
Press the power button. ...............................................................................................26
Gestures for the touch screen panel and touchpad .....................................27
Using the touch screen panel ....................................................................................27
Using the touchpad ....................................................................................................... 29
Using the keyboard ...................................................................................................36
Function keys ................................................................................................................... 36
Function keys for ASUS Apps ..................................................................................... 37
Windows®8 keys .............................................................................................................38
Chapter 3: Working with Windows® 8
Starting for the first time .........................................................................................40
Windows® 8 lock screen ...........................................................................................40
Windows® UI ................................................................................................................41
Notebook PC E-Manual
3

4
Notebook PC E-Manual
Start screen .......................................................................................................................41
Windows® Apps ..............................................................................................................41
Hotspots ............................................................................................................................. 42
Working with Windows® apps ...............................................................................45
Launching apps ............................................................................................................... 45
Customizing apps ........................................................................................................... 45
Accessing the Apps screen .......................................................................................... 48
Charms bar ........................................................................................................................ 51
Snap feature .....................................................................................................................54
Other keyboard shortcuts ......................................................................................56
Connecting to wireless networks ........................................................................58
Wi-Fi ..................................................................................................................................... 58
Bluetooth .......................................................................................................................... 60
Airplane mode ................................................................................................................. 62
Connecting to wired networks ............................................................................. 63
Configuring a dynamic IP/PPPoE network connection ....................................63
Configuring a static IP network connection .........................................................65
Turning your Notebook PC off ..............................................................................66
Putting your Notebook PC to sleep .........................................................................66
Chapter 4: ASUS apps
Featured ASUS Apps .................................................................................................68
Power4Gear Hybrid ........................................................................................................ 68
ASUS VivoBook app launcher ..................................................................................... 72
Chapter 5: Power-on Self Test (POST)
The Power-on Self Test (POST ) ..............................................................................80
Using POST to access BIOS and Troubleshoot...................................................... 80
BIOS ................................................................................................................................80
Accessing BIOS ................................................................................................................80
BIOS Settings .................................................................................................................... 81
Troubleshoot ...............................................................................................................91
Refresh your PC ...............................................................................................................91
Reset your PC ...................................................................................................................92
Advanced options .......................................................................................................... 93

Tips and FAQs
Useful tips for your Notebook PC ........................................................................96
Hardware FAQs ...........................................................................................................97
Software FAQs ............................................................................................................. 100
Appendices
DVD-ROM Drive Information (on selected models) ........................................... 104
Blu-ray ROM Drive Information (on selected models) ....................................... 106
Internal Modem Compliancy...................................................................................... 106
Overview ............................................................................................................................ 107
Network Compatibility Declaration ......................................................................... 107
Non-Voice Equipment ..................................................................................................107
Federal Communications Commission Interference Statement ................... 109
FCC Radio Frequency (RF) Exposure Caution Statement ................................. 110
Declaration of Conformity (R&TTE directive 1999/5/EC) .................................. 111
CE Marking ........................................................................................................................ 111
IC Radiation Exposure Statement for Canada ...................................................... 112
Déclaration d’Industrie Canada relative à l’exposition aux ondes radio ... 113
Wireless Operation Channel for Different Domains ........................................... 114
France Restricted Wireless Frequency Bands ....................................................... 114
UL Safety Notices ............................................................................................................ 116
Power Safety Requirement..........................................................................................117
TV Notices ......................................................................................................................... 117
REACH ................................................................................................................................. 117
Macrovision Corporation Product Notice .............................................................. 117
Prevention of Hearing Loss ......................................................................................... 117
Nordic Lithium Cautions (for lithium-ion batteries) ........................................... 118
Optical Drive Safety Information ..............................................................................119
CTR 21 Approval (for Notebook PC with built-in Modem) ..............................120
ENERGY STAR complied product .............................................................................. 122
European Union Eco-label ........................................................................................... 122
Global Environmental Regulation Compliance and Declaration .................. 123
ASUS Recycling/Takeback Services .......................................................................... 123
Regional notice for Singapore ...................................................................................123
Notebook PC E-Manual
5

6
Notebook PC E-Manual
About this manual
This manual provides information about the hardware and software
features of your Notebook PC, organized through the following
chapters:
Chapter 1: Hardware Setup
This chapter details the hardware components of your Notebook
PC.
Chapter 2: Using your Notebook PC
This chapter shows you how to use the dierent parts of your
Notebook PC.
Chapter 3: Working with Windows® 8
This chapter provides an overview of using Windows® 8 in your
Notebook PC.
Chapter 4: ASUS Apps
This chapter features the ASUS apps included with your Notebook
PC’s Windows® 8 operating system.
Chapter 5: Power-on Self-test (POST)
This chapter shows you how to use POST to change the settings
of your Notebook PC.
Tips and FAQs
This section presents some recommended tips, hardware FAQs,
and software FAQs you can refer to for maintaining and xing
common issues with your Notebook PC.
Appendices
This section includes notices and safety statements for your
Notebook PC.
Conventions used in this manual
To highlight key information in this manual, some text are presented as
follows:
IMPORTANT! This message contains vital information that must be
followed to complete a task.
NOTE: This message contains additional information and tips that can
help complete tasks.
WARNING! This message contains important information that must be
followed to keep you safe while performing tasks and prevent damage to
your Notebook PC's data and components.
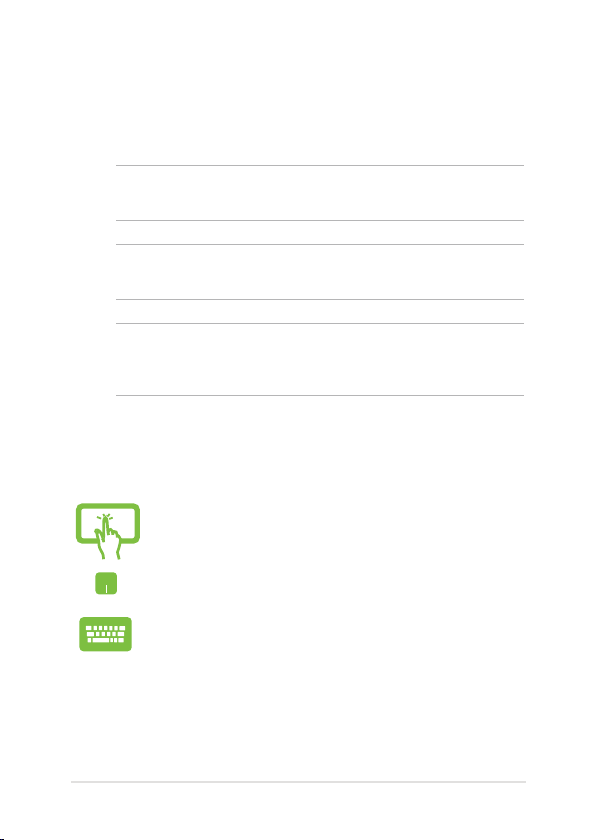
Icons
The icons below indicate the devices you can use for completing a
series of tasks or procedures on your Notebook PC.
= Use the touch screen panel.
= Use the touchpad.
= Use the keyboard.
Typography
Bold = This indicates a menu or an item that must be selected.
Italic = This indicates sections that you can refer to in this manual.
Notebook PC E-Manual
7
8
Notebook PC E-Manual
Safety precautions
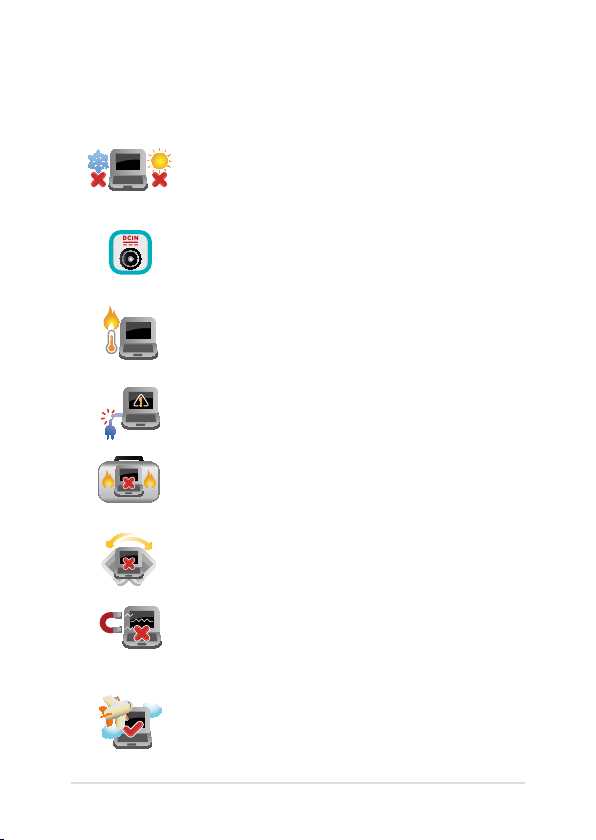
Using your Notebook PC
This Notebook PC should only be used in
environments with ambient temperatures between
5°C (41°F) and 35°C (95°F).
Refer to the rating label on the bottom of your
Notebook PC and ensure that your power adapter
complies with this rating.
Do not leave your Notebook PC on your lap or near
any part of your body to prevent discomfort or
injury from heat exposure.
Do not use damaged power cords, accessories, and
other peripherals with your Notebook PC.
While powered on, ensure that you do not carry or
cover your Notebook PC with any materials that can
reduce air circulation.
Do not place your Notebook PC on uneven or
unstable work surfaces.
You can send your Notebook PC through x-ray
machines (used on items placed on conveyor belts),
but do not expose them to magnetic detectors and
wands.
Contact your airline provider to learn about related
inight services that can be used and restrictions
that must be followed when using your Notebook
PC in-ight.
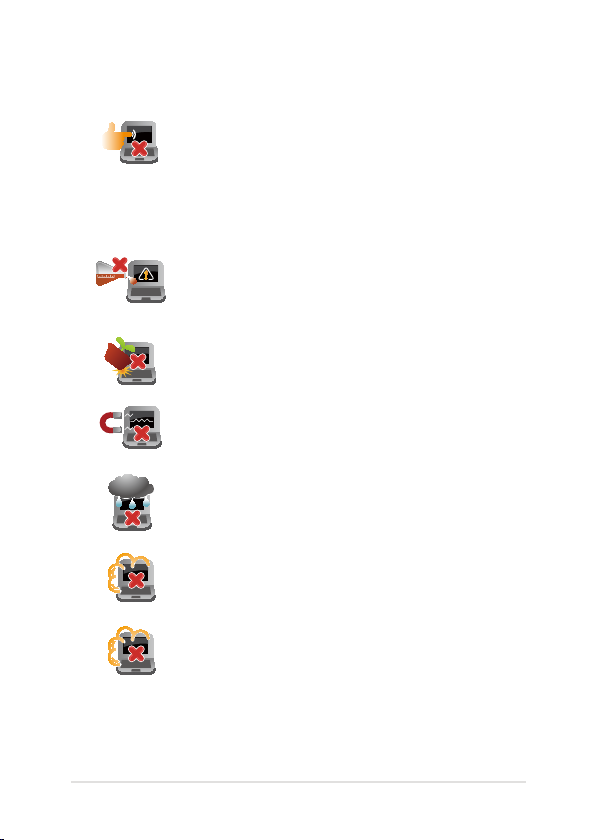
Caring for your Notebook PC
Disconnect the AC power and remove the battery
pack (if applicable) before cleaning your Notebook
PC. Use a clean cellulose sponge or chamois cloth
dampened with a solution of nonabrasive detergent
and a few drops of warm water. Remove any extra
moisture from your Notebook PC using a dry cloth.
Do not use strong solvents such as thinners,
benzene, or other chemicals on or near your
Notebook PC.
Do not place objects on top of your Notebook PC.
Do not expose your Notebook PC to strong
magnetic or electrical elds.
Do not use or expose your Notebook PC near
liquids, rain, or moisture.
Do not expose your Notebook PC to dusty
environments.
Do not use your Notebook PC near gas leaks.
Notebook PC E-Manual
9
10
Notebook PC E-Manual
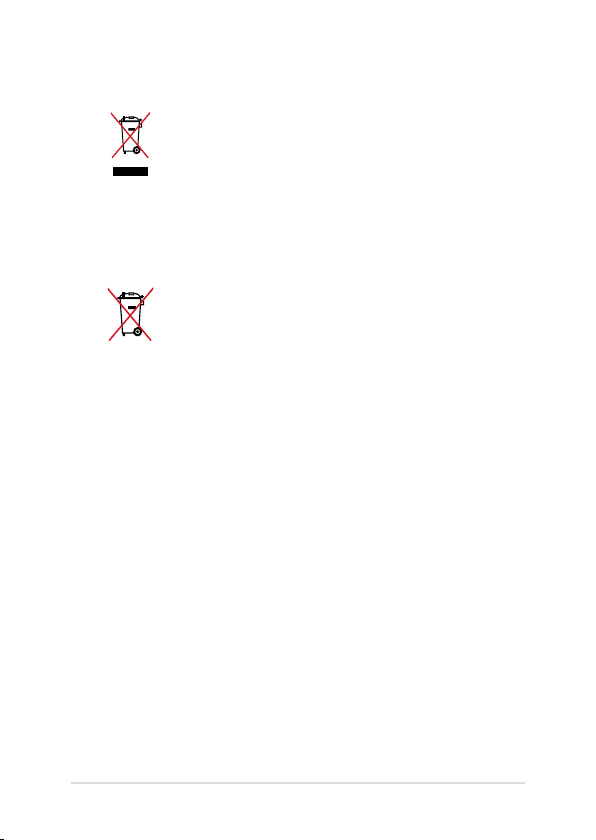
Proper disposal
Do not throw your Notebook PC in municipal waste.
This product has been designed to enable proper
reuse of parts and recycling. The symbol of the
crossed out wheeled bin indicates that the product
(electrical, electronic equipment and mercurycontaining button cell battery) should not be
placed in municipal waste. Check local regulations
for disposal of electronic products.
Do not throw the battery in municipal waste. The
symbol of the crossed out wheeled bin indicates
that the battery should not be placed in municipal
waste.

Chapter 1: Hardware Setup
Notebook PC E-Manual
11
12
Notebook PC E-Manual
Getting to know your Notebook PC
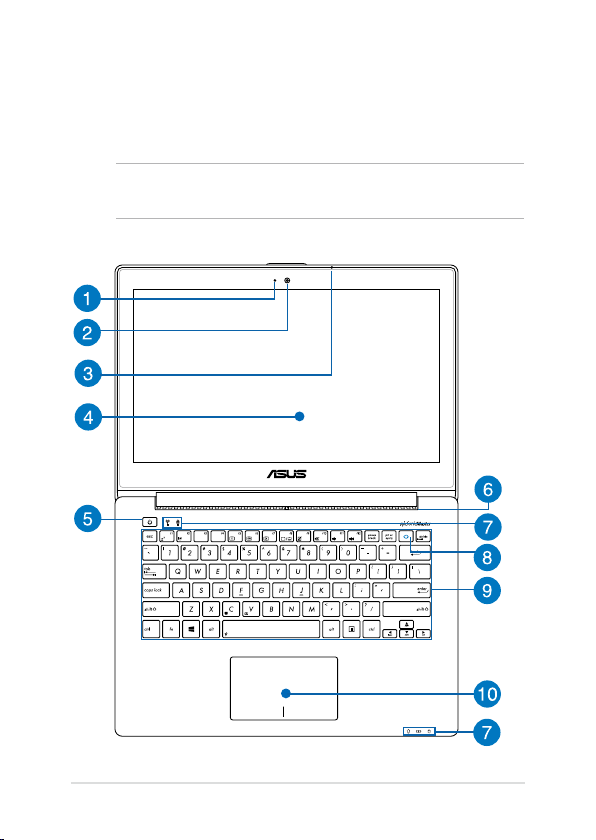
Top View
NOTE: The keyboard's layout may vary per region or country. The top
view may also vary in appearance depending on the Notebook PC model.

Camera indicator
The camera indicator lights up when the built-in camera is in use.
Camera
The built-in camera allows you to take pictures or record videos
using your Notebook PC.
Microphone
The built-in microphone can be used for video conferencing,
voice narrations, or simple audio recording.
Touch screen panel
This high-denition touch screen panel panel provides excellent
viewing features for photos, videos, and other multimedia
les on your Notebook PC. It also allows you to operate your
Notebook PC using touch gestures.
NOTE: For more details, refer to the Using the touch screen panel
section in this manual.
Power button
Press the power button to turn your Notebook PC on or o. You
can also use the power button to put your Notebook PC to sleep
or hibernate mode and wake it up from sleep or hibernate mode.
In the event that your Notebook PC becomes unresponsive,
press and hold the power button for about four (4) seconds until
your Notebook PC shuts down.
Notebook PC E-Manual
13
14
Notebook PC E-Manual
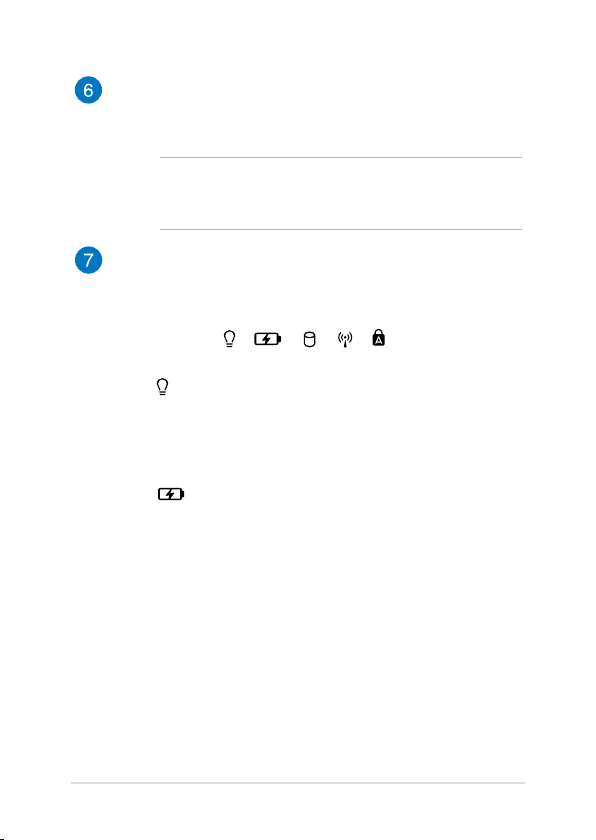
Air vents
The air vents allow cool air to enter and warm air to exit the
Notebook PC.
WARNING! Ensure that paper, books, clothing, cables, or other
objects do not block any of the air vents or else overheating may
occur.
Status indicators
The status indicators help identify the current hardware status of
your Notebook PC.
Power indicator
The power indicator lights up when the Notebook PC
is turned on and blinks slowly when the Notebook
PC is in sleep mode.
Two-color battery charge indicator
The two-color LED provides a visual indication of the
battery’s charge status. Refer to the following table
for details.

Color Status
Solid Green The Notebook PC is plugged to
a power source and the battery
power is between 95% and
100%.
Solid Orange The Notebook PC is plugged
to a power source, charging its
battery, and the battery power
is less than 95%.
Blinking Orange The Notebook PC is running on
battery mode and the battery
power is less than 10%.
Lights o The Notebook PC is running on
Drive activity indicator
This indicator lights up when your Notebook PC is
Bluetooth / Wireless indicator
This indicator lights up when your Notebook PC’s
Capital lock indicator
This indicator lights up when the capital lock
Notebook PC E-Manual
battery mode and the battery
power is between 10% to 100%.
accessing the internal storage drives.
wireless function (Bluetooth or Wi-Fi) is enabled.
function is activated. Using capital lock allows you
to type capitalized letters (such as A, B, C) using your
Notebook PC’s keyboard.
15
16
Notebook PC E-Manual
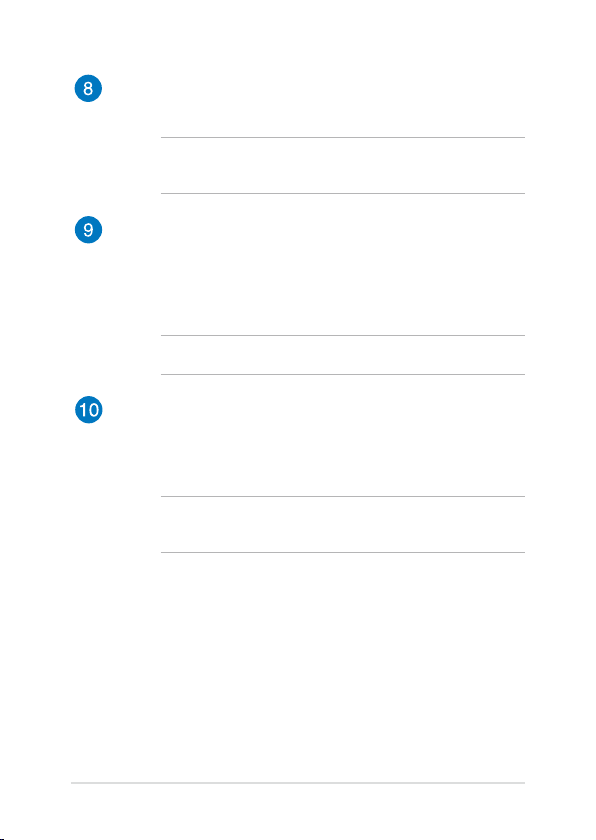
ASUS Vivo key
Press this key to launch the ASUS VivoBook app.
NOTE: For more information, refer to the ASUS VivoBook app
launcher section in this manual.
Keyboard
The keyboard provides full-sized QWERTY keys with a
comfortable travel depth for typing. It also enables you to use
the function keys, allows quick access to Windows®, and controls
other multimedia functions.
NOTE: The keyboard layout diers by model or territory.
Touchpad
The touchpad allows the use of multi-gestures to navigate
onscreen, providing an intuitive user experience. It also simulates
the functions of a regular mouse.
NOTE: For more details, refer to the Using the touchpad section in
this manual.

Bottom
NOTE: The bottom side may vary in appearance depending on model.
WARNING! The bottom of the Notebook PC can get warm to hot while in
use or while charging the battery pack. When working on your Notebook
PC, do not place it on surfaces that can block the vents.
IMPORTANT! Battery time varies by usage and by the specications for
this Notebook PC. The battery pack cannot be disassembled.
Notebook PC E-Manual
17

18
Notebook PC E-Manual
Air vents
The air vents allow cool air to enter and warm air to exit the
Notebook PC.
WARNING! Ensure that paper, books, clothing, cables, or other
objects do not block any of the air vents or else overheating may
occur.
Audio speakers
The built-in audio speaker allows you to hear audio straight from
the Notebook PC. The audio features of this Notebook PC are
software-controlled.
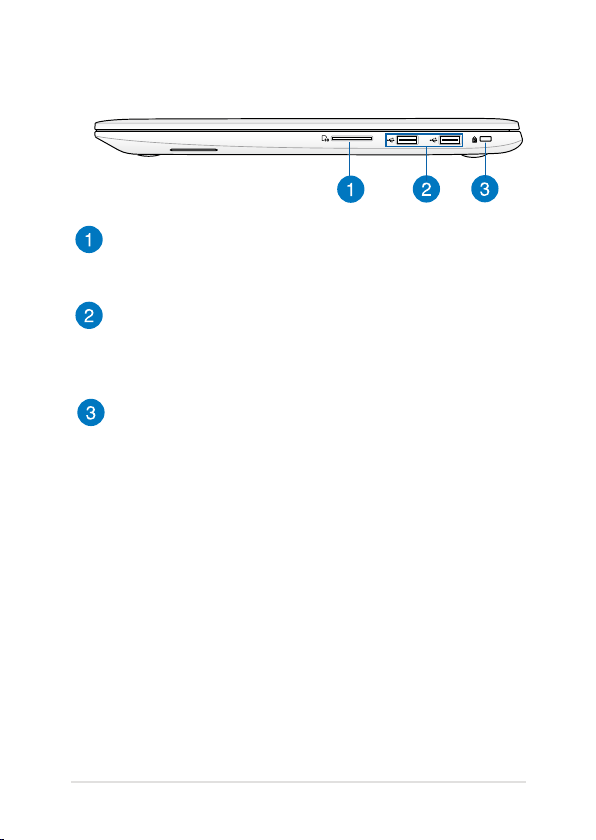
Right Side
Memory card reader
This built-in memory card reader supports SD and SDHC card
formats.
USB 2.0 ports
These USB (Universal Serial Bus) ports are compatible with USB
2.0 or USB 1.1 devices such as keyboards, pointing devices, ash
disk drives, external HDDs, speakers, cameras and printers.
Kensington® security slot
The Kensington® security slot allows you to secure your
Notebook PC using Kensington® compatible Notebook PC
security products.
Notebook PC E-Manual
19
20
Notebook PC E-Manual
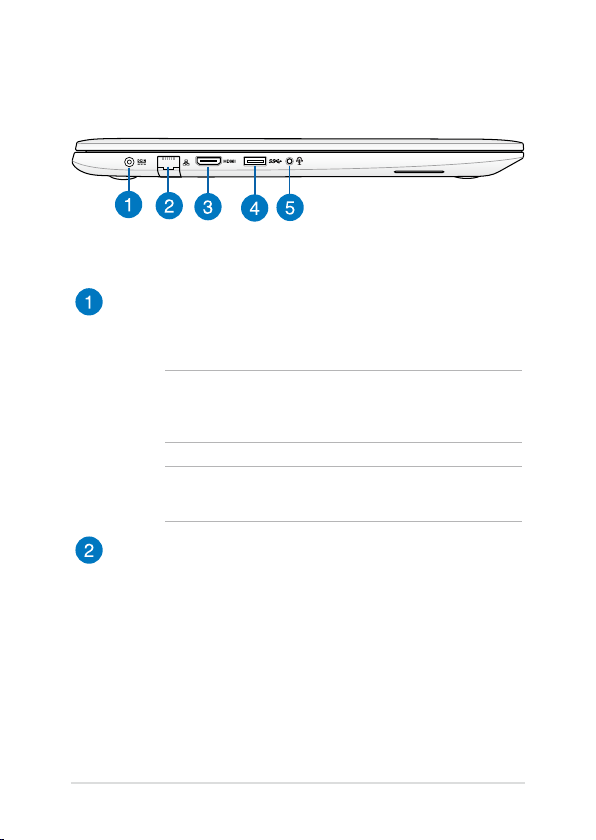
Left Side
Power (DC) input port
Insert the bundled power adapter into this port to charge the
battery pack and supply power to your Notebook PC.
WARNING! The adapter may become warm to hot while in use.
Do not cover the adapter and keep it away from your body while
it is connected to a power source.
IMPORTANT! Use only the bundled power adapter to charge
the battery pack and supply power to your Notebook PC.
LAN port
Insert the network cable into this port to connect to a local area
network.

HDMI port
This port is for the HDMI (High-Denition Multimedia Interface)
connector and is HDCP compliant for HD DVD, Blu-ray, and
other protected content playback.
USB 3.0 ports
These USB (Universal Serial Bus) 3.0 ports provide a transfer rate
of up to 5 Gbit/s and are backward compatible to USB 2.0.
Headphone output/microphone input combo jack port
This port allows you to connect your Notebook PC to amplied
speakers or headphones. You can also use this port to connect
your Notebook PC to an external microphone.
Notebook PC E-Manual
21

22
Notebook PC E-Manual

Chapter 2: Using your Notebook PC
Notebook PC E-Manual
23
24
Notebook PC E-Manual
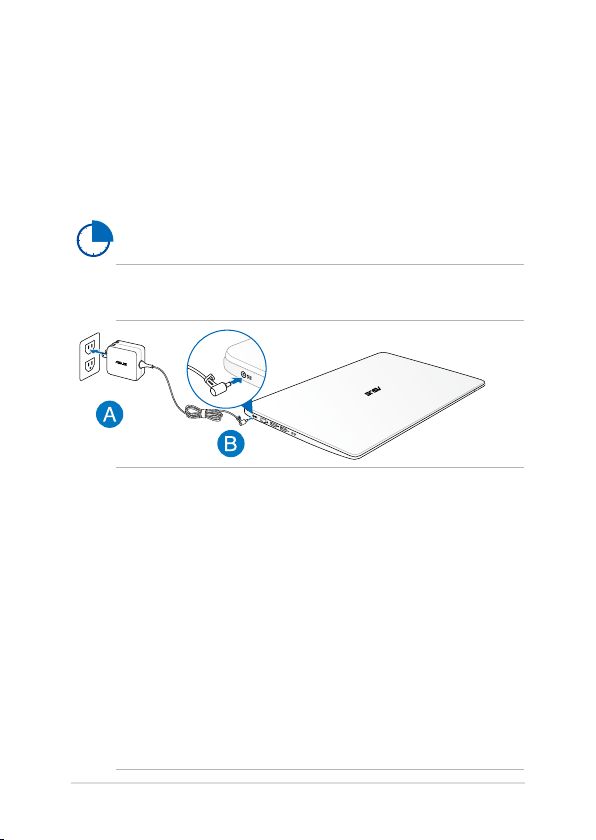
Getting started
Charge your Notebook PC.
A. Plug the AC power adapter into a 100V~240V power source.
B. Connect the DC power connector into your Notebook PC’s power
(DC) input.
Charge the Notebook PC for 3 hours before using it in
battery mode for the rst time.
NOTE: The power adapter may vary in appearance, depending on models
and your region.
IMPORTANT!
• Locate the input/output rating label on your Notebook
PC and ensure that it matches the input/output rating
information on your power adapter. Some Notebook PC
models may have multiple rating output currents based on
the available SKU.
• Ensure that your Notebook PC is connected to the power
adapter before turning it on for the rst time. We strongly
recommend that you use a grounded wall socket while using
your Notebook PC on power adapter mode.
• The socket outlet must be easily accessible and near your
Notebook PC.
• To disconnect your Notebook PC from its main power supply,
unplug your Notebook PC from the power socket.

NOTE:
Power adapter information:
• Input voltage: 100-240Vac
• Input frequency: 50-60Hz
• Rating output current: 3.42A (65W)
• Rating output voltage: 19V
WARNING!
Read the following precautions for your Notebook PC’s battery.
• Only ASUS-authorized technicians should remove the battery
inside the device.
• The battery used in this device may present a risk of re or
chemical burn if removed or disassembled.
• Follow the warning labels for your personal safety.
• Risk of explosion if battery is replaced by an incorrect type.
• Do not dispose of in re.
• Never attempt to short-circuit your Notebook PC’s battery.
• Never attempt to dissamble and reassemble the battery.
• Discontinue usage if leakage is found.
• The battery and its components must be recycled or disposed
of properly.
• Keep the battery and other small components away from
children.
Notebook PC E-Manual
25

26
Notebook PC E-Manual
Lift to open the display panel.
Press the power button.
Gestures for the touch screen panel and touchpad
Gestures allow you to launch programs and access the settings of your
Notebook PC. Refer to the following illustrations when using hand
gestures on your touch screen panel and touchpad.
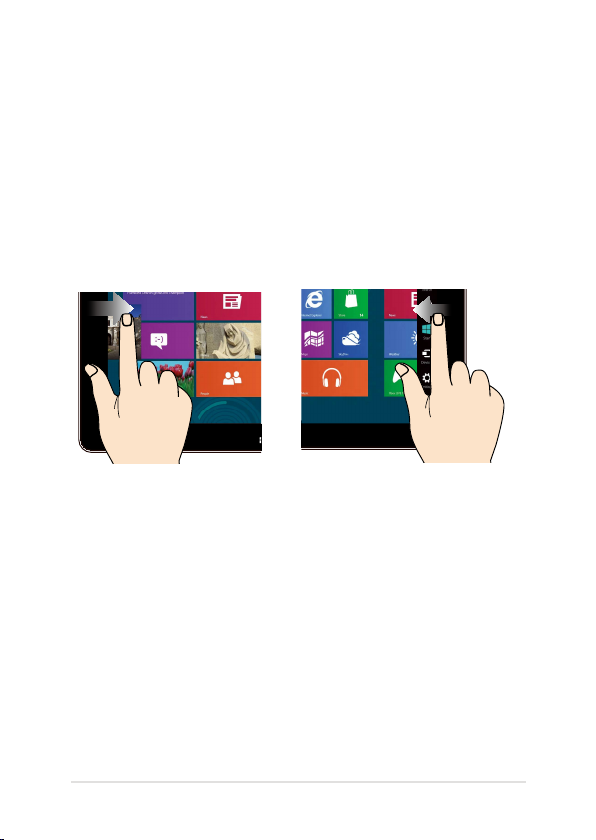
Using the touch screen panel
Left edge swipe Right edge swipe
Swipe from the left edge of the
screen to shue your running
apps.
Notebook PC E-Manual
Swipe from the right edge of the
screen to launch the Charms
bar.
27
28
Notebook PC E-Manual
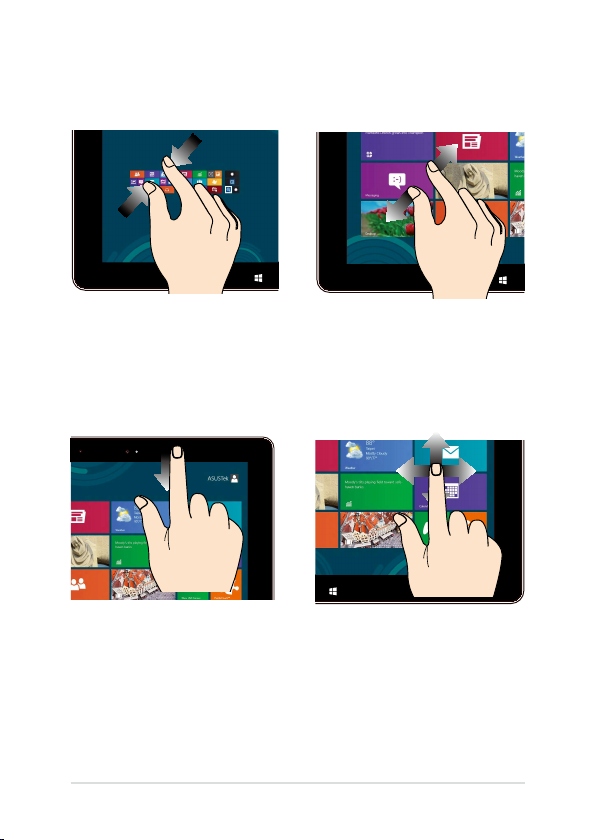
Zoom out Zoom in
Bring together your two ngers
on the touch panel.
Spread apart your two ngers on
the touch panel.
Top edge swipe Finger slide
• In the Start screen, swipe
from the top edge of the
screen to view the All Apps
Slide your nger to scroll up
and down and slide your nger
to pan the screen left or right.
bar.
• In a running app, swipe from
the top edge of the screen to
view its menu.
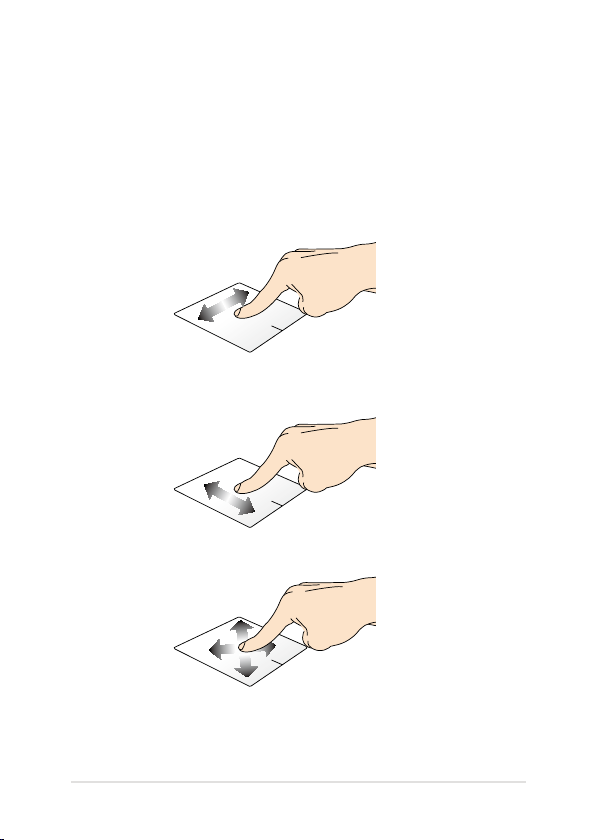
Using the touchpad
Moving the pointer
You can tap or click anywhere on the touchpad to activate its pointer,
then slide your nger on the touchpad to move the pointer onscreen.
Slide horizontally
Slide vertically
Slide diagonally
Notebook PC E-Manual
29
30
Notebook PC E-Manual
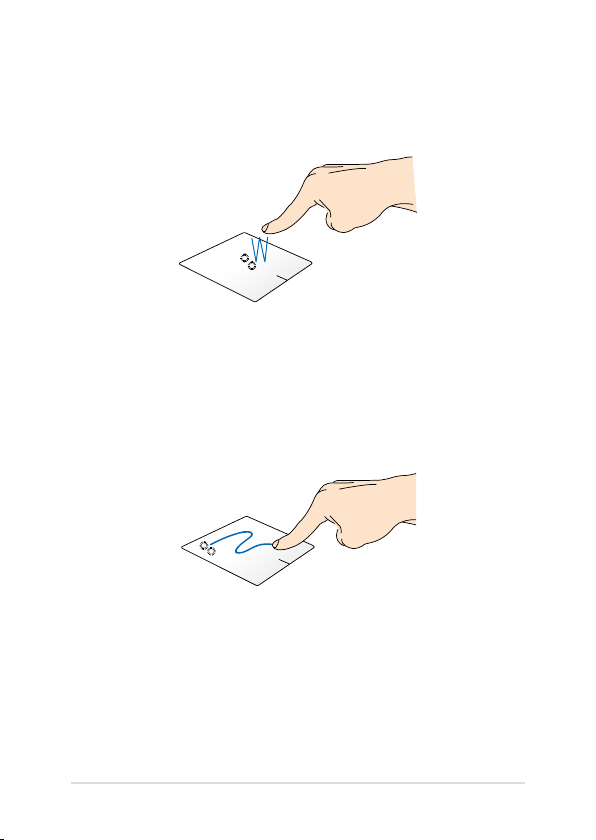
One-nger gestures
Tap/Double tap
• In the Start screen, tap an app to launch it.
• In Desktop mode, double-tap an application to launch it.
Drag and drop
Double-tap an item, then slide the same nger without lifting it o the
touchpad. To drop the item to its new location, lift your nger from the
touchpad.
 Loading...