

Page 1
R
PCI-V264VT
Graphics Card
USER’S MANUAL
E126
Page 2
User’s Notice
No part of this manual, including the products and softwares described in it, may be
reproduced, transmitted, transcribed, stored in a retrieval system, or translated into any
language in any form or by any means, except documentation kept by the purchaser for
backup purposes, without the express written permission of ASUSTeK COMPUTER
INC. (“ASUS”).
ASUS PROVIDES THIS MANUAL “AS IS” WITHOUT WARRANTY OF ANY KIND,
EITHER EXPRESS OR IMPLIED, INCLUDING BUT NOT LIMITED TO THE IMPLIED WARRANTIES OR CONDITIONS OF MERCHANTABILITY OR FITNESS
FOR A PARTICULAR PURPOSE. IN NO EVENT SHALL ASUS, ITS DIRECTORS,
OFFICERS, EMPLOYEES OR AGENTS BE LIABLE FOR ANY INDIRECT, SPECIAL, INCIDENT AL, OR CONSEQUENTIAL DAMAGES (INCLUDING DAMAGES
FOR LOSS OF PROFITS, LOSS OF BUSINESS, LOSS OF USE OR DATA, INTERRUPTION OF BUSINESS AND THE LIKE), EVEN IF ASUS HAS BEEN ADVISED
OF THE POSSIBILITY OF SUCH DAMAGES ARISING FROM ANY DEFECT OR
ERROR IN THIS MANUAL OR PRODUCT.
Products and corporate names appearing in this manual may or may not be registered
trademarks or copyrights of their respective companies, and are used only for identification or explanation and to the owners’ benefit, without intent to infringe.
SPECIFICATIONS AND INFORMATION CONTAINED IN THIS MANUAL ARE
FURNISHED FOR INFORMATIONAL USE ONLY, AND ARE SUBJECT TO
CHANGE AT ANY TIME WITHOUT NOTICE, AND SHOULD NOT BE CONSTRUED
AS A COMMITMENT BY ASUS. ASUS ASSUMES NO RESPONSIBLITY OR LIABILITY FOR ANY ERRORS OR INACCURACIES THAT MAY APPEAR IN THIS
MANUAL, INCLUDING THE PRODUCTS AND SOFTWARES DESCRIBED IN IT.
Copyright © 1997 ASUSTeK COMPUTER INC. All Rights Reserved.
2
R
PCI-V264VT User’s Manual
Page 3
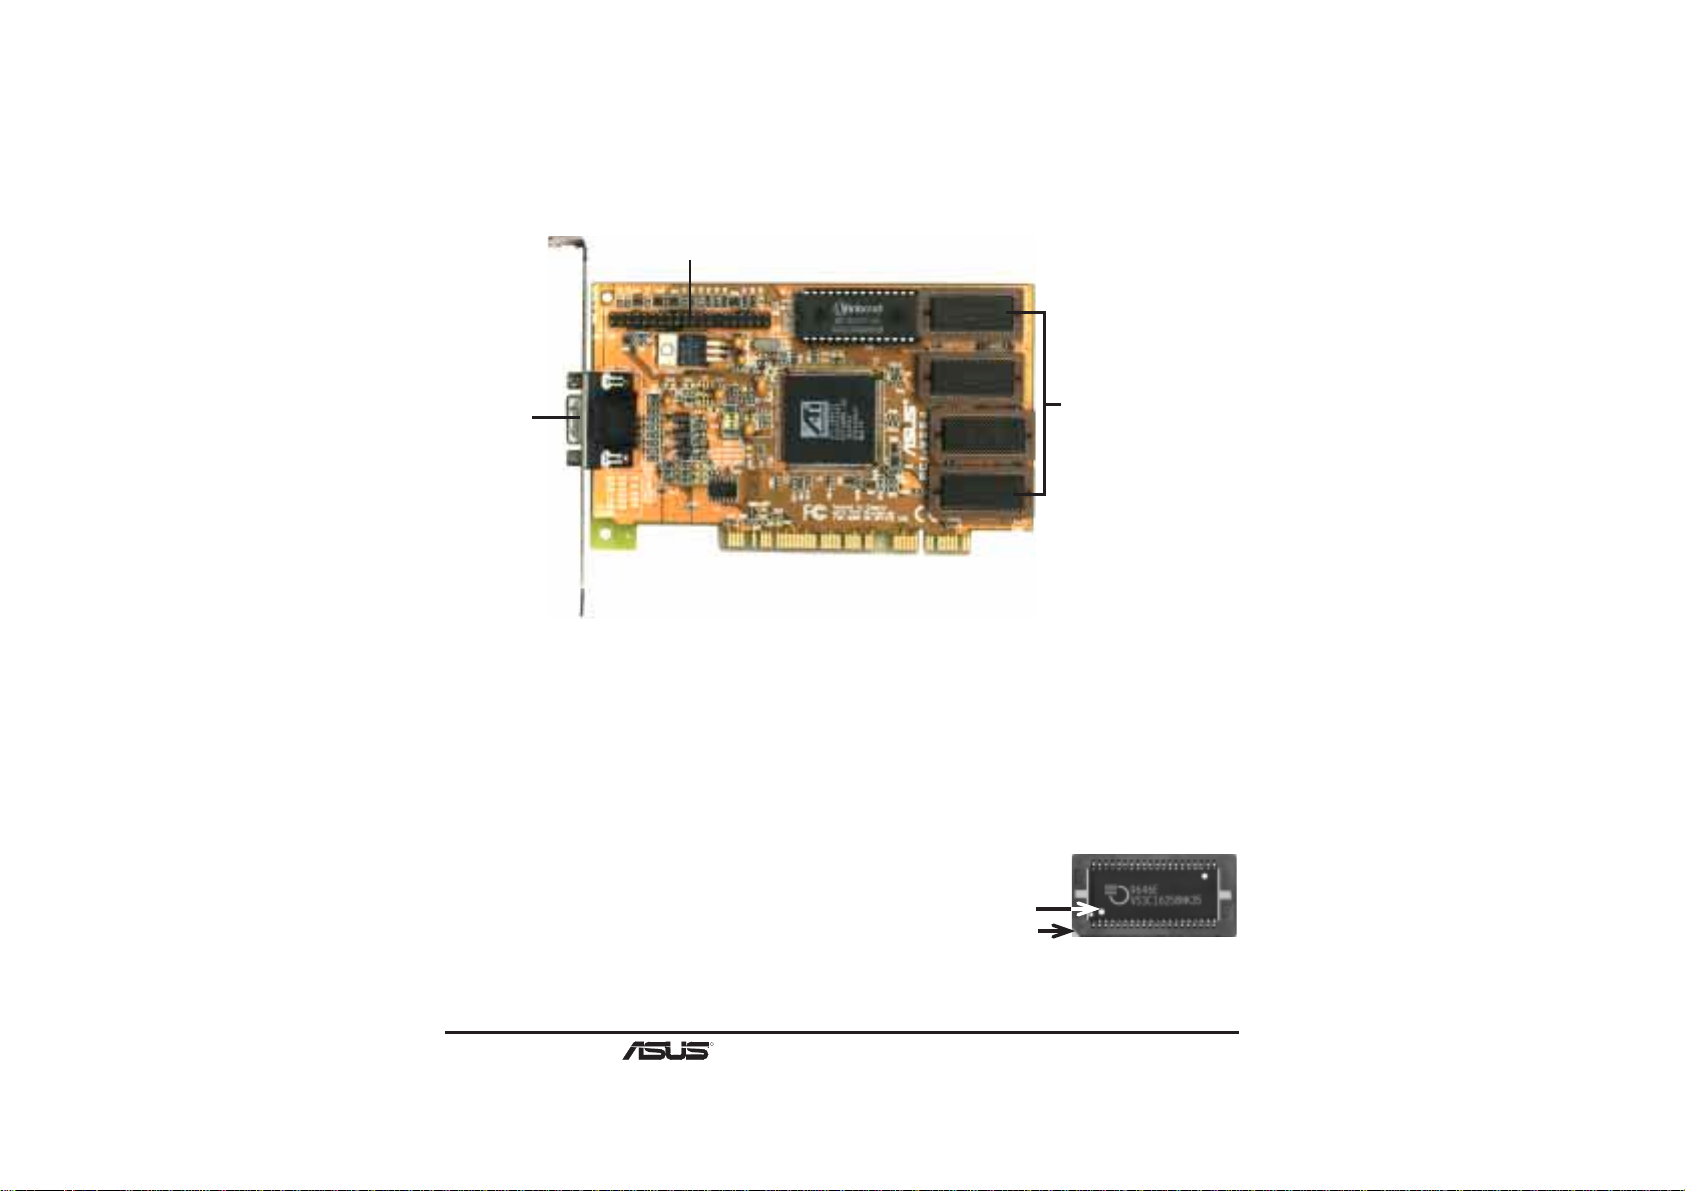
ASUS PCI-V264VT VGA Card Layout
AMC Connector
Monitor
Output
1MB Standard
Upgradeable to 2MB
Adding Additional Memory
The ASUS PCI-V264VT graphics card comes with 1MB video memory configuration.
Memory sockets are available to upgrade the video memory to 2MB by adding 2 memory
chips. Specifications may change without notice.
Memory Specifications
Onboard: two 256K x 16 EDO DRAM chips
Upgrade: two 256K x 16 EDO DRAM chips
Installed Example
Small indentation on
the chip's sloped edge
Socket's cut corner
NOTE: For greater reliability , make sure that all video memory are of the same type and speed.
R
PCI-V264VT User’s Manual
3
Page 4

Video Driver Installation for Windows 95
Introduction
After installing the ASUS graphics card, software drivers and utilities must be installed.
The following are various driver installation procedures for Windows 95 under specific
situations. The procedures for using the Autorun screen is self-explanatory.
Windows Plug and Play in Windows 95: (Auto installing drivers)
IMPORTANT: If an ASUS graphics card (or ATI compatible) was installed at one time,
Windows 95 Plug and Play may install ATI’s original driver upon entering Windows 95.
The old driver may cause your system to hang. If this happens, follow these steps to reset
your display driver to its basic defaults:
1. Enter Windows 95 in safe mode by pressing F5 repeatedly during bootup
2. Right click the mouse on the open desktop (not over any icons)
3. Select Properties
4. Click the Settings tab - Settings menu appears
5. Click Change Display Type - Change Display Type windows appears.
6. Click Change button - Select Device windows appears.
7. Click Show all devices - Manufacturers and Models appears
8. Click (Standard display types) - Standard Display Adapter (VGA) is selected
9. Click OK button - Change Display Type windows appears.
10. Click Apply button - System Settings Change window appears
11. Click Yes button to restart your computer now - restart in normal mode.
4
R
PCI-V264VT User’s Manual
Page 5
Video Driver Installation for Windows 95
Installing ATI Video drivers in Windows 95: (New Hardware Found)
If installing an ASUS graphics card for the first time, a “New Hardware Found” window
will appear upon entering Windows 95:
Select which driver you want to install for your new hardware:
Windows default driver
Driver from disk provided by hardware manufacturer
Do not install a driver (Windows will not prompt you again)
Select from a list of alternate drivers
1. Click OK to use the default selection: “Driver from disk provided by hardware manu-
facturer”
2. Insert ASUS installation CD and click Browse button - Open windows appears.
3. Select your CD-ROM drive in the “Drives:” box
4. Select \win95 directory - macxw4.inf shows in ”File name:”
5. Click the OK button - Install from Disk appears - Click OK button again.
6. Select your device and language then click OK button - Copying Files... appears
7. Click Yes button - ATI Desktop Help will appear upon restart, make changes as
necessary.
R
PCI-V264VT User’s Manual
5
Page 6

Video Driver Installation for Windows 95
Installing ATI Video drivers in Windows 95 (Prompted by Windows 95)
If an ASUS graphics card (or ATI compatible) was installed unsuccessfully or modified
at one time a “Display” message will appear upon entering Windows 95:
There is a problem with your display settings. The adapter type is incorrect,
or the current settings do not work with your hardware.
1. Click OK button to continue - The “Settings” tab of the Display Properties appears.
2. Click Change Display Type - Change Display Type windows appears.
3. Click Change button - Select Device windows appears.
4. Click Have Disk button - “Install From Disk” window appears
5. Insert ASUS instillation CD and Click Browse button - Open window appears
6. Select your CD-ROM drive in the “Drives:” box
7. Select \win95 directory - macxw4.inf shows in ”File name:”
8. Click the OK button - Install from Disk appears - Click OK button again.
9. Select your device and language then click OK button - Copying Files... appears
10. Change your monitor type if necessary - Click Close button when finished.
11. Adjust the “Desktop area,” “Color palette,” and “Font size” if necessary - Click
Apply button when finished - System Settings Change windows appears:
You must restart your computer before the new settings will take effect.
Do you want to restart your computer now?
12. Click Yes button - ATI Desktop Help will appear upon restart, make changes as
necessary.
6
R
PCI-V264VT User’s Manual
Page 7

Software MPEG & Video Player for Windows 95
Software MPEG allows the viewing of the following video files:
• MPEG Format: (*.MPG, *.DAT, *.MPV) Extensions
• AVI Files (*.AVI) Extensions
For Software MPEG support in W indows 95, you must first install DirectV ideo Upgrade
For Microsoft Windows, then install ATI Video Player.
Installing Microsoft DirectVideo in Windows 95:
1. Reinsert the ASUS installation CD or select the CD from My Computer.
2. Click Install DirectX - Click
3. Restart Windows when finished.
Installing ATI Video Player in Windows 95:
1. Reinsert the ASUS installation CD or select the CD from My Computer.
2. Click Install Video Player - ATI Setup: ATI VIDEO PLAYER window appears.
3. Click the OK button - Installation complete message will appear
4. Click Restart Windows button when finished
The setup program will give you "ATI Multimedia" in your Programs group and start
button. The following icons will be available from the "Start" button once the driver has
successfully been installed. Click ATI Player to bring up the ATI Player screen.
R
PCI-V264VT User’s Manual
7
Page 8

Video Driver Installation for Windows 3.x
For your convenience, the ATI video drivers for Windows 3.x can be installed in Windows 3.x or in DOS. The autorun ASUS Windows 3.1 Install Shell cannot be automatically run by Window 3.x, so manual execution is necessary.
Installing ATI video drivers in Windows 3.x:
1. Start Windows 3.x
2. Run File Manager
3. Insert the ASUS installation CD.
4. Change to your CD drive.
5. Double click setup.exe - ASUS Windows 3.1 Install Shell appears
6. Click on Install Windows 3.1 Display Driver- Confirm Installation appears
7. Click Yes - Copying Files appears - Restart Windows appears
8. Click Restart now to complete installation - ATI Desktop group and icon will ap-
pear upon restart - Install Shell Message appears:
Now installation process will continue. If you want to install Video for
Windows, please keep your ASUS driver CD in CD-ROM drive.
9. Click OK - Follow the instructions for Software MPEG & Video Player.
8
R
PCI-V264VT User’s Manual
Page 9

Software MPEG & Video Player for Windows 3.x
Software MPEG allows the viewing of the following video files:
• MPEG Format: (*.MPG, *.DAT, *.MPV) Extensions
• AVI Files (*.AVI) Extensions
For Software MPEG support in Windows 3.x, you must first install Microsoft’s Video
for Windows, then install ATI Video Player.
Installing Microsoft Video for Windows in Windows 3.x:
1. Click on Install Video for Windows - Video for Windows 1.1 Runtime appears
2. Click Continue - Setup appears - Setup Successful appears
3. Click Restart now to complete installation
Installing ATI Video Player in Windows 3.x:
1. Run File Manager
2. Insert the ASUS installation CD.
3. Change to your CD drive.
4. Double click setup.exe - ASUS Windows 3.1 Install Shell appears
5. Click on Install Video Player - Memory Requirement appears:
The ATI Video Player needs at least 600K conventional memory to execute.
If you are not sure or memory is not enough, you can type “MEMMAKER”
under DOS to optimize your memory configuration.
6. Click Continue - ATI Setup: ATI VIDEO PLAYER appears with message
7. Click OK to start installation - Installation completed message appears.
8. Click OK to complete installation - Restart Windows? appears
9. Click Restart Windows button.
10. The Video Player icon will be added to the ATI Desktop menu.
R
PCI-V264VT User’s Manual
9
Page 10

Video Driver Installation for Windows NT 4.0
Installing ATI Video drivers in Windows NT 4.0: (New Hardware Found)
If installing an ASUS Graphics device for the first time, a “New Hardware Found” window will appear upon entering Windows NT 4.0:
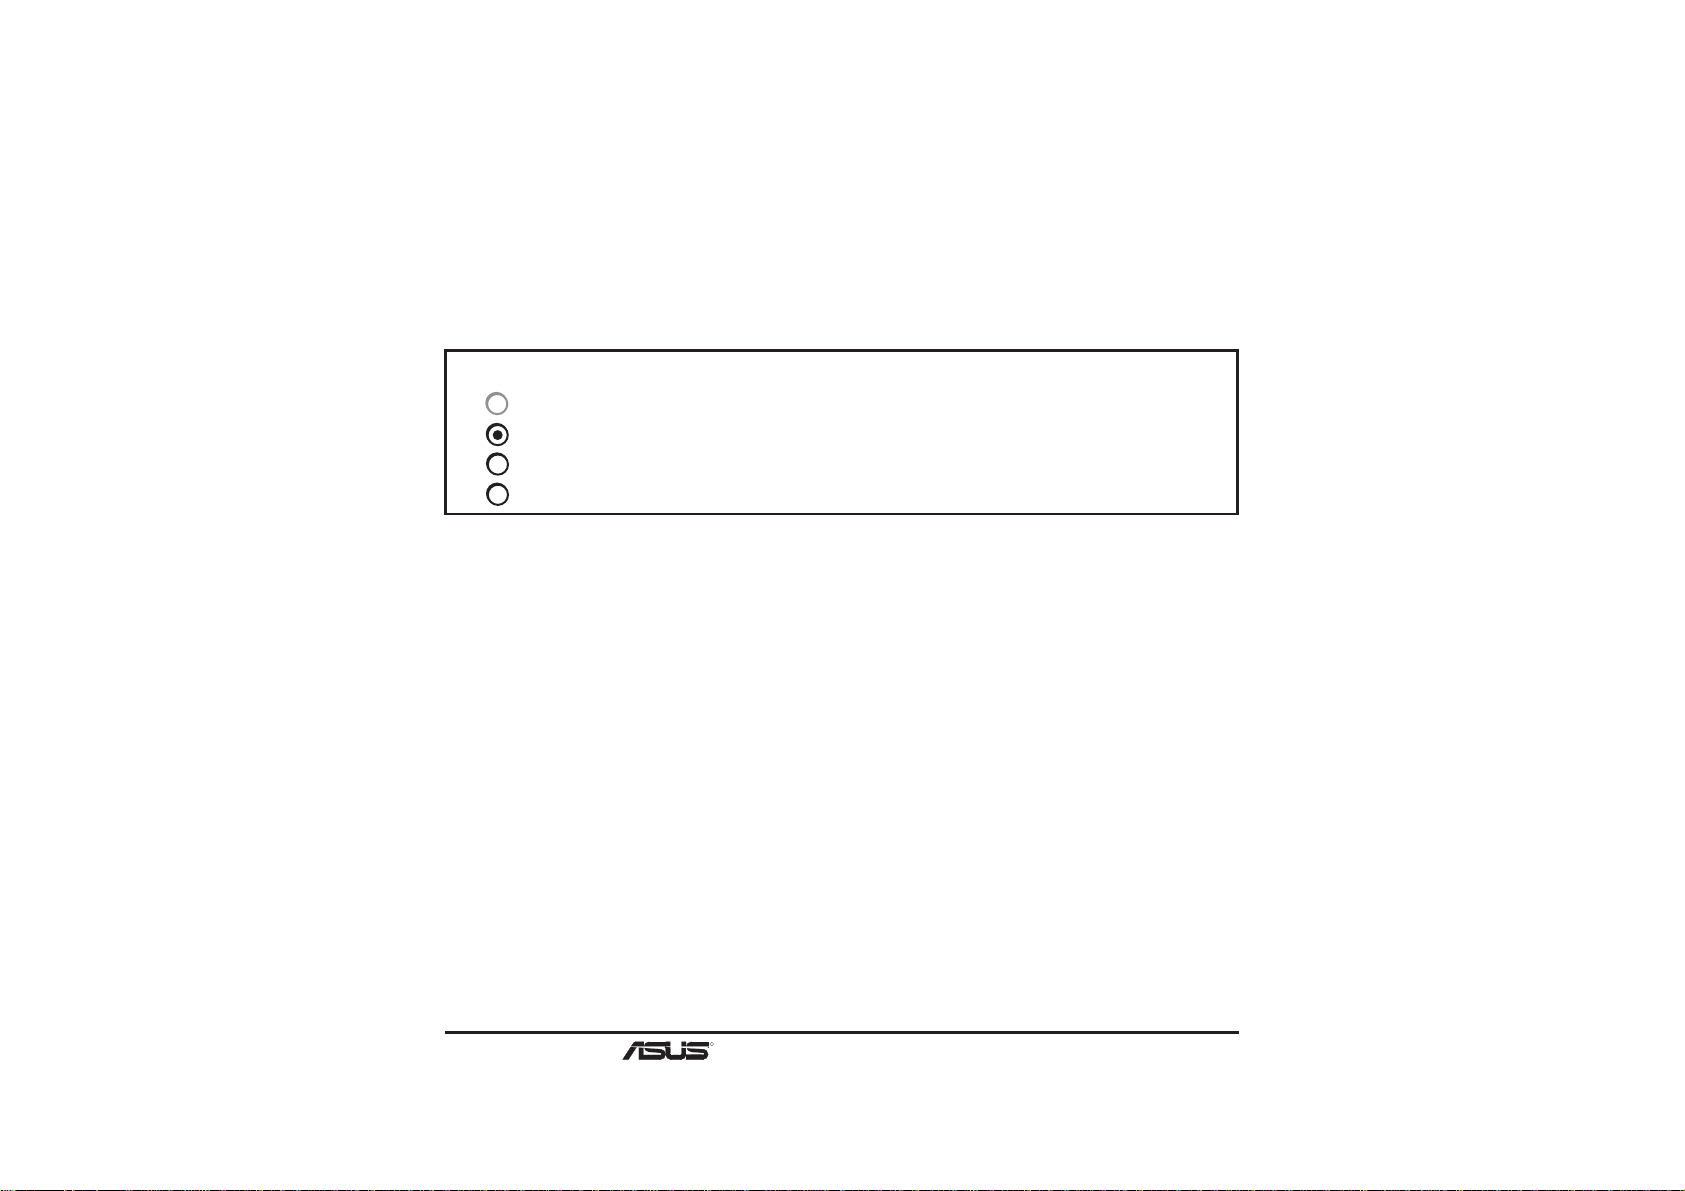
Select which driver you want to install for your new hardware:
Windows default driver
Driver from disk provided by hardware manufacturer
Do not install a driver (Windows will not prompt you again)
Select from a list of alternate drivers
1. Click OK to use the default selection: “Driver from disk provided by hardware manu-
facturer”
2. Insert ASUS installation CD and click Browse button - Open windows appears.
3. Select you CD-ROM drive in the “Drives:” box
4. Select \nt40 directory - ati.inf shows in “File name:”
5. Click the OK button - Install from Disk appears - Click OK button again.
6. Select your device and language then click OK button - Copying Files... appears -
message appears to restart your computer.
7. Click Yes button - ATI Desktop Help will appear upon restart, make changes as
necessary.
10
R
PCI-V264VT User’s Manual
Page 11

Video Driver Installation for Windows NT 4.0
Installing ATI Video drivers in Windows NT 4.0 (Prompted by Windows NT)
If an ASUS Graphics device (or compatible) was installed at one time a “Display” message will appear upon entering Windows NT 4.0 :
There is a problem with your display settings. The adapter type is incorrect, or
the current settings do not work with your hardware.
1. Click OK button to continue - The “Settings” tab of the Display Properties appears.
2. Click Display T ype - Change Display Type windows appears.
3. Click Change button - Select Device windows appears.
4. Click Have Disk button - “Install From Disk” window appears
5. Insert ASUS instillation CD and Click Browse button - Open window appears
6. Select your CD-ROM drive in the “Drives:” box
7. Select \nt40 directory - ati.inf shows in ”File name:”
8. Click the OK button - Install from Disk appears - Click OK button again.
9. Select the appropriate model of your Graphics device - messages appears: “You are
about to install a third-party driver...”
10. Click Yes - Copying Files... appears - message appears: “The drivers were successfully installed”
11. Click OK button
12. Change your monitor type if necessary - Click Close button when finished.
13. Adjust the “Desktop area,” “Color palette,” and “Font size” if necessary - Click
Apply button when finished - System Settings Change windows appears:
You must restart your computer before the new settings will take effect.
Do you want to restart your computer now?
14. Click Yes button - ATI Desktop Help will appear upon restart, make changes as
necessary.
R
PCI-V264VT User’s Manual
11
Page 12

Video Driver Installation for Windows NT 3.5x
The mach64 driver for Windows NT is shipped with Windows NT. Before installing the
mach64 driver, you must have installed Windows NT and selected VGA display.
Installing ATI video drivers in Windows NT 3.5, 3.51:
1. Boot Windows NT
2. Double-click the Main icon.
3. Double-click the Control Panel icon.
4. Double-click the Display icon.
5. Click Change Display Type button.
6. Click Change button.
7. Insert the installation CD into the CD-ROM drive.
8. Click Other button.
9. Supply the Setup program with the location of the NT files of your revision, for
example, type: D:\NT351 (or D:\NT35)
10. Click OK button.
11. Select the appropriate driver for your ASUS 264 series card
12. Click Install button.
13. Click Yes to change to your system configuration.
14. Click Continue to confirm the full path name.
15. If you are upgrading your driver, you will be asked whether you want to use the
“Current” or “New” driver. Select New driver to install the drivers.
16. After the files have been copied to your computer, click OK
17. Reboot W indows NT
18. After reboot the Invalid Display Settings window appears - Click OK
19. The Display Settings dialogue box appears - Select a desired display mode. For
more detailed information about changing your display mode, click Help.
12
R
PCI-V264VT User’s Manual
Page 13

Video Driver Installation for IBM OS/2
NOTE: The A TI OS/2 video driver is to be used for the English version of OS/2 only .
Installing ATI video drivers in English OS/2 or OS/2 Warp:
1. Start OS/2
2. Check that OS/2 is using standard VGA driver and other applications are closed.
3. Double-click the OS/2 System folder.
4. Double-click the Command Prompts folder.
5. Double-click the OS/2 Full Screen object.
6. Insert the installation CD (assuming your CD-ROM drive is letter D)
7. Type D: <Enter>, CD OS2 <Enter>, OS2INST <Enter>
8. Select IBM OS/2 - Install OS/2 Driver appears.
9. Select your version of OS/2.
10. Type C: (the drive letter of your OS/2 system) <Enter> - copying files appears.
11. Exit the installation program
12. Type C: <Enter>, CD\MACH_OS2 <Enter>, DSPINSTL
13. Display Driver Install panel appears - select Primary Display.
14. Click OK - Driver selection list appears.
15. Select the latest ATI mach64 enhanced driver version from the list - click OK.
16. In the Monitor Configuration Selection Utility, select Install Using Defaults for
Monitor Type, then click OK.
17. When the source directory panel appears, choose Change and enter path or use the
default location of C:\MACH_OS2 - Click SET
18. Click INSTALL.
19. Type EXIT to close the OS/2 full screen command prompt.
20. Shut down OS/2
21. Restart OS/2. It will default to 640x480 in 256 colors. To change screen resolution
and/or color depth, see your OS/2 User’s Guide.
R
PCI-V264VT User’s Manual
13
Page 14

Resolution Table (Max Referesh Rates)
Resolution Colors 1MB 2MB
640 x 480 x 8 256 120Hz 120Hz
640 x 480 x 16 65, 536 120Hz 120Hz
640 x 480 x 24 16.7 Million 85Hz 90Hz
800 x 600 x 8 256 100Hz 100Hz
800 x 600 x 16 65, 536 75Hz 75Hz
800 x 600 x 24 16.7 Million ------ 60Hz
1024 x 768 x 8 256 100Hz 100Hz
1024 x 768 x 16 65, 536 ------- 75Hz
1280 x 1024 x 8 256 ------- 75Hz
14
R
PCI-V264VT User’s Manual
Page 15

ASUS Technical Support
ASUSTeK COMPUTER INC.
Fax: +886-2-895-9254
BBS: +886-2-896-4667
Email: tsd@asus.com.tw
WWW: www.asus.com.tw
Gopher: gopher.asus.com.tw
FTP: ftp.asus.com.tw/pub/ASUS
ASUS COMPUTER INTERNATIONAL
BBS: +1-408-474-0569
Email: tsd-usa@asus.com.tw
WWW: www.asus.com
ASUS COMPUTER GmbH
BBS: 49-2102-448690
Email: tsd-ger@asus.com.tw
Hotline: 49-2102-499712
Product Name: ASUS PCI-V264VT
Manual Revision: 3.11
Release Date: July 1997
R
PCI-V264VT User’s Manual
15
Page 16

ASUS Doc. #AS9707G
 Loading...