

Page 1
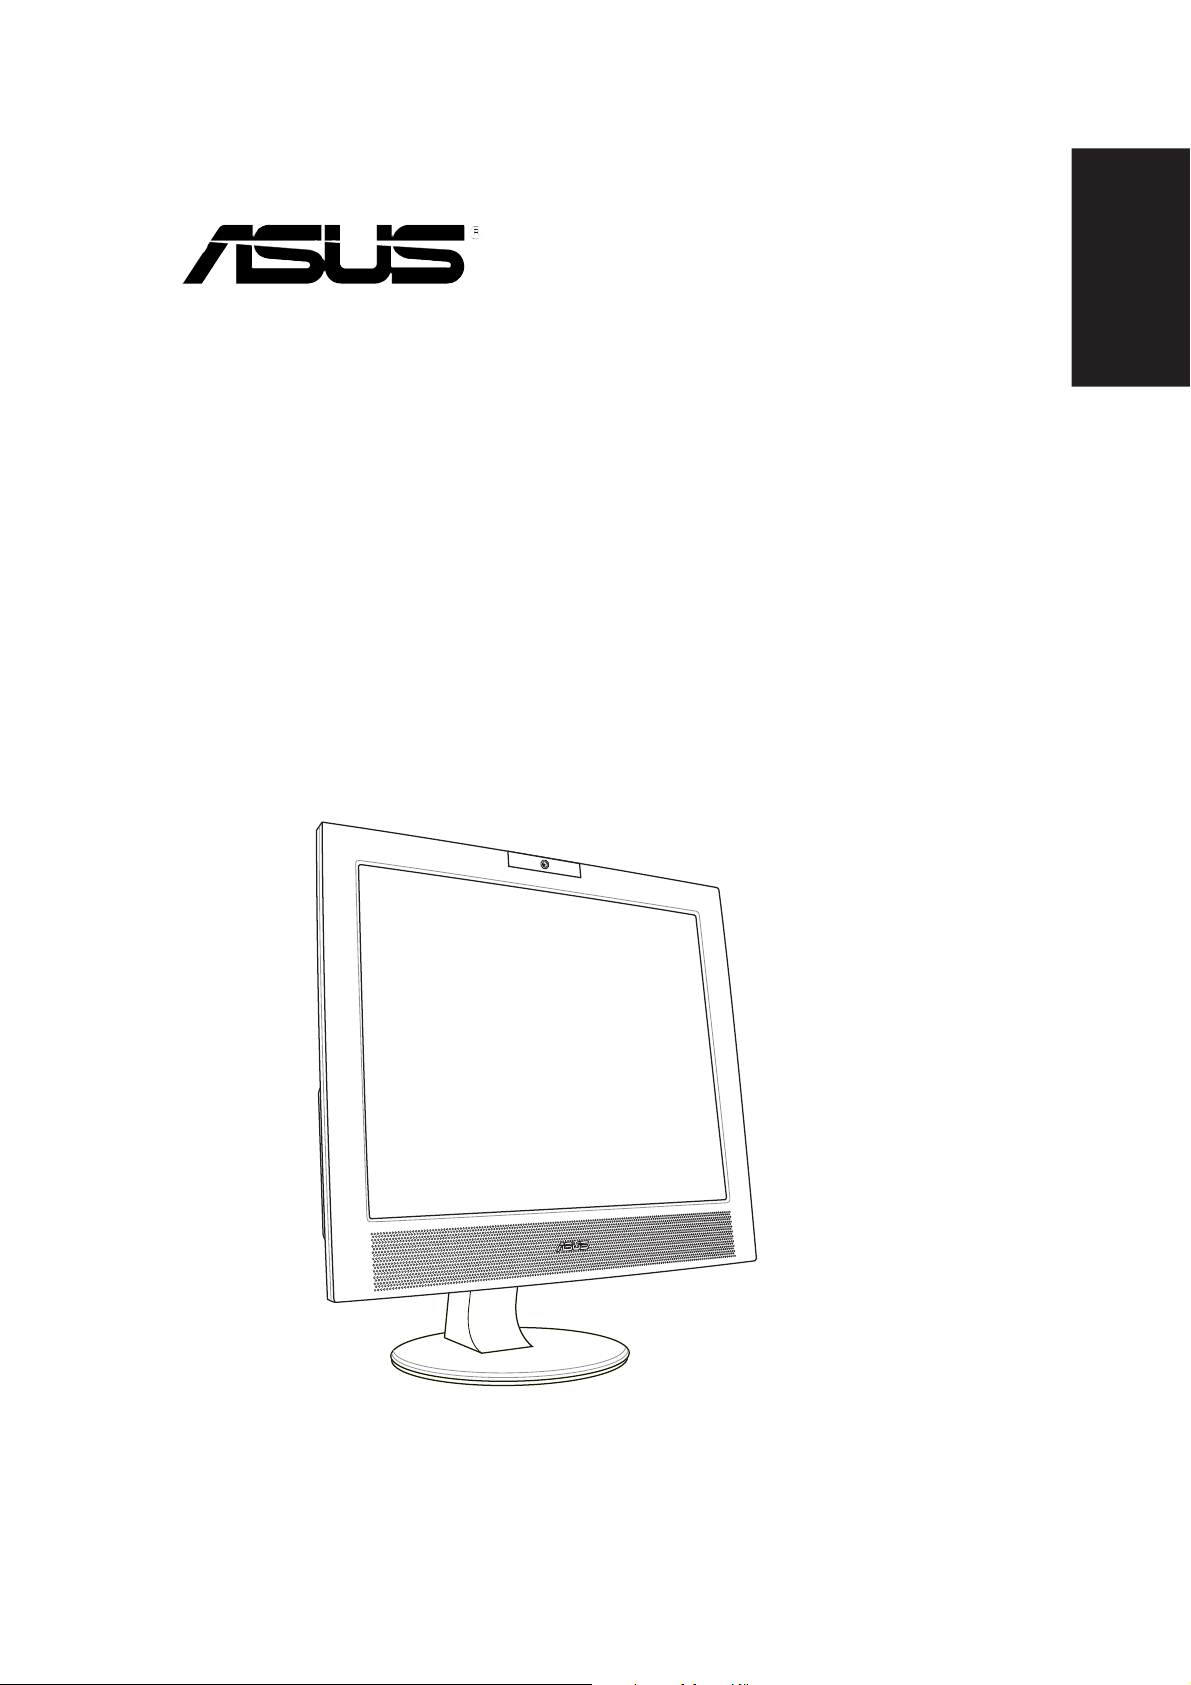
PG191
LCD Monitor
Quick Start Guide
English
Page 2
Safety information
English
• Before setting up the monitor, carefully read all the documentation that
• To prevent fire or shock hazard, never expose the monitor to rain or
• The monitor should be operated only from the type of power source
• Use the appropriate power plug which complies with your local power
• To ensure satisfactory operation, use the monitor only with UL listed
• If you encounter technical problems with the monitor, contact a qualified
Monitor introduction
came with the package.
moisture.
indicated on the label. If you are not sure of the type of power supplied
to your home, consult your dealer or local power company.
standard.
computers which have appropriate configured receptacles marked
between 100-240V AC.
service technician or your retailer.
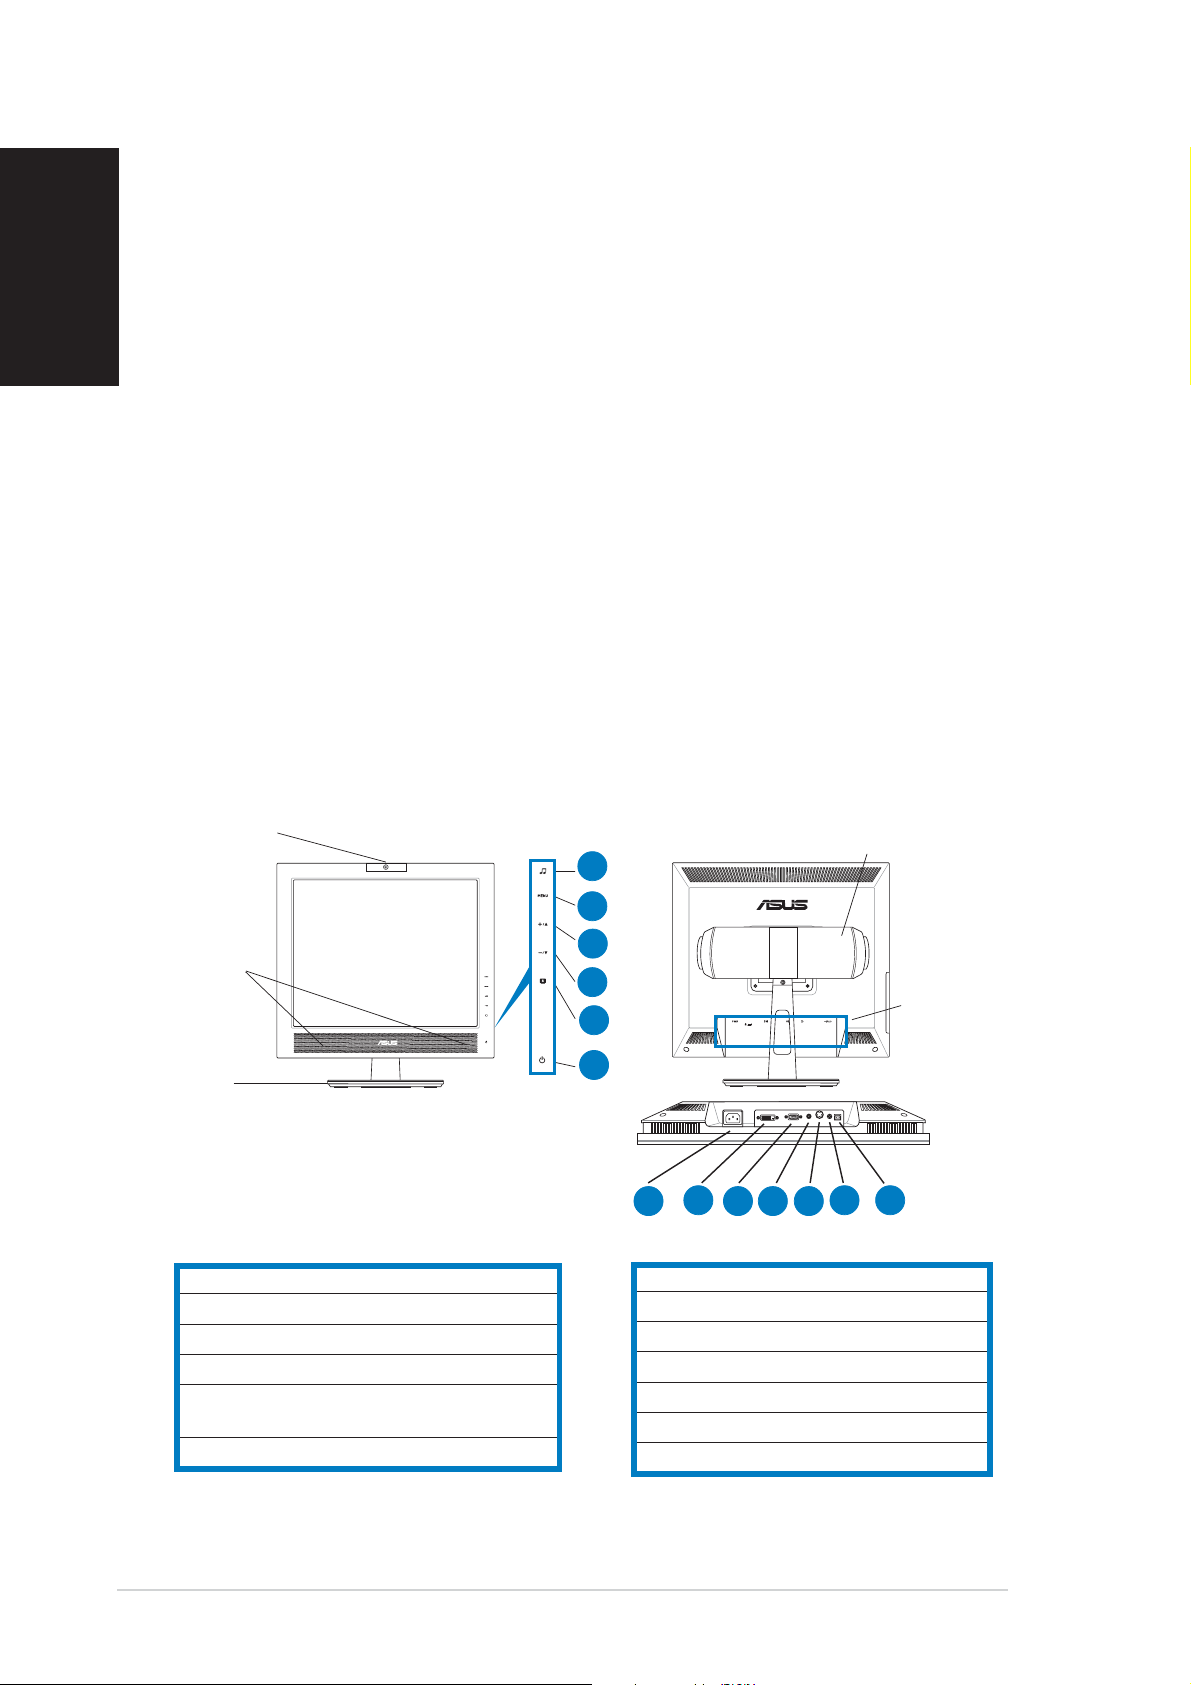
Front viewFront view
Front view
Front viewFront view
TouchTouch
Touch
WebcamWebcam
Webcam
WebcamWebcam
StereoStereo
Stereo
StereoStereo
speakersspeakers
speakers
speakersspeakers
(5Wx2)(5Wx2)
(5Wx2)
(5Wx2)(5Wx2)
BaseBase
Base
BaseBase
1. Sound sensor*
2. MENU sensor/ Confirmation sensor
3. Increase sensor/Brightness hotkey
4. Decrease sensor/Volume hotkey
5. SPLENDID™ sensor**/Exit MENU/
Automatic adjusting sensor***
6. Power sensor/LED indicator
* Hotkey for 5 sound preset mode selection.* Hotkey for 5 sound preset mode selection.
* Hotkey for 5 sound preset mode selection.
* Hotkey for 5 sound preset mode selection.* Hotkey for 5 sound preset mode selection.
** Hotkey for 5 video preset mode selection.** Hotkey for 5 video preset mode selection.
** Hotkey for 5 video preset mode selection.
** Hotkey for 5 video preset mode selection.** Hotkey for 5 video preset mode selection.
*** Adjusts the image automatically by touching the sensor for 2-3*** Adjusts the image automatically by touching the sensor for 2-3
*** Adjusts the image automatically by touching the sensor for 2-3
*** Adjusts the image automatically by touching the sensor for 2-3*** Adjusts the image automatically by touching the sensor for 2-3
seconds. seconds.
seconds.
seconds. seconds.
TouchTouch
sensorssensors
sensors
sensorssensors
11
1
11
22
2
22
33
3
33
44
4
44
55
5
55
66
6
66
Rear view Rear view
Rear view
Rear view Rear view
ASUS Power BassASUS Power Bass
ASUS Power Bass
ASUS Power BassASUS Power Bass
System (15W)System (15W)
System (15W)
System (15W)System (15W)
1111
11
1111
1212
12
1212
77
8
7
88
77
7. AC-in port
8. DVI port
9. VGA port
10. Audio-input port
11. Woofer port
12. Microphone-output port
13. USB port (Upstream)
10
9
1010
99
1010
99
88
ConnectorsConnectors
Connectors
ConnectorsConnectors
1313
13
1313
22
Quick Start Guide Quick Start Guide
2
Quick Start Guide
22
Quick Start Guide Quick Start Guide
Page 3

Side viewSide view
Side view
Side viewSide view
1. SRS On/Off button
2. USB 2.0 ports
3. Microphone port
4. Headphone port
Connecting the cables
11
1
11
22
2
22
33
3
33
44
4
44
English
Connect the cables as shown:
11
1
11
1. Power cord
2. DVI cable
3. VGA cable
4. Audio cable (gray)
5. Woofer cable
6. Microphone cable (red)
7. USB cable
33
22
3
2
33
22
44
55
66
4
5
44
55
77
6
7
66
77
Quick Start Guide Quick Start Guide
Quick Start Guide
Quick Start Guide Quick Start Guide
33
3
33
Page 4

English
•
To connect the USB cable: To connect the USB cable:
To connect the USB cable: connect one end of the
To connect the USB cable: To connect the USB cable:
USB cable to the monitor’s USB port (as the above drawing
shows), the other end to the computer’s.
•
To connect the microphone/audio cables: To connect the microphone/audio cables:
To connect the microphone/audio cables: connect one
To connect the microphone/audio cables: To connect the microphone/audio cables:
end (red/gray) of the microphone/audio cables to the monitor’s
microphone-out/audio-in ports, the other end (red/green) to the
computer’s microphone-in/audio-out ports.
•
To connect the VGA/DVI cables:To connect the VGA/DVI cables:
To connect the VGA/DVI cables:
To connect the VGA/DVI cables:To connect the VGA/DVI cables:
a. Plug the VGA/DVI connectors to the monitor’s VGA/DVI
ports.
b. Connect the other end of the VGA/DVI cables to your
computer’s VGA/DVI ports.
c. Tighten the two screws to secure the VGA/DVI connectors.
To connect the power cord: To connect the power cord:
•
To connect the power cord: connect one end of the
To connect the power cord: To connect the power cord:
power cord securely to the monitor’s AC input port, the other end
to a power outlet.
To connect the woofer cable: To connect the woofer cable:
•
To connect the woofer cable: connect the woofer cable to
To connect the woofer cable: To connect the woofer cable:
the monitor’s woofer port.
Adjusting the monitor
1. Grasp the top of the monitor and adjust the tilt within -5º to 25º.
-5º~25º
2. The swivel base allows you to turn the monitor left/right up to 120º.
120º
44
Quick Start Guide Quick Start Guide
4
Quick Start Guide
44
Quick Start Guide Quick Start Guide
Page 5

Built-in webcam introduction
This built-in webcam allows you to take photos and make videos; while
talking to friends via Internet-based communication tools, you can use the
webcam to show your vivid image.
HardwareHardware
Hardware
HardwareHardware
• The 1.3 megapixel webcam transmits images to your PC through the USB
ports. Make sure that you have connected the USB plugs of the supplied
4-in-1 cable before you use the webcam.
• The webcam is adjustable upward and downward as shown.
-30º ~ 30º
English
Warning: Do not turn the webcam upward or downward over 30º; doing
so might damage the webcam.
SoftwareSoftware
Software
SoftwareSoftware
To install the webcam driver:To install the webcam driver:
To install the webcam driver:
To install the webcam driver:To install the webcam driver:
1. Close all other applications first.
2. Insert the support CD into the optical drive and run the
ASUS USB2.0 WebcamASUS USB2.0 Webcam
ASUS USB2.0 Webcam program.
ASUS USB2.0 WebcamASUS USB2.0 Webcam
The default webcam resolution is 640 x 480. If you want to change the
default resolution to meet different kinds of application programs, go to
C:\WINDOWS\ASUS USB2.0 WebcamC:\WINDOWS\ASUS USB2.0 Webcam
C:\WINDOWS\ASUS USB2.0 Webcam and activate the program
C:\WINDOWS\ASUS USB2.0 WebcamC:\WINDOWS\ASUS USB2.0 Webcam
named LifeCam to modify the settings based on your needs.
• The default webcam captured video format is VGA (640 x 480)
mode in order to increase the transmission efficiency via all kinds of
Internet commmunication tools.
• Before using the webcam, you need to install the webcam driver into
your PC.
• The webcam driver only supports Microsoft® Windows 2000/XP
operating system with Microsoft® Direct X.
Quick Start Guide Quick Start Guide
Quick Start Guide
Quick Start Guide Quick Start Guide
55
5
55
Page 6

LifeFrame software
Introduction and installation instructionsIntroduction and installation instructions
Introduction and installation instructions
English
Introduction and installation instructionsIntroduction and installation instructions
To capture snapshots or video clips, ASUS PG191provides an
easy-to-use LifeFrame that can work with the built-in webcam, allowing
users to create their own photos or video clips.
System requirements are as follows:System requirements are as follows:
System requirements are as follows:
System requirements are as follows:System requirements are as follows:
• LifeFrame only supports Microsoft® Windows® 2000/XP operating
systems.
• Before starting to use this software, install LifeFrame into your PC.
• The LifeFrame software is bundled in the PG191 support CD.
®
1. A personal computer with Pentium
III 800 MHz or higher
processor
2. Microsoft
®
Windows® 2000/XP operating systems
3. Minimum 200 MB free hard disk space to run the program
4. 128 MB of RAM or above
5. A display card supporting 16-bit high color mode
Installation instructions:Installation instructions:
Installation instructions:
Installation instructions:Installation instructions:
1. Close all other applications.
2. Insert the support CD into the optical drive and run the
LifeFrame program.
3. Follow the on-screen instructions to complete the installation
Make sure that you connect the USB plug of the supplied 4-in-1 cable to
the USB port at the back of the LCD monitor; otherwise, the built-in
webcam and LifeFrame will not be activated.
66
Quick Start Guide Quick Start Guide
6
Quick Start Guide
66
Quick Start Guide Quick Start Guide
 Loading...