How it Works
Log In / Sign Up
Buy Points
How it Works
FAQ
Contact Us
Questions and Suggestions
Users
Asus
Loading...
G
GL752VW-T4299T
GL752VW-T4356T
GL752VW-T4396T
GL752VW-T4397T
GL752VW-T4474T
GL752VW-T4483T
GL752VW-T4504T
GL752VW-T4505T
GL752VW-TY315T
GL753VD
33
GL753VD-GC041T
GL753VD-GC043T
2
GL753VD-GC045T
GL753VD-GC091
GL753VD-GC144
GL753VD-GC345T
GL753VD-GC483T
GL753VD-GC526
GL753VD-GC526T
GL753VE
31
GL753VE-GC019T
GL753VE-GC041T
GL753VE-GC046T
GL771
30
GL771J
GL771JW
2
Gladius
Gladius II
3
Gladius II Core
2
Gladius III
Gladius III Wireless
Gladius II Origin
2
Gladius II Origin PINK
Gladius II Wireless
6
Gladius P501
GM501
34
GM501G
GM501GM
GM501GM-EI003T
GM501GM-EI032
GM501GS
GM501GS-EI028T
GM501GS-EI032
GMC-1
2
GN301
GO182
Goes Mobile P6000
GPS-BT100
GPU HD77701GD5
GPU Tweak II
GQE10A
GR6
5
GR8
25
GR8 II
28
GRANDER
Graphics Card
5
Graphics Card EN210SILENTDI1GD3V2LP
Graphics Card R72501GD5
GRAPHICSQVL
Grouper-GL8E
GRYPHON ARMOR KIT
GRYPHONZ87
Gryphon Z97
GRYPHON Z97 ARMOR EDITION
7
GS30
2
GS50
2
GT 1030
GT1030-2G-BRK
GT1030-SL-2G-BRK
GT15CK-RU032T
GT300
GT301
GT501
GT51CA
24
GT51CA-FR006T
GT51CA-FR007T
GT51CA-FR008T
GT51CA-FR010T
GT51CA-RU002T
GT51CH
17
GT640-DCSL-2GD3
GT710-SL-1GD5
GT710-SL-2GD5
GT 730
GT740-OC-1GD5
2
GT-AC2900
24
GT-AC5300
31
GT-AC9600
GT-ACS5300
GT-AX11000
24
GT-AX11000 Call of Duty Black Ops 4 Edition
20
GT-AXE11000
3
GTX 1050
GTX 1050 Ti
2
GTX 1080
GTX 1650
GTX 1650 Advanced
GTX 1650 OC
GTX 1660 SUPER
GTX 1660 SUPER advanced
Loading...
Loading...
Nothing found
GQE10A
User manual
66 pgs
5.53 Mb
0
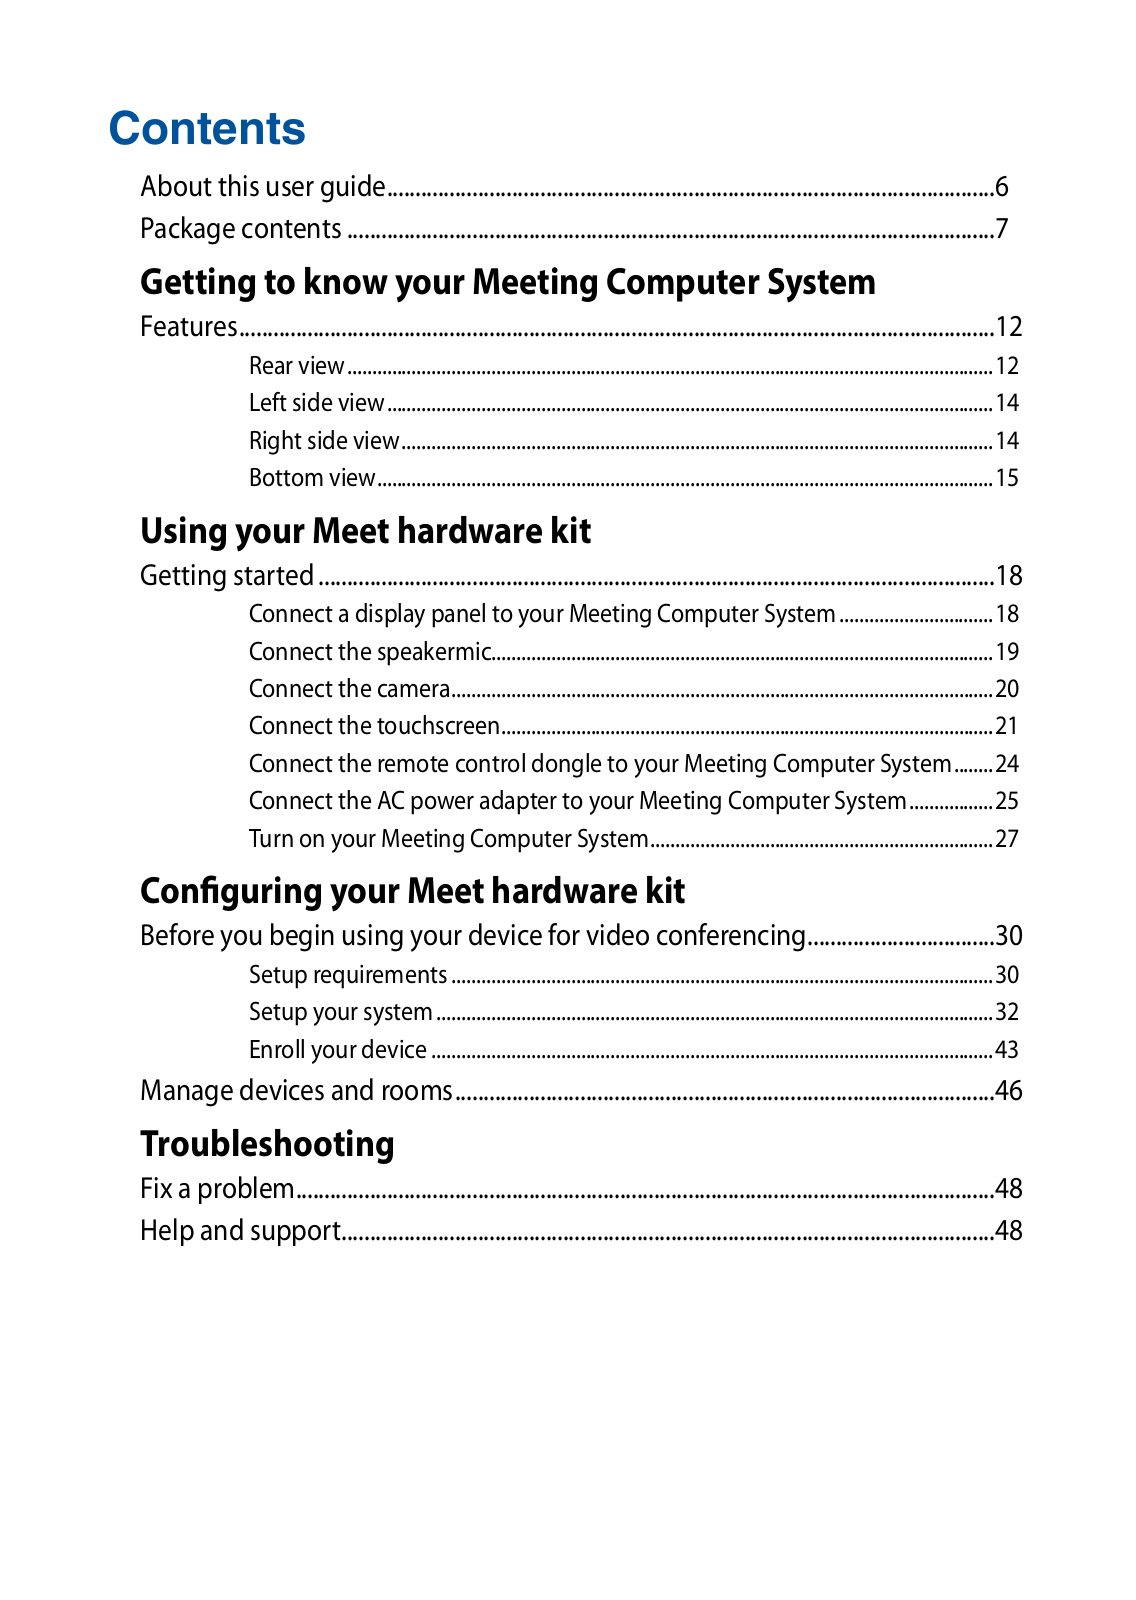
Table of contents
Loading...
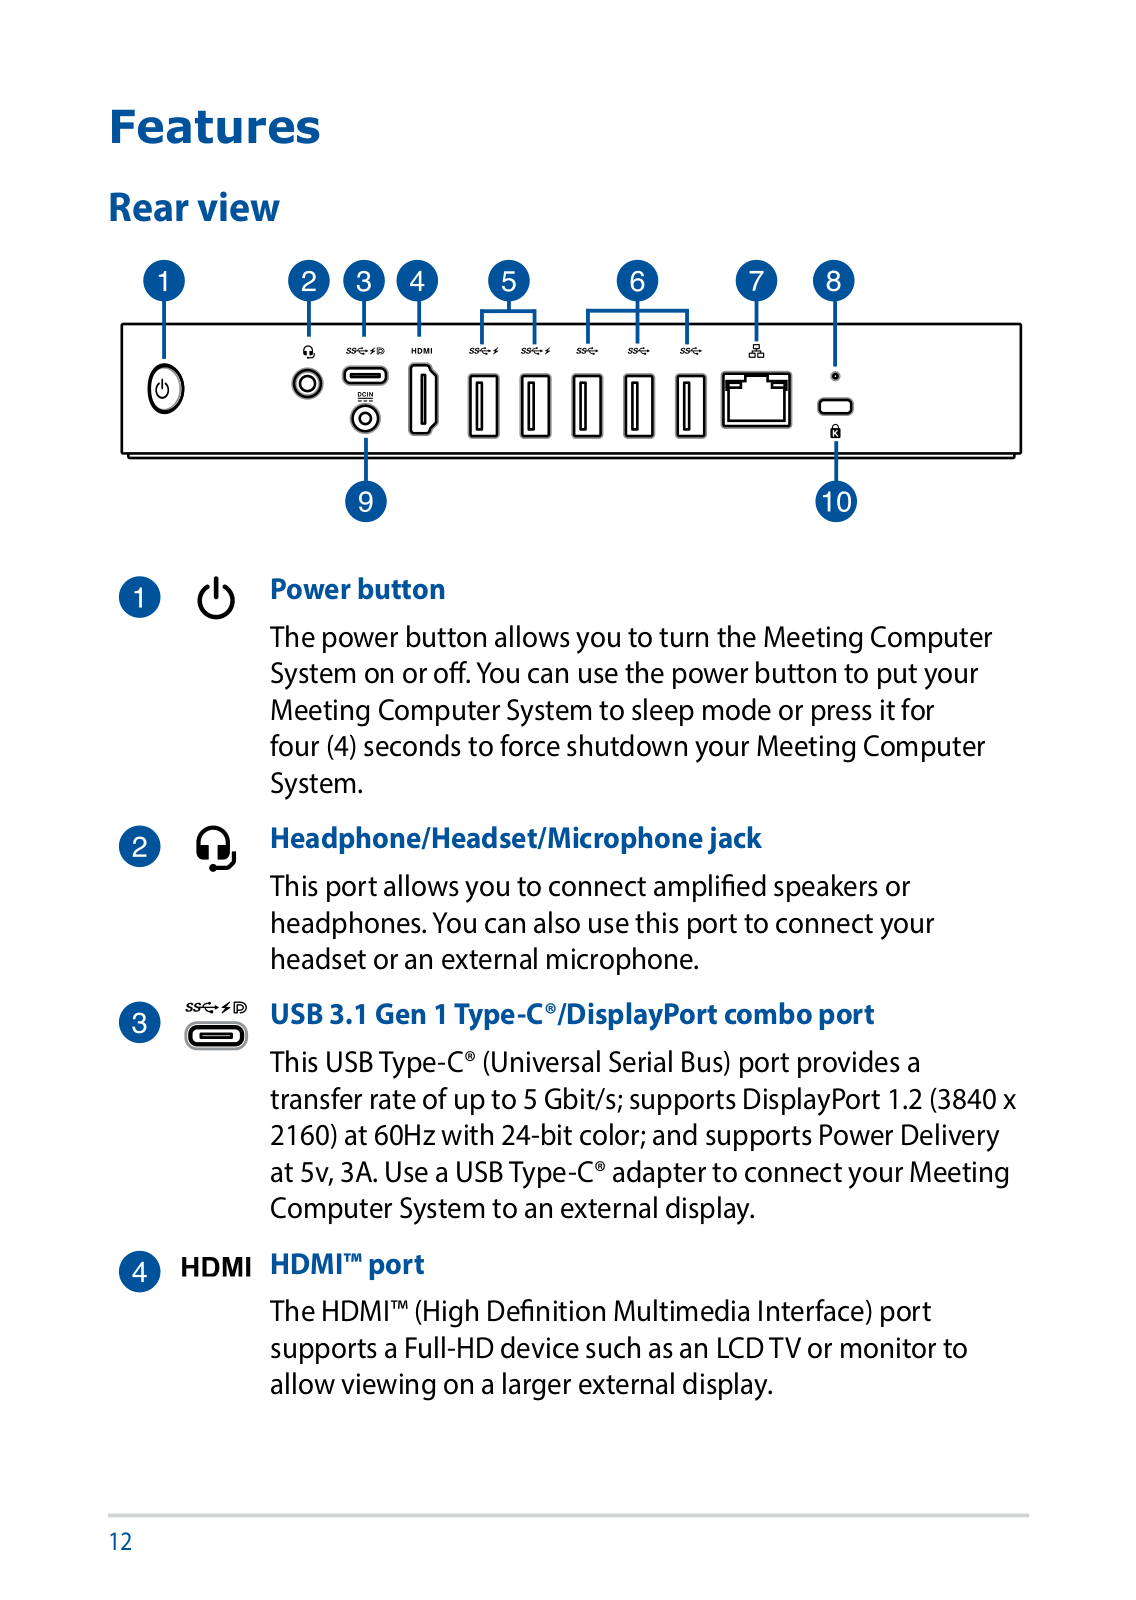
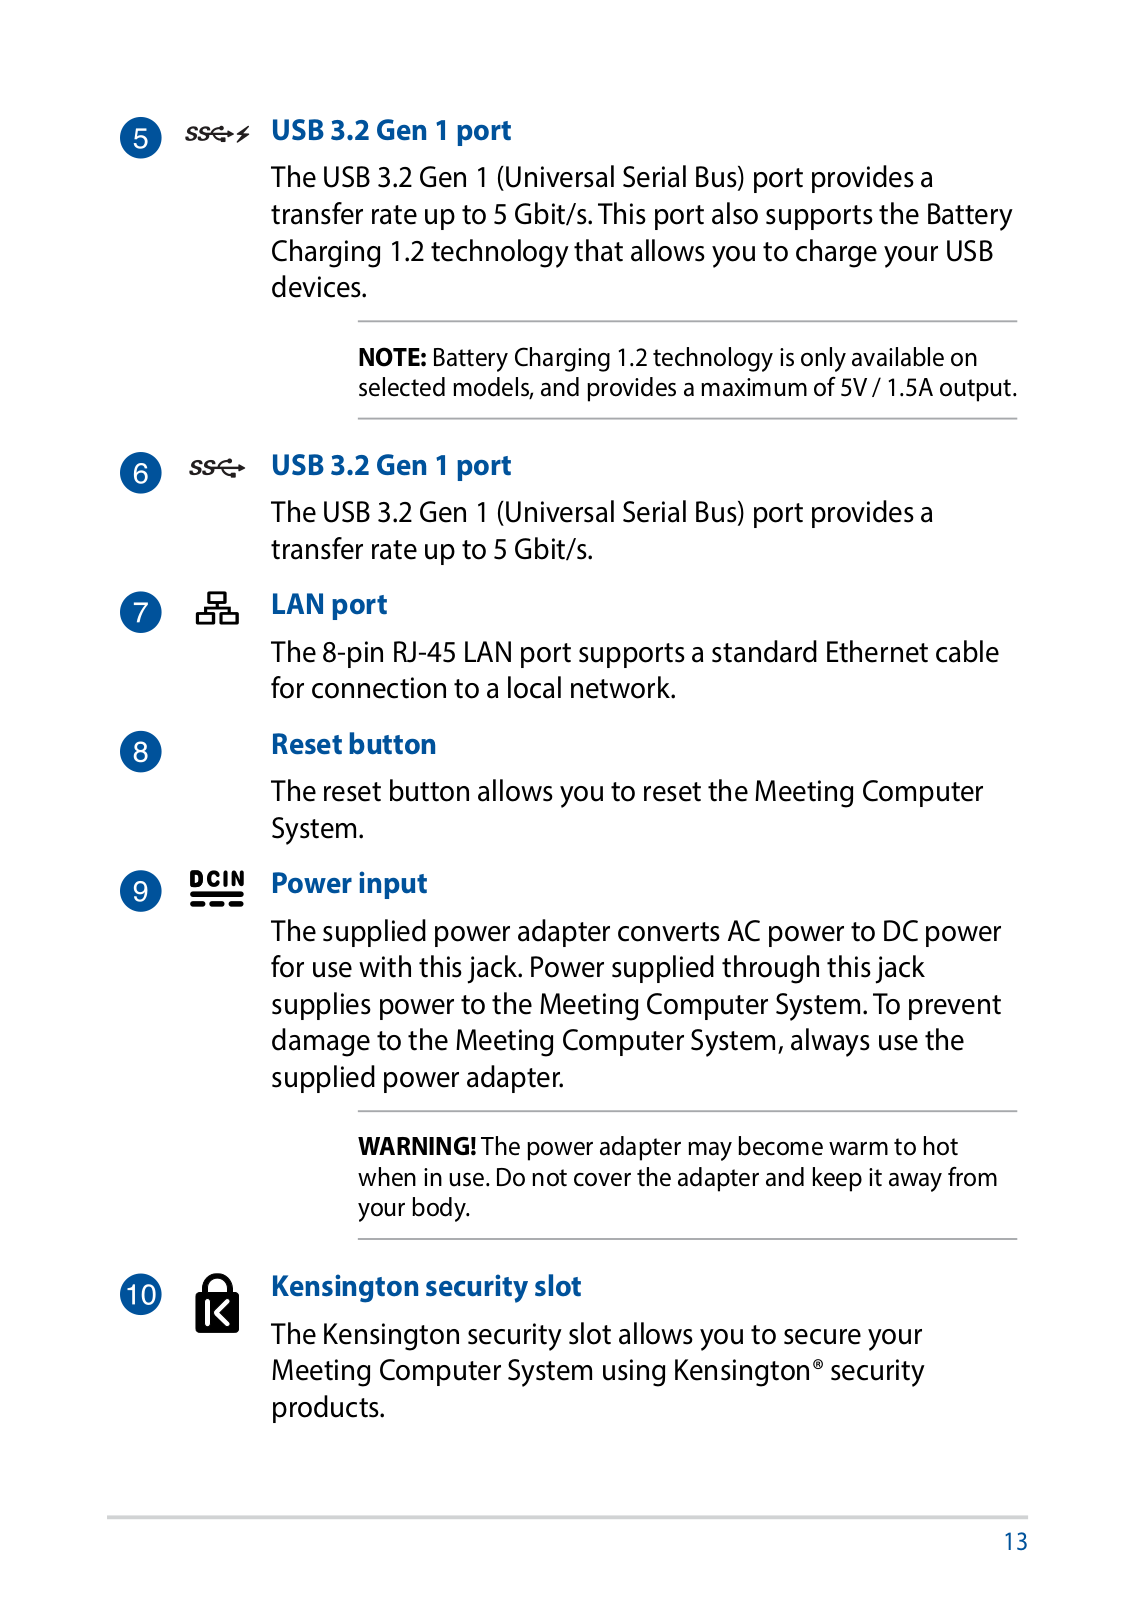
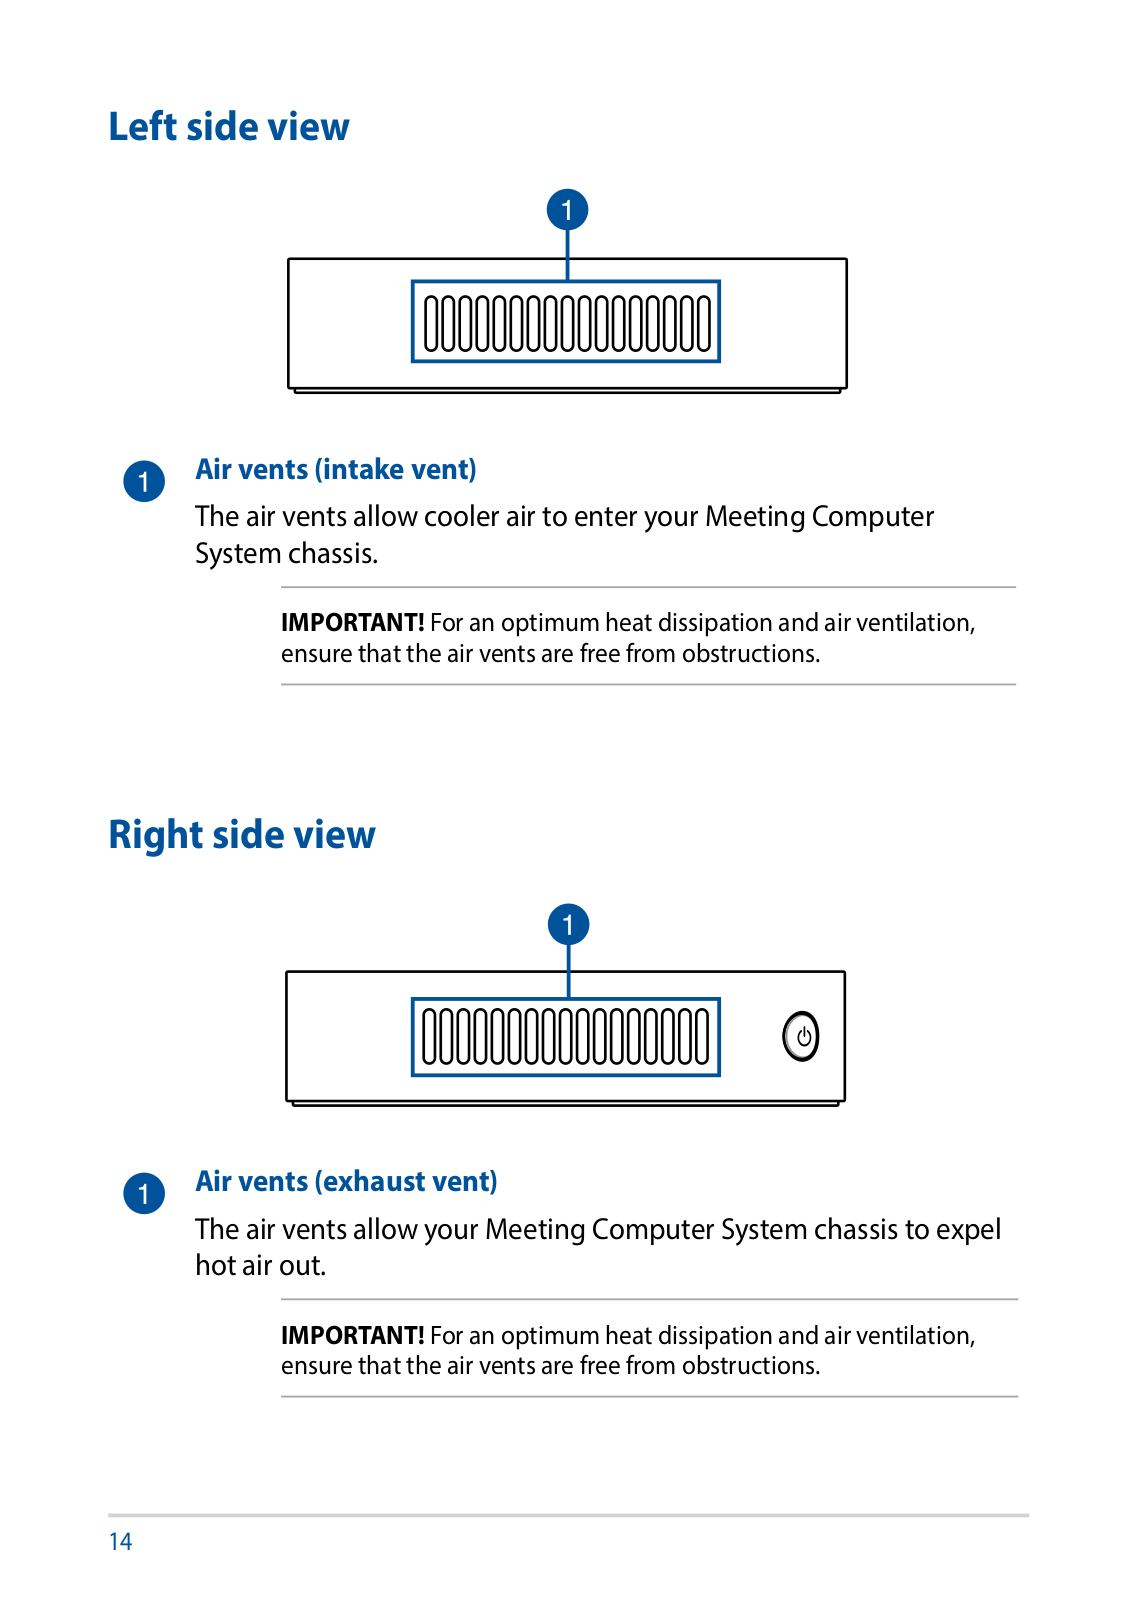
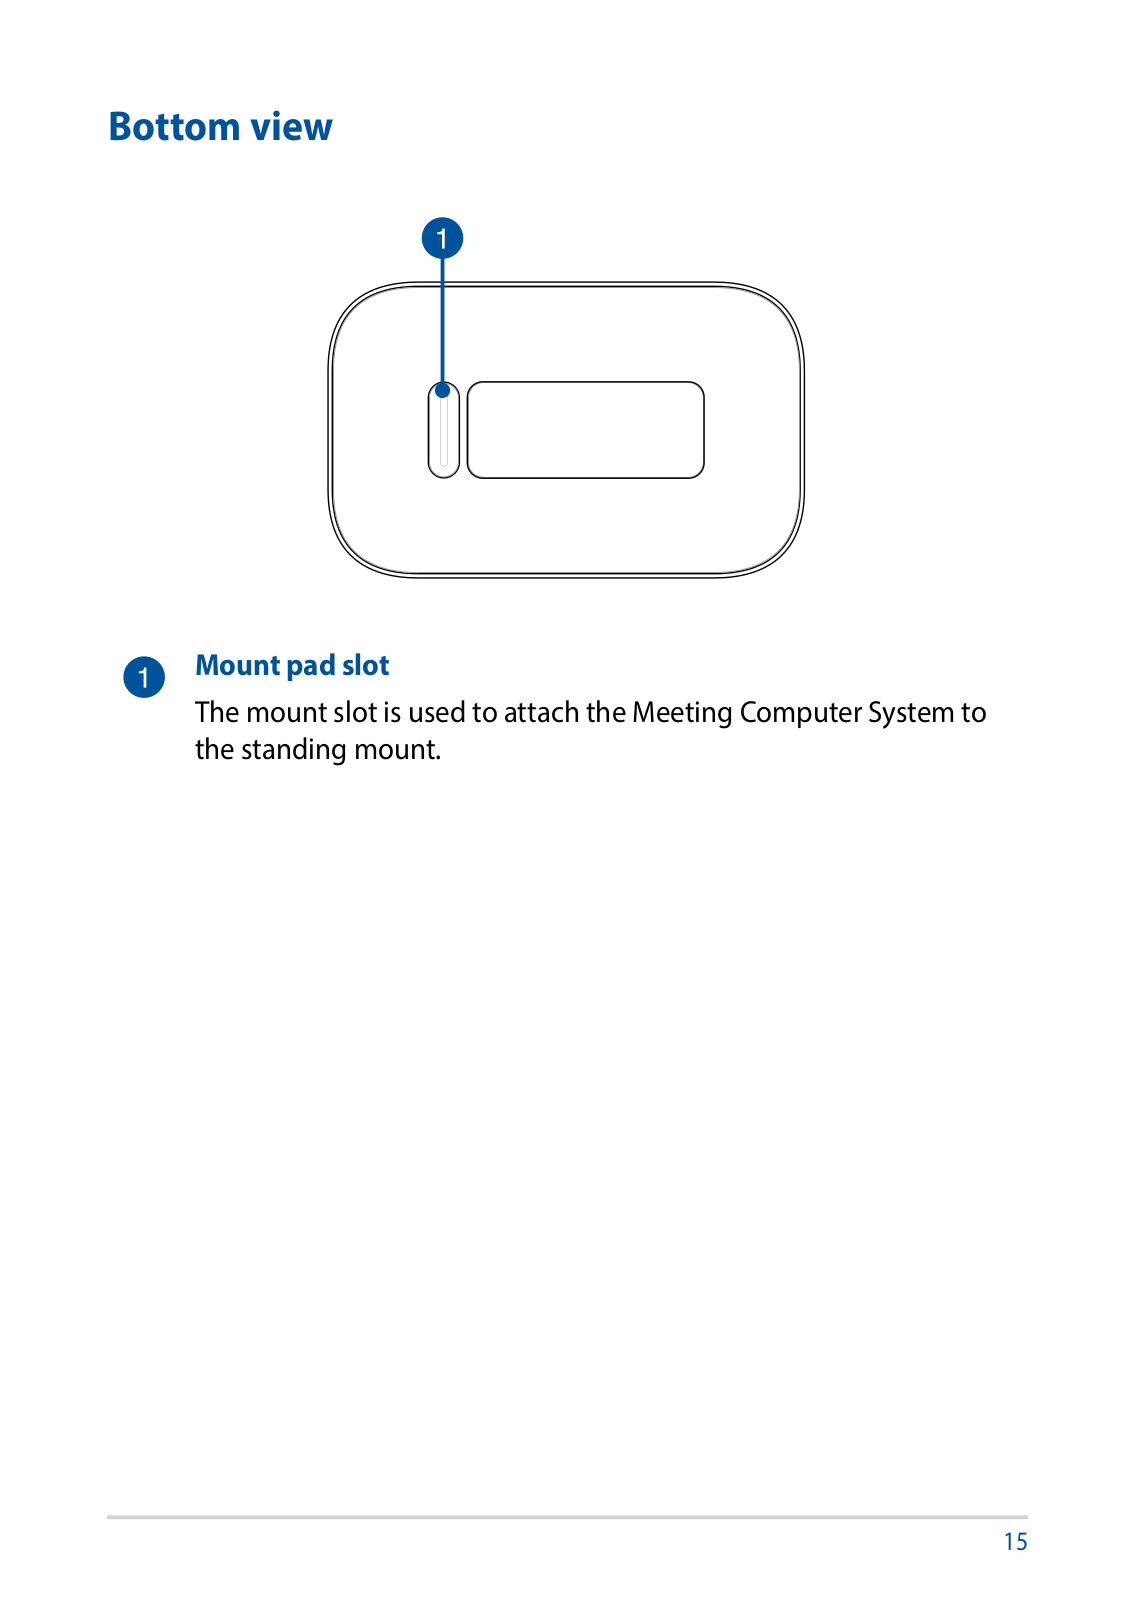
Asus GQE10A User manual
...
Asus User manual
Download
Specifications and Main Features
Frequently Asked Questions
User Manual
Download
Loading...
+
46
hidden pages
Unhide
You need points to download manuals.
1 point = 1 manual.
You can buy points or you can get point for every manual you upload.
Buy points
Upload your manuals
 Loading...