How it Works
Log In / Sign Up
Buy Points
How it Works
FAQ
Contact Us
Questions and Suggestions
Users
Asus
Loading...
E
EeeBox EB1012
2
EeeBox EB1012P
EeeBox EB1021
EeeBox EB1501
3
EeeBox EB1501P
EeeBox PC
140
EeeBox PC B202
7
EeeBox PC B204
3
EeeBox PC EB1006
EeeBox PC EB1007
6
EeeBox PC EB1007P
4
EeeBox PC EB1012
4
EeeBox PC EB1012P
2
EeeBox PC EB1020
EeeBox PC EB1021
EeeBox PC EB1030
EeeBox PC EB1031
EeeBox PC EB1033
EeeBox PC EB10330
EeeBox PC EB1035
EeeBox PC EB1501
EeeBox PC EB1501P
EeeBox PC EB1502
EeeBox PC EB1503
EeeBox PC EB1505
EeeBox PC ET1612I
EeeKeyboard PC EK1542
2
EeePAD Transformer
EeePC 1005HAG
2
EeePC 1005HR
EeePC 1005PXD
EeePC 1201HAG
EeePC 1201N-I
EeePC 1201NL BT
EeePC 701 XP
EEEPC900-W072X
EeePC p901
EeeTop ET1610
EeeTop ET1610P
EeeTop ET1610PT
EeeTop PC ET1602C
EeeTop PC ET1610
2
EeeTop PC ET1612IU
EeeTop PC ET2001B
2
EeeTop PC ET2002
EeeTop PC ET2010
EeeTop PC ET22
2
EeeTop PC ET2203T
2
EEU7708
EHD2-100-PT
EHD3-100-NAQ
EHD-A1T
2
EHD-A1TA2T
3
EHD-A2T
2
EI-102
EK1542
4
Elsa
EM64T
EM64T EIST
Emachines D725
eMTA
EN210
3
EN210-D1-512MD2
EN210-DI-512MD2
EN210-G-DI
EN210 SILENT-DI-1GD2
EN210SILENTDI1GD3V2LP
EN210 SILENT-DI-512MD3
EN5750
25
EN5900
28
EN5900-TVD
EN6200
29
EN6200LE
4
EN6200LE TC1G-TD
EN6200LE TC256-TD
EN6200LE TC512-TD-25
EN6500
30
EN6600
27
EN6800
30
EN7100
31
EN7300
31
EN7300GT-SILENT-HTD
EN7600
30
EN7600GT-2DHTV
EN7800
29
EN7900
30
EN7950
24
EN8800
29
ENGTX260
EP121
10
EP121-1A010M
EP121-1A011M
EPC1001
EPC1005
EPC 1215N
EPC 701SD LX HW
EPC 701SD LX SW
EPC900
EPCS1N766
EPC VX6
Loading...
Loading...
Nothing found
EHD-A1TA2T
Quick Installation Guide
42 pgs
4.6 Mb
0
Quick Installation Guide [zh]
3 pgs
741.78 Kb
0
User’s Manual [zh]
24 pgs
3.18 Mb
0
Table of contents
Loading...
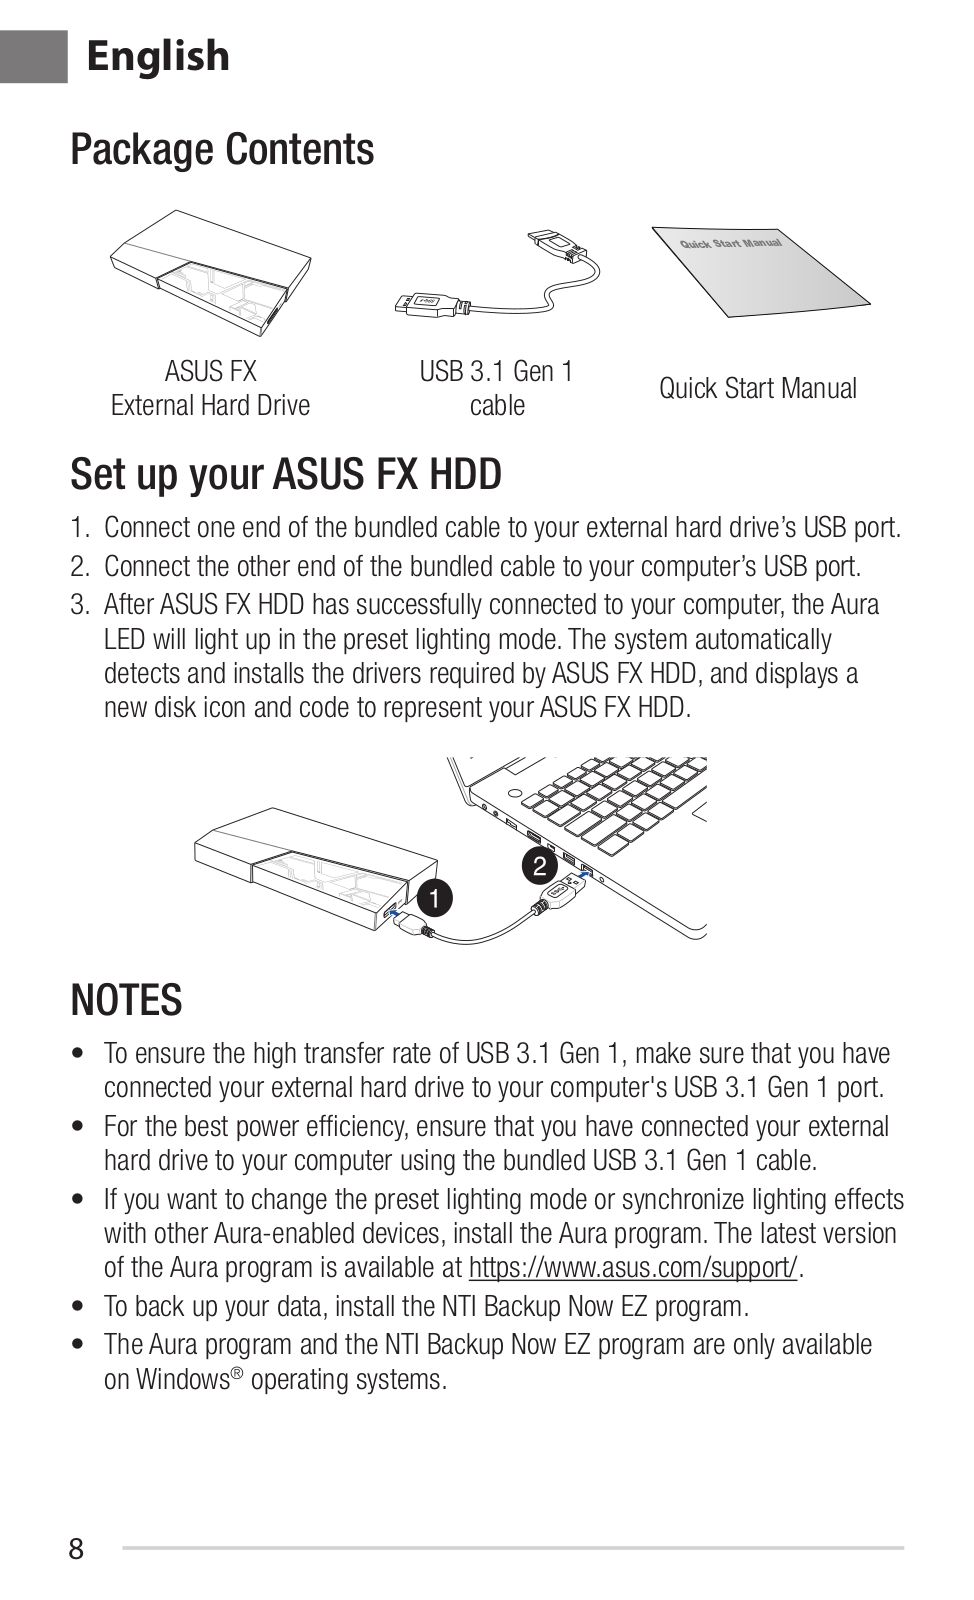
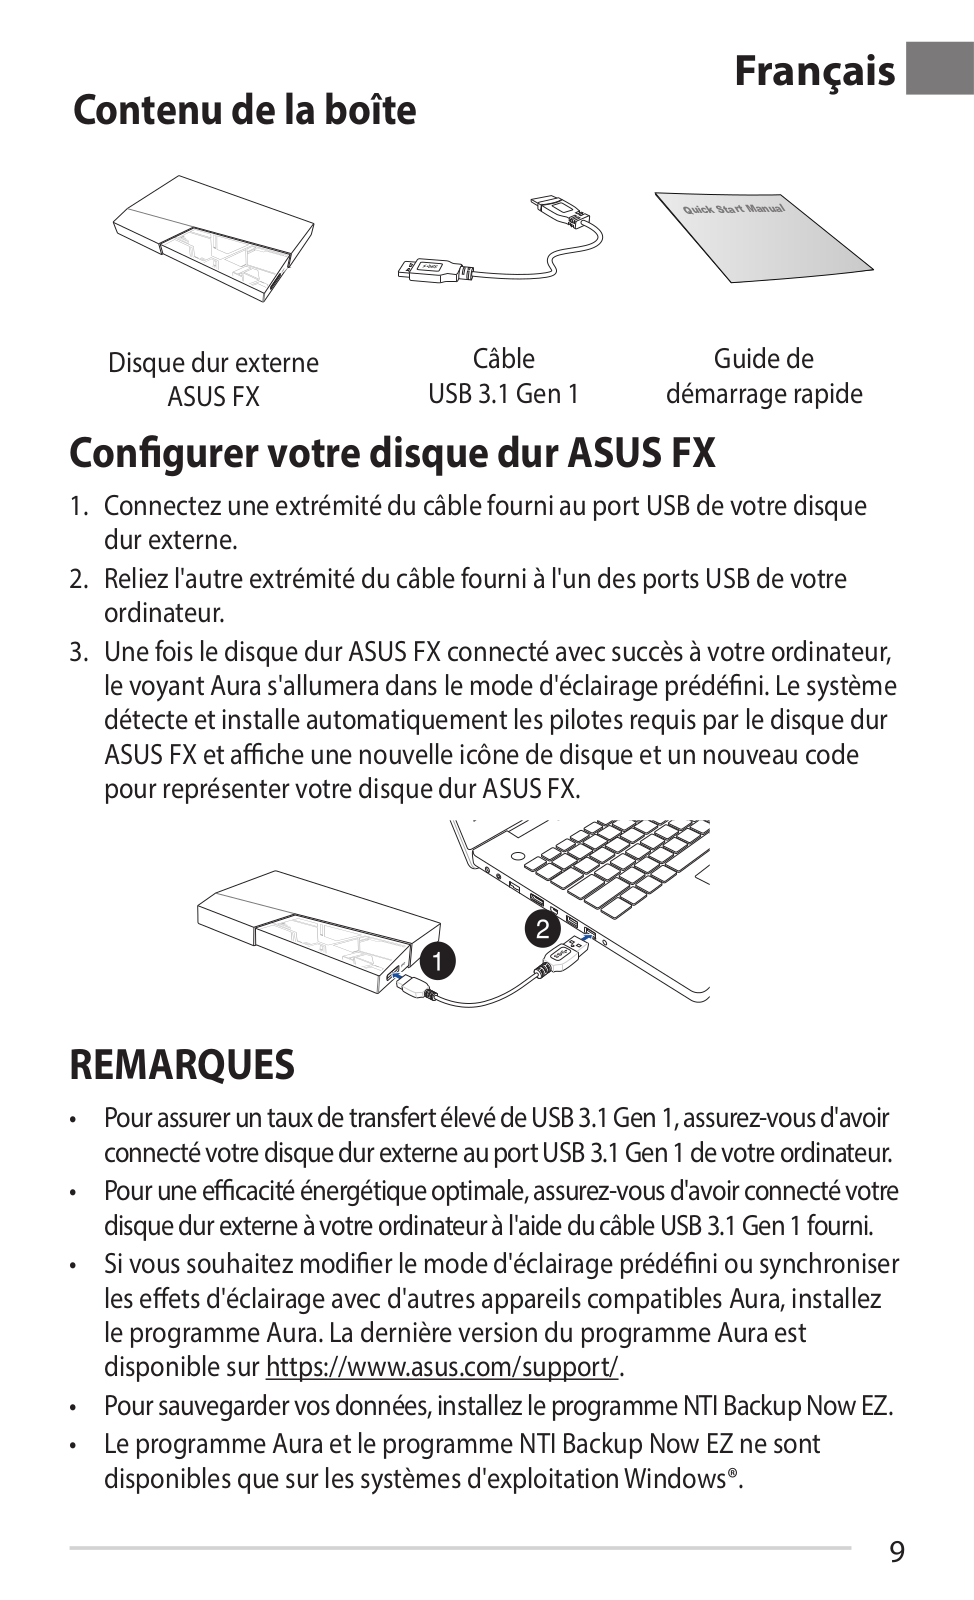
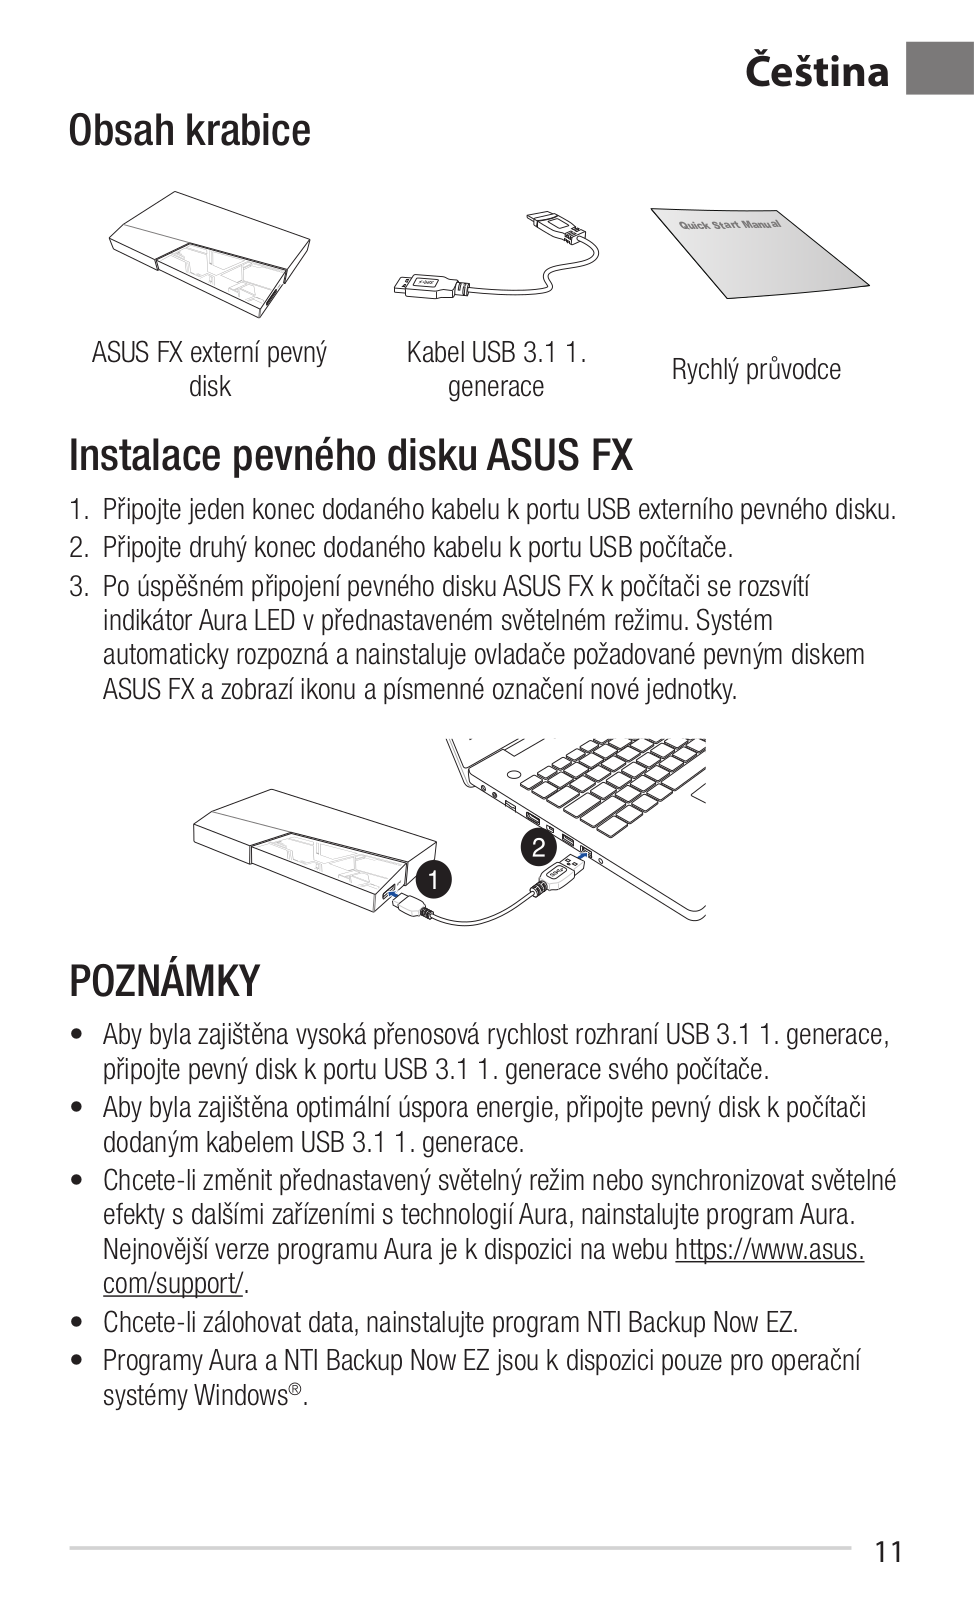
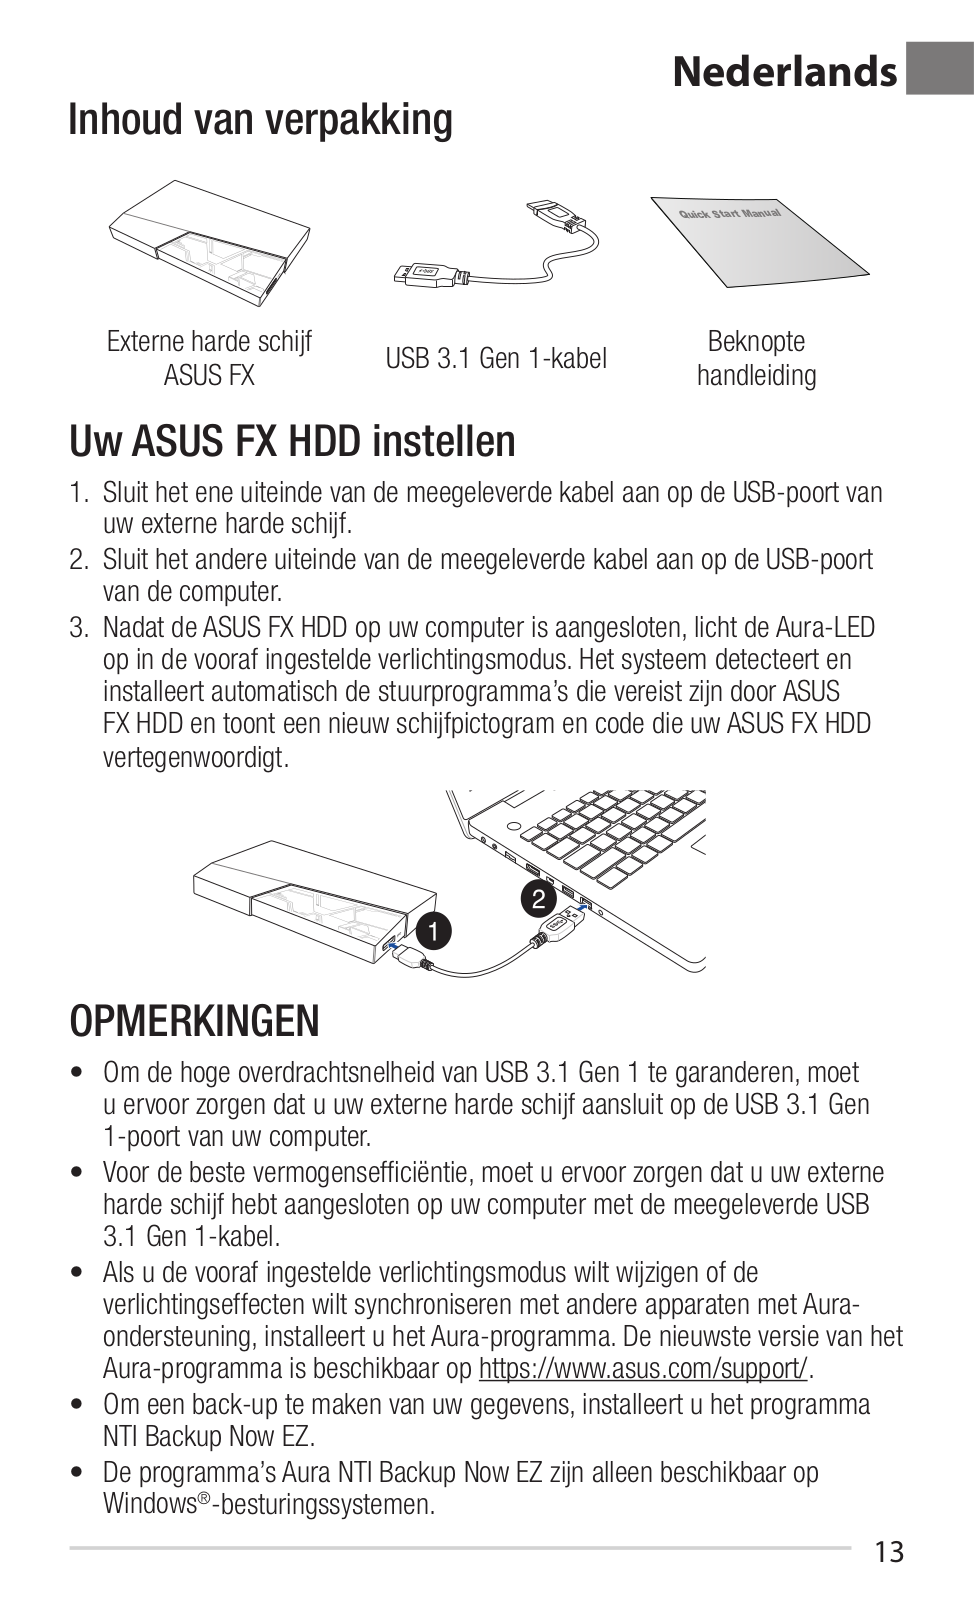
Asus EHD-A1TA2T Quick Installation Guide
...
Asus Quick Installation Guide
Download
Specifications and Main Features
Frequently Asked Questions
User Manual
Download
Loading...
+
29
hidden pages
Unhide
You need points to download manuals.
1 point = 1 manual.
You can buy points or you can get point for every manual you upload.
Buy points
Upload your manuals