

Page 1
PATENT NOS
CAN 1.130.426
USA 4.345.554 - 5.614.883
- 5.617.819 - 5.673.017
AND OTHER PATENTS PENDING
All rights reserved ® Directed Electronics Canada Inc. 2011 March 2011
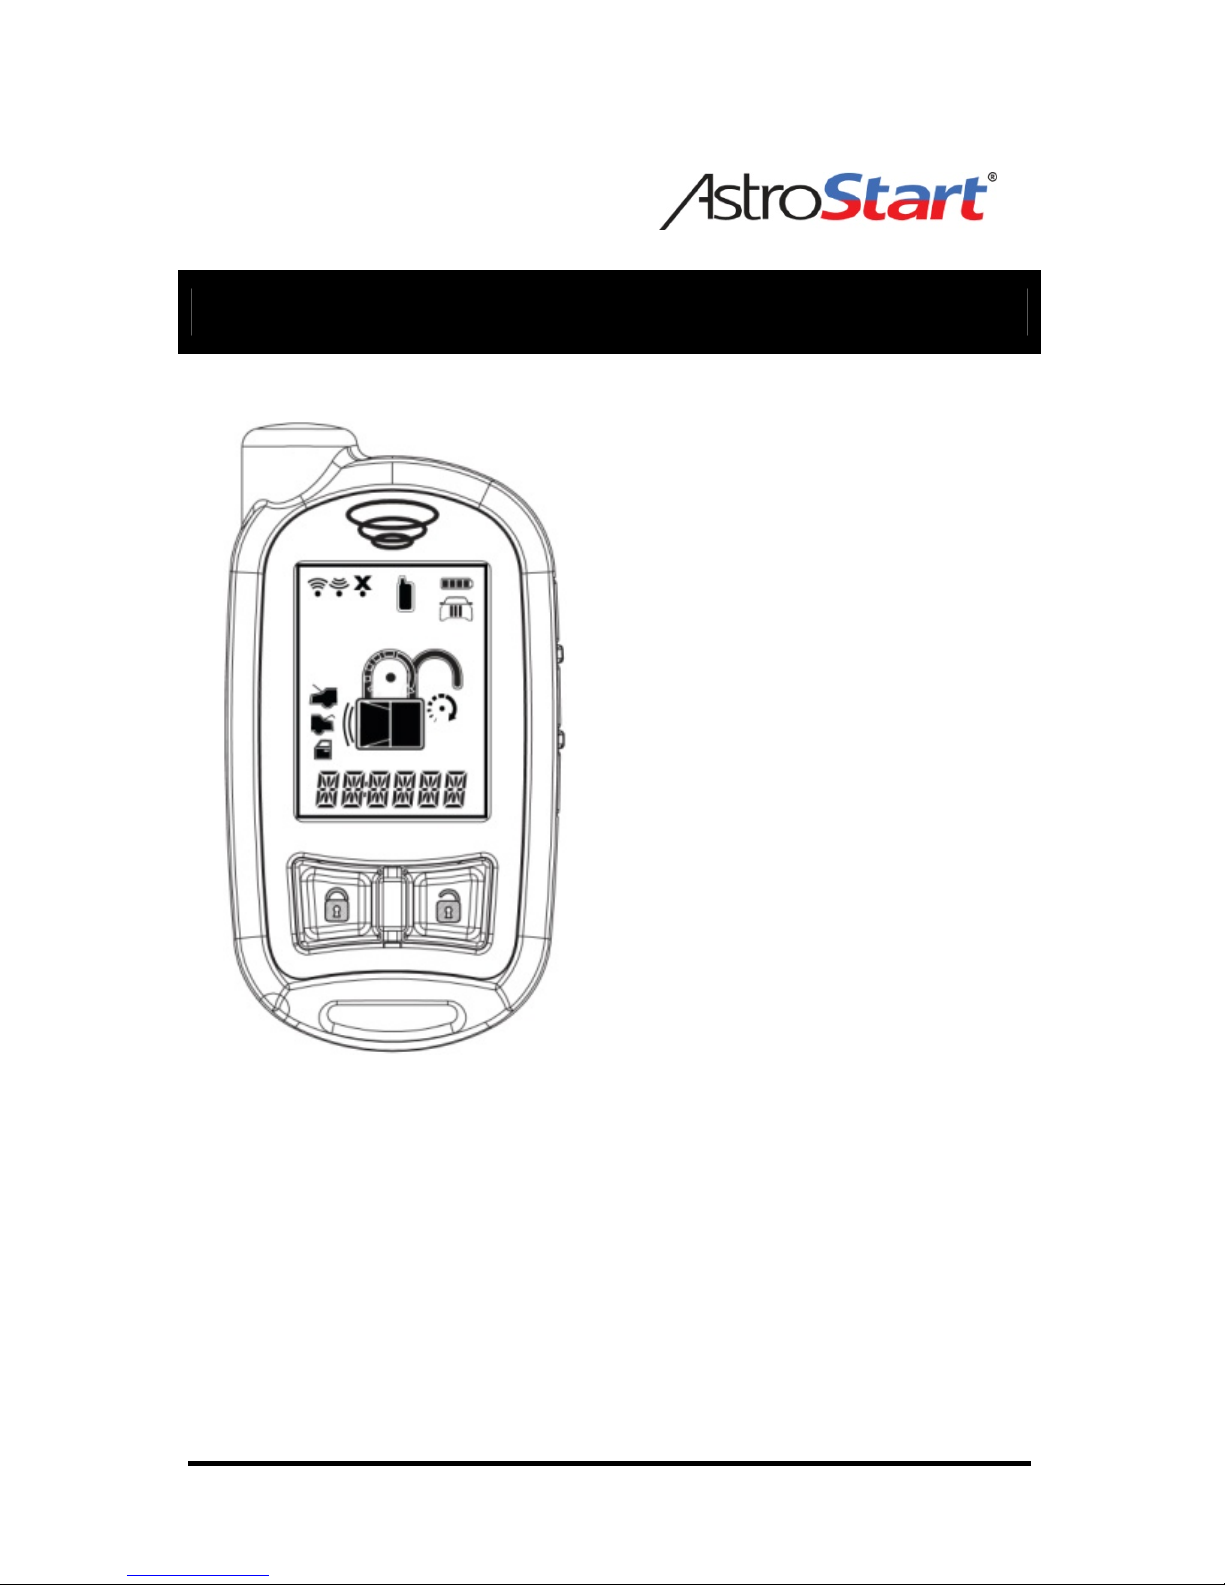
2-WAY REMOTE CONTROL
RF KIT
USER MANUAL
MODEL AF-RFK5225
2-WAY E-XRT 5-button remote
with LCD display
(FRANÇAIS AU VERSO)
Page 2
2
GOVERNMENT REGULATIONS
This device complies with the Industry Canada Radio Standards Specification RSS 210. Its use is authorized
only on a no-interference, no-protection basis; in other words, this device must not be used if it is determined
that it causes harmful interference to services authorized by IC. In addition, the user of this device must accept
any radio interference that may be received, even if this interference could affect the operation of the device.
This device complies with Part 15 of the FCC rules.
Operation is subject to the following two conditions:
(1) this device may not cause harmful interference and
(2) this device must accept interference that may cause undesired operation.
This equipment has been tested and found to comply with the limits for a class B digital device, pursuant to Part
15 of the FCC Rules. These limits are designed to provide reasonable protection against harmful interference in
a residential installation. This equipment generates uses and can radiate radio-frequency energy and, if not
installed and used in accordance with the instruction manual, may cause harmful interference to radio
communications. However, there is no guarantee that interference will not occur in a particular installation. If
this equipment does cause harmful interference to radio or television, which can be determined by turning the
equipment OFF and ON, the user is encouraged to try to correct the interference by one or more of the
following measures:
Reorient or relocate the receiving antenna.
Increase the separation between the equipment and receiver.
Connect the equipment to an outlet on a circuit different from the one the receiver is
connected to.
Consult the dealer or an experienced radio / TV technician for help.
Warning:
Changes or modifications not expressly approved by Directed Electronics Canada Inc. could void the
user's authority to operate the equipment.
Directed Electronics Canada Inc.
2750, Alphonse-Gariepy ave.
Lachine, QC, H8T 3M2,
Canada
WWW.ASTROSTART.COM
Page 3

3
THANK YOU FOR CHOOSING ASTROSTART’S RF REMOTE KIT!
We take this opportunity to remind you to properly defrost your windows and remove all the snow
on your vehicle before driving on public roads.
Rolling igloos are extremely dangerous!
We wish you an excellent journey!
USER GUIDE FOR AF-RFK5225 REMOTE SYSTEM.
Models AF-RFK5225 & AF-RFK623 are remote controls that offer basic start functions
including all the features required to achieve safe remote starting. They also offer central
locking features that allow you to control the door locks as well as releasing the trunk.
Some functionalities and b ehaviours may not b e availabl e on certain vehicle s.
Table of Contents
GOVERNMENTREGULATIONS __________________________________________________ 2
SAFETYPRECAUTIONS ________________________________________________________4
PREPARINGTHESYSTEMFOR REMOTESTARTINGFUNCTION (FORREMOTE‐START CAPABLE
SYSTEMSONLY)______________________________________________________________4
THE2‐ WAY5‐BUTTON REMOTECONTROLWITHLCDDISPLAY________________________5
THE BATTERY_______________________________________________________________ 6
5225– CONFIRMATIONS EMITTEDBYTHEREMOTE ________________________________8
LOCK/UNLO CK COMMANDSAND ALARMSYSTEMAR MING/DISARMING________________________9
STARTCOMMANDS (FORRE MOTE‐STARTCAPABLESYSTEMSONLY) __________________10
STARTINGTHEEN GINE________________________________________________________ 10
ADVANCEDFEATURES ________________________________________________________ 11
UTILITYCOMMANDS_________________________________________________________11
SETTINGTHEREMOTECONTROL _________________________________________________ 12
TABLE OFCOMMANDS________________________________________________________14
SAFETYCHECKS_____________________________________________________________15
HOODSWITCH _____________________________________________________________ 15
GEARSHIFTCHECK APPLICABLE TOAUTOMATICTRANSMISSION VEHICLES _____________________ 15
GLOSSARY _________________________________________________________________ 15
WARRANTY ________________________________________________________________ 16
Page 4

4
SAFETY PRECAUTIONS
Before using this prod uct, ple ase caref ully rea d the foll owing saf ety prec autions.
GENERAL RULES
• Never perform a remote start when a person or animal is inside the vehicle.
• Do not allow any person or animal to remain inside the vehicle when the engine is
running remotely (continuous mode).
• Immediately report any malfunction to the AstroStart dealer that performed the
installation.
• Under no circum stance can this product or its use be mod ified.
• Keep remo te controls aw ay from chi ldren.
• Have the engine tuned regularly to ensure optimal performance of your remote system.
• Make sur e that the windshield wipers an d the headlights are turned off before leaving
vehicle.
• Regularly check safety features that stop engine (see SAFETY CHECKS on page 14).
• Make sure you comply with all local regulations, which may prohibit leaving your
engine running when th e vehicl e is un attended in a p ublic pl ace.
• Always advise service personnel that your vehicle is equipped with a remote system.
• We strongly recommend
that you have your remote system checked annually.
Contact a dealer in your are a.
• All users of the vehicle should be aware
of the safety precautions and operation
procedures.
• Make sur e that the wa rning st icker is p resent o n the dr iver's wind ow.
PREPARING THE SYSTEM FOR REMOTE STARTING FUNCTION (FOR
REMOTE-START CAPABLE SYSTEMS ONLY)
When you exit the ve hicle, y ou need to prepar e the re mote star ter fo r its nex t use.
• Make sure th at the automatic-tr ansmissi on lever is in the "P" (Park) positi on.
• Set heatin g/air conditioning c ontrols to desired po sition (when the remot e starter starts
your engine, it will also turn on your climate control system).
• Turn your windshield wipers to the OFF position to avoid strain on the mechanism
should a start command be sent t o the vehicle when, for example, snow prevents the
wipers from moving.
• Make sure th at the headligh ts are turned OFF.
• Be sure not to leave your keys inside the vehicle. Certain rearming functions can
cause the doors to lock autom atically.
Page 5
5
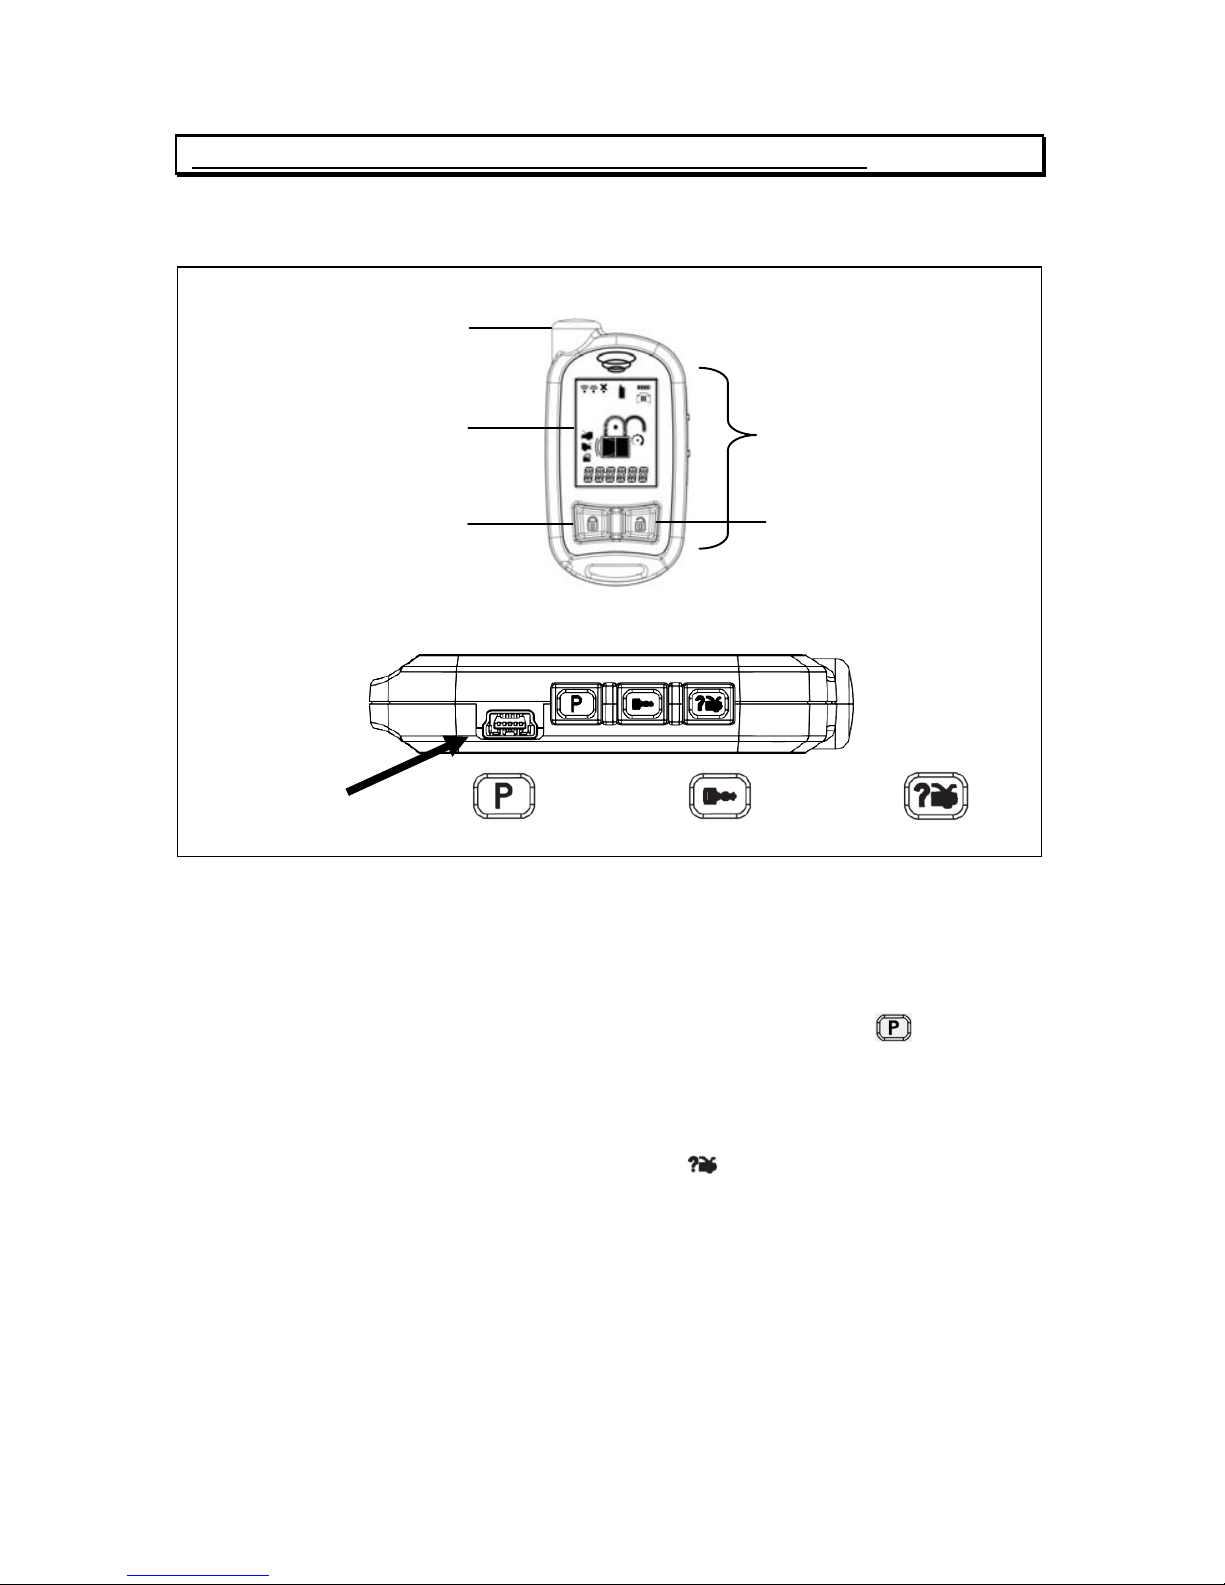
THE 2-WAY 5-BUTTON REMOTE CONTROL WITH LCD DISPLAY
This remote control can c ontrol three separa te vehicles. A maxi mum of four remote c ontrols
can be assigned to a vehicle. S ee your dealer for a dditional rem ote controls.
5225 Front view
Antenna
LCD screen Side buttons
Lock button Unlock button
5225 Side view
Mini-USB
Charging Port
Programming
Remote Start
Status / Trunk
USING YOUR REMOTE CONTROL
To send a command, press for 1 second on the appropriate button. The remote control
beeps when a button is pressed (if this option is on). A command may not be sent if the
button is not pressed long enough.
¾ Advanced: Your remote control can command three separate vehicles (additional
systems required). To select a different vehicle, hold the “P” button ( ), located on
the side of the remote , for 1.5 sec onds.
The range of your remote control can be affected by a weak battery, interference from
nearby metal structur es, “hydro” poles , electronic devic es (with magnet ic fields), or crowde d
parking lots. If no confirma tion is received in a given locat ion, move away from the sources
of interference and activate the "Status" command ( on the side of the remote). The
module will inform you of the status of door locks, the alarm and of the engine.
Note that the commun ication between the vehicle and the transmitter operates in o nly one
direction at a time. This is why it is recommended to wait for confirmations. Otherwise,
communications could be cancelled out .
OUT OF RANGE
If the vehicle is out of range, t he remote will e mit a soft chirp a fter three (3) sec onds and will
show the “X” icon to i ndicate that the command has not been rec eived.
Page 6

6
THE BATTERY
Your remote is powered by a n internal rechargeab le battery that can only b e serviced by an
authorized Directed dealer. Due to transit and storage time prior to your purchase, the
battery charge may have depleted. To ensure proper operation, check the battery level and
connect the 8602T battery charger if not fu lly char ged.
LOW BATTERY
Once the low battery alerts begi n (the text field flas hes low bat and the remot e beeps), they
will continue to command the system for a few days but should be charged at the earliest
opportunity.
CHARGING THE REMOTE CONTROL
• Plug the AC adapter into a 110V AC outlet. Insert the mini-USB connector into the
mini-USB port located on the s ide of the remote control (see prev ious page). The text
field will display “CHARGE” to indic ate that the remote control is ch arging (The remote
remains operational while charging. It can command the system).
• Once fully charged, the text field will display “FULL”.
• The remote control is then ready for use. Disconnect the mini-USB end from the
remote control first and then the AC adapter from the AC outlet.
Note
If the battery is excessively depleted when the charger is connected,
functionality may be delay ed while it charg es to the minimum v oltage required t o
operate the display, after which normal charging resumes.
Warning!
NEVER connect the supplied AC adapter to products other than the remote
control. It is a high current device designed specifically for rapid charging and
may cause severe da mage or explos ion when c onnec ted to a ny othe r produc ts.
Charging the battery when th e temperature is below 0°C (32°F) or above 4 5°C
(113°F) may cause severe battery damage and/or reduce battery life. Avoid
placing the remote control in areas exposed to extreme cold or heat (direct
sunlight) when chargi ng the b attery.
BATTERY LIFE
The remote control has many features that make i t one of the most unique rem ote controls
on the market today, including superior long range communication. The default feature
settings provide for excellent battery charge duration. However, to maximize this duration
between charges, the followin g sugges tions w ill hel p:
• Turning Paging OFF. The remote will not wake up to check for messages with Paging
OFF in the Setup Remote menu.
Caution! The remote will not receive alert messages from the system.
• Turn Bee ping off. The button beeps are off by default , but they ca n be turned on in the
remote setup menu if desired. However, the melodies are unaffected by the beeps
settings and will still play normally.
Page 7

7
BATTERY DISPOSAL
Directed Electronics cares about the environment. If you need to
dispose of the battery, please do so in accor dance with your municipal
requirements for batte ry disp osal or se nd it bac k to us at:
Directed Electronics Canada Inc.
2750, Alphonse-Gari epy ave.
Lachine, QC, H8T 3M2,
Canada
(Shipping and/or handling costs are the sole responsibility of the
owner/sender and will not
be covered by Directed Electronics).
Page 8

8
5225 – CONFIRMATIONS EMITTED BY THE REMOTE
AN AUDIBLE AND A VISUAL CONFIRMATION ARE EMITTED EACH TIME A COMMAND IS TRANSMITTED.
The LCD displays the vehicle status at all time. It is refreshed on every transmission or
when the status of the vehicle changes, unless the “Status confirmation” function is
disabled. The displ ay shows th e last con firmati on receive d.
The following diagra m shows t he usef ulness of eac h icon of the dis play.
1. Locked
8. Engine running (Small icon)
2. Unlocked
9. Car 1
3. Engine starting (Large icon)
10. Car 2
4. Battery Status
11. Car 3
5. Transmitting
12. Utility outputs status
6. Receiving
13. Clock
Text Field
7. Out of Range / No answer
The following diagram shows each icon of the display pertaining to the security system.
1. Alert
2. Car Door (Trigger)
3. Hood (Trigger)
4. Trunk (Trigger)
5. Messages
Note: Not all the messages in the text field refer to the security
system’s functions.
Text Field
Page 9

9
Two types of confirmations are displayed on the remote:
Command confirmation: These confirmations are command acknowledgements. The icon
corresponding to the command is displayed to confirm the reception of the command.
Status confirmations: These confirmations are displayed when the status of a monitored zone
changes: door opening, alarm state, etc.
Command confirmations are retur ned im media tely f oll owing a comm and t rans miss ion, wher eas the
status confirmations may be returned up to 12 seconds after the event happened.
Out of range: In the event that the environment preve nts confirmati ons from bein g receive d by the
remote control, the “X” icon appears.
Note: You can refresh the LCD screen displ ay by pres s ing on any button or press the status butt on
().
CONFIRMATIONS EMITTED BY VEHICLE
Confirmations emitted by the vehic le are sent as soon as the comma nd is received by the vehic le.
Refer to the vehicle owner’s guide for details.
LOCK/UNLOCK COMMANDS AND ALARM SYSTEM ARMING/DISARMING
If your vehicle is equipped with electric door locks, several functions can be operated by remote
control.
These features are optional and may or may not be available. Consult your dealer for
advice.
The Lock/Unlock functions also control Arming and disarming on the security system. The
arming/disarming functions only apply to compatible vehicle models equipped with an OEM
security system.
The following systems can be controlled:
• Door locks
• Trunk or hatchback release
• Interior lights
LOCK / ARM
Press the button: the doors are locked and the alarm system is armed. The parking lights flash
to confirm that the command has been received.
UNLOCK / DISARM
Press the button. The d oors are u nl oc k ed and t he alarm is disarmed. The parking li ghts fl a s h to
confirm that the command has been received.
If OEM-available, the “Unlock“ function can be programmed in such a way that the first Unlock
command only unlocks the driver's door, while a following Unlock command unlocks the other
doors.
TRUNK RELEASE
When OEM available, press the button and hold it for 4 seconds. The trunk is released and
the parking lights flash to confir m that the command has been executed. The remot e shows the
trunk opening.
Page 10

10
If you are not sure you have received confirmation, repeat the command. The system will repeat
the confirmation as often as you wish.
PANIC
Panic mode is used to attract attention in a situation of emergency.
Press and hold or for at least 4 seconds to trigger the panic mode of your vehicle. Refer to
your vehicle’s owner’s manual for your available options.
Panic mode can be cancelled by pressing .
START COMMANDS (FOR REMOTE-START CAPABLE SYSTEMS ONLY)
STARTING THE ENGINE
To start the engine, press the button.
The system automatically adjusts the ignition duration for your type of vehicle (gas or diesel); the
parking lights flash then stay on when the engine is running.
Note: In a case where your RF Kit is used to operate a GM OEM remote starter, refer to the
vehicle’s owner’s manual for details of operation.
When the start command is transmitted, the system
immediately sends out one of two possible confirmations:
1. the vehicle can start.
2. the vehicle will not start.
System starting
Large Remote
Start icon
appears on
remote
The vehicle won't start if, for example, the hood is open. In
this case, the parking lights flash and the text field shows
“remote start failed”.
System not starting
Error code, text
field
The text field
displays an error
code
If the vehicle starts, the system will au tomatically send
another confirmation, with a melody, after a few seconds.
Successful start
Small Remote
Start icon and a
melody is played
UPON ENTERING YOUR VEHICLE...
DO NOT TURN IGNITION KEY TO START POSITION.
Automatic transmission vehicles
To avoid turning the engine off when taking place be hind the s teering wheel, do n ot apply th e
brakes until you have placed the key in the ignition and turned it to the RUN position.
Drive as usual.
Page 11

11
STOP +
When the engine is running remotely
, you can turn it off by performing a stop command.
ADVANCED FEATURES
STATUS
When this command is sent, the vehicle checks the status for the engine, the protection zones and
for the locks, then retransmits this information to the remote control. The results show up on the
LCD display through a combination of pictograms and text in the text field.
When the remote control receives a confirmation, it flashes the relevant picto grams and vibrates
twice.
If the vehicle is out of range, the remote control will give a soft chirp after three (3) seconds,
indicating that either the vehicle or the remote could not receive the command.
UTILITY COMMANDS
These commands allow you to control most of the vehicle’s accessories depending on what was
connected during the installati on ( he adlights, defroster, etc.). For mor e i nformation, check with your
technician.
To activate these functions, simul taneously press the buttons as shown i n the following tab le. (Fillup the blanks).
Commands Buttons Corresponding accessory Duration
UTILITY 1 *
+
UTILITY 2
+
The accessory associated to each command is activated for the duration set at time of installation.
The delay can be cancelled by repeating the command.
* Programmable at time of installation: the “trunk” command can activate utility 1.
Page 12

12
SETTING THE REMOTE CONTROL
Certain functions on the remote may be set to your convenience.
To access the remote control programming mode, press the button located on the side of the
remote and hold it for four (4) seconds. The remote will emit one long tone. Release the button.
The text field will change to the remote settings menu.
In the menu, the three (3) side buttons ( , Remote Start and Status) become directional arrows to navigate
through the options.
Pressing the Status button goes one step up on the same menu level.
=
Pressing the Remote Start button goes one step down on the same menu level.
=
Pressing the button confirms a selection. It also navigates forward through menu levels.
= or Confirm
Setup level
(main menu)
Second level
(clock selected for example)
Third level
(hour selected for example)
Setup Keypad
Hour
Page
Light
Button
Pair Clock Back
Color
Car
Sensor
Exit Start
Minute
Review
Exit
**Cycle back to Keypad**
Use the Remote Start and Status buttons as arrows to modify the setting.
Press to confirm selection.
Confirming a setting brings back to previous level (second level in example).
Page 13

13
REMOTE TRANSMITTER PROGRAMMING TABLE
Note: Items in gray are default.
Setup Settings
Comment
Keypad
ON (Locked)
Keypad Lock/Unlock
OFF (Unlocked)
Page
ON
To receive vehicl e page
information.
OFF
Light
Upon "Status" command
Turn backlight on or off Upon any command
Never
Button
ON
Button sounds
OFF
Clock
Hour
To adjust clock time
Minute
Colour 1 to 7
To choose the desired backlight
colour
Car 1 to 3
To choose the vehicl e number
or or
Auxiliary sensor ic on
Trunk
Important:
Do not change this setting.
Motion sensor (not supported)
Glass sensor (not supported)
Tilt sensor (not supported)
Ultrasonic sensor (not supported)
Start
Clock
To display desired setting when
car is running.
Note: Run time on display may
not be exact. The default
displayed time is 12 minutes .
Run time
Page 14

14
TABLE OF COMMANDS
Check all that apply
Commands Button
Confirmations
Remote
Start
small
Stop
+
Stop
Lock / Arming
Locked
Panic (Button held for > 4 sec.)
or
Panic
Unlock / Disarming
Unlock
Trunk (Button held for > 4 sec.)
Trunk
Activate / Cancel Utility 1
+
Status
-
Activate / Cancel Utility 2
+
Vehicle selection (Button held 1.5 sec.)
On remote only: 1 beep for car 1
2 beeps for car 2
3 beeps for car 3
or or
Start confirmation takes a few seconds, except if the engine is already running.
Page 15

15
SAFETY CHECKS
In order to maintain a high safety standard, proceed with the following checks every month.
HOOD SWITCH
• Remote start your vehicle.
• Open the hood.
The engine should stop as soon as the hood is opened.
If the engine does not stop immedia tely, turn the main s witch to the OFF position and leave it off
until the situation is rectified. Contact your service center.
GEARSHIFT CHECK APPLICABLE TO AUTOMATIC TRANSMISSION VEHICLES
If the key must be in the ignition for the gearshift to be moved out of “P” (Park), your vehicle is safe
as long as keys are kept away from children.
If, on the other hand, the gearshift can be put in gear without th e key being in the i gnition, proceed
with this simple check.
• Make sure that the parking brake is applied.
• Put the gearshift in gear (D).
• Remain in the vehicle and be ready to apply the brakes
.
• Start the vehicle with the remote starter.
• Repeat these steps with the gearshift in every position other than Park and Neutral.
If the starter reacts within 90 seconds (which is not safe), turn the main switc h to the OFF position
and leave it off until the situation is rectified
. Contact your service center.
• Make sure that the parking brake is applied.
• With the gearshift in “P” (Park), start the vehicle with the remote starter.
• Remain in the vehicle and be ready to apply the brakes
.
• Without applying the brakes, move the gearshift out of “P”.
If, without applying the brakes, the engine does not stop immediately (which is not s afe), turn the
main switch to the OFF position and leave it off until the situation is rectified.
Contact your
service center.
GLOSSARY
VIOLATION
A Violation means that a situation c auses a protection zone to generate an alarm con dition. For
example: a door was opened, etc.
DOME LIGHT DURATION
The system may turn the vehicle dome light on for 30 seconds upon the unlocking command or
when the engine is stopped by the ignition key (depends on vehicle).
Page 16

© 2011 Directed Electronics. All rights reserved.
TWO (2) YEARS WARRANTY ON THE RECEIVER AND THE TRANSMITTERS
ASTROSTART® RECEIVER & TRANSMITTERS -- (COMPONENT)
Directed Electronics Canada, Inc. warrants to the original end-user purchaser that any AstroStart Receiver or Transmitter (Component) part provided contemporaneously with the main Product (Module) shall be free of defects in materials and/or workmanship for a period of two (2) years from the date of purchase, provided the
original end-user purchaser owns the vehicle that the main Product (Module) the Component was provided for, remains continually installed in the vehicle. In accordance with the terms of this warranty, Directed Electronics Canada, Inc., at its expense, shall repair or replace (subject to exceptions stipulated thereinafter) the Components which are proven defective.
WARRANTY LIMITATIONS
• The warranty period begins on the date the Module, Component or Accessory was purchased. In the event the date of purchase cannot be verified by the purcha-
se invoice, the manufacturer’s date indicated on the Product, Component or Accessory covered by this warranty shall be the date the warranty period begins.
• Installation or service of any Module, Accessory or Component covered by any of the Directed Electronics Canada, Inc. warranties, must be performed by an auth-
orized Directed Electronics Canada, Inc. technician.
WARRANTY IS
VOID IF
• The manufacturing date sticker is removed or damaged.
• The Product (i) is defective or has been damaged due to accident, neglect, fire, misuse, flood, lightning, shipping and handling, or any other condition beyond
the control of Directed Electronics Canada, Inc., (ii) has been altered in any way, (iii) has been installed or repaired by anyone other than an authorized technician, or (iv) has been installed or used in an inappropriate manner.
WARRANTY DOES NOT COVER
• Any damage to the unit caused by the removal, installation or maintenance of the Product, Accessory or Component, any labour cost for the removal, re-
installation or maintenance of the Product, Accessory or Component, shipment of the defective Product, Accessory or Component to Directed Electronics
Canada, Inc., return of the repaired or replaced Product, Accessory or Component.
• Wires, cables or switches.
• Batteries.
• Remote transmitter cases or the rubber button membrane from wear or damaged in use.
OWNER’S RESPONSIBILITIES FOR ALL WARRANTY RETURNS
**For all problems, the customer is asked to present themselves to an authorized Directed Electronics Canada, Inc. dealer with the following**
• A clear copy of the sales receipt, of the Product, Accessory or Component showing all the following:
o Date of purchase
o Customer’s full name and address
o The authorized dealer's company name and address.
o The type of product installed.
o The year, make, model and color of the vehicle.
o
The vehicle license number and/or the vehicle identification number.
WARRANTY TEXT:
ASTROSTART SECURITY SYSTEMS ARE DETERRENTS AGAINST POSSIBLE THEFT. DIRECTED ELECTRONICS CANADA, INC. IS NOT OFFERING
A GUARANTEE OR INSURANCE AGAINST VANDALISM, DAMAGE OR THEFT OF THE VEHICLE, ITS PARTS OR CONTENTS; AND HEREBY EXPRESSLY
DISCLAIMS ANY LIABILITY WHATSOEVER, INCLUDING WITHOUT LIMITATION, LIABILITY OF THEFT, DAMAGE AND/OR VANDALISM. DIRECTED ELECTRONICS CANADA, INC. DOES NOT AUTHORIZE ANY PERSON TO CREATE FOR IT ANY OTHER OBLIGATION OR LIABILITY IN CONNECTION
WITH THIS SECURITY SYSTEM.
THIS LIMITED WARRANTY IS IN LIEU OF ALL OTHER WARRANTIES, WHETHER ORA
L, WRITTEN, EXPRESS OR IMPLIED. TO THE MAXIMUM EXTENT ALLOWED BY LAW, ALL WARRANTIES, INCLUDING BUT NOT LIMITED TO EXPRESS WARRANTY, IMPLIED WARRANTY, WARRANTY OF
MERCHANTABILITY, FITNESS FOR PARTICULAR PURPOSE AND WARRANTY OF NON-INFRINGEMENT OF INTELLECTUAL PROPERTY, ARE EXPRESSLY EXCLUDED, AND DIRECTED ELECTRONICS CANADA, INC. NEITHER ASSUMES NOR AUTHORIZES ANY PERSON OR ENTITY TO ASSUME
FOR IT ANY DUTY, OBLIGATION OR LIABILITY IN CONNECTION WITH ITS PRODUCTS. DIRECTED ELECTRONICS CANADA, INC. DISCLAIMS AND
HAS ABSOLUTELY NO LIABILITY FOR ANY AND ALL ACTS OF THIRD PARTIES INCLUDING ITS AUTHORIZED DEALERS OR INSTALLERS. DIRECTED ELECTRONICS CANADA, INC.’S WARRANTY OBLIGATIONS AND PURCHASER’S REMEDIES HEREUNDER ARE SOLELY AND EXCLUSIVELY AS
STATED HEREIN.
TH
IS WARRANTY DOES NOT COVER ANY LABOUR COSTS FOR MAINTENANCE, REMOVAL OR REINSTALLATION OF THE UNIT OR ANY CONSEQUENTIAL DAMAGES OF ANY KIND IN THIS RESPECT. IN THE EVENT OF A CLAIM OR A DISPUTE INVOLVING DIRECTED ELECTRONICS CANADA,
INC. OR ITS SUBSIDIARY; THE PROPER VENUE SHALL BE IN THE PROVINCE OF QUEBEC. QUEBEC PROVINCIAL LAWS AND APPLICABLE CANADIAN
FEDERAL LAWS SHALL APPLY AND GOVERN THE DISPUTE. THE MAXIMUM RECOVERY UNDER ANY CLAIM AGAINST DIRECTED ELECTRONICS
CANADA, INC. SHALL BE STRICTLY LIMITED TO THE AUTHORIZED DIRECTED ELECTRONICS CANADA, INC. DEALER'S PURCHASE PRICE OF THE UNIT.
DIRECTED ELECTRONICS CANADA, INC. SHALL NOT BE RESPONSIBLE FOR ANY DAMAGES WHATSOEVER, INCLUDING BUT NOT LIMITED TO, ANY
CONSEQUENTIAL DAMAGES, INCI
DENTAL DAMAGES, DAMAGES FOR THE LOSS OF TIME, LOSS OF EARNINGS, COMMERCIAL LOSS, LOSS OF ECONOMIC OPPORTUNITY AND THE LIKE. THE WARRANTY FROM DIRECTED ELECTRONICS CANADA, INC. SOLELY AND EXCLUSIVELY APPLIES TO THE
PRODUCT ITSELF. A CLAIM SETTLEMENT DOES NOT CONSTITUTE AN ACKNOWLEDGEMENT OF LIABILITY FROM DIRECTED ELECTRONICS CANADA,
INC. OR ANY OF ITS AUTHORIZED DEALERS OR INSTALLERS.
Some states or provinces do not allow the exclusion or limitation of incidental or consequential damages, so the above limitations or exclusions may not apply to
you. Similar exclusions or limitations, including those as to non-assignment, may be applicable in some Canadian provinces. This warranty gives you specific legal
rights and you may also have other rights which vary from state to state or province to province. This warranty contains the entire agreement relating to warranty and
supersedes all previous and contemporaneous representations or understandings, whether written, implied or oral.
Rev.: 20110328MODELS: AF-RFK623 & AF-RFK5225
Warranty
 Loading...