

Page 1
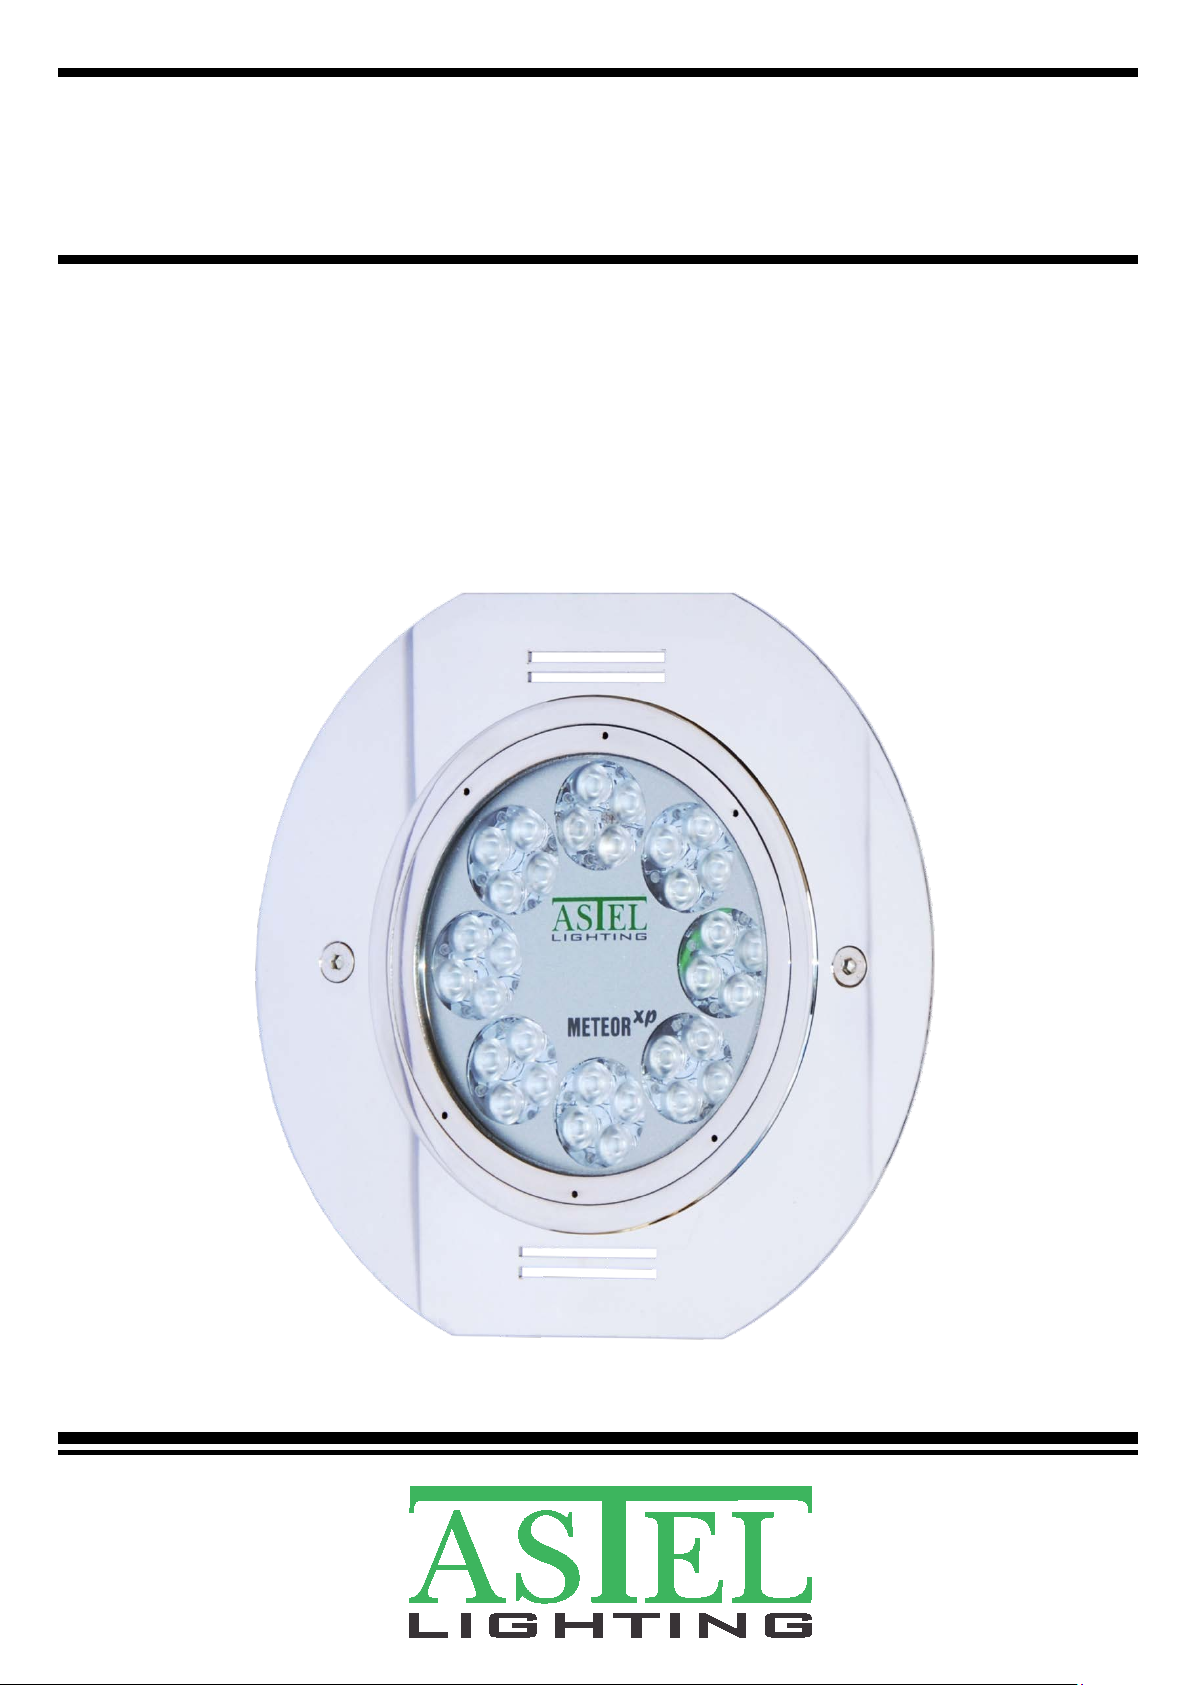
METEOR XP
LFR3210
LFR3215
UNDERWATER POOL LIGHT
Operating Instructions
Page 2

2
CONTENTS
Preface ...............................................................................................................................................................3
Features .............................................................................................................................................................3
Precautions ........................................................................................................................................................3
Components and Connectors ............................................................................................................................4
Installation ..........................................................................................................................................................5
Controls ..............................................................................................................................................................7
Appearance ........................................................................................................................................................9
Technical Specifications .....................................................................................................................................9
Warranty ...........................................................................................................................................................10
Declaration of Conformity .................................................................................................................................11
_________________________________________________________________________________
Page 3

3
PREFACE
The METEOR XP series of modern compact
flush-mount designed underwater pool light
with built-in driver is designed to use the latest
LED lighting technology.
The compact flush-mount designed casing
enables very simple installation to the
stainless-steel, concrete or liner/concrete pools
with suitable niches. The special connector
assembly enables very simple maintenance or
replacement during servicing period.
The METEOR XP series is available in
stainless steel casings. The lighting is available
in cool white, warm white, blue, green, red and
multi-color RGB or RGBW colors with 32 highpower LEDs.
The single-color or multi-color versions allow
light control with dimming and changing of the
color of lighting manually or automatically
through the complete rainbow spectrum.
The most advanced electronic design with
built-in microprocessor enables network
connection and simple control of complete
group of lights.
FEATURES
• Stainless Steel Casing
• 32 Power LEDs Design
• Cool White, Warm White, Blue, Green,
Red, Multi-Color RGB or RGBW Lighting
• Tempered Glass Optical Window
• High-Efficiency Lens
• Remote Control
• Digital Dimming
• Polarity Protection
• Transient Protection
• Thermal Protection
• Low Power Consumption
• Simple Installation
• Optional accessories for different pools
installations
PRECAUTIONS
• The underwater pool light has to be
installed and used in accordance with the
instructions of this manual only.
• The power supply has to be disconnected
before installation.
• The underwater pool light is recomended to
be installed around 0.2 m below the water
line for the best illumination and to avoid
over-heating.
• The optical window must be clear and not
covered by any kind of isolating or other
material.
• The optical window has to be cleaned with
a mild soap or detergent and lukewarm
water by using a soft cloth or sponge. Do
not use abrasive or highly alkaline cleaners.
Never scrape with razor blades or other
sharp instruments.
• Do turn power off immediately and refer
servicing to qualified service personnel if
the underwater pool light does not operate
normally following the operating
instructions.
Page 4
4
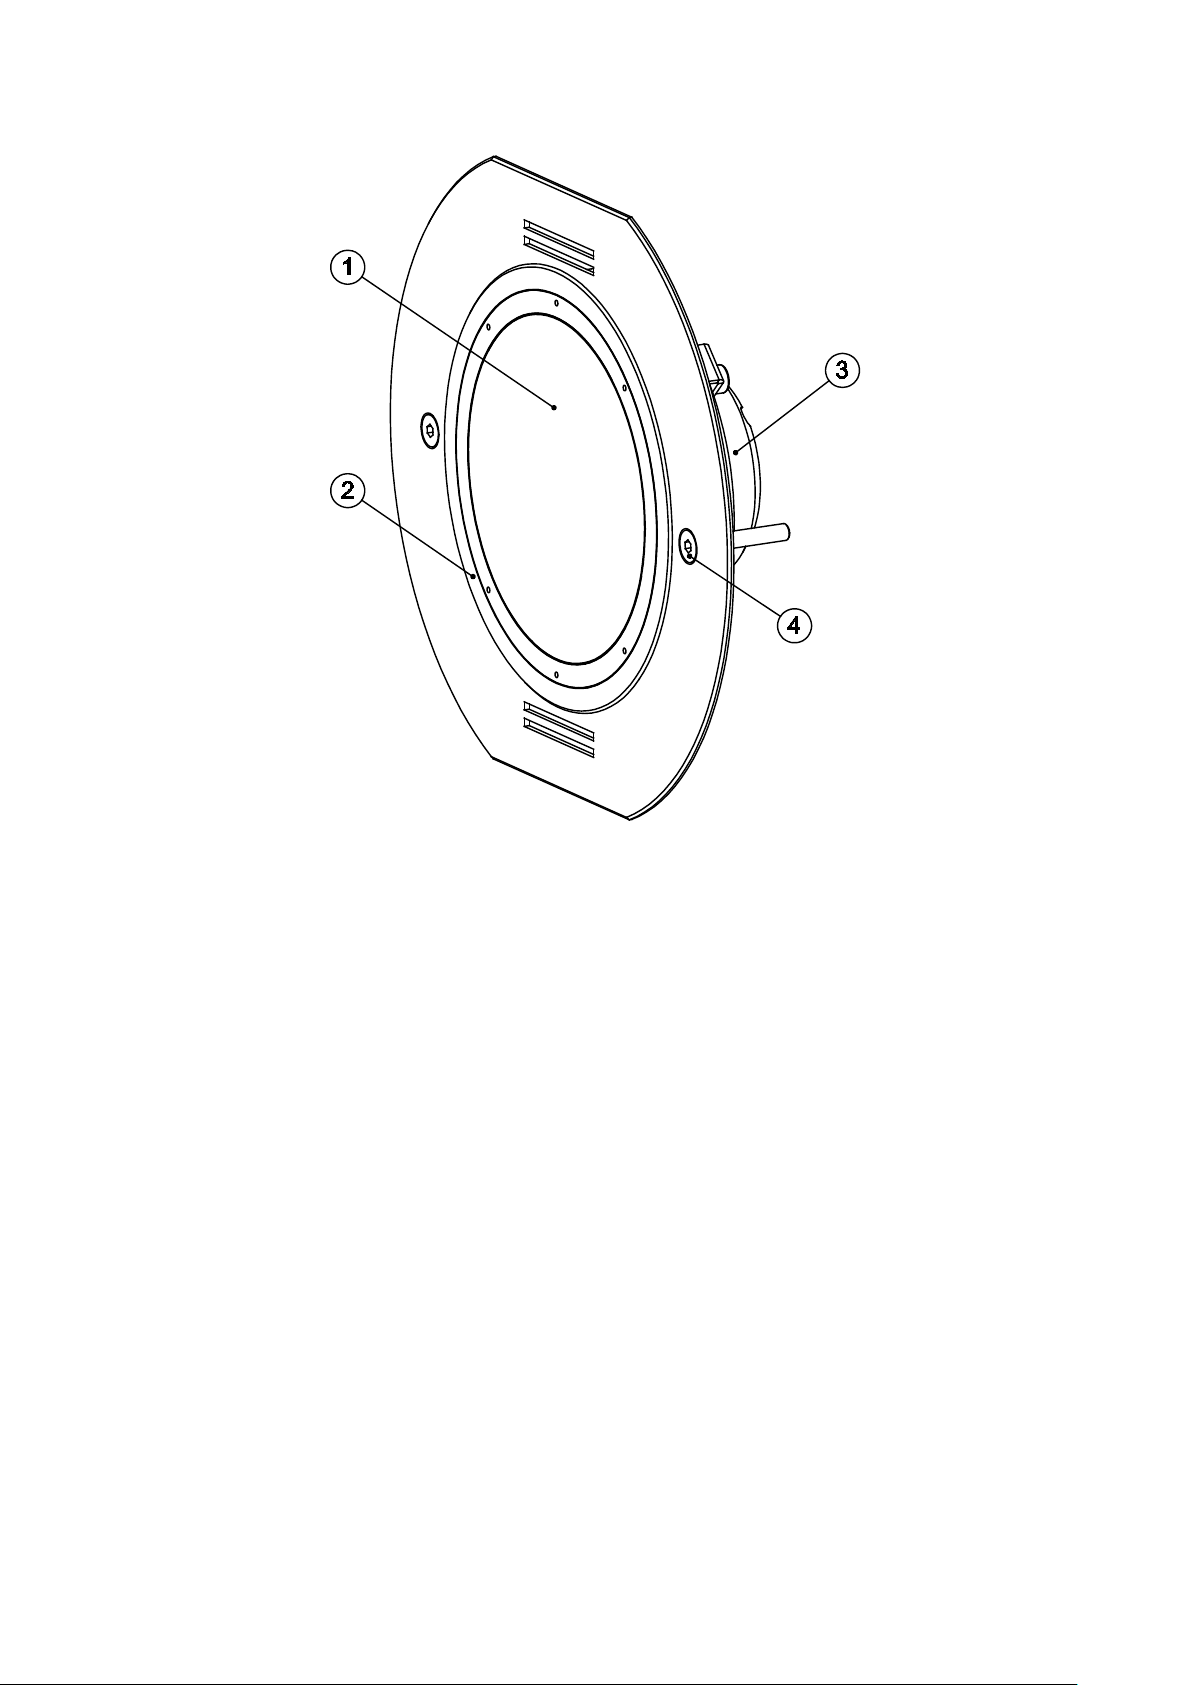
COMPONENTS AND CONNECTORS
(1) Optical window
Tempered glass optical window.
(2) Underwater pool light casing
Stainless steel casing incl. fixing plate with mounting holes and water cooling slots.
(3) Connector assembly
The 8-pole multi-core cable to connect the DC power supply and optional remote control or switch.
(4) Fixing screw
2 fixing screws to fix the underwater pool light into the suitable niche.
Page 5
5
INSTALLATION
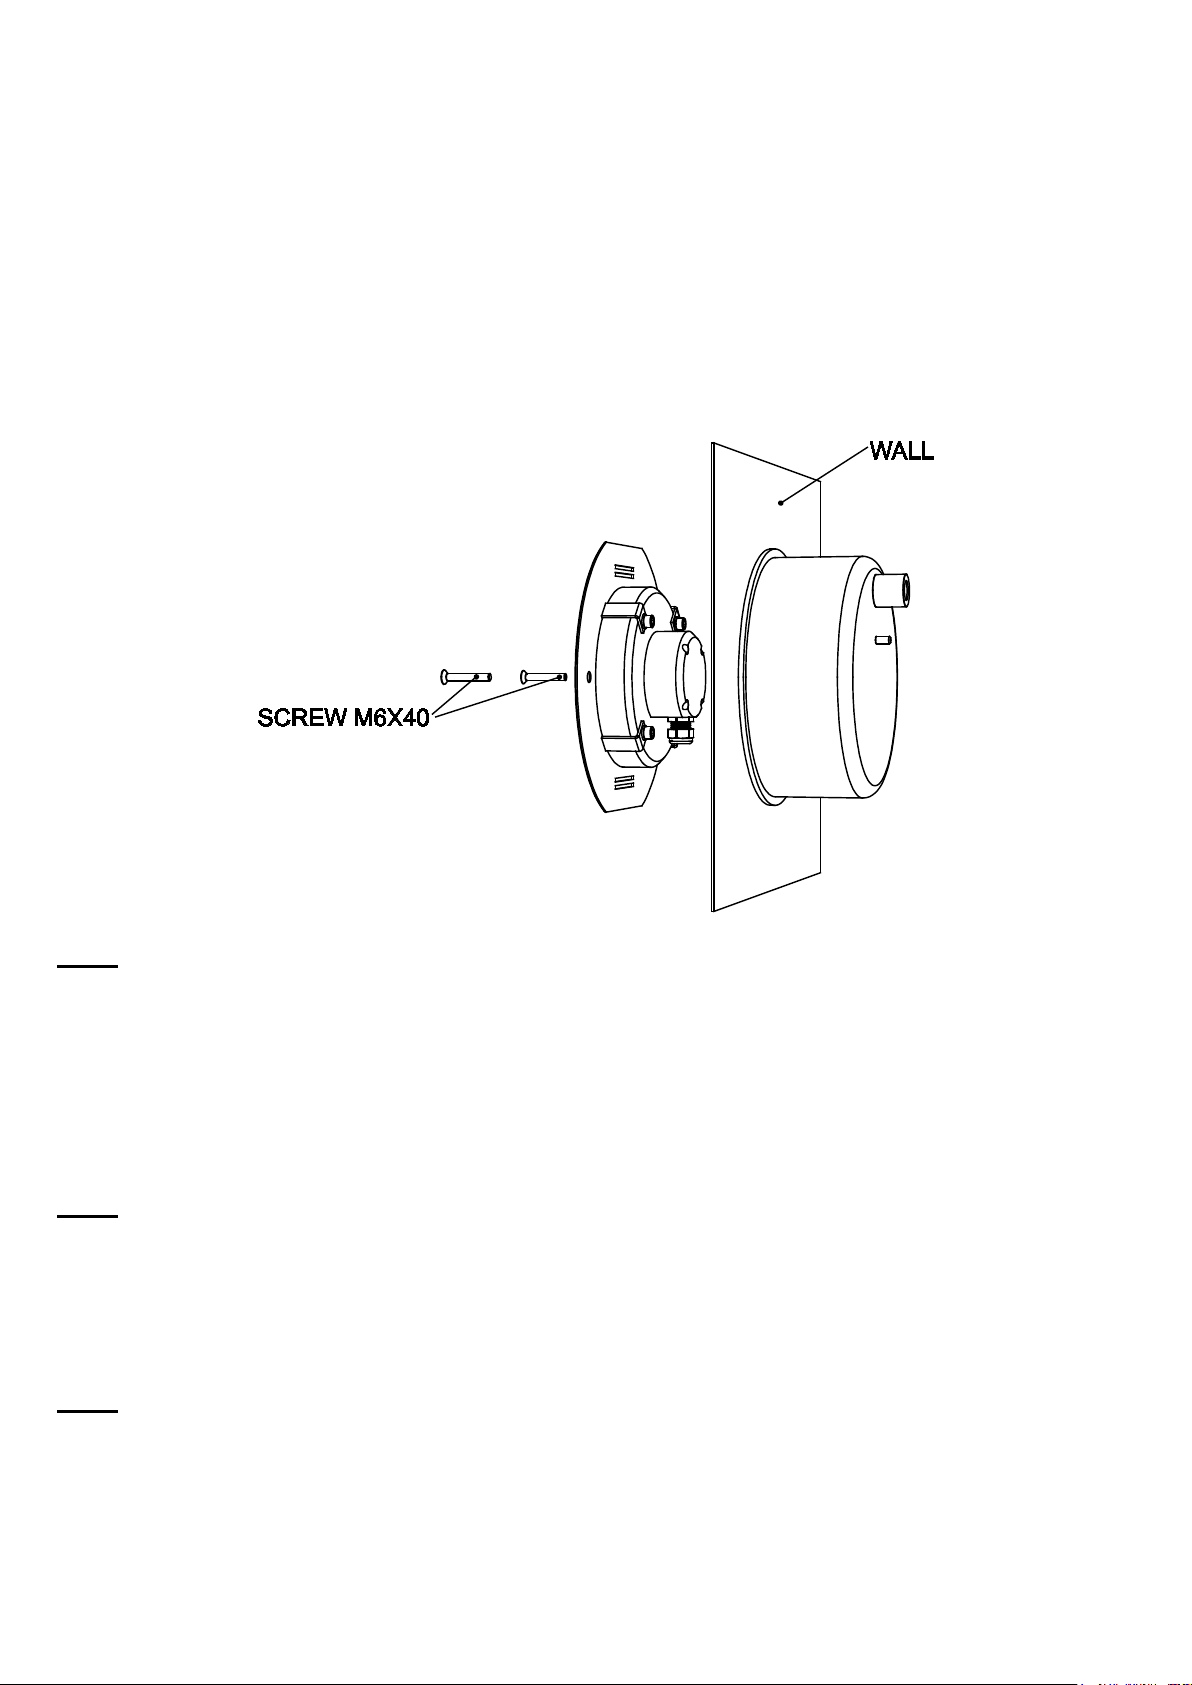
The underwater light kit consists of the following components:
• Underwater Light METEOR XP with connector assembly and connection cable
• 2 x fixing screws M6x40
• Operating Instructions with Declaration of Conformity and Warranty conditions
The METEOR XP has to be fixed into the suitable niche on the pool wall under waterline.
Leave at least 2m of connection cable wrapped inside the niche for future maintenance and service.
When the installation is finished briefly test the underwater light prior to fill the pool with water.
The installation have to be realized by a qualified personnel.
Note:
• Avoid using the underwater pool light out of the water for more than 1 minute.
The underwater pool light is protected by a temperature sensor against over-heating.
When the temperature of the underwater pool light exceeds 85°C the underwater pool light
is automatically switched off.
Fixing
The underwater light has to be fixed with 2 screws M6x40 to the suitable niche.
Note:
• Do not overtighten the screws as this can result in fixing plate or niche damage.
Connection
The power supply has to be connected through the main switch (not included) with correct polarity
and protected by a fuse (not included). The power supply voltage has to be 12-24Vdc.
Note:
• The power supply has to be switched off before installation.
Earthing
The underwater pool light has to be earthed by using a pre-tinned green wire with a yellow stripe a
minimum of 8 AWG (8.36 mm2). The wire has to be connected to the rear side of suitable niche by
the help of prepared fixing screw M6 signed by earthing label.
Page 6

6
The underwater light has to be connected as described in the table below:
METEOR XP
wire color
FUNCTION
Red+Yellow+White
+ DC Power Supply
Black+Blue+Green
GND Power Supply
Orange
+ Control
Brown
GND Control
Remote control connection
Single-color cool white (W), warm white (WW), blue (B), green (G) or red (R) models
To remotely turn-on and turn-off the underwater pool light the simple switch (not included) can be
used and connected to the CONTROL wires by a 2-pole signal cable (not included).
Note:
• If the remote control is not used at single-color models for normal operation the both
CONTROL wires have to be bridged and insulated or connected to the GND.
Multi-color (RGB, RGBW) models
To control the mode of lighting the simple key-switch (not included) has to be used and connected to
the CONTROL wires by the 2-pole signal cable (not included).
Page 7

7
CONTROLS
METEOR XP
Sequence of lighting
Custom Color
Full RGB / RGBW
Neutral White
White
Red
Green
Blue
White Color Spectrum
Custom White Color
(Rainbow) Color Spectrum
Single-color cool white (W), warm white (WW), blue (B), green (G) or red (R) models
Remote control can be used to turn-on and turn-off the underwater pool light and to control the
luminosity.
Dimming
The dimming are enabled by using optional PWM dimmer LDU13.
DMX512 control
The network connection to control the lights with the standard DMX512 protocol is enabled by using
optional PWM dimmer LDU13 and optional LXU01 interface.
Multi-color (RGB, RGBW) models
Remote control has to be used to turn-on and turn-off the underwater pool light and to control the
mode of lighting and luminosity.
The multi-color underwater pool light can be controlled by using the momentary-switch.
When the light is turned-off the color or mode of lighting can be changed sequentially by pressing
the momentary switch for 2 seconds:
Turning on /off
Press the momentary switch shortly.
Changing the color or mode of lighting
When the light is turned-off press the momentary switch for 2 seconds.
Setting the Custom White Color
At the selected White Color Spectrum mode press the momentary switch shortly to turn the light off.
After that press the momentary switch for 5 seconds or until the light is switched to the selected white
color and then the White Color is set and selected.
Setting the Custom Color
At the selected (Rainbow) Color Spectrum mode press the momentary switch shortly to turn the light
off. After that press the momentary switch for 5 seconds or until the light is switched to the selected
color and then the Custom Color is set and selected.
Dimming
When the light is turned-on press the momentary switch until the desired illumination is achieved. By
another pressing of the momentary switch the luminosity will increase to the maximum illumination.
Page 8

8
Set default
Press the momentary switch for min. 40 seconds or until the light is turned off.
Synchronization
When more than one multi-color underwater light is connected to the system the optional
Synchronization Unit LSU08 is recommended to synchronize the colors of lighting at the Rainbow
Color Spectrum mode of lighting. On the other case the colors of all installed lights would not be the
same after few minutes or hours of operation in the (Rainbow) Color Spectrum mode.
If the multi-color light is used only with one of the fixed color of lighting the synchronization is not
necessary.
DMX512 control
The built-in ASTEL protocol enables the network connection to control the lights with the standard
DMX512 protocol by using optional LXU01 interface.
Page 9
9
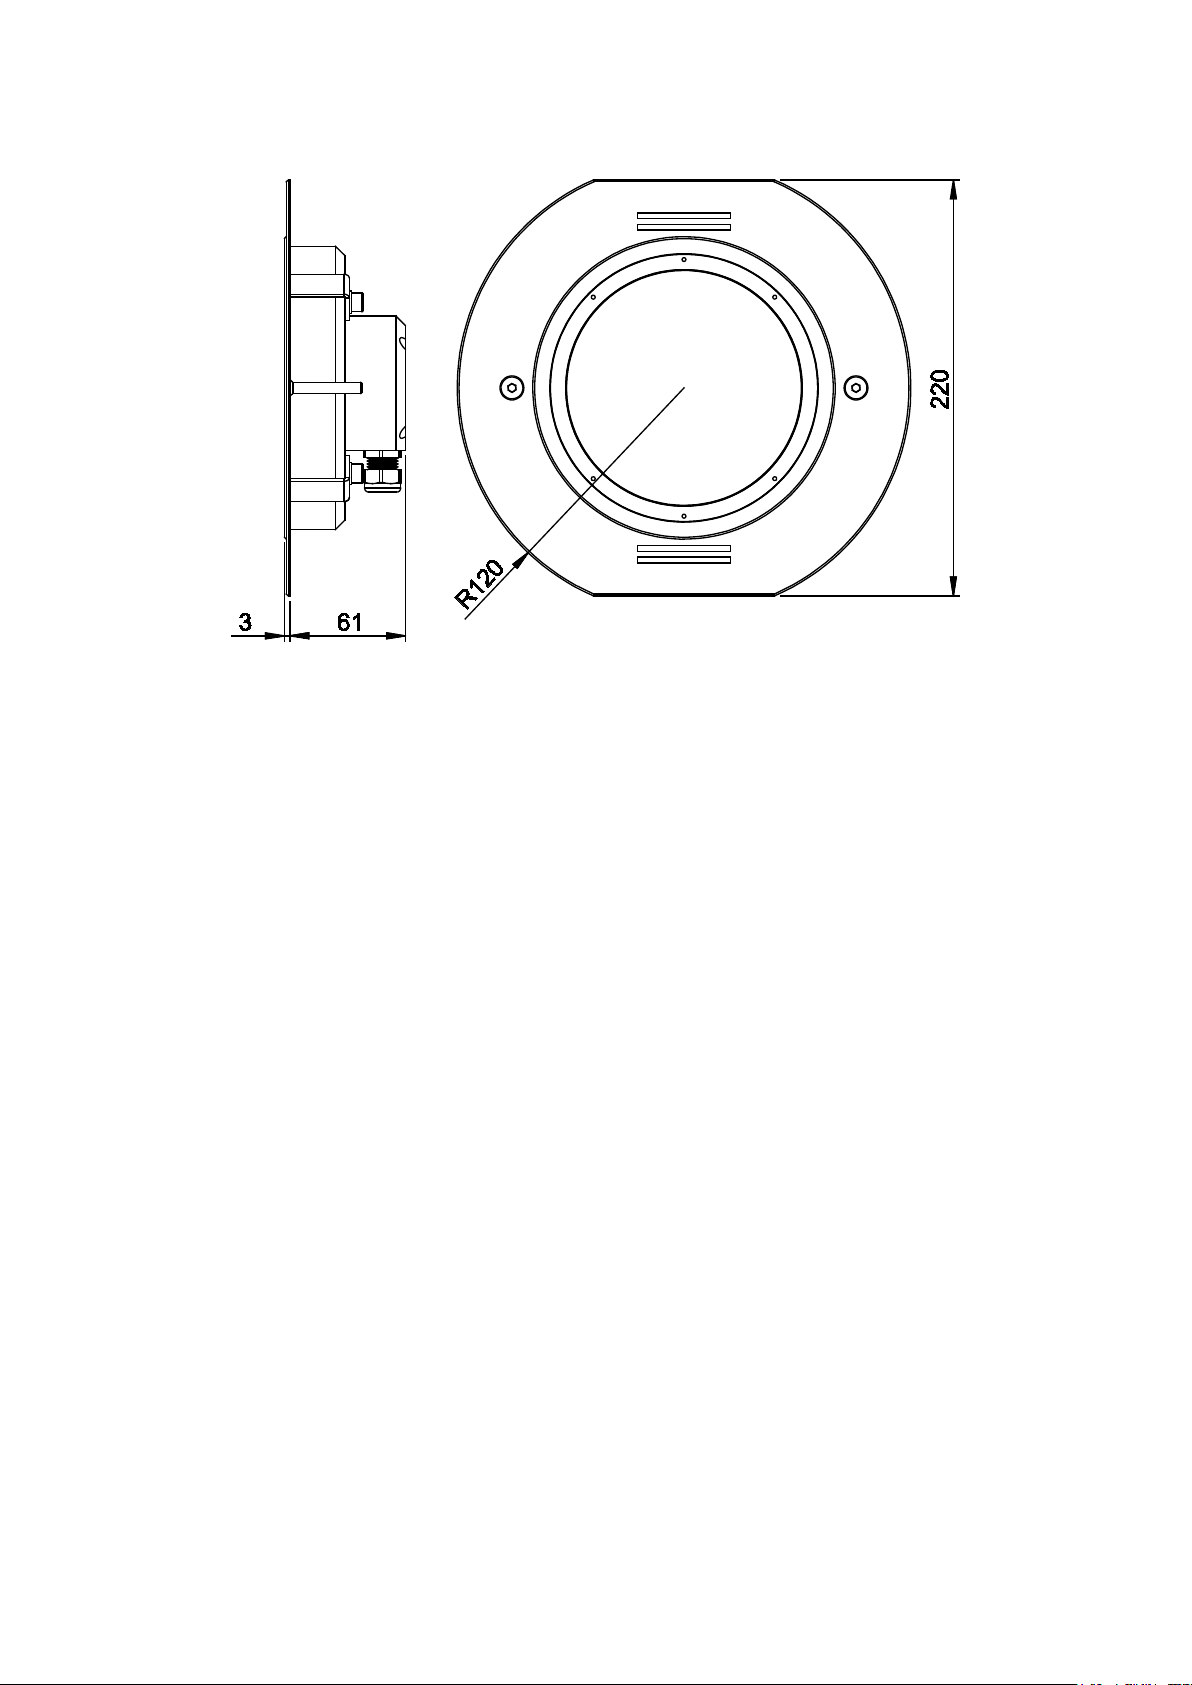
APPEARANCE
TECHNICAL SPECIFICATIONS
Power supply 12-24 Vdc, max. 9.7 A/12 Vdc or 4.6 A/24 Vdc
Beam angle 35° (standard)
Optical window Tempered glass 8 mm
Luminous flux max. 10.000 lm (cool white) (LFR3210)
max. 15.000 lm (cool white) (LFR3215)
White color temperature 6.000 K
Operating temperature -10°C - +50°C
Casing Stainless steel (316L)
Protection IP 68
Dimensions Ø240 x 220 X 64 mm
Weight 4.3 kg
Design and specifications subject to change without notice.
Page 10

10
WARRANTY
1. The equipment manufactured by ASTEL d.o.o. is warranted to be free from defects in
workmanship and materials under normal use and service.
2. This Warranty is in effect for of two years from the date of purchase by the user. Proof of purchase
must be included, to establish that it is inside the warranty period.
3. This Warranty is transferrable and covers the product for the specified time period.
4. In case any part od the equipment proves to be defective, other than those parts excluded in
paragraph 5 below, the owner should do the following:
(a) prepare a detailed written statement of the nature and circumstances of the defect, to the best
of the Owner’s knowledge, including the date of purchase, the place of purchase, the name and
adress of the installer, and the Purchaser’s name, adress and telephone number;
(b) the Owner should return the defective part or unit along with the statement referenced in the
preceding paragraph to the warrantor, ASTEL d.o.o., or an authorized distributor,
postage/shipping prepaid and at the expense of the Purchaser;
(c) if upon the Warrantor’s or authorized distributor’s examination, the defect is determined to
result from defective material or workmanship, the equipment will be repaired or replaced at the
Warrantor’s option without charge, and returned to the Purchaser at the Warrantor’s expense;
(d) no refund of the purchase price will be granted to the Purchaser, unless the Warrantor is
unable to remedy the defect after having a reasonable number of opportunities to do so. Prior
to refund of the purchase price, Purchaser must submit a statement in writing from a
professional supplier that the installation instructions of the Operating Instructions manual have
been complied with and that the defect remains;
(e) warranty service shall be performed only by the Warrantor, or an authorized distributor, and
any attempt to remedy the defect by anyone else shall render this warranty void.
5. There shall be no warranty for defects or damages coused by faulty installation or hook-up, abuse
or misuse of the equipment including exposure to excessive heat, salt or fresh water spray, or
water immersion except for equipment specially designed as waterproof.
6. There shall be no responsibility or liability whatsoever on the part of the Warrantor or its
employees and representatives for injury to any person or persons, or damage to property, loss of
income or profit, or any other consequential or resulting damage or cost which may be claimed to
have been incurred through the use or sale of the equipment, including any possible failure or
malfunction of the equipment, or part thereof.
Page 11

11
DECLARATION OF CONFORMITY
according to IEC Guide 22 and EN 45014
Manufacturer's Name: ASTEL, Podjetje za projektiranje, proizvodnjo in
trgovino, d.o.o.
Manufacturer's Address: Dutovlje 138
6221 Dutovlje Slovenija
declares that the products
Item, Product Name and Model Number: 1. Underwater Pool Light METEOR XP
conform to the following Product Specifications:
EMC: EN 55015:2006 + A1:2007
EN 61547:1995 + A1:2000 + A2:2009
EN 61547:2009
Safety: EN 60598-2-18:1995/A1:2012
EN 60529:1992+A2:2013
Supplementary Information:
The products herewith comply with the requirements of the following Directives and carry the CEmarking accordingly:
-the Low Voltage Directive 2014/35/EU
-the EMC Directive 2014/30/EU
-the RoHS Directive (EU)2015/863
ASTEL d.o.o.
Dutovlje 138
6221 Dutovlje
Slovenija
18th February, 2018
Page 12

12
ASTEL d.o.o., Dutovlje 138, 6221 Dutovlje, Slovenia
Tel: +386 5 7310771, +386 5 7310772
Fax:+386 5 7310789
E-mail:
Web: www.astel-lighting.com
info@astel-lighting.com
 Loading...