

Page 1
H.264 WIRELESS NETWORK CAMERA
IP700
Advanced User Guide
Setup and
Page 2

N E TWOR KIN G A N D S U R V E ILL A N C E P R O D U C T S
Setup and Advanced User Guide
Astak, Inc.
1911 Hartog Drive
San Jose, CA 95131
Tel : (408) 453-1188 Fax : (408) 453-1388
Page 3

Table of Contents
Getting familiar with your new ASTAK product......................... 1
Packing list...................................................................................... 2
System Overview............................................................................ 2
Usage Suggestions......................................................................... 2
Product Certifications...................................................................... 3
Warning........................................................................................... 3
Care and Maintenance.................................................................... 3
Setting up your ASTAK network camera..................................4
Register your camera......................................................................5
Register and configure your camera............................................... 5
Configuring for Wireless Networks.................................................. 6
Logging in to your camera............................................................... 7
Accessing your camera.......................................................... 11
Internet Explorer ........................................................................... 12
Accessing through the Yoics desktop ........................................... 12
Access by local IP......................................................................... 12
Using your camera.................................................................14
Home ............................................................................................ 14
View size .............................................................................................15
SD Card...............................................................................................15
Capture................................................................................................15
Record.................................................................................................15
Playback..............................................................................................16
Camera controls ..................................................................................16
Audio controls......................................................................................17
Media............................................................................................17
Image settings .....................................................................................18
Video settings......................................................................................19
Advanced......................................................................................20
Network ...............................................................................................20
Remote Access....................................................................................21
Page 4

DDNS Settings.....................................................................................22
User.....................................................................................................23
Email ...................................................................................................23
Alarm...................................................................................................24
Schedule .............................................................................................25
Motion Detection..................................................................................26
FTP .....................................................................................................27
Auto Capture .......................................................................................27
System Tab .........................................................................................28
Time Settings.......................................................................................28
Initialize ...............................................................................................29
Device Information...............................................................................30
Page 5
G E N E R A L O V E R V I E W
Chapter
1
T
Getting familiar with your
new ASTAK product
This section will familiarize you with your new ASTAK product,
to ensure easy setup and usage of your wireless network camera.
hank you for purchasing this ASTAK product. This manual will explain how
to use your new camera and will provide installation and operation
instructions. Please read this manual carefully before operating your product
and please save this manual for future reference.
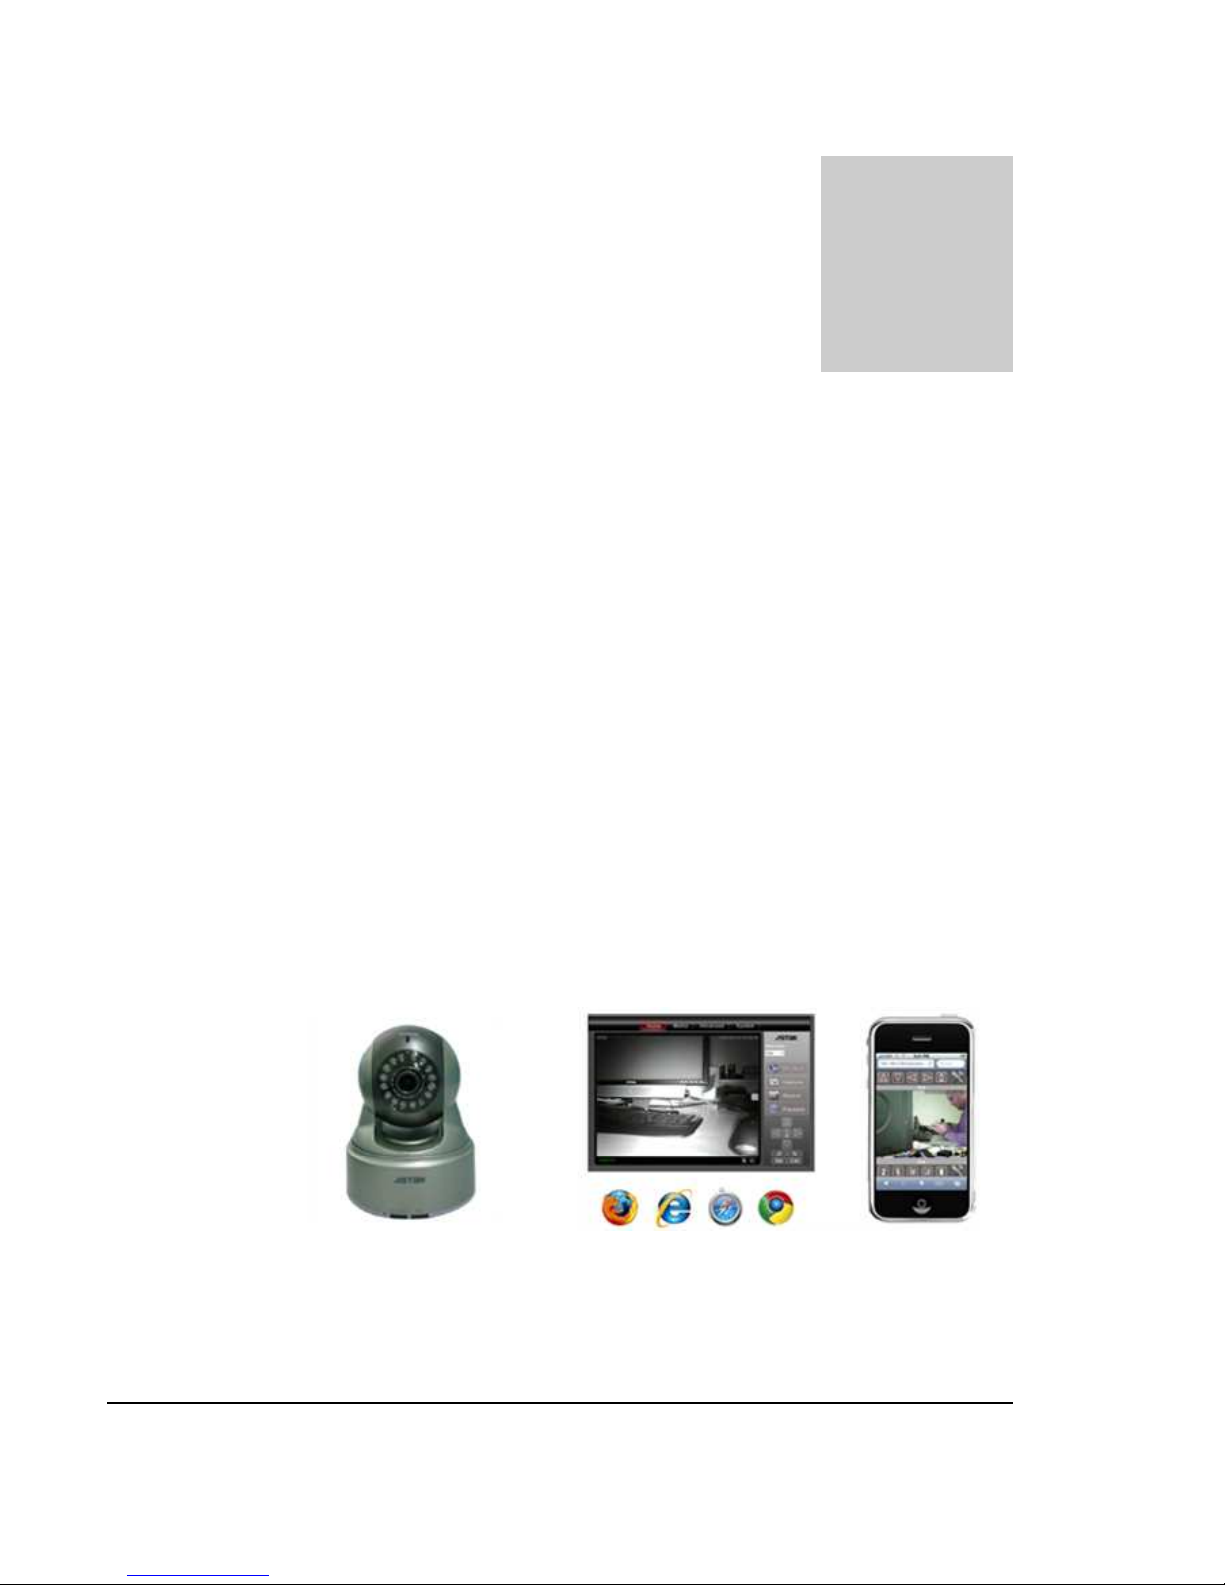
The IP-700 Network Camera is a web-based camera, which does not need to be
connected to a computer to operate. It is an independent monitoring system with a
built-in CPU and webserver, which enables it to deliver high-quality images from any
location where you have either wired or wireless network connectivity. You can
monitor and remotely control the IP-700 Network Camera from any internet
connected browser, even the one on your iPhone.
1
Page 6
G E N E R A L O V E R V I E W
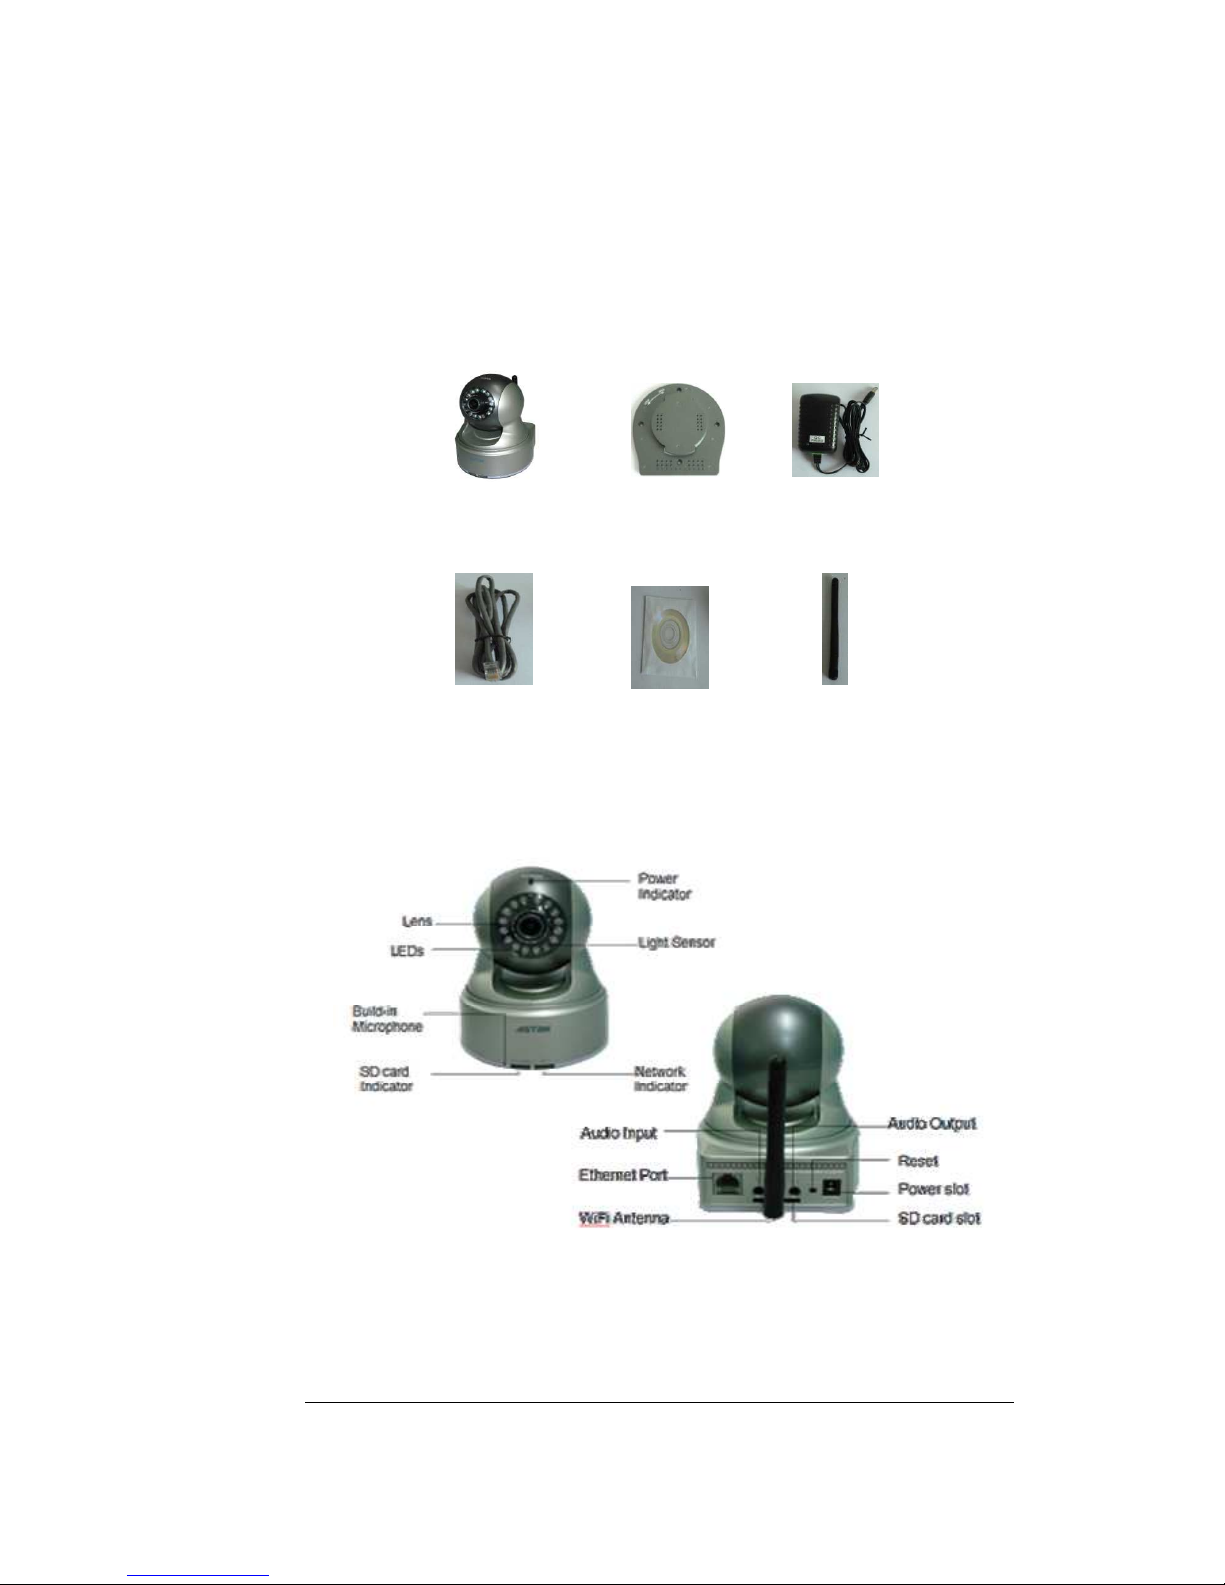
Packing list
In addition to this user guide and the Quick Setup guide, your package should include
the following six components. Before beginning setup, please check that all parts are
included. If any parts are missing, please contact your reseller or dealer.
Camera Mounting bracket AC adapter
Ethernet cable Software CD Wi-Fi Antenna
* Actual components may be slightly different from what is pictured above.
* The packaging is subject to change without notice.
System Overview
Usage Suggestions
At home: baby monitoring, family security;
At companies or offices: remote monitoring, anti-theft;
In public places: hotels, shops, railway stations, airports, etc.
2
Page 7

G E N E R A L O V E R V I E W
Product Certifications
This product complies with the radio frequency safety standards and recommendations
set by the FCC. This product is FCC & CE certified.
Warning
1. Do not use this product to invade others’ privacy or monitor others if they
have not agreed to be monitored.
2. Do not place this product near any medical equipment. The radio waves used
by this camera are likely to interfere with the performance of medical
equipment.
3. Do not use this product to do anything illegal. Illegal usage of this product
voids the warranty. Astak, Inc and Team Research, Inc will not assume any
responsibility for the illegal use of this camera.
Care and Maintenance
1. Keep this product in a ventilated place.
2. Do not strike or hit this product.
3. Do not put this product in very dry or dusty areas.
4. Do not put this product near magnetic objects.
5. Do not put this product in damp places nor places with large fluctuations in
temperature.
6. Keep this product away from heat sources, such as electric heaters.
7. Do not use this product next to strong corrosive chemicals.
8. Do not let this product come into contact with liquids or rain.
9. Do not use this product near metals or else the wireless signal will be affected.
10. Please follow your local government's environmental protection policies.
11. Please disconnect the power when not using this product for a long time.
12. Do not attempt to dismantle or repair this product because that will void the
warranty.
13. Keep packaging materials and camera away from babies and young children.
14. Do not plug the AC adapter into a power outlet if it is wet, or if your hand is
wet.
15. After usage, the AC adapter will heat up, so do not put it on heat-sensitive
surfaces.
3
Page 8
A U T O M A T I C C O N F I G U R A T I O N
Chapter
2
O
Setting up your ASTAK
network camera
This section will guide you through the initial setup of your
Network Camera.
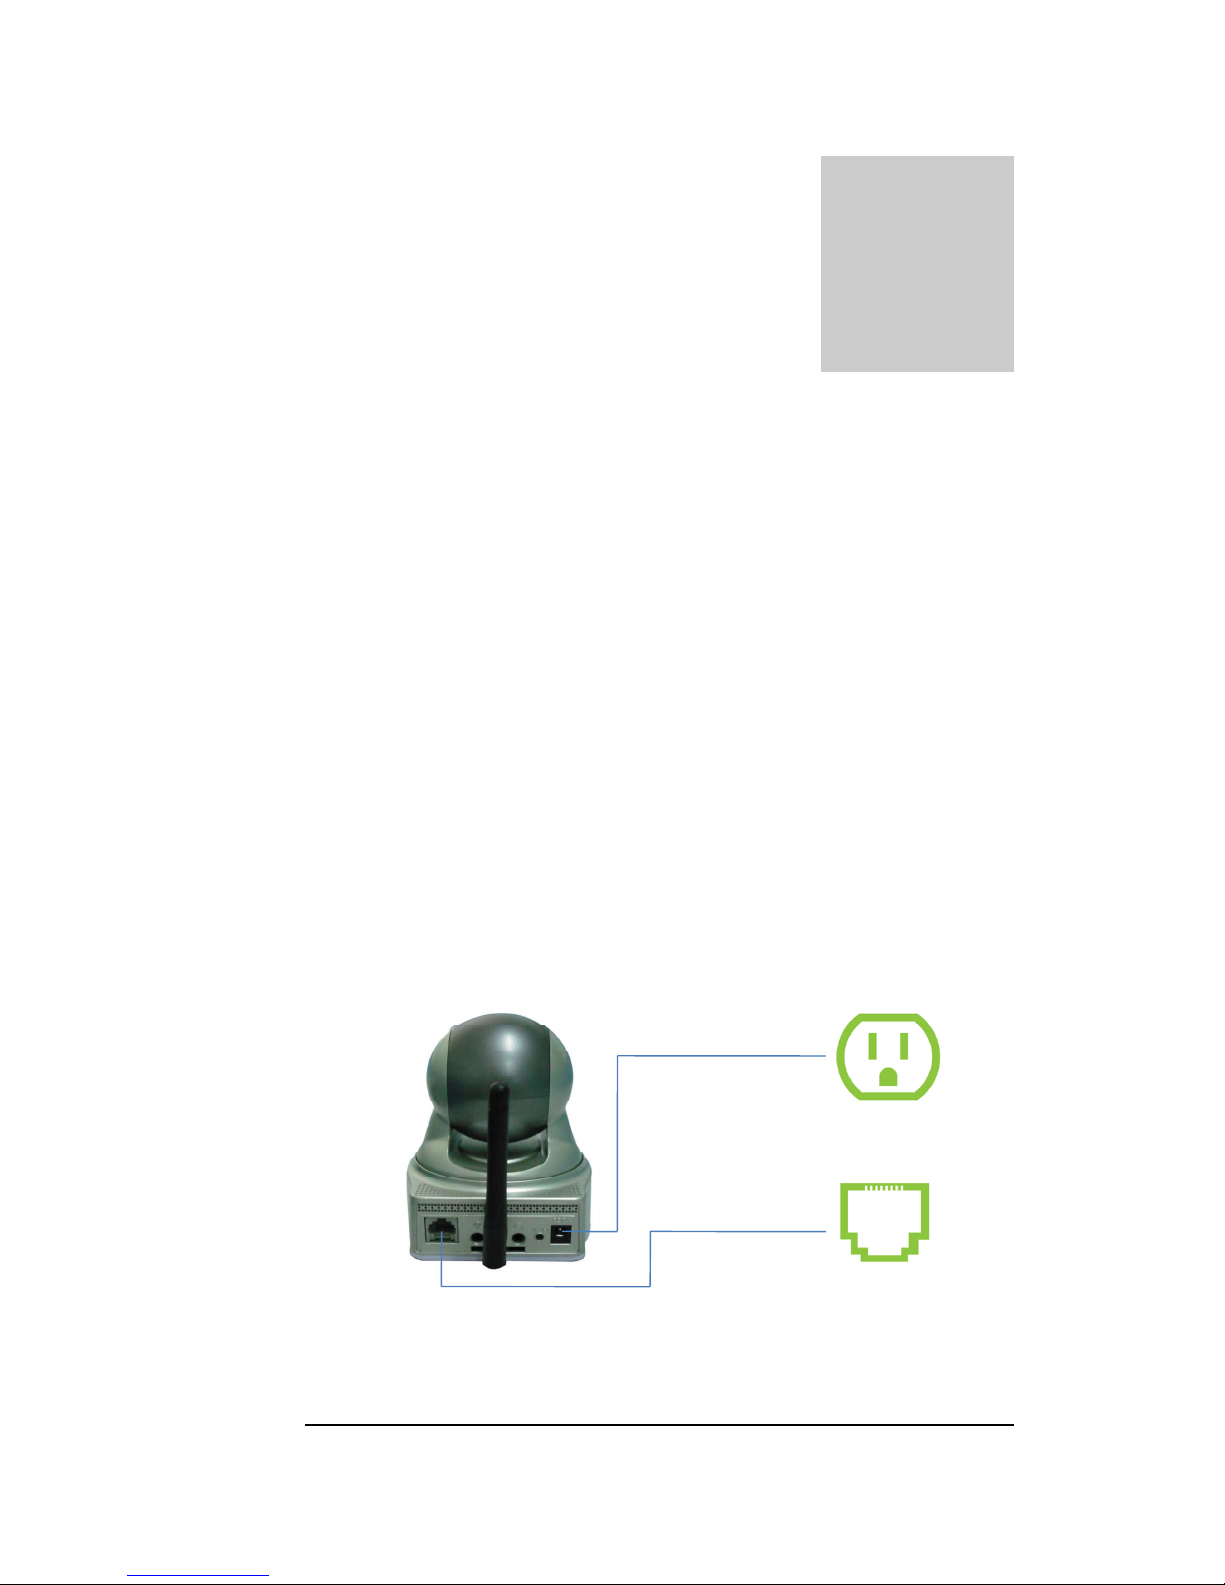
nce you’ve unpacked your camera and verified that all items on the packing
list were included in your package, take the following steps.
1. Connect the wireless antenna (WiFi version only)
2. Plug the Ethernet (network) cable into the camera and the other end into your
router.
3. Plug the AC power adapter into your camera, then into an 110V wall outlet.
AC Power
Network
(router)
4
Page 9
A U T O M A T I C C O N F I G U R A T I O N
Register your camera
Once you’ve connected your camera to your Internet connected network and to AC
power, you’re ready to register and auto-configure your camera. Your ASTAK camera
features Yoics, the easiest way to configure your network device.
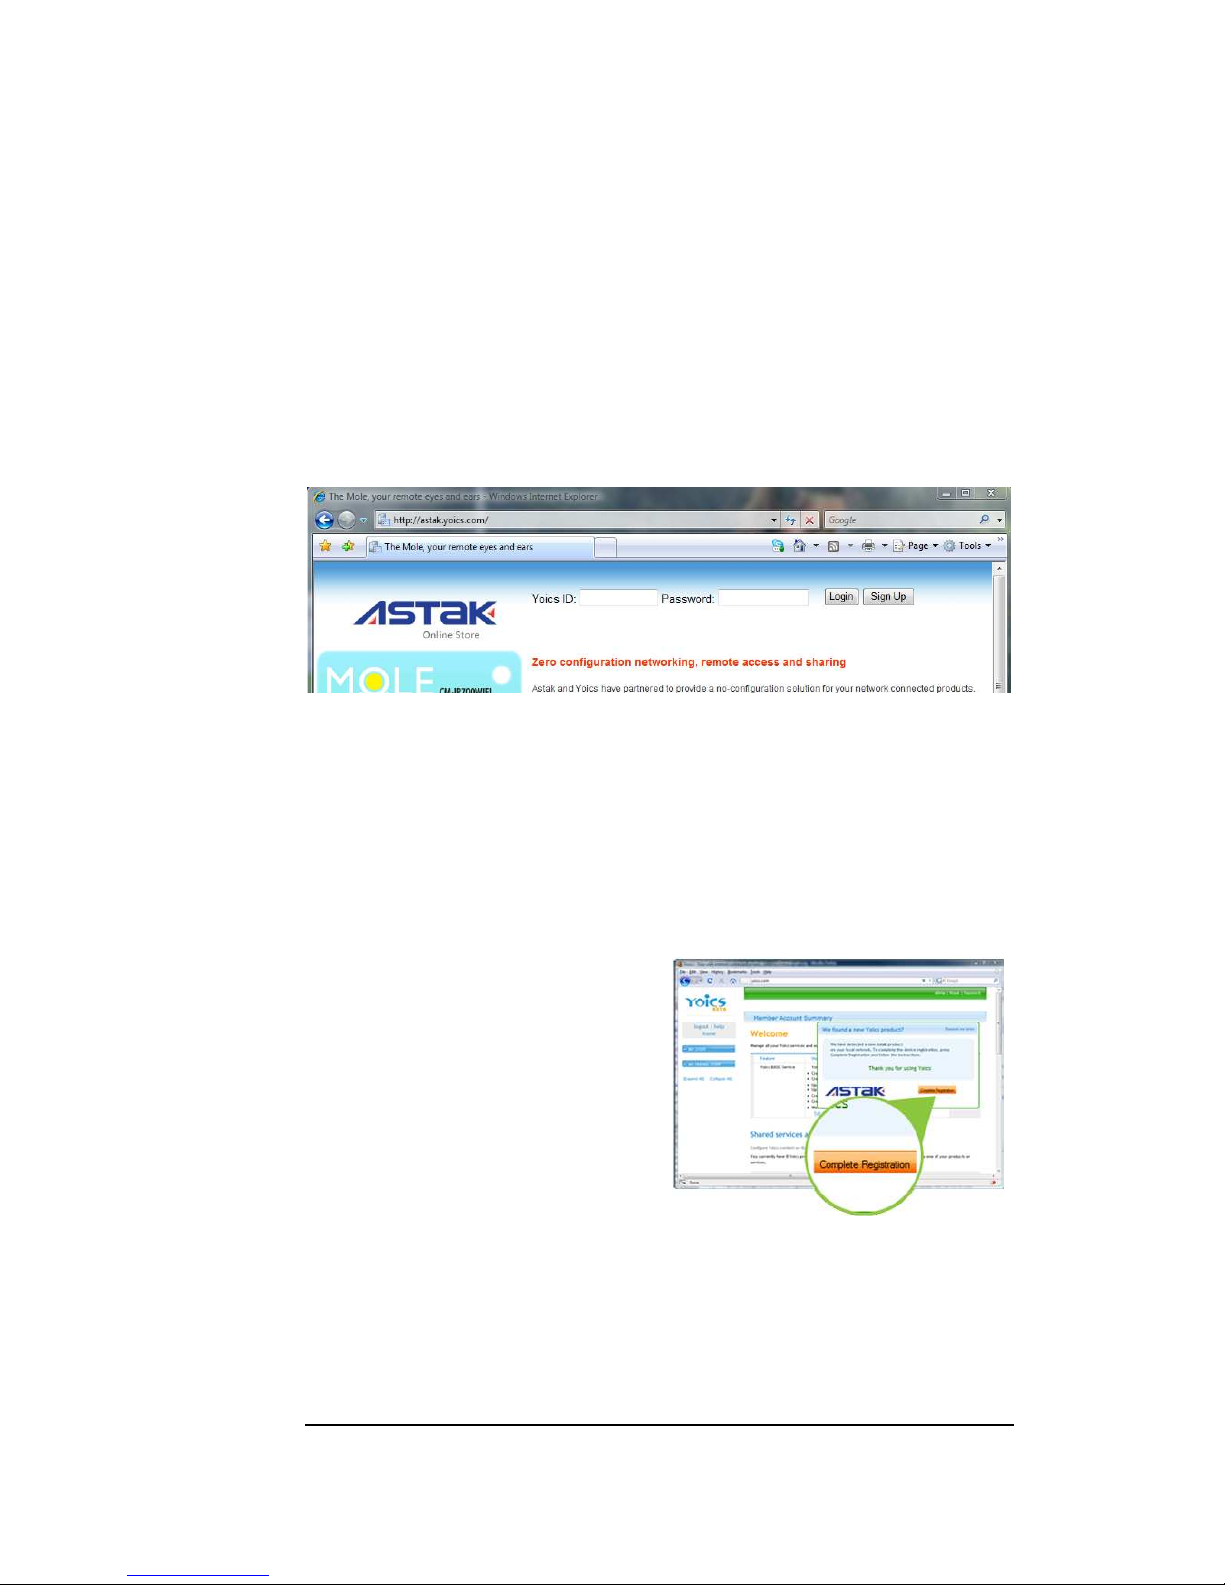
Go to your browser and visit http://astak.yoics.com
If you already have a Yoics account, simply enter your user name and password to
login. Otherwise select Sign Up to create a free account.
Register and configure your camera
Once you’ve logged in, you’ll be directed to the Yoics web interface. Yoics will
automatically detect your new ASTAK camera and you should see a pop-up window
asking if you want to register you new product. Just click Complete Registration.
Note: If the auto-detection pop-up
doesn’t come up, please log out and try
again in a couple of minutes. Depending
on your network connection, it may take
up to 5 minutes for your camera to be
detected.
5
Page 10
A U T O M A T I C C O N F I G U R A T I O N
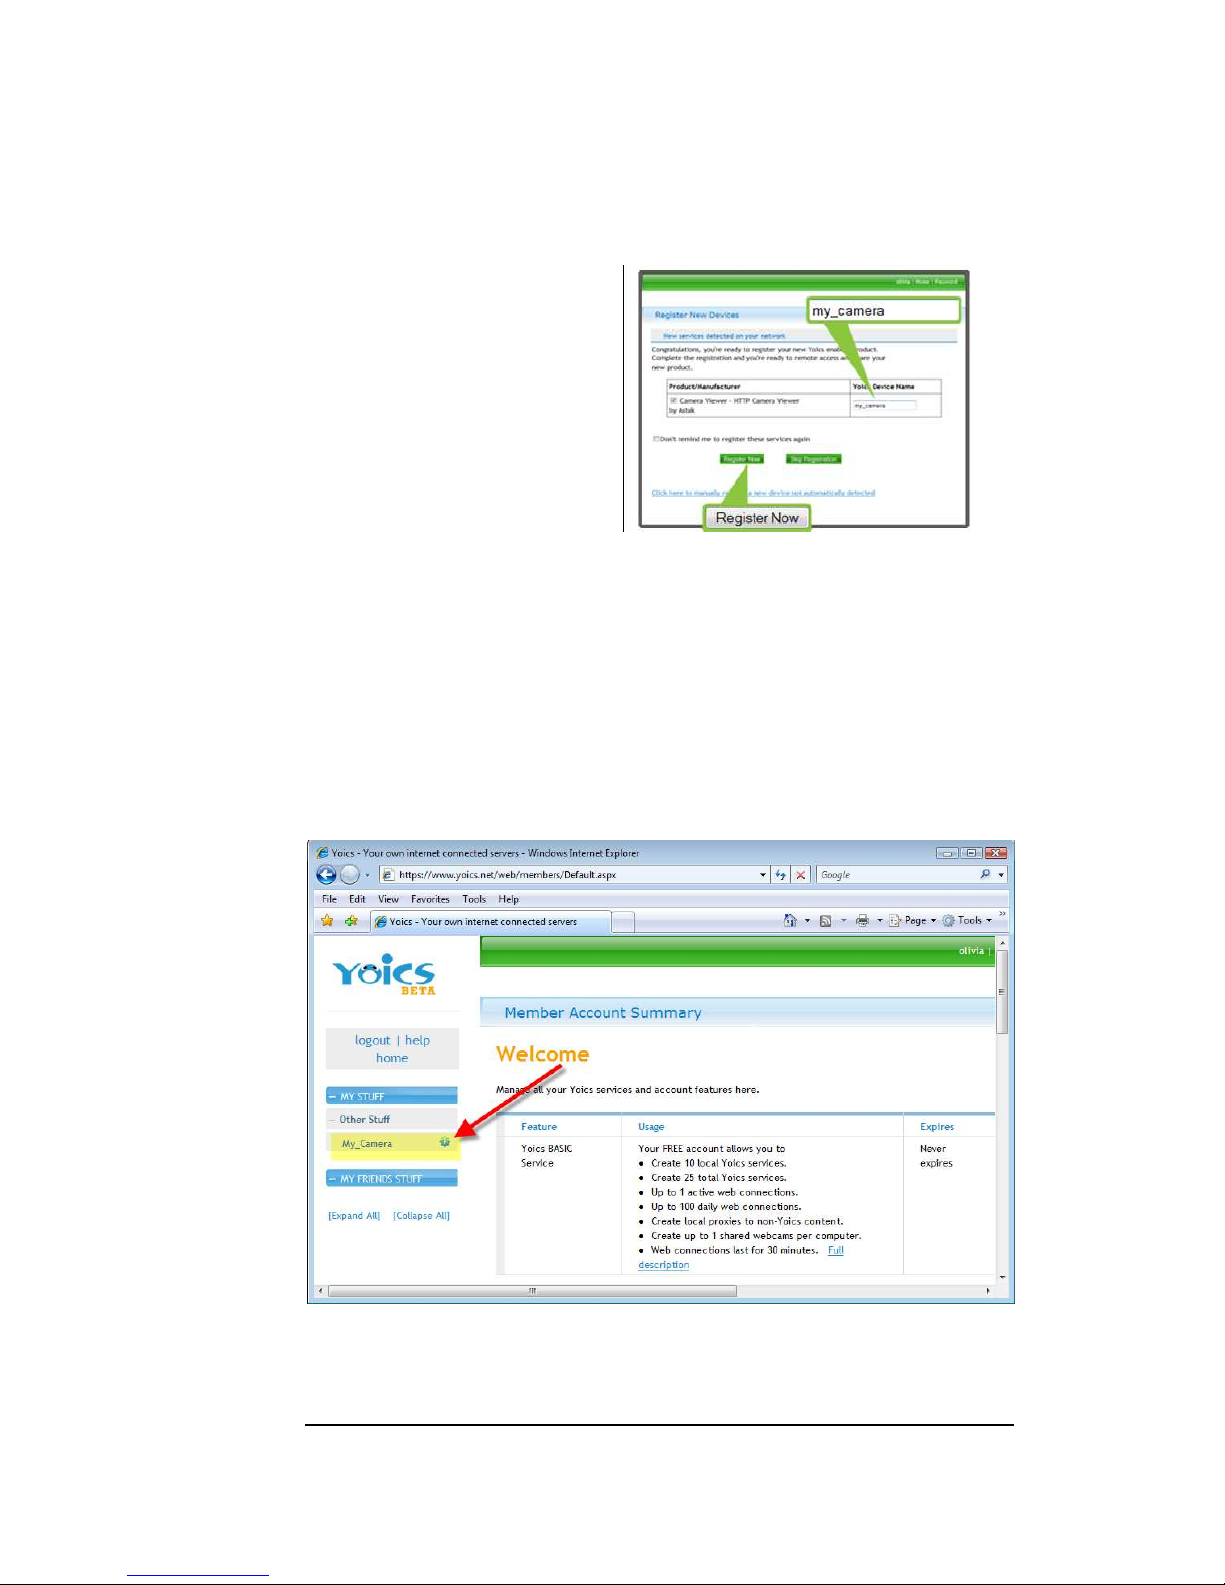
Once you clicked Complete
Registration you will be shown the
Register New Device Window. Simply
give your camera a name of your
choice.
That’s it. Your camera is now
registered and configured. Simply
login to yoics.com from any browser
to view your camera, see Chapter 3
for more information.
Configuring for Wireless Networks
If you have purchased the WiFi version of the ASTAK camera, the following
instructions detail how to configure your settings to configure your camera for your
network.
Once you’ve logged in to the Yoics web access screen, simply click on your camera’s
name.
6
Page 11
A U T O M A T I C C O N F I G U R A T I O N
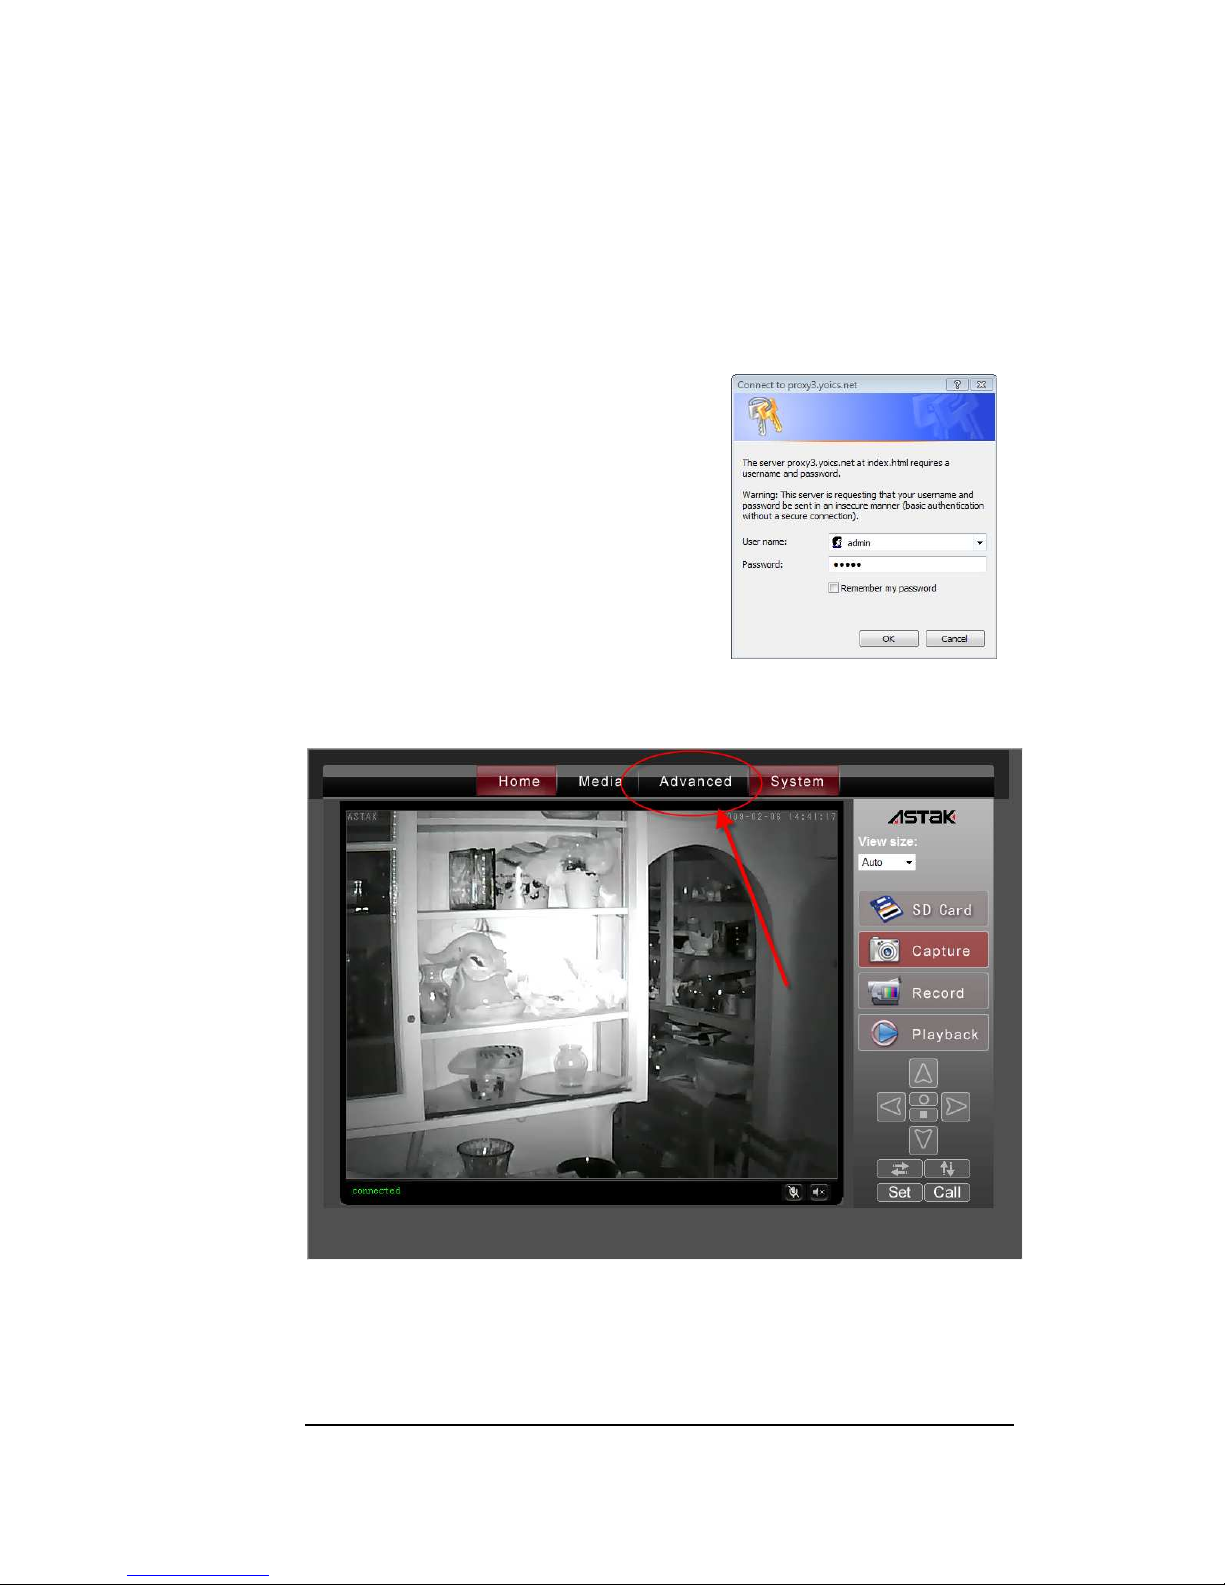
Logging in to your camera
Clicking on the name will bring up your camera.
Since this is the first time that you’re accessing
your camera, you will get a login screen. The
default values are:
User name: admin
Password: admin
Once your camera interface comes up, select the Advanced tab.
7
Page 12

A U T O M A T I C C O N F I G U R A T I O N
Scroll down to Wireless Settings and click on Search
Selecting Search will detect all of the wireless networks that it finds in range. Simply
select your preferred network.
8
Page 13

A U T O M A T I C C O N F I G U R A T I O N
Selecting the network will automatically populate the necessary settings for your
configuration. Simply enter your pass-key (the password for your wireless network)
and select Apply.
Note: It is recommended that
you verify your wireless connection
settings are correct. You can do
this by selecting the Check button.
Once you’ve completed the above steps, simply unplug the Ethernet (network) cable
and reboot (unplug and re-plug the power connector to) your camera, then your
wireless network will connect.
Once the network has connected, the LED on the front of the camera will turn blue to
let you know that it has connected successfully.
9
Page 14

A U T O M A T I C C O N F I G U R A T I O N
Network indicator LED
To revert to Ethernet mode, unplug the power from your camera, plug in an Ethernet
cable, and plug the power to the camera back in.
10
Page 15
A C C E S S I N G Y O U R C A M E R A
Chapter
3
O
Accessing your camera
This section will show you how you can access your camera.
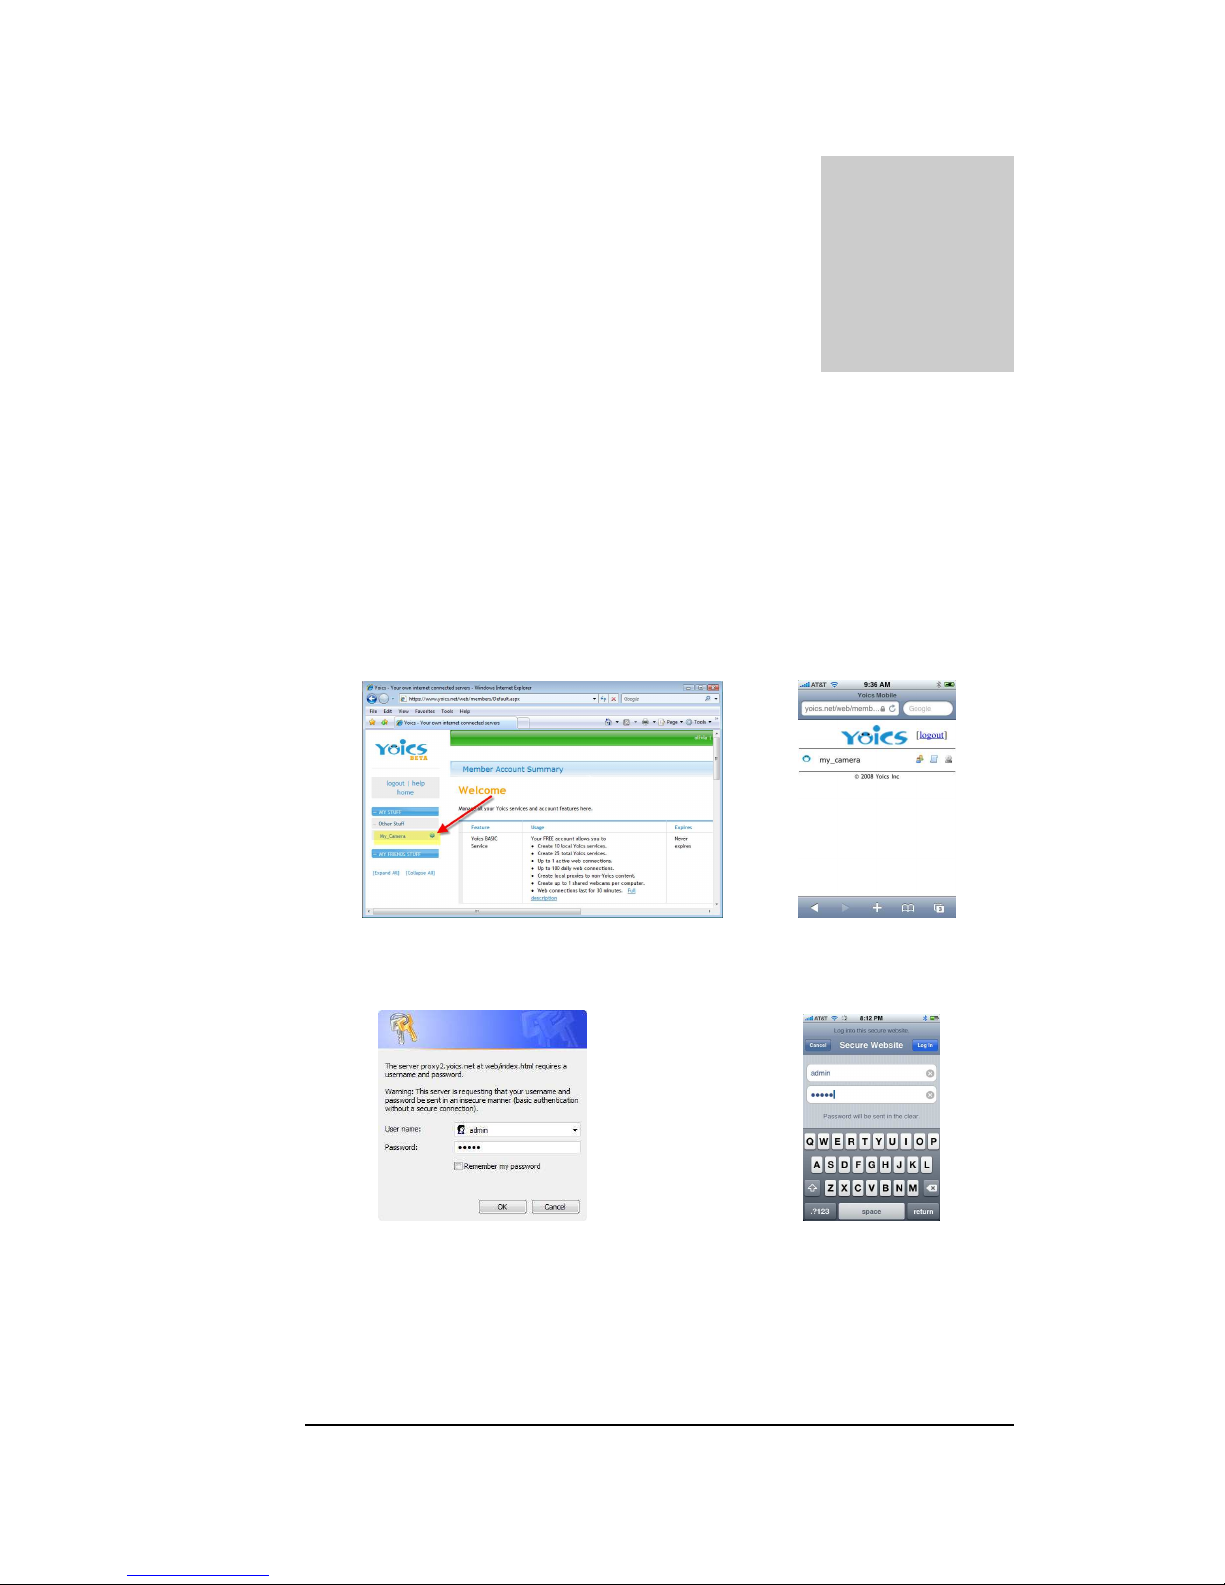
nce you have configured your camera there are many different configuration
options available to you. To access your camera, simply login to yoics.com,
and click on your camera to bring your camera up in your browser.
When you select your camera, you will be asked for a user name and password. The
default values are: username: admin, password: admin
11
Page 16
A C C E S S I N G Y O U R C A M E R A
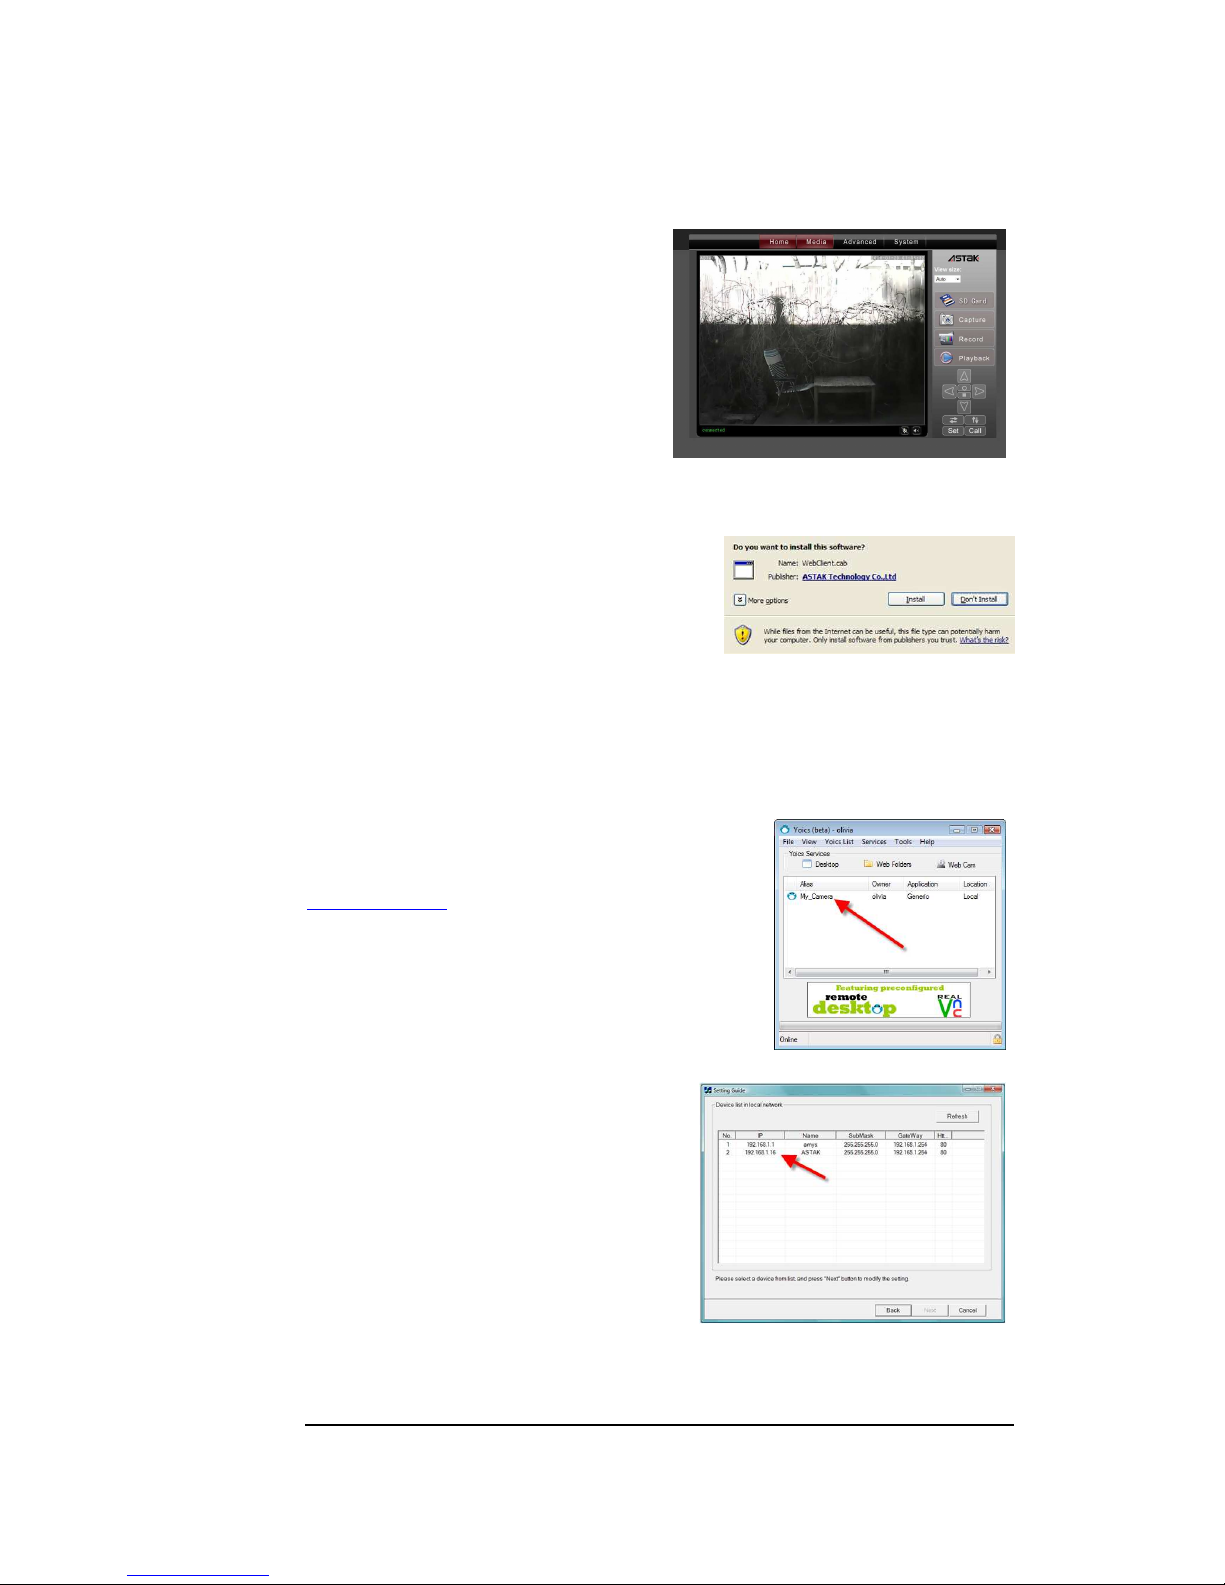
That’s it; once you login you’ll be able to
see your camera.
Internet Explorer
If you are using Microsoft’s Internet Explorer
browser, the first time that you view your camera
you will be prompted to install some additional
software. This software allows a greater viewing
experience by allowing stream feed, simply select
install to add this to your browser.
Note: You will need to repeat this process for each browser/computer that you
use to access this camera.
Accessing through the Yoics desktop
An alternative to using the Yoics web-site to access
your camera is to use the Yoics desktop software. The
software is available for free download at
http://yoics.com. Once installed, simply login using
your same credentials as for web-access and double
click on your camera’s name.
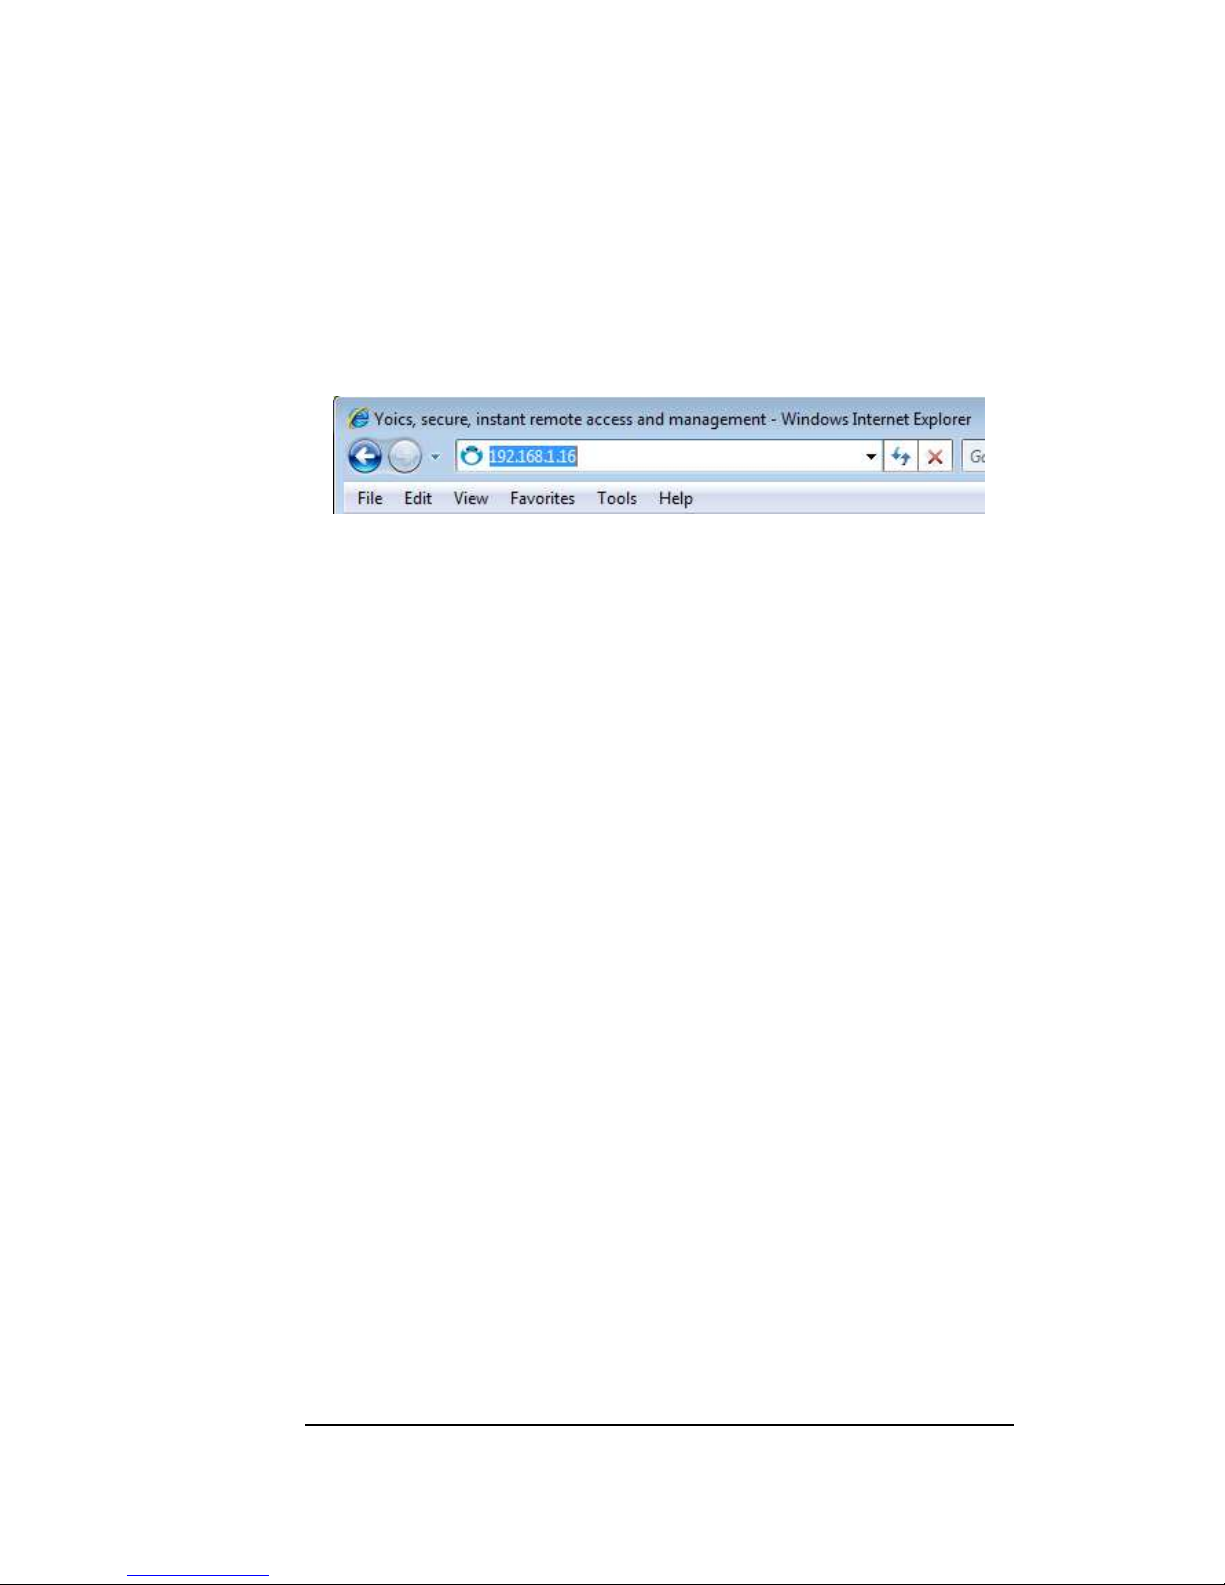
Access by local IP
If you are an advanced network user and
would like to access your camera by your local
IP (Internet Protocol) address, you can do so
using the following steps.
First insert the CD which came with your
camera and run the program called
CamSearcher. This program will discover
your camera on your network and let you
know its IP address.
12
Page 17
A C C E S S I N G Y O U R C A M E R A
If there is no DHCP server connected to your camera on your network, the default IP
address is 192.168.1.88.
Simply type this IP address into your browser to access the camera directly.
Note: Accessing by local IP address will ONLY work when you are on the same network
(e.g. same location) as the camera. For information on how to access your camera
remotely by IP address, see Remote Access in Chapter 4.
13
Page 18
M A N U A L C O N F I G U R A T I O N
Ch
apter
4
I
Using your camera
This section will guide you through the various menus of your
camera.
n addition to showing you the view, there are many configuration options with
your camera. This section will walk you through the various menus and submenus available to you.
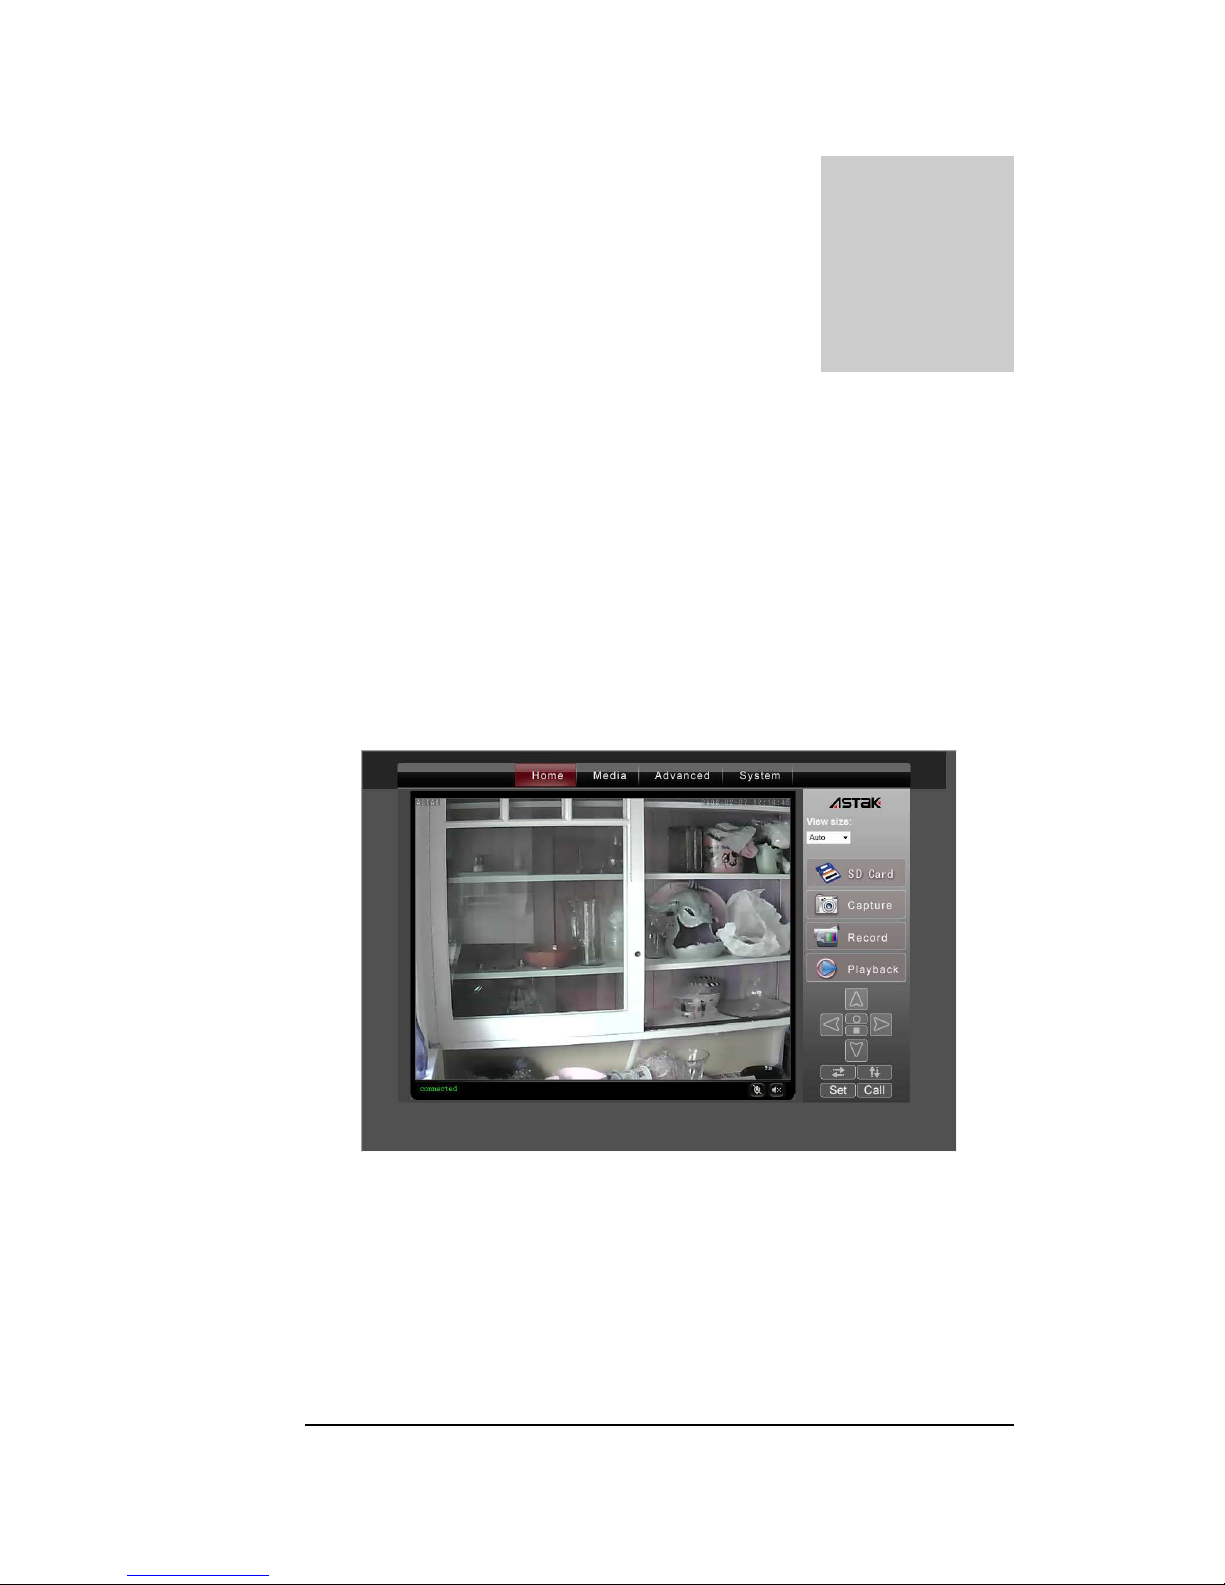
Home
The Home tab is the main view and shows you your camera and provides you access
to a variety of controls for your camera.
14
Page 19
M A N U A L C O N F I G U R A T I O N
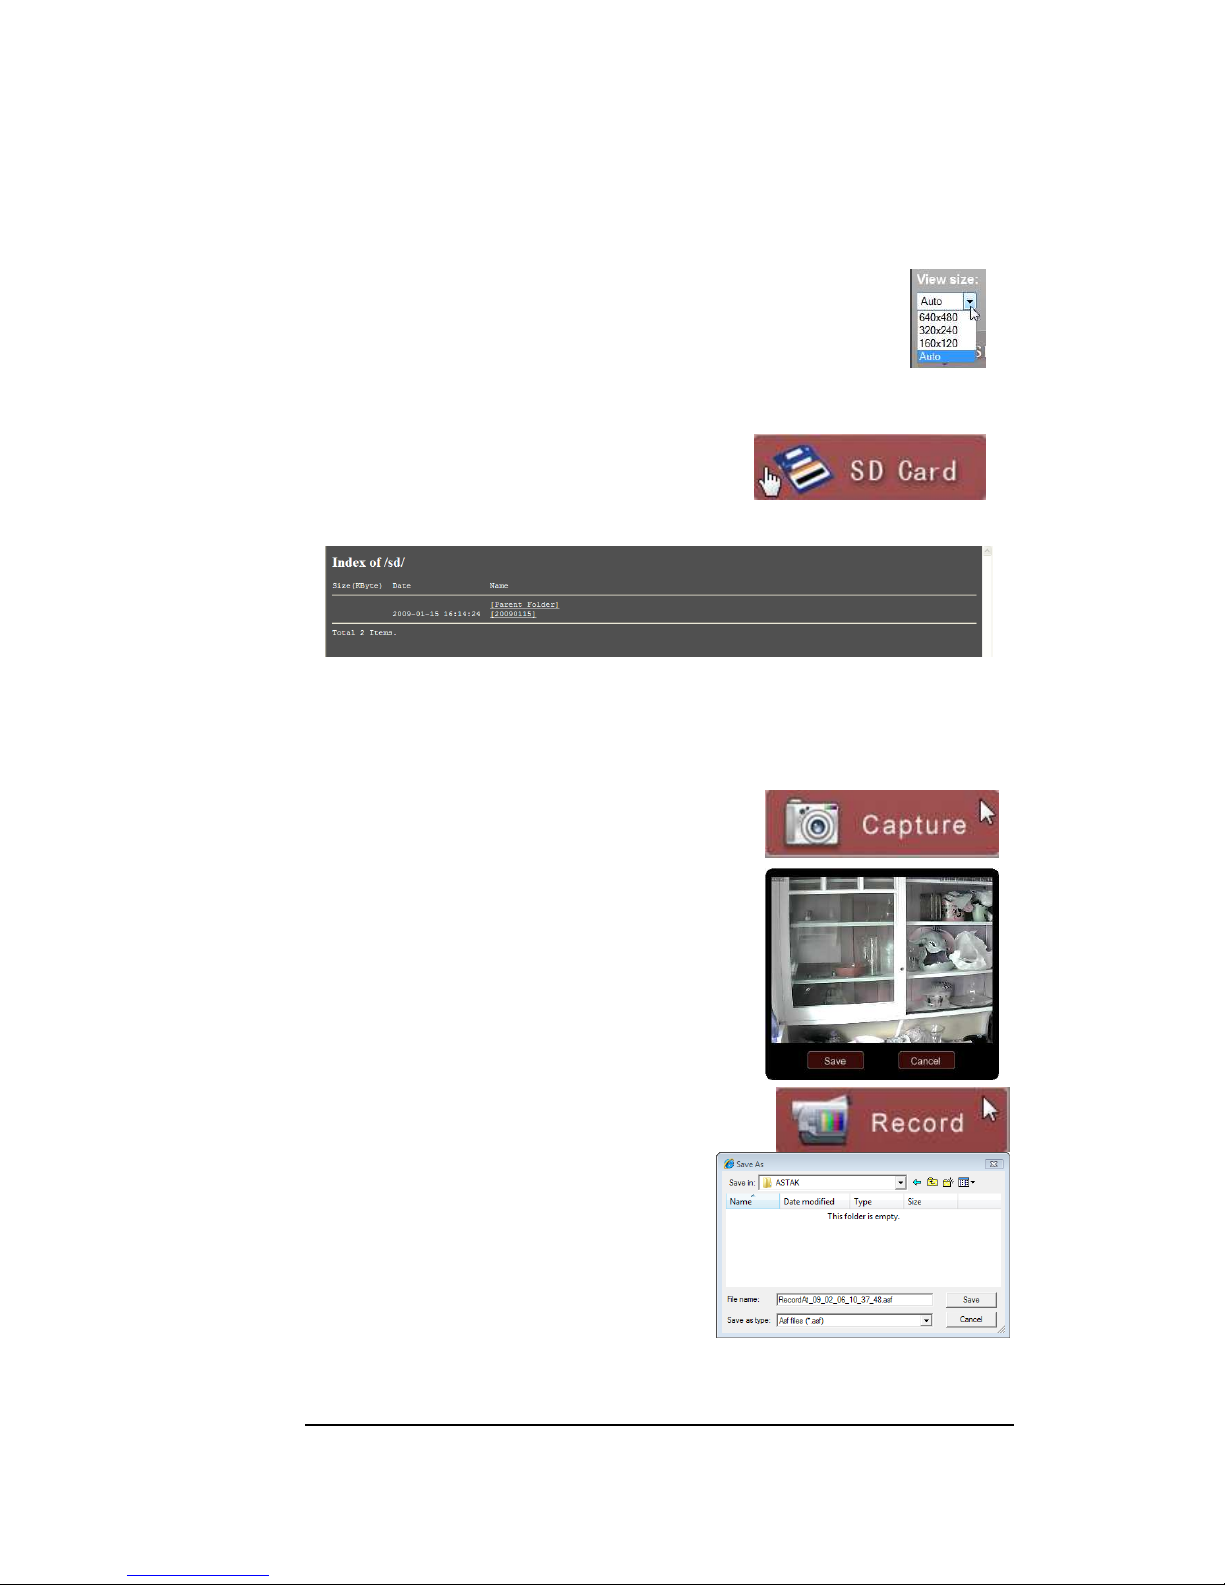
View size
View size allows you to select the default screen resolution that you see
you camera. Auto is the default and is recommended. Lowering image
size may be recommended in slow network situations, where
performance may be an issue at higher resolutions.
SD Card
Selecting the SD card will take you to the camera’s
built in DVR, where all of the videos and images are
stored. This feature is only available if you have
installed an SD memory card into the camera.
Simply select on any folder, then select any link to view any photos or videos that are
stored in your camera.
Capture
Select capture to take a picture of the current view. A
popup of the image will be displayed and give you the
option to save the image on your computer.
Record
The record function allows you to record a video
stream to the computer that you are viewing the camera
from. Upon selecting the button, you will be
prompted to give the video file a name, then
select Save to start recording. Simply hit Record
again to stop the recording.
15
Page 20
M A N U A L C O N F I G U R A T I O N
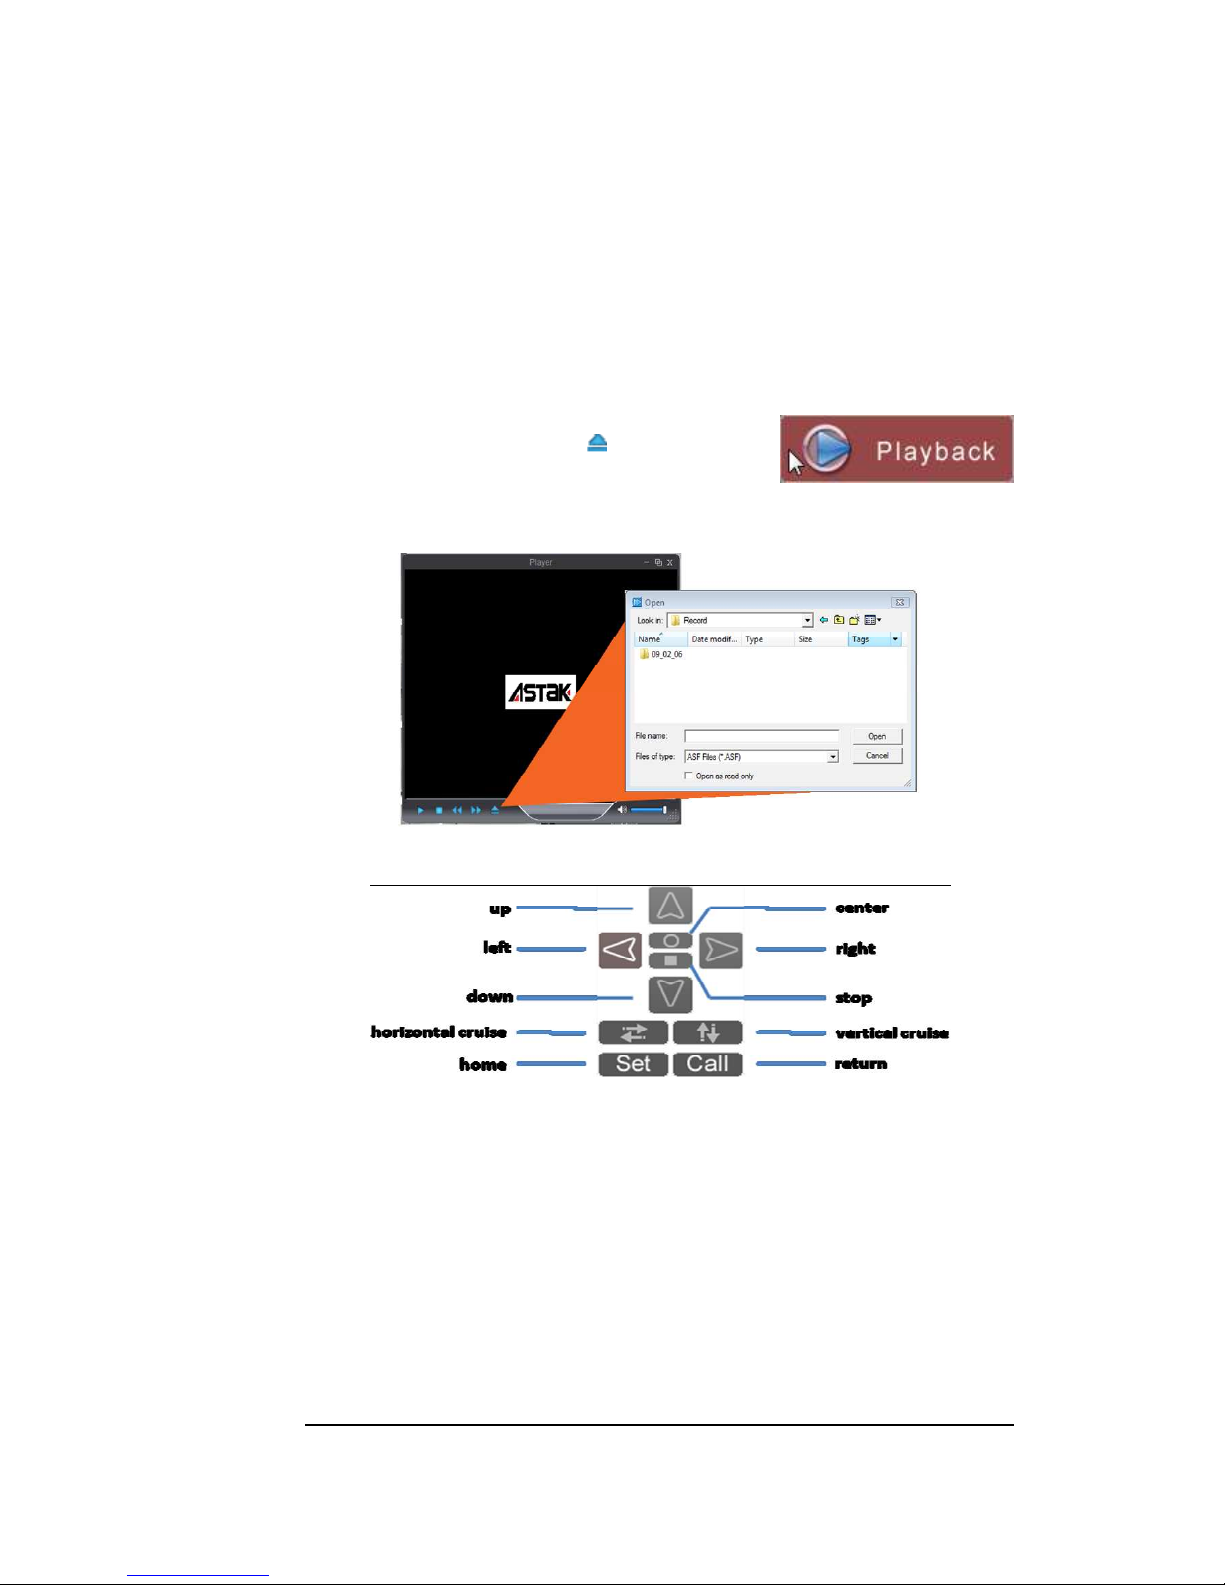
Playback
Playback allows you to view the recorded footage on
your computer. Simply select the button to bring up
a file listing of your recorded files. Note this feature will
play the footage stored on the computer that you are
currently watching from.
Camera controls
up | down | right | left: Controls the pan and tilt of the camera
center: Moves the camera to center from wherever it is.
stop: Stops the camera from moving (used in conjunction with cruise)
horizontal cruise: Makes the camera pan from left to right
vertical cruise: Makes the camera automatically tilt up and down.
set: defines a home position from the camera.
call: returns the camera to the set position.
16
Page 21
M A N U A L C O N F I G U R A T I O N
Audio controls
Your ASTAK is capable of two-way audio functionality. Connecting a
speaker to your camera, allows you to speak from wherever you are,
provided you have a microphone on the computer that you are watching from. To
turn this feature on, simply select the microphone (left above).
The camera features both an on-board microphone as well as a jack for an external
microphone. When you view your camera, you are able to listen to these microphones.
Click on the speaker icon (right above) to turn the audio on.
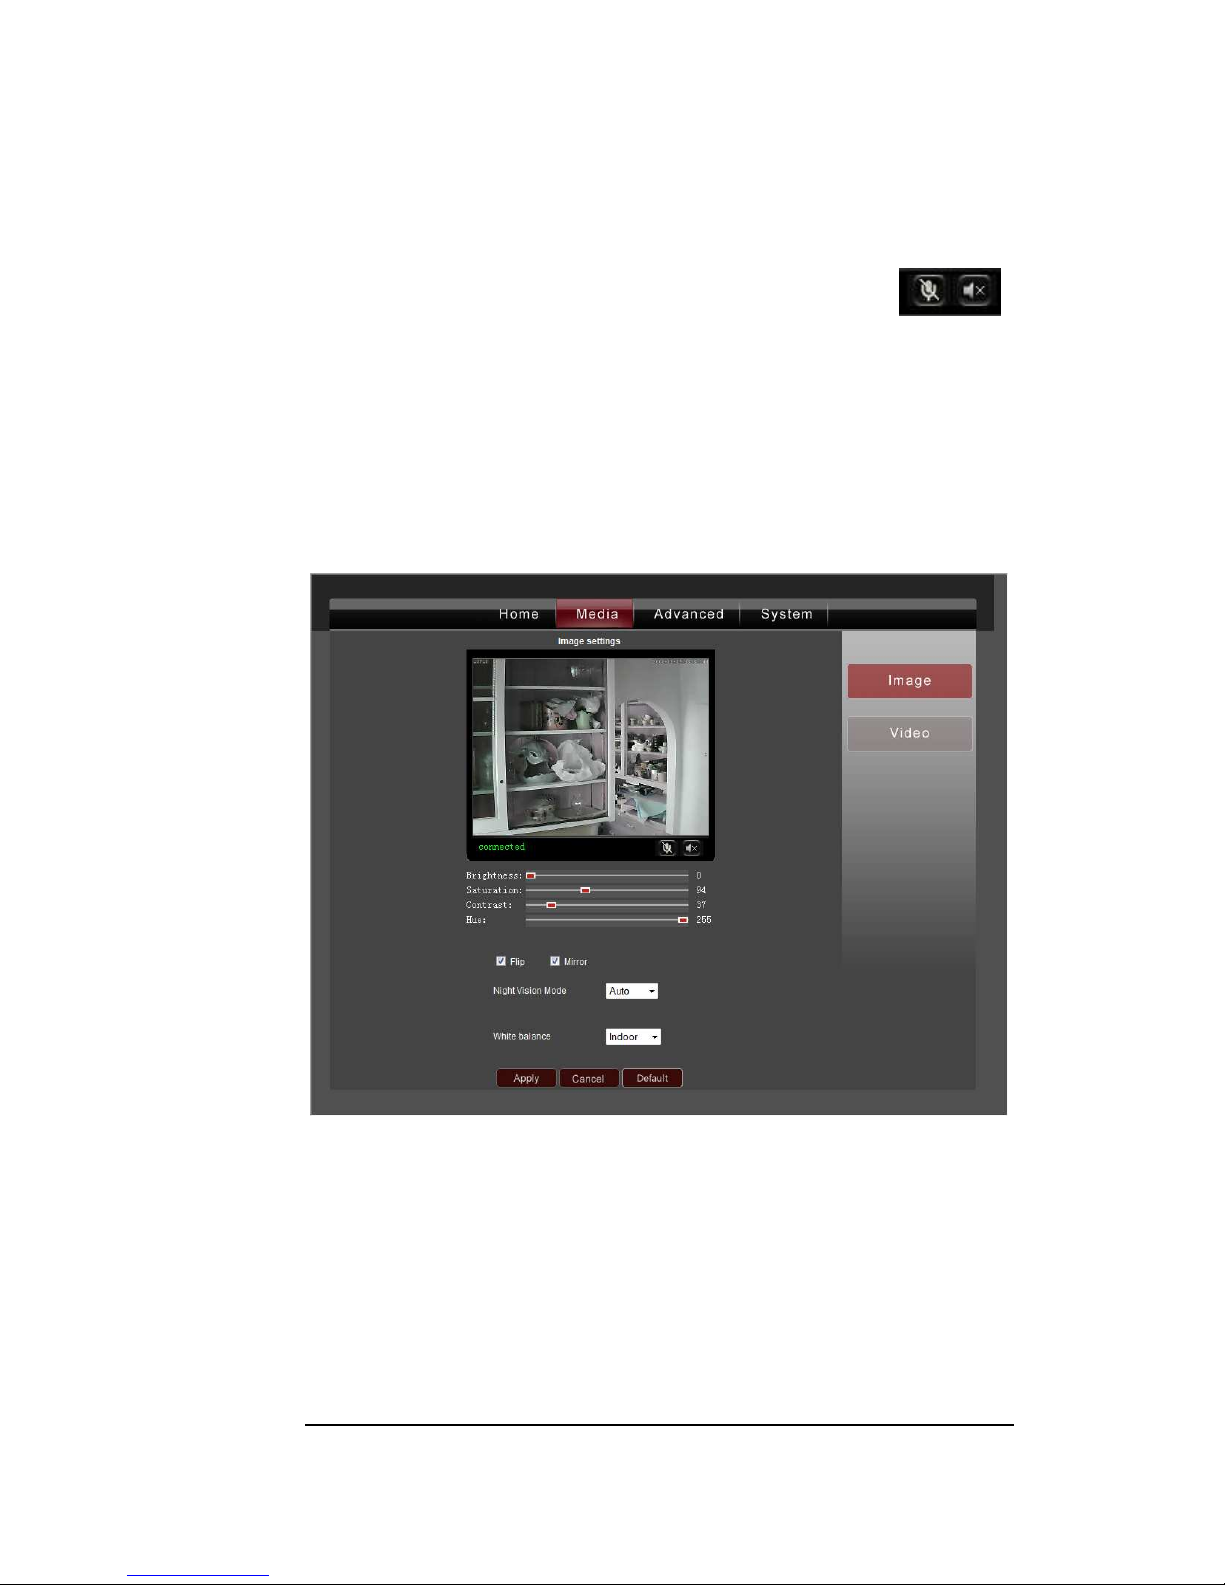
Media
Selecting the Media tab provides access to the image and video settings.
17
Page 22
M A N U A L C O N F I G U R A T I O N
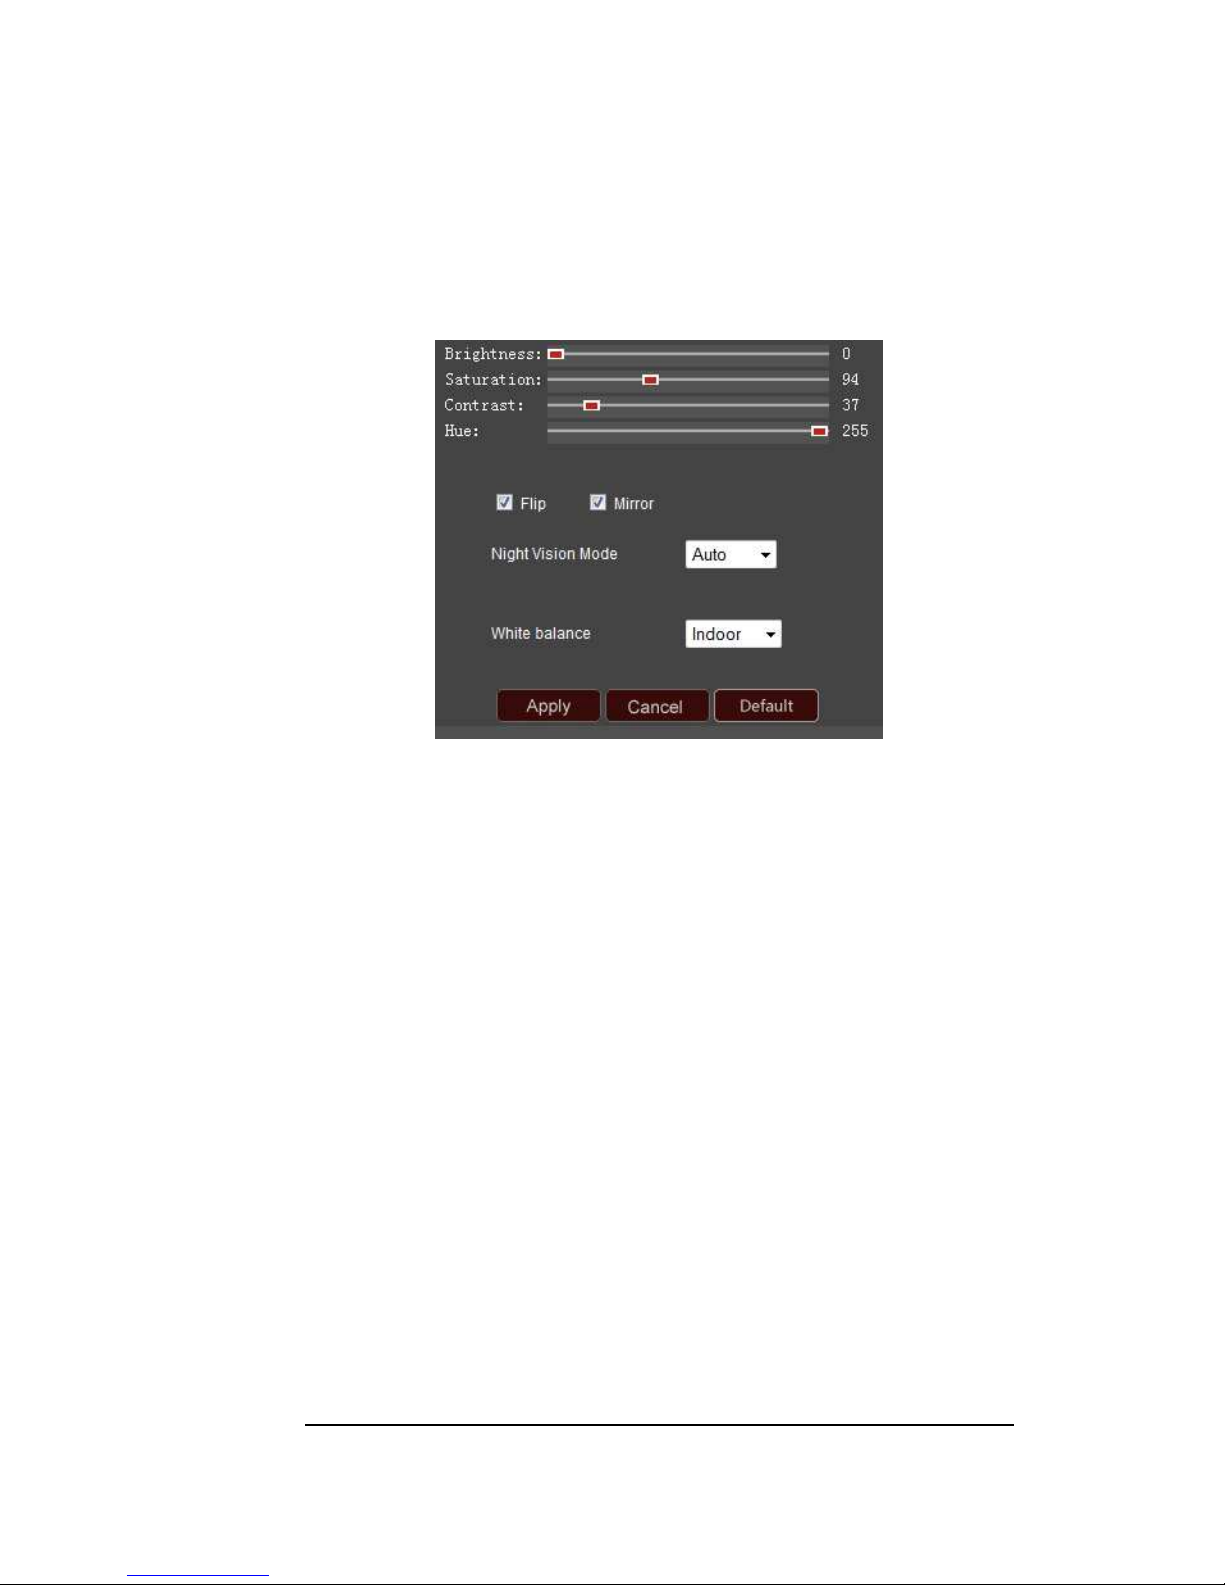
Image settings
Brightness | Saturation | Contrast | Hue: Adjust any of these settings to your liking.
Once you’ve found a setting that you like, select Apply to have the camera remember
those values.
Flip: Your camera is designed to allow ceiling mounting. Deselect this option and
select Apply to have the image flipped horizontally.
Mirror: The camera is intended to simulate as if you were there and provides that view
of the scene. If you want to see the Mirror image, simply deselect this box and select
Apply.
Night Vision Mode: This controls the Infrared lights on your camera. You can choose
to set this function on Auto, or Manual. If you choose to select the Manual mode, and
select On, then the infrared lights will be continuously on until you turn it off. Make
sure to click the “Apply” button after you make a change.
White Balance: This function helps to display colors correctly under different lighting
sources. For example, you can choose the Indoor or Outdoor selection when the
camera is placed indoors or outdoors. Or you can also choose the Auto options. If,
instead, you choose manual configuration, two additional boxes will appear. “R gain”
refers to the amount of red color shown and “B gain” refers to the amount of blue
color shown in the image. Make sure to click on “Apply” after you make your changes.
Default: Click on the Default button to return your camera to its original settings.
18
Page 23
M A N U A L C O N F I G U R A T I O N
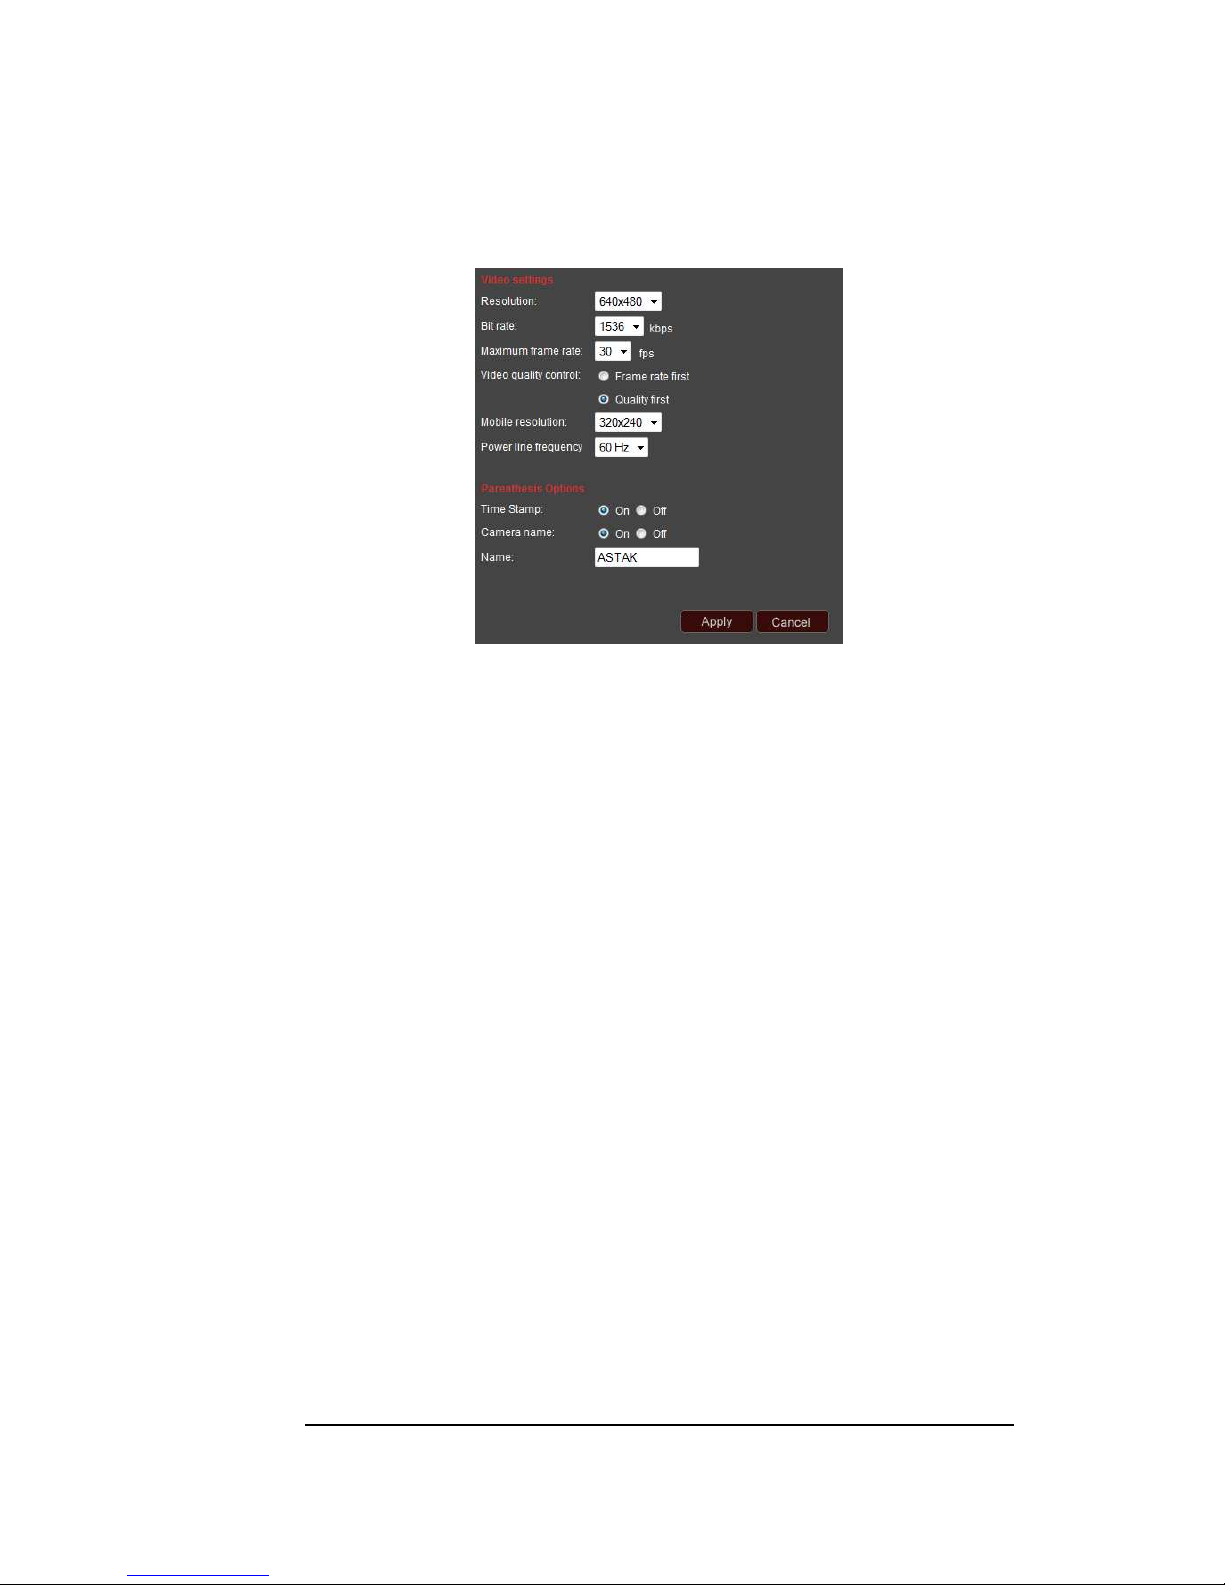
Video settings
Resolution: There are three different resolution options you can choose from:
640x480, 320x240, or 160x120.
Bit Rate: This specifies the number of kilobytes per second of the video stream.
Increased bit-rate equates to improved quality and increased size.
Note: to get good video and audio quality, the bit-rate should be set lower than the
speed of your internet connection’s upload speed.
Maximum Frame Rate: This controls how many frames per second the video is
displayed with. Choosing a higher number will result in a smoother video stream.
Video Quality Control: For a real-time, fast response, choose the “Frame rate first”
option. Choosing the “Quality first” option uses a buffer so that the video stream is
delayed a few seconds, but with improved overall smoothness and quality of the video.
Power Line Frequency: Different countries use different standard electric currents. If
you use your camera in the USA, please choose the 60Hz option. If you intend to use
your camera in certain other countries, such as Europe and China, please choose the
50Hz option.
Time Stamp and Camera Name (Parenthesis options): Selecting or turning on the
Time Stamp option will place a small time indicator at the top right corner of your
video. This will help you keep track of when your videos were taken.
Name: Selecting this option will place the name of your camera (which you can select)
at the top left corner of your video.
*Please click Apply to save your changes.*
19
Page 24
M A N U A L C O N F I G U R A T I O N
Advanced
Click on the Advanced tab to access advanced user settings.
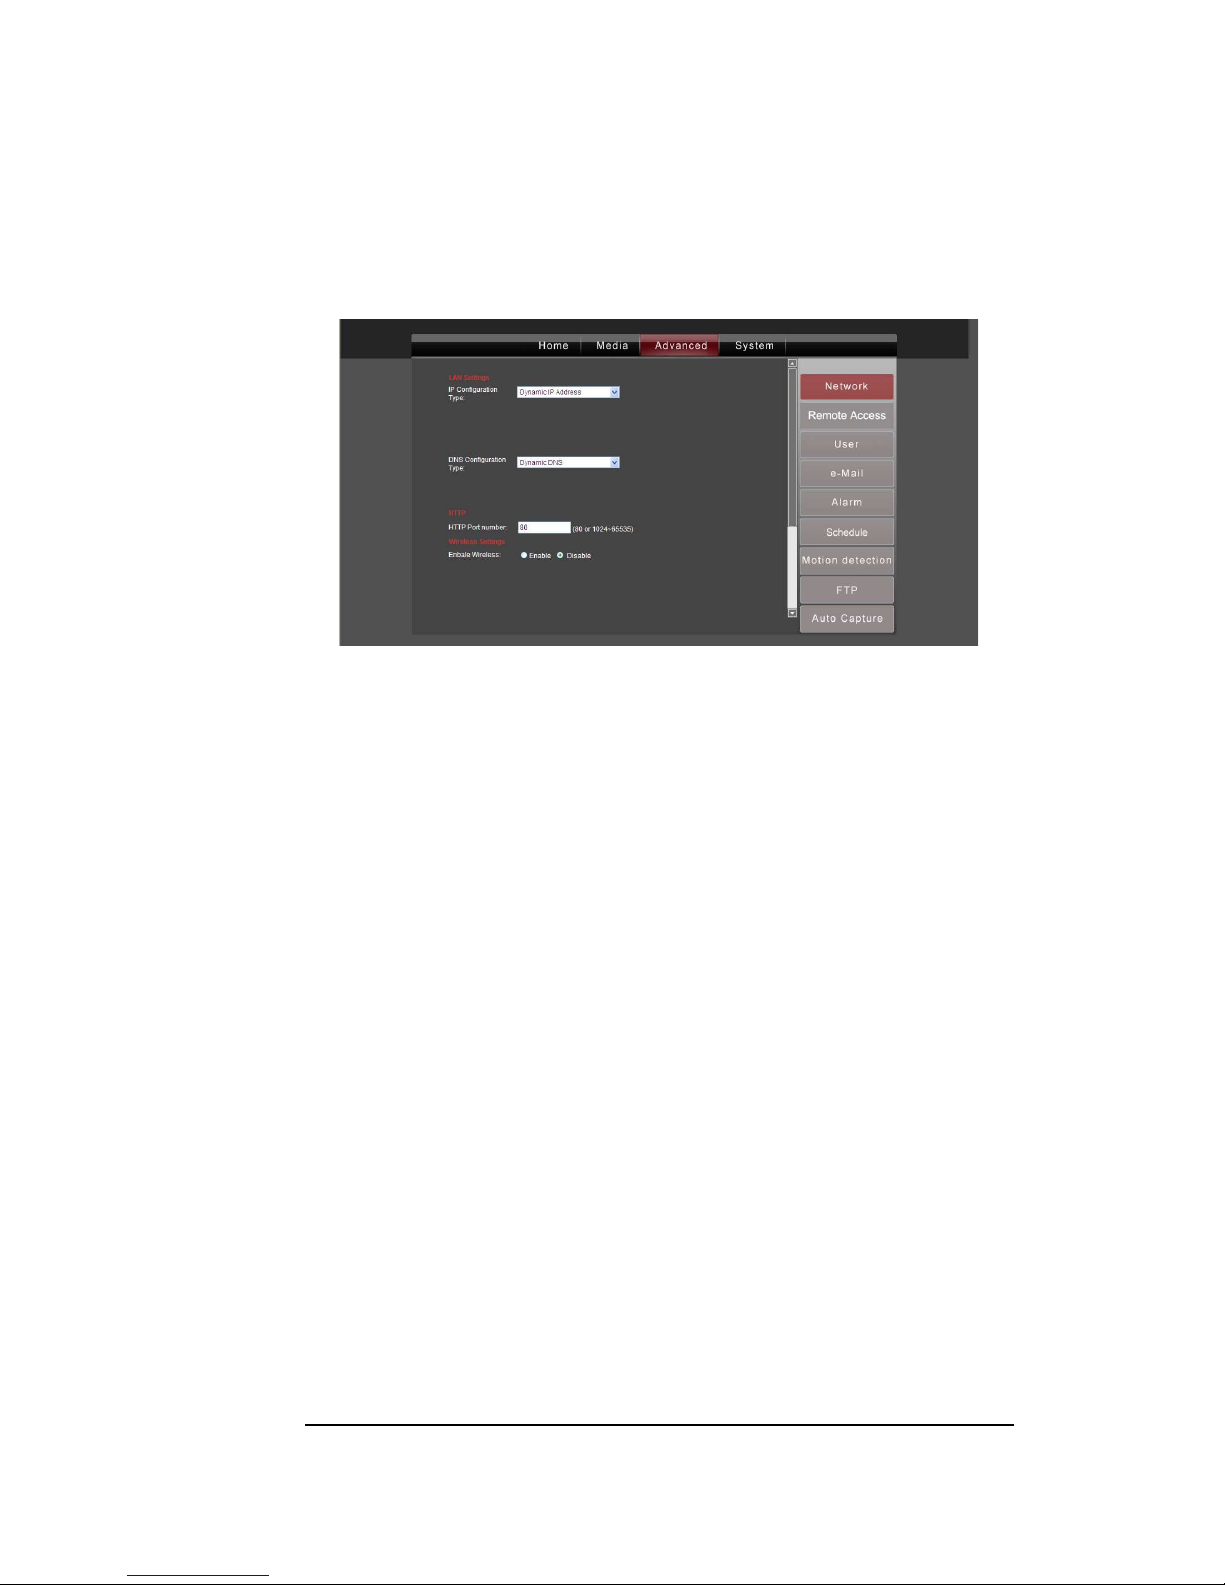
Network
Warning: Only advanced users should configure network settings.
IP Configuration Type: You can choose from a Dynamic or Fixed IP address. If you
choose a Dynamic IP address (default), your IP address will be assigned automatically
by your router. If you choose Fixed IP address, you will need to enter all your
information manually.
DNS Configuration: You can choose from a Automatic or Fixed DNS (Domain Name
System). As implied by the name, automatic DNS is assigned during the connection
stage, and Fixed DNS is a value that you enter manually.
HTTP Port Number: The default is 80. Changing this value with restart the camera.
Enable Wireless: If you want to enable wireless mode, click on Enable, and then click
on the Search button next to the SSID row. A popup window will appear that lists
available wireless networks in your location. Choose a wireless network and click OK.
For more information, see Configuring for wireless networks in Chapter 2.
Mode: Select either Infrastructure or Point to Point. Select the Infrastructure mode if
you are using a wireless router. Select Point to Point mode if you are connecting
directly to another wireless PC.
Security mode: Choose a security mode that matches your router’s security mode.
(You can refer to your router manual for this information.)
*Please click Apply to save your changes.*
20
Page 25
M A N U A L C O N F I G U R A T I O N
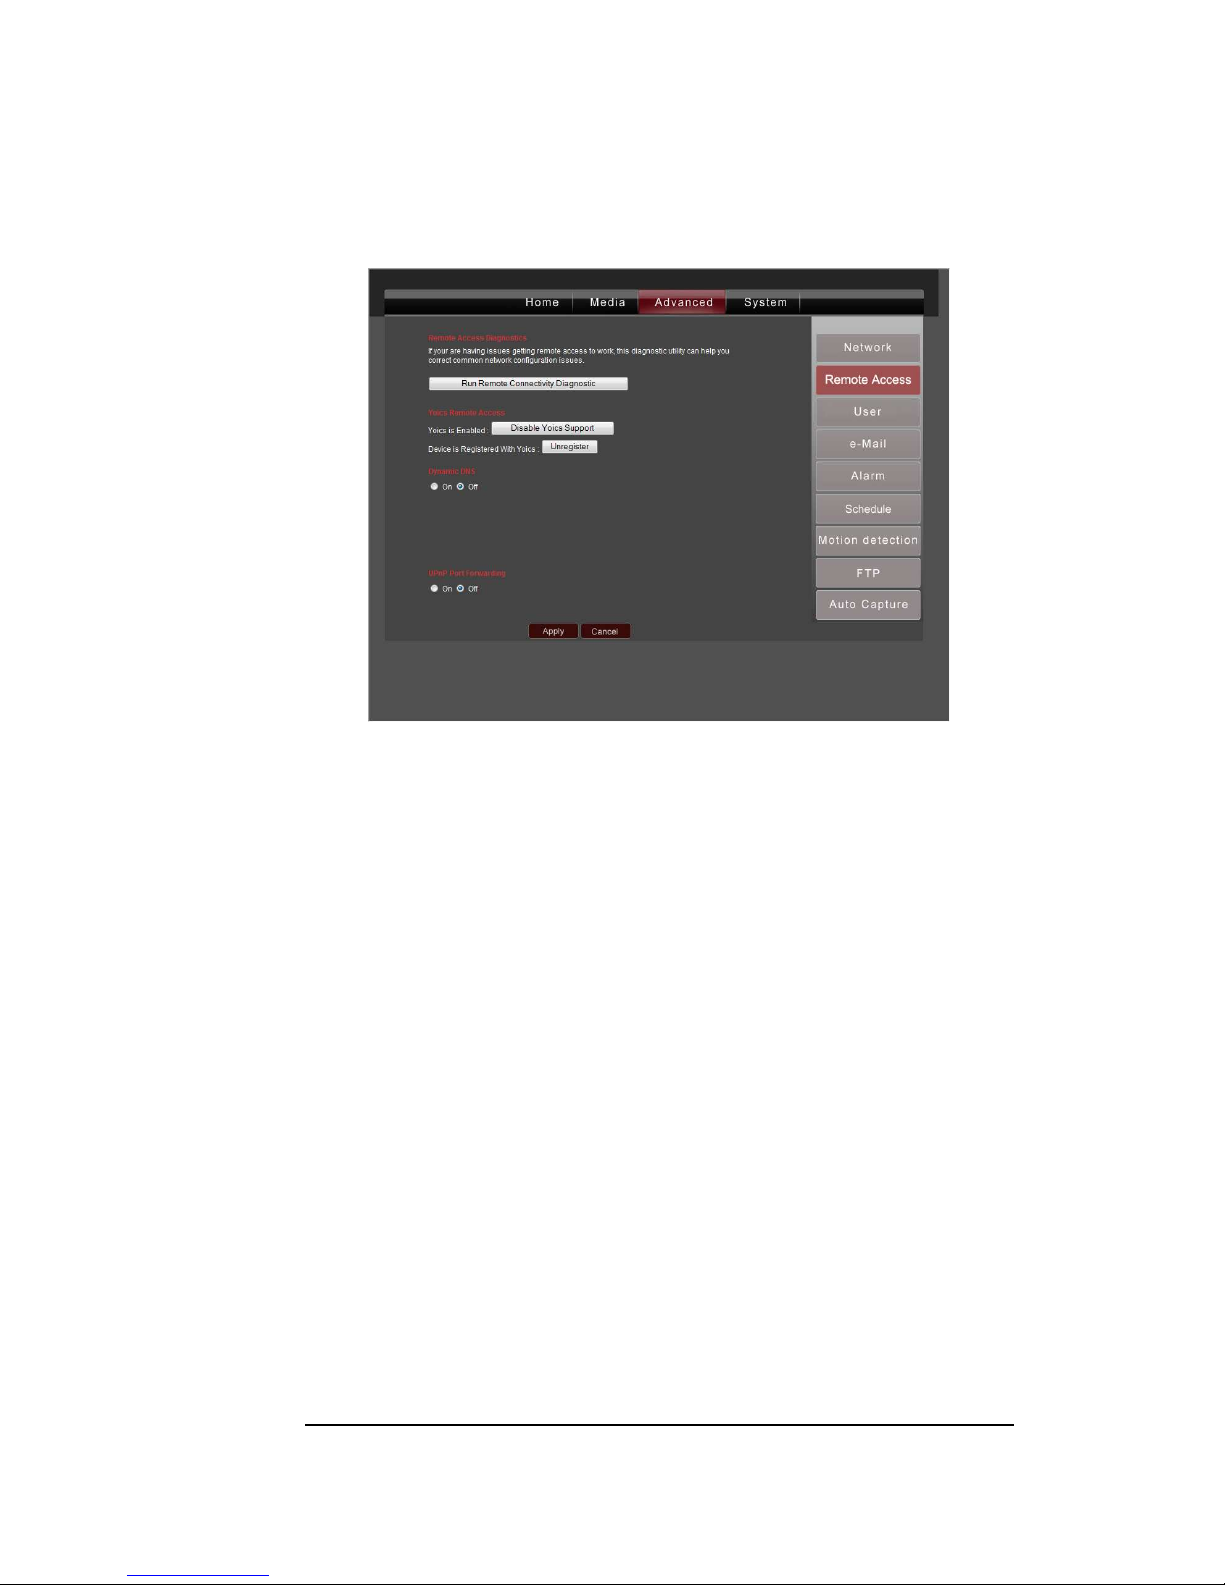
Remote Access
Yoics is Enabled: If you registered with Yoics already, you have the option of disabling
Yoics support and unregistering with Yoics. If you unregister, then you will not be able
to access your camera through the Yoics website. See Chapter 1: Setting up your ASTAK
camera for more information.
Dynamic DNS: Turn dynamic DNS on or off. Please see next page for setup info.
Universal PnP: Turns UPnP port forwarding on or off.
*Please click Apply to save your changes.*
21
Page 26

M A N U A L C O N F I G U R A T I O N
DDNS Settings
Most internet service providers do not provide a static (dedicated) IP address.
Accordingly it can be difficult to remote access your camera. Dynamic DNS (DDNS)
is a free service that keeps track of your IP address, through these changes.
These instructions detail how to configure DDNS for your camera.
Note: DDNS is NOT required if you are using Yoics to remote access your
camera.
How to use www.dyndns.com for DDNS setting:
o This service is free. Please allow 24-48 hours for the server to activate your
account.
o Please go to http://www.dyndns.com/ and click on [create account].
o Enter information required at Create Your DynDNS Account page and click
[create account]
o You should receive a confirmation email within a few minutes. Please make sure
that your spam filter allows messages from support@dyndns.com to be received.
o Login to your account by using the username and password you created.
o Click on [my service] on the upper right corner.
o Click [add host name] under Host Services.
o Create your own host name such as xxx.dyndns.org
o Select Service type: Host with IP address.
o Click [Use auto-detected IP address] and click [create host]
o Review your host service information.
o Go to your DVR or IP cam’s webpage and select DDNS setting.
o Enter hostname, username, and password you created for DynDNS service..
o Click [save] to enable this service for your DVR or IP cam.
o Note that after you create an account, DynDNS might need 24-48 hours to
process and activate your service.
o To access your DVR or IP cam, instead of using your IP address, please go to your
host service: http://xxx.dyndns.org:100 (replace xxx with your host name, and
replace 100 with your port number)
o If you have questions about this service please contact DynDNS at
Dynamic Network Services, Inc.
1230 Elm Street, Fifth Floor
Manchester, NH 03101
USA
support@dyndns.com
Phone: +1-603-668-4998
Fax: +1-603-668-6474
22
Page 27

M A N U A L C O N F I G U R A T I O N
User
This is where you can reset your Administrator default username and password. You
can also create additional user accounts by entering usernames and passwords.
Note: Only the Administrator account can access the Media, Advanced and
System sections. All other users only have access to the Home section. The default
values for the passwords are the same as the user names (e.g. the password for
guest is guest.)
Email
Your ASTAK camera can notify you via email if it detects events. The information
for your email settings should be entered here.
23
Page 28

M A N U A L C O N F I G U R A T I O N
SMTP Server Name: Type in the name of your email SMTP server, and your server
port number in order to enable the delivery of emails. Please check with your email
provider for the port number and if any security (e.g. SSL) settings are required.
Authentication: You can turn authentication on or off. If your email provider requires
logging in before sending email, then turn authentication on, then select ON and enter
the appropriate user name and password.
Send To: You can choose up to three separate email addresses to send images and
videos to.
Show From As: You can set which email address is displayed as the sender.
Subject and Message: You can enter an optional subject line or message for your
email.
Alarm
In this section, you can choose which actions to take if a movement triggers the camera
alarm. Note: You can choose multiple actions, or none.
Email Alarm: Click this box if you want to be notified via email when movement has
been detected. You must also click the Email Setting link to setup your email account.
If you enable this option, a Send with Picture checkbox will also appear. Click this box
if you want a picture to also be sent to you.
Save Video on the FTP Server: Click this box if you want video to be saved on your
FTP server. You must also click on the FTP Server Setting link to setup FTP for this
action to occur.
24
Page 29

M A N U A L C O N F I G U R A T I O N
Save picture on the SD card: Click this box if you want a picture to be saved on the SD
card when a movement is detected. Note: You must first insert a SD card into the
camera for this to occur.
Save video on the SD card: Click this box if you want a video to be saved on the SD
card when a movement is detected. Note: You must first insert a SD card into the
camera for this to occur.
*Please click Apply to save your changes.*
Schedule
This section allows you to specify what times of the day or night you want your
camera’s alarm function to be turned on.
Use the week mode: This mode gives you the greatest amount of control. You can
specify up to three different sections of time for each day of the week when you want
to activate the alarm function.
Use the work mode: In this mode, you can specify up to three different sections of
time from Monday through Friday when you want to activate the alarm function. You
can then choose up to three sections of time on the weekends when you want to
activate the alarm function.
25
Page 30

M A N U A L C O N F I G U R A T I O N
All times: You can choose this mode if you want the alarm function to be activate at all
times.
*Please click Apply to save your changes.*
Motion Detection
In this section, you can setup up to four different motion-sensitive windows.
For example, in the picture above, 2 windows are activated.
First, to activate a window, click on the checkbox next to “Window 1”. A window will
appear. Then you can specify the size of this window by hovering over the lower right
corner of the window until a double-headed arrow appears. Click and drag that
double-headed arrow to form the window size you want. You can also adjust the
placement of your window by clicking anywhere inside the window and dragging it to
where you want it to be. This window has a small number “1” in the upper left hand
corner to indicate that it is “Window1”.
Next, you can choose the sensitivity of motion detection by using the sliding bar titled
“Sensitivity”. As you slide the bar to the left, the number goes down to 0; if you slide
the bar to the right, the highest number is 75. A lower number means that the window
will not be very motion-sensitive; a higher number means that the window will be
extremely motion-sensitive.
*Please click Apply to save your changes.*
26
Page 31

M A N U A L C O N F I G U R A T I O N
FTP
In this section, you can configure your FTP settings. If you have access to an FTP
server, you can setup your FTP here so that any recorded videos will be sent to your
FTP server.
*Please click Apply to save your changes.*
Auto Capture
Your ASTAK camera can be configured to automatically take a picture at a designated
time interval.
Snap interval: Set any duration from 11440 here. For example, in the picture
above, the camera is setup to take a
picture every 60 minutes.
Send by email: You can click this
checkbox if you want the picture to be
sent to your email as soon as the picture
is taken.
Save picture on SD card: you can click this checkbox if you want the picture to be
saved to the on-board SD card so that you can browse it later. (Requires that an SD
card has been inserted in the camera)
*Please click Apply to save your changes.*
27
Page 32

M A N U A L C O N F I G U R A T I O N
System Tab
Time Settings
Current date & time: this box displays your camera’s current date and time.
Adjust: to setup your camera’s date and time, you can choose between four different
options:
28
Page 33
M A N U A L C O N F I G U R A T I O N
o Manual setting: Manually type in the date and time for your camera.
o Sync with computer time: Match your camera’s date and time to your
computer’s date and time.
o Network time protocol: You must fill in a server name and time
interval.
o Keep current setting: Choose a time zone for your camera.
Note: You can also choose to automatically adjust the date and time for
daylight savings time changes by clicking the checkbox at the bottom of
the page.
*Please click Apply to save your changes.*
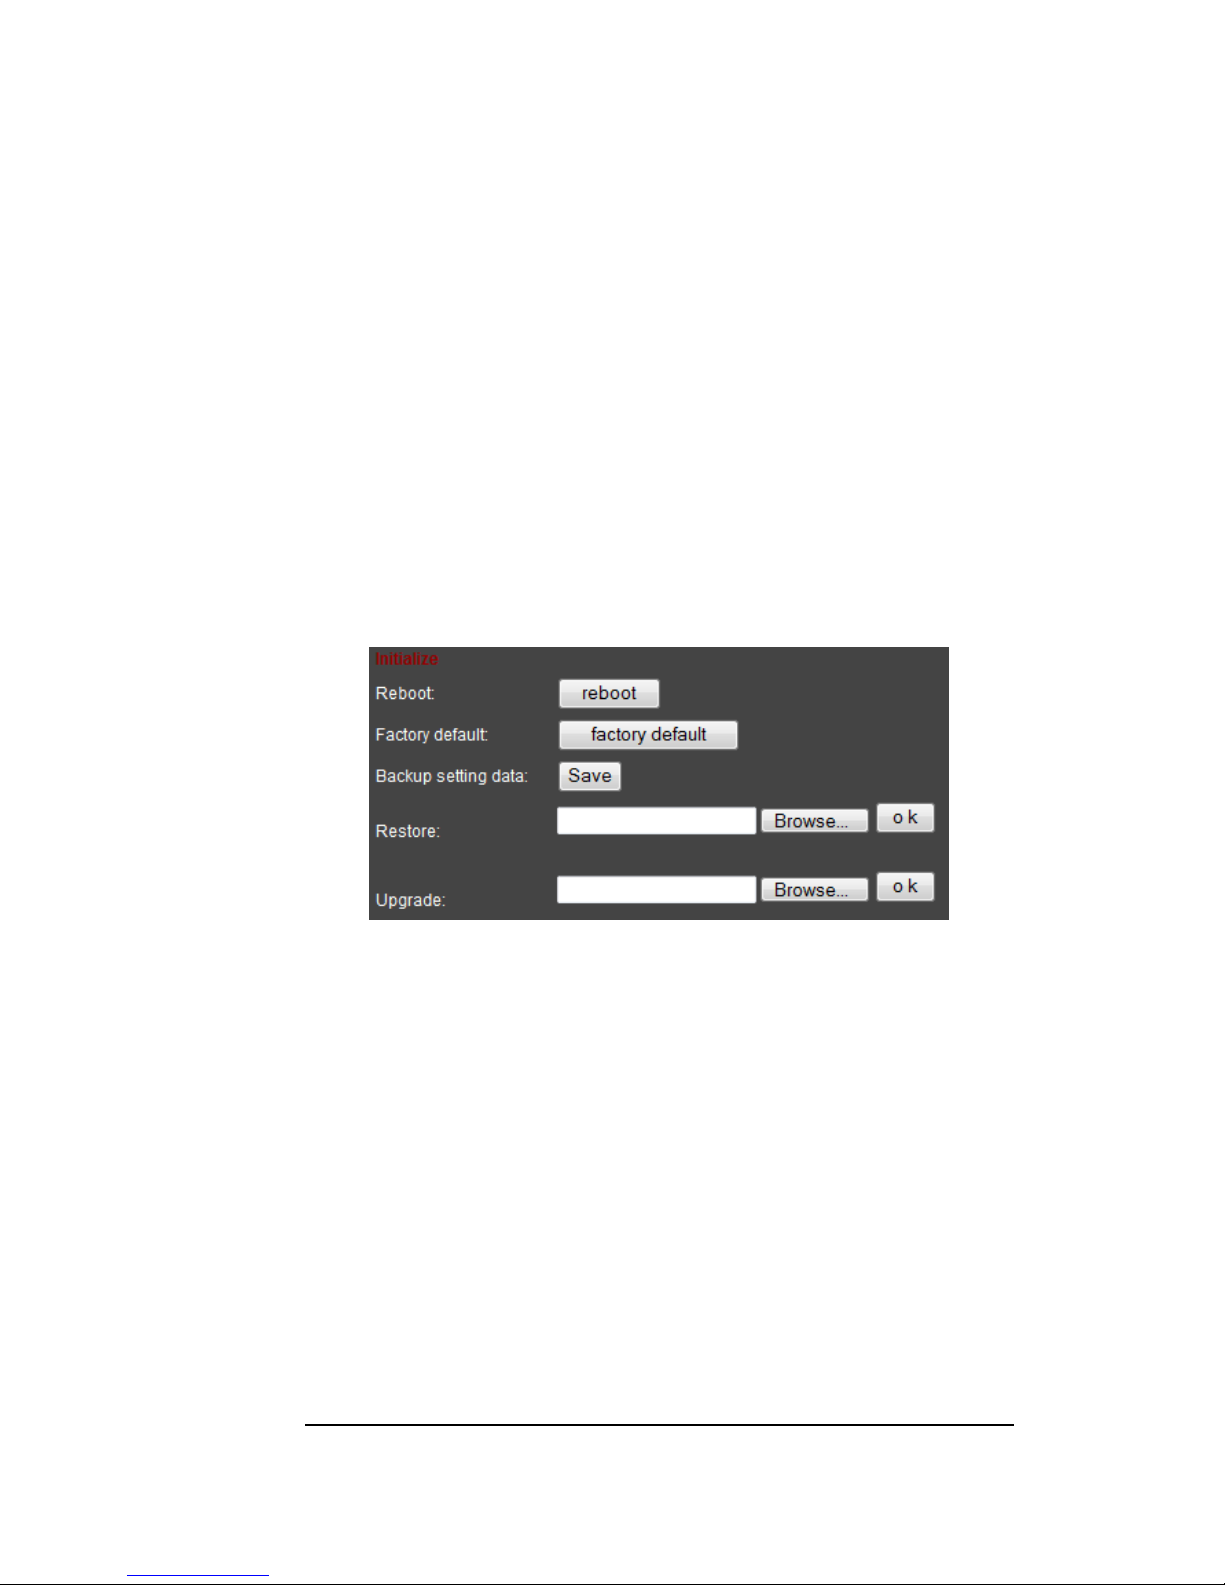
Initialize
Reboot: click this button to restart your camera.
Factory default: click this button to restore your camera to its original settings.
Backup setting data: click the Save button if you want to save your current camera
settings as a file.
Restore: if you want to restore your camera to a previous setting (which you have
saved), click on the Browse button to find the saved file. Click OK to apply.
Upgrade: In the future, if Astak offers updated firmware for your camera, you can
download it from the website and save it to your computer. Then you can apply it to
your camera by using this Upgrade feature.
29
Page 34
M A N U A L C O N F I G U R A T I O N
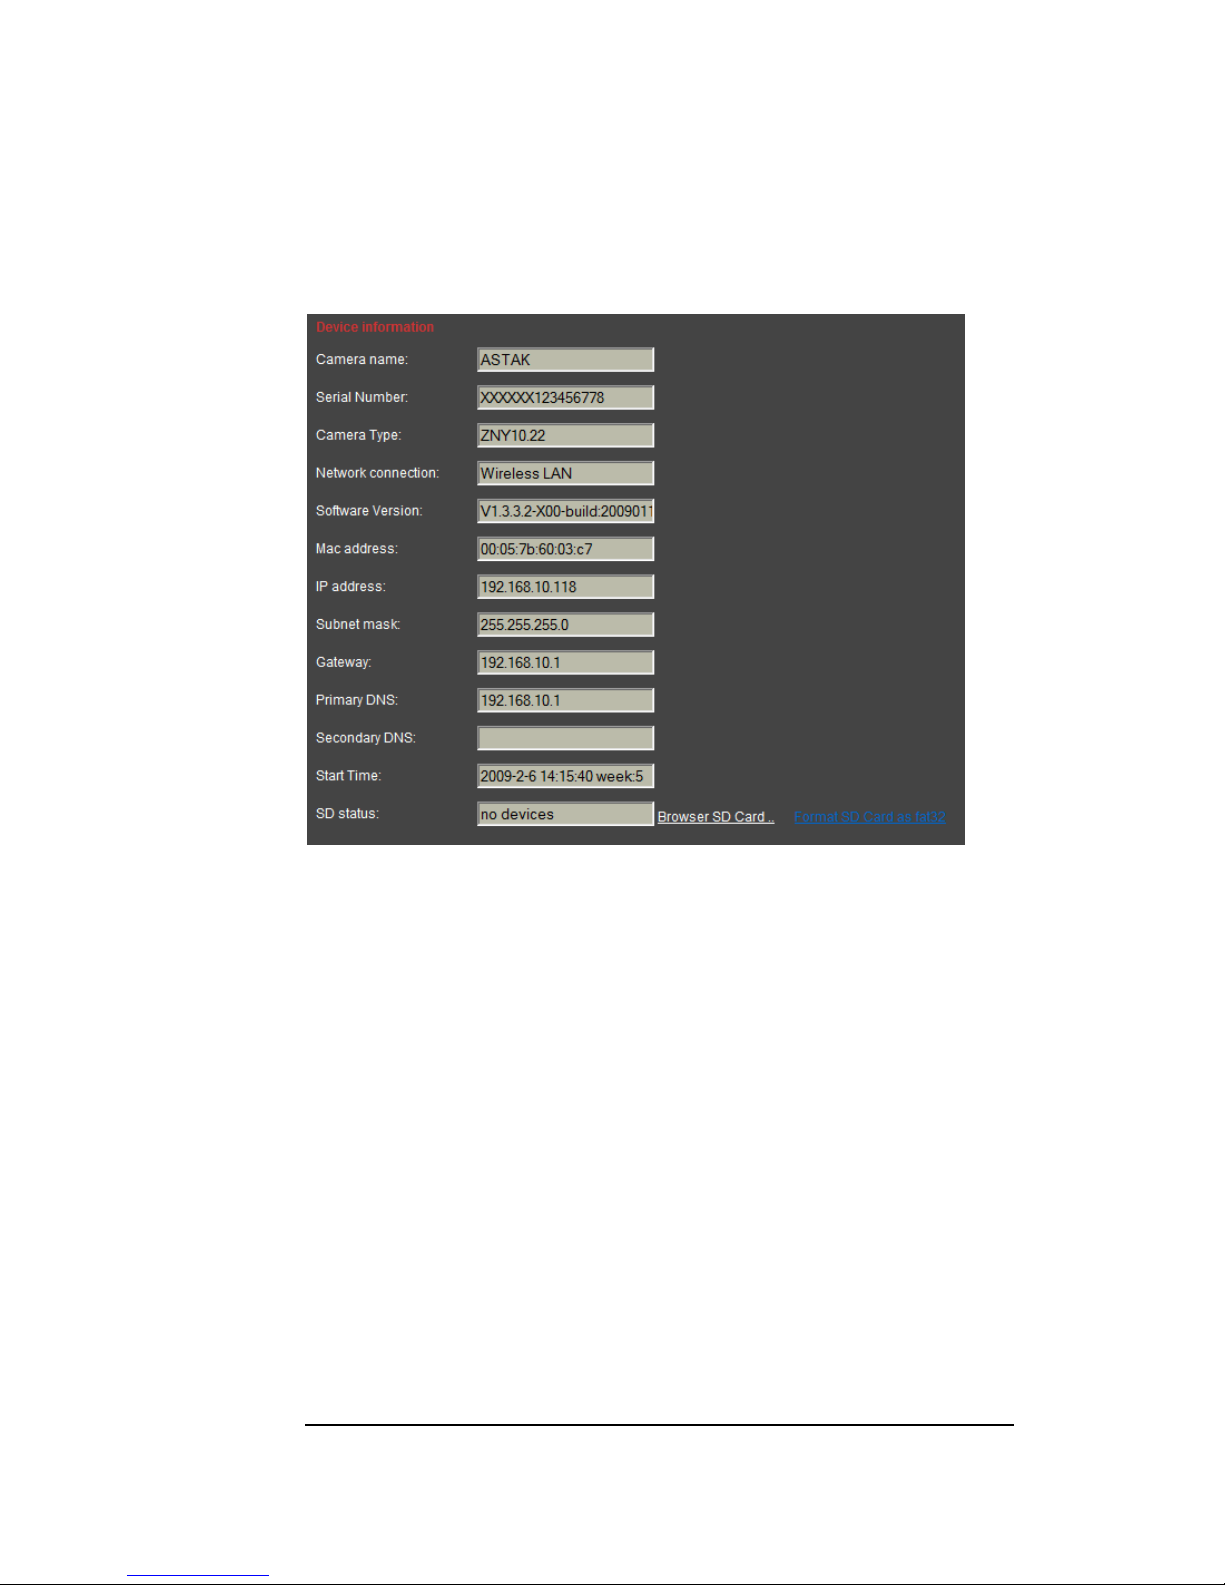
Device Information
This section displays technical details about your camera.
SD status: you can click on the Browser SD Card link to access the contents of your
SD card. You will need to enter your username and password, as shown below.
Format SD card: clicking this link will erase any information stored on your SD card.
30
Page 35

I P - 7 0 0
This page is intentionally left blank.
31
 Loading...