

Page 1

ARTS PDF
Crackerjack
Version 5.1
Page 2

ARTS PDF Crackerjack User Guide
Contents
Contents
1. INTRODUCTION .............................................................................................. 5
2. SETUP .......................................................................................................... 6
2.1. System Requirements................................................................................ 6
2.2. Installation............................................................................................... 6
3. PRINTING WITH ARTS PDF CRACKERJACK.......................................................... 8
3.1. Printing Preferences................................................................................... 8
3.1.1. Use default settings file................................................................................... 9
3.1.2. Embed Fonts in PostScript............................................................................... 9
3.1.3. Remember window positions............................................................................ 9
3.1.4. Use E in preview ............................................................................................ 9
3.1.5. Render Transfer Curves in Black.......................................................................9
3.1.6. Units............................................................................................................9
3.1.7. Pilot ........................................................................................................... 10
3.1.8. Select PPD folder (Mac OS X only) .................................................................. 10
3.2. The “Preview” Window ..............................................................................11
3.3. Embedding Fonts .....................................................................................13
3.4. The “ARTS PDF Crackerjack” Window ..........................................................15
3.4.1. Preview ...................................................................................................... 15
3.4.2. Save Settings..., Load Settings... ................................................................... 16
3.4.3. Defaults...................................................................................................... 16
3.4.4. Cancel........................................................................................................ 16
3.4.5. OK/Output .................................................................................................. 16
3.5. The “Target” Panel ...................................................................................17
3.5.1. Printer........................................................................................................ 17
3.5.2. File ............................................................................................................ 18
3.5.3. PostScript 3................................................................................................. 19
3.5.4. Printer description........................................................................................ 19
3.5.5. Page range.................................................................................................. 19
3.6. The “Media” Panel ....................................................................................21
3.6.1. Auto-size media........................................................................................... 21
3.6.2. Media......................................................................................................... 22
3.6.3. Orientation.................................................................................................. 22
3.6.4. Tile Output.................................................................................................. 22
3.7. The “Options” Panel..................................................................................24
3.7.1. Offsets ....................................................................................................... 24
3.7.2. Scaling ....................................................................................................... 25
3.7.3. Options....................................................................................................... 26
3.7.4. Check Certified PDF Status............................................................................ 26
3.7.5. Use PDF Background..................................................................................... 26
3.8. The “Marks” Panel ....................................................................................28
3.8.1. Printer’s marks ............................................................................................ 28
3.8.2. Crop and registration marks .......................................................................... 29
3.8.3. File/Plate names .......................................................................................... 29
| CONTENTS |
Í Page 2 of 79 Î
Page 3

ARTS PDF Crackerjack User Guide
Contents
3.8.4. Color bar .................................................................................................... 29
3.9. The “Color” Panel .....................................................................................30
3.9.1. Color set..................................................................................................... 30
3.9.2. Output color as............................................................................................ 31
3.9.3. Black overprint ............................................................................................ 32
3.9.4. Use ARTS PDF Crackerjack screens................................................................. 32
3.9.5. Color output options..................................................................................... 33
3.9.6. Edit............................................................................................................ 34
3.9.7. Map... ........................................................................................................ 34
3.9.8. All Spots to process...................................................................................... 35
3.9.9. Use ARTS PDF Crackerjack RGB conversion...................................................... 35
3.9.10. Edit RGB Conversion..................................................................................... 35
3.9.11. Use ARTS PDF Crackerjack DIC (Device Independent Color) ............................... 36
3.9.12. Save color set.............................................................................................. 37
3.9.13. Manage color sets... ..................................................................................... 37
3.10. The Print Preview Window ......................................................................38
4. CONVERTING RGB OR CMYK TO SPOT COLORS................................................... 40
4.1. Source Color............................................................................................40
4.1.1. Convert ...................................................................................................... 41
4.1.2. Threshold.................................................................................................... 41
4.2. Destination spot color ...............................................................................41
4.2.1. New Spot.................................................................................................... 41
4.2.2. Document Spot............................................................................................ 41
4.2.3. Always Make CMYK Spots.............................................................................. 41
5. USING THE IMPOSITION TOOL......................................................................... 42
5.1. Layout Tab..............................................................................................42
5.1.1. Imposition Type........................................................................................... 42
5.1.2. Columns / Rows........................................................................................... 44
5.1.3. Gutters....................................................................................................... 44
5.1.4. Binding....................................................................................................... 44
5.2. Media Tab ...............................................................................................45
5.2.1. Selecting a Media Size .................................................................................. 45
5.2.2. Scaling ....................................................................................................... 45
5.2.3. Margins ...................................................................................................... 46
5.3. Options Tab.............................................................................................47
5.3.1. Printer’s Marks............................................................................................. 47
5.3.2. Page Settings .............................................................................................. 48
5.3.3. Double Sided Printing ................................................................................... 48
5.3.4. Saving & Reusing Imposition Settings ............................................................. 49
USING ARTS PDF CRACKERJACK PILOT..................................................................... 50
5.4. The “Pilot Folders” Window ........................................................................51
5.4.1. Add….......................................................................................................... 51
5.4.2. Edit….......................................................................................................... 51
5.4.3. Remove...................................................................................................... 52
5.4.4. Done.......................................................................................................... 52
5.5. The “Add Pilot Folder” and “Edit Pilot Folder” Windows...................................52
| CONTENTS |
Í Page 3 of 79 Î
Page 4

ARTS PDF Crackerjack User Guide
Contents
5.5.1. Set… .......................................................................................................... 53
5.5.2. OK / Cancel................................................................................................. 53
5.6. Pilot Folder “Creation/Selection” Window .....................................................53
5.6.1. New Folder (Macintosh) / Create Folder (Windows) ........................................... 54
5.6.2. ‘Select “…”’ (Macintosh) / OK (Windows).......................................................... 54
5.6.3. Cancel........................................................................................................ 54
6. USING THE IMAGE EDITING TOOLS................................................................... 55
6.1. Overview ................................................................................................55
6.2. Using Images ..........................................................................................56
6.2.1. Preferences................................................................................................. 57
6.2.2. Undo.......................................................................................................... 58
6.2.3. Compression Methods................................................................................... 58
6.2.4. Saving Changes........................................................................................... 60
6.2.5. General Notes.............................................................................................. 60
6.2.6. The Image Selection Tool.............................................................................. 61
6.2.7. The Images Menu......................................................................................... 61
6.2.8. The “Image Tools” Window............................................................................ 64
6.2.9. The “Image Editor” Window........................................................................... 72
6.2.10. The “Document Tools” Window....................................................................... 75
6.3. Enfocus Certified PDF™.............................................................................77
7. TROUBLESHOOTING....................................................................................... 78
7.1. Forum ....................................................................................................78
7.2. Updates..................................................................................................78
7.3. Maintenance............................................................................................78
7.4. Technical Support .................................................................................... 79
| CONTENTS |
Í Page 4 of 79 Î
Page 5

ARTS PDF Crackerjack User Guide
Introduction
1. Introduction
This document contains information on both the Macintosh and Windows ® versions of ARTS
PDF Crackerjack™. Wherever appropriate, the differences are clearly indicated. If ARTS PDF
Crackerjack is used with Adobe ® Acrobat ® 5.05 in OS X there are other differences which are
clearly indicated as applying only to OS X usage. This document specifically covers the features in
ARTS PDF Crackerjack 5.0 and its companion ARTS PDF Crackerjack Pilot, so it should not be used
as a reference for earlier versions of the products.
ARTS PDF Crackerjack provides a set of professional output tools for PDF documents. With ARTS
PDF Crackerjack, you can control all of the important output issues that distinguish pay-for-print
from personal use. These include fine positioning, scaling, orientation, separations, screening, and
more. With ARTS PDF Crackerjack, you can create PostScript files for downstream prepress
applications or imagesetters, platemakers, digital presses, color printer/copiers, proofers, plotters,
and film recorders. ARTS PDF Crackerjack is also handy for separating PDF files originally created
with Microsoft applications such as Word, Publisher, and Excel, a particularly st icky problem for
graphic arts service providers. With this release, ARTS PDF Crackerjack now also includes the
ability to preview the separations that ARTS PDF Crackerjack can generate. This feature allows the
user to check separations before printing them and to view the effects of prepress parameters such
as overprinting. Additionally, ARTS PDF Crackerjack 5 still includes important features first
introduced in ARTS PDF Crackerjack 3, such as, color management, black overprint, auto-size
media selection, backgrounds, bleed support, and the ability to output PostScript 3 features, such
as, duotones/tritones/quadtones, smooth shading, and spot color gradients.
ARTS PDF Crackerjack Pilot is an automation option for the award-winning ARTS PDF Crackerjack.
With Pilot, you can create and manage one or more “hot folders” to automate your use of ARTS
PDF Crackerjack. All of the features you use in ARTS PDF Crackerjack, including separations,
screening, media selection, and more, can be saved in user-defined settings files and matched to
hot folders. These settings files can be set up either for particular applications or print job
classifications, or, for targeting output to different devices. Once configured, you only need to drop
a PDF document into a hot folder for ARTS PDF Crackerjack and Pilot to pick it up and print it.
ARTS PDF Crackerjack and ARTS PDF Crackerjack Pilot may be used with the full version of Adobe
Acrobat 5.0, 6.0 or 7.0.
| CONTENTS |
Í Page 5 of 79 Î
Page 6

ARTS PDF Crackerjack User Guide
Setup
2. Setup
2.1. System Requirements
Regardless of platform, ARTS PDF Crackerjack requires that a PostScript printer/printer
driver be selected before operation.
Macintosh
• PowerMacintosh G3 or G4
• Mac OSX 10.2 or higher
• Adobe ® Acrobat ® 5.05, 6.03 or 7.02
• Adobe ® PostScript ® (or 100% compatible) output device
Windows
• PC with Pentium processor
• Windows ® NT 4.0, Windows ® 2000 or Windows ® XP
• Adobe ® Acrobat ® 5.05, 6.03 or 7.02
• Adobe ® PostScript ® (or 100% compatible) output device
CAUTION: Any folders or files created during installation are required by ARTS PDF Crackerjack. If
you rename, move, or delete these folders the product will not work correctly or may not work at
all.
For technical support queries, please consult the
techsupport@artspdf.com.
Troubleshooting section of this manual or email
2.2. Installation
In addition to the User’s Guide, the ARTS PDF Crackerjack folder contains a file called
ColorSteps.pdf to assist in color management, and a subfolder containing ARTS PDF
Crackerjack default Color Sets.
On the Macintosh (except for OS X), ARTS PDF Crackerjack will use the system’s
Printer Descriptions folder for PPDs. For OS X, see the section on ARTS PDF Crackerjack
Preferences for how to manage PPDs. The Windows installer will create a folder named
“Printer Descriptions” inside the ARTS PDF Crackerjack folder and place PPDs for Acrobat
Distiller in the folder. After installing ARTS PDF Crackerjack you must copy any PPD files
for your devices to the Printer Descriptions folder. Failure to copy your PPD files to the
Printer Descriptions folder will cause ARTS PDF Crackerjack to have only Acrobat Distiller
PPDs available.
| CONTENTS |
Í Page 6 of 79 Î
Page 7

ARTS PDF Crackerjack User Guide
Setup
To validate the license and/or to view the installation status, open Acrobat and view the
“About Plug-Ins” box (on the Apple logo pulldown menu on the Macintosh, at the
bottom of the Acrobat Help pulldown menu in Windows) for “ARTS PDF Crackerjack...”.
The word “Demo” appears in the ARTS PDF Crackerjack “About” box when the version is
not fully licensed version. To validate your license, click on the “Register...” button, and
then enter the serial number provided by ARTS PDF.
To deactivate the plug-in, move it and the ARTS PDF Crackerjack folder out of the
Acrobat Plug-Ins folder before launching Acrobat.
| CONTENTS |
Í Page 7 of 79 Î
Page 8
ARTS PDF Crackerjack User Guide
Printing with ARTS PDF Crackerjack
3. Printing with ARTS PDF Crackerjack
To print using the software, select “Print with ARTS PDF Crackerjack...” from Acrobat’s “File”
pulldown or the “Plug-ins > ARTS PDF Crackerjack ” menu. Alternatively, you can launch ARTS PDF
Crackerjack using “keyboard shortcuts”. On the Macintosh, hold down the “Command” (Apple)
and “Shift” keys and then press the “C” key. In Windows, hold down the “Ctrl” and “Shift” keys
and then press the “C” key. You may also activate ARTS PDF Crackerjack by clicking on the “Print
Separations”
ARTS PDF Crackerjack will then display two windows. The “Preview” window gives a visual
representation of how the PDF page will be printed on the media. The “ARTS PDF Crackerjack”
window provides an interface organized by icons. Altering some of the entries in the ARTS PDF
Crackerjack window will cause corresponding changes in the Preview window.
button on the Acrobat toolbar.
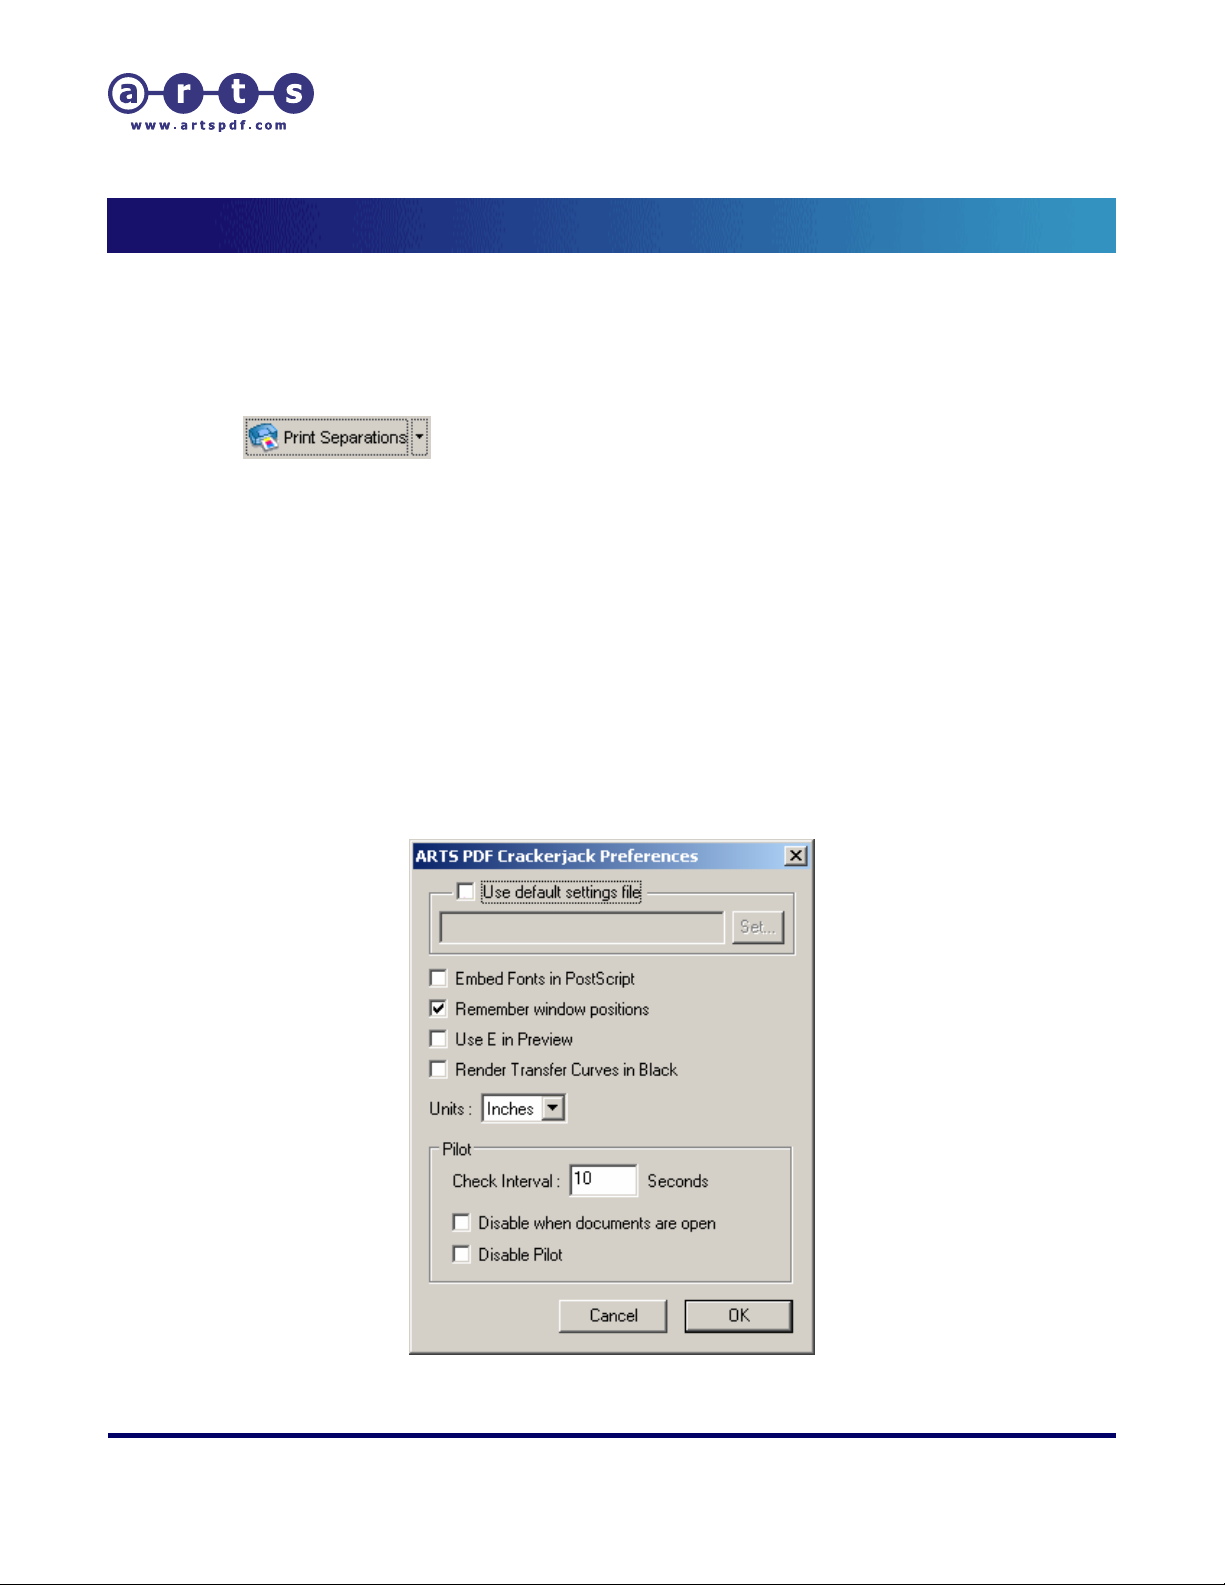
3.1. Printing Preferences
ARTS PDF Crackerjack’s printing preferences are accessed from Acrobat’s menu, “Edit >
Preferences > ARTS PDF Crackerjack > Printing…” (Win) and “Acrobat > Preferences >
ARTS PDF Crackerjack > Printing…” (Mac).
Note: On the Macintosh some preferences listed below are accessed by selecting “Pilot” or “Color”
from the drop-down list at the top of the ARTS PDF Crackerjack Preferences window.
Figure 1. Printing Preferences
| CONTENTS |
Í Page 8 of 79 Î
Page 9

ARTS PDF Crackerjack User Guide
Printing with ARTS PDF Crackerjack
3.1.1. Use default settings file
This control determines where ARTS PDF Crackerjack will get the default settings when it
is launched for the first time during an Acrobat session or whenever the “Defaults”
button is clicked. If left unchecked, ARTS PDF Crackerjack uses its internal defaults. The
“Set...” button brings up a standard dialog for specifying a folder/file location to allow
the user to specify the location and file name for ARTS PDF Crackerjack to use for its
default settings.
Note: The user must first create a settings file to be used before setting this parameter.
3.1.2. Embed Fonts in PostScript
When this box is checked, ARTS PDF Crackerjack will verify that all fon ts used in the
document are embedded before printing. If any non-embedded fonts are found ARTS
PDF Crackerjack will check the local hard disk for the fon ts and automatically substitute
them if possible. Otherwise the user will be prompted. See the section titled
Fonts” for details on this feature.
“Embedding
3.1.3. Remember window positions
This function will cause ARTS PDF Crackerjack to store the position of the Preview and
main windows as they are moved. The positions are maintained between sessions.
Unchecking this option causes the windows to revert to their default positions.
3.1.4. Use E in preview
Selecting this function causes ARTS PDF Crackerjack to display an “E” in the preview
window instead of a thumbnail of the currently selected PDF page. The “E” represents
the extent of the imageable data within the current PDF page. This function is useful
when working with large PDF files which may cause slow redraw of thumbnails in the
preview window.
3.1.5. Render Transfer Curves in Black
This allows the user to specify whether the transfer curves specified in ARTS PDF
Crackerjack’s Color panel are displayed in color or in black.
3.1.6. Units
This list allows for selection of inches, centimeters, millimeters, or points. This selection
affects all units of measurement throughout ARTS PDF Crackerjack’s panels.
| CONTENTS |
Í Page 9 of 79 Î
Page 10

ARTS PDF Crackerjack User Guide
Printing with ARTS PDF Crackerjack
3.1.7. Pilot
These settings control the functions of ARTS PDF Crackerjack Pilot.
• Check interval
Specified in seconds, this determines how often Pilot will “poll” its input folders to
see if a PDF file has been delivered for processing.
• Disable when documents are open
This option prevents Pilot from taking control of Acrobat to process files while the
user is currently working on a PDF document.
• Disable Pilot
Disables Pilot operation until the box is once again unchecked.
3.1.8. Select PPD folder (Mac OS X only)
Since OS X does not use the traditional Macintosh method of a Printer Descriptions
folder you must select a folder on your hard disk where your PPD files are located so
that ARTS PDF Crackerjack can use them.
| CONTENTS |
Í Page 10 of 79 Î
Page 11

ARTS PDF Crackerjack User Guide
Printing with ARTS PDF Crackerjack
3.2. The “Preview” Window
Figure 2. Preview window
This window shows a representation of the page currently selected. It defaults to the
page currently displayed in the Acrobat main window. In this window, the relationship of
the imageable area, the PDF page and the media is displayed for the current selections
for page size, media size, positioning, scaling, orientation, tiling and mirror and negative
print.
The PDF page is centered in the window and is defined by the blue outline. The
orientation of the PDF page is maintained as it is defined in the PDF document.
The white rectangular area represents the size of the selected media in the chosen
orientation. If you change the orientation between “Portrait” and “Landscape”, the media
is rotated, not the PDF page. If you select the “Rotate 90 degrees” function, both the
PDF page and the media are rotated.
The imageable data on the page is presented in the preview. Depending on a
“Preferences” setting, it is either shown as a scaled down version of the PDF page or as
| CONTENTS |
Í Page 11 of 79 Î
Page 12

ARTS PDF Crackerjack User Guide
Printing with ARTS PDF Crackerjack
an “E” whose size represents the x-y extents of the imageable data on the selected
page. A preview of a different page may be selected at the bottom of the preview
window by either entering the desired page number in the fill-in box or by using the
arrow keys. The down arrow corresponds to “page down” (higher page numbers), and
vice versa.
When selected, Printer’s Marks are also displayed in this window along with th e color
bar, if it is enabled.
| CONTENTS |
Í Page 12 of 79 Î
Page 13
ARTS PDF Crackerjack User Guide
Printing with ARTS PDF Crackerjack
3.3. Embedding Fonts
If the preference for checking non-embedded fonts is enabled, ARTS PDF Crackerjack
will verify that all fonts in the current document are embedded before printing. If ARTS
PDF Crackerjack finds that a font is not embedded, but that it exists on the current
system, it will print normally by including the system font in the output. If the nonembedded font cannot be found on the system, ARTS PDF Crackerjack will interrupt
output to allow the user to make a decision on what to do.
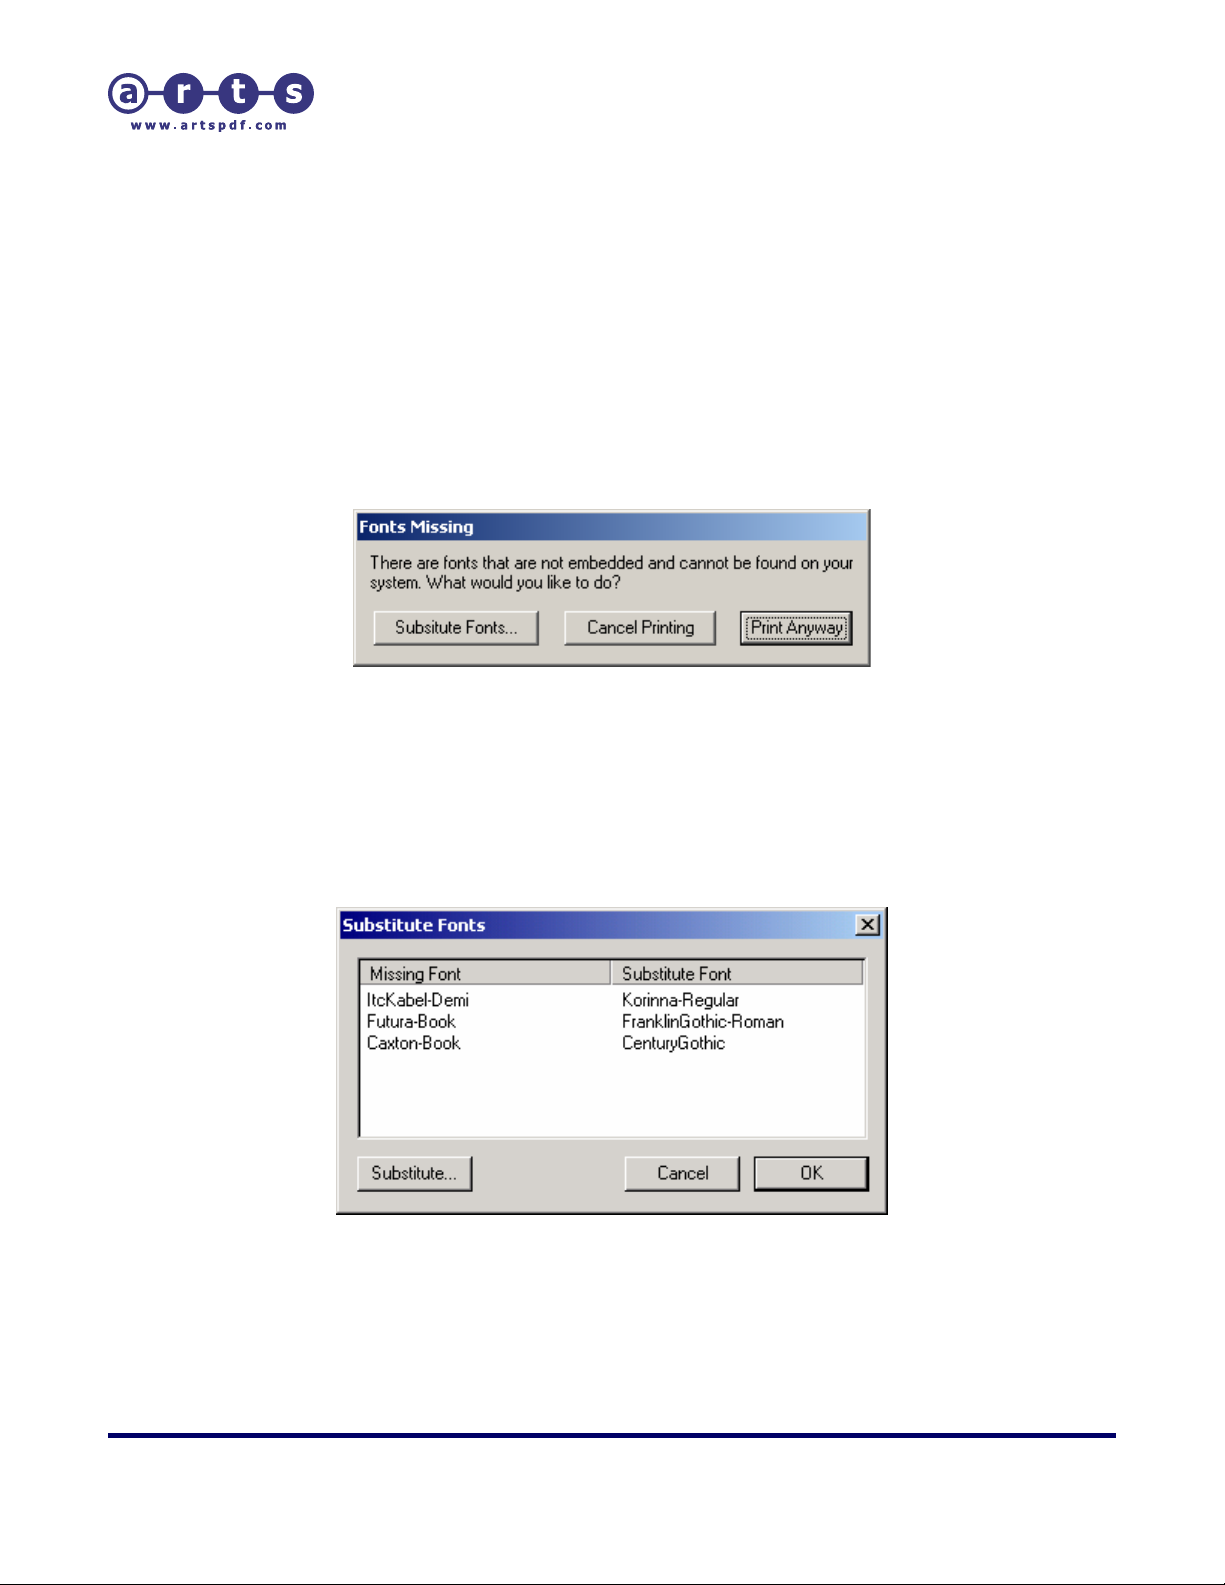
When non-embedded fonts are found with no matching font on the system, ARTS PDF
Crackerjack presents the user with the choices seen here.
Figure 3. Font Missing
“Cancel Printing” returns to ARTS PDF Crackerjack.
“Print Anyway” will cause the document to be printed and any objects using the non-
embedded fonts may, or may not, print correctly.
If the user clicks “Substitute Fonts...” they will see a list of missing fonts.
Figure 4. List of missing fonts
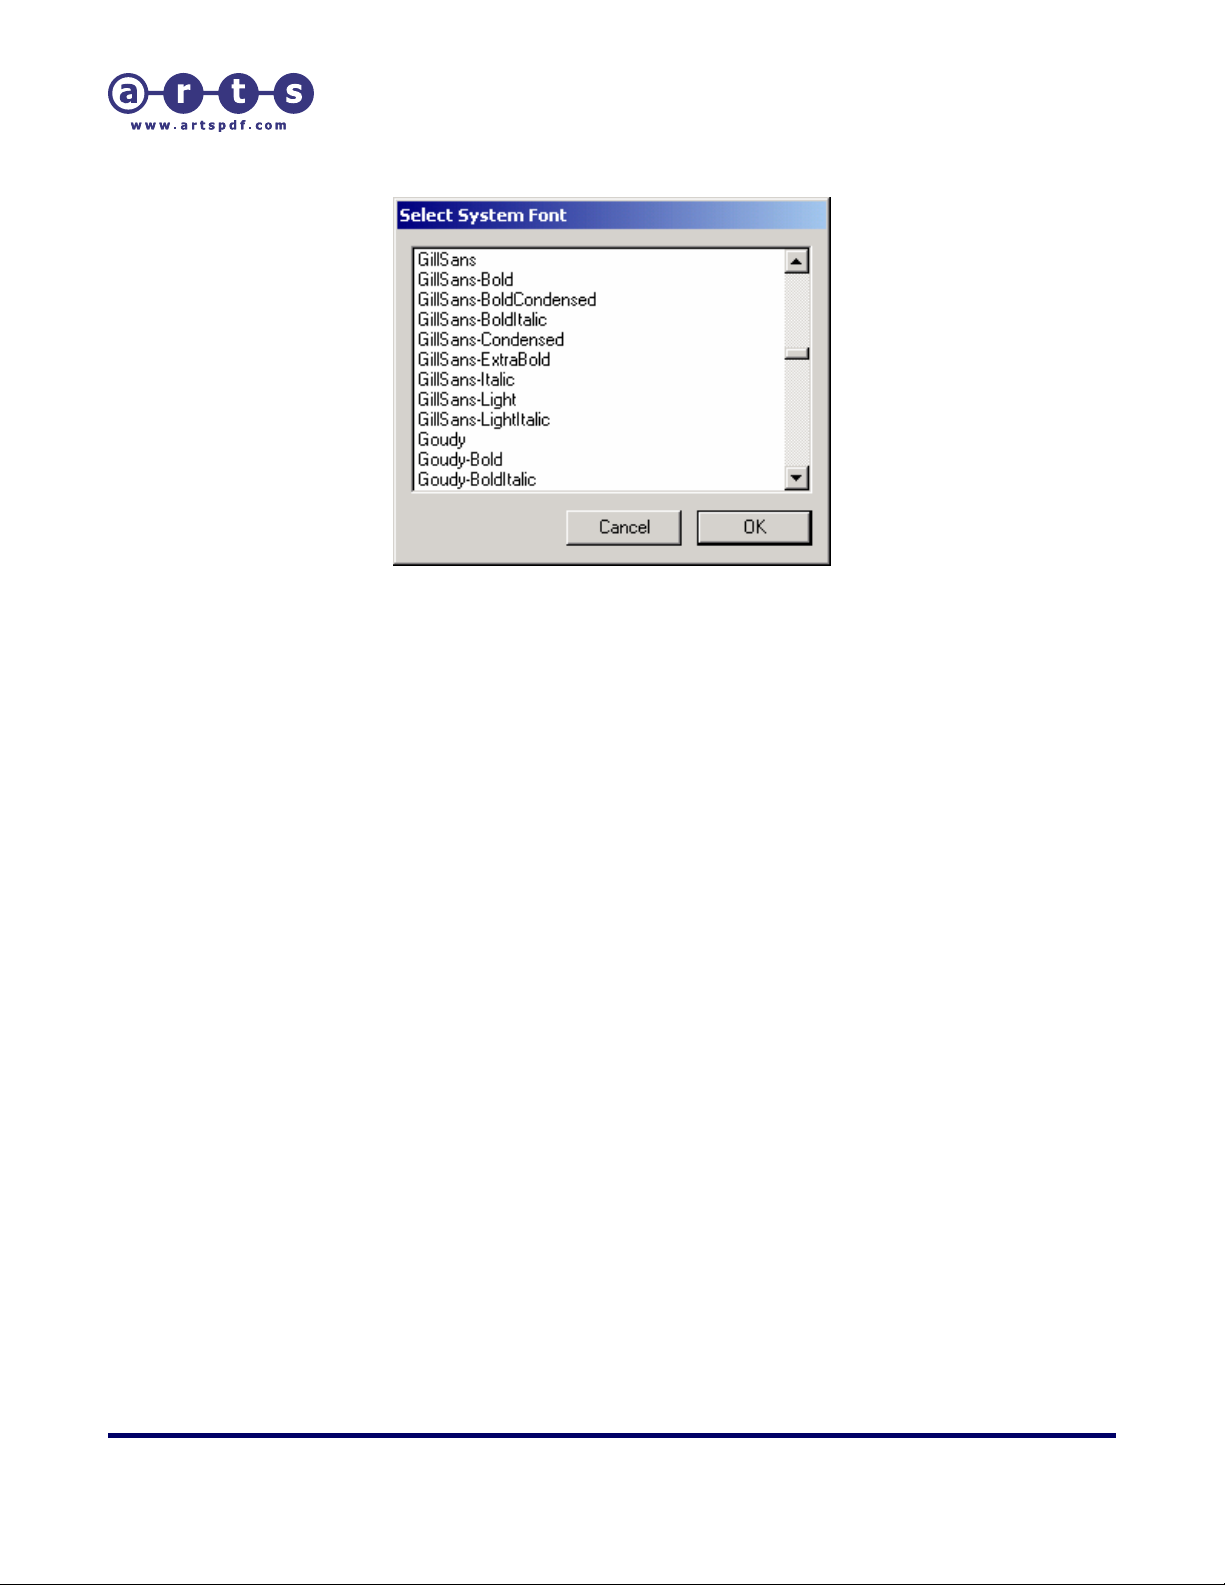
From the window showing the list of fonts clicking “Substitute...” will cause a list of all
fonts on the system to be opened for selection.
| CONTENTS |
Í Page 13 of 79 Î
Page 14
ARTS PDF Crackerjack User Guide
Printing with ARTS PDF Crackerjack
Figure 5. List of Fonts on the system
| CONTENTS |
Í Page 14 of 79 Î
Page 15
ARTS PDF Crackerjack User Guide
Printing with ARTS PDF Crackerjack
3.4. The “ARTS PDF Crackerjack” Window
The icons in this window provide professional user control over the printed output. There
are currently five icons: Target, Media, Options, Marks, and Color. Clicking on each icon
will display a “panel” where user selections can be made. The first time that you enter
ARTS PDF Crackerjack all items on the various panels are prefilled with the ARTS PDF
Crackerjack default selections. “Preview”, “Save Settings”, “Load Settings”, “Output”,
“Cancel”, and “Defaults” options appear on all panels.
3.4.1. Preview
This button launches the print preview window. If one of th e separation modes is
selected in ARTS PDF Crackerjack the user can selectively disable/enabled inks to
preview the effect of generating separations. Any settings currently enabled in ARTS PDF
Crackerjack will be previewed here also. For example, if “All spots to process” has been
selected in ARTS PDF Crackerjack, then the Preview will o nly show Cyan, Magenta,
Yellow, and Black inks. See the section titled
details.
| CONTENTS |
“The Print Preview Window” for more
Í Page 15 of 79 Î
Page 16

ARTS PDF Crackerjack User Guide
Printing with ARTS PDF Crackerjack
3.4.2. Save Settings..., Load Settings...
These buttons provide access to a standard folder/file selection mechanism. With th is,
you can save and name your ARTS PDF Crackerjack settings for each class of job that
you routinely run. These predefined formats save you time, diminish the likelihood of
error and its associated cost, and save you the trouble of re-experimenting to get jobs
to come out the way you want. These settings files are also used by ARTS PDF
Crackerjack Pilot, the production automation option for ARTS PDF Crackerjack.
Save Settings may be used to alter the entire set of default settings used when ARTS
PDF Crackerjack is launched or when the “Defaults” button is selected. See “Defaults”
(below).
3.4.3. Defaults
Clicking Defaults returns all parameters back to the “defau lt” values.
“Preferences>Use Default Settings File” to change the defaults settings for ARTS PDF
Crackerjack.
See
3.4.4. Cancel
Cancel causes an exit from ARTS PDF Crackerjack and return of control to Acrobat. No
output file is generated, and any settings changes are discarded.
3.4.5. OK/Output
If no document is open in Acrobat the button will read “OK”, otherwise it will read
“Output”. The Output button causes ARTS PDF Crackerjack to print the job to either the
printer or a file, depending on the selection made in the Target panel. After printing the
ARTS PDF Crackerjack dialog will close, and control will be returned to Acrobat. As long
as the current session of Acrobat is running. ARTS PDF Crackerjack will remember the
settings from the last job. If you quit Acrobat the current ARTS PDF Crackerjack settings
will be discarded. The next time Acrobat and ARTS PDF Crackerjack are launched, ARTS
PDF Crackerjack will start with the settin gs from the defaults file, if it exists, or its
internal defaults.
| CONTENTS |
Í Page 16 of 79 Î
Page 17

ARTS PDF Crackerjack User Guide
Printing with ARTS PDF Crackerjack
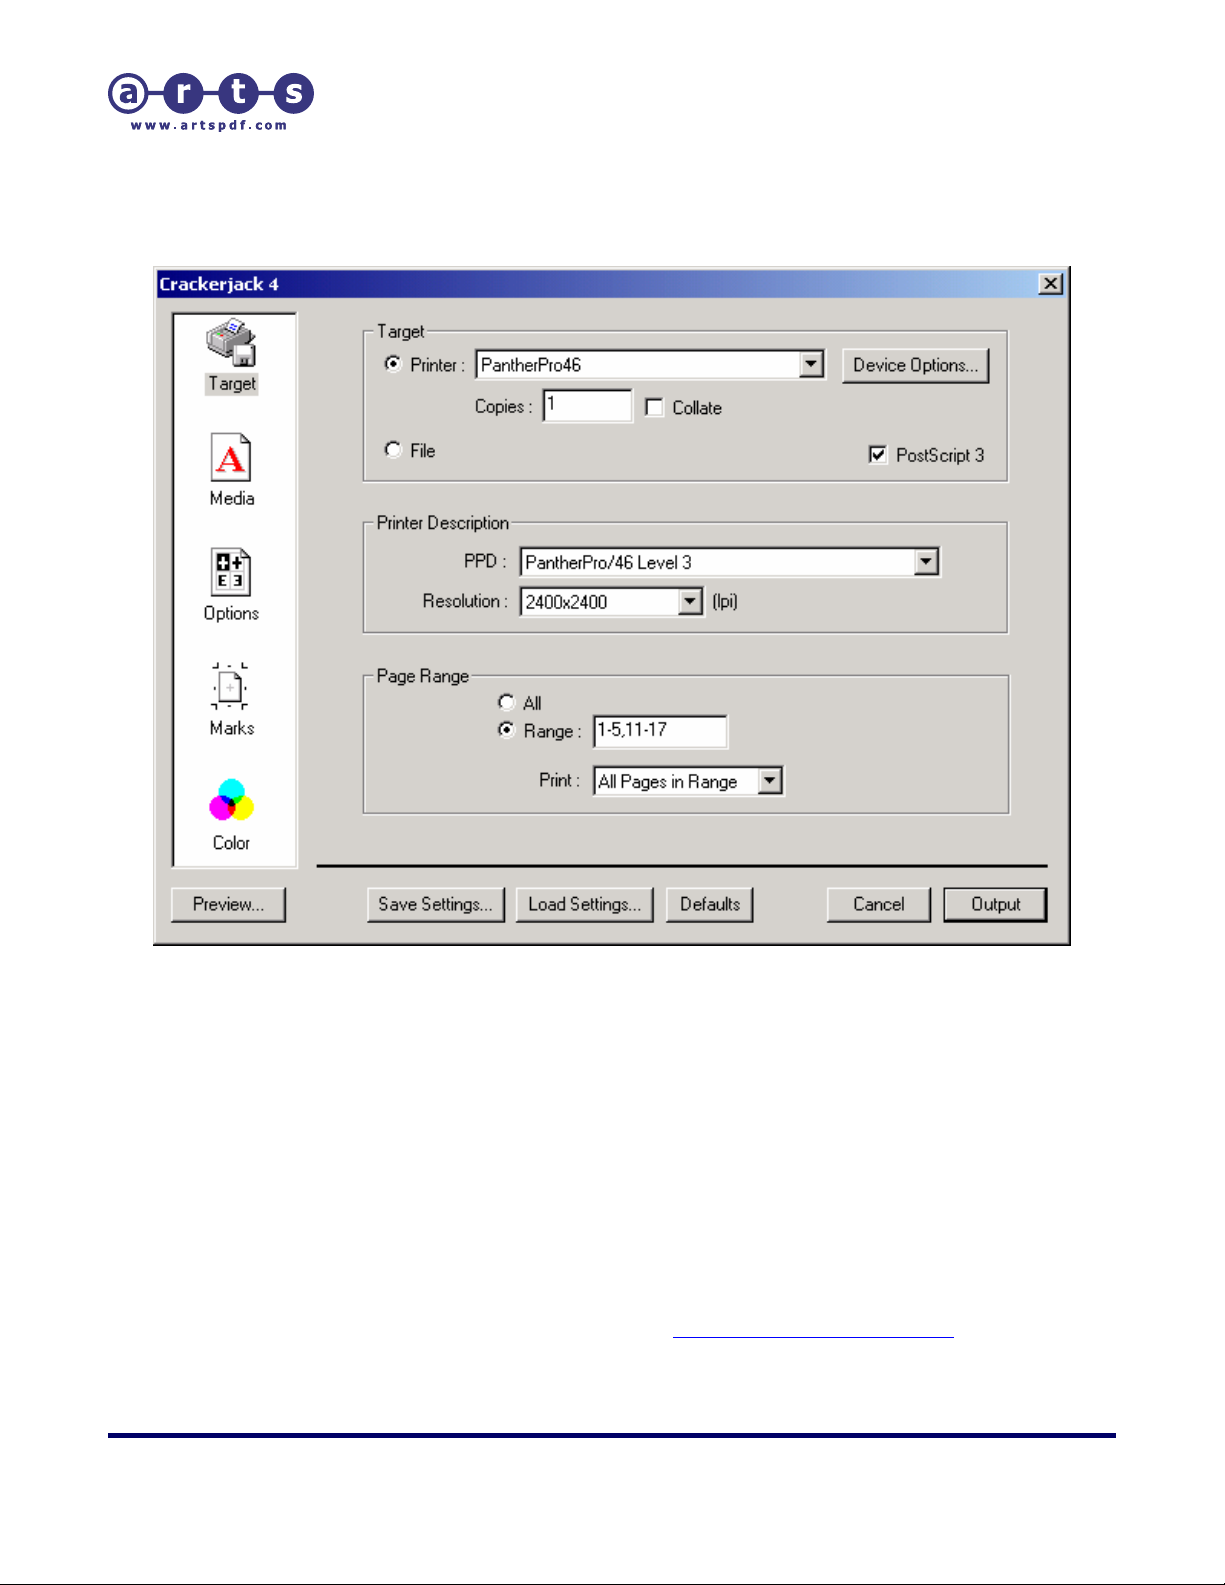
3.5. The “Target” Panel
The Target panel allows selection of high-level job parameters. It also provides controls
for the ARTS PDF Crackerjack environment.
The entire set of ARTS PDF Crackerjack values can be managed using the “Defaults”,
“Load Settings” and “Save Settings” buttons.
The remaining items on the Target panel relate to parameters to be used for the print
job.
3.5.1. Printer
By choosing Printer, you are indicating to ARTS PDF Crackerjack that you want to create
a PostScript file and send it to the indicated output device. On the Macintosh, if there is
no defaults settings file, ARTS PDF Crackerjack’s default is the printer currently selected
in “Chooser”. Pressing the “Set...” button will launch “Chooser” and allow you to select a
different device. You may then save this in your ARTS PDF Crackerjack Preferences as
the default, or in another ARTS PDF Crackerjack settings file. In OS X there is no “Set...
| CONTENTS |
Í Page 17 of 79 Î
Page 18

ARTS PDF Crackerjack User Guide
Printing with ARTS PDF Crackerjack
button. There will be a list of printers already installed through the OS X Print Center. In
Windows, with no default settings file, ARTS PDF Crackerjack’s default is the default
printer in your Windows “Printers” folder. You may choose from any printer in the dropdown list and subsequently save it in your ARTS PDF Crackerjack defaults, or in another
ARTS PDF Crackerjack settings file.
Note: that on either system, you must also change your PPD in ARTS PDF Crackerjack when
choosing a different printer. When you make a printer selection, ARTS PDF Crackerjack has all the
information it needs to print. There is no need to select “Setup” in the “Chooser” menu or “Page
Setup” in Acrobat.
• Copies
This field allows specification of the number of copies to be printed. The default is
one copy.
• Collate
If the number of Copies is greater than one, this option is made available. If the
box is checked, ARTS PDF Crackerjack performs software collation. If the selected
device supports a hardware collator, the user may choose to use that option
instead by selecting it from the Advanced Device Options (see below). Hardware
collation will only be available if it is a supported option wit hin the currently
selected PPD.
• Device options
ARTS PDF Crackerjack supports many traditional device options in a device
independent way. For example, collation, negative and mirror print, separations,
and screening are often treated as device options in other applications. ARTS PDF
Crackerjack supports selected device options from the currently selected PPD.
Basic
The initial list of device options includes input trays which are specified in the
currently selected PPD. If the PPD indicates that the device supports
duplexing, this option will also appear.
Advanced
Clicking the Advanced... button will display an extended list of device-specific
features defined in the PPD.
Note: that many advanced options, such as separations, specialized halftone screening, etc. may
conflict with choices made in ARTS PDF Crackerjack. Selecting these options may cause
unpredictable output results.
3.5.2. File
By choosing File, you are indicating to ARTS PDF Crackerjack that you want the output
| CONTENTS |
Í Page 18 of 79 Î
Page 19

ARTS PDF Crackerjack User Guide
Printing with ARTS PDF Crackerjack
to be saved in a PostScript file. When the Output button is selected, the standard system
folder/file selection/naming mechanism is displayed. The file will be saved as PostScript
Level 2 unless the “PostScript 3” box is checked. ARTS PDF Crackerjack creates
PostScript files containing all of the information for the currently specified pages.
3.5.3. PostScript 3
When checked, all output from ARTS PDF Crackerjack will contain PostScript 3 specif ic
operators.
Note: Using this option with non-PostScript 3 devices may cause errors or no output.
3.5.4. Printer description
• PPD (PostScript Printer Description)
This scroll list allows for selection of the PostScript print er description file to be
used when ARTS PDF Crackerjack creates a PostScript file. ARTS PDF Crackerjack
makes use of some of the information in the PPD file. Th is includes device
resolutions, supported media sizes, and screening frequencies and angles for the
selected device resolution. On the Macintosh, if there is no defaults settings file,
the initial PPD default is that chosen for the printer in “Chooser”. In OS X the PPD
list is either the default list from the OS (which cannot be modified) or the list
from the folder selected in your ARTS PDF Crackerjack preferences. In Windows,
with no default settings file, the initial defau lt PPD is the first file name in the
“Printer Descriptions” folder as if sorted alphabetically by file name.
• Resolution
For devices with multi-resolution capability as specified in the PPD, this scroll list
allows selection of the device Resolution to be used when printing. The selected
value is also used to select an optimized screen set (Frequency and Angle) for the
selected resolution. Resolution is always specified in dots per inch (dpi). The
default resolution is the resolution defined as “default ” in the PPD.
3.5.5. Page range
This option allows the user to specify the pages to be included in the output. You can
select either “All” pages or a page “Range”. If there is no defaults settings file, the first
time ARTS PDF Crackerjack is invoked for a new document the Page range will be set to
“All”.
Additional options are available in the drop-down list for further specifying which pages
are to be output. The choices are: All pages in range, Odd pages, or Even pages. Odd
and Even can be used in combination with “All” to outpu t all odd pages or all even
pages.
When “Range” is selected you may enter specific page numbers or page ranges. A page
range must have a hyphen between the beginning and ending page numbers (i.e. 3-7 to
| CONTENTS |
Í Page 19 of 79 Î
Page 20

ARTS PDF Crackerjack User Guide
Printing with ARTS PDF Crackerjack
print pages 3 through 7). Commas and spaces serve as separators between page
numbers (i.e. 3-7, 8-11 to print pages 3 through 7 and 8 through 11). Pages will print in
the order specified. Ranges with a higher beginning page number than ending page
number will print in reverse numerical order.
Note: that page numbers are the physical pages of the PDF, which may not correspond to page
numbers, if any, which are in the PDF document or displayed in Acrobat.
| CONTENTS |
Í Page 20 of 79 Î
Page 21
ARTS PDF Crackerjack User Guide
Printing with ARTS PDF Crackerjack
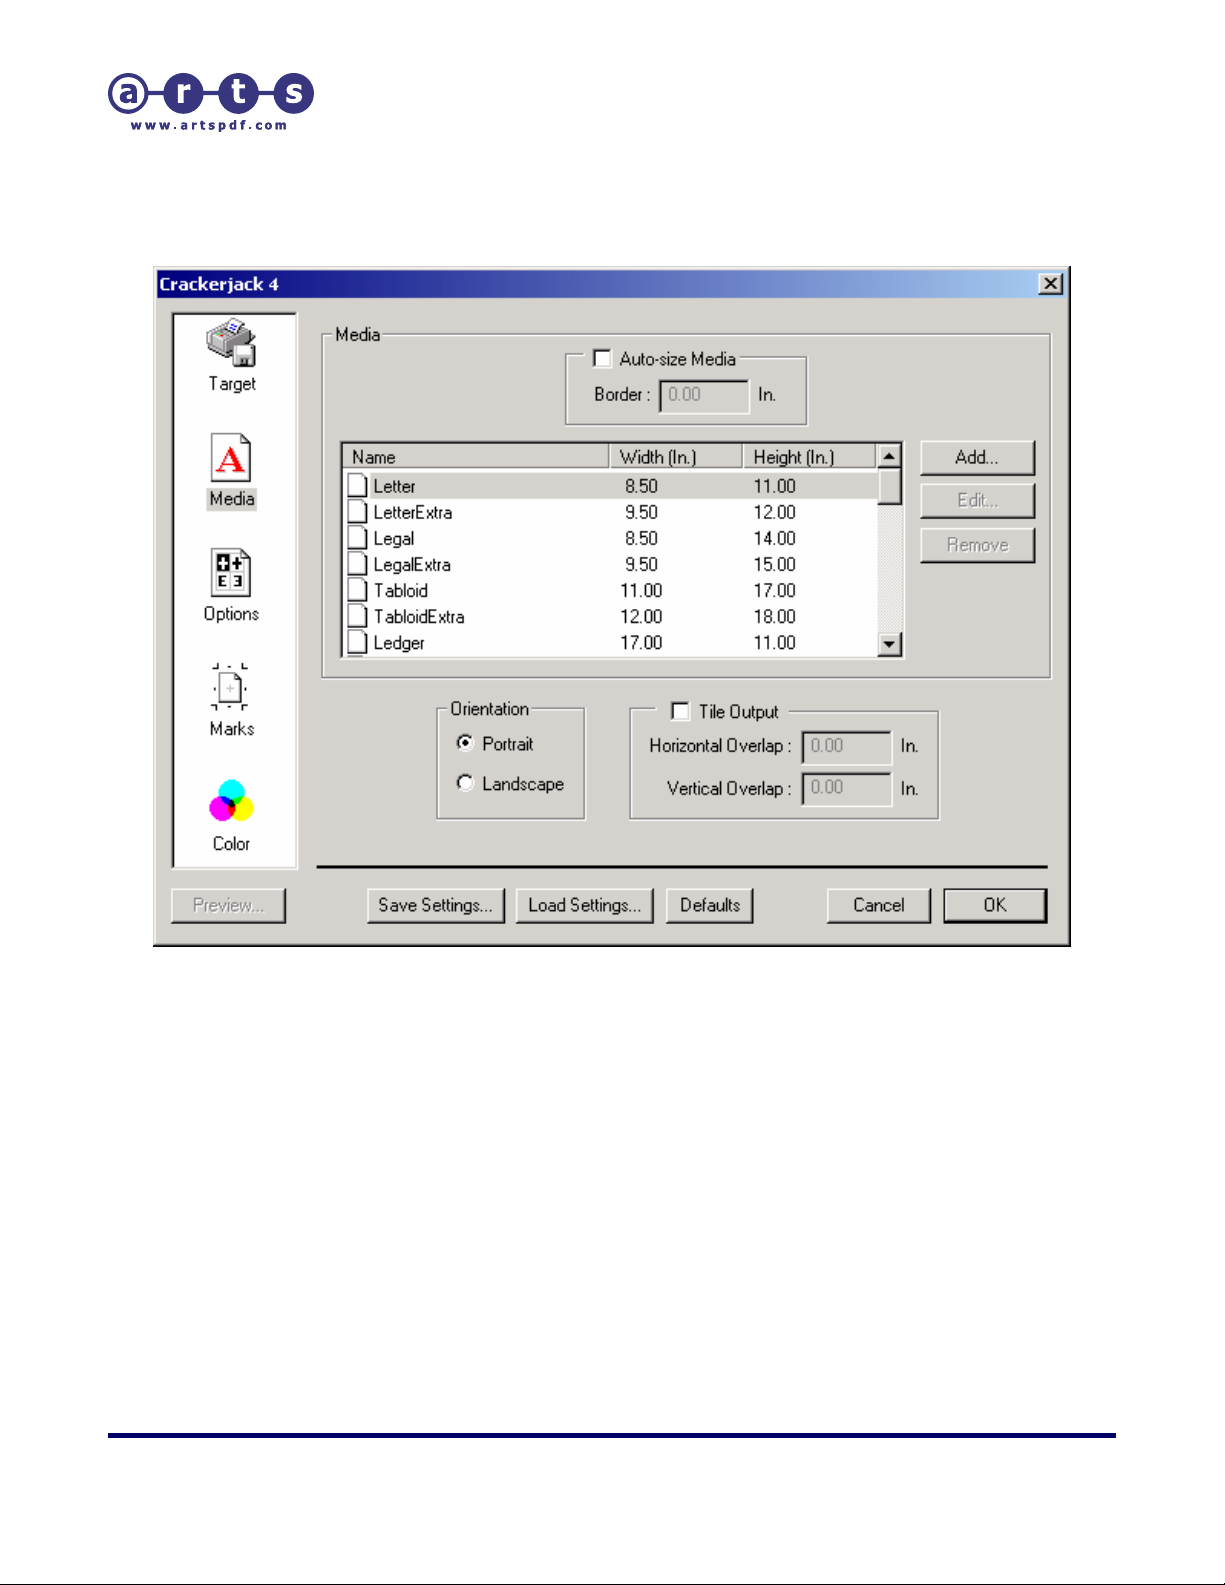
3.6. The “Media” Panel
This panel allows for media selection and provides some of the parameters for how the
PDF page will be placed on the media.
3.6.1. Auto-size media
When this box is checked, ARTS PDF Crackerjack will automatically set a media size
which matches the current PDF page size plus any extra amounts specified by the
“Border” parameter. Checking this box causes the list of media sizes in the Media box to
become disabled. If a multi-page PDF document contains different page sizes and/or
orientations, ARTS PDF Crackerjack will adjust the media size for each page during
output. This feature is particularly useful when ARTS PDF Crackerjack Pilot is used, since
you need not create multiple Pilot folders to accommodate different media sizes.
Note: Using this feature with devices such as desktop laser printers, which do not support custom
media sizes, may cause PostScript errors. Ensure that the PDF document page size(s) are
supported by your device before enabling Auto-size Media.
| CONTENTS |
Í Page 21 of 79 Î
Page 22

ARTS PDF Crackerjack User Guide
Printing with ARTS PDF Crackerjack
• Border
With Auto-size Media selected, this function allow s the user to specify how much
additional margin should be added to each page on output. The specified value
will be added to all four sides of each page. This is useful for accommodating
ARTS PDF Crackerjack’s Printer’s Marks.
3.6.2. Media
This scroll list allows for the selection of the media size to be used. This list is taken from
the currently selected PPD. Therefore, the name and dimensions shown for each media
size may be specific to the device for which that PPD was written.
The selected media size is used in display of the “Preview” window and any generated
output file.
• Add.../Edit.../Remove...
These buttons allow the user to define and update custom media sizes. Using
this feature, you can specify a name and the dimensions for any un ique media.
Care should be taken when using this since some PostScript devices can only
take predefined media. Some PostScript devices will generate a PostScript error
for a media size it doesn't recognize, and it is possible to specify a size that
violates the devices minimum and maximum size restrictions.
Note: The media sizes taken from the currently selected PPD cannot be edited or removed from
the list.
3.6.3. Orientation
This option allows for a change in the media orientation. Upon entering ARTS PDF
Crackerjack, the Orientation is reflected in the Preview window.
You may switch between orientations by clicking on the appropriate button. The change
is reflected in both the Preview window and in the commands inclu ded in the output file.
In the Preview window, when the orientation is changed, the media is rotated, not the
PDF page. The commands in the output file produce the same net effect on the printed
output regardless of which edge of the PDF page is output first.
Note: Orientation should be used to cause the media to align with the PDF page as
displayed in the Preview window. To obtain rotated output, sometimes called
“transverse” or “media saving”, use the “Rotate 90 degrees” feature on ARTS PDF
Crackerjack’s Options panel.
3.6.4. Tile Output
When a PDF document’s page size is larger than the available media size(s) on an
output device, this option can be useful for printing the job across multiple pages which
can then be combined to see the entire print job. This option would normally be used to
| CONTENTS |
Í Page 22 of 79 Î
Page 23

ARTS PDF Crackerjack User Guide
Printing with ARTS PDF Crackerjack
check, or proof, output on a desktop laser printer for a job which is intended to be run
on a large format device for final output. Another application might be tiling different
sections for billboards or theatrical scenery. When this option is selected ARTS PDF
Crackerjack’s Preview window will display a representation of t he tiled output.
• Horizontal Overlap / Vertical Overlap
When “Tile Output” is selected the additional option to specify horizontal and
vertical overlap are made available. Overlap is generally used so that portions of
each tile will overlap the neighboring tile(s). This is h elpful when printing to
desktop laser printers which usually have some unprintable region on the page
edges. With overlap the output can be aligned so that all data is visible.
| CONTENTS |
Í Page 23 of 79 Î
Page 24
ARTS PDF Crackerjack User Guide
Printing with ARTS PDF Crackerjack
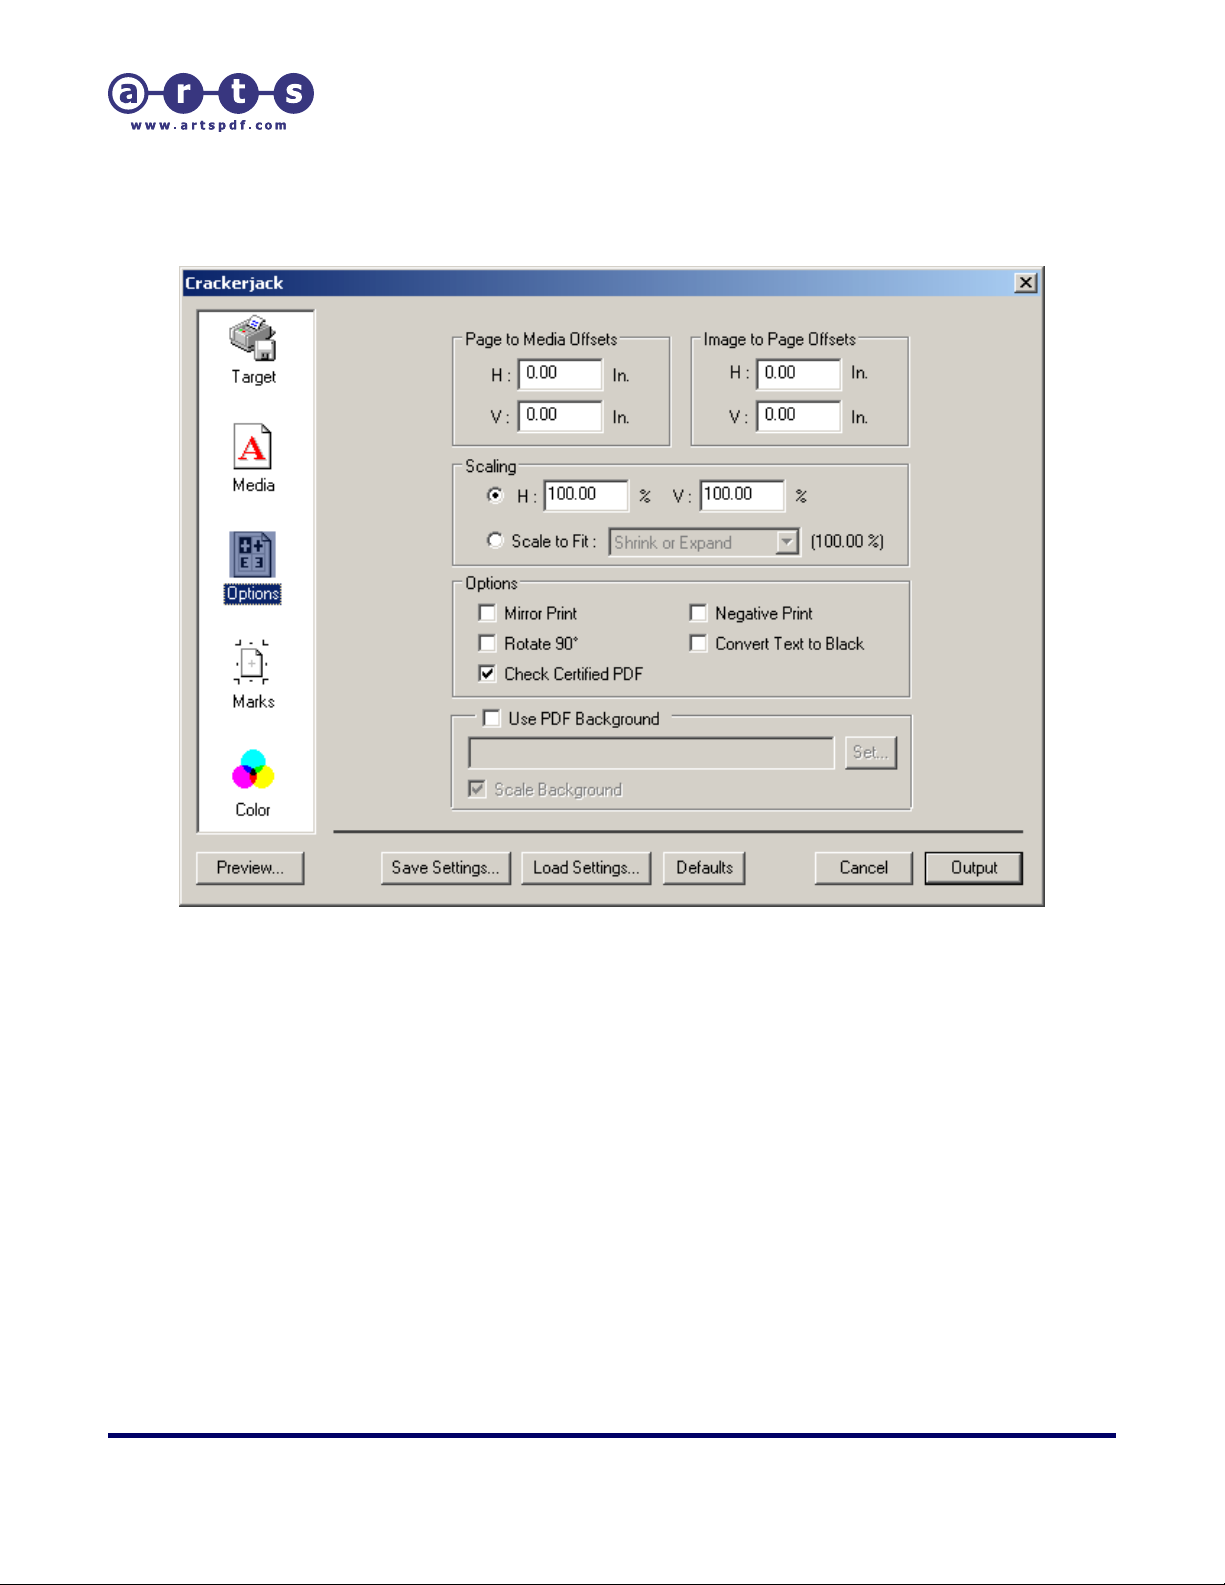
3.7. The “Options” Panel
This panel allows for setting certain options which affect how the printed output will
appear
3.7.1. Offsets
These options allow for the repositioning of the PDF page on the media and the
repositioning of the imageable area on the PDF page, both either vertically or
horizontally. Positive offsets move the PDF page up or to the right. Negative offsets
move the PDF page down or to the left. The initial offset defaults are zero. The offsets
may be specified in inches, centimeters, millimeters, or points depending on the Units
selection. Offsets are applied after scaling. As such, it is recommended t hat one consider
the offsets as moving the center of the PDF page or imageable area to the new location.
• Page to media
Often, it is necessary to reposition the PDF page on the media. For example, if
the default positioning places the page in an unprintable area used for media
transport, the page should be moved so that the information is not clipped. This
Page to Media offset option allows for the repositioning of the page on the media.
| CONTENTS |
Í Page 24 of 79 Î
Page 25

ARTS PDF Crackerjack User Guide
Printing with ARTS PDF Crackerjack
The offsets may allow some or all of the PDF page to be moved off the media.
These offset changes are reflected in both the Preview window and in the
PostScript output. If Printer’s Marks are selected, they will also be moved
accordingly.
• Image to page
Occasionally, the repositioning capability provided above is still insufficient for the
application. An example of this is trying to reposition data for the printing of right
and left pages with center binding or hole punching. The ability to move just the
imageable data while not altering the page position on the media is required.
Unlike PostScript, PDF pages allow for this type of manipulation, and ARTS PDF
Crackerjack supports this. This Image Area to Page offset option allows for the
repositioning of the imageable area with respect to the PDF page. The offsets
may allow some or all of the data to be moved off the page. The offset changes
are reflected in the both the Preview window and in the PostScript output.
Note: If Printer’s Marks are selected, they will not be affected by “Image to page” offsets.
3.7.2. Scaling
Scaling increases or decreases the size of the PDF page. The initial ARTS PDF
Crackerjack default for scaling is 100%. For the purposes of scaling, the origin is the
center of the PDF page. Scaling is applied to the PDF page before offsets. Based on
these two factors, it is recommended that one consider the offsets as moving the center
of the PDF page or imageable area to the new location. Either Scale to Fit or
Horizontal/Vertical Scaling may be applied at any one time, but not both simultaneously.
The changes implied by scaling are reflected in the Preview window and in any ARTS PDF
Crackerjack generated PostScript file.
• Horizontal/Vertical
You may select independent horizontal and vertical scaling factors to be applied
to the PDF pages. Input is limited to eight characters including the decimal
separator. Even though four digits may be entered to the right of the decimal
separator, only the three most significant are retained. With the maximum and
minimum page sizes allowed in PDF, this provides ample room to scale the
PostScript output to exceedingly large or small formats. Large output might have
to be tiled due to media size restrictions on the output device.
• Scale to fit
Selecting this option provides three choices for scaling. “Shrink or expand” means
that the page will automatically be scaled either up or down to fit the currently
selected media size. “Shrink only” will cause the page to be scaled down only if it
is necessary to fit a media size that is smaller than the PDF page. “Expand only”
will cause the page to be scaled up only if it is necessary to fit a media size that
is larger than the PDF page. Regardless of scaling method, the perspective of th e
original PDF page is always maintained, that is, horizontal and vertical
| CONTENTS |
Í Page 25 of 79 Î
Page 26

ARTS PDF Crackerjack User Guide
Printing with ARTS PDF Crackerjack
dimensions are scaled by the same amount.
3.7.3. Options
• Mirror print
This option allows you to invert the printing direction . To access this function click
on the box. In the Preview Window this is represented as a mirror image. This
option is useful for transfer processes and certain plate making approaches.
• Negative print
This option allows you to enable “reverse” printing. To access this function click
on the box. In the Preview Window, this is represented by changing the color
contents from positive to negative which often means that the PDF page outline
changes from blue to yellow, the media background changes from white to black,
and the “E”, if present, changes from black to white. This option is provided to
accommodate both positive-acting and negative-acting printing processes.
• Rotate 90 degrees
Selecting this option will cause the output, both media and PDF page, to be
rotated by 90 degrees clockwise. This function is also known as “transverse”
printing or “media saving”.
Note: that this option is typically only used for devices such as imagesetters that use wide
media.
• Convert Text To Black
When selected this option will cause ALL text objects in the PD F document to be
converted to process black on output.
3.7.4. Check Certified PDF Status
When this box is checked it will cause Crackerjack to validate the Enfocus Certified
PDF™ status of the PDF before printing. If the PDF has been modified such that it status
as a Certified PDF document is no longer valid Crackerjack will issu e a warning and ask
the user if they want to cancel the print job or continue printing anyway. To use this
feature you must have Enfocus’ Certified PDF plug-in installed. F or more inf ormation on
Enfocus Certified PDF visit the
Enfocus web site.
3.7.5. Use PDF Background
When this box is checked the user can select a PDF document to be used as a
background when printing the current document. Th e selected PDF will be printed behind
all objects on the page(s). It will also be centered on the output page(s). This feature is
useful for things like watermarking output and custom color bars/trim marks.
| CONTENTS |
Í Page 26 of 79 Î
Page 27

ARTS PDF Crackerjack User Guide
Printing with ARTS PDF Crackerjack
• Scale Background
When this box is checked the PDF document used as a background will be scaled
to the same size as the PDF document being printed. When the box is not
checked the background page will be printed at its original size, whether larger or
smaller than the document being printed. However, if the background page is
larger than the media size selected in ARTS PDF Crackerjack it will be cut off at
the extent of the media.
| CONTENTS |
Í Page 27 of 79 Î
Page 28

ARTS PDF Crackerjack User Guide
Printing with ARTS PDF Crackerjack
3.8. The “Marks” Panel
The Marks panel allows for the selection of the remaining parameters that determine
how the output will appear.
3.8.1. Printer’s marks
This option turns on a number of items that are useful for print production. These items
are printed outside the PDF page. They add approximately 0.5 inches to each side. To
ensure that these items are visible, choose a media size that is approximately one inch
larger both vertically and horizontally than the PDF page size. To access this function,
click on the box, and a check mark will appear.
• Crop mark type
User selectable choice of single or double crop marks.
| CONTENTS |
Í Page 28 of 79 Î
Page 29

ARTS PDF Crackerjack User Guide
Printing with ARTS PDF Crackerjack
• Registration mark type
User selectable choice of concentric circles or cross style registration marks.
• Offsets
Allows the user to specify the position of crop and registration marks for each of
the four sides of the page. This feature is useful in adjusting the crop marks for
bleeds.
3.8.2. Crop and registration marks
This check box determines whether the crop and registration marks are included in the
output. This box is disabled if “Printer’s Marks” is not checked.
The default position for crop marks corresponds to the PDF TrimBox, if it exists,
otherwise to the PDF CropBox.
3.8.3. File/Plate names
This check box determines whether the PDF file name and color separation plate names
are included in the output. This box is disabled if “Printers Marks” is not checked.
3.8.4. Color bar
This option includes a color bar on the printed output. A predefined color bar is included
with ARTS PDF Crackerjack. This box is disabled if “Printer’s Marks” is not checked.
ARTS PDF Crackerjack's color bar contains measurement squares of approximately 5
mm on a side for cyan, magenta, yellow, and black at 5%, 25%, 50%, 75%, 95%, and
100%, totaling about 5 inches in length. The color bar does not get scaled. The color bar
is positioned approximately one-quarter inch from the corner of the PDF page along the
long axis.
Note: To use a color bar of your own design, create a PDF page containing your color bar and use
it as a background when printing from ARTS PDF Crackerjack. See Use PDF Background for more
information.
| CONTENTS |
Í Page 29 of 79 Î
Page 30

ARTS PDF Crackerjack User Guide
Printing with ARTS PDF Crackerjack
3.9. The “Color” Panel
The Color panel provides options to control the color rendition of the out put. This panel
also provides access to controls for Separations and Screening. Most of ARTS PDF
Crackerjack’s settings may be deselected, allowing the user to rely on their RIP’s
defaults.
3.9.1. Color set
This is a scrollable list where the user may choose stored custom color settings. A color
set is a predefined selection for those parameters on and related to the Color panel. T he
default entry is “Custom”. If you choose a Color set and then change one or more of the
color parameters, this field will revert to “Custom”
ARTS PDF Crackerjack ships with some sample Color sets. These reflect industry
standard settings for dot gain for different types of printing, on different paper stocks
and at specific line screen frequencies. These should be considered as “starter” sets. You
may want to improve them for known print conditions. To assist you with this process,
ARTS PDF Crackerjack includes ColorSteps.pdf as part of the release. This document
| CONTENTS |
Í Page 30 of 79 Î
Page 31

ARTS PDF Crackerjack User Guide
Printing with ARTS PDF Crackerjack
contains known color values as defined in Acrobat. This document may be printed
successively with ARTS PDF Crackerjack, CMYK and spot ink percentages measured, and
ARTS PDF Crackerjack transfer functions adjusted until measured percentages match the
values in the document. Also, the RGB values may be used to fine tune ARTS PDF
Crackerjack’s RGB conversion (GCR (black generation) and UCR). If you will be
delivering PostScript files to a location whose print conditions are not known or not
fingerprinted, you may want to apply no transfer function s and rely on capabilities at the
destination to compensate for their local dot gain.
3.9.2. Output color as
This list allows the user to select from among the four types of ARTS PDF Crackerjack
output. The choices are: In-RIP separations, Pre-separated, Composite color, or
Composite gray.
When either In-RIP or Pre-separated are chosen additional controls become available.
Choosing separations provides access to an ink table containing a list of the standard
process colors (cyan, magenta, yellow, and black) plus any spot colors that have been
included in the PDF document. The default is t o print all inks. You can click on any of the
list entries to select that color (indicated by highlighting) . To deselect/select an ink, click
on the check mark next to its name. To set/review its screening settings and transfer
function or, in the case of spot colors, review their equivalent CMYK values, double-click
on the ink name or click “Edit”. When separations are selected, you can also select the
Black overprint and global spot to process options, review/change UCR/GCR generation
for RGB color conversion to DeviceCMYK, and select/reset ARTS PDF Crackerjack’s
device independent color rendering for the job.
• In-RIP separations
This is the preferred method of generating separations from ARTS PDF
Crackerjack. Files are smaller, thus transmission, interpretation and rendering
are significantly faster than pre-separated output. When selected, composite
color data will be separated into CMYK data using PostScript in-RIP separation
capability. Unless instructed otherwise elsewhere, spot colors are treated as
individual separations.
Some desktop printers with PostScript 3 are capable of doing in-RIP separations.
If you are experiencing difficulties, it may be due to memory limitations in the
printer. This can be verified by sending the job to the RIP with only one ink
selected. If successful, you can try it with two inks selected, etc. to determine
your practical limits. This can help you determine how much memory you might
consider adding.
• Pre-separated
Pre-separated is the preferred method to ensure that the output matches the
“Print Preview” window.
This method should also be used for desktop printers which are incapable of in-
| CONTENTS |
Í Page 31 of 79 Î
Page 32

ARTS PDF Crackerjack User Guide
Printing with ARTS PDF Crackerjack
RIP separations. The features available using this option are similar to In-RIP
separations.
Note: PDF files containing RGB data must have the data converted to CMYK before preseparated output can occur. ARTS PDF Crackerjack performs this conversion
automatically, but because of the amount of data to be converted, files containing RGB
images may take considerable time to process.
• Composite color
Selecting this option will cause composite color data in the PDF docu ment to
remain as composite color data in the PostScript file. Pre-separated PDF pages
will remain separated. Composite color files are useful for output to certain
printers, proofers, slide makers, film recorders, and downstream prepress
applications.
Choosing Composite for monochrome devices will cause the color data to be
printed based on its luminance values. For those devices that are halftone
devices, the RIP will also screen the output.
• Composite gray
Selecting this option will cause composite color data in the PDF docu ment to be
output as composite gray data in the PostScript file. Composite gray output is
useful for black and white or grayscale devices.
3.9.3. Black overprint
Regardless of the creator application, even with correct Acrobat Distiller settings,
“overprints” are not consistently preserved in composite color PDF files unless a custom
color (spot color) is used for objects to be overprinted.
When selected, this feature causes ARTS PDF Crackerjack to find all text, graphics, and
line art which are defined as 100% K in CMYK, 0% in RGB, and/or 100% “black” in
DeviceGray. ARTS PDF Crackerjack will then print these objects on the black separation
without knocking out the underlying object(s) on the other separations.
Note: This feature is only available when one of the separation modes is selected. It does not
affect images.
3.9.4. Use ARTS PDF Crackerjack screens
This check box determines whether the screening settings specified in ARTS PDF
Crackerjack will be used on output. If unchecked the values cu rrently set in the device
will be used.
These options provide control over halftone screening. Not only do they apply to
separated data, but also to composite output on halftoning devices. Typically, the
default Frequency is that optimized for the selected Resolution as specified in the PPD.
| CONTENTS |
Í Page 32 of 79 Î
Page 33

ARTS PDF Crackerjack User Guide
Printing with ARTS PDF Crackerjack
To implement these capabilities in a fashion independent of RIP vendor, ARTS PDF
Crackerjack relies on Adobe Accurate Screens, another standard feature of PostScript.
Alternative RIP technology vendors, such as Harlequin, automatically substitute their
versions of screening.
• Frequency
This drop-down list displays the line-screen frequen cy values from the currently
selected PPD. The list will vary depending on the resolution selected.
• Spot function
This option provides a choice of different spot functions that might be used to
provide different “look and feel” to your printed document. Round and Diamond
spots are probably the two most commonly used.
The spot function list does not contain casual selections. This is the list of spot
functions supported by Adobe's Portable Document Format Reference Manual,
i.e., the PDF specification. This means that these are also the spot functions used
by Distiller when it translates PostScript screening information into embedded
screen sets within a PDF document. Additionally, these are either standard spot
functions defined for Adobe Accurate Screens or ones that are transparently
supported by Accurate Screens.
3.9.5. Color output options
The outstanding feature of this section is the “inks list” table. By (un)checking the user
may select which separations will output. If ARTS PDF Crackerjack screening is not used,
the frequency and angle values for the inks will be “default”, that is, the values pre-set
in the RIP will be used. If ARTS PDF Crackerjack screening is selected, then the
frequency, angle, and transfer function may be altered.
• Name
When one of the separation types is selected, this list display s all ink names in
the PDF file. If separations are not chosen, the list shows only “Composite”. Inks
may be selected/deselected individually by clicking on the check mark next to the
ink name. If expected spot color inks do not appear in th is list, then the PDF was
created incorrectly.
Note: An asterisk (*) appearing next to an ink name indicates that a custom transfer
function has been applied to that ink.
• Frequency
This list displays the line-screen frequency value for each ink name. Unless edited
(see below), the values are derived from the currently selected PPD.
| CONTENTS |
Í Page 33 of 79 Î
Page 34

ARTS PDF Crackerjack User Guide
Printing with ARTS PDF Crackerjack
• Angle
This list displays the screen angle value for each ink name. As with frequencies,
unless edited (see below), the values are derived from the currently selected
PPD.
3.9.6. Edit...
This button activates a dialog box where values for frequency, angle and transfer
function can be edited for each color in the inks list. For spot colors, CMYK equivalents
are display and the user may elect to convert this spot color to process on an individual
basis.
• Frequency
Initially, this box will display the value from the PPD for the currently selected ink
name, Resolution, and Frequency as specified on the Color panel. Th is value may
be changed, but ARTS PDF Crackerjack does nothing to ensure that the new
value is valid for the target RIP.
• Angle
Initially, this box will display the value from the PPD for the currently selected ink
name, Resolution, and Frequency as specified on the Color panel. Th is value may
be changed, but ARTS PDF Crackerjack does nothing to ensure that the new
value is valid for the target RIP.
• Use custom transfer function
When this box is checked, the user can click on “Transfer function...”. This will
display a dialog where the user may enter values to specify a custom transfer
curve for the selected ink color. This transfer function will be used for all data in
the job that halftoned to this separation.
• Convert to process
When this box is checked, color information for this spot color only w il l be
converted to process color and appear on the appropriate CMYK plates.
3.9.7. Map...
This button activates a dialog box where spot colors can be mapped to the selected spot
color. The button will only be active when more than one spot color ex ists in the current
PDF document. To use spot color mapping, select the color that you want other spot
colors to be mapped TO, then click Map.
Mapped spot colors can also be un-mapped. Once a color has been mapped it will appear
in the inks list with a blue dot next to its name. Spot colors which have other spot colors
mapped to them will appear normally in the inks list.
| CONTENTS |
Í Page 34 of 79 Î
Page 35

ARTS PDF Crackerjack User Guide
Printing with ARTS PDF Crackerjack
3.9.8. All Spots to process
When checked, ARTS PDF Crackerjack will generate PostScript output with all the spot
color(s) in the job mapped into the appropriate percentages of Cyan, Magenta, Yellow
and Black.
3.9.9. Use ARTS PDF Crackerjack RGB conversion
When checked, this function causes ARTS PDF Crackerjack’s RGB conversion settings to
be applied to the output.
3.9.10. Edit RGB Conversion...
• Adjustments
This option allows you to specify your own functions for UCR or GCR. UCR and
GCR controls apply to the conversion of RGB data to DeviceCMYK.
Gray Component Replacement (GCR) is the substitution of black ink in areas
where the other three process inks overlap. This makes sense since the addition
of a third process ink only adds “grayness” to the other two, and black ink is
usually less expensive.
Under Color Removal (UCR) is a compensation for not having perfect inks, i.e.,
| CONTENTS |
Í Page 35 of 79 Î
Page 36

ARTS PDF Crackerjack User Guide
Printing with ARTS PDF Crackerjack
those that are monochromatic. These impurities have their greatest effect in
shadow areas and neutral colors. Their removal tends to add depth.
Of the two approaches, and all else being equal, GCR uses more black ink and
less cyan, magenta, and yellow than UCR. Refer to the Adobe Photoshop Users
Guide for usage guidelines. Save and Load options allow you to save, name, and
reuse your favorite settings.
ARTS PDF Crackerjack’s default is set to GCR=Maximum to constrain RGB black
to the process black plate. Otherwise, text defined as RGB black will appear on all
process plates.
• RGB Conversion
New in ARTS PDF Crackerjack 5 is the ability to handle the RGB to DeviceCMYK
conversion of all objects in the PDF using ICC profiles.
Selecting “Standard” will cause all RGB objects to be converted to CMYK using
the Adobe PostScript “Red Book” algorithm, less any UCR/GCR.
Selecting “Use UCR/GCR” will apply the current UCR/GCR settings.
Choosing “Use ICC Profile” allows the user to select the Source (RGB) color
profile and the Destination (CYMK) profile to cont rol conversion of objects from
RGB to CMYK. On the Macintosh, ICC profile management is done by the OS, so
list selections are controlled by ColorSync. In Windows there is a folder named
“ICC Profiles” located inside the ARTS PDF Crackerjack folder of your Acrobat
plug-ins folder. Several default ICC profiles are put in this folder during
installation. If you wish to use other profiles they must be copied into this folder.
Note: If there are objects within a PDF which are tagged with an ICC profile, ARTS PDF
Crackerjack will use the input (source) profile associated with each object instead of the
one selected in ARTS PDF Crackerjack.
3.9.11. Use ARTS PDF Crackerjack DIC (Device Independent Color)
This selection has an effect only when “Use ARTS PDF Crackerjack DIC” is chosen. It
only maps device independent color data. DeviceRGB, DeviceGray, and DeviceCMYK
color space data are not affected by this option. If it is known that this PDF document
was prepared in a color managed environment where the application of specific color
rendering intents might have been assigned to different objects, then you should
consider not using this selection.
Beginning with version 2015, all Adobe PostScript RIPs support the International Color
Consortium concept of standard color rendering intents. This option allows you to select
the color rendering that is appropriate for the subject material. This approach is
consistent with Apple's ColorSync and Window’s ICM device independent color
management.
| CONTENTS |
Í Page 36 of 79 Î
Page 37

ARTS PDF Crackerjack User Guide
Printing with ARTS PDF Crackerjack
There are four predefined renderings: Relative Colormetric, Perceptual, Saturation, and
Absolute Colormetric. You would probably select Relative Colormetric or Perceptual for
image or picture intensive files. Saturation would be most appropriate for documents
with a lot of business graphics (bar and pie charts). Even though Absolute Colormetric
often truncates out of gamut colors, it might be most appropriate for situations where
you must reproduce a color exactly, such as a shirt color in a catalogue or the logo color
for an important client.
Within the RIP, each of these Color Rendering Intents has the effect of mapping all the
ICC color data (LAB, CalRGB, CalGray) through a PostScript Color Rendering Dictionary
(CRD). In theory, there should be a different CRD for each rendering intent. But in some
devices, more than one Color Rendering Intent may be mapped into a single CRD.
3.9.12. Save color set...
This button activates a dialog box to allow the user to specify a file name to save all of
the current values in the Color panel. All color set file names saved in this manner will
be available in the Color set drop-down list at the top of the Color panel.
3.9.13. Manage color sets...
This button activates a dialog box that allows the user to select a Color set from a list
and to Edit (e.g. rename) it or Remove it from the list.
| CONTENTS |
Í Page 37 of 79 Î
Page 38

ARTS PDF Crackerjack User Guide
Printing with ARTS PDF Crackerjack
3.10. The Print Preview Window
At the top of the window there are navigation buttons and a page range box. If the
document has more than one page the buttons will become active. Alternatively, the
user can type in a page number, then hit the “Enter” key on their keyboard to jump to
that page.
The print preview window initializes to the current output mode selected in ARTS PDF
Crackerjack. If one of the composite modes is chosen, no ink buttons will appear in the
window.
Assuming that a separation mode is selected: on the left side of the window there are
buttons for each ink which is currently enabled in ARTS PDF Crackerjack. If an ink is
deselected on the Color panel its button will be “off” when the preview window
| CONTENTS |
Í Page 38 of 79 Î
Page 39

ARTS PDF Crackerjack User Guide
Printing with ARTS PDF Crackerjack
initializes. Clicking on a button will turn off that ink. Clicking several buttons quickly will
turn off/on multiple inks and eliminate u nwanted redraws. If the cursor is held briefly
over an ink button the ink name will be displayed. This may be part icularly useful for
identifying spot colors.
Any settings in ARTS PDF Crackerjack that will affect the output will also be displayed
here. As inks are turned on or off the effect of things such as overprints and/or
knockouts can be seen.
Note: Many factors can affect the way color is displayed on your monitor. Therefore this preview
function is not intended as a color management tool, nor is it intended to be a measure of the
actual CMYK color values that will appear on output.
| CONTENTS |
Í Page 39 of 79 Î
Page 40

ARTS PDF Crackerjack User Guide
Converting RGB or CMYK to spot colors
4. Converting RGB or CMYK to spot colors
New to Crackerjack 5 is a tool which allows you to convert any RGB or CMYK color in the document
to a spot color. To activate the spot color conversion tool, select “Create Spot Color…” from the
“Plug-ins > ARTS PDF Crackerjack” menu. You may also activate the tool by selecting “Create Spot
Color” from the “Print Separations” toolbar.
Figure 6. Print separations toolbar menu.
Figure 7. Create spot color dialog.
4.1. Source Color
Once the eyedropper tool has been activated, select the desired color from a text or
graphic object, this will launch the dialog above. Ensure “Tool selection” is checked to
convert the color selected using the eyedropper or select “Document color” to choose
from one of the colors in the document.
| CONTENTS |
Í Page 40 of 79 Î
Page 41

ARTS PDF Crackerjack User Guide
Converting RGB or CMYK to spot colors
4.1.1. Convert
When “Tool selection” is used a sample of the selected color will appear in the window
next to “Color:” When “Document Color” is selected the window changes to a drop-down
list where all RGB and/or CMYK colors from text or graphic objects in the document are
displayed.
4.1.2. Threshold
Enter a value here to convert colors whose value is within the specified range from the
selected color.
4.2. Destination spot color
Use this option to specify a new or existing spot color to convert the text or graphic to.
4.2.1. New Spot
The user may type any name they like. This name will then appear in Crackerjack’s inks
list when one of the separation modes is chosen.
4.2.2. Document Spot
If any spot colors exist in the current PDF they will appear in this list. Choosing this
option will cause selected colors to be converted to the existing spot color.
4.2.3. Always Make CMYK Spots
When “Always Make CMYK Spots” is selected, RGB colors converted to a spot color will
also have their alternate color space converted to CMYK. This will change the
appearance of the color on the screen. This is important if anyone printing the
document elects to convert spots to process.
| CONTENTS |
Í Page 41 of 79 Î
Page 42

ARTS PDF Crackerjack User Guide
Using ARTS PDF Crackerjack Pilot
5. Using the Imposition Tool
The imposition tool in ARTS PDF Crackerjack allows you to perform step-and-repeat, 2-up, 4-up
booklets and n-up impositions on the open PDF document. To launch the imposition tool click on
the
Imposition…” from Acrobat’s Menu.
button on the Acrobat toolbar or select “Plug-ins > ARTS PDF Crackerjack >
Figure 8. Imposition Window
5.1. Layout Tab
This tab allows the user to specify the type, layout, gutters and the binding style for the
imposed PDF. When opened, this dialog will retain the settings from the last imposit ion
performed.
5.1.1. Imposition Type
Select the desired imposition from the drop down list. The different imposition types
supported by ARTS PDF Crackerjack are described below.
| CONTENTS |
Í Page 42 of 79 Î
Page 43

ARTS PDF Crackerjack User Guide
Using ARTS PDF Crackerjack Pilot
5.1.1.1. N-Up
When imposing a multi-page PDF, selecting N-Up means that n-number of
pages will be placed across and down on the new PDF page. If there are less
pages in the original PDF than are required to fill the imposed page(s) then a
blank page (or pages) will appear so that a full imposed PDF is created. To
create multiple copies of a 1 page PDF use Step and Repeat instead.
N-Up impositions can be used in conjunction with two ordering types; Cut
Stacks and Sequential and double or single sided as described below.
5.1.1.2. Step and Repeat
‘Stepping’ up is the process of producing multiple copies of a page on a single
side of a press sheet. The original page is ‘repeated’ according to the specific
layout based on the number of rows and columns specified.
5.1.1.3. 2-Up Booklet
Select this option to create a standard booklet. Each output sheet will contain
four imposed pages, two on both the front and back sides of the sheet. The
input file must be ordered sequentially from first t o last page as the pages will
be shuffled automatically to compensate for double sided printing and folding.
2-Up booklets can be grouped for either perfect or saddle stitched binding
types as described below. There is also compensation for creep built into the
software.
5.1.1.4. 4-Up Booklet
4-Up booklets are slightly more complex than 2-up booklets. This type of
imposition can be used to create 8 page signatures with either sheetwise or
work and turn layout. Pages are automatically shuffled and reordered
according to the desired layout style.
5.1.1.5. Sheetwise
In a sheetwise imposition there are separate sets of plates for the front and
back of each press sheet. After the front of each form is printed the operator
must back up the sheets by turning them upside down and flipping them side
to side then printing the back of the form.
5.1.1.6. Work & Turn
This method is used to print both front and back sides of a single sheet on the
one form. Use this method to produce two copies of a 2-up booklet on a
| CONTENTS |
Í Page 43 of 79 Î
Page 44

ARTS PDF Crackerjack User Guide
Using ARTS PDF Crackerjack Pilot
single sheet. In some scenarios this should greatly reduce the time to
complete a job (as the numbers of passes through the printing press are
reduced by half) and also maximize paper efficiency.
5.1.1.7. Cut Stacks
Pages are ordered so that one pile can be cut in half and one half stacked
upon the other. Pages can also be prepared for double or single sided
printing by ensuring that the appropriate option is selected.
5.1.1.8. Sequential
If this option is selected, pages will be ordered on the output sheet in a
sequential manner across and then down the form. The order of pages can
also be optimized for double siding printing.
5.1.2. Columns / Rows
These settings determine the arrangement of pages on the form when performing Step
and Repeat or N-Up impositions. Columns refer to the number of pages that will be
imposed horizontally and rows refer to those imposed vertically. The total number of
pages on the output form is equal to multiplying the number of rows and columns.
5.1.3. Gutters
Gutters refer to the space separating the adjoining edges of imposed pages. These are
different to margins which bound the outer edges of the imposed pages and edge of the
sheet.
5.1.4. Binding
The order in which pages are imposed on the output sheets when performing 2 and 4-Up
booklets is affected by the binding type selected.
Saddle Stitched: Output sheets are stacked and folded in half. The sheets are bound
through the spine using a stable or thread.
Perfect Bound: Sheets are grouped into separate folds which are trimmed and glued
to the spine of the cover. Individual folds are assembled in a similar fashion to saddle
stitched booklets, however appended side by side to form larger booklets. The number
of sheets to be included in a fold is determined by the values specified here.
Creep: In larger folds, the paper thickness pushes the inner signatures away from the
spine, resulting in diminishing outer margins. You can compensate for the ‘creep’ effect
by specifying a creep value greater than 0. The diminishing margin will be compensat ed
for by incrementally shuffling the page cont ent by the amount specified for each sheet in
the signature.
| CONTENTS |
Í Page 44 of 79 Î
Page 45

ARTS PDF Crackerjack User Guide
Using ARTS PDF Crackerjack Pilot
5.2. Media Tab
This tab is designed for the user to specify the size of the output PDF file and to control
scaling and the length of margins as required.
Figure 9. Media Tab
5.2.1. Selecting a Media Size
The imposed pages will be arranged on the media size selected in the list. If your
required media is not listed, click Add to create a custom media size and enter the
length and width as required. Only custom media sizes can be edited and removed from
this list.
If Autosize Media is selected, the sheet size will be calculated based on the page size of
the original document, the gutter size and margins.
The final imposed PDF can be output in Landscape, Portrait or automatically rotated
according to the best fit on the page. We recommend using Auto Rotate settings.
5.2.2. Scaling
| CONTENTS |
Í Page 45 of 79 Î
Page 46

ARTS PDF Crackerjack User Guide
Using ARTS PDF Crackerjack Pilot
Pages are scaled according to the specified percentage. Scaling should be used to assist
imposing pages where the sum total is larger than the actual media size.
Fit to media size will either reduce or increase the scaling of the imposed pages to ‘Best
fit’ within the sheet size and margins. When using fit to media size, the aspect ratio will
always be retained.
5.2.3. Margins
The bounding margins for the page can be specified here. When the lock option is
checked, the values are grouped. Please note that if ‘Center Content’ is checked in the
Options tab the specified margins will be overridden. Otherwise the content will align at
the top left corner of the page. To allow double sided printing, the left and right margins
will interchange for the front and back of each sheet.
| CONTENTS |
Í Page 46 of 79 Î
Page 47

ARTS PDF Crackerjack User Guide
Using ARTS PDF Crackerjack Pilot
5.3. Options Tab
5.3.1. Printer’s Marks
This option turns on a number of items that are useful for print production. These items
are printed outside the PDF page. They add approximately 0.5 inches to each side. To
ensure that these items are visible, choose a media size that is approximately one inch
larger both vertically and horizontally than the PDF page size. To access this function,
click on the box, and a check mark will appear.
• Crop mark type
User selectable choice of single or double crop marks.
Figure 10. Options Tab
| CONTENTS |
Í Page 47 of 79 Î
Page 48

ARTS PDF Crackerjack User Guide
Using ARTS PDF Crackerjack Pilot
• Registration mark type
User selectable choice of concentric circles or cross style registration marks.
• Include
Mark the checkboxes according to the information you wish added to the page.
‘Inner Marks’ refers to the trim marks inserted between adjoining pages. Page
description will add a short text description indicating sheet, fold, page number
and whether the page is the front or back of the sheet.
5.3.2. Page Settings
• Scale large pages
With this on, any page that is larger than the first page of the source document
will be scaled down to avoid any content being clipped. If it has not been
selected then content will be trimmed.
• Include bleed information
Specify the bleed area that will be visible in the printed document. The bleed area
does not increase the size of the gutter or margins.
• Automatically add missing pages
Blanks pages are automatically added to 2-up and 4-up booklets if the original
document does not contain the correct number of pages to create the imposition.
If this is not selected, users will be prompted before continuing. To manually add
pages we suggest using Acrobat’s Insert Pages feature available from the
Document > Pages menu.
• Center content on media
Use this option to centre the imposed pages on the output form. If this is
unselected, the imposed pages will align at the top left margin.
5.3.3. Double Sided Printing
These options provide added flexibility to the output order and rotation of forms.
To use these settings, double sided printing must be selected in the Layout tab.
Please note the 2 and 4-Up booklets always print double sided.
• Interleave document
The output page order is sheet 1 front > sheet 1 back > sheet 2 front > sheet 3
| CONTENTS |
Í Page 48 of 79 Î
Page 49

ARTS PDF Crackerjack User Guide
Using ARTS PDF Crackerjack Pilot
back > … > sheet n front > sheet n back.
• Fronts first, then backs
The fronts of each sheet will be grouped first in ascending order, followed by the
backs also in descending order.
• Fronts first, then backs reversed
The fronts of each sheet will be grouped first in ascending order, followed by the
backs in descending order.
• Flip backs of sheets
The back sheets are output rotated 180 degrees. This setting can be helpful to
reduce the manual work required by press operators to back up the sheets on the
printing press.
5.3.4. Saving & Reusing Imposition Settings
Use the Save and Load buttons to save imposition settings. We recommend saving
imposition settings to avoid recreating standard templates for each job. These settings
files are also helpful for our tech support team to tr oubleshoot any issues you may come
across.
| CONTENTS |
Í Page 49 of 79 Î
Page 50

ARTS PDF Crackerjack User Guide
Using ARTS PDF Crackerjack Pilot
Using ARTS PDF Crackerjack Pilot
ARTS PDF Crackerjack Pilot is a “hot folders” approach to automation. First you set up a ARTS PDF
Crackerjack settings file and a group of associated folders, one for initial input, on e as a destination
for successfully processed jobs, another as a repository for unsuccessful jobs, and finally a
destination for “Save to File” output. After everything is set up, make sure that Acrobat has been
launched, then simply drop documents that you want processed in the appropriate Pilot Folder.
When active, ARTS PDF Crackerjack Pilot constantly scans the Pilot Folders. When Pilot sees a new
PDF document to be processed, it invokes ARTS PDF Crackerjack with the assigned settings,
including destination. ARTS PDF Crackerjack generates and delivers the appropriate P ostScript file.
Upon completion, Pilot moves the PDF to the Success Folder. If ARTS PDF Crackerjack Pilot finds a
file type other than a PDF in the input Pilot Folder, it moves it to the Excluded Folder. Normally,
output is delivered to the selected device, but for “Save to File”, the resultant output file is
delivered to the Output Folder.
Pilot folders may be “cascaded”, i.e., the “Success” folder for one operation can also be an input
Pilot folder for another. For example, one could set up the Distiller’s “Out” folder to be an input
Pilot folder, thereby automating distilling and printing as one continuous operation. Another
example of a repetitive task where ARTS PDF Crackerjack Pilot could be used is outputting fixed
page ranges with different media tray selections or for setting screen angles for successive preseparated (gray) PDF documents.
Naturally, the user can examine any of the folders described above at any time. Additionally, if the
user wishes to use ARTS PDF Crackerjack directly (non-automated), he may do so at any time. This
direct control by the user only temporarily suspends ARTS PDF Crackerjack Pilot operation.
To save time, it is recommended that you first generate one or more settings files using ARTS PDF
Crackerjack. This process is described above in “ Save Settings, Load Settings” under ‘The “Target”
Panel’. If you have not already setup ARTS PDF Crackerjack settings files, do so now and then
return to Pilot setup.
To setup or modify Pilot folders, select “Setup Pilot Folders …” from Acrobat’s “Plug-ins > ARTS PDF
Crackerjack” menu. Alternatively, you can launch ARTS PDF Crackerjack Pilot using “keyboard
shortcuts”. On the Macintosh, hold down the “Command” (Apple) and “Shift” keys and then press
the “Z” key. In Windows, hold down the “Ctrl” and “Shift” keys and then press the “Z” key. You
may also activate ARTS PDF Crackerjack Pilot by clicking on the button on the Acrobat toolbar.
When you invoke ARTS PDF Crackerjack Pilot, the Pilot folders dialog box appears. Here you will
specify or modify the definitions of which folders are to be used for input and the various types of
results.
Note: that using network volumes for Pilot folders is not a supported option due to the fact that Acrobat itself
is not designed for this use. Some users have had success, while others have not. Therefore, creating Pilot
folders on networked drives is purely at the option and risk of the user.
| CONTENTS |
Í Page 50 of 79 Î
Page 51

ARTS PDF Crackerjack User Guide
Using ARTS PDF Crackerjack Pilot
5.4. The “Pilot Folders” Window
The first time that ARTS PDF Crackerjack Pilot is invoked, no Pilot Folder names appear
in the list, and naturally the “Edit...”, and “Remove...” options are grayed out. In this
case, only the “Add...” option makes sense. Click on the “Add...” button to define new
hot folders. After the “Add...” operation is compete, both the Pilot Input folder name and
the settings file name will be here displayed on a new line, an d the “Enabled” box will be
checked.
If Pilot Folders have already been defined, then they are listed here. In this case,
“Add...”, “Edit...”, and “Remove...” are all valid choices. To specify which Pilot folder
definition to edit or delete, select a folder name using the cursor and mouse button,
then click on the desired function. You may also suspend Pilot’s monitoring of a hot
folder by unchecking the “Enabled” box.
5.4.1. Add…
Opens the Pilot Folder Settings window to allow you to create a new Pilot Folder.
5.4.2. Edit…
Opens the Pilot Folder Settings window to allow you to change the settings for the
selected Pilot Folder.
| CONTENTS |
Í Page 51 of 79 Î
Page 52

ARTS PDF Crackerjack User Guide
Using ARTS PDF Crackerjack Pilot
5.4.3. Remove
Deletes all references to the selected Pilot Folder.
Note: that this does not delete the folder from your hard disk, only from the Pilot definitions.
5.4.4. Done
This button closes the ARTS PDF Crackerjack Pilot window. All visible Pilot Folder
definitions and associated information are saved.
5.5. The “Add Pilot Folder” and “Edit Pilot Folder” Windows
This dialog window allows you to specify the name of the Pilot or hot folder, the Settings
file to be applied to it, and the various folders for ARTS PDF Crackerjack Pilot output
(Success, Excluded, and Output). If selections have been made, then they appear here.
If no selection has been made, then it is so indicated by a blank path name and a
warning icon instead of a folder icon.
| CONTENTS |
Í Page 52 of 79 Î
Page 53

ARTS PDF Crackerjack User Guide
Using ARTS PDF Crackerjack Pilot
5.5.1. Set…
To make a Folder selection, the “Set...” button accesses the “Pilot Folder Selection”
window.
If you specify the Pilot Folder before specifying folders for Success, Excluded, and
Output, then default entries for folders named Success, Excluded, and Output will be
created inside the Pilot folder as soon as you click “OK”. Folder selections may be
changed individually if so desired.
If you attempt to exit this window without specifying all information (i.e. did you specify
a Settings file?), a message is generated guiding you to either complete the task or
cancel the attempt.
5.5.2. OK / Cancel
Naturally, clicking on “OK” confirms your selections and creates the specified folders.
“Cancel” discards modifications made during the current visit to this window.
5.6. Pilot Folder “Creation/Selection” Window
This window allows you to select from among any available local or network disk drives.
Selection of removable media devices is only available in the Macintosh version.
| CONTENTS |
Í Page 53 of 79 Î
Page 54

ARTS PDF Crackerjack User Guide
Using ARTS PDF Crackerjack Pilot
Note: that using removable media drives with Pilot means that automation will fail if the media
containing the Pilot folder is not mounted.
5.6.1. New Folder (Macintosh) / Create Folder (Windows)
This button allows you to create a new folder at the location curren tly selected on the
hard disk.
5.6.2. ‘Select “…”’ (Macintosh) / OK (Windows)
Clicking this button confirms your selections.
5.6.3. Cancel
Clicking Cancel voids any choices you have made prior to clicking OK or ‘Select “…”’.
| CONTENTS |
Í Page 54 of 79 Î
Page 55

ARTS PDF Crackerjack User Guide
Using ARTS PDF Crackerjack Pilot
6. Using the Image Editing Tools
6.1. Overview
The Images feature provides a set of tools for image management and editing within
PDF documents. There are three ways to perform image manipulation in the Images
feature. First is the management of individual images using the image selection tool and
the available Image tools. Second is the handling of one or more images using Images
Document Tools. Third is automation of selected functions on all images in a PDF
document using Image commands in a batch process.
The current version supports device, indexed, and calibrated Gray, RGB, and CMYK.
Currently, Separation, Lab, DeviceN, ICCBased, and combinations such as
IndexedCalibrated color spaces are partially supported. If operations on these color
spaces are required they can be converted to one of the supported color spaces.
| CONTENTS |
Í Page 55 of 79 Î
Page 56

ARTS PDF Crackerjack User Guide
Using ARTS PDF Crackerjack Pilot
6.2. Using Images
To use the Images feature, select the icon from the ARTS PDF Crackerjack
toolbar. A black selection arrow will then be displayed. Click on any image with the
selection tool to activate the Images feature. Once an image is selected there are three
methods available for image editing or management. All of these are covered in detail in
their respective sections of this manual.
Depending on your settings in Images preferences, double-clicking on a selected image
will launch the ‘Image Tools’, ‘Edit Image’, ‘Document Tools’, ‘Despeckle’, ‘Extract
Image’, or ‘Replace Image’ dialog. See the relevant section in this manual for details on
these functions.
Once an image is selected you can use ‘Image Tools’ from the Acrobat menu bar at the
top of the screen. Image Tools provides information about the selected image plus
controls for image orientation, color conversion and adjustments, managing OPI,
downsampling/subsampling, and cropping.
The third option is ‘Document Tools’. Using this tool, all images in a PDF document will
be located and a window will show the page where each image is located as well as its
resolution, color space and the status of its OPI information, if any.
| CONTENTS |
Í Page 56 of 79 Î
Page 57

ARTS PDF Crackerjack User Guide
Using ARTS PDF Crackerjack Pilot
6.2.1. Preferences
Figure 11. Preference Window
Images preferences are set using the standard Acrobat method: Edit -> Preferences ->
ARTS PDF Crackerjack > Images.
The default selections are as shown in the picture above.
Available choices for the Double-click Tool are: “Image Tools, “Edit Image”, “Document
Tools”, “Despeckle”, “Extract Image”, or “Replace Image”.
On the Macintosh “Use ICC for color conversion” will use the ICC profiles currently
selected in the Colorsync control panel. In Windows the user must select an ICC profile
for Gray, RGB and CMYK color spaces. When this option is active ICC color matching will
be applied when doing conversions between color spaces.
The Default OPI Version may be set at “1.3” or “2.0”.
Any changes to the preferences are stored as soon as the user clicks “OK”.
| CONTENTS |
Í Page 57 of 79 Î
Page 58

ARTS PDF Crackerjack User Guide
Using ARTS PDF Crackerjack Pilot
6.2.2. Undo
Generally, one level of undo is supported for all Image functions except those functions
performed on all, or a selected range of, images in a PDF document. Undo is activated
by the standard “Control + Z” (Windows) or “Command+Z” (Macintosh) key sequence.
Repeating the keystrokes does a redo.
6.2.3. Compression Methods
Figure 12. Compression Methods
When you use the Images feature to add or replace an image in a PDF document, you
will be asked to select one of Acrobat’s supported compression filters. These include ZIP,
LZW, JPEG, Run Length, or None. Following is a brief overview of these compression
types. Users will need to experiment to determine which meth od gives them the best
combination of quality and file size.
The compression filters can be broken down into two classes: lossless and lossy. A
lossless filter (ZIP, LZW and Run Length) is one in which the process of encoding and
decoding results in no change of information. For a lossy filt er (JPEG), the process of
encoding and decoding changes the information. Lossy filters can be used when the
resulting loss of information is not visually significan t.
6.2.3.1. ZIP
ZIP encoding, like LZW encoding, discovers and exploits many patterns in its input
data. Thanks to its cascaded adaptive Huffman coding, ZIP-encoded output is usually
substantially more compact than LZW-encoded output for the same input. ZIP and
LZW decoding speeds are comparable, but ZIP encoding speed is considerably slower
than LZW encoding speed. Effective compression of monochrome images depends
upon the compression filter used and the properties of the image, but reductions of
2:1 to 8:1 are common. LZW or ZIP compression of graphics results in compression
ratios of approximately 2:1. The PDF specification also refers to ZIP encoding as
Flate encoding.
| CONTENTS |
Í Page 58 of 79 Î
Page 59

ARTS PDF Crackerjack User Guide
Using ARTS PDF Crackerjack Pilot
6.2.3.2. LZW
LZW compression can discover and exploit many patterns in its input data. The
compression obtained using the LZW method varies from file to file; the best case (a
file of all zeros) provides a compression approaching 1365:1 for long files, while the
worst case (a file in which no pair of adjacent characters appears twice) can produce
an expansion of approximately 50%.
6.2.3.3. JPEG
Using JPEG compression, color and grayscale images can be compressed by a factor
of 10 or more. The JPEG filter supported by PDF is a lossy filter. JPEG encoding
provides very significant compression of color and grayscale images, but because it
is a lossy compression it is not appropriate in all circumstances. Screenshots, in
particular, are often unacceptable when JPEG encoded. This happens because each
pixel in a screenshot is usually significant, and th e loss or alterat ion of just a few
pixels can drastically alter the appearance of the screenshot. Unlike screenshots, the
effect of JPEG encoding on continuous-tone images is typically acceptable,
particularly when high compression is not demanded.
6.2.3.4. Run Length
Run-length encoding is a compression technique that works best for black-and-white
or line art images. It works by replacing “runs” of the same color with a single
character. The more runs there are, and the longer the run sequence, the greater
the compression.
The compression achieved by run-length encoding depends on the input data. In the
best case, a file of all zeros, a compression of approximately 64:1 is achieved for
long files. The worst case, the hexadecimal sequence of alternating <00 FF 00 FF
…>, results in an expansion of 127:128.
| CONTENTS |
Í Page 59 of 79 Î
Page 60

ARTS PDF Crackerjack User Guide
Using ARTS PDF Crackerjack Pilot
6.2.4. Saving Changes
For changes to be made a permanent part of the PDF document, the file must be saved.
If the user attempts to close a document after having made changes, Acrobat will
automatically prompt the user as to whether they want to save the document or not.
Saving changes in this method certainly makes them a part of the document. However,
the standard “Save” leaves the document in a non-optimized state. For this reason it is
recommended that the user perform a “Save As” from the Acrobat file menu before
closing the document. This has the effect of “cleaning up” the document and making the
smallest possible file.
6.2.5. General Notes
1. Regardless of the original PDF format, when a document is saved in Acrobat 5.x it
will be saved as PDF 1.4 format.
2. Cut, copy and paste work only within Acrobat. Images cannot be copied to the
clipboard for use in other applications. To use an image outside of Acrobat, or in a
different PDF document, choose “Extract Image...” from the Images menu. Copy and
paste of whole images between documents can be performed using the standard
Acrobat Object Select tool.
3. When an image is copied then pasted, the copy will be plac ed down and to the right
by approximately 10 pixels. This is so that the user can readily see the duplicate
image. When pasting images to a different page in the same document the pasted
image will appear at the same location as the original image relative t o the lower left
corner of its page plus the offset described above.
4. The bits in a CMYK Photoshop JPEG file are inverted from those in a “standard” CMYK
JPEG file. Photoshop and most high-end page layout applications understand the
Photoshop JPEG format and will display the image correctly, while they will display a
standard JPEG image in inverted mode. Acrobat, on the other hand, always invert
the bits when a CMYK JPEG image is inserted into a PDF document using either the
“New Image...” or Replace Image...” functions described later. If you get unexpected
“negative” images, use the other JPEG format. This note only applies to CMYK
images. In other color spaces Photoshop and “standard” JPEG files are identical.
5. Extracted images are resized to the system resolution (on Windows this is 96 dpi,
on Macintosh this is 72 dpi). The extracted image contains all
but if these images are placed/opened in a page layout or an external image editing
application the size will appear larger than it was in the PDF by th e ratio of the
original resolution divided by the system resolution. Simply resize the image
dimensions to whatever you like and the resolution will increase or decrease
accordingly.
of the image data,
| CONTENTS |
Í Page 60 of 79 Î
Page 61

ARTS PDF Crackerjack User Guide
Using ARTS PDF Crackerjack Pilot
6.2.6. The Image Selection Tool
Selecting the
image selection tool shown below.
Use this tool to select an image to be edited. When an image is selected it will be
highlighted by a dashed line around the image, plus eight small squares – one on each
corner of the image, and one each at the center of the left, right, top and bottom edges.
An image may be moved anywhere on the page by clicking and holding in the cen ter of
the image, then dragging it to the desired location. An image may be resized by clicking
and holding one of the eight squares around the edges, then dragging in the desired
direction. If more precise positioning or scaling are needed, use the Image Tools
functions instead.
After an image is selected it can be cut, copied, or pasted using the standard keyboard
shortcuts. In Windows these are Control+X = Cut; Control+C = Copy, and Control+V =
Paste. On the Macintosh substitute the “Command” key for “Control”. Copy and paste
operations on whole images can be performed only on the current PDF document. Copy
and paste operations of selected areas from within the Image Editor can be performed
on images within the current document, or between images in different documents.
icon from the ARTS PDF Crackerjack tool bar will activate th e
6.2.7. The Images Menu
From the Acrobat menu you can activate the Images functions. Image Tools, Document
Tools, Edit Image, Despeckle, Extract Image or Replace Image may also be activated by
double-clicking on an image with the image selection tool. Settings in the preferences
determine which of these functions is activated by double-click. For this section, we will
assume that all functions are activated from the drop-down menu shown here.
All functions except ‘Document Tools’, and ‘New Image...’ will be grayed out unless an
image is currently selected using the image selection tool.
6.2.7.1. Image Tools...
This launches the main Images toolset window. See the
this manual.
Image Tools section later in
6.2.7.2. Document Tools...
This launches the Document Tools window. See the
| CONTENTS |
Document Tools section later in
Í Page 61 of 79 Î
Page 62

ARTS PDF Crackerjack User Guide
Using ARTS PDF Crackerjack Pilot
this manual.
6.2.7.3. Edit Image...
This launches the Image Editor window. See the
manual.
Image Editor section later in this
6.2.7.4. New Image...
This function allows the user to insert a new image into a PDF page. When using this
function the user will have the option to select a compression type for the new
image. See
are TIFF, or JPEG.
Compression Methods earlier in this manual. The supported image types
6.2.7.5. Extract Image...
This tool allows the currently selected image to be extracted to the user’s hard disk
using the standard file/folder selection method. Images may be extracted as TIFF,
JPEG (standard), or JPEG (Photoshop) formats. You may also simply click the “x” key
on your keyboard while an image is selected to activate image extraction.
6.2.7.6. Replace Image...
This function allows the user to replace the currently selected image with a different
image. Selection of the replacement image is done via the standard file/folder
selection method. When using this function the user will be prompted to select a
compression type for the new image. See
manual. If the image to be replaced has OPI Comments associated with it, the
“Select Compression Type” window will have an option to “Preserve OPI Comments”.
You may also simply click the “r” key on your keyboard while an image is selected to
activate image replacement.
Compression Methods earlier in this
6.2.7.7. Despeckle
This is a “filter” which detects the edges in an image (areas where significant color
changes occur) and blurs all of the selection except those edges. This blurring
removes noise while preserving detail. Users may find it usef ul for “cleaning up”
bitmapped images in a PDF file. For monochrome (1-bit) images Despeckle removes
isolated (single) pixels instead of the blurring described above for multi-bit images.
Note: Despeckle cannot be applied to images using indexed, LAB, DeviceN or Separation color
space.
| CONTENTS |
Í Page 62 of 79 Î
Page 63

ARTS PDF Crackerjack User Guide
Using ARTS PDF Crackerjack Pilot
6.2.7.8. Bring to Front
Causes the currently selected image to be move in front of any other objects in the
PDF. You may also simply click the “ [ ” key on your keyboard while an image is
selected to bring an image to the front.
6.2.7.9. Send to Back
Causes the currently selected image to be move behind any other objects in the PDF.
You may also simply click the “ ] ” key on your keyboard while an image is selected
to send an image to the back.
6.2.7.10. Remove Image Mask
If an image has an image mask this function will remove it.
| CONTENTS |
Í Page 63 of 79 Î
Page 64

ARTS PDF Crackerjack User Guide
Using ARTS PDF Crackerjack Pilot
6.2.8. The “Image Tools” Window
The panels in this window provide information and user control over images. There are
currently six panels: Info, Orientation, Color, OPI, Sample and Crop. Clicking on each
tab will display a “panel” where user selections can be made. On panels where an
“Apply” button appears changes made on that panel will only take effect after “Apply” is
pressed.
6.2.8.1. Info
Figure 13. Info Panel
The Info Panel provides information on the currently selected image.
| CONTENTS |
Í Page 64 of 79 Î
Page 65

ARTS PDF Crackerjack User Guide
Using ARTS PDF Crackerjack Pilot
6.2.8.2. Orientation
Figure 14. Orientation Panel
From this panel the user may move, scale, rotate, flip horizontally or flip vertically
the currently selected image. Except for “Position” which uses the lower left corner,
all changes made on this panel are made with respect to the center of an image.
Position
The functions in this section allow the user to fine tune the position or size of an
image. Image position can be controlled by entering new values for the X and Y
coordinates of the lower left corner of the image, then clicking Apply. To change the
image size, enter new values for X and Y and click Apply. If an error is made during
entry, click “Reset” to reset the numbers to their original values.
Rotation
The user can select either Relative or Absolute rotation. Relative means relative to
the current position of the image. Absolute means with respect to the original
position of the image in the PDF document. For example; using Relative, select a
value of 5 degrees, then click Rotate twice. The image will be rotated a total of 10
degrees. Using Absolute, the image will only be rotated by the specified amou nt
relative to its original position regardless of how many times Rotate is clicked.
Positive or negative values are allowed. To return an image to its original orientation,
select Absolute, set the rotation value to zero (0), an d then click Rotate.
In addition to manual rotation, there are 2 buttons which are preset to rotate the
selected image by 90 degrees counterclockwise, or clockwise.
| CONTENTS |
Í Page 65 of 79 Î
Page 66

ARTS PDF Crackerjack User Guide
Using ARTS PDF Crackerjack Pilot
Scaling
This will scale the image by the percentage value entered in the box. To change the
size of an image type in the scaling value desired, then click Scale.
Mirror
These two buttons will flip the image ho rizontally or vertically.
6.2.8.3. Color
Figure 15. Color Panel – Color Conversion
From this panel an image can be converted from its current color space to on e of the
color spaces in the “To” list. Images which are in indexed color space can be
converted to non-indexed by clicking the “Non-indexed ...” button. Similarly, nonindexed images can converted to indexed color. Additionally, the contrast and/or
brightness, or the HSB (hue, saturation and brightness) of an image can be
adjusted. The color conversion, brightness/contrast, and HSB adjustment menus are
shown in the three images below.
| CONTENTS |
Í Page 66 of 79 Î
Page 67

ARTS PDF Crackerjack User Guide
Using ARTS PDF Crackerjack Pilot
Figure 16. Color Panel – Contrast/Brightness
Figure 17. Color Panel – Adjust HSB
| CONTENTS |
Í Page 67 of 79 Î
Page 68

ARTS PDF Crackerjack User Guide
Using ARTS PDF Crackerjack Pilot
6.2.8.4. OPI
This panel allows the user to create, view, or alter the OPI information for an image.
Upon confirmation, this information will update the appropriate OPI information
stored inside the PDF.
Figure 18. OPI Panel
Note: Editing images with OPI information is potentially an exercise in futility since the
purpose of OPI is to replace the image in the PDF with one on the OPI server at print time.
One possible reason for doing so would be to prepare a PDF for use on-screen with low
resolution, RGB images which would still print “correctly” to a high-end device if an OPI server
with high quality images is used.
“Use OPI Info” determines whether or not the selected image will use OPI comments.
OPI Version specifies whether you want to use OPI version 1.3 or 2.0 compliance for
the OPI comments.
The “Hi-res Image” box is designated for entry of the entire external high-resolution
file path name. If an external high-resolution file has not yet been included, the edit
box is empty. Otherwise the full path and file name appears here. The “Set” button,
which launches the standard system “Specify File” dialogue box, can be used to
specify the path and file name. The Image feature will attempt to verify the
existence of this file. If it finds it, nothing happens.
If it does not find it, a “caution” (yellow triangle with “!” in it) sign will appear at the
left of the file name. This may or may not indicate an error since prepress and
printing may occur at different sites that do not share the same network.
The path format should be specified using the nomenclature of the OPI server
| CONTENTS |
Í Page 68 of 79 Î
Page 69

ARTS PDF Crackerjack User Guide
Using ARTS PDF Crackerjack Pilot
system. Using the “Set” button will cause a file name to be placed in the OPI
dictionary using the conventions and nomenclature of the current system,
i.e.Windows format on a Windows system, Macintosh format on a Macintosh system.
The Image feature does not perform any syntax checking to verify whether the input
corresponds to a legal path format. You should check with your OPI server vendor as
to their handling capabilities for non-native path formats.
When OPI information is added, the assumption is that the start of the file will be
displayed towards the top of the PDF page with succeeding lines imaged below. It is
assumed that the Hi-Res image is oriented in the same direction. If not the image
may need to be rotated.
This window also contains two other check boxes, “Overprint” and “Transparency”.
These boxes allow you to set/reset these states in the OPI dictionary. Note that
these functions are only applicable to OPI version 1.3. The intent is for these
parameters to be interpreted and executed by compliant OPI servers downstream.
Consult your OPI vendor about whether they support changes to these states. For
viewing, Acrobat does not currently honor changes to these states. Check marks
indicate that the background should be transparent, and that it should overprint,
respectively. Usually, the setting for Overprint is unchecked, i.e., knocked out.
6.2.8.5. Sample
From this panel you can choose how you would like to resample the currently
selected image.
Figure 19. Sample Panel
The Images feature can downsample or subsample an image to reduce the amount
of data in the image to no more than what an output device needs (output devices
include monitors). This results in smaller file sizes and better performance. You
| CONTENTS |
Í Page 69 of 79 Î
Page 70

ARTS PDF Crackerjack User Guide
Using ARTS PDF Crackerjack Pilot
should resample images when they are at a higher resolution than the intended
output device supports. Note that images never resample to a higher resolution, only
to a lower one.
When subsampling an image, a pixel is selected in a sample to represent that area at
the new resolution. You provide the resolution, and the Image feature selects pixels
as needed to reduce the image’s resolution to the specified dpi setting.
Downsampling uses a weighted average of pixels in a sample area to determine pixel
color and usually yields better results than subsampling. The Image feature prov ides
several filters for downsampling. Each filter produces differing results and, depending
on the image, one filter may produce a better appearance than another. Lantana has
tested a range of sample color images at different source and destination resolutions
and found that “Lanczos 3” produces consistently good results.
6.2.8.6. Crop
This tool allows the user to crop the currently selected image.
Figure 20. Crop Panel
The window will initially display the origin al image size, in pixels, in the field named
“New Image Size:”. As values are entered in the Left, Right, Top, or Bottom boxes
two things will be apparent in the window. First, dashed lines w ill appear to indicate
the part of the image which will remain (inside the lines) and which will be discarded
(outside the lines). As values are entered the New Image Size values will also be
updated to show what the image size will be after cropping.
If an attempt is made to crop an image which has a mask or clipping path, the user
will be presented with a dialog which offers a choice of removing the mask, keeping
it, or canceling the operation. Note that applying cropping without removing the
| CONTENTS |
Í Page 70 of 79 Î
Page 71

ARTS PDF Crackerjack User Guide
Using ARTS PDF Crackerjack Pilot
mask or clipping path may give unusual results. If this happens, the user may use
“Undo” to restore the image to its state before the cropping was applied.
Note: When an image is cropped the data is removed. It cannot be recovered except by an
“undo” immediately following the cropping action.
| CONTENTS |
Í Page 71 of 79 Î
Page 72

ARTS PDF Crackerjack User Guide
Using ARTS PDF Crackerjack Pilot
6.2.9. The “Image Editor” Window
This window shows a representation of the image to be edited. The initial view for the
window is its minimum size so as to not obscure the underlying PDF page.
Holding your mouse cursor over any of the tools in the tool bar will display a description
of that tool’s function. When the Image Editor is launched the Zoom tool is selected by
default. When the image editor initializes, it decompresses the image, converts it to RGB
for editing, and displays the real image data of the image you selected. The image is
converted back to its original color space and recompressed when the edit window is
closed, except that indexed colors are not maintained as indexed.
6.2.9.1. Zoom
There are five zoom states. They are 1x, 2x, 4x, 8x, and 16x. The default is to zoom
“in”. Holding down the “Control” (Windows) or “Option” (Macintosh) key while using
the zoom tool causes the zoom icon to change from a plus (+) sign to a minus (-)
sign and zooms “out”.
Figure 21. Image Editor
| CONTENTS |
Í Page 72 of 79 Î
Page 73

ARTS PDF Crackerjack User Guide
Using ARTS PDF Crackerjack Pilot
6.2.9.2. Grab
The grab (hand) tool can be used to move the image within the window. Note that
the hand tool is non-functional when the image fits entirely within the window.
6.2.9.3. Selection
This tool is used to select an area of the image which can then be moved, cut,
copied, or pasted. Once an area is selected you can move it within the current image
by clicking, holding, then dragging it to the desired location. To duplicate a selected
area, hold the “Control” (Windows) or “Command” (Macintosh) key while dragging
the selection to a new location. Cut, copy, paste and undo are done using the
standard keyboard shortcuts. These include: “Control” (Windows) or “Command”
(Macintosh) key +X = Cut, +C = Copy, +V = Paste, and +Z = Undo. These
functions only apply to operations within the Image feature (e.g. you cannot copy an
area of an image to the “clipboard” to be pasted into another application or to
Acrobat itself).
6.2.9.4. Eraser
The eraser tool will remove areas of the image and replace them with the currently
selected background color. The default eraser color is white. Holding down the eraser
tool will activate a “flyout” menu where different sized erasers can be selected.
6.2.9.5. Pencil
The pencil tool is used to draw a new pixel or pixels into the curren t image.
6.2.9.6. Paint
The paint (brush) tool is used to paint an area of an image with a new color. Holding
down the brush tool will activate a “flyout” menu where either square or circular
brushes of different sizes can be selected.
6.2.9.7. Line
The line tool is used to draw a line or lines into the curren t image.
6.2.9.8. Rectangle
This tool is used to create a new rectangle. Holding down the rectan gle tool will
activate a “flyout” menu where you can select either an empty or filled rectangle.
6.2.9.9. Ellipse
This tool is used to create a new ellipse. Holding down the ellipse tool will activate a
“flyout” menu where you can select either an empty or filled ellipse.
| CONTENTS |
Í Page 73 of 79 Î
Page 74

ARTS PDF Crackerjack User Guide
Using ARTS PDF Crackerjack Pilot
6.2.9.10. Select Color
The eyedropper tool is used to select colors from within the current image. Clicking
with the left mouse key selects the foreground color. In Windows, clicking with the
right mouse key selects the background color. On the Macintosh, using
Control+click selects the background color.
6.2.9.11. Foreground/Background Color
These two items are used to select the foreground and/or background color to be
used by the tools in the Image Editor. If you are working on a color image the
choices available will the standard Windows or Macintosh color dialogs. If you are
working on a grayscale image, you will see a “slider” which allows you to select f r om
0 to 100% gray. Finally, if you are working on a black & white image, the choices are
limited to simply black or white. An example of the color selection dialog for
Windows is shown below. The Macintosh color selection dialog will vary widely
depending on OS version and color management settings.
Note: In Windows using the left mouse button will apply the current foreground color to the
pencil, brush, line, rectangle and ellipse tools. Using the right mouse button appli es the
current background color. On the Macintosh these tools will use the foreground color unless
you hold the control key while clicking with the mouse, which will cause them to use the
background color.
| CONTENTS |
Í Page 74 of 79 Î
Page 75

ARTS PDF Crackerjack User Guide
Using ARTS PDF Crackerjack Pilot
6.2.10. The “Document Tools” Window
Figure 22. Document Tools Window
When activated, this window will find and display a list of all images in the current PDF
document. The list contains details on the PDF page number where each image exists,
its uncompressed size in Kilobytes, its resolution and color space, as well as informat ion
on any OPI comments associated with the images.
From this window the user can perform changes to a single image, a range of images, or
to all images in the document. When th e window first opens, the currently selected
image will be highlighted.
6.2.10.1. Selecting Images
There are several ways to select images from the Document Tools window. Clicking
on an entry in the list will select it. Holding down the “Control” (Windows) or
“Command” (Macintosh) key while clicking on successive entries allows mu ltiple
images to be selected. Holding down the “Shift” key while clicking on an entry selects
all images between the first and last selected images. Using “Control + A”
(Windows) or “Command+A” (Macintosh) will select all images.
6.2.10.2. Page Range
A page range may be specified, followed by “Refresh” (Windows) or “Update”
(Macintosh), to limit the display to only those images found on th ose pages in the
PDF. This is particularly useful when working with large documents with many
images.
| CONTENTS |
Í Page 75 of 79 Î
Page 76

ARTS PDF Crackerjack User Guide
Using ARTS PDF Crackerjack Pilot
6.2.10.3. “Go To” an Image
Selecting an entry in the list then clicking “Go To” will cause the image selector to
“jump to” that image. If you desire to work on that image, click “Close” (Windows) or
“Done” (Macintosh) on the Document Tools window to return to the PDF page
containing that image.
6.2.10.4. Applying Actions to Images
After an image, or images, have been selected, the user may select an “Action” from
the drop-down list. Clicking “Execute” will apply th e action to the selected images.
Each of these actions will activate the window related to the appropriate function.
Alternatively, when a single image is selected from the list , double-clicking on it will
“execute” the currently selected “Action”. If multiple images are selected when
double-clicking the action will only be applied to t he last selected image.
Apply Filter
Choosing this action will bring up a list of the available filters where the user makes
the appropriate selections to be applied to the selected image(s). See the section on
filters for more information.
Convert color space
When this option is selected and “Execute” is pressed, a new window will display and
the user can select the color space into which the selected images will be converted.
See detailed information on
Despeckle
This action will apply the despeckle feature to the selected images. A full description
of the
Note: Despeckle cannot be applied to images with indexed, LAB, DeviceN, or Separation color
space. To perform despeckle on these images, first convert them to a supported color space.
Edit OPI
When an individual image is selected in the list, the user may select “Edit OPI” from
the action list, then press “Execute”. This will launch a new window where the user
can specify the path to the hi-res image on the OPI server. See the section on the
OPI function.
Note: Edit OPI cannot be applied to multiple images. If multiple images are selected
from the list the “Execute” button will be grayed out when “Edit OPI” is selected in
the “Action” list.
Extract
This will allow the user to specify a location for ex tracted images as well as the
image format and compression type.
despeckle function.
converting color spaces.
| CONTENTS |
Í Page 76 of 79 Î
Page 77

ARTS PDF Crackerjack User Guide
Using ARTS PDF Crackerjack Pilot
Replace
Replace will only be available when one or more images have an OP I link. When this
action is selected and the Execute button is clicked the user will first be asked to
specify a folder to search for replacement images. A search is performed to find the
specified OPI path to the replacement image. If the image is not found the search
will continue through the specified folder and any subfolders lookin g for the image
file name. Only images currently selected in the Docu ment Tools list will be replaced.
Sample
Executing this action will cause a new window to display and the user can select the
X and Y resolution values to be applied to the selected images. See the detailed
information on
resampling earlier in this manual.
6.3. Enfocus Certified PDF™
The Images feature fully supports Enfocus Software’s Certified PDF technology. Any
changes to certified PDFs by users of the Images feature - i.e., what was edited, who
edited it, and when – will be recorded and will reside in the Certif ied PDF Edit Log that is
appended to every certified PDF.
Note: PDFs that have not already been certified using Enfocus software will not contain any edit
information.
The Certified PDF Edit Log can be accessed by any of the following Enfocus products:
PitStop Professional, Instant PDF and the free Enfocus Certified PDF Reader. Enfocus
Certified PDF Reader is a plug-in to Adobe Acrobat Reader or the full version of Acrobat
that allows anyone to "participate" in the Certified PDF workflow for free. Using these
Enfocus tools users can verify the status of a PDF, view the edit log and be confident
that it is tamper-free and ready to output at any stage in the workflow.
| CONTENTS |
Í Page 77 of 79 Î
Page 78

ARTS PDF Crackerjack User Guide
Troubleshooting
7. Troubleshooting
7.1. Forum
Are you having a problem that you can’t find in the Frequently Asked Questions? Then
perhaps you’ll find it on the ARTS PDF Forum. Visit the ARTS PDF Forum on our website
http://forum.artspdf.com.
at
7.2. Updates
To ensure you are up-to-date with the most recently released bug fixes and new
features; check that you have the latest version of ARTS PDF Crackerjack installed.
To check if your version is the latest:
1. Start Adobe Acrobat.
2. On Macintosh, choose Acrobat > About Third-Party Plug-Ins > ARTS PDF
Crackerjack. On Windows, choose Help > About Third-Party Plug-Ins > ARTS PDF
Crackerjack.
3. Choose Product Info and click Updates.
7.3. Maintenance
At times ARTS PDF will release updates that may include significant enhancements to
the product. It is recommended that you take up annual maintenance to be entitled to
free upgrades (whether it be minor or major release versions) over a period of 12
months from the initial purchase. Annual Maintenance also entitles you to priority phone
and email support.
Annual maintenance can be purchased at the same time you buy the associated product
from your ARTS PDF reseller. If you wish to renew a subscription, or if you wish to
purchase a subscription for a product you already own, please contact your reseller or
ARTS PDF directly at
info@artspdf.com
| CONTENTS |
Í Page 78 of 79 Î
Page 79

ARTS PDF Crackerjack User Guide
Troubleshooting
7.4. Technical Support
Before contacting us please read the complete Troubleshooting section as the answer to
your problem may be found in the FAQs or on the ARTS PDF Forum. To contact ARTS
PDF Technical Support, please e-mail
information below to help us replicate the problem you are experiencing.
a. The exact version of ARTS PDF Crackerjack you are using (this is located by
running ARTS PDF Crackerjack, and then clicking Help > About Third-Party PlugIns > ARTS PDF Crackerjack > Product Info). Please also specify whether you are
using a demo or full registered version.
b. Whether or not you purchased Maintenance with ARTS PDF Crackerjack. If you
did purchase Maintenance, please supply your ARTS PDF Crackerjack serial
number.
c. The exact version of Adobe Acrobat you are using (this is located by running
Adobe Acrobat, and then clicking Help > About Acrobat).
d. Whether you are running it on a PC or Macintosh and the exact version of the
Operating System you are using.
e. The amount of free disk space remaining.
f. The CPU speed and amount of RAM for the system on which ARTS PDF
Crackerjack is running (e.g. Pentium 233 MMX, 32MB RAM).
g. Any other programs that are running at the time of the error (e.g. Outlook,
Internet Explorer, etc).
h. A description of the expected behavior versus the actual behavior.
i. The minimum PDF file that exhibits the behavior.
j. If applicable, please include the resultant PostScript f ile or a description of the
output configuration (RIP model, PostScript interpreter version number, and
output device model).
Feedback If you have ideas and suggestions on how we could improve ARTS
PDF Crackerjack, we would love to hear your thoughts. Please
send them to
Legal Notes
Acrobat and Exchange are registered trademarks of Adobe
Systems Incorporated. ARTS PDF Crackerjack is Copyright ©
2005 ARTS PDF.
info@artspdf.com
techsupport@artspdf.com and supply the
| CONTENTS |
Í Page 79 of 79
 Loading...