

Artisan ARTISB Installation Manual
Artisan
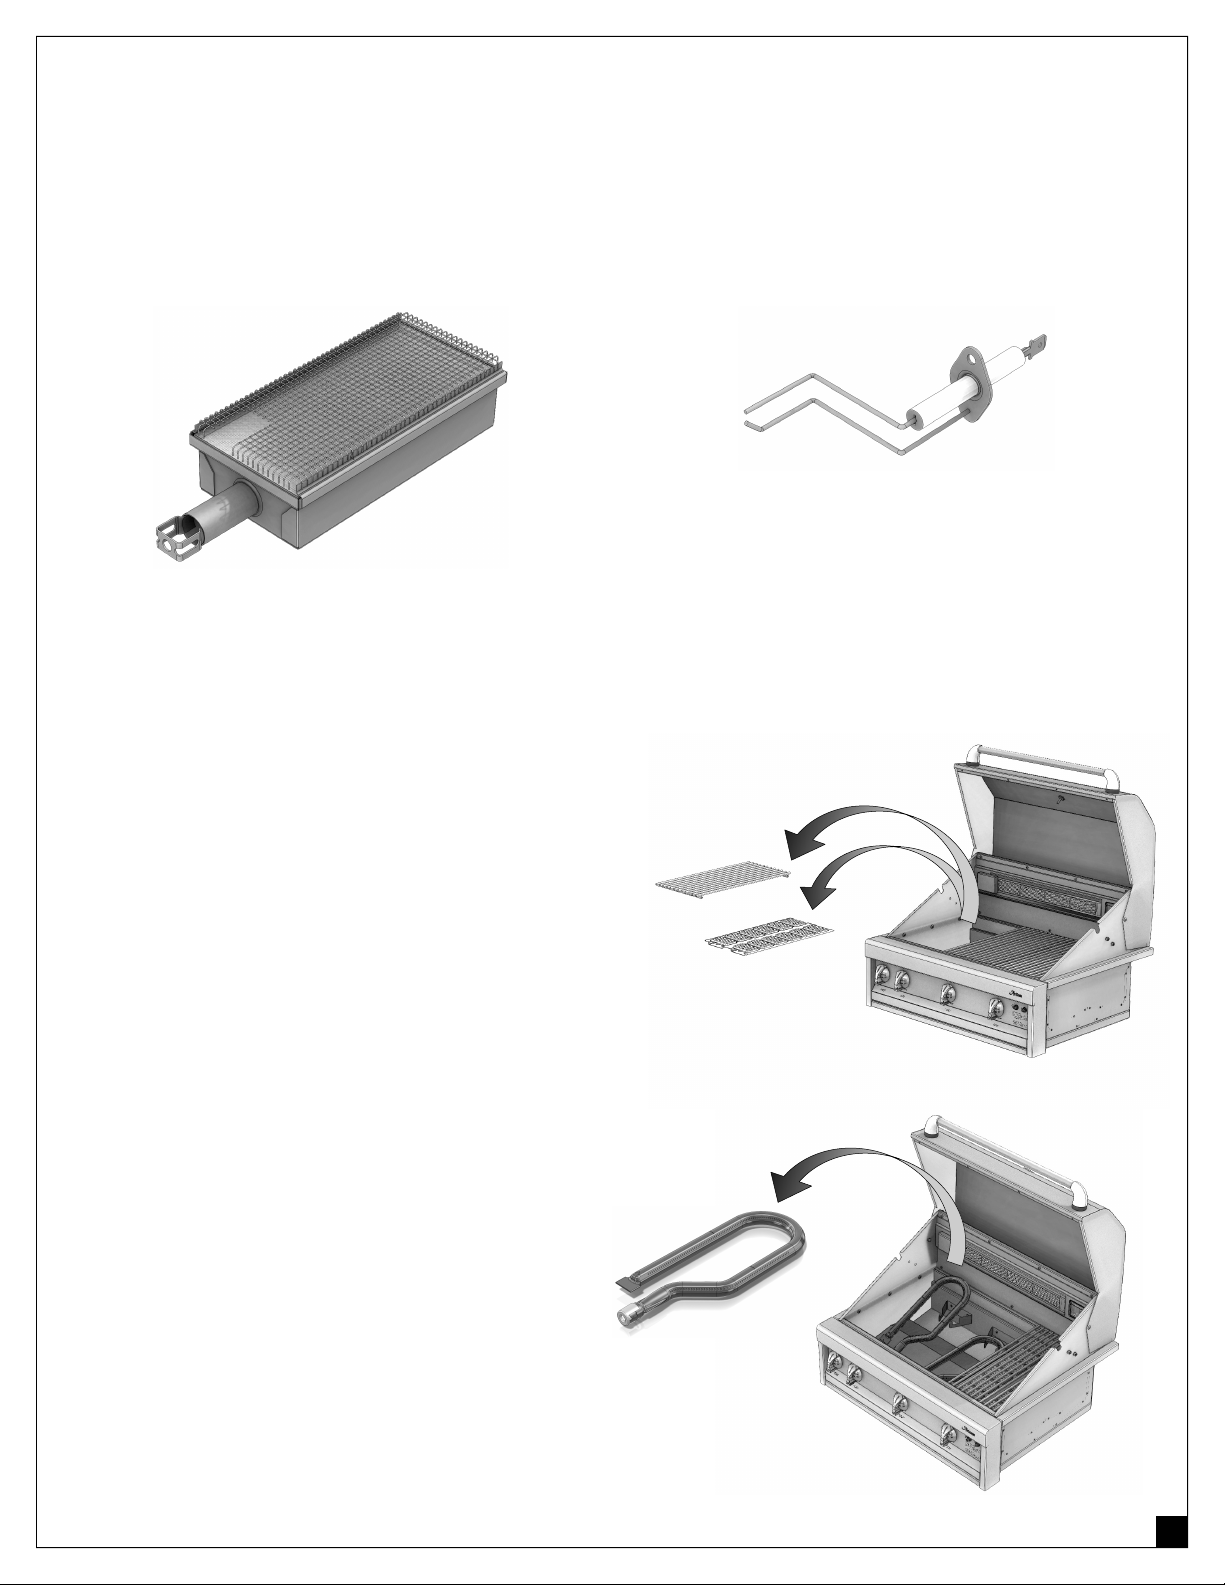
ITEMS PROVIDED IN THIS KIT MODEL ART-ISB:
Infrared Sear Burner Sear Burner Electrode
INSTALLATION:
WARNING:
(Applies to 32” and 36” units only).
The Infrared Sear Burner for your Artisan™ USA Grill
can be used in any existing grill burner location you
prefer: left, center or right.
•
Remove the grill grate and briquette tray from
the desired location as shown on the right .
(See Figure 1).
•
Lift and remove the U-BURNER out of the grill.
The U-BURNER is simply resting between the
gas valve and the rear bracket located in the
back wall. (See Figure 2)
Disconnect 110V AC power to the grill before servicing the unit.
™
USA
INFRARED SEAR BURNER
GRATE
U-BURNER
BRIQUETTE
TRAY
Figure 1
Figure 2
1
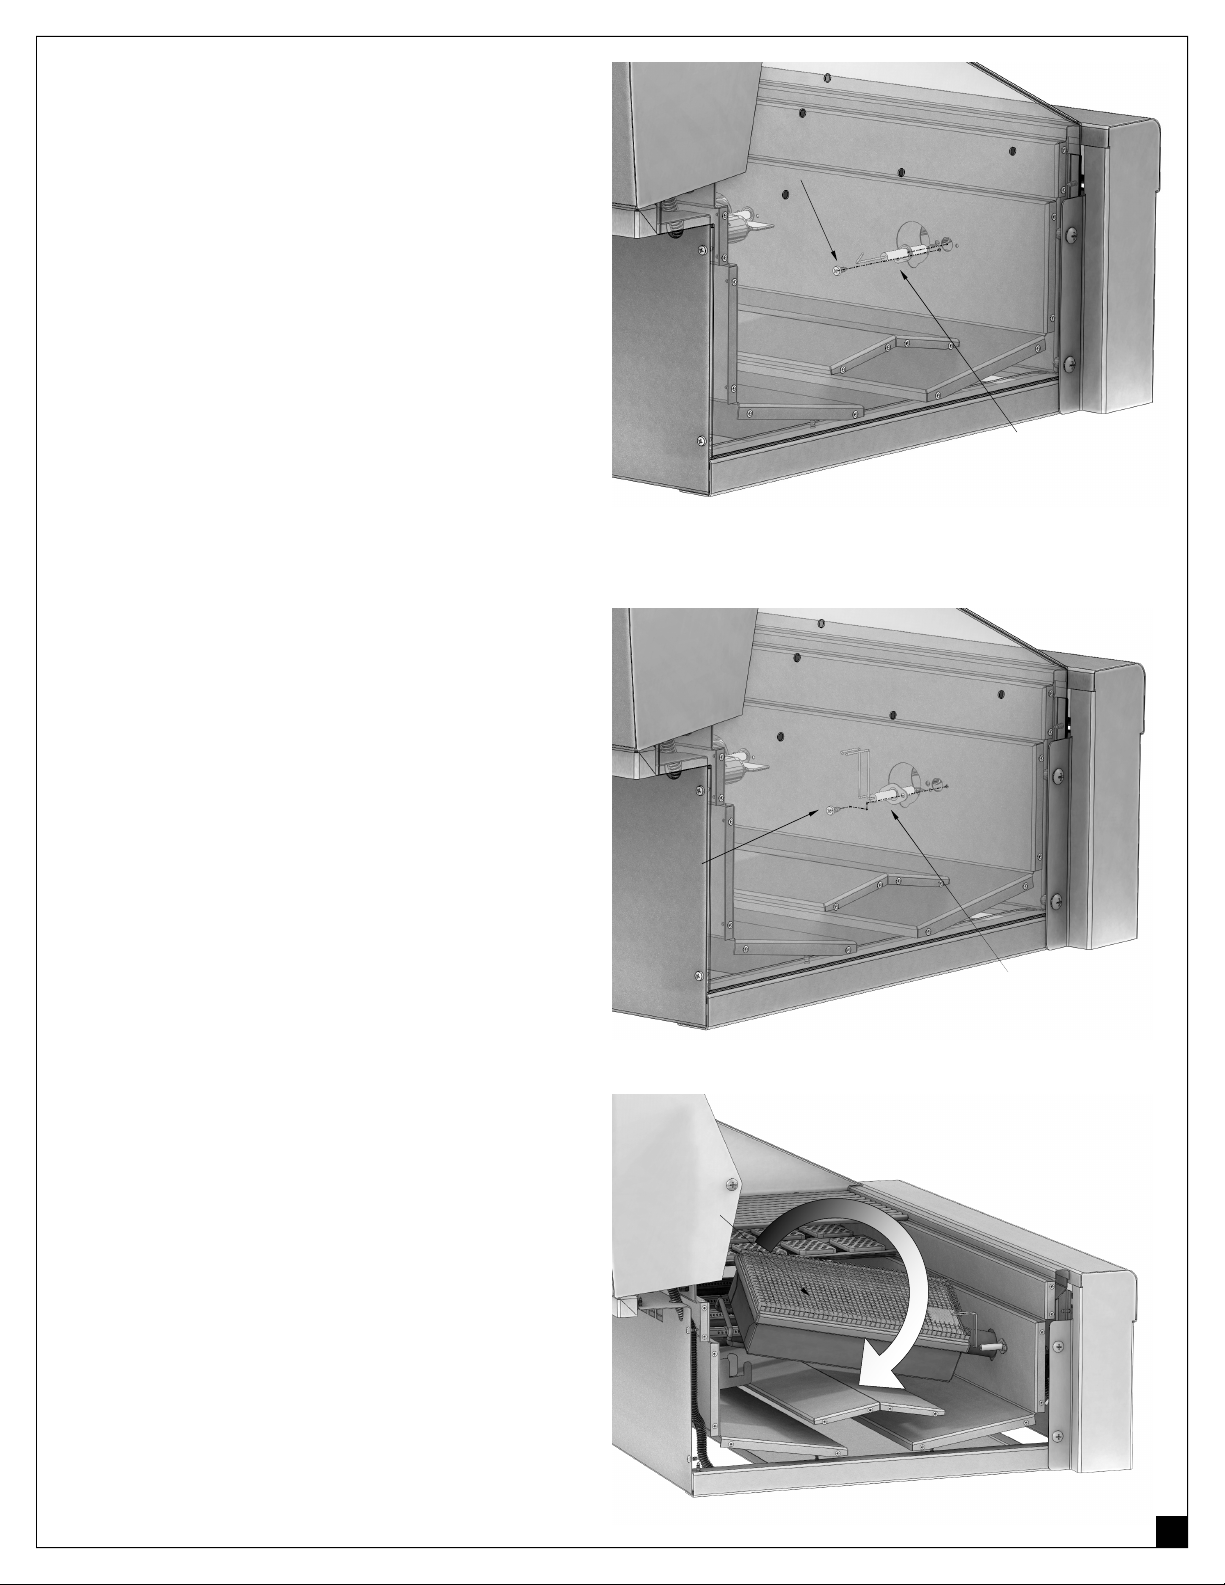
•
Using a screwdriver, remove the electrode screw
and pull the U-BURNER electrode out SLOWLY.
There is additional ignition wire located inside
the front of the grill in order to pull the connector
approximately 1” outside of the front wall.
(See Figure 3)
•
Remove the electrical wire connected to the
back of the U-BURNER Electrode by gently
pulling and moving from side to side.
DO NOT let go of this wire as you will need to
reconnect it to the SEAR BURNER Electrode.
•
Connect the Electrode wire to the new SEAR
BURNER Electrode by pushing it into the spade
connector at the end.
•
Install the new SEAR BURNER Electrode with
the tip facing “UP” using the same screw that
you previously removed.
(See Figure 4)
•
This new SEAR BURNER Electrode has dual
tips. At this point, you should be able to test the
spark by pressing the ignition button in the front
panel. Verify that the spark is good by maintain-
ing a 1/8” GAP between tips.
Replace the ignition module battery if necessary
as shown in the grill’s manual.
•
Insert the SEAR BURNER by installing the front
tube first and slightly rotating the burner around
the tips of the electrodes as you push the burner
forward towards the control panel.
(See Figure 5)
SCREW
SEAR
BURNER
SCREW
Figure 3
U-BURNER
ELECTRODE
SEAR BURNER
Figure 4
ELECTRODE
Figure 5
2
 Loading...