

Page 1
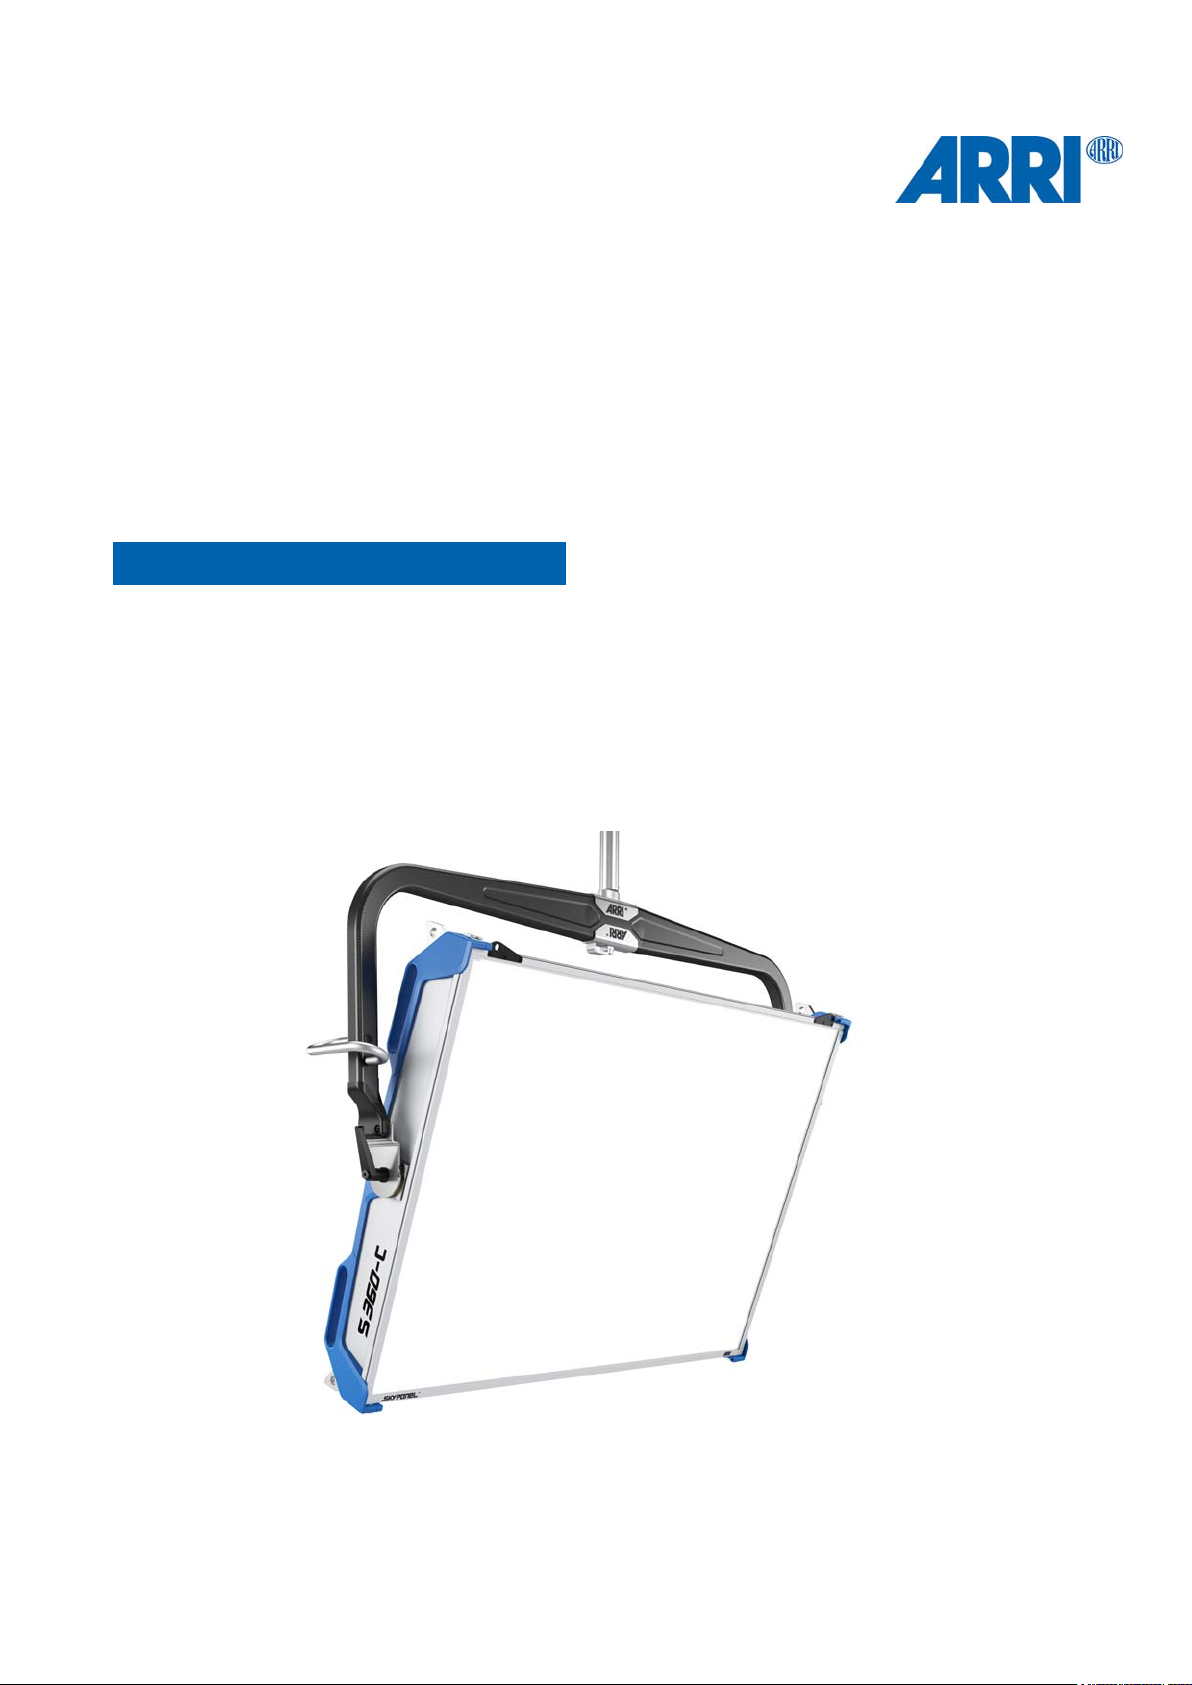
SkyPanel
S360-C
U S E R M A N U A L
L5.0016339
®
Page 2

© 2017 Arnold & Richter Cine Technik GmbH & Co. Betriebs KG.
All rights reserved. Information subject to change without notice. ARRI and all affiliated companies disclaim liability for any injury,
damage, direct or indirect loss, consequential or economic loss or any other loss occasioned by the use of, inability to use or reliance on the information contained in this document. ARRI, ARRI ARRI, the ARRI Logo, ARRIMAX, ARRISUN, EB, EBB, L-Series,
MAX Technology, M-Series, POCKETPAR, True Blue, SkyPanel, SKYPANEL, T 12 and T 24 are registered trademarks of Arnold
& Richter Cine Technik GmbH & Co. Betriebs KG.
No part of this document may be used for distribution, reproduction, transmission, transcription, storage in a data retrieval system,
or translated into any language in any form by any means without the prior written permission of ARRI
files from our web pages for your personal use, make sure to check for updated versions. ARRI
®
®
. If you are downloading
cannot take any liability whatso-
ever for downloaded files, as technical data are subject to change without notice.
TM
Art-Net
Designed by and Copyright Artistic Licence Holdings Ltd.
Page 3

Content
Introduction .................................................................................................................................................... 5
Features . . . . . . . . . . . . . . . . . . . . . . . . . . . . . . . . . . . . . . . . . . . . . . . . . . . . . . . . . . . . . . . . . . . . . . . . . . . 5
Properties. . . . . . . . . . . . . . . . . . . . . . . . . . . . . . . . . . . . . . . . . . . . . . . . . . . . . . . . . . . . . . . . . . . . . . . . . . 5
Fixture Menu................................................................................................................................................... 7
Overview . . . . . . . . . . . . . . . . . . . . . . . . . . . . . . . . . . . . . . . . . . . . . . . . . . . . . . . . . . . . . . . . . . . . . . . . . . 7
Features of the Fixture Menu . . . . . . . . . . . . . . . . . . . . . . . . . . . . . . . . . . . . . . . . . . . . . . . . . . . . . . . . . . . 7
To Set the Operation Mode . . . . . . . . . . . . . . . . . . . . . . . . . . . . . . . . . . . . . . . . . . . . . . . . . . . . . . . . . . . . 9
Fixture Control ............................................................................................................................................. 20
ARRI Lighting Service Manager. . . . . . . . . . . . . . . . . . . . . . . . . . . . . . . . . . . . . . . . . . . . . . . . . . . . . . . . 21
Web Server . . . . . . . . . . . . . . . . . . . . . . . . . . . . . . . . . . . . . . . . . . . . . . . . . . . . . . . . . . . . . . . . . . . . . . . 22
Overview of the Fixture Menu ..................................................................................................................... 23
RDM Commands .......................................................................................................................................... 27
RDM Command Extensions. . . . . . . . . . . . . . . . . . . . . . . . . . . . . . . . . . . . . . . . . . . . . . . . . . . . . . . . . . . 27
Manufacturer Commands. . . . . . . . . . . . . . . . . . . . . . . . . . . . . . . . . . . . . . . . . . . . . . . . . . . . . . . . . . . . . 28
Protocol......................................................................................................................................................... 30
ContentContent
3
3
Page 4

Page 5

Introduction
Thank you for selecting the SkyPanel LED soft light from ARRI. The SkyPanel is a compact, ultra-bright
and high-quality LED soft light. It is much more efficient than a soft light with a conventional light source.
The SkyPanel combines the advantages of the LED technology with the characteristic of a conventional
soft light. The SkyPanel integrates seamless into established working practice. Lighting designers as well
as Studios don’t need to change its workflow.The optical system produces a soft, homogeneous light field.
The different models of the SkyPanel emit white light with a fixed color temperature or colored light with
adjustable color temperature and adjustable green-magenta point. The light spectrum is optimized for excellent color rendition and fulfills perfect the demands of modern, digital cameras. All models of the SkyPanel can be controlled using the common DMX512-A protocol, Art-Net, sACN or the fixture menu.
Please observe the SkyPanel Installation and Safety Manual. The manual is available for free download on
the ARRI web site www.arri.com.
Features
Light Field
The SkyPanel offers the same functionality as a conventional softlight.
Even Light Field
IntroductionIntroduction
The SkyPanel softlight produces a homogeneous, single-shadow light field, delivering natural results.
Vibrant Colors, Full Spectrum Lighting
True-to-life color rendition is an outstanding feature of the SkyPanel S360-C. The fully tunable white light
of the SkyPanel can be adjusted for different skin tones, camera sensors and mixed light environments.
Full gamut color mixing enables the rendition of all color shades. The extensive gel library (from firmware
version 2.0) offers a wide range of familiar colors at the user’s fingertips.
Cool Light Beam
The SkyPanel S360-C does not emit any infrared or UV radiation and thus does not forward heat, making
actors feel comfortable in the light beam.
Properties
Guiding Rails
Diffuser plates or an intensifier is placed on the front of the fixture and held by four locking pins. Both the
diffuser and intensifier are equipped with guiding rails at the front to carry other accessories for shaping the
light like a honey comb.
Yoke
The carbon fiber yoke provides high strength with minimum weight. The short metal yoke is the perfect solution when the SkyPanel is mounted in a grid facing downwards.
Tilt-Lock
The high strength tilt-locks on each side of the stirrup provide secure locking. It eliminates movement and
slippage and ensures that the SkyPanel will stay where you put it.
5
5
Page 6
Introduction
Control
All functions of the SkyPanel S360-C are controllable through DMX, CRMX, Art-Net or sACN. The SkyPanel is also fully RDM compatible (via DMX, CRMX and Art-Net with suitable controllers) and is equipped with
an RDM feedback channel for reporting all set parameters including system status.
Fixture Menu
For location applications the SkyPanel is equipped with a fixture menu for manual adjustment of intensity,
color temperature and plus/minus green as well as hue and saturation.
Control Options
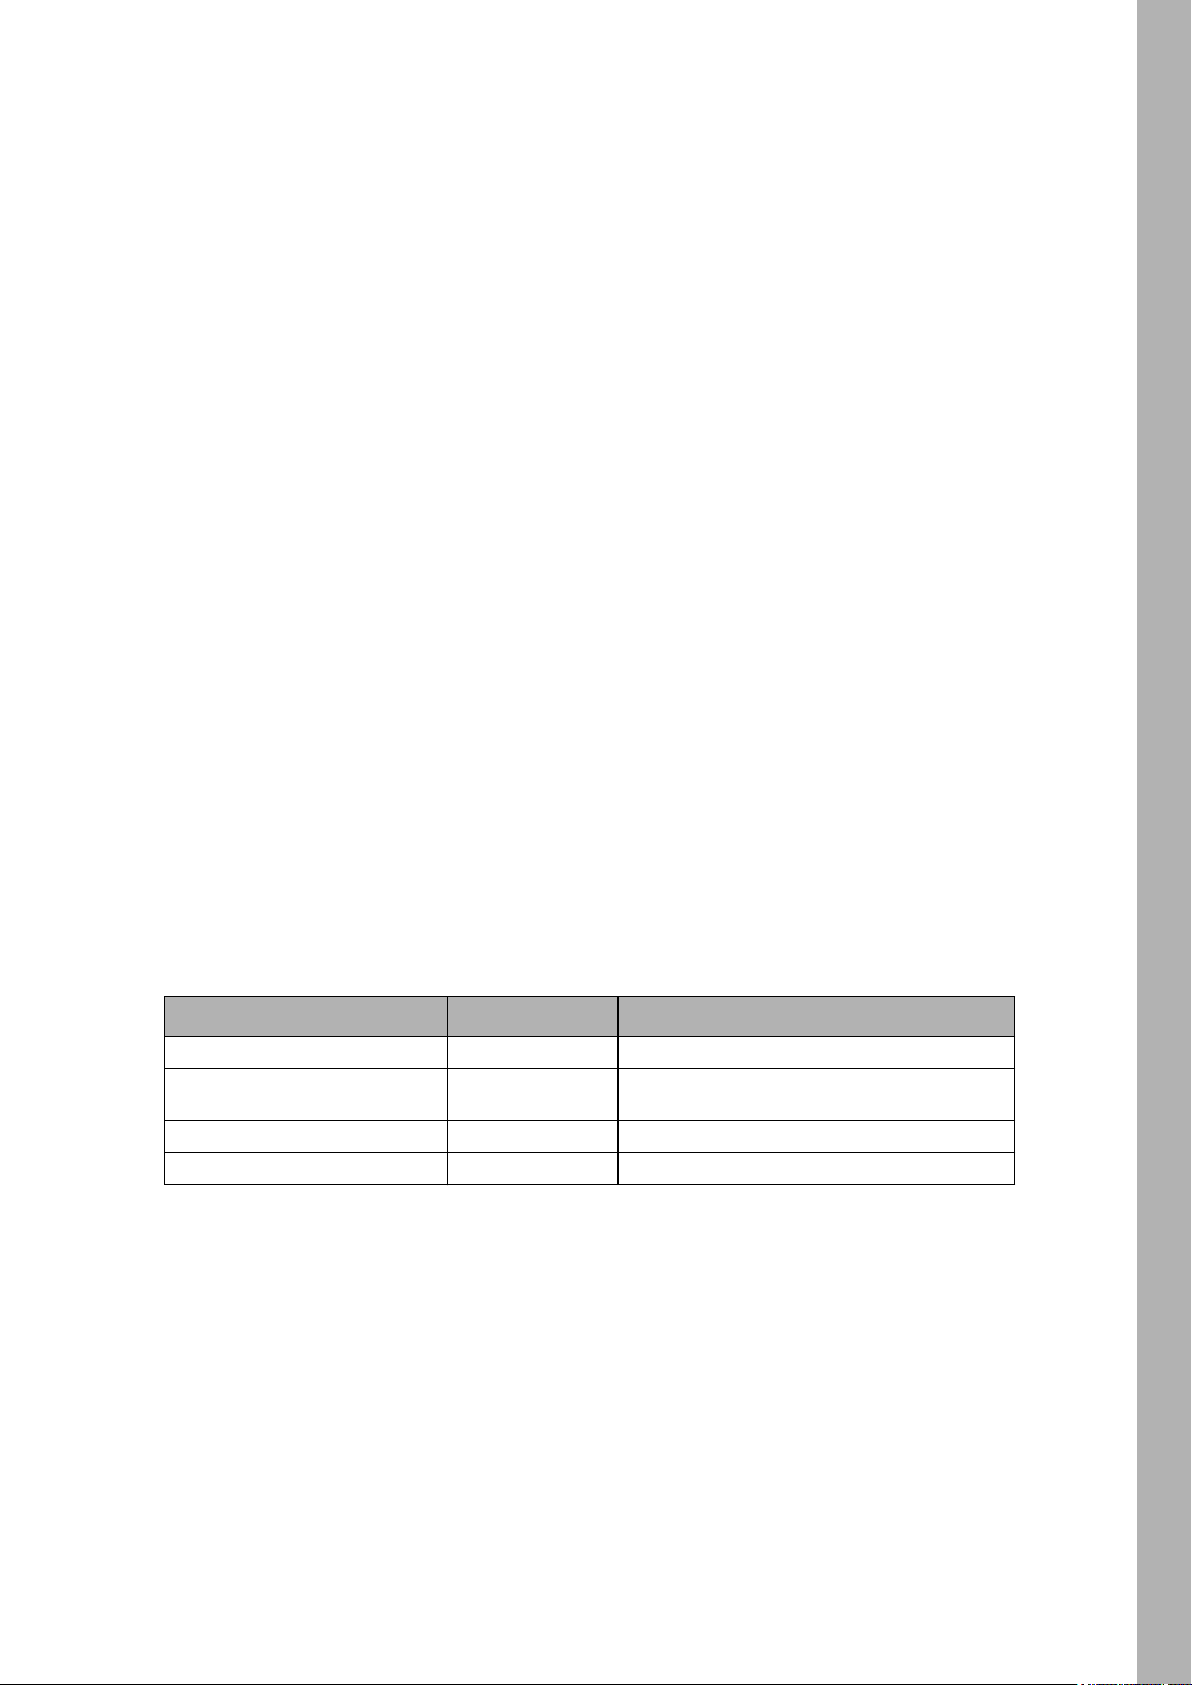
You can set up or control the SkyPanel with the options listed in the table below
Option Control Configuration Information
Fixture menu Yes Yes page 7
DMX Yes No page 30
CRMX (WDMX) Yes No page 13
RDM No Yes page 28
Art-Net and sACN Yes No page 21
ALSM No Yes page 21
Web server No Yes page 22
6
Page 7
Fixture Menu
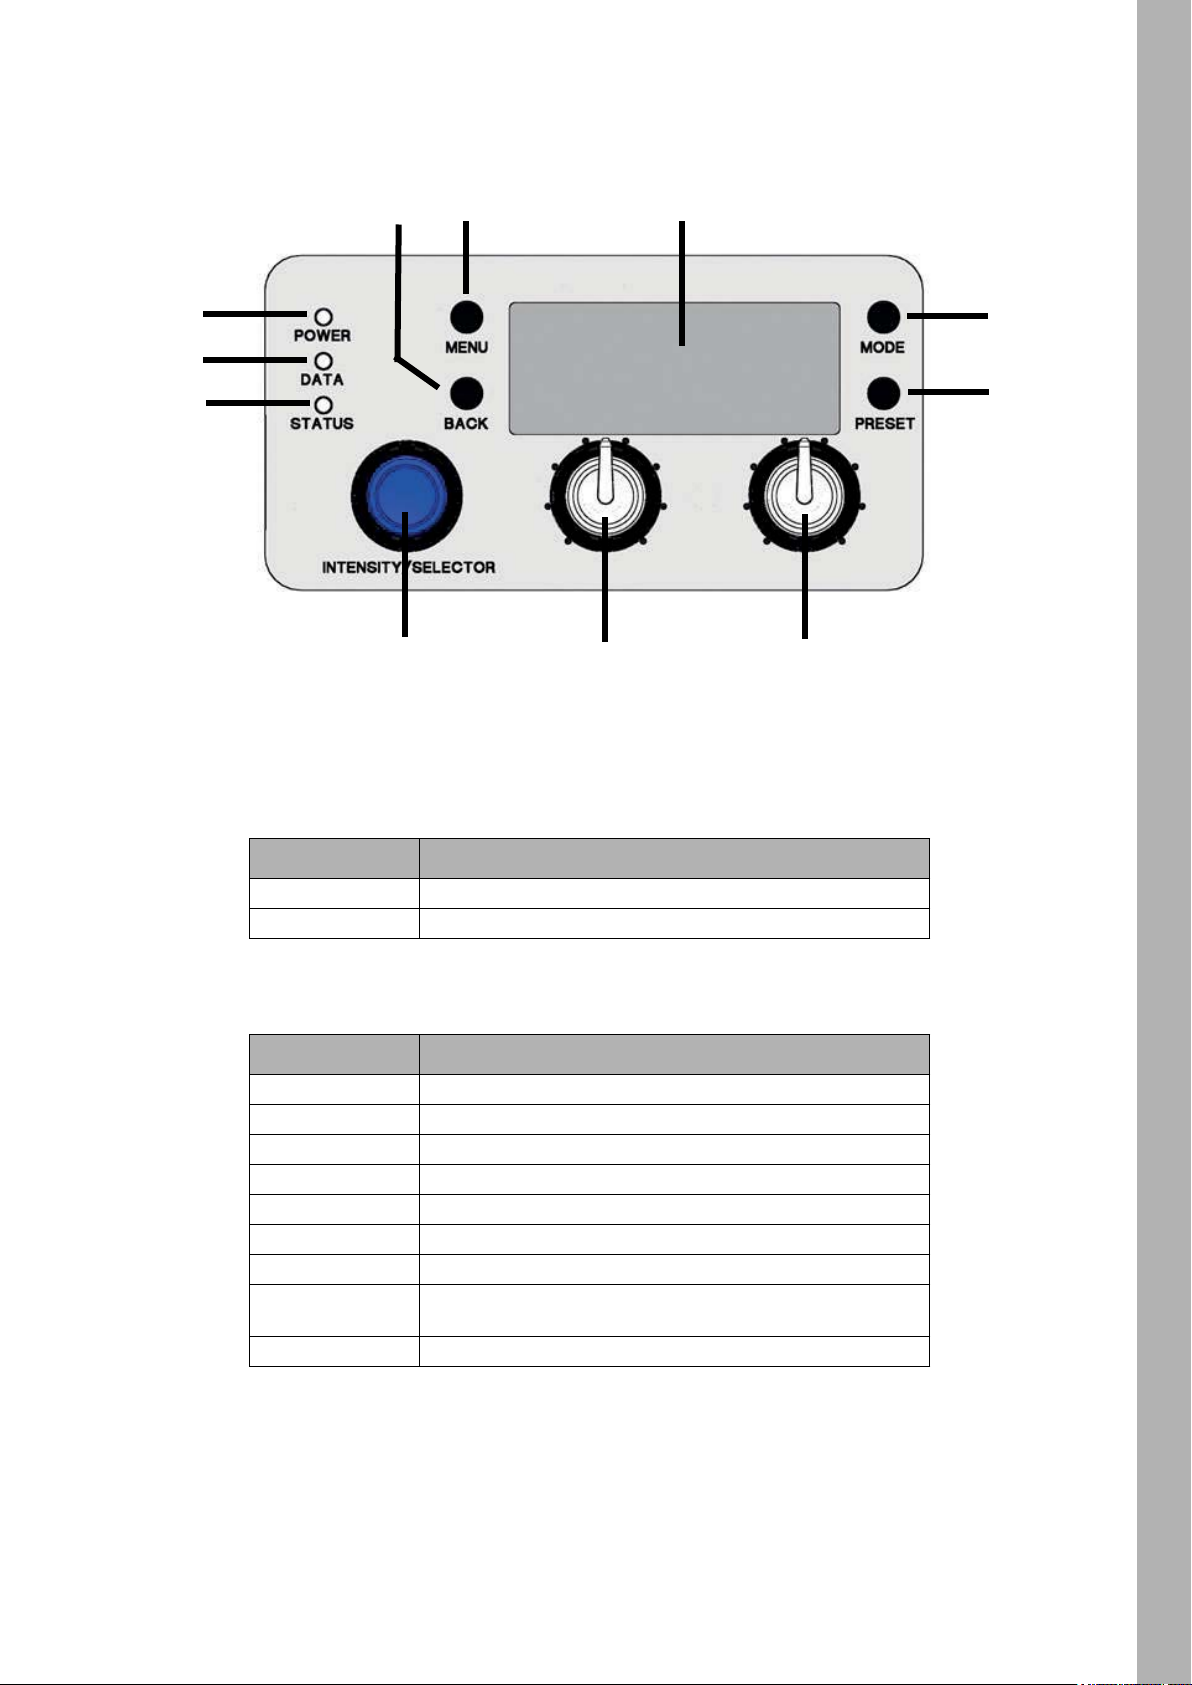
Overview
11
10
9
Fixture MenuFixture Menu
1
2
3
4
Features of the Fixture Menu
POWER-LED (1):
Color Indication
Green Fixture switched on. No error.
No color Fixture switched off.
8
7
5
6
DATA-LED (2):
Color Indication
Blue The fixture receives a valid DMX signal.
Blue / green The fixture receives a valid CRMX (WDMX) signal.
Purple Master mode active
White Receiving valid Art-Net signal, Gateway active
Green Receiving valid Art-Net signal, Gateway not active
Orange Receiving valid sACN signal, Gateway active
Cyan Receiving valid sACN signal, Gateway not active
Red
No light The fixture receives no valid control signal.
No communication between fixture menu and controller
board.
7
7
Page 8

Fixture Menu
STATUS-LED (3):
Color Indication
Green No error. Normal temperature.
Red flashing (0,5s rhythm)*
*
Red
Change from red to green
Red flashing (0,25s Rhythm)
*Display lights up red when STATUS-LED is lit red
*
*
Warning fixture over temperature (only
with fan modes LOW and High Speed).
Fixture over temperature.
Fixture normal temperature.
Calibration data not loaded.
INTENSITY/SELECTOR (I/S, 4)
The INTENSITY/SELECTOR encoder I/S has two functions:
• Fixture menu closed: Setting the intensity.
• Fixture menu open: Use I/S to scroll through the menu, open sub menus and set parameters. Pressing
the knob opens sub menus and confirms settings.
Central Rotary Knob (5)
Use the rotary knob to set the color temperature (CCT) or the color hue (HUE). The current function of the
rotary knob is shown in the display (9) above the knob.
Right Rotary Knob (6)
Use the rotary knob to set the green / magenta saturation or the color saturation (SAT). The current function
of the rotary knob is shown in the display (9) above the knob.
PRESET (7)
To call up a preset
A short press of the PRESET button brings up the list of all available presets. Turn I/S (4) to select one of
10 factory presets and 10 user definable presets. Press I/S (4) to activate the preset.
To store a preset
Use the fixture menu to adjust the settings. Hold PRESET, until the preset save dialog opens. Turn I/S (4)
to select a preset memory slot. Press I/S (4) to store the preset. Close the dialog with BACK.
MODE (8)
MODE swaps between CCT, HSI, GEL, Source Matching and RGBW mode of the SkyPanel.
DISPLAY (9)
The display shows the current settings and other information during normal operation. Press the MENU
button (4) to open or close the fixture menu. Use I/S (4) and the BACK button (11) to navigate through the
fixture menu.
MENU (10)
The MENU button opens the fixture menu. Press MENU when the fixture menu is open to close the menu
and abort an action (Escape). Use I/S (4) to scroll through the menu, open sub menus and set parameters.
Press MENU long to display the menus which are used most.
8
Page 9

BACK (11)
The BACK button closes a sub menu and aborts an action (Escape). Compared to the MENU button (10)
the BACK button only closes the sub menu, but not the fixture menu.
Press BACK long to display the last used menus.
To lock the fixture menu
• Press I/S in the home screen for 5 seconds to lock all buttons and knobs. Use the feature to prevent an
accidental change of settings.
• The word „LOCKED“ appears on the display when locked.
• Press I/S in the home screen for 5 seconds again to unlock all buttons and knobs.
• Please find a overview in chapter “Overview of the Fixture Menu” on page 23.
To Set the Operation Mode
Press the MODE button (8) to switch from CCT to HSI to GEL to Source to RGBW and back to CCT mode.
In CCT mode the SkyPanel generates white light with optimized color rendition. In HSI mode the SkyPanel
generates colored light. If saturation is set very low, the SkyPanel generates white light, but not with optimized color rendition. The GEL mode offers an extensive color gel library. In Source mode the SkyPanel
generates the light of traditional light sources. Use the RGBW mode to generate a RGBW color using the
control panel.
Fixture MenuFixture Menu
To set the Lighting Parameters in CCT Mode
Set the color temperature continuously with the central rotary knob (5). Set the Green-Magenta point continuously with the right rotary knob (6). The current setting is displayed above the rotary knobs.
To set the Color in HSI Mode
Set the hue continuously with the central rotary knob (5). Set the saturation continuously with the right rotary knob (6). The current setting is displayed above the rotary knobs.
To Set the Lighting Parameters in GEL Mode
Use the central rotary knob (5) to set the color temperature 3.200 K or 5.600 K. The right rotary knob (6)
offers two options: „Best color“ displays the gel with optimized color quality, „Brightest“ displays the gel with
optimized brightness.
• Press I/S (4) to open the gel library. Choose the gel manufacturer (Rosco or LEE) with the central rotary
knob (5). Use the right rotary knob (6) to activate a gel category as shown in the table below.
Rosco LEE
Color Correction Color Correction
CalColor Color Filters
Storaro Selection 600 Series
Cinelux Cosmetic
700 Series
• Turn I/S (4) to call up a gel from the gel set. Press I/S to select a gel or press BACK (11) to close the gel set and set
the intensity with I/S (4). Press I/S (4) again, to re-open the gel set
.
To set the Light Source in Source Mode
Use the fixture menu to activate the source mode. Press I/S to call up a list of the light sources available.
Use the right rotary knob (6) to select the category (please see page 56 for a detailed list). Turn I/S to select
a light source. The SkyPanel calls up the selected light source in real time. Press I/S to choose the selected
light source.
9
9
Page 10
Fixture Menu
To set the Color in RGBW Mode)
Use the MODE button to activate the RGBW color mode. The central rotary knob (5) has no function in
RGBW mode. Use the right rotary knob (6) to select the functionality of the encoder I/S (4). Dependent on
the selection of the right rotary knob, I/S is used to set the overall intensity of the red, green, blue and white
color. Please note the setting „Direct Control“ or „RGBW Color Space (see page 11). You can store the
RGBW color as a preset.
To Set the Brightness in all Operating Modes
Set the brightness in both operating modes continuously with the encoder I/S (4). The setting is dynamic:
Turning the encoder fast changes the intensity in coarse steps, turning it slow changes the intensity in fine
steps.
To Set the Dimming Curve
The SkyPanel supports four dimming curves. The dimming curves are global: They affect both the intensity
control via the fixture menu or DMX, WDMX, Art-Net and sACN.
• Linear: The intensity changes proportional to the encoder I/S (4) or the channel value.
• Exponential: The resolution is high at lower intensity levels and low at higher intensity levels. Use this
dimming curve when you need a high resolution at low intensity levels. This is the default setting.
• Logarithmic: The resolution is low at lower intensity levels and high at higher intensity levels. Use this
dimming curve when you need a high resolution at high intensity levels.
• „S“ curve: The resolution is both high at lower and higher intensity levels and low at intensity levels in
between. Use this dimming curve, when you need a high resolution at low and high intensity levels.
To set the dimming curve
1.Press the MENU button (10) to open the fixture menu.
2.Turn I/S, until „Light Control“ is selected. Press I/S to open the menu.
3.Turn I/S, until „Dimming Curve“ is selected. Press I/S to open the menu.
4.Select the dimming curve by turning I/S. Press I/S to confirm the setting.
NOTICE
The dynamic of an effect using the intensity is very low, when you choose a basic intensity value in
a flat area of the dimming curve. Choose a different effect or select another dimming curve to create
a more dynamic effect.
To Set a Special Control Mode
The SkyPanel supports three special control modes. The special control modes are global: They affect both
the intensity control via the fixture menu or DMX, WDMX, and Art-Net or sACN.
Low End Mode
The Low End Mode optimizes the dimmer quality at low intensity levels and enables SkyPanel to generate
accurate CCTs with high color rendition and smooth dimming at very low light levels. The Low End Mode
can cause flickering when used with cameras shooting at high frame rates.
Tungsten Mode
The tungsten Mode can mimic the dimming curve and strike on-and-off effect of a traditional tungsten lamp.
The CCT warms as the light is dimmed and when the intensity drops to zero quickly there is a short afterglow of warm light. This mode is perfect for mixing the SkyPanel with tungsten sources or for producing a
familiar effect.
High Speed Mode
The High Speed mode generates flicker-free light for High Speed shootings. High Speed Mode has been
tested up to 25.000 fps and down to 2° shutter angle with no flicker or roll bars. The intensity is fixed in High
Speed mode. The only settings are 0% (black out) or 100% (full intensity). In High Speed mode the settings
for low end mode, tungsten mode, effects and PWM frequencies are ignored.
10
Page 11
NOTICE
Effects are de-activated in High Speed mode. When you try to call up an effect in High Speed mode,
the warning „Not Possible: High Speed Active“ is displayed. When you try to activate the High Speed
mode with an effect active, the warning „Not Possible: Effect Active“ is displayed. De-activate the
effect or the High Speed mode to change the control mode.
To set a special control mode:
1.Press the MENU button (10) to open the fixture menu.
2.Turn I/S, until „Light Control“ is selected. Press I/S to open the menu.
3.Turn I/S, until „Special Modes“ is selected. Press I/S to open the menu.
4.Select the special mode by turning I/S. Press I/S to confirm the setting.
5. Press MENU to close the menu.
Master/Slave Mode
In Master/Slave mode the slave fixtures mimic the master fixture without delay. The master fixture generates a DMX signal on the 5-pin DMX Thru connector.
Connect a maximum of 32 SkyPanels and L-series fixtures to a DMX data link. Choose one SkyPanel to
be the master fixture.
NOTICE
There must not be more than one SkyPanel in the data link set to master.
Fixture MenuFixture Menu
Setting more than one fixture to master or connecting a DMX controller to the data link causes one
or all master fixtures to de-activate the master mode
To set the Master Fixture:
1.Press the MENU button (10) to open the fixture menu.
2.Turn I/S, until „Light Control“ is displayed. Press I/S to open the menu.
3.Turn I/S, until „Master/Slave Mode“ is displayed. Press I/S to open the menu.
4.Set all fixtures in the data link to „Off“ to de-activate master mode. Select „On“ on one fixture in the data
link to set the fixture as master fixture.
5.Press MENU to close the menu.
All fixtures in the data link will mimic the master fixture automatically and independent from their settings.
Please note when using the master/slave mode:
• Art-Net and sACN are de-activated on all fixtures in the data link.
• Changing the mode on the master fixture (CCT, HSI, GEL, Source Matching, RGBW) changes the mode
on all slave fixtures accordingly.
• The settings DMX protocol version, DMX address, tungsten mode, low end mode, fans and signal loss
behavior are changed accordingly to the settings of the master fixture.
• Connect only C version fixtures of one type in a data link.
• L-series fixtures do not support the GEL mode.
• Presets are not available.
Calibrated RGBW Color Space
When using RGBW mode, the SkyPanel by default does not generate colors in a calibrated color space.
The color is generated with optimized brightness within the specified tolerances. You can activate the calibrated color space Kodak Pro Photo Color Gamut / ESTA standard E1.54 to force the SkyPanel to generate a calibrated color. The white point is 3.200 K. The calibrated color space is a global setting and is active
in both on-board controls and DMX.
11
11
Page 12

Fixture Menu
To Activate and De-activate the Calibrated RGBW Color Space:
1.Press the MENU button (10) to open the fixture menu.
2.Turn I/S, until „Light Control“ is displayed. Press I/S to open the menu.
3.Turn I/S, until „RGBW Color Space“ is displayed. Press I/S to open the menu.
4.Select „Direct Control“ to generate colors with optimized intensity. Select „Calibrated Color“ to generate
a calibrated color.
5.Press MENU to close the menu.
Frequency Selection
You can change the frequency in the fixture menu. Change the frequency, when you recognize flicker when
in the camera picture or by your eyes. The default frequency is the highest frequency. You can change the
frequency in 10 steps. Frequency 1 is the highest frequency, while frequency 10 is the lowest frequency
setting.
To set the frequency:
1.Press the MENU button (10) to open the fixture menu.
2.Turn I/S, until „Light Control“ is displayed. Press I/S to open the menu.
3.Turn I/S, until „Frequency Selection“ is displayed. Press I/S to open the menu.
4.Select a frequency. Press I/S to confirm the setting. The frequency is set immediately.
5. Press MENU to close the menu.
DMX Address
When you control the SkyPanel using DMX in a DMX data network, you must assign a DMX address to the
fixture.
To assign a DMX address:
1.Press the MENU button (10) to open the fixture menu.
2.Turn I/S, until „DMX Settings“ is displayed. Press I/S to open the menu.
3.Turn I/S, until „DMX Address“ is displayed. Press I/S to open the menu.
4.Select a DMX address. Press I/S to confirm the setting.
5.Press MENU to close the menu.
DMX Protocol
The SkyPanel offer different DMX protocols. Please find a detailed overview of all DMX protocols on
page 30.
To Set a DMX Protocol:
1.Press the MENU button (10) to open the fixture menu.
2.Turn I/S, until „DMX Settings“ is displayed. Press I/S to open the menu.
3.Turn I/S, until „DMX Protocol“ is displayed. Press I/S to open the menu.
4.Select a DMX protocol. Press I/S to confirm the setting.
5.Press MENU to close the menu.
DMX-Signal-Loss Behavior
12
You can set the behavior of the fixture when the control signal is lost. The table below shows the available
options:
Option Description
Hold Last Command
Black Out
Hold 2 Min. Fade Out
The last received DMX values are used until the fixture is
switched off or valid DMX data is received again.
The fixtures douses to 0% intensity immediately.
The last received DMX values are used for 2 minutes. After 2
minutes the fixture douses to 0% intensity. When valid DMX
data is received after less than 2 minutes, these data will be
used.
Page 13
To set the DMX-Signal-Loss Behavior:
1.Press the MENU button (10) to open the fixture menu.
2.Turn I/S, until „DMX Settings“ is displayed. Press I/S to open the menu.
3.Turn I/S, until „DMX Loss Behavior“ is displayed. Press I/S to open the menu.
4.Select the setting by turning I/S. Press I/S to confirm the setting.
5.Press MENU to close the menu.
Wireless DMX
The SkyPanel S360-C is equipped with a wireless DMX receiver supporting the LumenRadio CRMX
protocol.
If there is no DMX traffic received via a wired interface (DMX-512A, ArtNet or sACN) and wireless DMX is
activated via the fixture menu, the SkyPanel S360-C can linked to a wireless DMX transmitter via an RDM
discovery command. Once linked successfully, the SkyPanel S360-C processes wireless DMX data and
respond to RDM requests only via the wireless link.
The DATA LED on the fixture menu panel fades from blue to green followed by a 2 second fade from green
to blue as soon as CRMX (WDMX) is active AND CRMX data is received and processed by the SkyPanel
S360-C.
If the WDMX Data State is set to OFF, no wireless DMX and no wireless RDM traffic will be processed.
However, „Unlinking“ and Linking is still possible in State OFF.
To Unlink a SkyPanel S360-C from a Wireless DMX transmitter:
1. Press the MENU button (10) to open the fixture menu.
2. Turn I/S until „DMX Settings“ is displayed. Press I/S to open the menu.
3. Turn I/S until „WDMX Settings“ is displayed. Press I/S to open the menu.
4. Turn I/S until „WDMX Connection Unlink“ is displayed. Press I/S to open the menu.
5. Select the setting „Yes“ by pressing the I/S.
6. The fixture is now unlinked from the transmitter. Press MENU to close the menu.
As soon as DMX or RDM traffic is detected via the other interfaces, any wireless DMX or RDM data will be
ignored and the SkyPanel S360-C processes the wired DMX/RDM traffic.
Fixture MenuFixture Menu
To set the Fan Mode
You can set the fan mode to adapt the cooling and noise level to the environment. The table below shows
the available options:
Fan Mode Max. power Description
Normal 1500 W
Quiet Mode 1200 W
Variable 1200 W
High Temp 1200 W
To set the fan Mode
1.Press the MENU button (10) to open the fixture menu.
2.Turn I/S, until „Fan Mode“ is displayed. Press I/S to open the menu.
3.Select the Fan mode by turning I/S. Press I/S to confirm the setting.
4.Press MENU to close the menu.
The fans operate temperature regulated.
The fans operate constantly at low speed
(silent).
The fans operate temperature regulated.
The fans run at maximum speed.
13
13
Page 14

Fixture Menu
14
Lighting Effects
The SkyPanel offers an effect library with a wide variety of lighting effects used on set or in a TV studio.
The SkyPanel replaces many special effect devices with its unique effect library.
You can call up all effects using the fixture menu or via DMX, Art-Net or sACN. Every effect offers specific
parameters. A lighting effect can be stored in a preset slot for quick access at a later point.
To select and activate an effect:
1.Press the MENU button (10) to open the fixture menu.
2.Turn I/S, until „Lighting Effects“ is displayed. Press I/S to open the menu.
3.Select the desired effect by turning I/S.
4.Press I/S to start the effect.
5.Set the parameters, as described below.
To stop an effect:
1.Press the MENU button (10) to open the fixture menu.
2.Turn I/S, until „Lighting Effects“ is displayed. Press I/S to open the menu.
3.Select the option „Off“. Press I/S to confirm.
Start / Stop function of the effect
If an effect is running, press I/S to stop the effect execution. Press I/S again to restart the effect from the
beginning. While stopped, the SkyPanel performs a black out and a P:<Effect> shows the status in the display. The start / stop function is only available in the effects control screen.
The SkyPanel provides the following effects in DMX modes 22 (8 bit) and 23 (16 bit). Intensity is a parameter for all effects:
Party
The Party effect calls up the color spectrum or changes the color temperature from warm to cold and vice versa in an
endless loop.
Parameters:
• Saturation
• Speed
If you do not need the effect for shooting, you will need it for the party when the movie is done!
Candle
Low flickering of a warm light, slower than fire and less energetic. The light gentle fades in CCT and brightness with periods of static behavior in between. It consists of „flutters“ and static periods.
Parameters:
• CCT range
• Speed
Clouds Passing
Slow variations in intensity and CCT that can be offset. The effect is most useful when using many SkyPanels that are offset to prevent a simultaneous effect on different fixtures.
Parameters:
• Offset
• Passing speed
• Sync
Club Lights
Random colors that pulse, flash and fade.
Parameters:
• Color variety
• Speed
• Sync
Color Chase
Creates a color chasing effect over the surface of the SkyPanel using multiple LED light engines.
Parameters:
• Saturation
• Speed
Page 15
• Offset
• Sync
Cop Car
Creates an on-board blue and red flashing effect to mimic a police car, an ambulance or a fire brigade. Do
not use the effect in public areas without permission.
Parameters
• Color combination
• Flash pattern
Fire
Creates a flickering fire effect.
Parameters:
• CCT range
• Flicker speed
Fireworks
Bright flashes of color and have a quick start and fade to zero intensity.
Parameters:
• Color combination
• Speed
Light Strobe
Generates a white or colored strobe effect with adjustable speed from 25 flashes / sec to 1 flash / sec.
Fixture MenuFixture Menu
DANGER
DANGER! Risk of injury or death through epileptic seizure.
Do not use the effect near stairways, in corridors or near public exits.
Provide advance notice that strobe lighting is in use. Display advisory notices on the set, at the point
of ticket sales, on tickets if possible, in the program, and at the entrance(s) to the venue or studio.
Avoid extended periods of continuous flashing, particularly at frequencies of 10 to 20 flashes per
second. At flash rates below 5 flashes per second, it is estimated that only 5% of flicker-sensitive
persons will be at risk of seizure
Make sure that personnel at the venue are trained in the care of a person who is having an epileptic
seizure and able to provide care if necessary.
If strobes are in use and a person has a seizure, switch the strobes off immediately.
Mount strobes as high above head height as practicable.
Parameters:
• CCT
• Green-Magenta point
• Cross fade
• Saturation
• Flash speed
Lightning
Creates an on-board flashing lightning effect. Intensity, speed and frequency of flashing can be controlled.
Parameters:
• CCT
• Green-Magenta point
• Speed
• Frequency
• Sync
15
15
Page 16
Fixture Menu
Paparazzi
Effect that mimics a flash bulb or modern camera flash.
Parameters:
• CCT
• Flash type
• Frequency
Pulsing
A pulsing or throbbing effect where the color and speed can be set.
Parameters:
• CCT
• Green-Magenta point
• Cross fade
• Color
• Saturation
• Frequency
• Span
Television
Creates an on-board TV effect. Cool CCT that changes intensity every few seconds.
Parameters:
• CCT range
• Speed
16
To Activate and set Effect Parameters with the Fixture Menu
The rotary knobs adjust the effect parameters when an effect is active. For all effects applies:
• The selected effect is displayed in the left top corner of the display.
• Intensity / Selector adjusts the intensity.
• Press I/S to stop the effect (black out).
• Press I/S again to restart the effect.
• Press MODE long (> 1 sec) to activate the parameters described below (column „Mode“, not available for
all effects).
• Press MODE again to close the effect control and regain normal control.
The table below shows the parameters you can adjust with the rotary knobs for each effect:
Effect Mode Rotary Knob Parameter
Candle Central CCT range
Right Speed
Clouds Passing Central Offset
Right Speed
Club Lights Central Color range
Right Speed
Color Chase Central Offset
X Central Saturation
Right Speed
Cop Car Central Color combination
Right Flash pattern
Fire Central CCT range
Right Speed
Fireworks Central Color combination
Right Speed
Page 17
Effect Mode Rotary Knob Parameter
Light Strobe X Central Speed
Central Normal functionality
Right Normal functionality
Lightning Central Frequency
X Central CCT range
Right Speed
X Right Green-Magenta point
Paparazzi Central Frequency
X Central CCT range
Right Flash bulb
X Right Green-Magenta point
Pulsing Central Normal functionality
X Central Span
Right Normal functionality
X Right Frequency
Television Central CCT range
Right Speed
Fixture MenuFixture Menu
When changing a parameter of an active effect through the fixture menu or via DMX, the internal effect generator recalculates the effect in real time. The effect can stutter, step or be unsmooth for a short period. Do
not change parameters of an active effect if the effect needs to run smooth.
To Set the Display Behavior
You can set the intensity of the background illumination, the contrast, the behavior of the background illumination and the orientation of the display content.
To set the display behavior:
1.Press the MENU button (10) to open the fixture menu.
2.Turn I/S, until „Display Setup“ is displayed. Press I/S to open the menu.
3.Turn I/S, until „Display Illumination“ is displayed. Press I/S to open the menu. Select the desired setting
by turning I/S. Press I/S to confirm the setting.
4.Turn I/S, until „Display Brightness“ is displayed. Press I/S to open the menu. Select the desired brightness by turning I/S. Press I/S to confirm the setting.
5.Turn I/S, until „Display Contrast“ is displayed. Press I/S to open the menu. Select the desired contrast by
turning I/S. Press I/S to confirm the setting.
6.Turn I/S, until „Display Rotation“ is displayed. Press I/S to open the menu. Select the desired setting by
turning I/S. Press I/S to confirm the setting.
7.Turn I/S, until „Error Mode Display“ is displayed. Press I/S to open the menu. Select the desired setting
by turning I/S. Press I/S to confirm the setting.
Please refer to section “Overview of the Fixture Menu” on page 23 for a detailed explanation of the options.
17
17
Page 18

Preset Lists
The fixtures preset list can be saved to an USB memory stick and be uploaded to another SkyPanel.
Fixture Menu
NOTICE
Disconnect all DMX cables from the product before using an USB memory stick. The data transfer
between the product and the USB memory stick might be disturbed due to interferences.
The USB-A port can power small USB devices. The maximum current is 500 mA @ 5V. Do not overload the USB-A port.
To Save a preset List:
1.Connect an USB memory stick to the USB-A connector of the SkyPanel.
2.Press the MENU button (10) to open the fixture menu.
3.Turn I/S, until „USB Functions“ is selected. Press I/S to open the menu.
4.Turn I/S, until „Save Presets“ is selected. Press I/S to open the menu.
5.Select „Yes“ and press I/S to confirm the setting. Select „No“ to abort saving the preset list.
6.The preset list will be saved on the USB memory stick.
Up to 30 preset lists can be stored in the root directory of the USB memory stick. The file name is
<product serial number>-Presetxx.json. The SkyPanel is looking for „Presetxx.json“ to identify a preset
list on an USB memory stick. Be sure to keep the string when renaming a preset list. Otherwise the file will
not be found by the SkyPanel.
To Load a Preset List:
1.Connect an USB memory stick with one or more preset lists to the USB-A connector of the SkyPanel.
2.Press the MENU button (10) to open the fixture menu.
3.Turn I/S, until „USB Functions“ is selected. Press I/S to open the menu.
4.Turn I/S, until „Load Presets“ is selected. Press I/S to open the list of the preset lists available in the root
directory of the USB memory stick.
5.Turn I/S, to select a preset list.
6.Press I/S to load the selected preset list. The internal preset list of the SkyPanel will be overwritten by the
selected preset list.
18
To Save and Load Fixture Settings
The fixtures settings can be saved to an USB memory stick and be uploaded to another SkyPanel. The file
contains all fixture settings except the DMX address and IP settings.
To Save the Fixture Settings:
1.Connect an USB memory stick to the USB-A connector of the SkyPanel.
2.Press the MENU button (10) to open the fixture menu.
3.Turn I/S, until „USB Functions“ is selected. Press I/S to open the menu.
4.Turn I/S, until „Save Fix. Settings“ is selected. Press I/S to open the menu.
5.Select „Yes“ and press I/S to confirm the setting. Select „No“ to abort saving the fixture settings.
6.The fixture settings will be saved on the USB memory stick.
Up to 30 fixture settings files can be stored in the root directory of the USB memory stick. The file name is
<product serial number>-Clonexx.json. The SkyPanel is looking for „Clonexx.json“ to identify a fixture
settings file on an USB memory stick. Be sure to keep the string when renaming a fixture settings file. Otherwise the file will not be found by the SkyPanel.
To Load Fixture Settings:
1.Connect an USB memory stick with one or more fixture settings files to the USB-A connector of the SkyPanel.
2.Press the MENU button (10) to open the fixture menu.
3.Turn I/S, until „USB Functions“ is selected. Press I/S to open the menu.
4.Turn I/S, until „Load Fix. Settings“ is selected. Press I/S to open the list of the fixture settings files available in the root directory of the USB memory stick.
5.Turn I/S, to select a fixture settings file.
6.Press I/S to load the selected fixture settings. The SkyPanel restarts with the new fixture settings after
successful upload.
Page 19

To Save the Error and Service Log
For diagnosis purpose you might be asked to send the error and service log to the ARRI service. The log
files can be downloaded to an USB memory stick.
The file name contains the date, time and serial number of the fixture.
To save the log files:
1.Connect an USB memory stick to the USB-A connector of the SkyPanel.
2.Press the MENU button (10) to open the fixture menu.
3.Turn I/S, until „USB Functions“ is selected. Press I/S to open the menu.
4.Turn I/S, until „Save Error Log“ is selected. Press I/S to open the menu.
5.Select „Yes“ and press I/S to confirm saving the log files. Select „No“ to abort saving the log files.
6.The log files will be saved on the USB memory stick.
To Read out Fixture Information
1.Press the MENU button (10) to open the fixture menu.
2.Turn I/S, until „Enabled Functions“ is displayed. Press I/S to open the menu.
3.Turn I/S to display readouts.
4.Press I/S to change settings, if applicable.
To Perform a Factory Reset
Fixture MenuFixture Menu
1.Press the MENU button (10) to open the fixture menu.
2.Turn I/S, until „Factory Reset“ is displayed. Press I/S to open the menu.
3.Turn I/S to choose the option „Yes“ and perform a factory reset. Press BACK (11) to abort.
4.The SkyPanel reboots with its factory settings.
19
19
Page 20

Fixture Control
The SkyPanel offers, depending on the model, up to 23 control modes. Use the 8 bit modes with basic controllers like dimmer consoles.
Fixture Control
ARRI recommends the use of the 16 bit modes in combination with controllers supporting 16 bit resolution
to obtain best results. The high resolution provides smooth dimming and precise color adjustments.
The coarse / fine modes utilize two channels for most parameters and provide higher resolution compared
to the 8 bit modes in combination with controllers that do not support true 16 bit resolution. One channel
sets the coarse value between 0 and 255 of the function. Each step is divided in 256 increments using the
fine channel. This way it is possible to control the light very precise without using a true 16 bit resolution.
CCT and RGBW
This mode provides control of intensity, color temperature, green-magenta point and individual channels
for controlling the red, green, blue and white color (only SkyPanel-C).
CCT
Simple white-only mode. It is used when the number of available channels of the controller is very limited.
It provides control of intensity, color temperature and green-magenta point.
CCT & HSI
Provides control of intensity, color temperature, green-magenta point, hue and saturation (HSI = hue, saturation, intensity). In HSI mode (only SkyPanel-C) the color and intensity is very even over the fixtures as
it is controlled using color algorithms which take the tolerances of the light engines into account during calculation.
RGBW
Simple mode for controlling the overall intensity and the red, green, blue and white intensity when only a
limited number of channels is available. Please find more information about the RGB color space on
page 11.
HSI
Simple mode for controlling hue, saturation and intensity when only a limited number of DMX channels is
available.
GEL
The GEL mode offers an extensive color filter list. The color temperature has two settings, 3.200 K and
5.600 K. The intensity can be controlled as usual.
20
xy Coordinates
The xy mode determines the color displayed by its xy coordinates in the CIE 1931 diagram. Set the x and
y coordinate with 8 bit or 16 bit resolution. One channel determines the transition type when fading from
one color to another color.
Source Matching
Select from a list of light sources to match that color and spectrum. Source Matching saves a lot of time
when you need a specific illumination. Select from 50 different light sources the one which fits best to your
demands.
Page 21

Light Effects
The SkyPanel contains a light effect engine with 13 different light effects. Activating a light effect is very
easy. Just activate a light effect via the fixture menu, DMX, Art-Net or sACN and set the parameters to get
exactly the effect you need.
Please find a detailed description of all modes in chapter “Protocol” on page 30.
Depending on the selected mode the channels required for each SkyPanel should be allocated in
the controller to provide independent control of all SkyPanels connected to the controller.
Art-Net and sACN
From firmware version 2.0 the SkyPanel supports Art-Net. Art-Net is a network protocol to control devices.
Here is a brief explanation of some basic terms being used by Art-Net. For more detailed information,
please visit the web site of the Art-Net developers: www.artisticlicence.com.
Please find more information about sACN in the standard ANSI E1.31.
Art-Net IP Address
When setting the IP address manually, please take care the address is in the range 2.0.0.1 to
2.255.255.255 (Network switch off) or 10.0.0.1 to 10.255.255.255 (Network switch on). Any other range is
not according to the Art-Net standard and problems might occur.
Art-Net Net
NOTICE
Art-Net and sACNArt-Net and sACN
A group of 16 consecutive Sub-Nets or 256 consecutive Universes is referred to as a net. There are 128
Nets in total.
Sub-Net
A group of 16 consecutive universes is referred to as a sub-net. (Not to be confused with the subnet mask).
Universe
A single DMX512 frame of 512 channels is referred to as a Universe.
Art-Net Merge Mode
The Art-Net protocol allows multiple nodes or controllers to transmit ArtDmx data to the same universe.Merging is limited to two sources, any additional sources will be ignored by the Node.
Art-Net Gateway
With enabled Art-Net gateway the SkyPanel makes all 512 channels of the used universe available at its
DMX connectors.
The menu „Art-Net Settings“ contains all parameters to set up a SkyPanel in an Art-Net network. Please
find a detailed description in the chapter “Features of the Fixture Menu” on page 7.
ARRI Lighting Service Manager
Please find information about the features and the functionality of the ARRI Lighting Service Manager in
the user manual for the ARRI Lighting Service Manager. You can download it with the ARRI Lighting Service Manager software-bundle from the ARRI web site www.arri.com/lightingsoftware free of charge.
21
21
Page 22

Web Server
The SkyPanel provides a web page accessible via http, when connected to a network. Type in the IP address of the SkyPanel in your web browser to open the web page and change the settings listed below.
The Web Server can also be found by using a Bonjour service to discover the fixture and open the Web
Server page without needing to know the IP address.
Art-Net and sACN
Always use the latest version of your web browser. Earlier versions might not be compatible to the
web page of the SkyPanel.
The table show the settings you can change:
To Save Settings
You can save the settings visible on the web page to a file. Click „Download Settings“ to start the download
to your computer.
To Load Settings
You can upload a settings file to the SkyPanel. Click „Upload Settings“ to start the upload of a settings file.
A file selector menu will open to select the settings file.
To Save or Load Presets via the Web Server
You can save and load a preset list via the web server. Click „Download Presets“ to save a preset list on
your computer. Click „Upload Presets“ to upload a preset list saved on your computer to the SkyPanel.
To Activate a Password Protection
You can activate a password protection for changing settings via the web server page. The password can
be set, modified and deactivated using the web server page.
If password protection has been activated via ALSM or the web server page, the SkyPanel only allows
changing settings via the web server if a valid password has been entered at the beginning of each http
session.
Per default there is no password check. A factory reset deactivates a previously activated password.
The default user name is „webuser“.
NOTICE
Option
DMX Settings
RGBW Color Space
Fan Mode
Dimming Curve
Special Modes
Light Effects
Display Settings
Network Settings
Low Battery Warning
USB Mode
Factory Reset
22
Page 23

Overview of the Fixture Menu
From Firmware-Version 3.0
Open and close the fixture menu the MENU button. BACK closes a sub menu and aborts an action.
Turn INTENSITY / SELECTOR to scroll. Press INTENSITY / SELECTOR to select an item
Level 1 Level 2 Level 3 Level 4 Explanation (default setting = bold)
DMX Address 001 - 512 Start address
DMX Protocol P1 - P23 Protocol (see page 30)
Hold Last Command Fixture holds the last received control values
DMX Settings
Fan Mode
Light Mode
Light
Control
DMX Loss Behavior
DMX Protocol
Version
RDM State
WDMX Settings
Normal Fans temperature regulated, P(max.) 1.500 W
Quiet Mode Fan speed low, P(max.) 1.200 W
Variable Fans temperature regulated, P(max.) 1.200 W
High Temp Fan speed high, P(max.) 1.200 W
CCT
HSI Colored light, hue and saturation adjustable
Gel
Source Matching The SkyPanel emulates a specific light source.
RGBW Color mixing in RGBW mode.
Dimming Curve
Special Modes
Master/ Slave
Mode
RGBW Color
Space
Black Out Fixture douses the dimmer
Hold 2 Min Fade Out
Version 3.4
Version 4.0
Version 4.1
Version 4.2
Version 4.3
On RDM communication active
Off RDM communication not active
WDMX State
Connection Unlink Link (NO) or Unlink (YES) fixture
Exponential Exponential dimming curve
Linear Linear dimming curve
Logarithmic Logarithmic dimming curve
„S“ Curve
Low End Mode
Tungsten Mode
High Speed Mode
Off Master/Slave Mode OFF
On Master/Slave Mode active
Direct Control
Calibrated Color The RGBW color is calibrated (optimized hue)
On WDMX activated
Off WDMX deactivated
Off Flicker free light
On
Off Color temperature optimized when dimming
On Emulates the behavior of a tungsten light
Off Highspeed mode OFF
On Highspeed mode ON
Hold the last received values for 2 min. then
douse
Version of the DMX protocol
White light, color temperature and green /
magenta correction adjustable
GEL mode, gel library available, color temperature 3.200 K or 5.600 K
Combination of exponential and logarithmic
dimming curve
Optimized dimming behavior at low intensity
levels
The color is mixed in RGBW mode direct (optimized brightness).
Overview of the Fixture MenuOverview of the Fixture Menu
23
23
Page 24

Level 1 Level 2 Level 3 Level 4 Explanation (default setting = bold)
Light
Control
(cont.)
Frequency
Selection
Overview of the Fixture Menu
Off No stand alone effect
Party Effect Party mode
Candle Candle
Clouds Passing Clouds passing
Club Lights Club light
Color Chase Color chase
Lighting
Effects
Display
Setup
USB
Functions
Cop Car Cop car
Fire Fire
Fireworks Fireworks
Light Strobe Light strobe
Lightning Lightning
Paparazzi Paparazzi
Pulsing Pulsing
Television Television
Display
Illumination
Display
Brightness
Display Contrast 01 - 03 - 10 Contrast of the display content
Display Rotation
Display Error
Mode
Light Presets
Fixture Settings
Save Error Log
Default Default frequency (highest frequency)
Frequency 1
Frequency 2
Frequency 3
Frequency 4
Frequency 5
Frequency 6
Frequency 7
Frequency 8
Frequency 9
Frequency 10
Always On Display illumination always on
Off After 10 Sec.
0 - 10 Brightness of the display illumination
Normal No rotation of the display content
Upside-Down Display content 180° rotated
Normal
Hidden
Save Light Presets
Load Light Presets
Save Fix. Settings
Load Fix. Settings [List]
No
Yes
[List]
No
Yes
Adjusted frequency
Display illumination douses 10 sec. after last
menu action
Show error codes, switch status LED and display illumination to red.
Show error codes. Status LEDs and display
illumination off.
Store preset list to an USB memory stick (see
page 18)
Load preset list from an USB memory stick.
Select preset list with Intensity / Selector (see
page 18)
Store fixture settings to an USB memory stick
(see page 18)
Load fixture settings from an USB memory
stick. Select fixture settings with Intensity /
Selector (see page 18)
Store error and service log to an USB memory
stick (see page 19)
24
Page 25

Level 1 Level 2 Level 3 Level 4 Explanation (default setting = bold)
Automatic Accepts both protocols.
Art-Net Only Accepts Art-Net only
sACN Only Accepts sACN only
Off Accepts no network protocol
LTP
HTP
On Gateway disabled
Off Gateway enabled
Connection OK Connection established
No Connection No connection
DHCP Use DHCP mode
Art-Net 2.B.C.D Use Art-Net net 2.B.C.D
Art-Net 10.B.C.D Use Art-Net net 10.B.C.D
Manual Jumps to „IP Address“
Select Merge-Mode „LTP“ (Last Take Precedence)
Select Merge-Mode „HTP“ (High Take Precedence)
The fixtures IP address (assigned via DHCP, if
active)
If manual mode is active:
AAA = 10, 172 or 192
BBB = 0 - 255, 16 - 31 or 168
CCC = 0 - 255
DDD = 0 - 255
If changed, the IP mode is automatically set to
„Manual“
Shows the settings of each option. Press I/S to
change the setting of the selected option.
Art-Net &
sACN
Network
Settings
Enabled
Menu
Art-Net/sACN
State
Art-Net Net 0 - 127 Select Art-Net net
Art-Net Subnet 0 - 15 Select Art-Net subnet in Art-Net net
Art-Net Universe 0 - 15 Select Art-Net universe in Art-Net subnet
Merge Mode
Gateway
sACN Universe 1 ... 65000 sACN universe
IP Mode --> Shortcut to menu „Fixture Settings“.
Connection
Status
IP Address AAA.BBB.CCC.DDD
IP Mode
Subnet Mask 255.255.255.0 Cannot be changed via the fixture menu.
Gateway x.x.x.x Cannot be changed via the fixture menu.
DNS1 x.x.x.x Cannot be changed via the fixture menu.
DNS2 x.x.x.x Cannot be changed via the fixture menu.
MAC Address XX:XX:XX:XX:XX:XX MAC address
Network Name Sxx-xxxxxxx-xxxx Serial number
Fan Mode
Dim. Curve
Low End
Tungsten
High Speed
Frequency
Master/Slave
Effect
Art-Net/sACN
RDM
Gateway
RGBW C-Space
USB Mode
Overview of the Fixture MenuOverview of the Fixture Menu
25
25
Page 26

Level 1 Level 2 Level 3 Level 4 Explanation (default setting = bold)
Fixture Status
Light Engine
Fixture
Info
Overview of the Fixture Menu
Fixture
Settings
Factory
Reset
Temp.
Hour Counter
Battery Status x.y V Recent voltage of an external battery
Fixture Serial No. L1.xxxxxxx-xxx The fixtures serial number
Firmware
Versions
USB Mode
No Abort action
Yes Load factory settings
System Ready No error
<error message>
xx.x °C
xx.x °F
xxh - Light Engine
yyh - System
FW: x.xx.xx.xxxx
CP: x.xx.xx.xxxx
Normal USB port powered
Service
Error message (see „Safety and Installation
manual“)
Recent light engine temperature
Working hours of the light engines and of the
system since production of the fixture
Main firmware version and display firmware
version
USB port not powered. Do not change this
setting unless being asked by ARRI service. Risk of damage!
26
Page 27

RDM Commands
From Firmware 3.2.
Command Description GET SET
Discover Unique Branch Searches RDM device X X
Discover Mute Mutes the RDM device, no response messages X X
Discover Unmute Activates device for response messages X X
Supported Parameters Shows a list of all supported RDM commands X
Parameter Description
Device Info
Software Version Label
DMX Start Address DMX address X X
Identify Sevice
RDM Command Extensions
Shows a list of commands that are not standard
RDM commands, mostly commands from manufacturer.
Get:
RDM protocol version
Model ID
Product category
Main software version ID
DMX foot print,
DMX personality
Sub device count
Sender count
Shows the software version string from main, e.g.
Main 1.66.1 Yes 16 2012 19:10:26
Identify Flag -> physically fl ash the light, SkyPanel-C flashes Blue and all other White
RDM CommandsRDM Commands
X
X
X
XX
Command Description GET SET
Status Message
Status ID Description
Device Label
Product Detail ID List
Device Model Description A text description for the model type of the fixture. X
Manufacturer Label Shows „ARRI Lighting“ an X
Boot Software Version ID PrBO Version 2.03.00 X
Boot Software Version Label Shows text from PrBo Bootloader X
DMX Personality DMX mode X X
DMX Personality Description Displays a text description of a DMX mode X
Slot Info Shows a description for each DMX channel in use X
Slot Description Shows a text description for each DMX channel X
Default Slot Value Shows the default DMX channel value X
Sensor Definition Shows the definition of a specific sensor X
Sensor Value Shows the actual sensor value X
Device Hours Shows the actual device hours of the fixture X
Lamp Hours Shows the actual lamp hours of the fixture X
Factory Defaults
Reset Device Performs a reboot. X X
Display of actual warning / error message of the
fixture.
Detailed description of each warning / status
report.
Generate an informative label for each fixture. It
can be utilized to identify the rack number of a
dimmer or to determine the position of a fixture
This parameter is utilized to retrieve technical
details of a fixture.
This command deletes all user parameters and
sets the fixture to factory default
X
X
XX
X
XX
27
27
Page 28

RDM Command Extensions (continued)
Command Description GET SET
Display Invert Rotates the display content 180° (only MKII) X X
Display Level Set the display contrast (only MKII) X X
Real Time Clock Get / set time and date (only L10 and SkyPanel) X X
RDM Commands
Queued Message Get / set message X X
Curve Get / set dimming curve (only SkyPanel) X
Curve Description Get / set curve description X
List Interfaces
Interface Label
Interface Hardware Address
Type1
IPV4 Current Address
IPV4 DHCP Mode
IPV4 Static Address
Interface Release DHCP
IPV4 Default Route
DNS IPV4 Name Server
DNS Hostname
Interface Apply Configuration
only SkyPanel X X
Manufacturer Commands
Command Description GET SET
RDM Fan Mode
0x8001
RDM Status LED
0x8002
RDM DMX Signal Lost Mode
0x8005
RDM DMX Protocol version
0x8004
RDM Display contrast
0x8005
RDM Dim Curve
0x8006
RDM Tungsten Mode
0x8007
RDM Low End Mode
0x8008
RDM IP DHCP
0x8009
Get / set fan mode
Fan Low = 1
Fan HI45 = 2
Fan Vari = 3
Get / set status LED and display illumination
on = 0
off = 1
Get / set DMX signal lost behavior
Hold = 1
Hold 2 min / fade out = 2
Blackout = 3
Get / set DMX protocol version
V3.4 = 1
V4.0 = 2
V4.1 = 3
V4.2 = 4
V4.3 = 5
Get / set display contrast (only MKII)
less = 0
high = 10
Get / set dimming curve
Dim Curve Exponential = 1
Dim Curve Linear = 2
Dim Curve Logarithmic = 3
Dim Curve S-Curve = 4
Get / set Tungsten mode
off = 0
on = 1
Get / set low end dimming mode
off = 0
on = 1
Get / set DHCP
off = 0
on = 1
XX
XX
XX
XX
XX
XX
XX
XX
XX
28
Page 29

Manufacturer Commands (continued)
Command Description GET SET
RDM IP Address
0x800A
RDM IP Subnet
0x800B
RDM IP Gateway
0x800C
RDM IP DNS1
0x800D
RDM IP DNS2
0x800E
RDM Error Mode Display
0x800F
RDM RGBW PLASA Mode
0x810
RDM Frequency
0x8011
RDM High Speed Mode
0x8012
RDM Service RDM
0x8013
Get / set IP address X X
Get / set subnet mask X X
Get / set Gateway address X X
Get / set DNS1 address X X
not used
Get / set error mode display (only MKII)
normal = 0
hidden = 1
Get / set calibrated color space (PLASA mode)
off = 0
on = 1
Get / set PWM frequency
Frequency setting off = 0
Frequency 1 = 1
Frequency 2 = 2
Frequency 3 = 3
Frequency 4 = 4
Frequency 5 = 5
Frequency 6 = 6
Frequency 7 = 7
Frequency 8 = 8
Frequency 9 = 9
Frequency 10 = 10
Get / set high speed mode
off = 0
on = 1
Get / set RDM service
off = 0
on = 1
XX
XX
XX
XX
XX
RDM CommandsRDM Commands
29
29
Page 30

Protocol
Protocol
Protocol V4.3 is set as default. Use the ALSM to change to the protocol version. ARRI recommends to reserve additional channels which are required in V4.3 for each fixture when using a protocol version below
V4.3. This way you do not need to change the patch when you want to use additional features which became available with protocol V4.3.
From Firmware-Version 3.0
8 bit, 1 channel per function 16 bit, 2 channels per function
Mode 1
CCT & RGBW
Mode 2
CCT
Mode 3
CCT & HSI
Mode 4
RGBW
Mode 5
HSI
Mode 16
GEL V2
Mode 18
x,y Koordinaten
DMX Mode 20
Source Matching
DMX Mode 22
Effects
Mode 6
CCT & RGBW
Mode 7
CCT
Mode 8
CCT & HSI
Mode 9
RGBW
Mode 10
HSI
Mode 17
GEL V2
Mode 19
x,y Koordinaten
DMX Mode 21
Source Matching
DMX Mode 23
Effects
Coarse/fine, 1-2 channels
per function
Mode 11
CCT & RGBW
Mode 12
CCT
Mode 13
CCT & HSI
Mode 14
RGBW
Mode 15
HSI
Green-Magenta Point - Average Equivalents
Setting Rosco# Setting Rosco#
Full -Green 3308 Full +Green 3304
1/2 -Green 3313 1/2 +Green 3315
1/4 -Green 3314 1/4 +Green 3316
1/8 -Green 3318 1/8 +Green 3317
30
Page 31

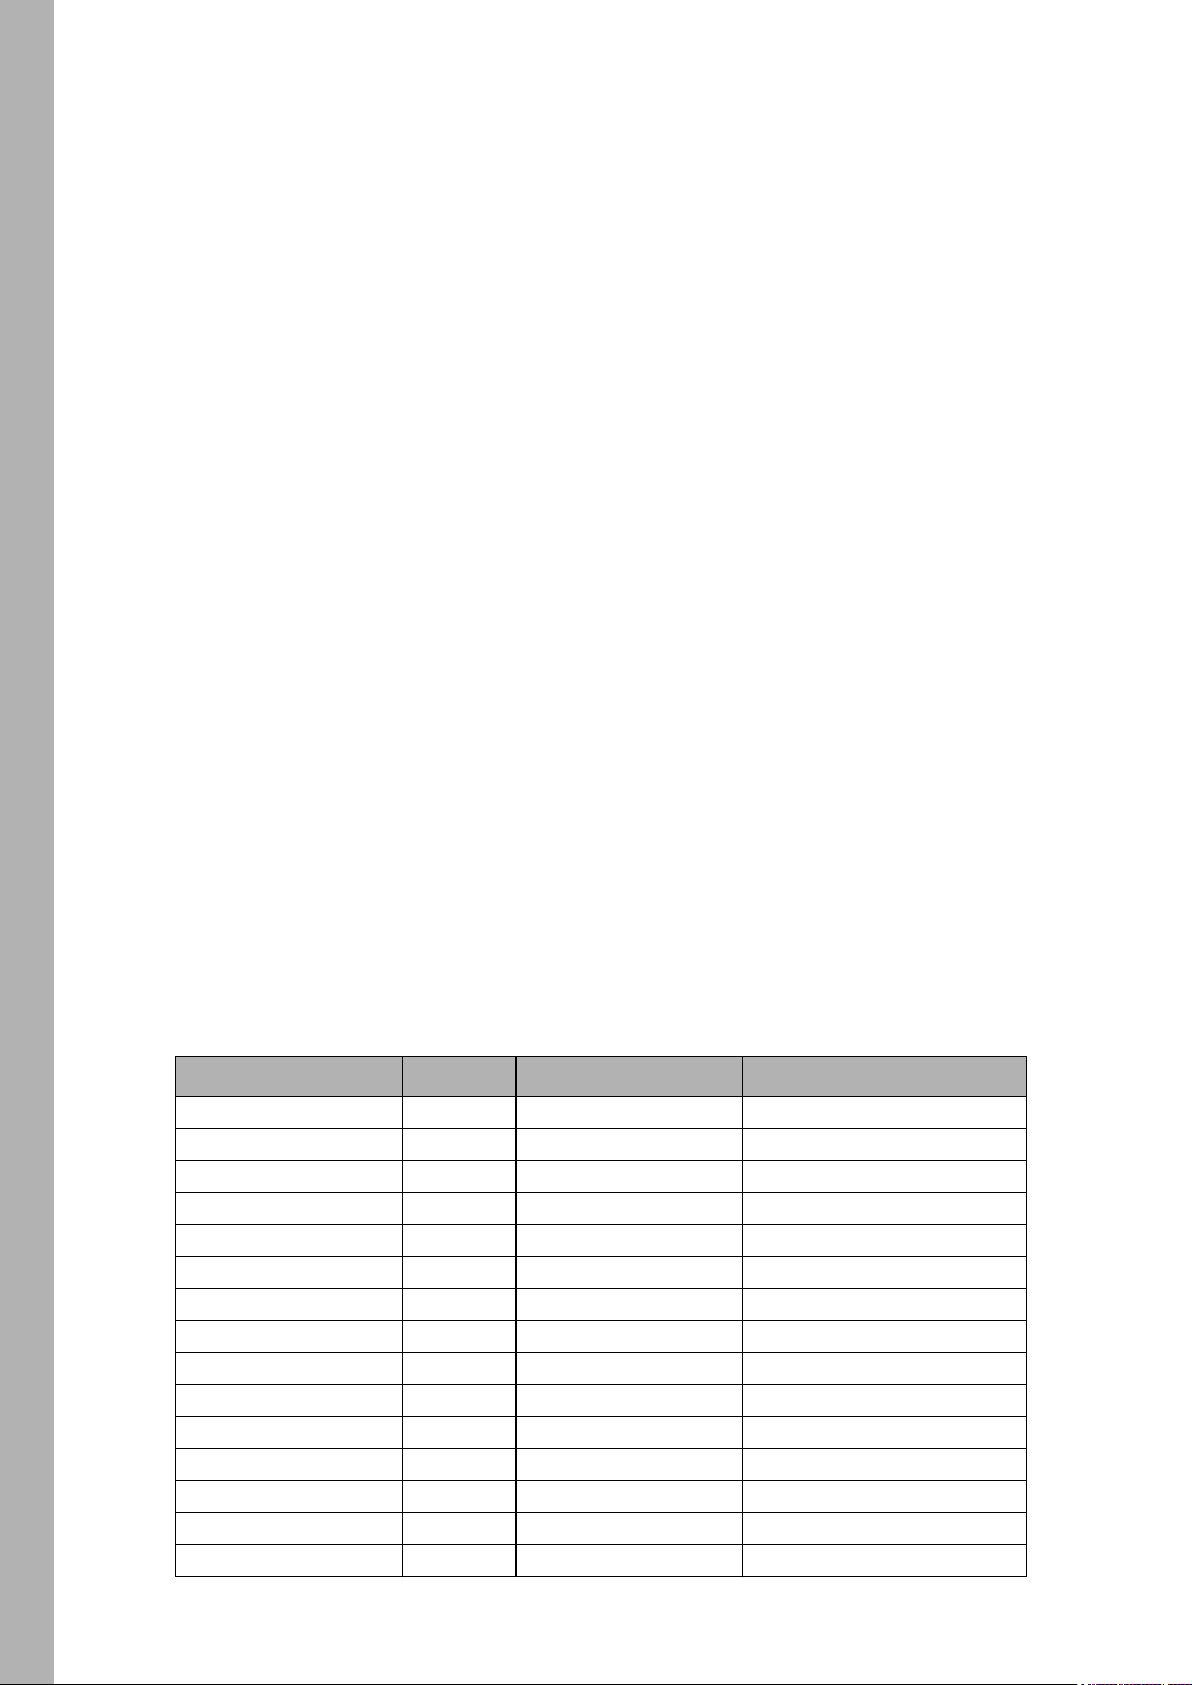
Preset Channel - DMX Value Allocation
Channel Value Percent Function
0 – 4
5 – 9
10 – 14
15 – 18
19 – 23
24 – 28
29 – 33
34 – 37
38 – 42
43 – 47
48 – 51
52 – 56
57 – 61
62 – 65
66 – 70
71 – 75
76 – 80
81 – 84
85 – 89
90 – 94
95 - 100
Depending on
DMX mode
0 – 11
12 – 23
24 – 35
36 – 47
48 – 59
60 – 71
72 – 83
84 – 95
96 – 107
108 – 119
120 – 131
132 – 143
144 – 155
156 – 167
168 – 179
180 – 191
192 – 203
204 – 215
216 – 227
228 – 239
240 - 255
Preset
No effect
User Defined Presets
Preset 01
Preset 02
Preset 03
Preset 04
Preset 05
Preset 06
Preset 07
Preset 08
Preset 09
Preset 10
Factory Presets
Preset 01 (2.900 K, 0 +/- GN)
Preset 02 (3.200 K, 0 +/- GN)
Preset 03 (5.600 K, 0 +/- GN)
Preset 04 (6.500 K, 0 +/- GN)
Preset 05 (120° Hue, 100% Sat)
Preset 06 (240° Hue, 100% Sat)
Preset 07 (Rosco 3408, 5.600 K)
Preset 08 (Lee 187, 3.200 K Base)
Preset 09 (Rosco 3152, 3.200 K)
Preset 10 (Lee 162, 3.200 K Base)
ProtocolProtocol
Mode 1: CCT & RGBW, 8 bit Resolution per Function
Channel Value Percent Function
1
2
3
4
5
6
7
8
9
Reverts to fixture setting when signal lost.
10
11-12 Reserved (only V4.x)
0-255 0-100
0-255 0-100
0-10
11-20
21-119
120-145
146-244
245-255
0-255 0-100
0-255 0-100
0-255 0-100
0-255 0-100
0-255 0-100
0-9
10-57
58-105
106-153
154-201
202-249
250-255
0-255 0-100
0-4
5-8
8-46
47-57
57-96
96-100
0-3
4-22
23-41
42-60
61-78
79-97
98-100
Master Intensity
0 % → 100% (open)
Color temperature CCT
2.800 K → 10.000 K
Green-Magenta Point
neutral / no effect
full minus green
-99% → -1%
neutral / no effect
1% → 99%
full plus green
Cross Fade to Color
White → RGBW color
Intensity red
0% → 100%
Intensity green
0% → 100%
Intensity blue
0% → 100%
Intensity white
0% → 100%
Fan Control
Use fixture setting
Quiet Mode
Variable Mode
High Temp Mode
Normal Mode (only S360-C)
Fan max. speed
Fan off
Preset
See page 31
31
31
Page 32

Protocol
Mode 2: CCT, 8 bit Resolution per Function
Channel Value Percent Function
1
2
3
4
Reverts to fixture set-
ting when signal lost
5
6-7 Reserved (only V4.x)
0-255 0-100
0-255 0-100
0-10
11-20
21-119
120-145
146-244
245-255
0-9
10-57
58-105
106-153
154-201
202-249
250-255
0-255 0-100
8-46
47-57
57-96
96-100
4-22
23-41
42-60
61-78
79-97
98-100
0-4
5-8
0-3
Master Intensity
0 % → 100% (open)
Color temperature CCT
2.800 K → 10.000 K
Green-Magenta Point
neutral / no effect
full minus green
-99% → -1%
neutral / no effect
1% → 99%
full plus green
Fan Control
Use fixture setting
Quiet Mode
Variable Mode
High Temp Mode
Normal Mode (only S360-C)
Fan max. speed
Fan off
Preset
See page 31
Mode 3: CCT & HSI, 8 bit Resolution per Function
Channel Value Percent Function
1
2
3
4
5
6
7
Reverts to fixture set-
ting when signal lost
8
9-10 Reserved (only V4.x)
0-255 0-100
0-255 0-100
0-10
11-20
21-119
120-145
146-244
245-255
0-255 0-100
0-255 0-100
0-255 0-100
0-9
10-57
58-105
106-153
154-201
202-249
250-255
0-255 0-100
8-46
47-57
57-96
96-100
4-22
23-41
42-60
61-78
79-97
98-100
0-4
5-8
0-3
Master Intensity
0 % → 100% (open)
Color temperature CCT
2.800 K → 10.000 K
Green-Magenta Point
neutral / no effect
full minus green
-99% → -1%
neutral / no effect
1% → 99%
full plus green
Cross Fade to Color
White → Color
Hue
0° → 360°
Saturation
0 → full saturated
Fan Control
Use fixture setting
Quiet Mode
Variable Mode
High Temp Mode
Normal Mode (only S360-C)
Fan max. speed
Fan off
Preset
See page 31
32
Page 33

Mode 4: RGBW, 8 bit Resolution per Function
Channel Value Percent Function
1
2
3
4
5
6
Reverts to fixture set-
ting when signal lost
7
8-9 Reserved (only V4.x)
0-255 0-100
0-255 0-100
0-255 0-100
0-255 0-100
0-255 0-100
0-9
10-57
58-105
106-153
154-201
202-249
250-255
0-255 0-100
0-3
4-22
23-41
42-60
61-78
79-97
98-100
Master Intensity
0 % → 100% (open)
Intensity red
0% → 100%
Intensity green
0% → 100%
Intensity blue
0% → 100%
Intensity white
0% → 100%
Fan Control
Use fixture setting
Quiet Mode
Variable Mode
High Temp Mode
Normal Mode (only S360-C)
Fan max. speed
Fan off
Preset
See page 31
ProtocolProtocol
Mode 5: HSI, 8 bit Resolution per Function
Channel Value Percent Function
1
2
3
4
Reverts to fixture set-
ting when signal lost
5
6-7 Reserved (only V4.x)
0-255 0-100
0-255 0-100
0-255 0-100
0-9
10-57
58-105
106-153
154-201
202-249
250-255
0-255 0-100
0-3
4-22
23-41
42-60
61-78
79-97
98-100
Master Intensity
0 % → 100% (open)
Hue
0° → 360°
Saturation
0 → full saturated
Fan Control
Use fixture setting
Quiet Mode
Variable Mode
High Temp Mode
Normal Mode (only S360-C)
Fan max. speed
Fan off
Preset
See page 31
33
33
Page 34

Protocol
Mode 6: CCT & RGBW, 16 bit Resolution per Function
Channel Value Percent Function
HI LO
12
34
56
78
910
11 12
13 14
15 16
17
Reverts to fixture set-
ting when signal lost
18
19-20 Reserved (only V4.x)
0-65.535 0-100
0-65.535 0-100
0-10
11-20
21-119
120-145
146-244
245-255
0-65.535 0-100
0-65.535 0-100
0-65.535 0-100
0-65.535 0-100
0-65.535 0-100
0-9
10-57
58-105
106-153
154-201
202-249
250-255
0-255 0-100
0-4
5-8
8-46
47-57
57-96
96-100
0-3
4-22
23-41
42-60
61-78
79-97
98-100
Master Intensity
0 % → 100% (open)
Color temperature CCT
2.800 K → 10.000 K
Green-Magenta Point
neutral / no effect
full minus green
-99% → -1%
neutral / no effect
1% → 99%
full plus green
Xfade to color
White → RGBW color
Intensity red
0% → 100%
Intensity green
0% → 100%
Intensity blue
0% → 100%
Intensity white
0% → 100%
Fan Control
Use fixture setting
Quiet Mode
Variable Mode
High Temp Mode
Normal Mode (only S360-C)
Fan max. speed
Fan off
Preset
See page 31
34
Page 35

Mode 7: CCT, 16 bit Resolution per Function
Channel Value Percent Function
HI LO
12
34
56
7
Reverts to fixture set-
ting when signal lost
8
9-10 Reserved (only V4.x)
0-65.535 0-100
0-65.535 0-100
0-10
11-20
21-119
120-145
146-244
245-255
0-9
10-57
58-105
106-153
154-201
202-249
250-255
0-255 0-100
0-4
5-8
8-46
47-57
57-96
96-100
0-3
4-22
23-41
42-60
61-78
79-97
98-100
ProtocolProtocol
Master Intensity
0 % → 100% (open)
Color temperature CCT
2.800 K → 10.000 K
Green-Magenta Point
neutral / no effect
full minus green
-99% → -1%
neutral / no effect
1% → 99%
full plus green
Fan Control
Use fixture setting
Quiet Mode
Variable Mode
High Temp Mode
Normal Mode (only S360-C)
Fan max. speed
Fan off
Preset
See page 31
Mode 8: CCT & HSI, 16 bit Resolution per Function
Channel Value Percent Function
HI LO
12
34
56
78
910
11 12
13
Reverts to fixture set-
ting when signal lost
14
15-16 Reserved (only V4.x)
0-65.535 0-100
0-65.535 0-100
0-5.000
5.001-10.000
10.001-29.999
30.000-40.000
40.001-59.999
60.000-65.535
0-65.535 0-100
0-65.535 0-100
0-65.535 0-100
0-9
10-57
58-105
106-153
154-201
202-249
250-255
0-255 0-100
0-7
8-15
16-46
46-61
61-92
92-100
0-3
4-22
23-41
42-60
61-78
79-97
98-100
Master Intensity
0 % → 100% (open)
Color temperature CCT
2.800 K → 10.000 K
Green-Magenta Point
neutral / no effect
full minus green
-99% → -1%
neutral / no effect
1% → 99%
full plus green
Xfade to color
White → Color
Hue
0° → 360°
Saturation
0 → full saturated
Fan Control
Use fixture setting
Quiet Mode
Variable Mode
High Temp Mode
Normal Mode (only S360-C)
Fan max. speed
Fan off
Preset
See page 31
35
35
Page 36

Protocol
Mode 9: RGBW, 16 bit Resolution per Function
Channel Value Percent Function
HI LO
12
34
56
78
910
11
Reverts to fixture set-
ting when signal lost
12
13-14 Reserved (only V4.x)
0-65.535 0-100
0-65.535 0-100
0-65.535 0-100
0-65.535 0-100
0-65.535 0-100
0-9
10-57
58-105
106-153
154-201
202-249
250-255
0-255 0-100
0-3
4-22
23-41
42-60
61-78
79-97
98-100
Master Intensity
0 % → 100% (open)
Intensity red
0% → 100%
Intensity green
0% → 100%
Intensity blue
0% → 100%
Intensity white
0% → 100%
Fan Control
Use fixture setting
Quiet Mode
Variable Mode
High Temp Mode
Normal Mode (only S360-C)
Fan max. speed
Fan off
Preset
See page 31
Mode 10: HSI, 16 bit Resolution per Function
Channel Value Percent Function
HI LO
12
34
56
7
Reverts to fixture set-
ting when signal lost
8
9-10 Reserved (only V4.x)
0-65.535 0-100
0-65.535 0-100
0-65.535 0-100
0-9
10-57
58-105
106-153
154-201
202-249
250-255
0-255 0-100
0-3
4-22
23-41
42-60
61-78
79-97
98-100
Master Intensity
0 % → 100% (open)
Hue
0° → 360°
Saturation
0 → full saturated
Fan Control
Use fixture setting
Quiet Mode
Variable Mode
High Temp Mode
Normal Mode (only S360-C)
Fan max. speed
Fan off
Preset
See page 31
36
Page 37

Mode 11: CCT & RGBW, Coarse / Fine per Function
Channel Value Percent Function
1
2 0-255 0-100 Master Intensity fine
3
4 0-255 0-100 Color temperature CCT fine
5
6
7
8 0-255 0-100 Red fine
9
10 0-255 0-100 Green fine
11
12 0-255 0-100 Blue fine
13
14 0-255 0-100 White fine
15
Reverts to fixture set-
ting when signal lost
16
17-18 Reserved (only V4.x)
0-255 0-100
0-255 0-100
0-10
11-20
21-119
120-145
146-244
245-255
0-255 0-100
0-255 0-100
0-255 0-100
0-255 0-100
0-255 0-100
0-9
10-57
58-105
106-153
154-201
202-249
250-255
0-255 0-100
0-4
5-8
8-46
47-57
57-96
96-100
0-3
4-22
23-41
42-60
61-78
79-97
98-100
Master Intensity coarse
0 % → 100% (open)
Color temperature CCT coarse
2.800 K → 10.000 K
Green-Magenta Point
neutral / no effect
full minus green
-99% → -1%
neutral / no effect
1% → 99%
full plus green
Xfade to color
White → RGBW color
Intensity red coarse
0% → 100%
Intensity green coarse
0% → 100%
Intensity blue coarse
0% → 100%
Intensity white coarse
0% → 100%
Fan Control
Use fixture setting
Quiet Mode
Variable Mode
High Temp Mode
Normal Mode (only S360-C)
Fan max. speed
Fan off
Preset
See page 31
ProtocolProtocol
37
37
Page 38

Protocol
Mode 12: CCT, Coarse / Fine per Function
Channel Value Percent Function
1
2 0-255 0-100 Master Intensity fine
3
4 0-255 0-100 Color temperature CCT fine
5
6
Reverts to fixture set-
ting when signal lost
7
8-9 Reserved (only V4.x)
0-255 0-100
0-255 0-100
0-10
11-20
21-119
120-145
146-244
245-255
0-9
10-57
58-105
106-153
154-201
202-249
250-255
0-255 0-100
8-46
47-57
57-96
96-100
4-22
23-41
42-60
61-78
79-97
98-100
0-4
5-8
0-3
Master Intensity coarse
0 % → 100% (open)
Color temperature CCT coarse
2.800 K → 10.000 K
Green-Magenta Point
neutral / no effect
full minus green
-99% → -1%
neutral / no effect
1% → 99%
full plus green
Fan Control
Use fixture setting
Quiet Mode
Variable Mode
High Temp Mode
Normal Mode (only S360-C)
Fan max. speed
Fan off
Preset
See page 31
38
Page 39

Mode 13: CCT & HSI, Coarse / Fine per Function
Channel Value Percent Function
1
2 0-255 0-100 Master Intensity fine
3
4 0-255 0-100 Color temperature CCT fine
5
6
7
8 0-255 0-100 Hue fine
9
10 0-255 0-100 Saturation fine
11
Reverts to fixture set-
ting when signal lost
12
13-14 Reserved (only V4.x)
0-255 0-100
0-255 0-100
0-10
11-20
21-119
120-145
146-244
245-255
0-255 0-100
0-255 0-100
0-255 0-100
0-9
10-57
58-105
106-153
154-201
202-249
250-255
0-255 0-100
0-4
5-8
8-46
47-57
57-96
96-100
0-3
4-22
23-41
42-60
61-78
79-97
98-100
Master Intensity coarse
0 % → 100% (open)
Color temperature CCT coarse
2.800 K → 10.000 K
Green-Magenta Point
neutral / no effect
full minus green
-99% → -1%
neutral / no effect
1% → 99%
full plus green
Xfade to color
White → Color
Hue coarse
0° → 360°
Saturation coarse
0 → full saturated
Fan Control
Use fixture setting
Quiet Mode
Variable Mode
High Temp Mode
Normal Mode (only S360-C)
Fan max. speed
Fan off
Preset
See page 31
ProtocolProtocol
39
39
Page 40

Protocol
Mode 14: RGBW, Coarse / Fine per Function
Channel Value Percent Function
1
2 0-255 0-100 Master Intensity fine
3
4 0-255 0-100 Red fine
5
6 0-255 0-100 Green fine
7
8 0-255 0-100 Blue fine
9
10 0-255 0-100 White fine
11
Reverts to fixture set-
ting when signal lost
12
13-14 Reserved (only V4.x)
0-255 0-100
0-255 0-100
0-255 0-100
0-255 0-100
0-255 0-100
0-9
10-57
58-105
106-153
154-201
202-249
250-255
0-255 0-100
4-22
23-41
42-60
61-78
79-97
98-100
0-3
Master Intensity coarse
0 % → 100% (open)
Intensity red coarse
0% → 100%
Intensity green coarse
0% → 100%
Intensity blue coarse
0% → 100%
Intensity white coarse
0% → 100%
Fan Control
Use fixture setting
Quiet Mode
Variable Mode
High Temp Mode
Normal Mode (only S360-C)
Fan max. speed
Fan off
Preset
See page 31
Mode 15: HSI, Coarse / Fine per Function
Channel Value Percent Function
1
2 0-255 0-100 Master Intensity fine
3
4 0-255 0-100 Hue fine
5
6 0-255 0-100 Saturation fine
7
Reverts to fixture set-
ting when signal lost
8
9-10 Reserved (only V4.x)
0-255 0-100
0-255 0-100
0-255 0-100
0-9
10-57
58-105
106-153
154-201
202-249
250-255
0-255 0-100
4-22
23-41
42-60
61-78
79-97
98-100
0-3
Master Intensity coarse
0 % → 100% (open)
Hue coarse
0° → 360°
Saturation coarse
0 → full saturated
Fan Control
Use fixture setting
Quiet Mode
Variable Mode
High Temp Mode
Normal Mode (only S360-C)
Fan max. speed
Fan off
Preset
See page 31
40
Page 41

Mode 16: GEL V2, 8 bit Resolution per Function, Basis
Channel Value Percent Function
Master Intensity
0 % → 100% (open)
Gel 1,CCT Selection
3.200 K
5.600 K
Gel 1, Color Matching
Best Color
Color quality optimized
Brightest
Color brightness opt.
No Color Gel
Gel 1, Brand
Category on ch. 5
Gel on ch. 6
Rosco
LEE Filters
Gel 1, category
Manufacturer on ch. 4
Category 1:
Rosco: Color Correction
LEE: Color Correction
Category 2:
Rosco: CalColor
LEE: Color Filters
Category 3:
Rosco: Storaro Selection
LEE: 600 Series
Category 4:
Rosco: Cinelux
LEE: Cosmetic Filters
Category 5:
LEE: 700 Series
Gel 1
See tables below
Xfade to Gel
Gel 1 Gel 2
Gel 2,CCT Selection
3.200 K
5.600 K
Gel 2, Color Matching
Best Color
Color quality optimized
Brightest
Color brightness opt.
No Color Gel
Gel 2, Brand
Category on ch. 11
Gel on ch. 12
Rosco
LEE Filters
10
1
2
3
4
5
6
7
8
9
0-255 0-100
0-128
129-255
0-128
129-170
171-255
0-128
129-255
0-50
51-101
102-152
153-203
204-255
0-255 0-100
0-255 0-100
0-128
129-255
0-128
129-170
171-255
0-128
129-255
0-50
51-100
0-50
51-67
68-100
0-50
51-100
0-20
21-39
40-60
61-80
81-255
0-50
51-100
0-50
51-67
68-100
0-50
51-100
ProtocolProtocol
41
41
Page 42

Protocol
Channel Value Percent Function
Gel 1, category
Manufacturer on ch. 10
0-50
51-101
11
102-152
153-203
204-255
12
13
14
Reverts to fixture set-
ting when signal lost
15
16-17 Reserved (only V4.x)
0-255 0-100
0 – 51
52 – 102
103 – 153
154 – 204
205 - 255
0-9
10-57
58-105
106-153
154-201
202-249
250-255
0-255 0-100
0-20
21-39
40-60
61-80
81-255
0 – 20
21 – 40
41 – 60
61 – 79
80 - 100
0-3
4-22
23-41
42-60
61-78
79-97
98-100
Category 1:
Rosco: Color Correction
LEE: Color Correction
Category 2:
Rosco: CalColor
LEE: Color Filters
Category 3:
Rosco: Storaro Selection
LEE: 600 Series
Category 4:
Rosco: Cinelux
LEE: Cosmetic Filters
Category 5:
LEE: 700 Series
Gel 2
See tables below
Gel Transition Type
Direct
Through White Point
Through Black Point
Over White Point
Under White point
Fan Control
Use fixture setting
Quiet Mode
Variable Mode
High Temp Mode
Normal Mode (only S360-C)
Fan max. speed
Fan off
Preset
See page 31
42
Page 43

Mode 17: GEL V2, 16 bit Resolution per function, Basic
Channel Value Percent Function
HI LO
12
3
4
5
6
7
89
10
11
12
0-65.535 0-100
0-128
129-255
0-128
129-170
171-255
0-128
129-255
0-50
51-101
102-152
153-203
204-255
0-255 0-100
0 - 65.535 0 - 100
0-128
129-255
0-128
129-170
171-255
0-128
129-255
0-50
51-100
0-50
51-67
68-100
0-50
51-100
0-20
21-39
40-60
61-80
81-255
0-50
51-100
0-50
51-67
68-100
0-50
51-100
Master Intensity
0 % → 100% (open)
Gel 1,CCT Selection
3.200 K
5.600 K
Gel 1, Color Matching
Best Color
Color quality optimized
Brightest
Color brightness opt.
No Color Gel
Gel 1, Brand
Category on ch. 5
Gel on ch. 6
Rosco
LEE Filters
Gel 1, category
Manufacturer on ch. 4
Category 1:
Rosco: Color Correction
LEE: Color Correction
Category 2:
Rosco: CalColor
LEE: Color Filters
Category 3:
Rosco: Storaro Selection
LEE: 600 Series
Category 4:
Rosco: Cinelux
LEE: Cosmetic Filters
Category 5:
LEE: 700 Series
Gel 1
See tables below
Xfade to Gel
Gel 1 Gel 2
Gel 2,CCT Selection
3.200 K
5.600 K
Gel 2, Color Matching
Best Color
Color quality optimized
Brightest
Color brightness opt.
No Color Gel
Gel 2, Brand
Category on ch. 13
Gel on ch. 14
Rosco
LEE Filters
ProtocolProtocol
43
43
Page 44

Protocol
Channel Value Percent Function
Gel 1, category
Manufacturer on ch. 12
0-50
51-101
13
102-152
153-203
204-255
14
15
16
Reverts to fixture setting when signal lost.
17
18-19 Reserved (only V4.x)
0-255 0-100
0 – 51
52 – 102
103 – 153
154 – 204
205 - 255
0-9
10-57
58-105
106-153
154-201
202-249
250-255
0-255 0-100
0-20
21-39
40-60
61-80
81-255
0 – 20
21 – 40
41 – 60
61 – 79
80 - 100
0-3
4-22
23-41
42-60
61-78
79-97
98-100
Category 1:
Rosco: Color Correction
LEE: Color Correction
Category 2:
Rosco: CalColor
LEE: Color Filters
Category 3:
Rosco: Storaro Selection
LEE: 600 Series
Category 4:
Rosco: Cinelux
LEE: Cosmetic Filters
Category 5:
LEE: 700 Series
Gel 2
See tables below
Gel Transition Type
Direct
Through White Point
Through Black Point
Over White Point
Under White point
Fan Control
Use fixture setting
Quiet Mode
Variable Mode
High Temp Mode
Normal Mode (only S360-C)
Fan max. speed
Fan off
Preset
See page 31
44
Page 45

Mode 16 / 17: GEL, Gel Selection
Category 1, Rosco, Color correction
Channel Value Gel Name Number
Full CTB
3/4 CTB
1/2 CTB
1/3 CTB
1/4 CTB
1/8 CTB
Double CTB
Full CTO
3/4 CTO
1/2 CTO
1/4 CTO
1/8 CTO
Double CTO
Full CTS
1/2 CTS
1/4 CTS
1/8 CTS
Full Plusgreen
1/2 Plusgreen
1/4 Plusgreen
1/8 Plusgreen
Full Minusgreen
3/4 Minusgreen
1/2 Minusgreen
1/4 Minusgreen
1/8 Minusgreen
Fluorofilter
Industrial Vapor
Urban Vapor
Tough Y-1
Tough MT 54
Tough MTY
Tough MT2
Reserved
3202
3203
3204
3206
3208
3216
3220
3407
3411
3408
3409
3410
3420
3441
3442
3443
3444
3304
3315
3316
3317
3308
3309
3313
3314
3318
3310
3150
3152
3107
3134
3106
3102
8 bit:
Gel 1: 6
Gel 2: 12
16 bit:
Gel 1: 6
Gel 2: 14
0 - 1
2 - 3
4 - 5
6 - 7
8 - 9
10 - 11
12 - 13
14 - 15
16 - 17
18 - 19
20 - 21
22 - 23
24 - 25
26 - 27
28 - 29
30 - 31
32 - 33
34 - 35
36 - 37
38 - 39
40 - 41
42 - 43
44 - 45
46 - 47
48 - 49
50 - 51
52 - 53
54 - 55
56 - 57
58 - 59
60 - 61
62 - 63
64 - 65
66 - 255
ProtocolProtocol
45
45
Page 46

Category 2, Rosco, CalColor
Channel Value Gel Name Number
Protocol
8 bit:
Gel 1: 6
Gel 2: 12
16 bit:
Gel 1: 6
Gel 2: 14
0 - 1
2 - 3
4 - 5
6 - 7
8 - 9
10 - 11
12 - 13
14 - 15
16 - 17
18 - 19
20 - 21
22 - 23
24 - 25
26 - 27
28 - 29
30 - 31
32 - 33
34 - 35
36 - 37
38 - 39
40 - 41
42 - 43
44 - 45
46 - 47
48 - 49
50 - 51
52 - 53
54 - 55
56 - 57
58 - 59
60 - 61
62 - 63
64 - 65
66 - 255
15 Blue
30 Blue
60 Blue
90 Blue
7 Cyan
15 Cyan
30 Cyan
60 Cyan
90 Cyan
15 Green
30 Green
60 Green
90 Green
15 Yellow
30 Yellow
60 Yellow
90 Yellow
15 Red
30 Red
60 Red
90 Red
15 Magenta
30 Magenta
60 Magenta
90 Magenta
15 Pink
30 Pink
60 Pink
90 Pink
15 Lavender
30 Lavender
60 Lavender
90 Lavender
Reserved
4215
4230
4260
4290
4307
4315
4330
4360
4390
4415
4430
4460
4490
4515
4530
4560
4590
4615
4630
4660
4690
4715
4730
4760
4790
4815
4830
4860
4890
4915
4930
4960
4990
Category 3, Rosco, Storaro Selection
Channel Value Gel Name Number
2001
2202
2003
2004
2005
2006
2007
2008
2009
2010
8 bit:
Gel 1: 6
Gel 2: 12
16 bit:
Gel 1: 6
Gel 2: 14
0 - 1
2 - 3
4 - 5
6 - 7
8 - 9
10 - 11
12 - 13
14 - 15
16 - 17
18 - 19
20 - 255
VS Red
VS Orange
VS Yellow
VS Green
VS Cyan
VS Azure
VS Blue
VS Indigo
VS Violet
VS Magenta
Reserved
46
Page 47

Category 4, Rosco Cinelux
Channel Value Gel Name Number
8 bit:
Gel 1: 6
Gel 2: 12
16 bit:
Gel 1: 6
Gel 2: 14
0 - 1
2 - 3
4 - 5
6 - 7
8 - 9
10 - 11
12 - 13
14 - 15
16 - 17
18 - 19
20 - 21
22 - 23
24 - 25
26 - 27
28 - 29
30 - 31
32 - 33
34 - 35
36 - 37
38 - 39
40 - 41
42 - 43
44 - 45
46 - 47
48 - 49
50 - 51
52 - 53
54 - 55
56 - 57
58 - 59
60 - 61
62 - 63
64 - 65
66 - 67
68 - 69
70 - 71
72 - 73
74 - 75
76 - 77
78 - 79
80 - 81
82 - 83
84 - 85
86 - 87
88 - 89
90 - 91
92 - 255
Bastard Amber
Pale Bastard Amber
No Color Straw
Pale Gold
Daffodil
Straw
Light Amber
Gallo Gold
Light Flame
Flame
Mayan Sun
Golden Amber
Soft Golden Amber
Orange
Henna Sky
Light Red
No Color Pink
Blush Pink
Flesh Pink
Pale Rose Pink
Salmon
Deep Salmon
Middle Rose
Light Rose Purple
Surprise Pink
No Color Blue
Clearwater
Booster Blue
Tipton Blue
Blue Bell
Daylight Blue
Tharon Delft Blue
Cerulean Blue
Bermuda Blue
Green Blue
Alice Blue
Primary Blue
Baldassari Blue
Medium Blue
Pale Yellow Green
Light Green
Moss Green
Primary Green
Turquoise
Blue Green
Chocolate
Reserved
2
302
6
8
310
12
16
316
17
18
318
21
321
23
325
26
33
333
34
37
41
42
44
47
51
60
360
62
362
364
65
365
375
376
77
378
80
381
83
87
88
89
91
92
93
99
ProtocolProtocol
47
47
Page 48

Category 1, LEE Color Correction
Channel Value Gel Name Number
Protocol
8 bit:
Gel 1: 6
Gel 2: 12
16 bit:
Gel 1: 6
Gel 2: 14
0 - 1
2 - 3
4 - 5
6 - 7
8 - 9
10 - 11
12 - 13
14 - 15
16 - 17
18 - 19
20 - 21
22 - 23
24 - 25
26 - 27
28 - 29
30 - 31
32 - 33
34 - 35
36 - 37
38 - 39
40 - 41
42 - 43
44 - 45
46 - 47
48 - 49
50 - 51
52 - 53
54 - 55
56 - 57
58 - 59
60 - 61
62 - 63
64 - 65
66 - 67
68 - 69
70 - 71
72 - 73
74 - 75
76 - 77
78 - 255
Double CTB
Full CTB
3/4 CTB
1/2 CTB
1/4 CTB
1/8 CTB
Double CTO
Full CTO
3/4 CTO
1/2 CTO
1/4 CTO
1/8 CTO
1 1/2 CTB
1 1/2 CTO
Full CTS
1/2 CTS
1/4 CTS
1/8 CTS
Full CTO + .3 ND
Full CTO + .6 ND
L.C.T. Yellow (Y1)
White Flame Green
LEE Fluorescent Green
Super Correction L.C.T. Yellow
Super Correction W.F. Green
H.M.I. (to Tungsten)
C.I.D. (to Tungsten)
C.S.I. (to Tungsten)
LEE Fluorescent 5700 Kelvin
LEE Fluorescent 4300 Kelvin
LEE Fluorescent 3600 Kelvin
LEE Plus Green
1/2 Plus Green
1/4 Plus Green
1/8 Plus Green
LEE Minus Green
1/2 Minus Green
1/4 Minus Green
1/8 Minus Green
Reserved
200
201
281
202
203
218
287
204
285
205
206
223
283
286
441
442
443
444
207
208
212
213
219
230
232
236
237
238
241
242
243
244
245
246
278
247
248
249
279
48
Page 49

Category 2, LEE Color Filters
Channel Value Gel Name Number
8 bit:
Gel 1: 6
Gel 2: 12
16 bit:
Gel 1: 6
Gel 2: 14
0 - 1
2 - 3
4 - 5
6 - 7
8 - 9
10 - 11
12 - 13
14 - 15
16 - 17
18 - 19
20 - 21
22 - 23
24 - 25
26 - 27
28 - 29
30 - 31
32 - 33
34 - 35
36 - 37
38 - 39
40 - 41
42 - 43
44 - 45
46 - 47
48 - 49
50 - 51
52 - 53
54 - 55
56 - 57
58 - 59
60 - 61
62 - 63
64 - 65
66 - 67
68 - 69
70 - 71
72 - 73
74 - 75
76 - 77
78 - 79
80 - 81
82 - 83
84 - 85
86 - 87
88 - 89
90 - 91
92 - 93
94 - 95
96 - 97
98 - 99
100 - 101
102 - 103
104 - 105
106 - 107
108 - 109
110 - 111
112 - 113
114 - 115
Rose Pink
Lavender Tint
Medium Bastard Amber
Pale Yellow
Dark Salmon
Pale Amber Gold
Medium Yellow
Straw Tint
Surprise Peach
Fire
Medium Amber
Gold Amber
Dark Amber
Scarlet
Sunset Red
Bright Red
Light Pink
Medium Pink
Dark Magenta
Rose Purple
Light Lavender
Paler Lavender
Lavender
Mist Blue
Pale Blue
Sky Blue
Evening Blue
Just Blue
Deeper Blue
Lime Green
Moss Green
Dark Yellow Green
Spring Yellow
Yellow
Light Amber
Straw
Deep Amber
Primary Red
Light Rose
English Rose
Light Salmon
Middle Rose
Dark Pink
Magenta
Peacock Blue
Steel Blue
Light Blue
Deep Blue
LEE Green
Fern Green
Dark Green
Smokey Pink
Bright Pink
Marine Blue
Golden Amber
Deep Golden Amber
Pale Lavender
Special Lavender
002
003
004
007
008
009
010
013
017
019
020
021
022
024
025
026
035
036
046
048
052
053
058
061
063
068
075
079
085
088
089
090
100
101
102
103
104
106
107
108
109
110
111
113
115
117
118
120
121
122
124
127
128
131
134
135
136
137
ProtocolProtocol
49
49
Page 50

Category 2, LEE Color Filters, continued
Channel Value Gel Name Number
Protocol
8 bit:
Gel 1: 6
Gel 2: 12
16 bit:
Gel 1: 6
Gel 2: 14
116 - 117
118 - 119
120 - 121
122 - 123
124 - 125
126 - 127
128 - 129
130 - 131
132 - 133
134 - 135
136 - 137
138 - 139
140 - 141
142 - 143
144 - 145
146 - 147
148 - 149
150 - 151
152 - 153
154 - 155
156 - 157
158 - 159
160 - 161
162 - 163
164 - 165
166 - 167
168 - 169
170 - 171
172 - 173
174 - 175
176 - 177
178 - 255
Pale Green
Summer Blue
Pale Violet
Pale Navy Blue
No Color Blue
Apricot
Bright Rose
Gold Tint
Pale Gold
Pale Salmon
Pale Rose
Chocolate
Pink
No Color Straw
Slate Blue
Bastard Amber
Flame Red
Daylight Blue
Lilac Tint
Deep Lavender
Dark Steel Blue
Loving Amber
Dark Lavender
Light Red
Flesh Pink
Surprise Pink
Zenith Blue
True Blue
Alice Blue
Palace Blue
Regal Blue
Reserved
138
140
142
143
144
147
148
151
152
153
154
156
157
159
161
162
164
165
169
170
174
176
180
182
192
194
195
196
197
198
199
Category 3,LEE 600 Series
Channel Value Gel Name Number
600
601
602
603
604
650
651
652
653
8 bit:
Gel 1: 6
Gel 2: 12
16 bit:
Gel 1: 6
Gel 2: 14
0 - 1
2 - 3
4 - 5
6 - 7
8 - 9
10 - 11
12 - 13
14 - 15
16 - 17
18 - 255
Arctic White
Silver
Platinum
Moonlight White
Full CT 85
Industry Sodium
HI Sodium
Urban Sodium
LO Sodium
Reserved
50
Page 51

Category 4,LEE Cosmetic Filters
Channel Value Gel Name Number
184
186
187
188
189
191
705
717
718
720
749
750
774
775
791
217
221
224
8 bit:
Gel 1: 6
Gel 2: 12
16 bit:
Gel 1: 6
Gel 2: 14
0 - 1
2 - 3
4 - 5
6 - 7
8 - 9
10 - 11
12 - 13
14 - 15
16 - 17
18 - 19
20 - 21
22 - 23
24 - 25
26 - 27
28 - 29
30 - 31
32 - 33
34 - 35
36 - 255
Cosmetic Peach
Cosmetic Silver Rose
Cosmetic Rouge
Cosmetic Highlight
Cosmetic Silver Moss
Cosmetic Aqua Blue
Lily Frost
Shanklin Frost
Half Shanklin Frost
Durham Daylight Frost
Hampshire Rose
Durham Frost
Soft Amber Key 1
Soft Amber Key 2
Moroccan Frost
Blue Diffusion
Blue Frost
Daylight Blue frost
Reserved
Category 5,LEE 700 Series
Channel Value Gel Name Number
Perfect Lavender
Provence
Special Pale Lavender
Cold Lavender
Lily
King Fals Lavender
Cool Lavender
Electric Lilac
Spir Special Blue
Cold Blue
Bedford Blue
Elysian Blue
Cabana Blue
Mikkel Blue
Colour Wash Blue
Berry Blue
Virgin Blue
Ocean Blue
Old Steel Blue
Steel Green
Liberty Green
Dirty Ice
Damp Squib
JAS Green
am Brown
Dirty White
Brown
Easy White
Seedy Pink
Wheat
Sun Colour Straw
LEE Yellow
Cardbox Amber
Nectarine
Millenium Gold
Bastard Pink
Terry Red
Blood Red
Moroccan Pink
Pretty n’Pink
Magical Magenta
Reserved
700
701
702
703
704
706
708
709
710
711
712
714
715
716
719
721
723
724
725
728
730
731
733
738
742
744
746
747
748
763
764
765
773
776
778
779
781
789
790
794
795
8 bit:
Gel 1: 6
Gel 2: 12
16 bit:
Gel 1: 6
Gel 2: 14
0 - 1
2 - 3
4 - 5
6 - 7
8 - 9
10 - 11
12 - 13
14 - 15
16 - 17
18 - 19
20 - 21
22 - 23
24 - 25
26 - 27
28 - 29
30 - 31
32 - 33
34 - 35
36 - 37
38 - 39
40 - 41
42 - 43
44 - 45
46 - 47
48 - 49
50 - 51
52 - 53
54 - 55
56 - 57
58 - 59
60 - 61
62 - 63
64 - 65
66 - 67
68 - 69
70 - 71
72 - 73
74 - 75
76 - 77
78 - 79
80 - 81
82 - 255
ProtocolProtocol
51
51
Page 52

Protocol
Mode 18: X,Y Coordinates, 8 bit Resolution per Function
Channel Value Percent Function
1
2
3
4
5
6
7
8
Reverts to fixture setting when signal lost.
9
10-11 Reserved (only V4.x)
0-255 0-100
0-255 0-100
0-255 0-100
0-255 0-100
0-255 0-100
0-255 0-100
0 – 51
52 – 102
103 – 153
154 – 204
205 - 255
0-9
10-57
58-105
106-153
154-201
202-249
250-255
0-255 0-100
21 – 40
41 – 60
61 – 79
80 - 100
98-100
0 – 20
0-3
4-22
23-41
42-60
61-78
79-97
Master Intensity
0 % → 100% (open)
X1 Coordinate
0.0 → 0.8
Y1 Coordinate
0.0 → 0.8
Xfade
X1, Y1 → X2, Y2
X2 Coordinate
0.0 → 0.8
Y2 Coordinate
0.0 → 0.8
Gel Transition Type
Direct
Through White Point
Through Black Point
Over White Point
Under White point
Fan Control
Use fixture setting
Quiet Mode
Variable Mode
High Temp Mode
Normal Mode (only S360-C)
Fan max. speed
Fan off
Preset
See page 31
52
Page 53

Mode 19: X,Y Coordinates, 16 bit Resolution per Function
Channel Value Percent Function
HI LO
12
34
56
78
910
11 12
13
14
Reverts to fixture setting when signal lost.
15
16 - 17 Reserved (only V4.x)
0-65.535 0-100
0-65.535 0-100
0-65.535 0-100
0-65.535 0-100
0-65.535 0-100
0-65.535 0-100
0 – 51
52 – 102
103 – 153
154 – 204
205 - 255
0-9
10-57
58-105
106-153
154-201
202-249
250-255
0-255 0-100
0 – 20
21 – 40
41 – 60
61 – 79
80 - 100
0-3
4-22
23-41
42-60
61-78
79-97
98-100
Master Intensity
0 % → 100% (open)
X1 Coordinate
0.0 → 0.8
Y1 Coordinate
0.0 → 0.8
Xfade
X1, Y1 → X2, Y2
X2 Coordinate
0.0 → 0.8
Y2 Coordinate
0.0 → 0.8
Gel Transition Type
Direct
Through White Point
Through Black Point
Over White Point
Under White point
Fan Control
Use fixture setting
Quiet Mode
Variable Mode
High Temp Mode
Normal Mode (only S360-C)
Fan max. speed
Fan off
Preset
See page 31
ProtocolProtocol
53
53
Page 54

Protocol
Mode 20: Source Matching, 8 bit Resolution per Function
Channel Value Percent Function
1
2
3
4
5
6
7
Reverts to fixture setting when signal lost.
8
9-11 Reserved (only V4.x)
0-255 0-100
0-50
51-101
102-152
153-203
204-255
0-255 0-100
0-255 0-100
0-50
51-101
102-152
153-203
204-255
0-255 0-100
0-9
10-57
58-105
106-153
154-201
202-249
250-255
0-255 0-100
0-20
21-39
40-59
60-79
80-100
0-20
21-39
40-59
60-79
80-100
4-22
23-41
42-60
61-78
79-97
98-100
0-3
Master Intensity
0 % → 100% (open)
Category 1
Incandescent
Fluorescent
Discharge
Other
Reserved for future use
Source 1
Please see table below
Cross Fade
Cat 1, Source 1 → Cat 2, Source 2
Category 2
Incandescent
Fluorescent
Discharge
Other
Reserved for future use
Source 2
Please see table below
Fan Control
Use fixture setting
Quiet Mode
Variable Mode
High Temp Mode
Normal Mode (only S360-C)
Fan max. speed
Fan off
Preset
See page 31
54
Page 55

Mode 21: Source Matching, 16 bit Resolution per Function
Channel Value Percent Function
HI LO
12
3
4
56
7
8
9
Reverts to fixture setting when signal lost.
10
11 - 12 Reserved (only V4.x)
0-65.535 0-100
0-50
51-101
102-152
153-203
204-255
0-255 0-100
0-65.535 0-100
0-50
51-101
102-152
153-203
204-255
0-255 0-100
0-9
10-57
58-105
106-153
154-201
202-249
250-255
0-255 0-100
0-20
21-39
40-59
60-79
80-100
0-20
21-39
40-59
60-79
80-100
0-3
4-22
23-41
42-60
61-78
79-97
98-100
Master Intensity
0 % → 100% (open)
Category 1
Incandescent
Fluorescent
Discharge
Other
Reserved for future use
Source 1
Please see table below
Cross Fade
Cat 1, Source 1 → Cat 2, Source 2
Category 2
Incandescent
Fluorescent
Discharge
Other
Reserved for future use
Source 2
Please see table below
Fan Control
Use fixture setting
Quiet Mode
Variable Mode
High Temp Mode
Normal Mode (only S360-C)
Fan max. speed
Fan off
Preset
See page 31
ProtocolProtocol
55
55
Page 56

Source Matching, Light Sources
Category Value Function
Tungsten Bulb
Incandescent
Halogen
Antique Bulb
Warm Antique Bulb
Christmas Lights
Night Light
Infrared Heat Lamp
Grow light
Reserved for future use
CFL Soft White
CFL Bright White
CFL Cool White
CFL Daylight
Cool White 1
Cool White 2
Cool White 3
Warm White
CFL Blacklight
Reserved for future use
HMI
High Pressure Sodium
Low Pressure Sodium
Mercury Vapor
Metal Halide
Ceramic
Carbon Arc
Xenon
Reserved for future use
Candle
Gas Fire
Sun Direct
Sun Overcast
Sun Blue Hour
Mobile Phone
Computer Monitor
Electroluminescence
Blow Torch
Road Flare
Amber Caution
Green Traffic Light
Yellow Traffic Light
Red Traffic Light
Blue Glow Stick
Green Glow Stick
Red Glow Stick
Yellow Glow Stick
Pink Glow Stick
Violet Glow Stick
Reserved for future use
Incandescent
Flourescent
Discharge
Other
0-2
3-5
6-8
9-11
12-14
15-17
18-20
21-23
24-26
27-255
0-2
3-5
6-8
9-11
12-14
15-17
18-20
21-23
24-26
27-255
0-2
3-5
6-8
9-11
12-14
15-17
18-20
21-23
24-255
0-2
3-5
6-8
9-11
12-14
15-17
18-20
21-23
24-26
27-29
30-32
33-35
36-38
39-41
42-44
45-47
48-50
51-53
54-56
57-59
60-255
Page 57

Mode 22: Effects, 8 bit Resolution per Function
Channel Value Percent Function
1
2
3
4
5
6
7
8
9
10
Reverts to fixture setting when signal lost.
11
12-13 Reserved (only V4.x)
0-255 0-100
0-10
11-20
21-30
31-40
41-50
51-60
61-70
71-80
81-90
91-100
101-110
111-120
121-130
131-140
141-255
0-255 0-100
0-255 0-100
0-255 0-100
0-255 0-100
0-255 0-100
0-255 0-100
0-255 0-100
0-9
10-57
58-105
106-153
154-201
202-249
250-255
0-255 0-100
0-4
5-8
9-12
13-15
16-20
21-23
24-27
28-31
32-35
36-39
40-43
44-47
48-51
52-55
53-100
0-3
4-22
23-41
42-60
61-78
79-97
98-100
Master Intensity
0 % → 100% (open)
Effect Selection
No Effect
Party Effect
Candle
Clouds Passing
Club Lights
Color Chase
Cop Car
Fire
Fireworks
Light Strobe
Lightning
Paparazzi
Pulsing
Television
Reserved for future use
Effect Parameter 1
See table below
Effect Parameter 2
See table below
Effect Parameter 3
See table below
Effect Parameter 4
See table below
Effect Parameter 5
See table below
Effect Parameter 6
See table below
Effect Parameter 7
See table below
Fan Control
Use fixture setting
Quiet Mode
Variable Mode
High Temp Mode
Normal Mode (only S360-C)
Fan max. speed
Fan off
Preset
See page 31
ProtocolProtocol
57
57
Page 58

Protocol
Mode 23: Effects, 16 bit Resolution per Function
Channel Value Percent Function
HI LO
12
3
45
67
89
10 11
12 13
14 15
16 17
18
Reverts to fixture set-
ting when signal lost
19
20-21 Reserved (only V4.x)
0-65535 0-100
0-10
11-20
21-30
31-40
41-50
51-60
61-70
71-80
81-90
91-100
101-110
111-120
121-130
131-140
141-255
0-255 0-100
0-255 0-100
0-255 0-100
0-255 0-100
0-255 0-100
0-255 0-100
0-255 0-100
0-9
10-57
58-105
106-153
154-201
202-249
250-255
0-255 0-100
0-4
5-8
9-12
13-15
16-20
21-23
24-27
28-31
32-35
36-39
40-43
44-47
48-51
52-55
53-100
0-3
4-22
23-41
42-60
61-78
79-97
98-100
Master Intensity
0 % → 100% (open)
Effect Selection
No Effect
Party Effect
Candle
Clouds Passing
Club Lights
Color Chase
Cop Car
Fire
Fireworks
Light Strobe
Lightning
Paparazzi
Pulsing
Television
Reserved for future use
Effect Parameter 1
See table below
Effect Parameter 2
See table below
Effect Parameter 3
See table below
Effect Parameter 4
See table below
Effect Parameter 5
See table below
Effect Parameter 6
See table below
Effect Parameter 7
See table below
Fan Control
Use fixture setting
Quiet Mode
Variable Mode
High Temp Mode
Normal Mode (only S360-C)
Fan max. speed
Fan off
Preset
See page 31
58
Page 59

Party Effect
Parameter Value 8 bit Value 16 bit Percent Function
10
1-255
2
0-255 0 – 65535 0-100
0
1 – 65535
0
1-100
Candle
Parameter Value 8 bit Value 16 bit Percent Function
1
2
0-84
85-170
171-255
0-255 0 – 65535 0-100
0 – 21844
21845 - 43690
43691 - 65535
0-33
34-66
67-100
Clouds Passing
Parameter Value 8 bit Value 16 bit Percent Function
1 0-255
2 0-127
128-255
3
0 – 65535
0 - 32767
32768 - 65535
0-100
0-50
51-100
Saturation
CCT 2.800 10.000 K
0 1.0 Saturation
Speed
Loop 60 s 1 s
CCT Range
Not continuous, set range for
random generation
1.400 → 1.700 K
1.700 → 2.000 K
2.000 → 2.300 K
Speed
0 → 120 changes / min
Offset
Offset Number 0 – 50
Every 5 DMX values is a new
offset
Speed
2 x Slower → Default Speed
Default Speed → 2 x Faster
Sync
If bumped to 255 (100%), the
loop will start at zero (or
depending on the offset
value)
ProtocolProtocol
Club Lights
Parameter Value 8 bit Value 16 bit Percent Function
0 – 31
32 – 63
64 – 95
1
2
96 – 127
128 – 159
160 – 191
192 – 223
224 – 255
0-255 0 – 65535 0-100
0 – 8191
8192 – 16383
16384 – 24575
24576 – 32767
32768 – 40959
40960 – 49151
49152 – 57343
57344 – 65535
0 – 12
13 – 25
26 – 37
38 – 49
50 – 62
63 – 75
76 – 87
88 – 100
Color Variety
3 Colors
6 Colors
9 Colors
12 Colors
15 Colors
18 Colors
21 Colors
24 Colors
Speed
0 → 120 changes / min
59
59
Page 60

Protocol
Color Chase
Parameter Value 8 bit Value 16 bit Percent Function
1 0-255 0 – 65535 0-100
2
30
4
0-255 0 – 65535 0-100
1-255
0
1 – 65535
0
1-100
Cop Car
Parameter Value 8 bit Value 16 bit Percent Function
0-63
1
2
64-127
128-191
192-255
0 – 31
32 – 63
64 – 95
96 – 127
128 – 159
160 – 192
192 – 223
224 – 255
0 – 16383
16384 – 32767
32768 – 49151
49152 - 65535
0 – 8191
8192 – 16383
16384 – 24575
24576 – 32767
32768 – 40959
40960 – 49151
49152 – 57343
57344 - 65535
0-25
26-50
51-75
76-100
0 – 12
13 – 25
26 – 37
38 – 50
51 – 62
63 – 75
76 – 87
88 – 100
Offset
Offset Number 0 – 50
Every 5 DMX values is a new
offset
Speed
Loop 60 s → 1 s
Saturation
CCT 2.800 → 10.000 K
0 → 1.0 Saturation
Sync
If bumped to 255 (100%), the
loop will start at zero (or
depending on the offset
value)
Color Combinations
Just Blue
Blue and Red
Blue and White
Blue, Red and White
Flash Pattern
Single Flash
Double Flash
Quint All Flash
Quint Flash
Quad Flash
Cycle All
Reserved for future use
Reserved for future use
Fire
Parameter Value 8 bit Value 16 bit Percent Function
1
2
0-84
85-170
171-255
0-255 0 – 65535 0-100
0 – 21844
21845 – 43690
43691 - 65535
0-33
34-66
67-100
Fireworks
Parameter Value 8 bit Value 16 bit Percent Function
0-63
1
2
64-127
128-191
192-255
0-255 0 – 65535 0-100
0 – 16383
16384 – 32767
32768 – 49151
49152 - 65535
0-25
26-50
51-75
76-100
CCT Range
Not continuous, set range for
random generation
1.800 → 2.200 K
2.200 → 2.600 K
2.600 → 3.000 K
Speed
0 → 180 changes / min
Color Combinations
Colors
White
Colors and White
Reserved for future use
Speed
10 → 0,5 s between fireworks
60
Page 61

Strobe Light
Parameter Value 8 bit Value 16 bit Percent Function
1
2
3
4 0-255 0 – 65535 0-100 Cross Fade
5
6
0-255 0 – 65535 0-100
0-255 0 – 65535 0-100
0 - 10
11 - 20
21 - 119
120 - 145
146 - 244
245 - 255
0-255 0 – 65535 0-100
0-255 0 – 65535 0-100
0 – 2621
2622 – 5243
5244 – 30146
30147 – 37355
37356 – 62914
62915 - 65535
47 - 57
57 - 96
97 - 100
0 - 4
5 - 8
8 - 46
Lightning
Parameter Value 8 bit Value 16 bit Percent Function
1 0-254
255
2 0-254
255
3
4
5
0-255 0 – 65535 0-100
0 - 10
11 - 20
21 - 119
120 - 145
146 - 244
245 - 255
0 – 65534
65535
0 – 65534
65535
0 – 2621
2622 – 5243
5244 – 30146
30147 – 37355
37356 – 62914
62915 - 65535
0-99
100
0-99
100
0 - 4
5 - 8
8 - 46
47 - 57
57 - 96
97 - 100
Speed
1 → 25 flashes / second
Color Temperature
CCT 2.800 → 10.000 K
Green-Magenta Point
neutral / no effect
full minus green
-99% → -1%
neutral / no effect
1% → 99%
full plus green
Hue
0 → 360°
Saturation
0 → 1.0 Saturation
Frequency
2 → 14 lightning strikes set
Random
Speed
0 → 10 flashes / second
Random
Color Temperature
CCT 2.800 → 10.000 K
Green-Magenta Point
neutral / no effect
full minus green
-99% → -1%
neutral / no effect
1% → 99%
full plus green
Sync
If bumped to 255 (100%), the
loop will start at zero (or
depending on the offset
value)
ProtocolProtocol
Paparazzi
Parameter Value 8 bit Value 16 bit Percent Function
1
2 0-128
3
4
0-255 0 – 65535 0-100
0 - 32767
129-255
0-255 0 – 65535 0-100
0 - 10
11 - 20
21 - 119
120 - 145
146 - 244
245 - 255
32768 - 65535
0 – 2621
2622 – 5243
5244 – 30146
30147 – 37355
37356 – 62914
62915 - 65535
51-100
47 - 57
57 - 96
97 - 100
0-50
0 - 4
5 - 8
8 - 46
Frequency
6 → 120 Flashes / min
Flash Type
Flash Bulb
Modern Flash
Color Temperature
CCT 2.800 → 10.000 K
Green-Magenta Point
neutral / no effect
full minus green
-99% → -1%
neutral / no effect
1% → 99%
full plus green
61
61
Page 62

Protocol
Pulsing
Parameter Value 8 bit Value 16 bit Percent Function
1
2
3
4
5 0-255 0 – 65535 0-100 Cross Fade
6
7
0-255 0 – 65535 0-100
0-255 0 – 65535 0-100
0-255 0 – 65535 0-100
0 - 10
11 - 20
21 - 119
120 - 145
146 - 244
245 - 255
0-255 0 – 65535 0-100
0-255 0 – 65535 0-100
0 – 2621
2622 – 5243
5244 – 30146
30147 – 37355
37356 – 62914
62915 - 65535
47 - 57
57 - 96
97 - 100
0 - 4
5 - 8
8 - 46
Television
Frequency
5 → 90 Pulses / minute
Pulse Duration
4 → 0.25 seconds
Color Temperature
CCT 2.800 → 10.000 K
Green-Magenta Point
neutral / no effect
full minus green
-99% → -1%
neutral / no effect
1% → 99%
full plus green
Hue
0 → 360°
Saturation
0 → 1.0 Saturation
Parameter Value 8 bit Value 16 bit Percent Function
CCT Range
Not continuous, set range for
1
2
0-84
85-170
171-255
0-255 0 - 65535 0-100
0 – 21844
21845 – 43690
43690 - 65535
0-32
33-66
67-100
random generation
2.800 → 4.700 K
4.700 → 6.500 K
6.500 → 10.000 K
Speed
4 → 24 changes / min
62
Page 63

Overview of Typical CCT Values as DMX Values
D
CCT value DMX value (8 bit) DMX value (16 bit)
Sky-Panel C C
3.200 K 14 3.670
5.600 K 99 25.493
6.000 K 113 29.098
6.500 K 131 33.685
Equations for calculation
To calculate the CCT value
8 bit
DMX
CCT
Value
16 bit
DMX
CCT
Value
To calculate the x,y coordinate
8 bit
DMX
DMX
Value
Value
x Value–
y Value–
DMX
=
DMX
CCT
------------------------------------------=
Value
2800–
28.235
Value
28.2352800+=
2800–
Value
CCT
------------------------------------------
0.109865
Value
=
0.1098652800+=
x
Coordinate
---------------------------------------- -
0.8
y
Coordinate
=
-----------------------------------------
0.8
255
255
16 bit
DMX
MX
x Value–
y Value–
x
Coordinate
=
-----------------------------------------------
0.8
y
Coordinate
=
-----------------------------------------------
0.8
65535
65535
Page 64

 Loading...