

Page 1
Kullaným kilavuzu
KOMBI SOGUTUCU/DONDURUCU
TR
Türkçe, 1
GB F
MBZE 45 NF BAR T
Içindekiler
TR
Montaj, 2
Yerlestirme ve baglama
Bar bölmesi
Français, 29English,15
Cihazýn tanýmý, 3-4
Kontrol paneli
Genel görünüm
Aksesuarlar, 5
Ekran, 6-7
Ekranýn tanýmý
Ekranýn kullanýlmasý
Çalýstýrma ve kullanma, 8-10
Cihazýn çalýstýrýlmasý
Sogutma sistemi
Sogutucunun en iyi sekilde kullanýlmasý
Dondurucunun en iyi sekilde kullanýlmasý
Ever Fresh
Bakým ve temizlik, 11
Elektrik sebekesinin devre dýsý býrakýlmasý
Cihazýn temizlenmesi
Ever Fresh
Küfün ve istenmeyen kokularýn önlenmesi
Ampulün degistirilmesi
Koku önleyici filtrenin degistirilmesi
Önlemler ve öneriler, 122
Genel güvenlik uyarýlarý
Atýklarýn tasfiye edilmesi
Tasarruf ve çevreye saygý
Ariza ve onarým, 13
Teknik Servis, 14
Page 2
Montaj
TR
! Bu kitapçýgý gerektigi her an danýsabilmeniz için
özenle saklayýnýz. Satýs, devir yada tasýma halinde,
çalýsma sistemi ve bununla ilgili uyarýlar konusunda
yeni sahibinin bilgilenmesi için bu kitapçýgýn cihazla
birlikte kalmasýný saglayýnýz.
! Talimatlarý dikkatlice okuyunuz: montaj, kullaným ve
güvenlige iliskin önemli bilgiler içermektedir.
Yerlestirme ve baglama
Konumlandýrma
1. Cihazý nemsiz ve havadar bir yere yerlestiriniz.
2. Arkadaki havalandýrma ýzgaralarýný kapatmayýnýz:
kompresör ve kondenser sýcak yapar, bu yüzden
cihazýn iyi çalýsmasýný ve tüketiminin azalmasýný
saglamak için bunlarýn duvara dayanmamasý gerekir.
3. Cihazýn üst kýsmý ile üstüne konacak mobilya
arasýnda en azýndan 10 cm, mobilia/duvar yanýna
yerlestirilmesi durumunda ise en az 5 cm açýklýk
býrakýnýnz
4. Cihazý ýsý kayaklarýndan uzak tutunuz (ör. direkt
günes ýsýgý, elektrik ocak).
5. Ürünün arka kýsmýyla duvar arasýndaki mesafeyi
saðlamak için kullaným talimatlarýna uygun olarak
monte etme kitinde mevcut olan uzaklaþtýrýcý çubuklarý
monte ediniz.
! Cihaz monte edildikten sonra besleme kablosuna ve
elektrik prizine kolayca ulasýlabilmelidir.
! Kablo kývrýlmamalý ve sýkýstýrýlmamalýdýr.
! Kablonun periyodik olarak kontrol edilmesi ve sadece
yetkili personel tafarýndan degistirilmesi gerekir (Teknik
Servis bölümüne bakýnýz).
! Üretici firma yukarýdaki normlarýn dikkate
alýnmamasý durumunda hiçbir sorumluluk kabul
etmeyecektir.
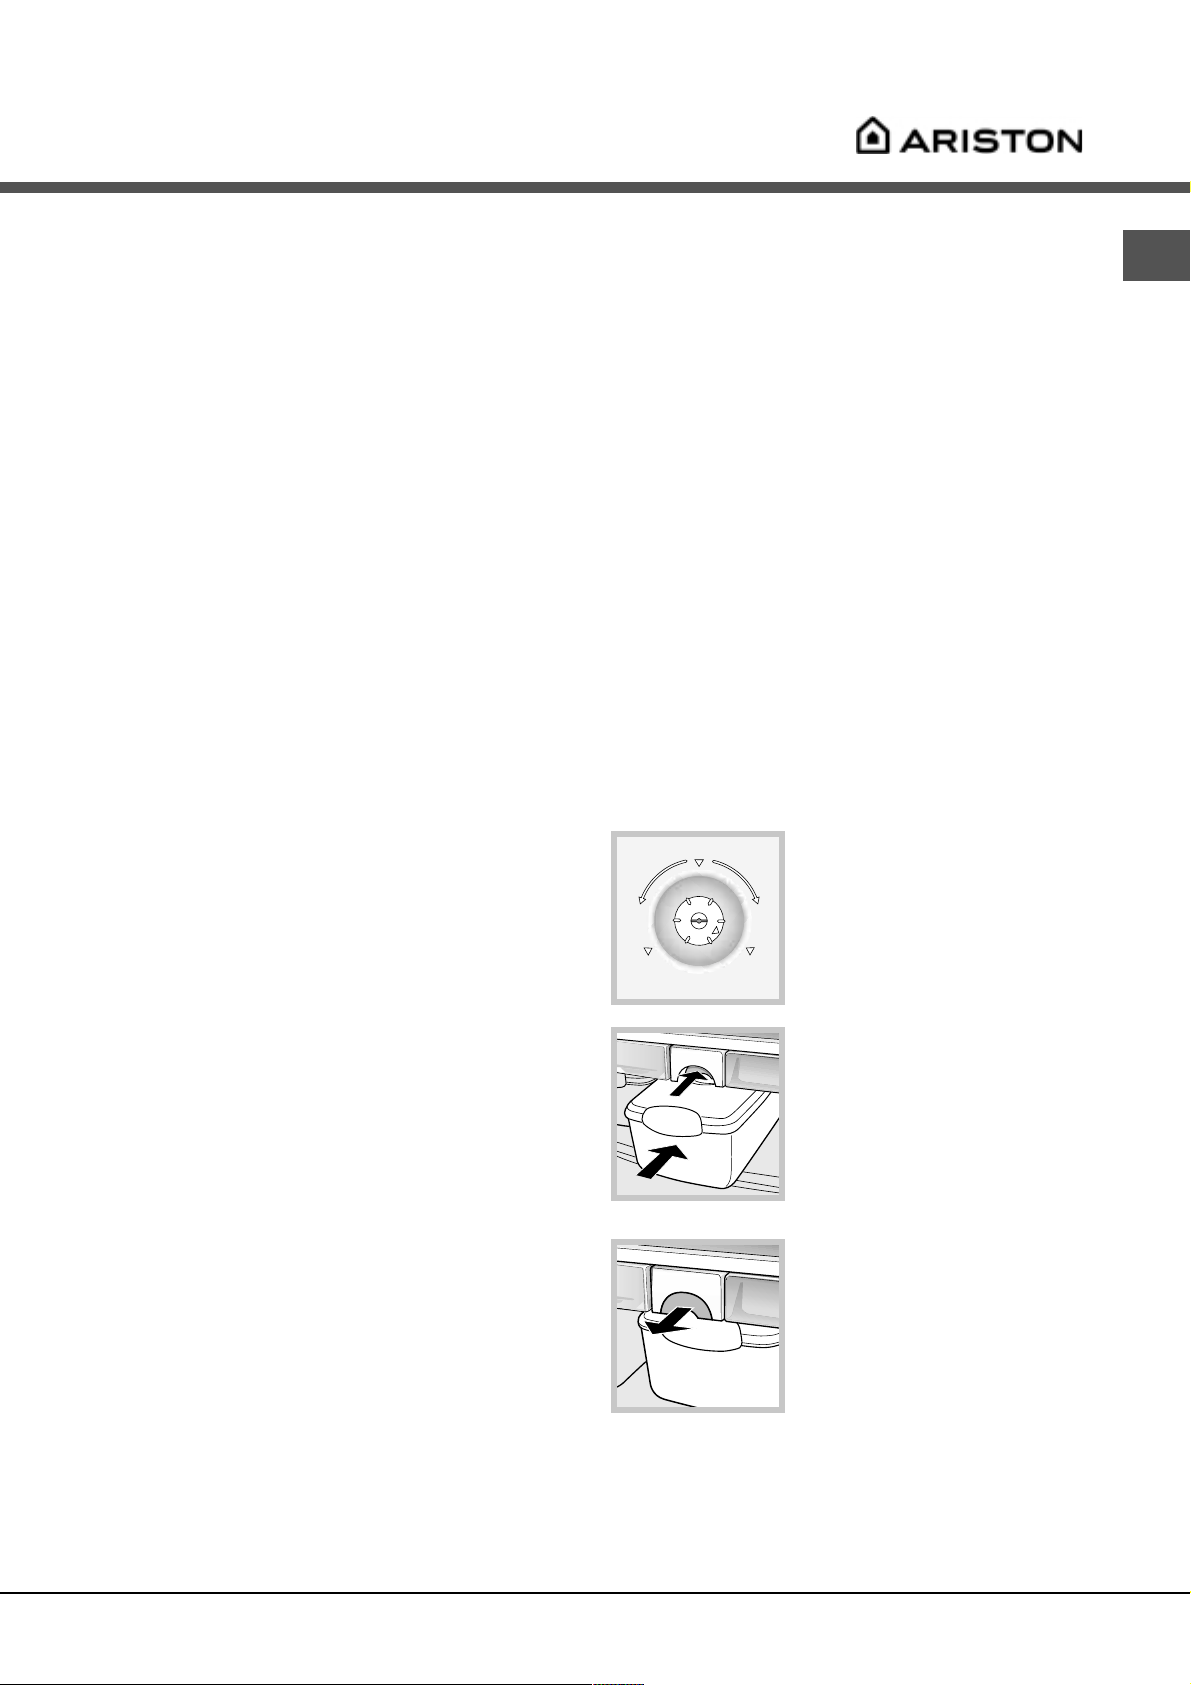
Bar Bölmesi
Bar bölmesinin kapagýnýn
açma/kapama hareketinin
sertligi ayarlanabilir. Ürün
önünde durarak hareketin
sertligini yükseltmek için yan
üzengileri sola, azaltmak için de
saga döndürünüz.
! Önemli olan üzengilerin ikisinin de ayný sekilde
ayarlanmýs olmasýdýr. Kollarýn ikisi de ayný sertlikte
ayarlanmalýdýr.
Seviyeye ayarlama
1. Buzdolabýnýzý düz ve sert bir zemine yerlestiriniz.
2. Zemin düz olmamasý durumunda ayarlanabilir
ayaklarý gevseterek veya sýkarak cihazýn tamamen
zemine oturmasýný saglayýnýz.
Elektrik sebekesine baglanmasý
Tasýnmadan sonra cihazý dik olarak yerlestiriniz ve
elektrik tesisatýna baglamak için en az 3 saat
bekleyiniz. Cihazýn fisini bir elektrik prizine takmadan
önce asagýdakileri kontrol ediniz:
priz topraklý tesisata sahip ve yürürlükteki normlara
uygun olmalýdýr;
elektrik prizi, sogutucu bölmesinin sol tarafýnýn
asagýsýnda bulunan özellik etikentinde belirtilen
maksimum yükü tasýyabilmelidir;
besleme gerilimi sogutucu bölmesinin sol tarafýnýn
asagýsýnda bulunan özellik etiketinde belirtilen deger
sýnýrý kapsamýnda olmalýdý (ör. 220-240 V);
priz ve fis birbiriyle uyumlu olmalýdýr.
Aksi takdirde cihazýn fisinin degistirilmesi için yetkili
Servise (Teknik Servis bölümüne bakýnýz)
basvurmanýz gerekir, uzatma kablosu ya da çoklu
priz kullanmayýnýz.
2
Page 3
Cihazýn tanýmý
Kontrol paneli
EVER
FRESH
tusu
RESET ALARM tusu
Ekran MODE
ECOECO
ADJUST/SELECT+ tusuON/OFF Tusu
Tusu
ADJUST/SELECT- tusu
TRTR
TR
TRTR
ON/OFF tusu cihazý (sogutucu ve dondurucu
bölmeleri) açmak veya kapatmak için kullanýlýr. En
azýndan 2 saniye basýlý tutulmalýdýr.
Çalýstýrma ve kullanma ve Bakým ve temizlik
bölümlerine bakýnýz.
EVER FRESH tusu EVER FRESH fonksiyonunu
çalýstýrmak veya kapatmak için kullanýlýr
RESET ALARM tusu sesli alarmý kapatmak için (bir
kere basýnýz) ve ekranda akan alarm mesajlarýný
silmek için (bir kere daha basýnýz) kullanýlýr.
Ariza ve onarým bölümüne bakýnýz.
MODE tusu ekrandaki ayarlarý ve fonksiyonlarý
seçmek için kullanýlýr.
Ekran ve Çalýstýrma ve kullanma bölümlerine
bakýnýz.
ADJUST/SELECT+ tusu fonksiyonlarý çalýstýrmak
veya ýsý derecesi, saat, tarih, dil ayarlarýný
degistirmek için kullanýlýr.
Ekran ve Çalýstýrma ve kullanma bölümlerine
bakýnýz.
ADJUST/SELECT- tusu fonksiyonlarý kapatmak
veya ýsý derecesi, saat, tarih, dil ayarlarýný
degistirmek için kullanýlýr.
Ekran ve Çalýstýrma ve kullanma bölümlerine
bakýnýz.
Ekran cihazý programlamak veya çalýsmasýný takip
etmek için kullanýlýr. Ekran
3
Page 4
Cihazýn tanýmý
TR
Genel görünüm
AMPUL
(Bakým bölümüne
bakýnýz)
RAFLAR
EVER FRESH rafý
MEYVE VE SEBZE
çekmecesi
Çýkarýlabilen kapaklý
raf ve SEBZELIK
KAPI RAFI
KUTU MESRUBAT
TUTUCUSU
BAR bölmesi
SISE Tutucusu
Buzluk EASY ICE
DONDURMA ve
SAKLAMA bölmesi
Buzluk EASY ICE
SAKLAMA bölmesi
Ayarlanabilir
AYAKLAR
WATER LEVEL
MAX
WATER LEVEL
MAX
Sayýsý ve/ya pozisyonu degisebilir.
4
Page 5
Aksesuarlar
1
2
yerlestirilmistir.
RAFLAR: büyük kaplar veya
fazla yer kaplayan gýdalarýn
yerlestirilmesi için mevcut olan
kýlavuzlar kullanýlarak
çýkarýlabilir ve yüksekligi
ayarlanabilir (sekile bakýnýz).
Yüksekligi raf tamamen
çýkarýlmadan ayarlanabilir.
EVER FRESH: gýdalarý vakumlu
ambalajlarda saklama bölmesi.
Özel kaplar kullanýlarak
gýdalarýn saklanma süresi
uzatýlabilir.
KUTU MESRUBAT
TUTUCUSU: birkaç kutu yatay
olarak yerlestirilebilir (sekile
bakýnýz). Ayrýca, yogurt, tereyag
ya da genel olarak kaplar
yerlestirilebilir.
KOKU ÖNLEYICI FILTRE*:
bazý modellerde mevcut olan
aktif karbonlu koku önleyici
filtre, sogutucu içinde hava
kalite seviyesinin
yükseltilmesini saglamaktadýr.
Filtre sagda asagýdaki bölümde
havalandýrma çýkýsýnýn içine
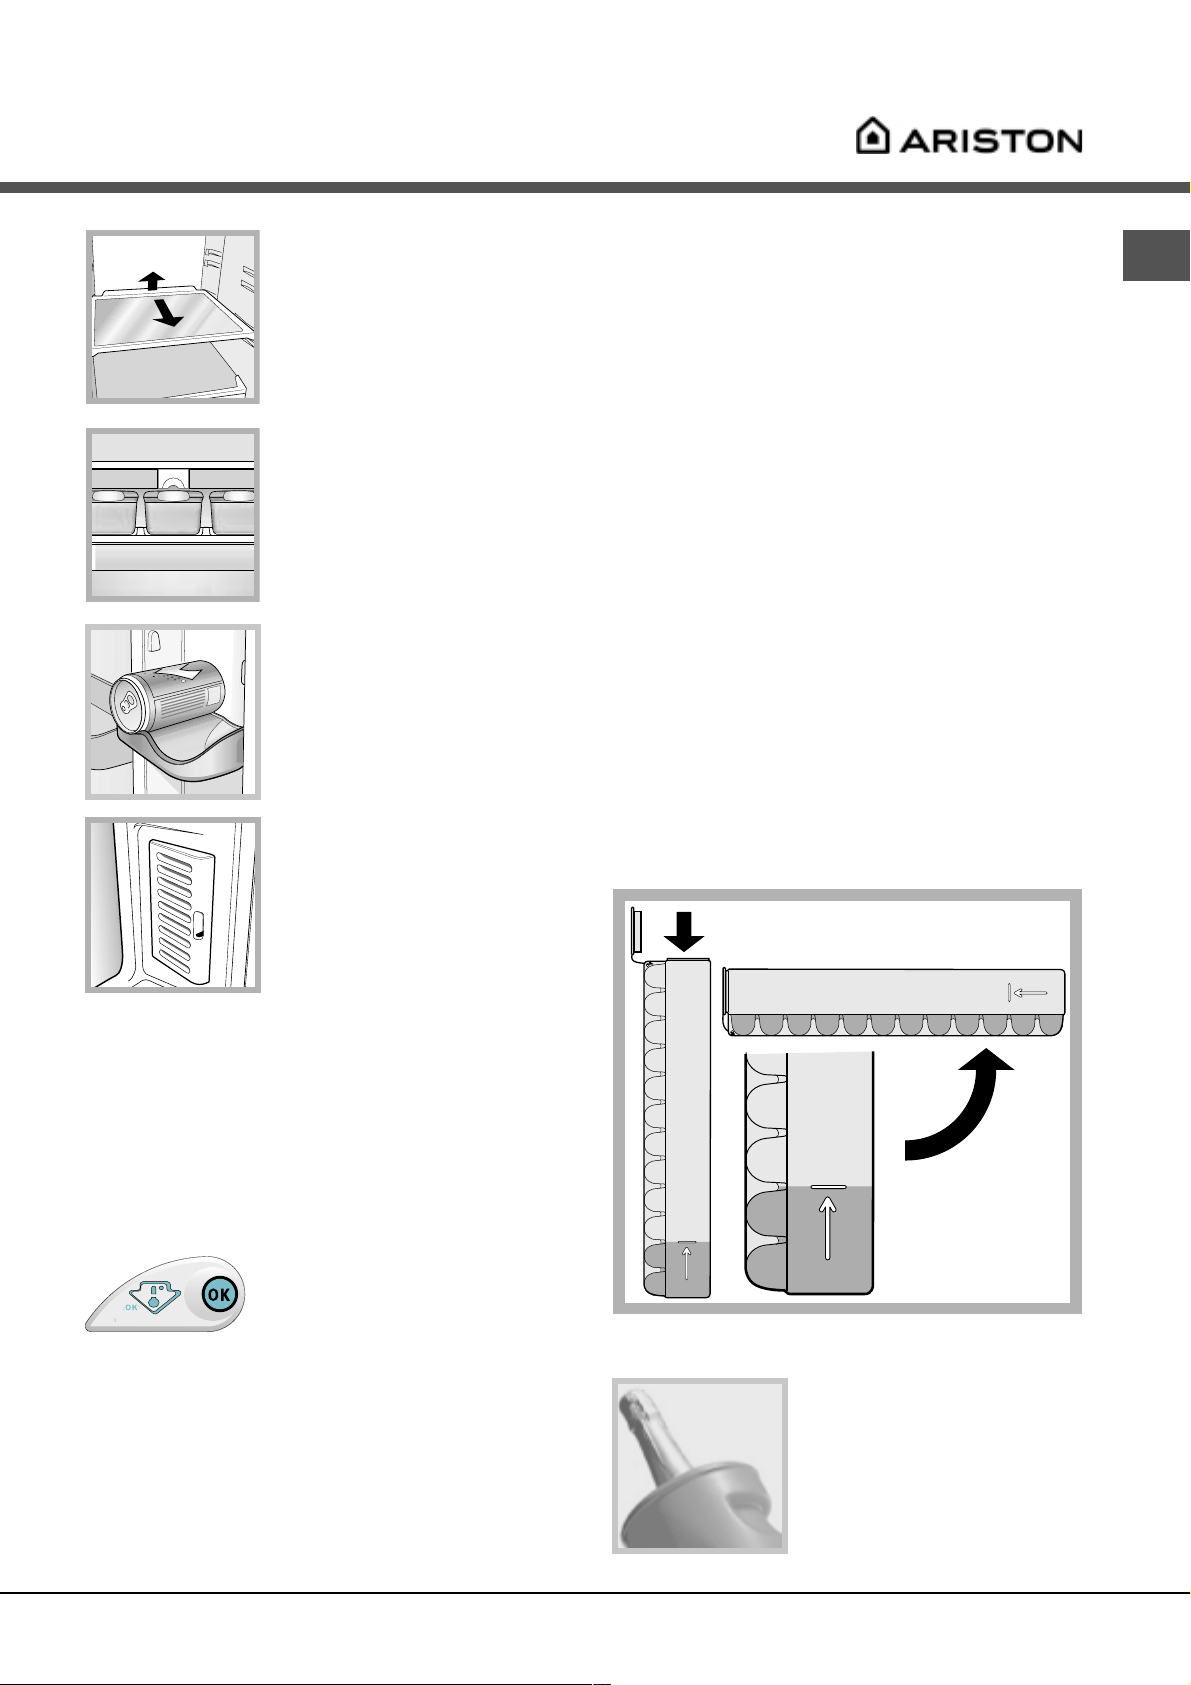
3. Göstergeyi tekrar kontrol ediniz: gerekirse bir daha
ayarlayýnýz. Gýdanýn büyük miktarda yerlestirilmis veya
sogutucu kapagýnýn devamlý açýlýp kapatýlmýs olmasý
durumunda da gösterge siyah olabilir. Böyle bir
durumda ýsý derecesini tekrar ayarlayýnýz (Ekranýn
kullanýlmasý bölümüne bakýnýz).
! Isý derecesinin sonraki ayarlamalarý en 10 saat aralýklý
(sogutucu içinde ýsý derecesi oturur) yapýlmalýdýr.
Buzluk: buz üretmek için kullanýlýr.
1. Önce yukarýya, sonra dýsarýya dogru iterek buzlugu
çýkarýnýz (sekile bakýnýz). Buzlugun bos olup
olmadýgýný kontrol ediniz ve üstündeki deligin içine
su dökerek doldurunuz.
2. Gösterilen seviyeyi (MAX WATER LEVEL)
geçmemelidir. Fazla su varsa buzluktan buzun
çýkarýlmasý engellenir (böyle bir durumda buzun
erimesini bekleyiniz ve içindeki suyu dökünüz).
3. Buzlugu 90° döndürünüz: su ile içindeki sekiller
doldurulur (sekile bakýnýz). Deligi kapakla kapatýnýz
ve yerine yerlestiriniz. Buz olustugu zaman
(minimum süre 8 saattir) çýkarmak için buzlugu sert
bir yüzeye vurunuz.
MAX
WATER LEVEL
TRTR
TR
TRTR
BAR BÖLMESI:
Içecekler hep soguk ve elinizin altýndadýr. Bu bölme
sogutucunun kapagýný açmadan siseler alýnabilecek ve
açýkken rahatça konabilecek sekilde tasarlanmýstýr
(maksimum tasýma hacmi 10 Kg). Sise tutucusunun
kapagý sayesinde sogutucunun içinde ýsý derecesinin
yükselmesi ertelenir.
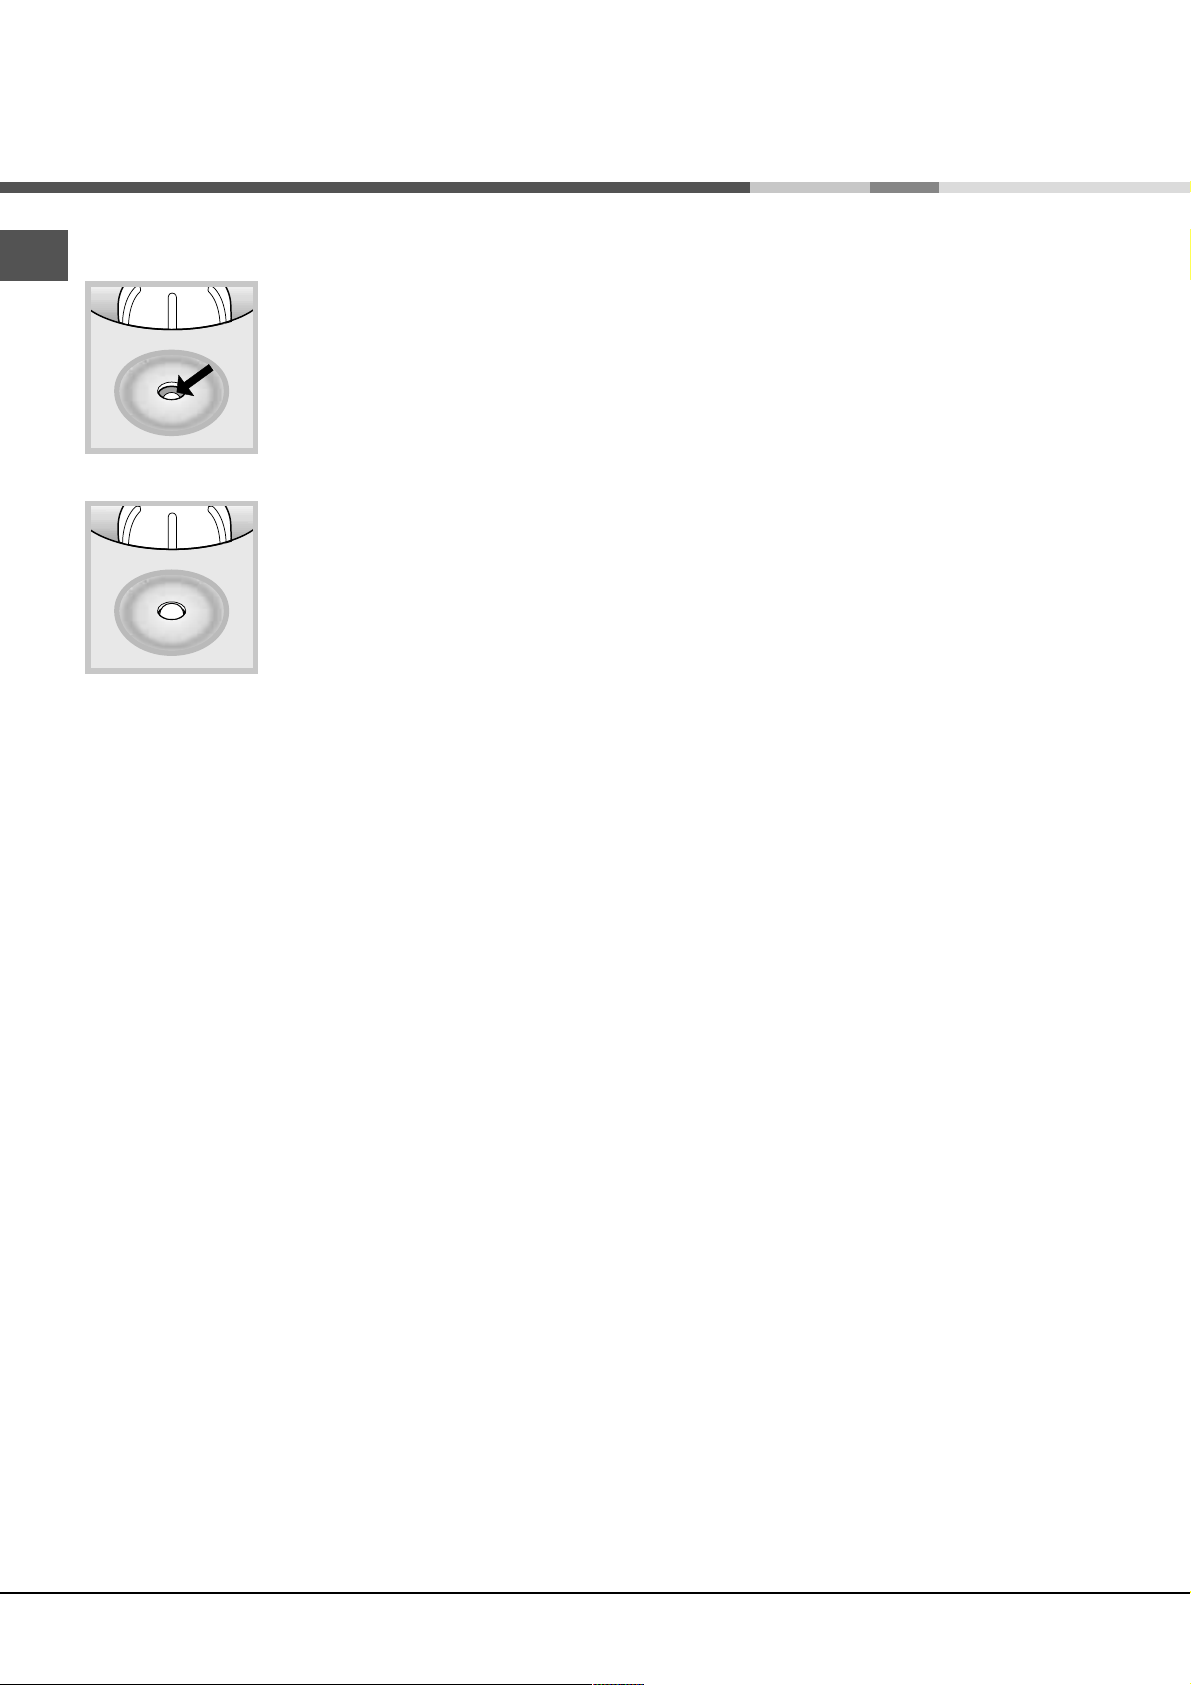
ISI DERECE* göstergesi:
sogutucunun en soguk bölümünü
vert
noir
consulter la notice
belirlemek için kullanýlýr.
1. Gösterge üzerinde OK yazýsýnýn
net bir sekilde okunup
okunmadýgýný kontrol ediniz (sekile bakýnýz).
2. OK (TAMAM) yazýsý gözükmüyorsa ýsýnýn çok yüksek
olduðu anlamýna gelir: Sogutucunun ýsý derecesi daha
düsük bir degere ayarlanmalý ve oturmasý için 10 saat
(Ekranýn kullanýlmasý bölümüne bakýnýnz) bekletilmelidir.
Sadece bazý modellerde mevcuttur.
*
WATER LEVEL
MAX
WATER LEVEL
MAX
ICE PARTY: gazlý sarap veya
sampanya sisesini uygun
sekilde sogutmak için. Siseyi
DONDURMA ve SAKLAMA
bölmesi içindeki kovaya
yerlestiriniz. Kova, sarabý
içereken siseyi soguk tutmak
için kullanýlabilir.
5
Page 6

ECO
Ekran
TR
Ekranýn tanýmý
ALARM Göstergesi
SOGUTUCU ÇALISMA Göstergesi SAAT
DONDURUCU ÇALISMA Göstergesi
EVER FRESH
fonksiyonu
ECO
ECO
SUPER FREEZE fonksiyonu
Akan yazý
Göstergesi
ICE PARTY fonksiyonu
SUPER COOL fonksiyonu
ECO fonksiyonu
SOGUTUCU ÇALISMA göstergesi: sogutucu
bölmesi için ayarlanmýs olan (rakam durur) veya
ayarlanmakta olan (rakam yanýp söner) ýsý derecesini
görüntüler. OFF yazýsý bölmenin kapalý oldugunu
belirtir.
ALARM Göstergesi yandýgý zaman acil bir durum
belirtir (kapak açýk, ýsý derecesi yüksek).
Ariza ve onarým bölümüne bakýnýz.
ECO fonksiyonu: Fonksiyon durumunu belirtir.
Tüketimi azaltacak ve gýdalarý saklayacak en iyi ýsý
derecesi otomatik olarak ayarlanýr.
SAAT Göstergesi: saati görüntüler. Ayrýca, saat ve
tarih ayarlamak için kullanýlýr.
Akan yazýlar: ekranýn kullanýlmasý ve cihazýn durumu
hakkýnda bilgi görüntüler.
Ayrýca, dil ayarlamak için kullanýlýr.
SUPER COOL fonksiyonu Fonksiyon durumunu
belirtir. Sogutucu bölmesinin hýzlý soguma sistemidir.
Otomatik olarak devreden çýkar.
Çalýstýrma ve kullanma bölümüne bakýnýz.
SUPER FREEZE fonksiyonu: fonksiyon durumunu
belirtir. Dondurucu bölmesinin hýzlý soguma
sistemidir. Otomatik olarak devreden çýkar.
Çalýstýrma ve kullanma bölümüne bakýnýz.
EVER FRESH fonksiyonu: fonksiyon durumunu
belirtir. Raf ortasýndaki pozisyona yerlestirilerek
kaplarýn içindeki havanýn alýnmasýný saglar.
ICE PARTY fonksiyonu: fonksiyon durumunu belirtir.
Dondurucu içindeki sýcaklýk derecesini bir sise
sogutacak kadar azaltýr.
Sesli bir sinyal uygun bir sýcaklýk derecesine
ulastýgýný belirtir.
Aksesuvarlar bölümüne bakýnýz.
DONDURUCU ÇALISMA Göstergesi dondurucu
bölmesi için ayarlanmýs olan (rakam durur) veya
ayarlanmakta olan (rakam yanýp söner) ýsý derecesini
görüntüler. OFF yazýsý bölmenin kapalý oldugunu
belirtir.
6
! Fonksiyonlarýn sembölleri durumu (kapalý, seçilmis,
açýk) belirtecek farklý sekillerde yanar.
Page 7

Ekranýn kullanýlmasý
Iýsý derecesinin ayarlanmasý
Cihaz çalýstýrýldýgýnda standart saklanma ýsý derecesi
otomatik olarak ayarlanýr.
Sogutucu bölmesi için +5°Cdir
Dondurucu bölmesi için -18°Cdir
Ayarlanabilen ýsý dereceleri asagýda verilmistir:
Sogutucu bölmesi için +2°C / +8°C arasýndadýr
Dondurucu bölmesi için -18°C / -26°C arasýndadýr
Isý derecesini ayarlamak için:
1. Sogutucu veya dondurucu bölmesinin uyarý lambasý
yanýp sönmeye baslayýncaya kadar MODE dügmesini
basýlý tutunuz.
2. Isý derecesini yükseltmek için ADJUST/SELECT+
dügmesine basýnýz.
Isý derecesini azaltmak için ADJUST/SELECTdügmesine basýnýz.
Her basýldýgýnda ýsý derecesi 1°C yükselir veya azalýr.
3. Seçilen ýsý derecesini konfirme etmek için on saniye
içinde MODE dügmesine basýnýz: seçilen degerin yanýp
sönmesi biter. Seçilen ýsý derecesinin konfirme
edilmemesi durumunda göstergede bu islemden önce
ayarlanmýs olan sýcaklýk derecesi görüntülenir.
! ECO fonksiyonunda tüm ayarlamalar mevcut degildir:
sogutucu bölmesi için +4°C / +6°C arasýnda, dondurucu
bölmesi için -18°C / -20°C arasýnda degisebilir.
Fonksiyonlarýn durumu
fonksiyon açýktýr
(yesil semböl ve lacivert iç kýsmý yanar)
Saat ve tarih ayarlamasý
Ayarlamalar sýrayla yapýlmalýdýr. Saat kurmadan önce
tarih ayarlamak mümkün degildir:
1. Akan yazý olarak ekranda SAAT AYARLA[+/-] yazýsý
görüntüleninceye kadar MODE dügmesine devamlý
basýnýz.
2. Saatin bir saat ileri alýnmasý için ADJUST/SELECT+
dügmesine basýnýz. Saatin bir saat geri alýnmasý için
ADJUST/SELECT- dügmesine basýnýz.
3. Seçiminizi konfirme etmek için on saniye içinde
MODE dügmesine basýnýz. Seçiminizin konfirme
edilmemesi durumunda ekranda bu islemden önce
ayarlanmýs olan saat görüntülenir.
Saat ayarlandýktan sonra 1-3 noktalarýnda belirtilen
islemler yapýlarak dakika, gün, ay,yýl ayarlanmalýdýr.
Dil ayarlamasý
1. Akan yazý olarak ekranda dýl ayarlamasý ile ilgili yazý
görüntüleninceye kadar MODE dügmesine devamlý
basýnýz.
2. Ileri gitmek için ADJUST/SELECT+ dügmesine
basýnýz.
Geri gitmek için ADJUST/SELECT- dügmesine basýnýz.
3. Seçiminizi konfirme etmek için on saniye içinde
MODE dügmesine basýnýz. Seçiminizin konfirme
edilmemesi durumunda göstergede bu islemden önce
ayarlanmýs olan dil görüntülenir.
! Cihaz ilk açýldýgýnda otomatik olarak istenilen dil
ayarlama yapýlmasý talep edilir: açýklanan prosedürü
uygulayýnýz.
TRTR
TR
TRTR
fonksiyon seçilidir
(yesil semböl ve kýrmýzý çerçevesi yanar)
fonksiyon kapalýdýr
(sadece yesil semböl yanar)
SUPER COOL, ECO, SUPER FREEZE, ICE PARTY
fonksiyonlarýn açýlmasý ve kapatýlmasý.
1. Istenilen fonksiyon seçili oluncaya kadar MODE
dügmesine basýnýnz.
2. Çalýstýrmak için ADJUST/SELECT+ dügmesine
basýnýz.
Kapatmak için ADJUST/SELECT+ dügmesine basýnýz.
3. Seçiminizi konfirme etmek için on saniye içinde
MODE dügmesine basýnýz. Seçiminizin konfirme
edilmemesi durumunda göstergede bu islemden önce
ayarlanmýs olan fonksiyon görüntülenir.
Islem sonunda kýrmýz çerçeve söner.
Fonksiyon açýk durumda ise: yesil semböl ve lacivert iç
kýsmý yanar. Fonksiyon kapalý durumda ise: sadece
yesil semböl yanar.
Sesli ve görsel alarmlarý kapatýnýz.
RESET ALARM dügmesine basýnýz: sesli alarm
kapatmak için bir kere basýnýz ve akan yazýlardaki
alarm mesajlarýný silmek için bir kere daha basýnýz.
! Kapý açýk alarmý kapýyý kapatmakla iptal edilir.
(Ariza ve onarým bölümüne bakýnýz.)
! Ekranda DEMO MODE yazýsýnýn görüntülenmesi
durumunda ise cihaz açýklayýcý durumdadýr ve bu
yüzden ekran ve iç ampul açýk olmasýna ragmen
sogutma yapmýyor. Bu moddan çýkmak için MODE,
ADJUST/SELECT+ ve ADJUST/SELECT- dügmelerini
ayný zamanda en az üç saniye için basýlý tutununz.
7
Page 8
Çalýstýrma ve kullanma
TR
Cihazýn çalýstýrýlmasý
! Cihazý çalýstýrmadan önce montaj hakkýnda verilen
talimatlarý uygulayýnýz (Montaj bölümüne bakýnýz).
! Cihazý elektrik sebekesine baglamadan önce tüm
bölmeleri ve aksesuarlarý bikarbonat kullanarak ýlýk su
ile yýkayýnýz.
! Cihaz, çalýsmaya basladýktan sadece 8 dakika sonra
kompresörü devreye sokan motor kurtarma aygýtýna
sahiptir. Istenilen ya da istenilmeyen (black out)
sebeplerden elektrik her kesildikten sonra ayný islem
tekrarlanýr.
Fisi elektrik prizine takýnýnz. Ekranda OFF yazýsýnýn
görüntülenmesi durumunda her iki göstergeden
(sogutucu ve dondurucu göstergesi) ON/OFF
dügmesini birkaç saniye için basýlý tutarak cihazý
çalýstýrýnýnz:
- sogutucu +5°C olarak ayarlanmalýdýr.
- dondurucu -18°C olarak ayarlanmalýdýr.
Bölmenin ikisinin de daha hýzlý sogumasý için SUPER
COOL ve SUPER FREEZE fonksiyonlarý açýnýz (Ekran
bölümüne bakýnýz).
Buzdolabýnýzýn en iyi sekilde
kullanýlmasý
Isý derecesi ekrandan ayarlanmalýdýr.
Az süre içinde ýsý derecesini azaltmak için, ör. büyük
miktarda alýs veris yapýldýktan sonra bölme
dolduruldugu zaman, SUPER COOL fonksiyonunu
açýnýz.
Gereken süre geçtikten sonra fonksiyon otomatik
olarak devreden çýkar.
Sadece soguk, ýlýk ve sýcak olmayan gýda
yerlestirilebilir (Önlemler ve öneriler bölümüne
bakýnýz).
Pismis gýda çig gýdadan daha uzun süre saklanmaz.
Sývý kapaksýz kaplara dökülmemlidir: nem oraný
yükselir ve kondens suyu olusur.
Gýda hijeni
Yiyecek alýsverisinden sonra kagýt, karton gibi dýs
ambalajý çýkarýnýz, bu tür cisimler sogutucu içine kir
ve bakteri tasýyabilir.
Sogutma sistemi
Cihaz asagýda açýklanan sogutma sistemine sahptir:
No Frost
No frost özelligi bölmelerin arka
yüzeylerinde havalandýrma
hücrelerinin olmasýdýr.
No frost sistemi ile devamlý
soguk hava dolasýmý saglanýr.
Böylece nem toplanir, buz ve
çiy olusmasý engellenir:
sogutucu bölmesinde gerekli
olan nem oraný saglanýr ve çiy olusmasýný engelledigi
için gýdalarýn besin özelliklerinin korunmasý saglanýr;
dondurucu bölmesinde ise buz çözme islemine gerek
kalmadan ve gýdalarýn birbiriyle yapýsmamasý
saglanarak buz olusmasý engellenir.
! Gýda veya kap arka sogutma duvarý ile direk temasa
geçmemelidir. Havalndýrma delikleri kapatýlmasý
kondens suyu olusmasýna sebep olur.
! Siseleri kapatýnýnz ve gýdalarý sarýnýz.
Yiyecekleri (özellikle çabuk bozulanlarý ve keskin
koku yayanlarý) birbiriyle temas etmeyecek sekilde
koruyunuz, böylelikle hem bakterilerin diger
yiyeceklere geçmesi hem de sogutucuda
olusabilecek kötü kokularýn yayýlmasý önlenir.
Yiyecekleri, havanýn aralarýnda rahatça
dolasabilecegi sekilde yerlestiriniz
Sogutucu içini temiz tutunuz, zararlý veya oksitlesme
yapan temizlik ürünleri kullanmamaya özen
gösteriniz
Saklama süresi dolmus olan yiyecekleri
buzdolabýnýzda tutmayýnýz
Çabuk bozulan yiyecekleri (taze penir, cig balýk, ve et
gibi) sebzeligin üstünde bulunan, bölmenin en soguk
yerine yerlestiriniz.
8
Page 9
Dondurucunun en iyi sekilde
kullanýlmasý
Isý derecesi ekrandan ayarlanmalýdýr.
Gýdanýn büyük miktarda dondurulmasý durumunda
SUPER FREEZE fonksiyonunu çalýstýrýnýz. 24 saat
geçtikten sonra veya en uygun ýsý derecesine
ulasýnca fonksiyon otomatik olarak kapanýr.
Çözülmüs veya çözülmek üzere olan yiyecekleri
dondurmayýnýz, bu yiyecekler 24 saat içinde
tuketilmeli veya pisirdikten sonra dondurulmalýdýr.
Dondurulacak taze yiyecekler, daha önce donmus
olanlarla temas etmemelidir. Bu taze yiyecekler
dondurucunun üst bolümüne yerlestirilmelidir, burada
ýsý derecesi 18°cnin altýna inerek hýzlý bir dondurma
islemini garanti eder
Dondurucu icinde sývý olan kapagi kapatýlmýs sise
koymayýnýz, patlayabilir.
Günlük en fazla yiyecek dondurma miktarý sogutucu
içinde asagýda sagda bulunan teknik veriler etiketi
üzerinde yazýlýdýrlar (örnegin: Kg/24h 4).
! Ever Fresh özel kaplarýnýn içine konan gýdalarýn
dayanýklýgýna ve bu gýdalarýn son kullanma tarihine
göre kullanýlmalýdýr. Gýdalarýn vakumlu saklamasý
gýdalarýn özelliklerini degistirmez.
! EVER FRESH kullanýldýgýnda sadece cihazla birlikte
verilen kaplarý kullanýnýz. Baska kaplar
kullanýlmamalýdýr.
Ever Fresh Sistemi
Ever Fresh sistemi sogutucu rafýnda bulunan
dügmeden, ekranda bulunan dügmeden veya kap
kapagýndaki koldan açýlýp kapatýlýr.
! Sadece Ever Fresh rafý ortasýndaki pozisyon
kaplardan hava alacak pompaya sahiptir.
Ever Freshýn açýlmasý ve kapatýlmasý
1. Kabý doldurunuz. Icine koydugunuz yiyecekler
kapagýn dogru kapanmasýný engellememelidir.
TRTR
TR
TRTR
! Dondurma islemi sýrasýnda kapagý acmamaya özen
gösteriniz.
! Elektrik kesintisi veya ariza durumunda kapagý
acmazsaniz, dondurulmus gidalar 9-14 saate kadar,
hic bir degisiklige ugramadan korunurlar.
Ever Fresh
Kaplarýn içinde hava olmamasý, gýda saklama süresinin
uzatýlmasýný, dýs görünüm, tad ve enerji özelliklerinin
aynen kalmasýný saglar.
Gýda sartlarda EVER
normal FRESH
Genel pismis gýdalar 2 gün 10 gün
Hazýr birinci tabak 2 gün 10 gün
Taze balýk 2-3 gün 4-5 gün
Çig taze et 3 gün 9 gün
Kasar peynir 15 gün 60 gün
Çig sebze 5 gün 21 gün
Taze meyve 10 gün 21 gün
Kuru biskuvi 180 gün 365 gün
Kremli tatlý 2 gün 10 gün
Diger tatlýlar 5 gün 20 gün
Normal
*
2. Kabý kapagýný kapatýnýz.
U
U
C
M
A
V
O
T
O
U
A
V
3. Kabýn yanlarýndaki kilitleri
kapatýnýz ve kapak üstündeki
kolu tamamen çevirip CLOSE
konumuna getiriniz.. Saatin tersi
yönüne çevirerek VAKUM
O
T
N
R
E
E
P
P
A
O
C
H
C
I
L
U
O
S
S
O
pozisyonuna getiriniz ( A Sekline
E
bakýnýz).
B
4. Sogutucu içindeki dügmeye
(1) basýnýnz ve kabý ortadaki
pozisyona (2) yerlestiriniz(B
1
sekline bakýnýz).
5. Raftaki dügmeyý çekerek kabý
2
sabitleyiniz (C sekline bakýnýz).
6. Ekrandaki ilgili dügmeye
C
basarak Ever Fresh
fonksiyonunu çalýstýrýnýz (Ever
Fresh ikonu yanar).
Ever fresh çalýstýgý zaman
buzdolabý çok hafif bir ses
yapar.
* Yukarýdaki çizelge gösterici amaçlý olup sogutucuda
3°C - 5°C arasýnda saklamak için dikkate alýnmalýdýr.
Gýdalarýn saklama süresi ürünlerin tazeligine,
hazýrlanýs, saklama prosedürüne ve Ever Fresh
sistemini dogru kullanýlmasýna baglýdýr.
7. Ekranda vakum durumu bildirilecektir. Bekleyiniz.
(Ever Fresh ikonu söner).
9
Page 10
8. Raftaki dügmeye basarak kabý serbest býrakýnýz.
TR
D
E
! Kap kapagýnda yuvarlak biçimli bir vanacýk bulunur.
Vanacýk (D sekline bakýnýz) asagýda bulunmasý
durumunda kaplarýn içinde havanýn olmadýgý belirtilir.
Vanacýk(E sekline bakýnýz)yukarýda bulunmasý
durumunda kaplarýn içinde havanýn olmadýgý belirtilir..
! eger vakumu ayarladýktan (1-9 açýklamalar) sonra, üç
günden önce vanacýk üst duruma geçerse (E sekline
bakýnýz) kapagý iyi kapatýp kapatmadýgýnýzý ve kabýn
bütünlügünü kontrol ediniz. Vakum islemlerini
tekrarlamadan önce yiyeceklerin saklama durumunu
kontrol ediniz.
! Ever Fresh fonksiyonu bir emniyet sistemiyle
donatýlmýstýr. Bu sistem kaplarýn yanlýs veya eksik
kullanmadan kaynaklanan kötü islem durumunda
pompayý söndürür. Bloke olma durumunda normal
çalýsmasýný yeniden saglamak için RESET ALARM
dügmesine iki kere basýnýnz.
9. Kabý dýsarý çýkarýnýz ve saatin
yönüne çevirerek kolu CLOSE
pozisyonuna getiriniz. Böylece
yanlýslýkla açýlmamasý saglanýr.
( A Sekline bakýnýz). Kaplarin
icinde havanýn olmadýgý,
asagýda bulunan vanacýkta
gösterilmistir(D sekline bakýnýz).
10. Kabý açmak için saatin tersi
yönüne çevirerek kolu OPEN
pozisyonuna getiriniz (A
Sekline bakýnýz). Bu durum
kabýn içine hava girmesini ve
açýlmasýný saglayacaktýr. Kabýn
içine hava girdigini vanacýgýn
yukarý dogru hareketi gösterir (E
sekline bakýnýz) .
Ever Freshýn açýlmasý ve kapatýlmasý
Ever Fresh sistemi ve yiyeceklerin en dogru sekilde
kullanma kurallarý asagýda verilmistir.
Ever Fresh kaplarý
Eger herhangi bir sývý saklayacaksanýz kabýn içinde
gösterilen en yüksek seviyeye dikkat ediniz. Sývýnýn
emilmesi Ever Freshýn pompasýna zarar verebilir.
Vakum kapaklarýnýn devamlý açýlmasý yiyeceklerin
saklama durumlarýnda degisiklik ortaya çýkarabilir.
Kullanmadan önce kaplarda görülür bir ariza
olmadýgýný kontrol ediniz.
Kaplarýn vanacýgý emniyet sistemi ile donatýlmýstýr.
Eger vakumu ayarladýktan sonra, üç günden önce
vanacýk üst duruma geçerse kapagý iyi kapatýp
kapatmadýgýnýzý ve/ya kabýn bütünlügünü kontrol ediniz.
Vakum islemlerini tekrarlamadan önce yiyeceklerin
saklama durumunu kontrol ediniz. Ever Freshýn
açýlmasý ve kapatýlmasý bölümüne bakýnýz
Gýda kap ile direkt temasa geçmemelidir.
Bu kaplarý hiç bir pisirme islemi için
kullanmayýnýz(mikrodalga, fýrýn, ates, ýzgara gibi).
Kaplarý dondurucuya koymayýnýz.
Kaplarýn kapagýný bulasýk makinesinde yýkamayýnýz.
Gýdalarýn vakumlu saklanmasý
Önceden paketlenmis gýdalar vakumlu saklandýgý
zaman da son kullanma tarihi içinde tuketilmelidir.
Ayný gýdalarýn devamlý vakumlu saklanmasý dogal
dayanýklýk özelliklerini degistirmez.
Erimis gýdalarý kesinlikle pisirmeden vakumlu
saklamayýnýz.
Korunacak gýdalarýn taze olarak hazýrlanmýs ve bütün
olmalarý gerekir (kýyýlmýs, dilimlenmis, pisirilmis).
Bozulabilir gýdalar vakumlu saklandýgý zaman da
sogutucu içinde tutulmalýdýr.
Pismis gýdalarý sügutucu içine koymdan önce
soguncaya kadar bekletiniz.
10
Page 11
Bakým ve temizlik
Elektrik sebekesinin devre dýsý býrakýlmasý
Temizlik ve bakým islemi sýrasýnda elektrik baglantýsýný
kesiniz:
1. her iki göstergede (sogutucu ve dondurucu) OFF yazýsý
görüntüleninceye kadar ON/OFF dügmesini iki saniyeden
uzun basýlý tutunuz.
2. fisi prizden çekiniz
! Bu prosedürün uygulanmamasý durumunda alarm çalabilir:
bu alarm bir anormallik belirtisi degildir. Normal çalýsmasýný
saglamak için iki saniyeden fazla ON/OFF dügmesini basýlý
tutmak yeterdir. 1 ve 2 noktalarýný uygulayarak cihazýn
elektrik sebekesi ile baglantýsýný kesiniz.
Cihazýn temizlenmesi
Buzdolabýnýzýn dýs, iç duvarlarýný ve contalarýný
karbonat (yemek sodasý) veya nötr sabun eklenmis ýlýk
su ile ýslatýlmýs yumusak bir sünger ile temizleyiniz.
Asýndýrýcý maddeler ve çözücü, amonyak, beyazlatýcý türü
maddeleri kesinlikle kullanmayýnýz.
Sökülebilen aksesuarlarý deterjan veya sabun eklenmis
ýlýk su içine batýrýnýz. Çalkalayýnýz ve dikkatlice
kurulayýnýz.
Buzdolabýnýzýn arkasý toz dolu ise, cihazý kapatýp
elektrik baglantýsýný kestikten sonra elektrik süpürgesini
orta watta ayarlayarak uzun ucu ile arkasýERROR[Basic
syntax error] in:ndaki tozlarý iyice alýnýz.
Ever Fresh
Ever Fresh rafý ortasýnda bulunan emme agzýný
temizlemek icin kuru ve temiz bir bez kullanýnýz. Su
ve cözücü maddeleri kullanmayýnýz.
Ever Fresh rafý ortasýnda bulunan emme agzýndan
su veya baska sývý temasýný önleyiniz.
Kaplarý kullanmadan önce yýkayýp kurulayýnýz.
Kaplarýn kapagýný bulasýk makinesinde yýkamayýnýz.
Kaplarý kapatmadan önce her yanýnýn temiz
oldugundan emin olunuz, kir kalýntýlarý vakumun
kalite ve süresini düsürebilir.
Kapak ortasýnda bulunan kolu temizlemek zorunda
kalýrsanýz, kol tamamen çýkana kadar saatin ter
yönüne çeviriniz ve su veya zararsýz deterjanla
temizleyiniz. Iyice kuruladýktan sonra tekrar yerine
takýnýz.
EverFres rafýnýn çýkarýp temizlemek için arka tarafta
bulunan baglantý borusunu çýkarýnýz. Tekrardan
dogru takmak için özen gösteriniz, böylece sistemin
kötü çalýsmasý engellenir. Ever Fresh rafý ortasýnda
bulunan emme agzýndan su veya baska sývý
temasýný önleyiniz. Bu temas sistemin iyi çalýsmasýna
zarar verebilir.
Istenmeyen kokularýn ve küfün
önlenmesi
Cihaz kokularý önleyici hijenik malzemelerle
üretilmistir. Bu özelligi kaybetmemek için gýdalarýn
iyice sarýlýp kapatýlmasý gerekir. Böylece leke
olusmasý engellenecektir.
Cihazýn uzun süre devre dýsý býrakýlmasý durumunda
içini iyice temizleyiniz ve kapagý açýk býrakýnýz.
Ampulün degistirilmesi
Sogutucu bölmesinin ampulünü
degistirmeden önce
buzdolabýnýn fisini prizden
çýkarýnýnz.
Sekilde gösterildigi gibi (sekile
bakýnýz) gücü 10 Watttan fazla
olmayan bir yenisi ile
degistiriniz.
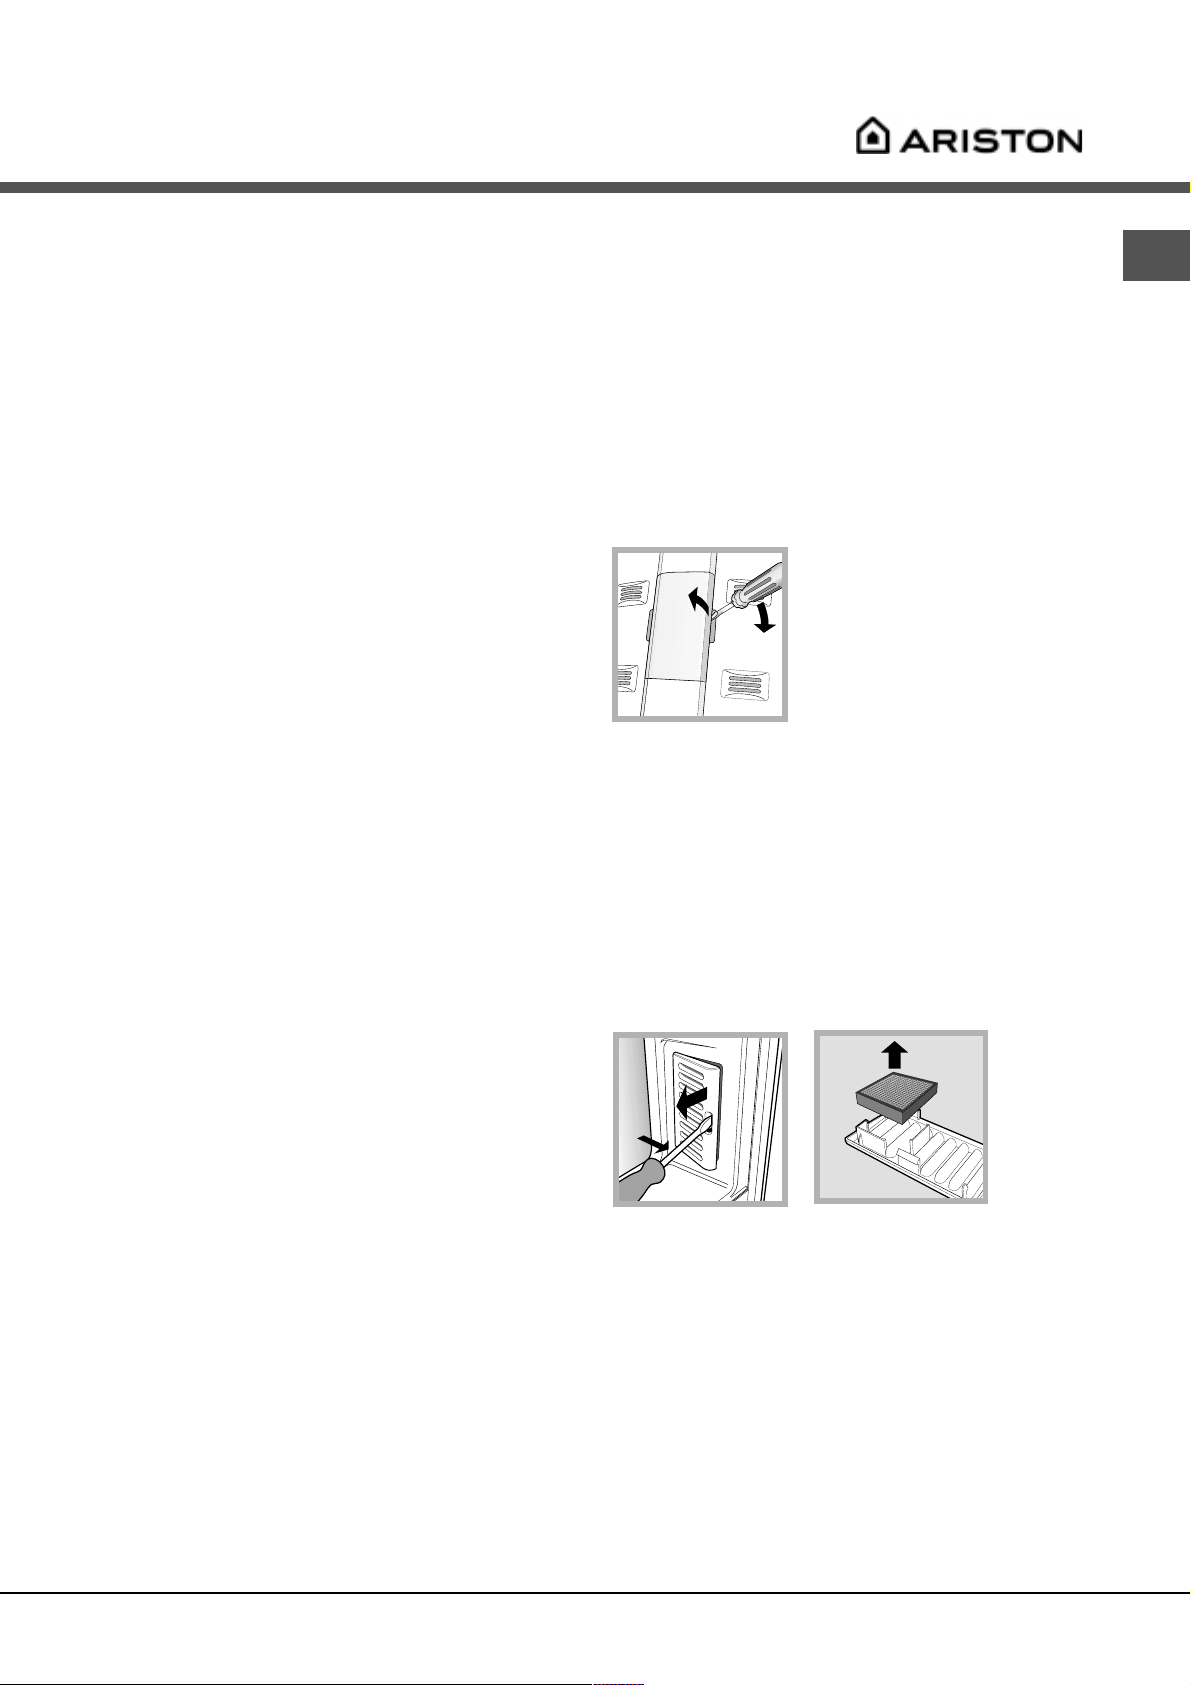
Koku önleyici filtrenin degistirilmesi
Filtre, ilk kullanýldýgýndan 6-8 ay içinde degistirilmesi
gerekir. Kullaným süresi saklanan gýdalara göre
degisebilir. Yedek filtre satýs noktalarýný ögrenmek için
Teknik Servise basvurmanýz gerekir (Teknik Servis
bölümüne bakýnýz). Filtreyi degistirmek için sekildeki
gibi yapmanýz gerekir.(A ve B sekline bakýnýz).
A
B
TRTR
TR
TRTR
11
Page 12
Önlemler ve öneriler
TR
! Cihaz, uluslararasý güvenlik normlarýna uygun olarak
tasarlanýp üretilmistir. Asagýdaki bilgiler, güvenligi
saglamak amacýyla verilmistir. Bu yüzden dikkatlice
okunmasý gerekir.
Bu cihaz aþaðýdaki Avrupa Birliði Talimatlarýna
uygundur:
- 19/02/73 tarihli EAT 73/23 (Düþük Voltaj
Yönergesi) ve sonraki deðiþiklikler;
- 03/05/89 tarihli 89/336/CEE (Elektromanyetik
uyum) ve sonraki deðiþiklikler.
- EAT/2002/96
Genel güvenlik uyarýlarý
Cihaz meskenlerde kullanýlmak üzere tasarlanmýs
olup profesyonel kullaným amaçlý degildir.
Cihaz sadece gýda saklamasý için, yetiskinler
tarafýndan ve bu kitapçýktaki talimatlar çerçevesinde
kullanýlmalýdýr.
Cihaz, üzeri kapalý bile olsa açýk alanlara monte
edilmez, zira yagmur ve fýrtýnaya maruz kalmasý son
derece tehlikelidir.
Ambalaj çocuk oyuncagý degildir.
Atýklarýn tasfiye edilmesi
Ambalaj malzemelerinin tasfiye edilmesi: yerel
yasalara uyunuz, bu þekilde ambalajlarýn geri
dönüþümü saðlanýr.
Eletrik ve eletronik cihazlarýn atýklarýný deðerlendirme
2002/96/CE sayýlý Avrupa Konseyi direktifinde; beyaz
eþyalarýn kentsel katý atýk genel yöntemi ile tasfiye
edilmemesi öngörülmüþtür. Kullanýlmayan cihazlarýn,
madde geri kazaným ve geri dönüþüm oranýný en
yüksek seviyeye yükseltmek, çevre ve insan
saðlýðýna olasý zararlarý engellemek için ayrý ayrý
toplanmasý gerekir. Tüm ürünlerin üzerinde; ayrý
toplama hükümlerini hatýrlamak amacýyla üstünde
çarpý iþareti olan sepet sembolü verilmiþtir.
Cihazlarýn tasfiye edilmesi konusunda daha geniþ
bilgi almak için cihaz sahiplerinin mevcut müþteri
hizmetine veya satýþ noktalarýna baþvurulmasý
gerekir.
Tasarruf ve çevre korumasý
Cihaza ayaklarýnýz çýplakken yada elleriniz veya
ayaklarýnýz ýslak yada nemliyken dokunmayýnýz.
Buzdolabýnýn sogutma yapan iç kýsýmlarýna
dokunmayýnýnz: yanma veya yaralanma tehlikesi
vardýr.
Fisi prizden çekerken kablosundan degil fisin
kendisinden tutarak çekiniz.
Temizlik ve bakým isleminden önce fis elektrik
sebekesinden çýkarýlmalýdýr.
Buzdolabýnýn tüm elektrik baglantýlarýný kesmek için
iki saniyeden fazla ON/OFF dügmesine basýlý tutmak
yeterli degildir.
Arýza halinde onarmak amacýyla iç mekanizmalarý
kurcalamayýnýz.
Bölmelerin ikisinin içinde buzu kazýmak veya eritmek
için baska aygýtlar veya gerekçeler degil, sadece
mevcut olan buz küregini kullanýnýnz.
Buz küplerini dondurucu bölmesinden çýkarýr
çýkarmaz agzýnýza sokmayýnýz ve yemeyiniz.
Buzdolabý dogrudan günes ýsýgýna maruz
kalmayacak, serin ve havadar uygun bir yere
yerlestiriniz. Ayrýca, ýsý kaynaklarýndan uzakta
olmalýdýr.
Gýdalarý almak ya da yerlestirmek için cihazýn
kapagýný mümkün oldugu kadar az açýk tutunuz.
Buzdolabýnýn kapagý her açýldýgýnda enerji tüketilir.
Cihazý fazla gýda ile doldurmayýnýz: gýdalarýn iyi
saklanmasý için soguk hava dolasýmýnýn saglanmasý
gerekir. Hava dolasýmýnýn engellenmesi durumunda
kompresör devamlý çalýsmak zorunda kalacaktýr.
Buzdolabýnýn içine sýcak gýda koymayýnýz: ýsý
derecesi yükselir, kompresör yogun çalýsmak
zorunda kalýr ve enerji büyük miktarda tüketilir.
Contalarýn temiz olmasýný ve verimli çalýsmasýný
saglayýnýz. Soguk çýkmamasý için sogutucu
kapagýnýn conta vasýtasýyla tamamen kapanmasý
gerekir (Bakým bölümüne bakýnýz).
Çocuklarýn cihazla oynamasýna izin vermeyiniz.
Kesinlikle çekmece üstüne oturmamalý ve kapýya
tutunup sarkmamaldýr.
12
Page 13
Ariza ve onarým
Buzolabýnýz bazen size sorun çýkarabilir yada kötü çalýsabilir. Teknik Servise basburmadan önce (Teknik Servis
bölümüne bakýnýz) asagýdakiler dikkate alýnarak çözülebilecek bir problem olup olmadýgýný kontrol ediniz.
Ariza:
Ekran kapalý.
Motor çalýsmaya baslamýyor.
Ekran hafifça yanýyor.
Alarm çalýyor ve sogutucu
bölmesinde ampul yanýp sönüyor.
Alarm çalýyor ve ekranda akan yazý
olarak bir mesaj görüntüleniyor.
Alarm çalýyor ve ekranda akan yazý
olarak bir mesaj görüntüleniyor.
Olasý sebep/Çözüm:
Fis prize takýlý degil veya kontaga girecek kadar takýlý degil veya evdeki
elektrik akýmý kesik.
Cihaz motor kurtarma aygýtýna sahiptir (Çalýstýrma ve kullanma
bölümüne bakýnýz).
Fisi prizden çekiniz ve tersine çevirip tekrar prize takýnýz.
Sogutucu kapagý iki dakikdan fazla açýk kalmýs.
Sesli sinyal kapýyý kapatarak veya RESET/ALARM dügmesine basarak
kapanýr. Veya dogru kapama prosedürü uygulanmamýs (Bakým
bölümüne bakýnýz).
Cihaz dondurucunun fazla ýsýnmýs oldugunu belirtir:
Dondurucu ýsý derecesi, gýdalarýn tekrar dondurulmasý için 0°C civarýnda
korunacaktýr. Böylece gýda 24 saat içinde kullanýlabilir ve pistikten sonra
tekrar dondurulabilir.
Cihaz dondurucunun tehlikeli olacak sekilde fazlasýyla ýsýnmýs oldugunu
belirtir: gýdalar tüketilmemelidir. Dondurucu -18°C olarak ayarlanacaktýr.
Sesli sinyali kapatmak için RESET ALARM dügmesine basýnýz.
Ekrandaki yazýyý silmek için ve normal çalýsmasýný saglamak için bir kere
daha basýnýnz.
TRTR
TR
TRTR
Alarm ikonu yanýp sönüyor, EverFresh
ikonu sönüyor ve ekranda bir mesaj
görüntüleniyor.
Sogutucu ve dondurucu az sogutma
yapýyor.
Sogutucu bölmesinde gýdalar
donuyor.
Motor devamlý çalýsýyor.
Cihaz çok ses yapýyor.
Fonksiyonlarýn erken kapatýlmasý
Vakum pompasýnýn fazlasýyla çalýstýgý için EverFresh emniyet aygýtý
çalýsmýs. Normal çalýsmasýnýn yeniden saglamak için EverFresh
sistemini kontrol ettikten sonra Reset Alarm dügmesine iki kere basýnýnz
(Ekran bölümüne bakýnýz).
EverFres rafýnýn arkasýndaki boru sogutucu hücresinin dibine iyice takýlý
olup olmadýgýný kontrol ediniz.
Kapaklar tamamen kapanmýyor veya contalar bozuk.
Kapaklar sýk sýk açýlýyor.
Çok sýcak bir ýsý derecesi ayarlanmýs (Çalýstýrma ve kullanma bölümüne
bakýnýz).
Sogutucu veya dondurucu fazla doldurulmus.
Çok soguk bir ýsý derecesi ayarlanmýs (Çalýstýrma ve kullanma bölümüne
bakýnýz).
SUPER COOL ve/ya SUPER FREEZE ve/ya ICE PARTY fonksiyonlarý açýk.
Kapak tam kapalý degil veya devamlý açýlýp kapatýlýyor.
Dýs ortam sýcaklýgý çok yüksek.
Cihaz tamamen düz bir zemine montaj edilmemis (Montaj bölümüne bakýnýz).
Cihaz ses ve sarsýntý yapan mobilya veya esay arasýna yerlestirilmis.
Içindeki gaz kompresör çalýsmadýgý zamanda hafif bir ses yapmýyor: bir
ariza degildir, normaldýr.
Sebekenin elektrik bozuklugu veya elektrik sebekesinin kýsa kesikligi
13
Page 14
Teknik Servis
195060821.00
11/2006
TR
Teknik servisi çagýrmadan önce:
<P> Servise basvurmadan çözülebilecek bir ariza olup olmadýgýný kontrol ediniz (Ariza ve onarým
bölümüne bakýnýz.
Sonucun olmusuz olmasý durumunda en yakýn Teknik Servise basvurunuz.
model
seri numarasý
Asagýdaki bilgileri bildiriniz:
ariza tipini
cihazýn modelini (Mod.)
seri numarasýný (S/N)
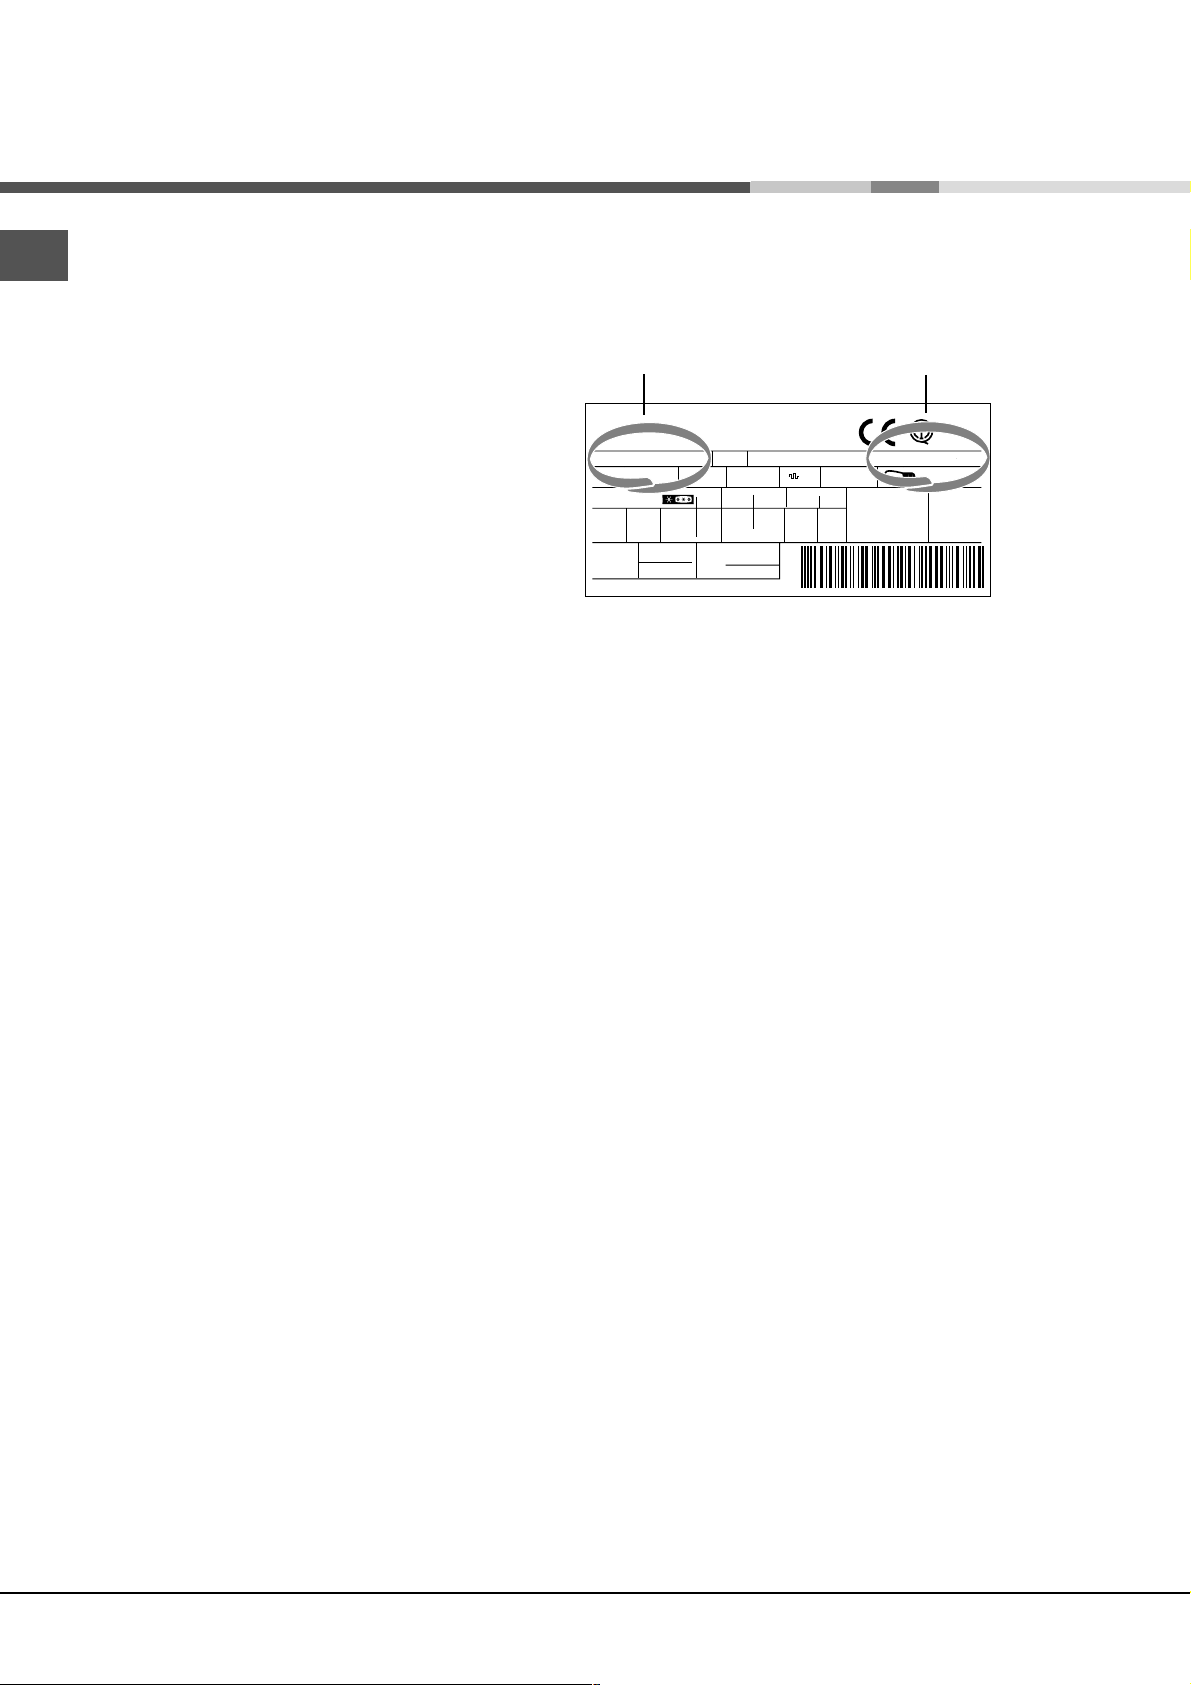
Istenilecek bilgiler sogutucu içinde
asagýda sagda bulunan teknik veriler
etiketi üzerinde yazýlýdýrlar.
Gross
Bruto
Brut
TI
75
Test
P.S-I.
RG 2330
Mod.
220 - 240 V- 50 Hz 150 W
340
Total
Gross
Bruto
Brut
Compr.
R 134 a
Syst.
kg 0,090
Kompr.
Made in Italy 13918
93139180000 S/N 704211801
Net
Util
Utile
Pressure
HIGH-235
LOW 140
Cod.
Gross
Bruto
Brut
Fuse
W
A
Freez. Capac
Poder de Cong
kg/24 h
4,0
Max 15 w
Class
Clase
Classe
N
Kesinlikle sadece yetkili teknisyenlere basvurunuz ve orijinal yedek parçalarý kullanýnýz.
14
Page 15

Operating Instructions
REFRIGERATOR/FREEZER COMBINATION
TR
Türkçe
GB F
MBZE 45 NF BAR T
Contents
GB
Installation, 16
Positioning and connection
Bar compartment
Français, 29English,15
Description of the appliance, 17-18
Control panel
Overall view
Accessories, 19
Display, 20-21
Display description
Using the display
Start-up and use, 22-24
Starting the appliance
Chiller system
Using the refrigerator to its full potential
Using the freezer to its full potential
Ever Fresh
Maintenance and care, 25
Switching the appliance off
Cleaning the appliance
Ever Fresh
Avoiding mould and unpleasant odours
Replacing the light bulb
Changing the odour filter
Precautions and tips, 26
General safety
Disposal
Respecting and conserving the environment
Troubleshooting, 27
Assistance, 28
15
Page 16

Installation
GB
! Before operating your new appliance please read these
instructions carefully. They contain important information
for safe use, installation and care of the appliance.
! Please keep these operating instructions for future
reference. Pass them on to possible new owners of the
appliance.
Positioning and connection
Positioning
1. Place the appliance in a well-ventilated, dry room.
2. Do not obstruct the rear fan grills. The compressor and
condenser give off heat and require good ventilation in
order to operate correctly and save energy.
3. Leave a space of at least 10 cm between the top part
of the appliance and any furniture above it, and at least
5 cm between the sides and any furniture/side walls.
4. Ensure the appliance is kept well away from any
sources of heat (direct sunlight, electric stove, etc.).
5. In order to maintain the correct distance between the
appliance and the wall behind it, fit the spacers
supplied in the installation kit, following the instructions
provided.
Levelling
1. Install the appliance on a level and sturdy floor.
2. If the floor is not perfectly horizontal, adjust the
refrigerator by tightening or loosening the front feet.
! Once the appliance has been installed, the power
supply cable and the electrical socket must be easily
accessible.
! The cable must not be bent or compressed.
! The cable must be checked regularly and replaced by
authorised technicians only (see Assistance).
! The manufacturer declines any liability should
these safety measures not be observed.
Bar compartment
The stiffness of the door
opening/closing movement for
the bar compartment may be
adjusted. When you are in front
of the appliance, turn the two
lateral rods to the left if you wish
to stiffen the movement, or to
the right if you wish to loosen the
movement.
! The two brackets must be adjusted to the same
stiffness level. Turn each rod the same number of times,
in the same direction.
Electrical connections
After transportation of the appliance, carefully place it in
an upright position and wait at least 3 hours before
connecting it to the electricity mains. Before inserting the
plug into the electrical socket ensure the following:
The appliance is earthed and the plug is compliant
with the law.
The socket can withstand the maximum power of the
appliance (this is indicated on the data plate in the
bottom left section of the refrigerator compartment),
for example 150 W).
The voltage is in the range of values indicated on the
data plate located on the bottom left section (e.g. 220240V).
The socket is compatible with the plug of the
appliance.
If the socket is incompatible with the plug, ask an
authorised technician to replace it (see Assistance). Do
not use extension cords or multiple sockets.
16
Page 17

Description of the appliance
Control panel
ON/OFF button
EVER
FRESH
button
RESET ALARM
button
Display MODE
ECOECO
ADJUST/SELECT +
button
ADJUST/SELECT -
button
button
GB
ON/OFF button switches the whole appliance on and
off (refrigerator compartment and freezer
compartment). Press and hold for at least 2 seconds.
See Start-up and use and Maintenance and care.
EVER FRESH button activates and deactivates the
EVER FRESH function.
RESET ALARM button switches off the sound alarm
(press once) and deletes the alarm messages from the
scrolling text on the display (press a second time). See
Troubleshooting.
MODE button selects the various display settings and
functions. See Display and Start-up and use.
ADJUST/SELECT + button activates the functions
and modifies the temperature, time, date and
language settings. See Display and Start-up and use.
ADJUST/SELECT - button deactivates the functions
and modifies the temperature, time, date and
language settings. See Display and Start-up and use.
Display programmes the appliance and controls its
operation. See Display.
17
Page 18

Description of the appliance
GB
Overall view
LAMP
(see Maintenance)
SHELVES
EVER FRESH
FRUIT and
VEGETABLE
compartment
shelf
Removable shelf
with lid and
EGG TRAY
Storage SHELF
CAN RACK
shelves
BAR compartment
BOTTLE shelf
ICE TRAYS
FREEZER and
STORAGE
compartment
ICE TRAYS
STORAGE
compartments
Levelling FEET
WATER LEVEL
MAX
WATER LEVEL
MAX
Number and/or position may vary.
18
Page 19

Accessories
SHELVES: the shelves are
1
removable and their height may
be adjusted thanks to special
rails (see diagram), allowing easy
2
storage of large containers and
bulky food. The height may be
adjusted without removing the
shelf completely.
EVER FRESH: shelf dedicated
to storing food in vacuumpacked containers. Food keeps
for longer when stored in the
containers provided.
be completely black when large quantities of food are
placed inside or when the door is opened repeatedly. If
this is the case, set the temperature again (see Using
the display).
! Any further adjustments to the temperature should be
carried out at 10 hour intervals, as this is the amount of time
needed for the temperature inside the refrigerator to stabilise.
ICE TRAYS
The fact that they are situated on the top part of the
freezer drawers ensures greater cleanliness: the ice no
longer comes into contact with the food placed inside the
freezer compartment; furthermore, the dripping of the
GB
water during filling is avoided (a lid to cover up the hole
after filling with water is also provided).
CAN RACK shelf: stores cans
horizontally (see diagram).
Yoghurt, butter or general
containers may also be stored
here.
1. Pull out the tray by pushing it up.
Check that the tray is ompletely empty and fill it with
water through the opening provided.
2. Take care not to exceed the level indicated (MAX
WATER LEVEL). Excess water prevents the ice cubes
from dispensing (if this happens, wait for the ice to
melt and empty the tray).
3. Turn the tray 90°: due to the connected compartments
ODOUR FILTER
: some
*
models are fitted with a new
active carbon odour filter, which
ensures better air quality inside
the refrigerator.
The filter is located on the bottom
right-hand side, inside the
each mould fills with water (see diagram).
4. Close the opening with the lid provided and put the
tray back.
5. When the ice has formed (minimum time approximately
8 hours) knock the tray against a hard surface and wet
the outside so that the ice cubes come loose and take
them out through the opening.
ventilation opening.
BAR COMPARTMENT:
Drinks stay cold and are easy to reach. The compartment
is designed to enable you to obtain bottles without having
to open the door of the refrigerator. It also provides a
handy surface when the door is open (maximum load 10
kg). The bottle shelf cover ensures the temperature inside
the refrigerator does not rise too quickly.
TEMPERATURE
Indicator light:
*
identifies the coldest area in the
vert
noir
consulter la notice
refrigerator.
1. Check that OK appears clearly
on the indicator light (see diagram).
2. If the word OK does not appear it means that the
temperature is too high: set the temperature of the
refrigerator compartment to a lower figure (see Using
the display) and wait approximately 10 hours for the air
inside the compartment to reach this temperature.
3. Check the indicator light again: if necessary, readjust it
following the above process. The indicator may also
Available only in certain models.
*
WATER LEVEL
MAX
WATER LEVEL
WATER LEVEL
MAX
MAX
ICE PARTY: ensures bottles of
sparkling wine or champagne
reach the right temperature.
Place the bottle in the bucket
provided inside the FREEZER
and STORAGE compartment.
The bucket may be used to
serve the bottle and keeps it
cool outside the appliance.
19
Page 20

ECO
Display
GB
Display description
REFRIGERATOR OPERATING
FREEZER OPERATING
indicator light
indicator light
ALARM indicator light
EVER FRESH
function
ECO
ECO
SUPER FREEZE function
Scrolling text
TIME
indicator
light
ICE PARTY function
SUPER COOL function
REFRIGERATOR OPERATING indicator light:
displays the set temperature (static digit) or the
temperature that is being set (flashing digit) for the
refrigerator compartment. OFF indicates that the
compartment is off.
ALARM indicator light: when this switches on a
critical situation is indicated (door open, high
temperature). See Troubleshooting.
ECO function: displays the function status.
Automatically sets the optimal temperature for food
storage while minimizing energy consumption.
TIME indicator light: displays the time. This is also
used to set the date and time.
Scrolling text: displays information on the status of
the appliance and on how to use the display.
It is also used to set the language.
FREEZER OPERATING indicator light: displays the
set temperature (static digit) or the temperature that is
being set (flashing digit) for the freezer compartment.
OFF indicates that the compartment is off.
ECO function
SUPER COOL function: displays the function status.
This is the rapid cooling function of the refrigerator
compartment. It deactivates automatically.
See Start-up and use.
SUPER FREEZE function: displays the function
status. This is the rapid cooling function of the freezer
compartment. It deactivates automatically.
See Start-up and use.
EVER FRESH function: displays the function status.
The central position of the special shelf enables air to
be sucked out of the containers provided.
ICE PARTY function: displays the function status. It
reduces the temperature of the freezer for the period
of time required to cool a bottle.
A buzzer sounds when the correct temperature has
been reached. See Accessories.
! The function symbols light up in various ways to
indicate their status (deactivated, selected or activated).
20
Page 21

Using the display
Setting the temperature
When the appliance is switched on, the standard storage
temperatures are automatically set:
+5°C for the refrigerator compartment
-18°C for the freezer compartment.
The temperatures may be set in the following ranges:
between +2°C and +8°C for the refrigerator
compartment
between -18°C and -26°C for the freezer compartment
To set the temperature:
1. Press the MODE button until the value flashes on the
refrigerator or freezer compartment display.
2. To increase the temperature, press the
ADJUST/SELECT+ button.
To decrease the temperature, press the
ADJUST/SELECT- button.
Each time the button is pressed, the value increases or
decreases by 1°C.
3. Confirm the choice by pressing the MODE button
within ten seconds: the value will stop flashing: If the
choice is not confirmed, the previous set temperature will
appear on the display.
! The ECO function reduces the possible adjustments:
from +4°C to +6°C for the refrigerator and from -18°C to
-20°C for the freezer.
Function status
function activated
(green symbol with blue inside lights up)
function selected
(green symbol with red border lights up)
function deactivated
(green symbol only lights up)
Activating and deactivating the SUPER COOL,
ECO, SUPER FREEZE, ICE PARTY functions.
1. Press the MODE button until the desired function is
selected.
2. To activate it, press the ADJUST/SELECT + button.
To deactivate it, press the ADJUST/SELECT - button.
3. Confirm the choice by pressing the MODE button
within ten seconds. If the choice is not confirmed, the
previously set function will appear on the display.
Once the operation has finished, the red border switches
off.
If the function has been activated: the green symbol with
blue inside lights up. If the function has been
deactivated: only the green symbol lights up.
Setting the date and time
The settings are in series and it is not possible to adjust
the date if the time has not been set before:
1. Press the MODE button repeatedly until SET TIME [+/-]
appears on the scrolling text.
2. To scroll forward one hour press the ADJUST/
SELECT+ button. To scroll back one hour press the
ADJUST/SELECT- button.
3. Confirm the choice by pressing the MODE button
within ten seconds. If the choice is not confirmed, the
previously set time will appear on the display.
Once the hours have been set, the minutes, days,
months and years can be set by following steps 1-3.
Setting the language
1. Press the MODE button repeatedly until the language
setting screen appears on the scrolling text display.
2. To scroll forward, press the ADJUST/SELECT +
button.
To scroll back, press the ADJUST/SELECT - button.
3. Confirm the choice by pressing the MODE button
within ten seconds. If the choice is not confirmed, the
previously set language will appear on the display.
! The first time the appliance is switched on, the language
setting request screen appears automatically on the
display: follow the above procedure.
Switching off the audio and visual alarms
Press the RESET ALARM button: by pressing it once, the
audio alarms are switched off; by pressing it a second
time, the alarm messages are deleted from the scrolling
text on the display.
! The open door alarm stops automatically when the door
is closed. (See Troubleshooting).
! If DEMO MODE appears on the display, the appliance is
in exhibition mode, i.e. it does not cool despite the fact
that the display and the internal lamp are on. To exit this
mode, press the MODE, ADJUST/SELECT+ and
ADJUST/SELECT- buttons and hold for at least three
seconds.
GB
21
Page 22

Start-up and use
GB
Starting the appliance
! Before starting the appliance, follow the
installation instructions (see Installation).
! Before connecting the appliance, clean the
compartments and accessories well with lukewarm water
and bicarbonate of soda.
! The appliance comes with a motor protection control
system which means that the compressor starts up
approximately 8 minutes after being switched on. The
compressor also starts each time the power supply is cut
off, whether voluntarily or involuntarily (power cut/
blackout).
Insert the plug into the electrical socket and, if OFF
appears on both indicator displays (refrigerator and
freezer), switch the appliance on by holding the ON/OFF
button down for at least two seconds:
- the refrigerator will be set at a temperature of +5°C
- the freezer will be set at a temperature of -18°C.
To cool the two compartments more rapidly, activate the
SUPER COOL and SUPER FREEZE functions (see
Display).
Chiller system
Using the refrigerator to its full
potential
Adjust the temperature using the display.
Activate the SUPER COOL function to lower the
temperature quickly, for example, when you place a
large number of new food items inside a fridge and the
internal temperature rises slightly. This function quickly
cools the groceries by temporarily reducing the
temperature until it reaches the ideal level.
Place only cold or lukewarm foods in the
compartment, never hot foods (see Precautions and
tips).
Remember that cooked foods do not last longer than
raw foods.
Do not store liquids in open containers: they will
increase the level of humidity in the refrigerator and
cause condensation to form.
Food hygiene
After buying food, throw away any external paper or
cardboard packaging that could introduce dirt or
bacteria into the refrigerator.
The appliance is fitted with the following chiller system:
No Frost
This system can be recognised
by the aeration cells located on
the back walls of each
compartment.
The No Frost system circulates
cold air continuously to collect
humidity and prevent ice and
frost formation. The system
maintains an optimal humidity level in the compartment,
preserving the original quality of the food, preventing the
food from sticking together and making defrosting a thing
of the past.
! Do not block the aeration cells by placing food or
containers in direct contact with the refrigerating back
panel.
! Close bottles and wrap food tightly.
Protect foods (especially easily perishable substances
and food that gives off a strong odour) by ensuring
they do not come into contact with each other. Not
only does this stop germs and bacteria from
spreading, but it also prevents certain odours from
lingering in the refrigerator.
Position foods so that air may circulate freely between
them.
Keep the inside of the refrigerator clean but do not use
oxidising or abrasive agents.
Throw away any food that has exceeded its use-by
date.
To ensure they keep well, foods that spoil easily
(cheese, raw fish, meat etc...) should be placed in the
coldest part of the refrigerator, above the vegetable
compartment.
22
Page 23

Using the freezer to its full potential
Adjust the temperature using the display.
When you wish to freeze a lot of food at once, activate
the SUPER FREEZE function. The function is
automatically disabled after 24 hours or once the
optimal temperature has been reached.
Do not refreeze food that has been defrosted or that is
defrosting; this food must be eaten within 24 hours or
may be frozen again after it has been cooked.
Fresh food that needs to be frozen must not come into
contact with food that has already been defrosted.
Fresh food must be packed in the top FREEZER
compartment where the temperature drops below 18°C and guarantees rapid freezing.
Do not place glass bottles containing liquids or bottles
that are corked or hermetically sealed in the freezer as
they may break.
The maximum quantity of food that may be frozen each
day is indicated on the plate containing the technical
properties located on the bottom left side of the
refrigerator compartment (for example: Kg/24h 4).
! Do not open the door during the freezing process.
! Do not open the freezer door if there is a power cut or
malfunction. This will help maintain the temperature inside
the freezer, ensuring that foods are conserved for at least
9 -14 hours.
Ever Fresh
The absence of air inside the containers ensures that
food is preserved for longer periods of time while
maintaining its original appearance, taste and nutritional
characteristics.
In
Food
normal
conditions
General cooked dish 2 days 10 days
Ready-made rice or pasta dish 2 days 10 days
Fresh fish 2-3 days 4-5 days
Fresh raw meat 3 days 9 days
Hard cheese 15 days 60 days
Raw vegetables 5 days 21 days
Fresh fruit 10 days 21 days
Dry biscuits 180 days 365 days
Pastries with cream/custard 2 days 10 days
Other desserts/pastries 5 days 20 days
* The above table is indicative and refers to food storage
in the refrigerator at temperatures ranging between 3°C
and 5°C. The length of time food lasts for will, however,
depend on the initial freshness of the products,
preparation and storage methods, and correct use of the
Ever Fresh function.
! The foods tendency to spoil and use-by date must
With
EVER
FRESH*
always be borne in mind when using the Ever Fresh food
storage system. This method of storing food does not
change any of the characteristics of the food.
! Use only the containers that come with the product to
store food in the Ever Fresh system. Do not use any other
type of container.
Ever Fresh system
The Ever Fresh system is activated and deactivated by
means of a button on the refrigerator shelf, an external
button on the display and a knob on the cover of each
container.
! There is a pump in the centre of the Ever Fresh shelf
which sucks the air out of the containers.
Activating and deactivating Ever Fresh
1. Fill the container. Make sure that the food inside leaves
room for the container to be closed properly.
2. Put the lid on the container.
U
U
C
M
A
V
O
T
O
U
A
V
3. Close the handles on either
side of the container and turn the
knob on the lid of the container
all the way to the CLOSE
O
T
N
R
E
E
P
P
A
O
C
H
C
I
L
U
position. Then turn the knob
O
S
S
O
E
anticlockwise to the VACUUM
position
(see figure A).
B
4. Press the button on the shelf
and place the container in the
1
central position (see figure B).
5. Lock the container into
2
position by pulling the button on
the shelf (see figure C).
6. Activate the Ever Fresh
C
function by pressing the relevant
button on the external display
(the Ever Fresh icon will light up).
A slight noise can be heard while
the Ever Fresh system is in
operation.
7. Wait for the signal that the operation has finished (the
Ever Fresh icon will switch off).
GB
23
Page 24

8. Unlock the container from its position by pressing the
GB
button on the shelf.
D
E
! The lid of the container is provided with a circular valve.
When the valve is low (figure D) there is no air inside the
container. When the valve is high (figure E) air is present
inside the container.
! If, after you have created a vacuum (instructions
1-9), the valve moves upward (see figure E) within three
days, check the lid has been put on the container
properly and/or that the container is intact. Check the
storage status of the food before repeating the vacuum
storage operation.
! The Ever Fresh function is equipped with a safety device
that switches off the pump in case of malfunction (if the
container is missing or incorrectly positioned, for
example). If the safety device is activated, the RESET
ALARM button must be pressed twice to restore normal
operation.
9. Take it out of the refrigerator
and turn the knob clockwise to
the CLOSE position to avoid
accidental opening (see figure A).
The absence of air inside the
container is indicated by the valve
at the bottom (see figure D).
10. To open the container, turn
the knob anticlockwise to the
OPEN position (see figure A): this
will allow air to enter the
container and make it easy to
open. The valve will move
upwards as air enters the
container (see figure E).
Using Ever Fresh to its full potential
The following information is a guide on how to get the
best from the Ever Fresh system and the food it stores.
Ever Fresh containers
The maximum fill level marked on the container must be
respected when storing liquids of any kind. Vacuuming
actual liquid from the container may damage the Ever
Fresh pump.
Repeated opening of the vacuumed containers may
disturb the storage conditions of the food inside.
Before using the system, make sure there is no visible
damage on any part of the container.
The container valve has a built-in security system. If,
after you have created a vacuum, the valve moves
upward within three days, check the lid has been put on
the container properly and/or that the container is intact.
Check the storage status of the food before repeating the
vacuum storage operation. See Activating and
deactivating Ever Fresh.
The containers were designed to come into direct
contact with food.
Do not use the containers for any type of cooking (in
the microwave or oven, on an electric plate, over a flame,
etc.).
Do not put the containers in the freezer.
Do not clean the lids in a dishwasher.
Vacuum storage
Pre-packed foods stored using the vacuum system
must still be consumed before the use-by date.
Repeatedly storing these vacuum-packed foods does
not change their natural tendency to spoil.
Do not store defrosted foods using the vacuum system
unless they have been cooked already.
Stored food should be prepared while fresh (chopped,
sliced, peeled, cooked) and should be in perfect
condition.
Perishable foods stored using the vacuum system must
still be stored inside the refrigerator.
Cooked foods must be left to cool before being stored
using the vacuum system.
24
Page 25

Maintenance and care
Switching the appliance off
During cleaning and maintenance it is necessary to
disconnect the appliance from the electricity supply:
1. Hold the ON/OFF button down for more than two
seconds until OFF appears on both indicator displays
(refrigerator and freezer).
2. Pull the plug out of the socket.
! If this procedure is not followed, the alarm may sound.
This alarm does not indicate a malfunction. To restore
normal operation, hold the ON/OFF button down for
more than two seconds. To disconnect the appliance,
follow points 1 and 2 above.
Cleaning the appliance
The external and internal parts and the rubber seals
may be cleaned using a sponge that has been soaked
in lukewarm water and bicarbonate of soda or neutral
soap. Do not use solvents, abrasive products, bleach
or ammonia.
The removable accessories may be soaked in warm
soapy water or dishwashing liquid. Rinse and dry them
carefully.
The back of the appliance may collect dust. This can
be removed by carefully using the hose of a vacuum
cleaner set on medium power. The appliance must be
switched off and the plug disconnected from the
electricity mains before it is cleaned.
Ever Fresh
Avoiding mould and unpleasant odours
GB
The appliance is manufactured with hygienic, odour
free materials. Food should be wrapped well and
containers closed properly in order to maintain this
hygiene. This will also prevent the formation of stains.
If you wish to switch the appliance off for an extended
period of time, clean the inside and leave the doors
open.
Replacing the light bulb
To replace the light bulb in the
refrigerator compartment,
disconnect the plug from the
electricity mains.
Access the light bulb as shown
(see diagram) and replace it with
a similar light bulb, the power of
which should not exceed 10 W.
Changing the odour filter
The filter should be replaced approximately 6-8 months
after it has been activated. This period may vary
depending on the type of food stored inside the
refrigerator. For information on where a replacement filter
may be purchased, contact Assistance (see Assistance).
To replace the filter, follow the instructions (see diagrams
A and B).
Use a clean dry cloth to clean the opening of the
vacuum system in the centre of the Ever Fresh shelf.
Do not use water or solvents.
The opening in the centre of the Ever Fresh shelf should
not come into contact with water or any other liquids.
Wash and dry the containers before using them.
Do not clean the lids in a dishwasher.
Before closing the containers make sure that the
edges are clean. Traces of dirt may affect the sealing
process and consequently the length of time food may
be stored.
If the knob on the cover needs to be cleaned, turn it
anticlockwise until it comes off and wash it using water
and neutral detergent. After drying it thoroughly, screw
it back on.
If you wish to take the Ever Fresh shelf out and clean
it, you must first disconnect the tube at the back of the
shelf. Make sure it is reattached properly in order to
avoid blockages and system malfunctions. The Ever
Fresh shelf should not come into contact with water or
other liquids as these may damage the system.
A
B
25
Page 26

Precautions and tips
GB
! The appliance was designed and manufactured in
compliance with international safety standards. The
following warnings are provided for safety reasons and
must be read carefully.
This appliance complies with the following
Community Directives:
- 73/23/EEC of 19/02/73 (Low Voltage) and
subsequent amendments;
-89/336/EEC of 03.05.89 (Electromagnetic
Compatibility) and subsequent amendments;
- 2002/96/CE..
General safety
The appliance was designed for domestic use inside
the home and is not intended for commercial or
industrial use.
The appliance must be used by adults only to store
and freeze food products according to the instructions
in this manual.
The appliance must not be installed outdoors, even in
covered areas. It is extremely dangerous to leave the
appliance exposed to rain and storms.
Do not touch the appliance when barefoot or with wet
or damp hands and feet.
Do not touch the internal cooling elements: this could
cause skin abrasions or frost/freezer burns.
When unplugging the appliance always pull the plug
from the mains socket, do not pull on the cable.
Always switch the appliance off and disconnect it from
the electrical supply before cleaning it or carrying out
maintenance work. It is NOT sufficient to hold the ON/
OFF button down for more than two seconds to
eliminate all electrical contact.
In case of malfunction, under no circumstances
should you attempt to repair the appliance yourself.
Repairs carried out by inexperienced persons may
cause injury or further malfunctioning of the appliance.
Disposal
Observe local environmental standards when
disposing packaging material for recycling purposes.
The European Directive 2002/96/EC on Waste
Electrical and Electronic Equipment (WEEE), requires
that old household electrical appliances must not be
disposed of in the normal unsorted municipal waste
stream. Old appliances must be collected separately in
order to optimise the recovery and recycling of the
materials they contain and reduce the impact on
human health and the environment. The crossed out
wheeled bin symbol on the product reminds you of
your obligation, that when you dispose of the
appliance it must be separately collected.
Consumers should contact their local authority or
retailer for information concerning the correct disposal
of their old appliance.
Respecting and conserving the
environment
Install the appliance in a cool, well-ventilated room.
Ensure that it is protected from direct sunlight and do
not place it near sources of heat.
Try to avoid keeping the door open for long periods.
A significant amount of energy is used every time the
door is opened.
Do not over-fill the appliance: cold air must circulate
freely for food to be preserved properly. If air circulation
is impeded, the compressor will work continuously.
Do not place hot food in the refrigerator. The internal
temperature will increase, forcing the compressor to
work harder and consume more energy.
Regularly check the door seals and wipe clean to
ensure they are free of debris and to prevent cold air
from escaping (see Maintenance).
Do not use utensils other than the scraper provided, or
electrical equipment which is not of the type specified by
the manufacturer, inside the frozen food storage
compartments.
Do not put ice cubes taken directly from the freezer
into your mouth.
Do not allow children to tamper with the controls or
play with the appliance. Under no circumstances
should they be allowed to sit on the bins or to hang
from the door.
Keep packaging material out of reach of children.
26
Page 27

Troubleshooting
If the appliance does not work, before calling for Assistance (see Assistance), check for a solution from the following list.
Malfunctions:
The display is off.
The motor does not start.
The display is on but it is dim.
The alarm sounds and the lamp in
the refrigerator compartment
flashes.
The alarm sounds and a message
appears on the scrolling text of the
display.
The alarm sounds and a message
appears on the scrolling text of the
display.
Possible causes / Solutions:
The plug has not been inserted into the electrical socket, or not far enough
to make contact, or there is no power in the house.
The appliance is equipped with a motor protection control system (See
Start-up and use).
Pull the plug out and check it before putting it back in the socket.
The refrigerator door has been open for more than two minutes.
The buzzer stops when the door is closed or when the RESET ALARM
button is pressed. It could also be that the correct switching-off procedure
was not followed (see Maintenance).
The temperature of the freezer is too high.
The freezer will maintain a temperature of around 0°C so that the food will
not refreeze, allowing you to eat it within 24 hours or to refreeze it after it
has been cooked.
The temperature of the freezer is dangerously high: the food inside must
not be eaten. The freezer will return to a temperature of -18°C.
To switch off the buzzer, press the RESET ALARM button. Press again to
delete the message on the display and restore normal operation.
GB
The alarm icon flashes, the Ever
Fresh icon switches off and a
message appears on the display.
The refrigerator and the freezer do
not cool well.
The food inside the refrigerator is
beginning to freeze.
The motor runs continuously.
The appliance makes a lot of noise.
The Ever Fresh safety lock has intervened during prolonged use of the
vacuum pump. To restore normal operation, check the ever Fresh system
and press the Reset Alarm button twice (see Display).
Make sure that the tube at the back of the Ever Fresh shelf is connected to
the base of the refrigerator unit correctly.
The doors do not close properly or the seals are damaged.
The doors have been opened too frequently.
The set temperature is too high (see Start-up and use).
The refrigerator or freezer has been over-filled.
The set temperature is too low (see Start-up and use).
The SUPER COOL and/or SUPER FREEZE and/or ICE PARTY functions
have been activated.
The door is not closed properly or has been open continuously.
The ambient temperature outside the appliance is very high.
The appliance has not been installed on a level surface (see Installation).
The appliance has been installed between cabinets that vibrate and make
noise.
The internal refrigerant gas makes a slight noise even when the
compressor is off. This is not a defect, it is normal.
The functions end earlier than they
should.
There is electrical network disturbance or the power supply has been
interrupted briefly.
27
Page 28

Assistance
195060821.00
11/2006
GB
Before calling for Assistance:
Check if the malfunction can be solved on your own (see Troubleshooting).
If after all the checks, the appliance still does not operate or the problem persists, call the nearest Service
Centre
model
serial number
Communicating:
type of malfunction
appliance model (Mod.)
serial number (S/N)
This information can be found on the data plate
located on the bottom left side of the refrigerator
compartment.
Gross
Bruto
Brut
TI
75
Test
P.S-I.
RG 2330
Mod.
220 - 240 V- 50 Hz 150 W
340
Total
Gross
Bruto
Brut
Compr.
R 134 a
Syst.
kg 0,090
Kompr.
Made in Italy 13918
93139180000 S/N 704211801
Net
Util
Utile
Pressure
HIGH-235
LOW 140
Cod.
Gross
Bruto
Brut
Fuse
W
A
Freez. Capac
Poder de Cong
4,0
kg/24 h
Max 15 w
Class
Clase
Classe
N
Never call on unauthorized technicians and always refuse spare parts which are not originals.
28
Page 29

Mode demploi
COMBINE REFRIGERATEUR/CONGELATEUR
TR
Türkçe
GB F
MBZE 45 NF BAR T
Sommaire
FR
Installation, 30
Mise en place et raccordement
Bar intégré
Français, 29English,15
Description de lappareil, 31-32
Tableau de bord
Vue densemble
Accessoires, 33
Afficheur, 34-35
Description de lafficheur
Utilisation de lafficheur
Mise en marche et utilisation, 36-38
Mise en service de lappareil
Système de refroidissement
Pour profiter à plein de votre réfrigérateur
Pour profiter à plein de votre congélateur
Ever Fresh
Entretien et soin, 39
Mise hors tension
Nettoyage de lappareil
Ever Fresh
Contre la formation de moisissures et de mauvaises
odeurs
Remplacement de lampoule déclairage
Remplacement du filtre anti-odeurs
Précautions et conseils, 40
Sécurité générale
Mise au rebut
Economies et respect de lenvironnement
Anomalies et remèdes, 41
Assistance, 42
29
Page 30

Installation
FR
! Conservez ce mode demploi pour pouvoir le consulter
à tout moment. En cas de vente,
de cession ou de déménagement, veillez à ce quil suive
lappareil pour informer le nouveau propriétaire
sur son fonctionnement et lui fournir les conseils
correspondants.
! Lisez attentivement les instructions : elles contiennent
des conseils importants sur linstallation, lutilisation et la
sécurité de votre appareil.
Mise en place et raccordement
Mise en place
1. Placez lappareil dans une pièce bien aérée et non
humide.
2. Ne bouchez pas les grilles daération arrière : le
compresseur et le condensateur produisent de la chaleur
et exigent une bonne aération pour bien fonctionner et
réduire la consommation délectricité.
3. Prévoir au moins 10 cm entre le haut de lappareil et
les meubles installés au-dessus et au moins 5 cm entre
les côtés et les meubles/parois latérales.
4. Installez lappareil loin de sources de chaleur (rayons
directs du soleil, cuisinière électrique).
5. Pour maintenir une distance optimale entre le produit
et la paroi arrière, montez les cales despacement
comprises dans le kit dinstallation et suivez les
instructions de la notice spécialement prévue.
! Contrôlez le câble périodiquement et ne le faites
remplacer que par des techniciens agréés (Voir
Assistance).
! Nous déclinons toute responsabilité en cas de non
respect des normes énumérées ci-dessus.
Bar intégré
Possibilité de réglage du
mouvement douverture /
fermeture de la trappe du bar
intégré. Placez-vous face à la
trappe. Pour augmenter la
rigidité du mouvement, tournez
les deux tiges vers la gauche
tandis que pour la diminuer,
tournez-les vers la droite.
! Veillez à ce que les deux bras soient bien réglés de
façon à avoir la même rigidité. Effectuez pour les deux
bras le même nombre de rotations dans la même
direction.
Mise à niveau
1. Installez lappareil sur un sol plat et rigide.
2. Si le sol nest pas parfaitement horizontal, vissez ou
dévissez les petits pieds avant pour bien niveler lappareil.
Raccordement électrique
Après le transport, placez lappareil à la verticale et
attendez au moins 3 heures avant de le raccorder à
linstallation électrique. Avant de brancher la fiche dans la
prise de courant, assurez-vous que :
la prise est bien munie dune terre conforme à la loi;
la prise est bien apte à supporter la puissance
maximale de lappareil, indiquée sur la plaquette
signalétique placée à lintérieur du compartiment
réfrigérateur en bas à gauche (150 W par ex.);
la tension dalimentation est bien comprise entre les
valeurs indiquées sur la plaquette signalétique, placée
en bas à gauche (220-240 V par ex.);
la prise est bien compatible avec la fiche de lappareil.
En cas dincompatibilité, faites remplacer la fiche par
un technicien agréé (voir Assistance); nutilisez ni
rallonges ni prises multiples.
! Après installation de lappareil, le câble électrique et la
prise de courant doivent être facilement accessibles.
! Le câble ne doit être ni plié ni excessivement écrasé.
30
Page 31

Description de lappareil
Tableau de bord
Touche ON/OFF
Touche
EVER
FRESH
Touche
RESET ALARM
Afficheur Touche
ADJUST/SELECT+
ECOECO
ADJUST/SELECT-
Touche
MODE
Touche
FR
Touche ON/OFF pour allumer ou éteindre lappareil
(compartiment réfrigérateur et compartiment
congélateur). Gardez la touche enfoncée pendant au
moins 2 secondes.
Voir Mise en marche et utilisation et Entretien et soin.
Touche EVER FRESH pour activer ou désactiver la
fonction EVER FRESH.
Touche RESET ALARM pour faire cesser lalarme
acoustique (appuyez une fois) et pour effacer les
messages dalarme affichés par le texte déroulant de
lafficheur (appuyez une deuxième fois). Voir Anomalies
et remèdes.
Touche MODE pour accéder aux fonctions et
sélections disponibles sur lafficheur. Voir Afficheur et
Mise en marche et utilisation.
Touche ADJUST/SELECT+ pour activer les fonctions
ou pour modifier les sélections de température, heure,
date, langue. Voir Afficheur et Mise en marche et
utilisation.
Touche ADJUST/SELECT pour désactiver les
fonctions ou pour modifier les sélections de
température, heure, date, langue. Voir Afficheur et
Mise en marche et utilisation.
Afficheur pour programmer lappareil et contrôler son
fonctionnement. Voir Afficheur.
31
Page 32

Description de lappareil
FR
Vue densemble
AMPOULE
DECLAIRAGE
(voir Entretien)
CLAYETTES
Clayette
EVER FRESH
Balconnet amovible à
abattant contenant un
SUPPORT A OEUFS
Balconnet
PORTE-OBJETS
Balconnets
PORTE-CANETTES
Bar intégré
Bac FRUITS et
LEGUMES
BACS À GLACE
Compartiment
CONGELATION et
CONSERVATION
BACS À GLACE
Compartiments
CONSERVATION
PIEDS de réglage
WATER LEVEL
Balconnet
BOUTEILLES
MAX
WATER LEVEL
MAX
Leur nombre et/ou leur emplacement peut varier.
32
Page 33

Accessoires
1
2
daération: pour lactiver.
CLAYETTES elles sont
amovibles et réglables en
hauteur grâce à des glissières
spéciales (voir figure), pour le
rangement de récipients ou
daliments de grande dimension.
Pour régler la hauteur de la
clayette, pas besoin de la sortir
complètement.
EVER FRESH : clayette spéciale
pour la conservation daliments
sous vide. Lutilisation de boîtes
spéciales vous permettra de
prolonger la durée de
conservation des aliments.
Balconnet PORTE-CANETTES:
pour ranger horizontalement
plusieurs canettes (voir figure).
Vous pouvez aussi y ranger vos
yaourts, votre beurre ou dautres
récipients.
FILTRE ANTI-ODEURS
:
*
certains modèles possèdent un
filtre anti-odeurs à charbon actif
qui améliore sensiblement la
qualité de lair à lintérieur du
réfrigérateur.
Le filtre est situé en bas à droite,
à lintérieur de louverture
heures pour que la température se stabilise.
3. Contrôlez lindicateur une nouvelle fois : si nécessaire,
procédez à un nouveau réglage. Lindicateur peut
aussi être entièrement noir en cas de stockage de
grosses quantités daliments ou en cas douvertures
répétées de la porte du réfrigérateur. Dans ce cas,
procédez à un nouveau réglage de la température (voir
Utilisation de lafficheur).
! Tout autre réglage de la température doit être effectué
au bout de 10 heures environ, temps nécessaire à la
stabilisation de la température interne du réfrigérateur.
BACS À GLACE
Placés dans la partie supérieure des tiroirs du compartiment
freezer, ils sont plus ergonomiques et garantissent
davantage de propreté: en effet, les glaçons ne touchent
plus aux aliments stockés dans le freezer; de plus, fini l'eau
qui dégouline lorsque vous rangez votre bac (un couvercle
est fourni pour boucher le récipient après l'avoir rempli).
1. Pour sortir le bac, poussez-le vers le haut .
Vérifiez que le bac est bien vide avant de le remplir en
introduisant leau par louverture prévue.
2. Attention à ne pas dépasser le niveau indiqué (MAX
WATER LEVEL). Une trop grande quantité deau gêne
la sortie des glaçons (si celase produit, attendez que la
glace fonde et videz le bac).
3. Faites pivoter le bac de 90° : leau envahit les cavités
selon le principe des vases communicants (voir figure).
4. Bouchez louverture à laide du couvercle fourni,
remettez le bac à sa place.
5. Une fois que la glace sest formée (il faut compter au
moins 8 heures) tapez le bac contre une surface dure
et mouillez-le à lextérieur pour détacher les glaçons
que vous ferez sortir par louverture prévue.
FR
BAR INTÉGRÉ :
Des boissons toujours fraîches à portée de main. Ce
compartiment est spécialement conçu pour vous
permettre de sortir vos bouteilles sans ouvrir la porte du
réfrigérateur. Ouvert, il se transforme en un plan dappui
très pratique (portée maxi. 10 kg). Le portillon du
balconnet à bouteilles sert à ralentir la remontée en
température à lintérieur du réfrigérateur.
Indicateur de TEMPERATURE
*
pour repérer la zone la plus froide à
vert
noir
consulter la notice
lintérieur du réfrigérateur.
1. Contrôlez que lindicateur affiche
bien OK (voir figure).
2. Si le message OK nest pas affiché, cest que la
température est trop élevée: sélectionnez une
température plus basse à lintérieur du réfrigérateur
(voir Utilisation de lafficheur) et attendez environ 10
Nexiste que sur certains modèles.
*
MAX
WATER LEVEL
WATER LEVEL
MAX
WATER LEVEL
:
MAX
ICE PARTY: pour amener une
bouteille de mousseux ou de
champagne à sa température idéale.
Mettez la bouteille dans le
rafraîchisseur prévu et rangez le tout
dans le compartiment
CONGELATION et CONSERVATION.
Le rafraîchisseur de bouteille gardera
votre bouteille au frais même à table.
33
Page 34

ECO
Afficheur
FR
Description de lafficheur
Indicateur
FONCTIONNEMENT
REFRIGERATEUR
Indicateur
FONCTIONNEMENT CONGELATEUR
Indicateur ALARMES
Fonction
EVER FRESH
ECO
ECO
Fonction SUPER FREEZE
Texte déroulant
Indicateur
HEURE
Fonction ICE PARTY
Fonction SUPER COOL
Fonction ECO
Indicateur FONCTIONNEMENT REFRIGERATEUR: il
affiche la température sélectionnée dans le
compartiment réfrigérateur (affichage fixe) ou en cours
de sélection (affichage clignotant). OFF indique que le
compartiment est éteint.
Indicateur ALARMES: il sallume pour signaler une
situation critique (porte ouverte, température élevée).
Voir Anomalies et remèdes.
Fonction ECO: affichage de létat de la fonction. Elle
sélectionne automatiquement la température optimale
pour conserver les aliments tout en réduisant la
consommation délectricité.
Indicateur HEURE: affichage de lheure. Il sert aussi à
sélectionner lheure et la date.
Texte déroulant: affichage des informations sur létat
de lappareil et sur le mode demploi de lafficheur.
Il sert aussi à sélectionner la langue.
Indicateur FONCTIONNEMENT CONGELATEUR:
affichage de la température sélectionnée dans le
compartiment congélateur (affichage fixe) ou en cours
de sélection (affichage clignotant). OFF indique que le
compartiment est éteint.
Fonction SUPER COOL: affichage de létat de la
fonction. Pour un refroidissement rapide du
compartiment réfrigérateur. Elle se désactive
automatiquement.
Voir MISE EN MARCHE et UTILISATION.
Fonction SUPER FREEZE affichage de létat de la
fonction. Pour un refroidissement rapide du
compartiment congélateur. Elle se désactive
automatiquement.
Voir MISE EN MARCHE et UTILISATION.
Fonction EVER FRESH: affichage de létat de la
fonction. Pour faire le vide dans les boîtes prévues
grâce au dispositif situé au milieu de la clayette dédiée.
Fonction ICE PARTY: affichage de létat de la
fonction. Pour abaisser la température du congélateur
le temps nécessaire au refroidissement dune bouteille.
Un signal acoustique indique que la température est
atteinte. Voir Accessoires.
! Les symboles des fonctions sallument de façon
différente pour indiquer leur état (désactivée, sélectionnée
ou activée).
34
Page 35

Utilisation de lafficheur
Sélectionner la température
Dès allumage de lappareil, les températures standard de
conservation sont automatiquement sélectionnées :
+5°C dans le compartiment réfrigérateur
-18°C dans le compartiment congélateur.
Les températures sélectionnables vont :
de +2°C à +8°C dans le compartiment réfrigérateur
de -18°C à -26°C dans le compartiment congélateur
Pour sélectionner la température :
1. Appuyez sur la touche MODE jusquà ce que vous voyez la
valeur clignoter dans lindicateur du compartiment réfrigérateur
ou du compartiment congélateur.
2. Pour augmenter la température, appuyez sur la touche
ADJUST/SELECT+.
Pour diminuer la température, appuyez sur la touche
ADJUST/SELECT-.
A chaque pression, la valeur augmente ou baisse de 1°C.
3. Pour confirmer votre choix, appuyez sur la touche
MODE dans les dix secondes : la valeur cesse de
clignoter. Si le choix nest pas confirmé, lindicateur
affiche la température qui avait été sélectionnée
auparavant.
! La fonction ECO réduit les réglages possibles : de +4°C
à +6°C pour le réfrigérateur et de -18°C à -20°C pour le
congélateur.
Etat des fonctions
fonction activée
(le symbole vert et son intérieur bleu sont
allumés)
fonction sélectionnée
(le symbole vert et son pourtour rouge sont
allumés)
fonction désactivée
(seul le symbole vert est allumé)
Activer et désactiver les fonctions SUPER COOL,
ECO, SUPER FREEZE, ICE PARTY.
1. Appuyez sur la touche MODE jusquà ce que la
fonction souhaitée soit sélectionnée.
2. Pour lactiver, appuyez sur la touche
ADJUST/SELECT+.
Pour la désactiver, appuyez sur la touche
ADJUST/SELECT-.
3. Pour confirmer votre choix, appuyez sur la touche
MODE dans les dix secondes. Si le choix nest pas
confirmé, lindicateur affiche la fonction qui avait été
sélectionnée auparavant.
A la fin de lopération, le pourtour rouge séteint.
Si la fonction a été activée : le symbole vert et son
intérieur bleu sont allumés. Si la fonction a été désactivée
: seul le symbole vert est allumé.
Sélectionner lheure et la date
Les réglages sont prévus en succession, il nest donc
pas possible dagir sur la date si lon na pas auparavant
réglé lheure :
1. Appuyez plusieurs fois de suite sur la touche MODE
jusquà ce que le texte déroulant affiche le message
SELECTIONNER HEURE [+/-].
2. Pour faire avancer dune heure, appuyez sur la touche
ADJUST/SELECT+. Pour faire reculer dune heure,
appuyez sur la touche ADJUST/SELECT-.
3. Pour confirmer votre choix, appuyez sur la touche
MODE dans les dix secondes. Si le choix nest pas
confirmé, lafficheur revient à lheure qui avait été
sélectionnée auparavant.
On passe ensuite à la sélection des minutes, du jour, du
mois et de lannée en refaisant les opérations 1-3.
Sélectionner la langue
1. Appuyez plusieurs fois de suite sur la touche MODE
jusquà ce que le texte déroulant affiche le message de
sélection de la langue.
2. Pour aller de lavant, appuyez sur la touche ADJUST/
SELECT+.
Pour revenir en arrière, appuyez sur la touche ADJUST/
SELECT-.
3. Pour confirmer votre choix, appuyez sur la touche
MODE dans les dix secondes. Si le choix nest pas
confirmé, lafficheur revient à la langue qui avait été
sélectionnée auparavant.
! Lors de la première mise en service de lappareil, la
demande de sélection de la langue est automatiquement
affichée : suivez la procédure décrite.
Couper les alarmes acoustiques et visuelles
Appuyez sur la touche RESET ALARM : appuyez une fois
pour faire cesser les alarmes acoustiques, appuyez une
deuxième fois pour effacer les messages dalarme
affichés par le texte déroulant.
! Pour couper lalarme porte ouverte, il suffit de fermer la
porte (voir Anomalies et remèdes).
! Si DEMO MODE est affiché sur lécran, cest que
lappareil se trouve en mode de fonctionnement
démonstration, il ne produit autrement dit pas de froid
bien que lafficheur et son éclairage intérieur soient
allumés. Pour quitter ce mode de fonctionnement,
appuyez simultanément sur les touches MODE, ADJUST/
SELECT+ et ADJUST/SELECT- pendant au moins trois
secondes de suite.
FR
35
Page 36

Mise en marche et utilisation
FR
Mise en service de lappareil
! Avant de mettre lappareil en service, suivez bien
les instructions sur linstallation (voir Installation).
! Avant de brancher votre appareil, nettoyez bien les
compartiments et les accessoires avec de leau tiède
additionnée de bicarbonate.
! Cet appareil est équipé dun système protège-moteur
qui ne fait démarrer le compresseur que 8 minutes après
son branchement. Cest ce qui se passera aussi après
toute coupure de courant, volontaire ou involontaire
(panne délectricité).
Branchez la fiche dans la prise de courant et, si les deux
indicateurs du réfrigérateur et du congélateur affichent
OFF, allumez lappareil en gardant la touche ON/OFF
enfoncée pendant au moins deux secondes :
- le réfrigérateur est réglé sur une température de +5°C.
- le congélateur est réglé sur une température de -18°C.
Pour obtenir un refroidissement plus rapide dans les deux
compartiments, activez les fonctions SUPER COOL et
SUPER FREEZE (voir Afficheur).
Système de refroidissement
Lappareil est doté du système de refroidissement suivant
:
No Frost
Il est reconnaissable à la
présence de trappes daération
placées sur les parois arrières
des compartiments.
Le système No Frost gère un flux
continu dair froid qui absorbe
lhumidité et empêche la
formation de glace et de givre : il maintient un niveau
dhumidité adéquat à lintérieur du compartiment
réfrigérateur et, grâce à labsence de givre, il préserve les
qualités originaires des aliments; dans le compartiment
congélateur il évite la formation de glace, il ny a par
conséquent plus besoin de dégivrer et les aliments ne
collent plus entre eux.
! Ne placez pas daliments ou de récipients contre la
paroi refroidissante arrière pour ne pas boucher les trous
daération et éviter une formation rapide deau
condensée.
! Fermez bien les bouteilles et emballez les aliments.
Pour profiter à plein de votre réfrigérateur
Réglez la température à laide de lafficheur.
Activez la fonction SUPER COOL pour faire baisser la
température rapidement, par exemple quand vous
remplissez le compartiment après avoir fait de grosses
provisions. Cette fonction se désactive
automatiquement une fois le temps écoulé.
Nintroduisez que des aliments froids ou à peine
tièdes, jamais chauds (voir Précautions et conseils).
Les aliments cuits contrairement à ce que lon croit ne
se conservent pas plus longuement que les aliments
crus.
Nintroduisez pas de récipients non fermés contenant
des liquides : ces derniers entraîneraient une
augmentation de lhumidité et la formation deau
condensée.
Lhygiène alimentaire
Après achat, les aliments doivent être débarrassés de
leur emballage extérieur en papier/carton ou autre qui
pourraient véhiculer des bactéries ou de la saleté à
lintérieur du réfrigérateur.
Protégez les aliments (notamment ceux qui se
détériorent rapidement et ceux qui dégagent une forte
odeur ) pour éviter tout contact entre eux et éliminer
ainsi toute possibilité de contamination de germes/
bactéries et la diffusion dodeurs particulières à
lintérieur du réfrigérateur.
Rangez les aliments de manière à ce que lair puisse
circuler librement entre eux.
Veillez à ce que lintérieur du réfrigérateur soit toujours
propre; attention à ne pas utiliser de produits oxydants
ou abrasifs pour son nettoyage.
Sortez les aliments du réfrigérateur dès quils
dépassent leur durée limite de conservation.
Pour une bonne conservation, les aliments facilement
périssables (fromages à pâte molle, poisson cru,
viande, etc.) doivent être placés dans la zone plus
froide cest à dire au-dessus des bacs à légumes.
36
Page 37

Pour profiter à plein de votre congélateur
Réglez la température à laide de lafficheur.
Pour congeler une grosse quantité daliments, activez
la fonction SUPER FREEZE. La fonction se désactive
automatiquement au bout de 24 heures ou dès que la
température optimale est atteinte.
Ne recongelez pas des aliments en cours de
décongélation ou déjà décongelés, consommez-les dans
les 24 heures ou recongelez-les après cuisson.
Les aliments frais à congeler ne doivent pas être
placés au contact daliments déjà congelés; il faut les
stocker dans le compartiment supérieur
CONGELATION où la température qui descend audessous de -18°C garantit une vitesse de congélation
adéquate.
Ne stockez pas dans votre congélateur des bouteilles en
verre contenant des liquides, bouchées ou fermées
hermétiquement, elles pourraient se briser.
La quantité journalière maximale daliments pouvant être
congelée est indiquée sur létiquette des
caractéristiques, placée dans le compartiment
réfrigérateur en bas à gauche (exemple : 4 kg/24h).
! Evitez douvrir la porte pendant la phase de congélation.
! En cas de coupure de courant ou de panne, nouvrez
pas la porte du congélateur : les produits surgelés et
congelés se conserveront ainsi sans problème pendant 9
- 14 heures environ.
Ever Fresh
Labsence dair à lintérieur des boîtes spécialement
prévues permet de prolonger la durée de conservation
des aliments tout en maintenant leur aspect, leurs
caractéristiques organoleptiques et nutritionnelles ainsi
que leur goût tout à fait inaltérés.
Avec
Aliments
conditions
normales
Plats cuisinés en général 2 jours 10 jours
Plat principal cuisiné 2 jours 10 jours
Poisson frais 2-3 jours 4-5 jours
Viande fraîche crue 3 jours 9 jours
Fromage à pâte dure 15 jours 60 jours
Légumes crus 5 jours 21 jours
Fruits frais 10 jours 21 jours
Biscuits secs 180 jours 365 jours
Gâteaux à la crème 2 jours 10 jours
Autres gâteaux 5 jours 20 jours
* Ce tableau nest quindicatif et se réfère à une conservation
au réfrigérateur à des températures comprises entre 3°C et
5°C. La durée de vie des aliments dépend toutefois de la
fraîcheur initiale des produits, de leur mode de préparation et
de conservation ainsi que de lutilisation correcte de Ever
Fresh.
Dans des
EVER
FRESH*
! Ever Fresh doit toujours être utilisé en tenant compte
des caractéristiques de périssabilité des aliments à
stocker dans ses boîtes et de leur date limite de
consommation. La conservation renouvelée des aliments
sous vide ne permet pas de modifier ces caractéristiques.
! Le système Ever Fresh ne fonctionne quavec les boîtes
équipant lappareil que vous avez acheté. Nutilisez pas
dautres types de boîtes.
Système Ever Fresh
Le système Ever Fresh est activé ou désactivé au moyen
dun bouton-poussoir interne situé sur la clayette du
réfrigérateur, dune touche de lafficheur extérieur et dun
bouton placé sur le couvercle des boîtes.
! Seul lemplacement central de la clayette Ever Fresh est
équipé dune pompe et permet de faire le vide dans les
boîtes.
Activation et désactivation de Ever Fresh
1. Remplissez la boîte. Veillez à ce que les aliments
stockés à lintérieur ne gênent pas sa fermeture.
2. Posez le couvercle sur la boîte.
3. Rabattez les poignées placées sur les côtés de la boîte
et vissez à fond le bouton situé
U
U
C
M
A
V
O
T
O
U
A
V
sur son couvercle (position
CLOSE). Puis, tournez le bouton
dans le sens inverse des aiguilles
dune montre jusquà la position
VACUUM (voir figure A).
O
T
N
R
E
E
P
P
A
O
C
H
C
I
L
U
O
S
S
O
E
4. Appuyez sur le boutonpoussoir équipant la clayette et
placez la boîte dans
B
1
lemplacement central (voir figure
B).
5. Tirez sur le bouton-poussoir
de la clayette pour fixer la boîte
(voir figure C).
2
6. Appuyez sur la touche
correspondante de lafficheur
extérieur pour activer la fonction
C
Ever Fresh (licône Ever Fresh
sallume).
Le fonctionnement normal de
ever fresh saccompagne dun
bruit modéré.
7. Attendez que lafficheur
signale que le vide a été fait
(licône Ever Fresh séteint).
FR
37
Page 38

8. Pour dégager la boîte, appuyez sur le bouton-poussoir
FR
équipant la clayette.
9. Sortez la boîte et tournez le bouton dans le sens des
aiguilles dune montre jusquà la position CLOSE pour
éviter toute ouverture
D
E
! Le couvercle des boîtes est équipé dune soupape de
forme ronde. La position basse de la soupape (figure D)
indique labsence dair à lintérieur des boîtes. La position
haute de la soupape (figure E) indique la présence dair à
lintérieur des boîtes.
accidentelle (voir figure A).
Labsence dair à lintérieur des
boîtes est signalée par la
soupape en position basse (voir
figure D).
10. Pour ouvrir la boîte, tournez
le bouton dans le sens inverse
des aiguilles dune montre
jusquà la position OPEN (voir
figure A): lair pénètrera ainsi à
lintérieur de la boîte que vous
pourrez alors ouvrir. Lentrée de
lair à lintérieur des boîtes sera
signalée par un déplacement de
la soupape vers le haut (voir
figure E).
Pour profiter à plein de Ever Fresh
Quelques règles essentielles à respecter pour une
utilisation optimale des aliments et du système Ever
Fresh.
Boîtes Ever Fresh
Si les boîtes contiennent des liquides de quelque nature
quils soient, ne dépassez pas le niveau maximal indiqué.
Laspiration de liquides par la pompe Ever Fresh pourrait
en effet lendommager.
Louverture répétée des boîtes sous vide peut
compromettre les conditions de conservation des
aliments.
Avant dutiliser les boîtes, assurez-vous que tous leurs
composants sont en parfait état.
La soupape des boîtes est dotée dun système de
sécurité. Si, après avoir fait le vide (instructions 1-9), la
soupape se replace en position haute avant un délai de
trois jours, il faut vérifier si la boîte est bien fermée et/ou
intacte. Vérifiez aussi létat de conservation des aliments
avant de recommencer les opérations de mise sous vide.
Voir Activation et désactivation de Ever Fresh.
Les aliments peuvent être placés directement au
contact de la boîte.
Nutilisez ces boîtes pour aucun type de cuisson (micro
ondes, four, sur une flamme, sur une plaque etc.).
Ne mettez pas les boîtes au congélateur.
Ne lavez pas le couvercle des boîtes en lave-vaisselle.
! Si, après avoir fait le vide (instructions 1-9), la soupape
se replace en position haute (voir figure E) avant un délai
de trois jours, vérifiez si la boîte est bien fermée et/ou
intacte. Vérifiez aussi létat de conservation des aliments
avant de recommencer les opérations de mise sous vide.
! La fonction Ever Fresh est dotée dun arrêt de sécurité
qui éteint la pompe en cas de dysfonctionnement dû à un
mauvais positionnement des boîtes. En cas darrêt, il faut
appuyer deux fois de suite sur la touche RESET ALARM
pour rétablir un fonctionnement normal.
Conservation des aliments sous vide
Tous les aliments préemballés, conservés sous vide,
doivent être consommés avant la date limite de
consommation indiquée sur lemballage.
Le fait de renouveler à plusieurs reprises les opérations
de mise sous vide dun même aliment ne modifie
aucunement ses caractéristiques naturelles de
périssabilité.
Les aliments décongelés ne doivent pas être conservés
sous vide à moins davoir été préalablement cuits.
Les aliments à conserver doivent être préparés à
linstant (hachés, coupés en tranche, épluchés, cuits) et
être intacts.
Les aliments périssables, même conservés sous vide,
doivent quand même être mis au réfrigérateur.
Il faut laisser refroidir les aliments cuits avant de les
mettre sous vide.
38
Page 39

Entretien et soin
Mise hors tension
Pendant les opérations de nettoyage et dentretien,
débranchez lappareil du réseau dalimentation:
1. gardez la touche ON/OFF enfoncée pendant plus de
deux secondes jusquà ce que vous voyez OFF affiché par
les deux indicateurs, réfrigérateur et congélateur.
2. débranchez la fiche de la prise de courant.
! Si cette procédure nest pas respectée, lalarme peut se
déclencher : ceci ne dénote pas une anomalie. Pour
rétablir le fonctionnement normal, il suffit de garder la
touche ON/OFF enfoncée pendant plus de deux
secondes. Pour isoler lappareil, procédez comme
indiqué aux points 1 et 2.
Nettoyage de lappareil
Nettoyez lextérieur, lintérieur et les joints en
caoutchouc à laide dune éponge imbibée deau tiède
additionnée de bicarbonate de soude ou de savon
neutre. Nutilisez pas de solvants, de produits abrasifs,
deau de Javel ou dammoniaque.
Mettez tremper les accessoires amovibles dans de
leau chaude additionnée de savon ou de liquide
vaisselle. Rincez-les et essuyez-les soigneusement.
Larrière de lappareil a tendance à sempoussiérer,
pour éliminer la poussière avec délicatesse, après
avoir éteint lappareil et débranché la fiche, servezvous dun aspirateur montant un accessoire adéquat
et réglé sur une puissance intermédiaire.
risque de blocage ou de mauvais fonctionnement du
système. Evitez tout contact de la clayette Ever Fresh
avec de leau et des liquides en général qui
pourraient compromettre son bon fonctionnement.
Contre la formation de moisissures et
de mauvaises odeurs
Cet appareil est fabriqué dans des matériaux
hygiéniques qui ne transmettent pas dodeur. Pour
sauvegarder cette caractéristique, veillez à bien
emballer et couvrir vos aliments. Vous éviterez par la
même occasion la formation de taches.
Si vous devez laisser votre appareil éteint pendant une
période de temps prolongée, nettoyez bien lintérieur
et laissez les portes ouvertes.
Remplacement de lampoule déclairage
Pour remplacer lampoule
déclairage du compartiment
réfrigérateur, débranchez la fiche
de la prise de courant.
Pour remplacer lampoule,
procédez comme illustré (voir
figure) utilisez une ampoule
semblable dont la puissance ne
dépasse pas 10 W.
FR
Ever Fresh
Pour nettoyer la buse daspiration, située au milieu de
la clayette Ever Fresh, utilisez un chiffon propre et sec.
Nutilisez ni solvants ni eau.
Evitez tout contact de la buse daspiration, située au
milieu de la clayette Ever Fresh, avec de leau ou tout
autre liquide.
Lavez et essuyez les boîtes avant de les utiliser.
Ne lavez pas le couvercle des boîtes en lave-vaisselle.
Avant de fermer les boîtes assurez-vous que les bords sont
bien propres, des traces de salissure pourraient
compromettre létanchéité et la durée du vide.
Pour nettoyer, si besoin est, le bouton situé au centre
du couvercle, tournez-le dans le sens inverse des
aiguilles dune montre jusquà ce quil se dévisse
complètement et lavez-le à leau avec un détergent
neutre. Après lavoir soigneusement essuyé, revissez-
le à fond.
Pour démonter et nettoyer Ever Fresh, il faut
débrancher le tuyau de raccordement situé à larrière.
Attention à bien le remettre en place afin déviter tout
Remplacement du filtre anti-odeurs
Il est conseillé de changer le filtre 6-8 mois après son
activation, ce délai peut toutefois varier selon le type
daliments stockés. Pour savoir où acheter un filtre de
rechange, adressez-vous au service dAssistance (voir
Assistance). Pour remplacer le filtre, agissez comme
illustré par les figures (voir figures A et B).
A
B
39
Page 40

Précautions et conseils
FR
! Lappareil a été conçu et fabriqué conformément aux
normes internationales de sécurité. Ces conseils sont
fournis pour des raisons de sécurité et doivent être lus
attentivement.
Cet appareil est conforme aux Directives
Communautaires suivantes :
- 73/23/CEE du 19/02/73 (Basse Tensione) et
modifications suivantes;
-89/336/CEE du 03/05/89 (Compatibilité
Electromagnétique) et modifications suivantes;
- 2002/96/CE.
Sécurité générale
Cet appareil a été conçu pour un usage familial, de type
non professionnel.
Cet appareil qui sert à conserver et à congeler des
aliments ne doit être utilisé que par des adultes
conformément aux instructions du mode demploi.
Cet appareil ne doit pas être installé en extérieur, même
dans un endroit à labri, il est en effet très dangereux de
le laisser exposé à la pluie et aux orages.
Ne touchez pas à lappareil pieds nus ou si vos mains
ou pieds sont mouillés ou humides.
Ne touchez pas aux parties refroidissantes : vous
pourriez vous brûler ou vous blesser.
Pour débrancher la fiche de la prise de courant, sortez
la fiche, ne tirez surtout pas sur le câble.
Avant deffectuer toute opération de nettoyage ou
dentretien, débranchez la fiche de la prise de courant.
Il ne suffit pas dappuyer pendant plus de deux
secondes de suite sur la touche ON/OFF de lafficheur
pour éliminer tout contact électrique.
En cas de panne, nessayez en aucun cas daccéder
aux mécanismes internes pour tenter de réparer
lappareil.
A lintérieur des compartiments de conservation de
produits congelés, ne pas utiliser dustensiles autres
que la raclette à givre fournie avec lappareil ou
dappareils électriques à moins quils ne soient dun
type recommandé par le fabricant.
Ne pas porter à la bouche des glaçons à peine sortis
du congélateur.
Mise au rebut
Mise au rebut du matériel demballage : conformez-
vous aux réglementations locales, les emballages
pourront ainsi être recyclés.
La Directive Européenne 2002/96/EC sur les Déchets
des Equipements Electriques et Electroniques (DEEE),
exige que les appareils ménagers usagés ne soient
pas jetés dans le flux normal des déchets municipaux.
Les appareils usagés doivent être collectés
séparément afin doptimiser le taux de récupération et
le recyclage des matériaux qui les composent et
réduire limpact sur la santé humaine et
lenvironnement. Le symbole de la poubelle barrée
est apposée sur tous les produits pour rappeler les
obligations de collecte séparée.
Les consommateurs devront contacter les autorités
locales ou leur revendeur concernant la démarche
à suivre pour lenlèvement de leur vieil appareil.
Economies et respect de lenvironnement
Installez votre appareil dans un endroit frais et bien
aéré, protégez-le contre lexposition directe aux rayons
du soleil et ne le placez pas près de sources de
chaleur.
Pour introduire ou sortir les aliments, nouvrez les
portes de lappareil que le temps strictement
nécessaire.
Chaque ouverture de porte cause une considérable
dépense dénergie.
Ne chargez pas trop votre appareil : pour une bonne
conservation des aliments, le froid doit pouvoir circuler
librement. Si la circulation est entravée, le
compresseur travaillera en permanence.
Nintroduisez pas daliments chauds : ces derniers font
monter la température intérieure ce qui oblige le
compresseur à travailler beaucoup plus en gaspillant
un tas délectricité.
Gardez toujours les joints propres et en bon état pour
quils adhèrent bien aux portes et ne laissent pas le
froid séchapper (voir Entretien).
Ne permettez pas aux enfants de jouer avec lappareil.
Il ne faut en aucun cas quils sasseyent sur les tiroirs
ou quils saccrochent à la porte.
Les emballages ne sont pas des jouets pour enfants.
40
Page 41

Anomalies et remèdes
Il peut arriver que lappareil ne fonctionne pas. Avant de téléphoner au service de dépannage (voir Assistance), contrôlez
sil ne sagit pas dun problème facile à résoudre à laide de la liste suivante.
Anomalies :
Lafficheur est éteint.
Le moteur ne démarre pas.
Lafficheur est faiblement éclairé.
Lalarme sonne et léclairage à
lintérieur du compartiment
réfrigérateur clignote.
Lalarme sonne et un message est
affiché par le texte déroulant.
Lalarme sonne et un message est
affiché par le texte déroulant.
Causes / Solution possibles :
La fiche nest pas branchée dans la prise de courant ou pas assez enfoncée
pour quil y ait contact ou bien il y a une coupure de courant.
Lappareil est équipé dun système protège-moteur (Voir Mise en marche et
utilisation.
Débranchez la fiche et rebranchez-la dans la prise de courant après lavoir
retournée sens dessus dessous.
La porte du réfrigérateur est restée ouverte pendant plus de deux minutes.
Le signal acoustique cesse dès fermeture de la porte ou après avoir appuyé
sur la touche RESET ALARM. Ou bien vous ne lavez peut-être pas éteint
correctement (voir Entretien).
Lappareil signale un réchauffement excessif du congélateur.
Le congélateur maintient une température denviron 0°C pour ne pas faire
recongeler les aliments et vous permettre de les consommer dans les 24
heures ou de les recongeler après cuisson.
Lappareil signale un réchauffement dangereux du congélateur. ne pas
consommer les aliments. Le congélateur se portera à une température de
-18°C.
Pour faire cesser le signal acoustique, appuyez sur la touche RESET ALARM.
Appuyez une deuxième fois pour effacer le message sur lécran et revenir à un
fonctionnement normal.
FR
Licône des alarmes clignote, licône
Ever Fresh séteint et un message est
affiché à lécran.
Le réfrigérateur et le congélateur
refroidissent peu.
Les aliments gèlent à lintérieur du
réfrigérateur.
Le moteur est branché en permanence.
Lappareil est très bruyant.
Larrêt de sécurité de Ever Fresh sest déclenché à cause dun fonctionnement
prolongé de la pompe à vide. Pour rétablir un fonctionnement normal,
contrôlez le système Ever Fresh puis appuyez deux fois de suite sur la touche
Reset Alarm (voir Afficheur).
Assurez-vous que le tuyau situé à larrière de la clayette Ever Fresh est bien
raccordé au fond du compartiment réfrigérateur.
Les portes ne ferment pas bien ou les joints sont abîmés.
Ouverture trop fréquente des portes.
Sélection dune température trop chaude (voir Mise en marche et utilisation).
Le réfrigérateur et le congélateur sont excessivement remplis.
Sélection dune température trop froide (voir Mise en marche et utilisation).
Les fonctions SUPER COOL et/ou SUPER FREEZE et/ou ICE PARTY sont
activées.
La porte nest pas bien fermée ou trop souvent ouverte.
La température à lextérieur est très élevée.
Lappareil na pas été installé bien à plat (voir Installation).
Lappareil est installé entre des meubles ou des objets qui vibrent et font du
bruit.
Le gaz réfrigérant interne produit un léger bruit même quand le compresseur est
à larrêt : il ne sagit pas dun défaut, cest tout à fait normal.
Arrêt anticipé des fonctions
Perturbations du réseau électrique ou coupures brèves de la tension
dalimentation.
41
Page 42

FR
Assistance
Avant de contacter le centre dAssistance :
Vérifiez si vous pouvez résoudre lanomalie vous-même (voir Anomalies et Remèdes).
Si, malgré tous ces contrôles, lappareil ne fonctionne toujours pas et linconvénient persiste, faites appel au
service après-vente le plus proche de chez vous.
modèle numéro de série
Signalez :
93139180000 S/N 704211801
Gross
Bruto
Brut
75
Test
P.S-I.
TI
Net
Util
Utile
Pressure
HIGH-235
LOW 140
Cod.
Gross
Bruto
Brut
W
Fuse
A
Freez. Capac
Poder de Cong
kg/24 h
4,0
Max 15 w
Class
Clase
Classe
N
le type danomalie
le modèle de lappareil (Mod.)
le numéro de série (S/N)
Vous trouverez tous ces renseignements sur
létiquette signalétique placée dans le
compartiment réfrigérateur en bas à gauche.
RG 2330
Mod.
220 - 240 V- 50 Hz 150 W
340
Total
Gross
Bruto
Brut
Compr.
R 134 a
Syst.
kg 0,090
Kompr.
Made in Italy 13918
Ne faites jamais appel à des techniciens non agréés et refusez toujours des pièces détachées non
originales.
42
Page 43

FR
43
Page 44

FR
195060821.00
11/2006
44
 Loading...